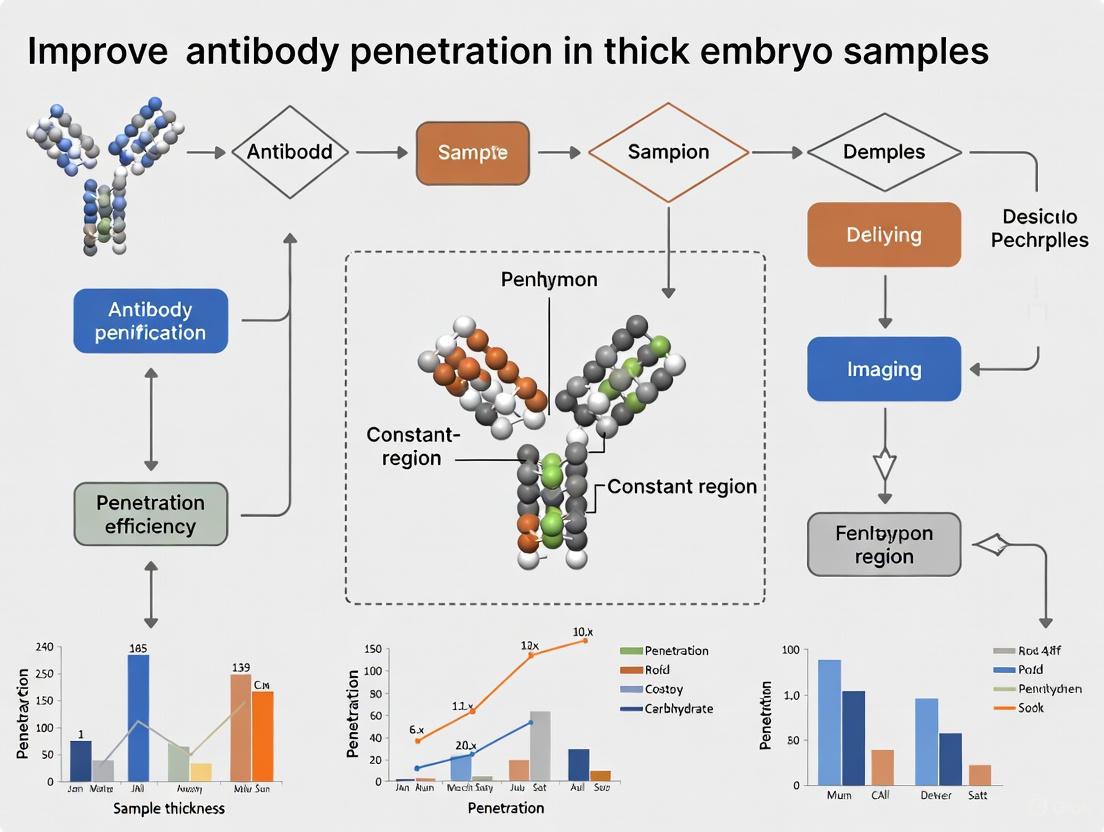
Breaking the Barrier: Advanced Strategies for Enhanced Antibody Penetration in Thick Embryo Samples
This article provides a comprehensive guide for researchers and drug development professionals tackling the critical challenge of antibody penetration in thick embryo specimens.
Breaking the Barrier: Advanced Strategies for Enhanced Antibody Penetration in Thick Embryo Samples
Abstract
This article provides a comprehensive guide for researchers and drug development professionals tackling the critical challenge of antibody penetration in thick embryo specimens. Covering foundational principles to advanced applications, we explore the physical and chemical barriers inherent in dense tissue architectures. The scope includes an evaluation of cutting-edge methodologies such as nanobody technology, tissue clearing, and physical-assisted delivery systems. We detail rigorous optimization and troubleshooting protocols for fixation, permeabilization, and signal amplification, and present a framework for the quantitative validation and comparative analysis of these techniques. This resource aims to equip scientists with the knowledge to achieve uniform, deep-penetrating immunolabeling for high-fidelity 3D spatial biology research.
Understanding the Challenge: The Science Behind Antibody Penetration Barriers in Dense Embryonic Tissues
For researchers working with thick embryo samples, achieving uniform antibody penetration is a significant hurdle. The challenge is rooted in fundamental physics: the diffusion of macromolecules through dense biological matrices is governed by a complex interplay between the size of the biological agent and the structural density of the tissue. This technical support article explores the principles of diffusion in thick samples, such as embryos, and provides actionable, evidence-based troubleshooting guidance to improve your experimental outcomes in antibody-based imaging.
FAQs: Core Principles of Diffusion
1. How does the size of an antibody or its fragment influence its penetration into thick embryo samples?
The molecular weight of an antibody or its fragment is a primary determinant of its distribution within tissue. Research has established a direct, exponential relationship between protein size and tissue uptake, quantified as the Biodistribution Coefficient (BC). Smaller fragments penetrate tissues more effectively due to reduced steric hindrance.
- Key Data: The following table summarizes how BC values, which represent the percentage ratio of tissue to plasma concentration, change with molecular size across different tissues [1].
| Molecule Type | Molecular Weight (kDa) | Bone (%) | Liver (%) | Muscle (%) | Skin (%) | Heart (%) | Spleen (%) |
|---|---|---|---|---|---|---|---|
| Nanobody | 13 | 59.2 | 121 | 46.9 | NA | 112 | 144 |
| scFv | 27 | 35.2 | 65.8 | 23.1 | 89.3 | 56.9 | 71.7 |
| Fab' | 50 | 15.2 | 55.7 | 8.54 | NA | 28.7 | 10.1 |
| F(ab')2 | 100 | 7.27 | 12.1 | 3.97 | 15.7 | 10.2 | 12.8 |
| mAb | 150 | 4.9 | 11.2 | 2.7 | 11.6 | 8.4 | 10.8 |
NA: Data not available in the source material.
The data shows that a reduction in molecular weight from 150 kDa (full mAb) to 27 kDa (scFv) can lead to a 7- to 27-fold increase in tissue distribution, depending on the tissue type [1]. The molecular weight increase that results in a 50% reduction in tissue uptake (BC50) is approximately 35 kDa for most tissues [1].
2. Why is tissue density a major barrier, and how can it be characterized?
Tissues are not homogenous fluids but complex, dense gels. Embryo samples, much like mucosal tissues, consist of a hydrated network of proteins and carbohydrates forming a porous matrix. Penetration is limited by steric hindrance when the size of the antibody approaches or exceeds the average pore size of this mesh [2].
The penetration of particles into a hydrogel network is a two-stage process [2]:
- Surface Deposition: The initial contact and adhesion of particles to the tissue surface.
- Diffusion-Driven Penetration: The subsequent movement of particles into the tissue interior, which is highly dependent on particle size and concentration, as well as the hydrogel's crosslinking density (which determines pore size).
Theoretical models indicate that for a given tissue porosity, there is a critical particle radius beyond which penetration is severely restricted [2].
Troubleshooting Guides
Problem: Heterogeneous or Superficial Antibody Staining
Issue: Fluorescence signal is strong on the periphery of your thick embryo sample but weak or absent in the core regions.
Potential Causes & Solutions:
- Cause 1: Antibody too large. A full-length IgG antibody (≈150 kDa) may be too large to penetrate the dense core of the sample effectively.
- Solution: Switch to a smaller antibody fragment. Consider using validated single-chain variable fragments (scFv, ≈27 kDa) or antigen-binding fragments (Fab, ≈50 kDa), which show significantly better tissue penetration [1].
- Cause 2: Insufficient diffusion time. The antibody did not have enough time to reach equilibrium throughout the entire sample.
- Solution: Empirically determine the optimal incubation time. For thick samples (>500 µm), this may require extending incubation times from 24 hours to 48-72 hours. Gently agitating the sample during incubation can also enhance convective mixing at the surface.
- Cause 3: High non-specific binding creating a "binding site barrier." At sub-saturating concentrations, antibodies can bind to their targets immediately upon entering the tissue, preventing further penetration into the sample interior [3].
- Solution: Implement a co-administration or "loading dose" strategy. Pre-incubate the sample with an unlabeled parent antibody or a non-reactive IgG to saturate non-specific binding sites. Subsequently, apply your specific labeled antibody. Clinical and pre-clinical studies have shown this can improve the microscopic distribution of antibodies within tumors without increasing off-target uptake [3].
Problem: Excessive Background Noise or High Photobleaching
Issue: The overall fluorescence background is high, making specific signal difficult to distinguish, or the fluorescence signal fades very quickly during imaging.
Potential Causes & Solutions:
- Cause 1: Incomplete washing. Unbound antibody remains trapped in the tissue matrix or sample chamber.
- Solution: Increase the number and duration of wash steps. Use a larger volume of wash buffer and consider including mild detergents (e.g., 0.1% Tween-20) to reduce hydrophobic interactions. For very thick samples, perform gentle perfusion or flow-through washing if possible.
- Cause 2: Antibody aggregation. Large aggregates can lodge superficially in the tissue and cause non-specific signal.
- Solution: Centrifuge your antibody solution at a high speed (e.g., 14,000 x g for 10 minutes) immediately before use to pellet any aggregates. Use ultrapure, filtered buffers.
- Cause 3: Photobleaching from intense light exposure.
Experimental Protocols for Enhanced Penetration
Protocol 1: Co-administration Strategy to Overcome Binding Barrier
This protocol is adapted from methods used to improve antibody distribution in human cancer tissues [3].
- Prepare the loading dose solution: Dilute the unlabeled parent antibody or an isotype control in your standard antibody dilution buffer.
- Pre-incubate: Apply the loading dose solution to your fixed and permeabilized embryo sample. Incubate for a duration equal to or longer than your planned primary antibody incubation (e.g., 4-24 hours at 4°C with gentle agitation).
- Apply specific antibody: Without washing away the loading dose, add your fluorescently-labeled primary antibody directly to the sample. Incubate for the desired time.
- Wash and image: Proceed with standard wash and mounting procedures before imaging.
Protocol 2: Validation of Penetration Efficiency
To assess whether your optimization strategies are working, you can implement a simple quantitative check.
- Acquire Z-stack images: Capture high-resolution confocal Z-stacks of your stained thick sample.
- Measure fluorescence intensity: Use image analysis software (e.g., ImageJ/Fiji) to plot the fluorescence intensity profile from the sample surface to its core.
- Analyze the profile: A successful penetration protocol will show a relatively flat intensity profile, indicating uniform staining. A steep, decaying profile indicates poor penetration, with staining largely confined to the surface layers.
The Scientist's Toolkit: Research Reagent Solutions
| Reagent / Material | Function in Improving Penetration |
|---|---|
| Antibody Fragments (scFv, Fab) | Smaller size reduces steric hindrance, enabling deeper penetration into dense tissue matrices [1]. |
| Unlabeled "Loading Dose" Antibody | Saturates non-specific binding sites to prevent the "binding site barrier" effect, allowing the specific antibody to diffuse deeper [3]. |
| Permeabilization Detergents | Creates pores in cell membranes by solubilizing lipids, allowing antibodies to access intracellular targets. |
| Size-Tuned Nanoparticles | Synthetic particles designed with a diameter smaller than the tissue mesh pore size can be used as carriers to facilitate transport through biological gels [2]. |
| Anti-fading Mounting Medium | Reduces photobleaching, preserving the fluorescence signal for longer during imaging, which is crucial for capturing clear data from deep within a sample [4]. |
| 2-Methylbutyrylcarnitine | 2-Methylbutyroylcarnitine Reference Standard |
| 5-Carboxy-2-pentenoyl-CoA | 5-Carboxy-2-pentenoyl-CoA, MF:C27H42N7O19P3S, MW:893.6 g/mol |
Visualization of Workflows and Relationships
Antibody Penetration Optimization Strategy
Molecular Size Impact on Tissue Distribution
For researchers working with thick embryo samples, achieving specific antibody staining is a common and critical challenge. The very process of fixation, essential for preserving tissue architecture, can chemically alter proteins and mask the epitopes that antibodies are designed to recognize. This guide delves into the chemistry of how different fixatives create or overcome this epitope masking, providing targeted troubleshooting and protocols to improve your experimental outcomes in embryonic research.
FAQs on Fixation and Epitope Masking
What is epitope masking, and how do fixatives cause it?
Epitope masking (or antigen masking) occurs when the specific region of a target protein that an antibody binds to becomes hidden or altered. Fixatives cause this through two primary mechanisms:
- Cross-linking Fixatives (e.g., Formaldehyde/PFA): These reagents form covalent methylene bridges between adjacent amino acid side chains on proteins [6] [7]. While this beautifully preserves tissue structure, it can physically encapsulate the epitope within a network of cross-linked proteins, preventing antibody access [8]. The extent of masking depends on fixation time and temperature [9].
- Precipitating Fixatives (e.g., Acetone, Methanol): These solvents dehydrate the sample and coagulate proteins by disrupting hydrophobic bonds and hydrogen bonding [7]. This can denature the protein, distorting the three-dimensional conformation of a structural (or discontinuous) epitope and rendering it unrecognizable by the antibody [8].
My antibody works on frozen sections but not on my fixed embryo samples. What should I do?
This is a classic sign of epitope masking. The antibody likely recognizes a structural epitope that is altered by your current fixation method. Your troubleshooting options include:
- Optimize Antigen Retrieval: Implement or intensify Heat-Induced Epitope Retrieval (HIER). Boiling your samples in a buffer like citrate (pH 6.0) or EDTA (pH 8.0-9.0) can help break cross-links and unmask epitopes [10] [9].
- Switch Fixatives: If you are using a cross-linking fixative like PFA, try a precipitating fixative like ice-cold methanol or acetone, especially if your target is a large protein or localized to the nucleus [10] [11]. Conversely, if you are using a precipitant, switch to a milder cross-linker and shorten the fixation time.
- Use a Fixative-Adapted Immunogen: A groundbreaking proof-of-concept study showed that immunizing mice with VLPs (Virus-Like Particles) decorated with the target antigen and fixed with an FFPE-like protocol successfully generated monoclonal antibodies that selectively recognize the fixed antigen, not the native one [12]. This highlights the importance of matching the antibody's selectivity to the fixation state of the sample.
How does fixation chemistry affect antibody penetration in thick embryo samples?
The density of the tissue and the fixation method both pose barriers to penetration.
- Cross-linking and Density: Over-fixation with aldehydes can create an excessively dense protein network that is difficult for large antibody molecules to diffuse through, especially in thick samples like wholemount embryos [7] [13].
- Permeabilization is Key: Following fixation, a permeabilization step is non-negotiable for intracellular targets. Detergents like Triton X-100 or Saponin create holes in lipid membranes to allow antibody passage [8]. For particularly challenging tissues, a novel passive clearing method, OptiMuS-prime, uses sodium cholate for gentler delipidation and enhanced antibody penetration in thick sections and whole organs [14].
Troubleshooting Guide: Common Fixation-Related Issues
| Problem | Potential Cause | Recommended Solution |
|---|---|---|
| Weak or No Staining | Over-fixation (excessive cross-linking), wrong fixative type, epitope denaturation [9]. | Shorten fixation time; try a different fixative class (e.g., switch from PFA to methanol); optimize antigen retrieval protocol [11] [9]. |
| High Background Staining | Under-fixation leading to cellular degradation and non-specific antibody binding [9]. | Ensure immediate and adequate fixation; increase fixation time; ensure fixative volume is 15-20x tissue volume [9]. |
| Inconsistent Staining | Incomplete or uneven fixative penetration, especially in thick samples [7]. | Perfuse embryos if possible; ensure tissue is thinly dissected; use sufficient fixative volume with agitation [7] [11]. |
| Poor Antibody Penetration | Dense tissue structure, insufficient permeabilization, over-fixation. | Increase permeabilization agent concentration/time; use saponin for membrane-associated targets; consider active clearing methods [8] [14]. |
| Altered Cellular Morphology | Harsh precipitating fixatives extracting lipids [10] [8]. | Switch to a cross-linking fixative like PFA; reduce incubation time with organic solvents. |
Experimental Protocols for Embryo Research
Protocol 1: Comparative Fixation for Epitope Sensitivity Testing
This protocol is adapted from a 2024 preprint comparing PFA and TCA fixation in chicken embryos [15]. It is an excellent starting point for testing a new antibody or optimizing for a sensitive epitope.
Materials:
- 4% Paraformaldehyde (PFA) in 0.2M Phosphate Buffer
- 2% Trichloroacetic Acid (TCA) in 1X PBS
- PBS or TBS with Triton X-100 (PBST/TBST)
Method:
- Fixation: Divide embryos into two groups.
- Group A (PFA): Fix embryos in 4% PFA for 20 minutes at room temperature.
- Group B (TCA): Fix embryos in 2% TCA in PBS for 1-3 hours at room temperature.
- Washing: Wash embryos 3x in PBST or TBST for 5-10 minutes each.
- Permeabilization & Blocking: Incubate embryos in blocking solution (e.g., PBST with 10% serum) for 1 hour at room temperature or overnight at 4°C.
- Immunostaining: Proceed with standard primary and secondary antibody incubation protocols.
- Analysis: Compare staining intensity, background, and subcellular localization between the two fixation methods.
Protocol 2: Generating Antibodies Specific for Fixed Epitopes
This advanced protocol, based on a 2023 study, outlines a method to generate monoclonal antibodies that selectively recognize formaldehyde-fixed antigens, bypassing the issue of epitope masking entirely [12].
Materials:
- Cells expressing C-terminally truncated target antigen
- HIV-1 Gag plasmid for VLP formation
- Formaldehyde
Method:
- VLP Production: Create VLPs decorated with your target cell-surface antigen (e.g., trNGFR) by co-expressing HIV-1 Gag and the antigen in a producer cell line.
- Fixation of VLPs: Fix the purified VLPs using a simplified FFPE-mimetic protocol (FF90: formaldehyde and 90°C heat fixation).
- Immunization: Immunize mice with the fixed, antigen-decorated VLPs.
- Hybridoma Generation: Fuse splenocytes with myeloma cells using standard hybridoma technology.
- Screening: Screen hybridoma supernatants for mAbs that bind the fixed antigen on FFPE or FF90-treated cells, but not the native antigen.
Quantitative Data on Fixation Effects
Table 1: Comparative Analysis of Common Fixatives in Embryonic Tissues
| Fixative | Mechanism | Optimal For | Impact on Epitopes | Penetration in Thick Samples | Key Considerations |
|---|---|---|---|---|---|
| Paraformaldehyde (PFA) [15] | Cross-linking | Preserving tissue morphology; structural epitopes; nuclear proteins [15] [11]. | Can mask epitopes via cross-linking; may require antigen retrieval. | Moderate; over-fixation can hinder penetration [7]. | Standard, versatile fixative; time and concentration critical. |
| Trichloroacetic Acid (TCA) [15] | Precipitation/ Acid coagulation | Cytoskeletal proteins (e.g., Tubulin); membrane proteins (e.g., Cadherins) [15]. | Can reveal epitopes hidden by PFA; may denature sensitive structural epitopes. | Good for wholemount embryo fixation. | Can alter nuclear morphology; suboptimal for some transcription factors [15]. |
| Methanol / Acetone [10] [11] | Precipitation/ Dehydration | Large proteins, immunoglobulins; nuclear proteins [11]. | Denatures proteins, destroying some structural epitopes but revealing linear ones. | Fast, but can cause tissue shrinkage and brittleness. | Use ice-cold; can be combined with cross-linking. |
| Bouin's Fixative [10] [11] | Mixed (Picric acid precipitates, formaldehyde cross-links) | Delicate tissues; meiotic chromosomes [11]. | Picric acid can extract or alter some epitopes. | Good due to acetic acid component. | Contains picric acid (hazardous); requires thorough washing. |
Visualizing Fixation Strategies and Outcomes
Diagram 1: Fixation Choice Workflow
Diagram 2: VLP Strategy for FFPE-Specific Antibodies
The Scientist's Toolkit: Key Research Reagents
Table 2: Essential Reagents for Overcoming Epitope Masking
| Reagent | Function | Example Use Case |
|---|---|---|
| Sodium Citrate Buffer (pH 6.0) | Antigen Retrieval | Heat-Induced Epitope Retrieval (HIER) to break cross-links in FFPE samples [10]. |
| Triton X-100 | Permeabilization | Non-ionic detergent for creating holes in membranes post-fixation to aid antibody penetration [15] [8]. |
| Sodium Cholate | Gentle Delipidation | Detergent in novel clearing methods (e.g., OptiMuS-prime) for enhanced antibody penetration in thick tissues with minimal protein disruption [14]. |
| Saponin | Selective Permeabilization | Detergent that complexes with cholesterol to permeabilize membranes without solubilizing membrane proteins, ideal for cell-surface target studies [8]. |
| Dimethyl Suberimidate (DMS) | Amine-reactive Cross-linker | An alternative cross-linker that does not change the net charge of proteins, potentially preserving immunoreactivity better than aldehydes [10]. |
| cyclopropanecarboxyl-CoA | Cyclopropanecarboxyl-CoA Research Grade | Research-grade Cyclopropanecarboxyl-CoA for studying microbial degradation of cyclopropane rings. This product is For Research Use Only. Not for human use. |
| Estrogen receptor modulator 6 | Estrogen receptor modulator 6, MF:C18H16F2O3, MW:318.3 g/mol | Chemical Reagent |
This technical support center provides targeted troubleshooting guides and FAQs to help researchers navigate the central challenge in microscopic analysis of thick specimens: achieving robust antibody penetration while preserving fine cellular ultrastructure.
Frequently Asked Questions (FAQs)
FAQ 1: What is the fundamental trade-off between ultrastructure preservation and antigen accessibility?
The core conflict arises from the sample preparation methods. Chemical fixatives like glutaraldehyde excel at preserving ultrastructure by creating strong cross-links between proteins, but these same cross-links can mask antigen epitopes, preventing antibody binding [16] [17]. Conversely, milder fixation or methods that improve antibody penetration often compromise the integrity of delicate cellular membranes and organelles [18] [16].
FAQ 2: For thick embryo samples, what strategies can enhance antibody penetration without destroying structure?
For thick specimens like embryos, consider these key strategies:
- Active Clearing & Labeling: Methods like ACT-PRESTO use tissue-hydrogel hybridization and electrophoresis to rapidly clear lipids (within a day), making the sample optically transparent and more accessible to antibodies. It can be combined with PRESTO, which uses pressure to drive antibodies deep into dense organs [19].
- Mild Detergents: During immunolabeling, use mild detergents to gently permeabilize membranes. Optimization of concentration and incubation time is critical to avoid extracting cellular structures [16].
- Sectioning: Physically sectioning the embryo into thinner slices is a direct way to overcome penetration barriers. The Tokuyasu cryosectioning technique is relatively rapid and known for good antigen preservation [20].
FAQ 3: My antigen is not detected after standard aldehyde fixation. What are my options?
This common issue, often caused by epitope masking, can be addressed by:
- Antigen Retrieval: Using heat or enzymes to break cross-links and expose hidden epitopes. This is a standard step for formalin-fixed, paraffin-embedded samples [17].
- Alternative Fixatives: Testing precipitative fixatives like methanol or ethanol, which can preserve antigenicity for some targets, though they may compromise morphology [17].
- Cryo-Methods: Bypassing chemical fixation altogether using high-pressure freezing and freeze-substitution. This physical fixation instantly vitrifies the sample, best preserving native molecular conformations and antigen activity [16].
Troubleshooting Guides
Issue: Poor Antibody Penetration in Thick Embryo Sections
Problem: Immunostaining is strong on the surface but weak or absent in the center of the sample.
Solutions:
- Evaluate and Optimize Permeabilization:
- Confirm that a permeabilization step (e.g., with Triton X-100 or saponin) is included after fixation.
- Titrate the concentration and incubation time of the permeabilizing detergent. Start with lower concentrations and increase if needed, monitoring ultrastructure preservation.
- Implement a Tissue Clearing Method:
- For a rapid, scalable option, consider the ACT-PRESTO protocol [19]. It is compatible with a wide range of commercial antibodies and can clear whole organs within hours.
- The table below compares key metrics for different methods applicable to thick samples.
Table 1: Comparison of Methods for Enhancing Antibody Penetration in Thick Samples
| Method | Principle | Processing Time | Compatibility with Embryos | Key Advantage |
|---|---|---|---|---|
| ACT-PRESTO [19] | Electrophoretic lipid removal & hydrogel hybridization | ~1 day | High (scalable) | Speed and compatibility with immunolabeling |
| Tokuyasu Cryosectioning [20] | Physical sectioning of fixed, cryoprotected tissue | 1-2 days | Moderate (technically demanding) | Excellent antigen preservation; relatively rapid |
| Passive Clearing (e.g., CUBIC) [19] | Free diffusion of clearing reagents | Several days to weeks | Moderate (slower for large samples) | No specialized equipment required |
| Resin Embedding (for sectioning) [20] | Dehydration and plastic embedding | 3-7 days | High | Provides excellent structural support for sectioning |
- Increase Antibody Incubation Time: For passive penetration, significantly extend primary antibody incubation times (e.g., 24-72 hours at 4°C) with gentle agitation.
Issue: Loss of Ultrastructure After Permeabilization or Clearing
Problem: While antibody staining is successful, EM or high-resolution imaging reveals extracted or damaged membranes and organelles.
Solutions:
- Use Gentler Permeabilization Agents:
- Switch from strong detergents like Triton X-100 to milder ones like saponin or digitonin, which preferentially extract cholesterol from membranes.
- Reduce the concentration and time of exposure to permeabilizing agents to the minimum required for adequate staining.
- Combine Aldehydes for Balanced Fixation:
- Use a mixture of formaldehyde and low concentrations of glutaraldehyde (e.g., 0.01-0.05%) [16]. Formaldehyde penetrates quickly, while glutaraldehyde provides stronger cross-linking for better ultrastructure.
- Choose a Milder Clearing Protocol:
- Some hydrophilic clearing methods like SeeDB and CUBIC cause less tissue shrinkage and deformation compared to organic solvent-based methods, better preserving tissue architecture [19].
Issue: Inconsistent or Weak Staining Throughout the Sample
Problem: Staining is patchy, not reproducible, or universally weak, even in superficial areas.
Solutions:
- Verify Fixation Efficiency:
- Employ Sequential Antigen Retrieval and Staining:
- For highly multiplexed experiments, consider using a reagent like MAX Eraser [21]. This chaotropic solution strips antibodies at room temperature, allowing up to 10 cycles of staining, imaging, and re-staining on the same sample with minimal tissue distortion.
- Optimize Antibody Concentrations: Perform a checkerboard titration of primary and secondary antibodies to find the ideal signal-to-noise ratio, as excessive antibody can cause high background that masks specific signal.
The Scientist's Toolkit: Key Research Reagent Solutions
Table 2: Essential Reagents for Balancing Ultrastructure and Antigenicity
| Reagent / Material | Function | Key Consideration |
|---|---|---|
| Paraformaldehyde (PFA) [16] [17] | Crosslinking fixative; rapidly penetrates tissue to preserve structure. | The backbone of most fixation protocols; over-fixation can mask epitopes. |
| Glutaraldehyde [16] [17] | Strong crosslinking fixative; provides excellent ultrastructure preservation. | Often used at low concentrations (0.01-0.05%) mixed with PFA; can destroy antigenicity at high concentrations. |
| Triton X-100 & Saponin [16] | Detergents for membrane permeabilization to allow antibody entry. | Triton X-100 is stronger; Saponin is milder and often preferred for membrane antigen preservation. |
| Hydrophilic Resins (LR White, Lowicryl) [20] [18] [16] | For embedding samples for sectioning; preserve fluorescence and antigenicity better than epoxy resins. | Enable "in-resin" fluorescence correlative light and electron microscopy (CLEM). |
| MAX Eraser [21] | Chaotropic reagent for gentle antibody removal at room temperature. | Enables highly multiplexed imaging (~10 cycles) on a single sample without specialized equipment. |
| SDS-based Clearing Buffer [19] | Used in ACT/CLARITY methods to actively remove lipids via electrophoresis. | Rapidly clears tissue but requires optimization to prevent protein loss and tissue damage. |
| Uranyl Acetate & Osmium Tetroxide [20] [18] | Heavy metal stains for EM contrast; OsO4 is a strong fixative for lipids. | Both can quench fluorescence; protocols must be mild or these agents omitted until post-imaging staining. |
| 2-Hydroxyphytanoyl-CoA | 2-Hydroxyphytanoyl-CoA|Fatty Acid α-Oxidation Substrate | |
| (3S)-3-Carboxy-3-hydroxypropanoyl-CoA | (3S)-3-Carboxy-3-hydroxypropanoyl-CoA|Malyl-CoA | High-purity (3S)-3-Carboxy-3-hydroxypropanoyl-CoA (Malyl-CoA) for glyoxylate cycle and carbon metabolism research. For Research Use Only. Not for human or veterinary use. |
Experimental Workflow & Pathway Diagrams
The following diagrams outline key protocols and decision pathways for managing the structure-antigen balance.
ACT-PRESTO Clearing and Labeling Workflow
Fixation Strategy Decision Pathway
Multiplex Staining with Antibody Removal Cycle
The Impact of Tissue Lipids and Extracellular Matrix on Reagent Delivery
Frequently Asked Questions (FAQs)
Q1: Why is my immunolabeling signal weak or non-uniform in thick tissue samples, such as whole embryos? Weak or non-uniform signaling is most frequently caused by inadequate penetration of antibodies into the dense tissue matrix. The lipid bilayers of cell membranes and the mesh-like structure of the extracellular matrix (ECM) create significant physical barriers that restrict the diffusion of large antibody molecules [19]. Furthermore, the use of certain blocking agents like Bovine Serum Albumin (BSA) can, counterintuitively, impair the final fluorescence signal in thick, cleared tissues [22].
Q2: What are the primary physiological barriers that hinder antibody delivery? The main barriers are:
- Lipids: The dense lipid bilayers of cell membranes impede the free movement of macromolecules [19].
- Extracellular Matrix (ECM): Proteins and proteoglycans in the ECM form a dense, hydrogel-like network that sterically hinders antibody diffusion [19].
- Enzymatic Degradation: Endogenous RNases and other enzymes can degrade the reagents if they are not properly protected [23].
Q3: How can I improve antibody penetration in dense embryo samples? Several strategies can significantly enhance penetration:
- Lipid Removal: Use tissue clearing methods like ACT (Active Clarity Technique) that actively remove lipids, creating a more porous tissue-hydrogel [19].
- ECM Permeabilization: Apply urea-based reagents like ScaleA2 to loosen the ECM structure [24].
- Active Delivery: Employ techniques like PRESTO, which uses pressure (e.g., centrifugal force) to drive antibodies deep into the tissue [19].
- Smaller Probes: Use nanobodies, which are approximately one-tenth the size of conventional antibodies, for superior diffusibility [24].
Q4: Does the standard practice of blocking with BSA improve immunolabeling in thick tissues? Recent evidence suggests that omitting the BSA blocking step can improve the signal-to-background ratio in thick, cleared tissues. BSA does not reduce non-specific binding in this context and can instead lower the specific signal intensity, potentially by obstructing antibody penetration or binding [22].
Q5: What is the role of tissue clearing in reagent delivery? Tissue clearing transforms opaque tissues into optically transparent samples by homogenizing the refractive index, primarily through lipid removal. This process not only enables deep-tissue imaging but also dramatically improves the diffusion of antibodies and other reagents by removing the obstructive lipid barriers and creating a more open tissue structure [19].
Troubleshooting Guides
Problem: Incomplete or Superficial Antibody Labeling
Issue: Staining is only successful at the surface of the tissue sample, with signal intensity dropping off sharply beyond a certain depth.
Solutions:
- Optimize Tissue Permeabilization:
- Method: Incorporate a urea-based permeabilization reagent (e.g., ScaleA2) into your protocol. This helps to loosen the dense ECM for better antibody access [24].
- Protocol: Following tissue fixation and washing, incubate the sample in a solution of ScaleA2 (e.g., 4M urea, 10% glycerol (w/w), and 0.1% Triton X-100) for 24-48 hours with gentle agitation [24].
Employ Active Delivery Methods:
- Method: Use the PRESTO (Pressure Related Efficient and Stable Transfer of Macromolecules into Organs) technique.
- Protocol: After clearing, place the tissue sample in a tube with the primary antibody solution. Apply pressure via a centrifugal force of 500–1000 x g for several hours or use convection flow systems to actively push the antibodies into the tissue [19].
Switch to Smaller Probes:
- Method: Replace conventional IgG antibodies with nanobodies.
- Protocol: Use peroxidase-fused nanobodies (POD-nAb) in conjunction with a fluorescent tyramide signal amplification system (FT-GO). This combines superior tissue penetration with high-signal amplification [24].
Problem: High Background or Non-Specific Signal
Issue: The resulting images have a high background fluorescence that obscures the specific signal.
Solutions:
- Re-evaluate Your Blocking Step:
- Method: Test immunolabeling without a protein blocking step.
- Protocol: Instead of incubating with BSA or normal serum, proceed directly to the primary antibody diluted in PBS after tissue permeabilization and washing. Compare the signal-to-background ratio with your standard blocked samples [22].
- Optimize Antibody Concentrations and Washes:
- Method: Titrate your primary and secondary antibodies to find the optimal concentration that maximizes specific signal and minimizes background.
- Protocol: Perform a dilution series of your antibodies on test tissue sections. Ensure thorough washing with PBS containing 0.1% Tween-20 after each antibody incubation step [22].
Problem: Poor Tissue Transparency After Clearing
Issue: The tissue sample remains opaque after undergoing a clearing protocol, limiting imaging depth.
Solutions:
- Ensure Efficient Lipid Removal:
- Method: Use an active clearing method like ACT (Active Clarity Technique) with an optimized Electrophoretic Tissue Clearing (ETC) system.
- Protocol:
- Fixation and Hydrogel Formation: Fix tissue with paraformaldehyde, then infuse with acrylamide (without bis-acrylamide) to form a tissue-hydrogel with higher porosity [19].
- Active Clearing: Subject the sample to electrophoresis in a chamber with a dense, regular current and an active cooling system (e.g., 6-12 hours for a mouse brain) using an SDS-based buffer to actively remove lipids [19].
- Refractive Index Matching: After clearing, immerse the sample in a Refractive Index Matching Solution (RIMS) to achieve final transparency [19].
Table 1: Comparison of Tissue Clearing and Labeling Methods
| Method | Clearing Time | Tissue Size Change | Compatibility with Immunostaining | Key Advantage |
|---|---|---|---|---|
| ACT-PRESTO [19] | ~1 day | Returns to original size in RIMS [19] | High (91.5% of tested antibodies worked) [19] | Speed, preserves protein signals, works with large organs [19] |
| POD-nAb/FT-GO [24] | Days (labeling) | Information Missing | High, specifically for thick tissues | Rapid, uniform labeling in 1mm-thick slices, 9x signal amplification [24] |
| iDISCO [22] | Up to 2 weeks | Can cause tissue shrinkage [19] | High | Well-established protocol for whole organs [22] |
| CUBIC [19] | 1-3 days | Moderate swelling [19] | High | Good for passive clearing [19] |
Table 2: Impact of Blocking Agents on Signal-to-Background Ratio (SBR) in Thick Tissues
| Blocking Condition | Impact on SBR (vs. No Block) | Recommended Use |
|---|---|---|
| No Block (PBS) | Reference SBR (Highest) [22] | Recommended for thick, cleared tissues to maximize signal penetration and intensity [22]. |
| Bovine Serum Albumin (BSA) | Statistically significant lower SBR for AF488, AF555, AF647 [22] | Not recommended, as it can impair fluorescence signal quality [22]. |
| Normal Goat Serum (NGS) | Lower SBR for AF488; No significant difference for AF555/AF647 [22] | Use with caution; may be acceptable for certain fluorophores but offers no benefit over no block [22]. |
Experimental Protocols
Protocol 1: Rapid Tissue Clearing and Labeling with ACT-PRESTO
This protocol enables rapid clearing and immunolabeling of thick tissues within a few days [19].
Fixation and Hydrogel Formation:
- Perfuse and immerse the tissue sample (e.g., embryo or whole organ) in 4% paraformaldehyde (PFA) for 6-24 hours.
- Wash and then incubate in a hydrogel solution (4% acrylamide) in PBS for 1-3 days at 4°C.
- Initiate polymerization with 0.25% VA-044 initiator at 37°C for 2-4 hours [19].
Lipid Removal via Electrophoresis:
- Place the polymerized tissue-hydrogel in an Electrophoretic Tissue Clearing (ETC) chamber.
- Submerge in a clearing buffer (e.g., 200mM boric acid, 4% SDS, pH 8.5).
- Apply a constant voltage (e.g., 30-50V) with active cooling for 4-12 hours, depending on tissue size [19].
Immunolabeling with PRESTO:
- Wash the cleared tissue in PBS with 0.1% Triton X-100 to remove SDS.
- Place the tissue in a tube with primary antibody solution.
- Apply centrifugal force (e.g., 500 x g) for 4-12 hours to drive antibody penetration.
- Wash thoroughly, then apply a fluorescent secondary antibody using the same PRESTO method [19].
Refractive Index Matching and Imaging:
- Immerse the labeled sample in a Refractive Index Matching Solution (RIMS) for 1-2 days before imaging [19].
Protocol 2: Enhanced Immunolabeling with Nanobodies and Signal Amplification
This protocol uses smaller nanobodies and enzymatic amplification for deep, strong labeling in thick tissues [24].
Tissue Preparation and Permeabilization:
- Fix tissue samples with 4% PFA.
- Permeabilize by incubating in a urea-based reagent (e.g., ScaleA2) for 24-48 hours [24].
Nanobody Staining:
- Incubate the tissue with peroxidase-fused nanobodies (POD-nAb) for 24-48 hours.
- Wash the sample to remove unbound nanobodies.
Fluorescent Signal Amplification:
- Incubate the tissue with the Fluorochromized Tyramide-Glucose Oxidase (FT-GO) system to deposit fluorescent tyramides catalytically at the site of the bound nanobody, amplifying the signal [24].
Multiplexing (Optional):
- To label a second target, quench the residual peroxidase activity with sodium azide (NaN₃) before repeating steps 2 and 3 with a different POD-nAb and a fluorophore of a different color [24].
Visualized Workflows and Relationships
The Scientist's Toolkit: Research Reagent Solutions
Table 3: Essential Reagents and Materials for Improved Reagent Delivery
| Reagent/Material | Function | Example Use Case |
|---|---|---|
| Acrylamide Hydrogel | Forms a porous matrix that supports tissue structure while allowing lipid extraction [19]. | Used in ACT-PRESTO to create a tissue-hydrogel composite for stable, rapid clearing [19]. |
| SDS-based Clearing Buffer | An ionic detergent that actively solubilizes and removes lipids from the tissue-hydrogel [19]. | The key component in the electrophoresis buffer for ACT-based lipid removal [19]. |
| Urea-based Permeabilization Reagent (e.g., ScaleA2) | Loosens the dense extracellular matrix (ECM) to enhance reagent penetration [24]. | Pre-treatment for nanobody-based immunolabeling to ensure uniform diffusion in thick slices [24]. |
| Peroxidase-fused Nanobodies (POD-nAb) | Small, single-domain antibodies that penetrate dense tissues more effectively than full-size antibodies [24]. | Core component of the POD-nAb/FT-GO method for rapid, high-sensitivity 3D immunolabeling [24]. |
| Fluorochromized Tyramide-Glucose Oxidase (FT-GO) | A signal amplification system that catalytically deposits fluorophores, drastically increasing signal intensity [24]. | Used with POD-nAb to achieve a ~9x signal boost at depth compared to conventional labeling [24]. |
| Refractive Index Matching Solution (RIMS) | A solution that homogenizes the refractive index of the cleared tissue, rendering it transparent for imaging [19]. | Final step before imaging in clearing protocols like ACT-PRESTO to achieve optical clarity [19]. |
| 6-oxocyclohex-1-ene-1-carbonyl-CoA | 6-oxocyclohex-1-ene-1-carbonyl-CoA|Research Chemical | 6-oxocyclohex-1-ene-1-carbonyl-CoA is a key intermediate in the anaerobic benzoyl-CoA pathway. This product is for research use only and is not intended for human use. |
| 4-Azidoaniline hydrochloride | 4-Azidoaniline hydrochloride, CAS:91159-79-4, MF:C6H7ClN4, MW:170.60 g/mol | Chemical Reagent |
Practical Solutions: A Toolkit of Techniques for Deep Immunolabeling in 3D Embryo Imaging
The Scientist's Toolkit: Research Reagent Solutions
The following table details key reagents and their functions for implementing nanobody-based penetration protocols in thick samples, based on current research.
| Reagent / Material | Function / Explanation in Research |
|---|---|
| Peroxidase-fused Nanobodies (POD-nAbs) | Engineered immunoreagents that combine the deep tissue penetration of nanobodies with the enzymatic activity of peroxidase for highly sensitive signal amplification [25] [26]. |
| Fluorochromized Tyramide-Glucose Oxidase (FT-GO) | A fluorescent signal amplification system. POD-nAb's peroxidase activity catalyzes the deposition of fluorescent tyramide, dramatically enhancing the detection signal [25]. |
| ScaleA2 Solution | A urea-based tissue clearing agent used to permeabilize tissues, facilitating deeper and more uniform penetration of nanobodies and other reagents into thick samples [25] [26]. |
| Sodium Azide (NaN₃) | Used to quench the activity of peroxidase after a round of labeling, enabling sequential, multiplexed immunolabeling of different targets on the same thick tissue sample [25] [26]. |
| Phage Display Library | A key platform for screening and isolating antigen-specific nanobodies from immunized camelids. It is a standard method for generating new nanobody reagents [27] [28]. |
| Cell-Penetrating Peptides (e.g., TAT) | Fused to nanobodies to facilitate their delivery across cell membranes, enabling the targeting of intracellular antigens, which is crucial for some antiviral and therapeutic applications [28]. |
| 4-Amino-2-fluorobenzoic acid | 4-Amino-2-fluorobenzoic acid, CAS:446-31-1, MF:C7H6FNO2, MW:155.13 g/mol |
| 8-Quinolinesulfonic acid | 8-Quinolinesulfonic acid, CAS:85-48-3, MF:C9H7NO3S, MW:209.22 g/mol |
Performance Data: Nanobodies vs. Conventional Antibodies
The quantitative advantages of using nanobodies and peroxidase-fused variants for penetrating thick tissues are summarized in the table below.
| Parameter | Conventional IgG Antibodies | Basic Nanobodies (Nbs) | Peroxidase-fused Nanobodies (POD-nAbs) |
|---|---|---|---|
| Molecular Size | ~150 kDa [25] [26] | ~15 kDa [25] [26] | ~60 kDa [25] |
| Penetration Depth in 1mm Tissue | Limited to the periphery [25] [26] | Deep penetration [25] | Nearly uniform labeling across the full depth [25] [26] |
| Signal Strength (vs. direct Nb labeling) | N/A | Baseline | Up to 9-fold greater signal intensity at 500 µm depth [26] |
| Production System | Mammalian cells (complex) | Simple prokaryotic systems (e.g., E. coli) [27] | Mammalian cell lines (e.g., 293T cells) [25] |
| Secretory Production Enhancement | Not applicable | Not applicable | Can increase production of difficult-to-secrete fusion proteins by over 1,000-fold [29] |
Experimental Protocol: POD-nAb/FT-GO 3D Immunohistochemistry
This detailed protocol is adapted from the method published by Yamauchi et al. (2025) for immunolabeling millimeter-thick mouse brain tissues within three days [25] [26].
The following diagram illustrates the key stages of the POD-nAb/FT-GO 3D-IHC protocol.
Materials
- Biological Samples: Fixed, millimeter-thick tissue sections (e.g., mouse brain, embryo).
- Permeabilization Solution: ScaleA2 or similar urea-based clearing solution [25].
- Primary Immunoreagent: Culture medium from a 293T cell line transfected with the desired POD-nAb expression vector [25].
- Signal Amplification Reagents: FT-GO reaction mix (contains fluorochromized tyramide, glucose oxidase, and glucose) [25].
- Washing Buffers: Phosphate-buffered saline (PBS) or similar.
- Quenching Solution: Sodium azide (NaN₃) for multiplexing [25].
Step-by-Step Procedure
Tissue Permeabilization:
- Incubate the fixed thick tissue sample in ScaleA2 solution at room temperature for 24 hours with gentle agitation [25]. This step is critical for removing lipids and creating pores for reagent penetration. Note: This step can be omitted if antigenicity is a concern.
Primary Immunolabeling with POD-nAb:
- Wash the permeabilized tissue with PBS to remove residual ScaleA2.
- Incubate the tissue with the culture medium containing the POD-nAb against your target antigen. Use gentle agitation for 20-24 hours at room temperature [25].
- Perform multiple washes with PBS to remove any unbound POD-nAb thoroughly.
Fluorescent Signal Amplification (FT-GO Reaction):
- Incubate the tissue with the FT-GO reaction mixture for 8.5 hours at room temperature with gentle agitation [25].
- During this time, the glucose oxidase steadily generates hydrogen peroxide, which is used by the peroxidase (fused to the nanobody) to activate tyramide. The activated fluorochromized tyramide then deposits densely at the site of the antigen, resulting in massive signal amplification [25].
Imaging:
- After thorough washing, the tissue is ready for 3D imaging via confocal microscopy or light-sheet fluorescence microscopy.
Protocol for Multiplexed Labeling
To label multiple targets in the same thick tissue sample, repeat steps 2 and 3 sequentially [25]:
- After the first FT-GO reaction and imaging, incubate the tissue with a solution of sodium azide (NaN₃) to completely quench the peroxidase activity from the first POD-nAb round [26].
- Wash the tissue thoroughly.
- Proceed with the next cycle of incubation with a different POD-nAb, followed by its corresponding FT-GO reaction.
Troubleshooting Guide & FAQs
Q1: My immunolabeling signal is weak and heterogeneous in the center of my thick embryo sample. What could be the issue?
- Cause 1: Insufficient tissue permeabilization. The reagents are not penetrating deeply.
- Solution: Optimize the permeabilization step. Ensure adequate incubation time in ScaleA2 and consider testing alternative clearing methods or incorporating electrophoresis (e.g., CLARITY) for thicker samples [25].
- Cause 2: The primary immunoreagent is too large.
- Cause 3: Signal is genuinely low for low-abundance targets and is not being detected.
- Solution: Employ the FT-GO tyramide signal amplification system. The enzymatic amplification provides a dramatic boost in signal intensity, making low-abundance targets visible [25].
Q2: I want to label three different cell types in my same thick tissue sample. How can I do this with the POD-nAb/FT-GO system?
- Answer: Sequential multiplexing is possible by using a quenching step between labeling rounds.
- Complete the full POD-nAb/FT-GO protocol for your first target.
- After imaging, incubate the sample with a solution of sodium azide (NaN₃) to inactivate the peroxidase enzyme from the first round [25] [26].
- Validate quenching by ensuring no residual signal is produced if the FT-GO mixture is reapplied.
- Repeat the primary incubation and FT-GO reaction with a POD-nAb for a second target. The fluorophore used in the FT-GO system must be different from the first round.
- Repeat the quenching and labeling cycle for subsequent targets.
Q3: Can I use nanobodies to target intracellular antigens in thick samples?
- Answer: Yes, but it requires additional engineering. Standard nanobodies and POD-nAbs target extracellular or surface antigens. To reach intracellular targets, you can fuse your nanobody to a cell-penetrating peptide (CPP), such as the TAT peptide from HIV. Research has shown that TAT-fused nanobodies can efficiently enter cells and inhibit viral replication by targeting intracellular viral proteins [28].
Q4: The enzymatic amplification of the FT-GO system is too strong and creates high background. How can I reduce this?
- Cause: The non-linear, enzymatic nature of tyramide signal amplification can lead to background from incomplete washing or over-amplification.
- Solution 1: Titrate the concentration of your primary POD-nAb. Using a more dilute solution can reduce both specific signal and background.
- Solution 2: Optimize the duration of the FT-GO reaction. Shortening the 8.5-hour incubation may help find a balance between signal and background.
- Solution 3: Increase the number and duration of washes after the FT-GO reaction to remove any non-specifically deposited tyramide thoroughly.
Q5: Why is my POD-nAb fusion protein not expressing well in the production system?
- Answer: The fusion of a nanobody to peroxidase can sometimes make the protein difficult to express or secrete. A recent study found that fusing difficult-to-express proteins to a camelid nanobody can act as a secretion chaperone, enhancing their production by over 1,000-fold in some cases. This suggests that the nanobody's stable, well-folded nature can improve the trafficking of the entire fusion protein through the secretory pathway [29]. Consider using a nanobody as a fusion partner to boost production.
For researchers investigating the intricate architecture of embryonic development, achieving effective antibody penetration in thick tissue samples remains a significant technical challenge. Traditional histological sectioning disrupts critical three-dimensional contexts, making it difficult to analyze system-wide biological processes. Tissue clearing methodologies have emerged as powerful solutions, enabling comprehensive 3D imaging of intact specimens. Within this field, ACT-PRESTO, CUBIC, and iDISCO represent three advanced techniques with distinct advantages for embryonic applications. This technical support center provides a detailed comparison of these methods, along with troubleshooting guidance specifically tailored for researchers working to improve antibody penetration in thick embryo samples. By understanding the strengths and limitations of each approach, scientists can select the optimal protocol for their specific experimental needs in developmental biology and drug discovery research.
Technical Comparison of Clearing Methodologies
The table below summarizes the core characteristics of ACT-PRESTO, CUBIC, and iDISCO methods to aid in protocol selection.
| Method | Clearing Principle | Processing Time | Compatibility with Embryos | Impact on Tissue Size | Key Advantages |
|---|---|---|---|---|---|
| ACT-PRESTO | Electrophoretic tissue clearing with pressure-assisted labeling [19] | ~1 day [19] | Scalable for whole bodies (e.g., zebrafish, Xenopus) [19] | Transient swelling (80%) during clearing, returns to original size in RIMS [19] | Rapid processing (4-20 hours for whole organs); preserves protein-based signals; compatible with immunolabeling and RNA probes [19] |
| CUBIC | Aqueous-based delipidation and decolorization [30] | Several days to weeks (10 days for E14.5 uterus) [31] | Effective for fragile embryonic mouse brains and pregnant uterus [32] [31] | Minimal expansion [31] | Excellent decolorization of hemoglobin/myoglobin; preserves endogenous fluorescence (EGFP); maintains tissue integrity [32] [31] |
| iDISCO | Solvent-based dehydration and delipidation [33] | 1-2 days for whole mouse brain [33] | Applied to whole-body embryonic imaging [33] | Significant shrinkage to ~50% of original size [19] | High transparency; robust for immunolabeling; compatible with light-sheet microscopy [19] [33] |
Research Reagent Solutions Toolkit
The table below outlines essential reagents and their functions for implementing these tissue clearing methods.
| Reagent/Chemical | Function in Protocol | Method Compatibility |
|---|---|---|
| Paraformaldehyde (PFA) | Tissue fixation to preserve antigenicity and structure [34] | Universal (ACT-PRESTO, CUBIC, iDISCO) |
| Acrylamide | Forms tissue-hydrogel hybrid for macromolecule stabilization [19] | ACT-PRESTO (and other hydrogel-based methods) |
| Sodium Dodecyl Sulfate (SDS) | Detergent for lipid removal (delipidation) [33] | ACT-PRESTO, CUBIC |
| Amino alcohols | Main clearing agents for delipidation and refractive index matching [30] | CUBIC |
| Dibenzyl Ether (DBE) | Organic solvent for refractive index matching (RI ~1.56) [33] | iDISCO |
| Urea | Water-soluble agent for lipid removal and refractive index homogenization [33] | CUBIC (and other aqueous methods) |
| Triton X-100 | Mild detergent for permeabilization [35] | Common in pre-treatment steps |
| Proteinase K | Enzyme treatment to increase tissue permeability for antibodies [35] | Optional for challenging embryos |
| Refractive Index Matching Solution (RIMS) | Final solution to homogenize refractive index for transparency [19] | ACT-PRESTO |
| Glutathione diethyl ester | Glutathione diethyl ester, CAS:97451-40-6, MF:C14H25N3O6S, MW:363.43 g/mol | Chemical Reagent |
| 3-(Benzyloxy)oxan-4-one | 3-(Benzyloxy)oxan-4-one, CAS:1351450-56-0, MF:C12H14O3, MW:206.24 g/mol | Chemical Reagent |
Workflow Diagram for Method Selection
Frequently Asked Questions (FAQs)
Q1: What is the fastest clearing method for embryonic tissues?
ACT-PRESTO currently offers the most rapid processing time, clearing tissues or whole bodies within 1 day while preserving tissue architecture and protein-based signals [19]. This method achieves this speed through optimized electrophoretic tissue clearing (ETC) combined with pressure-assisted labeling (PRESTO) to drive macromolecules into tissues [19]. For time-sensitive projects where preserving endogenous fluorescence is not the primary concern, ACT-PRESTO provides a significant advantage.
Q2: Which method best preserves endogenous fluorescent proteins in embryos?
CUBIC is particularly effective for preserving endogenous fluorescent proteins like EGFP in embryonic tissues [31]. Research using CUBIC on pregnant uteri from transgenic EGFP mice successfully visualized EGFP-positive conceptus within EGFP-negative uteruses, confirming the precise three-dimensional location of invading trophoblasts [31]. The aqueous nature of CUBIC causes less damage to fluorescent protein structures compared to harsher solvent-based methods.
Q3: How can I improve antibody penetration in dense embryonic tissues?
Several strategies can enhance antibody penetration:
- ACT-PRESTO: Incorporates pressure (centrifugal or convection flow) to actively drive antibodies into dense tissues [19]
- Proteinase K treatment: For challenging embryos, careful titration of proteinase K (e.g., 1 µg/ml for 10 minutes) can increase permeability without damaging tissue integrity [35]
- Methanol treatment: Incubation with methanol effectively suppresses endogenous peroxidase activity, reducing background staining in aphid embryos [35]
- Extended incubation times: For whole-mount staining, significantly longer incubation times are necessary to allow reagents to penetrate the center of samples [34]
Q4: Which method causes the least tissue distortion for accurate morphological analysis?
CUBIC demonstrates minimal size alteration, maintaining organ volume without significant shrinking or expansion [31]. In contrast, iDISCO and other solvent-based methods can shrink tissues to approximately half their original size [19], while ACT-PRESTO causes transient swelling during clearing (approximately 80%) but returns to original size in refractive index matching solution [19]. For studies requiring precise morphological measurements, CUBIC may be preferable.
Q5: What specialized equipment is required for these methods?
Equipment requirements vary significantly:
- ACT-PRESTO: Requires specialized electrophoretic equipment with cooling systems and platinum electrodes [19]
- CUBIC: Uses simple immersion techniques without specialized equipment [30]
- iDISCO: Requires standard laboratory equipment but must be performed in fume hoods due to organic solvents [33]
Consider both equipment availability and safety requirements when selecting a method.
Troubleshooting Guide
| Problem | Possible Causes | Solutions |
|---|---|---|
| Poor antibody penetration | Inadequate permeabilization; dense extracellular matrix; large sample size | Use ACT-PRESTO pressure application [19]; Optimize proteinase K concentration and incubation time [35]; Extend antibody incubation times [34] |
| High background staining | Insufficient blocking; endogenous enzyme activity; non-specific antibody binding | Use specialized blocking reagents (e.g., DIG buffer set) instead of NGS/BSA [35]; Apply methanol treatment to suppress endogenous POD [35]; Optimize antibody concentrations |
| Tissue damage during clearing | Over-digestion with enzymes; excessive heat during electrophoresis | Titrate proteinase K concentration carefully [35]; Ensure proper cooling in ACT-PRESTO system [19]; For fragile samples, use CUBIC-f variant [32] |
| Incomplete clearing | Insufficient delipidation; inadequate refractive index matching; endogenous pigments | Extend incubation in delipidation solutions; Ensure proper reagent penetration; For pigmented tissues, use CUBIC for decolorization [31] |
| Loss of fluorescent signal | Harsh solvents; overfixation; prolonged clearing | Use aqueous-based methods (CUBIC) for fluorescent proteins [31]; Optimize fixation time to maintain antigenicity [30]; Test antibody compatibility after clearing [19] |
Frequently Asked Questions (FAQs)
FAQ 1: What is the core advantage of using ACT-PRESTO over passive diffusion methods for immunolabeling? The core advantage is speed and efficiency. ACT-PRESTO can clear whole organs within a day and uses pressure or convection flow to drive antibodies deep into tissue, reducing labeling times from days to hours. Passive methods rely on slow diffusion, which can take weeks for whole organs and often results in incomplete labeling of dense tissues [19] [36].
FAQ 2: My samples are not clearing properly. What could be the main issue? Improper clearing is often linked to suboptimal tissue-hydrogel formation. Ensure the hydrogel monomer solution has fully infused the fixed tissue (typically 12-24 hours at 4°C with gentle shaking) and that polymerization proceeds correctly in a deoxygenated environment at 37°C. Incomplete polymerization can hinder subsequent lipid removal [36].
FAQ 3: After clearing and labeling, I am seeing high background fluorescence. How can I reduce this? High background is frequently due to insufficient washing after the Electrophoretic Tissue Clearing (ETC) step or inadequate blocking before immunolabeling. Wash the cleared sample multiple times with PBS until no bubbles are visible upon shaking to ensure complete SDS removal. Use a blocking buffer containing 6% BSA and 0.1% Triton X-100 during antibody incubations [36].
FAQ 4: Can the ACT-PRESTO method be used with any antibody? The method is compatible with a wide range of conventional antibodies; one study found that 75 out of 82 commercially available antibodies tested worked successfully with the protocol. However, a small number of antibodies may not recognize their epitopes after the tissue-hydrogel formation process, potentially due to epitope masking [19].
FAQ 5: What is the purpose of the electrophoresis step in the ACT method? The Electrophoretic Tissue Clearing (ETC) step uses an electric field and an SDS-containing buffer to actively remove lipid molecules from the hydrogel-embedded tissue. This process is crucial for achieving optical transparency by eliminating a major source of light scattering [19] [36].
Troubleshooting Guide
| Problem Area | Specific Issue | Possible Cause | Recommended Solution |
|---|---|---|---|
| Optical Clarity | Tissue remains opaque after ETC. | Incomplete lipid removal; insufficient ETC time. | Increase ETC duration; ensure ETC buffer pH is 8.5 and temperature is maintained at 37°C [36]. |
| Immunolabeling | Weak or no specific signal. | Antibodies failed to penetrate deep tissue; low antibody concentration. | Use the PRESTO pressure system for accelerated delivery; optimize antibody concentration and consider incubating for 4 days at 37°C with solution replacement [19] [36]. |
| Immunolabeling | High, non-specific background. | Incomplete washing after ETC; insufficient blocking. | Extend PBS washes post-ETC until no bubbles form; use a blocking buffer with 6% BSA and 0.1% Triton X-100 [36]. |
| Sample Integrity | Tissue appears damaged or swollen. | Excessive heat or current during ETC; over-pressurization during PRESTO. | Use an ETC chamber with an active cooling system; for PRESTO, optimize and monitor the applied pressure [19]. |
| General | Inconsistent results between samples. | Variations in hydrogel monomer infusion or polymerization. | Standardize tissue size; ensure consistent infusion times and complete, uniform polymerization [36]. |
Experimental Protocol: ACT-PRESTO for Thick Embryo Samples
Sample Preparation and Fixation
- Reagents: 0.1x PBS, 4% Paraformaldehyde (PFA) in PBS.
- Protocol: Dissect embryo samples and fix by immersion in 4% PFA at 4°C overnight. For uniform fixation, ensure the volume of PFA is at least 10 times the volume of the tissue [36].
Hydrogel Monomer Infusion and Polymerization
- Reagents: Hydrogel monomer solution (A4P0: 4% acrylamide in 0.1x PBS), thermal initiator.
- Protocol:
- Incubate fixed samples in A4P0 solution at 4°C for 12-24 hours with gentle shaking.
- Transfer the sample to a tube with fresh A4P0 solution containing the initiator.
- Remove oxygen by bubbling nitrogen through the liquid for 1 minute, then seal the tube tightly.
- Polymerize in a water bath at 37°C for 2 hours [36].
Electrophoretic Tissue Clearing (ETC)
- Reagents: ETC buffer (200 mM boric acid, 4% SDS, pH 8.5).
- Protocol:
- Place the polymerized sample into the ETC chamber.
- Fill the chamber with ETC buffer.
- Run the ETC at 1.5 A and 37°C. For embryo samples (1-2 mm thick), a run time of approximately 2 hours is a good starting point.
- Post-ETC, transfer the sample to a tube with 0.1x PBS and wash several times until no bubbles are visible to ensure complete SDS removal [36].
Pressure-Assisted Immunolabeling (PRESTO)
- Reagents: Antibody dilution solution (1x PBS, 6% BSA, 0.1% Triton X-100, 0.01% sodium azide), primary and secondary antibodies.
- Protocol:
- Incubate the cleared sample in primary antibody solution (e.g., diluted 1:500) within a specialized pressure chamber.
- Apply controlled pressure (e.g., centrifugal force or convection flow) for 4 days at 37°C with mild shaking. Replace the antibody solution on the second day.
- Wash the sample thoroughly with 0.1x PBS for 3-5 hours, changing the buffer every hour.
- Incubate with fluorescent secondary antibody under the same pressure conditions for 4 days.
- Perform a final wash with PBS before imaging [19] [36].
Workflow and Process Diagrams
ACT-PRESTO Workflow
PRESTO Labeling Process
Research Reagent Solutions
| Reagent / Material | Function in ACT-PRESTO |
|---|---|
| Acrylamide (4%) | Forms the hydrogel monomer that infiltrates tissue and crosslinks with proteins, creating a porous scaffold that preserves structure while allowing lipid removal [36]. |
| Paraformaldehyde (PFA) | Fixes the tissue by crosslinking proteins, preserving cellular architecture and antigen targets during subsequent clearing steps [36]. |
| SDS ETC Buffer | Electrophoretic Tissue Clearing buffer; the detergent SDS emulsifies and removes lipids under an electric field, which is essential for achieving optical transparency [19] [36]. |
| Refractive Index Matching Solution (RIMS) | A solution containing sucrose and urea that matches the refractive index of the cleared tissue-hydrogel, minimizing light scattering and rendering the sample transparent for imaging [19]. |
| Antibody Dilution Solution (with BSA) | A solution containing Bovine Serum Albumin (BSA) and a detergent used to dilute antibodies. It blocks non-specific binding sites and facilitates antibody penetration during pressure-assisted labeling [36]. |
| Pressure Chamber (PRESTO device) | A specialized chamber that applies physical pressure (e.g., centrifugal force or convection flow) to actively drive antibody solutions deep into the dense matrix of the cleared tissue, drastically reducing incubation times [19]. |
Research involving the detailed imaging of thick specimens, such as whole-mount embryos, presents a significant challenge: achieving sufficient signal from low-abundance targets while maintaining high spatial resolution. This technical support article details two powerful signal amplification strategies—the Tyramide Signal Amplification (TSA) system and Glucose Oxidase-based systems—framed within the context of improving antibody penetration and detection sensitivity in thick embryo samples. These methods enable researchers to push the boundaries of what is detectable, allowing for the visualization of rare cellular events and intricate structures deep within tissue.
The following table summarizes the core principles, advantages, and primary applications of the two signal amplification systems discussed in this guide.
Table 1: Comparison of Signal Amplification Systems
| Feature | Tyramide Signal Amplification (TSA) | Glucose Oxidase (GOx) System |
|---|---|---|
| Core Principle | HRP catalyzes the activation and covalent deposition of labeled tyramide onto tyrosine residues near the epitope [37] [38]. | GOx oxidizes glucose to gluconic acid, consuming oxygen and producing hydrogen peroxide (Hâ‚‚Oâ‚‚), which locally lowers pH [39] [40]. |
| Key Enzyme | Horseradish Peroxidase (HRP) [37] [38]. | Glucose Oxidase (GOD) [39] [40]. |
| Signal Output | Fluorescent or chromogenic deposition directly on the target [37] [38]. | pH change, which can trigger the swelling/shrinking or degradation of a pH-responsive material (e.g., hydrogel), leading to drug release [39]. |
| Key Advantage | Up to 100-fold higher sensitivity over conventional methods; allows use of 10-5000x less primary antibody [37] [38]. | Self-regulated, feedback-driven system; highly promising for glucose-responsive drug delivery (e.g., insulin) [39]. |
| Primary Application | Enhancing sensitivity for ICC, IHC, and FISH; detecting low-abundance targets [37] [41]. | Primarily used in closed-loop biosensing and smart, glucose-sensitive drug delivery platforms [39] [40]. |
Visualizing the Core Workflows
The diagrams below illustrate the fundamental operational workflows for both the TSA and Glucose Oxidase systems.
Troubleshooting Guides & FAQs
Troubleshooting Tyramide Signal Amplification
Problem: High Background or Non-Specific Staining
- Possible Cause: Concentration of tyramide reagent is too high or incubation time is too long.
- Solution: Titrate the tyramide reagent. Reduce the concentration and/or incubation time (e.g., from 10 minutes to 2-5 minutes). Always include a stop reaction step to halt HRP activity precisely [38].
- Possible Cause: Incomplete blocking or insufficient washing.
- Solution: Ensure adequate blocking with serum or BSA and perform thorough washes between steps [41].
Problem: Weak or No Signal
- Possible Cause: HRP activity has been compromised.
- Solution: Avoid sodium azide in buffers as it inhibits HRP. Ensure hydrogen peroxide in the amplification buffer is fresh and active [37].
- Possible Cause: Primary antibody is not suitable for fixed samples or has lost activity.
- Solution: Validate the antibody in a standard IHC protocol first. The high sensitivity of TSA allows for a significant reduction in primary antibody concentration (up to 5000-fold), so testing a range of concentrations is advised [38].
Problem: Inconsistent Staining in Thick Embryo Samples
- Possible Cause: Poor antibody penetration into deep tissue layers.
- Solution: Implement enhanced permeabilization strategies. Recent advancements, such as the wildDISCO method, use heptakis(2,6-di-O-methyl)-β-cyclodextrin to dramatically improve cholesterol extraction and membrane permeabilization, enabling homogeneous penetration of standard IgG antibodies throughout whole-mount samples like mouse embryos [42].
- Solution: For very thick samples (>150 µm), consider physical trimming. In whole-mount embryo imaging, removing lateral body walls to reduce the distance from the surface to internal structures like the dorsal aorta can be necessary for antibody access [43].
Troubleshooting Glucose Oxidase Systems
Problem: Limited Glucose Sensitivity or Slow Response
- Possible Cause: Loss of Glucose Oxidase (GOD) enzymatic activity.
- Solution: Co-immobilize GOD with Catalase (CAT). Catalase decomposes the inhibitory byproduct Hâ‚‚Oâ‚‚ and regenerates oxygen, which sustains the glucose oxidation reaction and enhances system sensitivity [39].
- Possible Cause: The pH-responsive material does not undergo sufficient change.
- Solution: Characterize the swelling/transition properties of your polymer matrix to ensure it responds effectively within the pH range generated by the enzymatic reaction (typically a drop to ~pH 4-6) [39].
Problem: Poor Long-Term Stability
- Possible Cause: Enzyme leaching or denaturation over time.
- Solution: Employ stable immobilization platforms, such as layer-by-layer (LbL) self-assembly films, cross-linked hydrogels, or hybrid mesoporous silica nanoparticles, which can better retain enzyme activity and function [39].
Essential Protocols for Embryo Research
Protocol: TSA for Whole-Mount Embryo Staining with Enhanced Clearing
This protocol combines the sensitivity of TSA with advanced tissue clearing for deep imaging [43] [42].
Tissue Preparation and Permeabilization:
- Fix embryos (e.g., E10.5-E11.5 mouse) in 4% PFA.
- Critical Step: For whole embryos, carefully remove the head and lateral body walls to reduce tissue depth to ~120 µm, facilitating antibody penetration [43].
- Permeabilize with 0.5% Triton X-100. For superior whole-body penetration, perfuse or incubate samples with a permeabilization buffer containing heptakis(2,6-di-O-methyl)-β-cyclodextrin to extract cholesterol and enhance antibody access [42].
Immunostaining:
- Block with appropriate serum (e.g., 5% goat serum) for 2-4 hours.
- Incubate with primary antibody (diluted significantly lower than standard IHC, e.g., 1:2000-1:5000) for 24-48 hours at 4°C with gentle agitation [38].
Tyramide Signal Amplification:
- Wash thoroughly.
- Incubate with HRP-conjugated secondary antibody (or a poly-HRP conjugate for greater sensitivity) for 12-24 hours at 4°C [38].
- Wash extensively.
- Prepare the fluorophore-conjugated tyramide reagent according to the manufacturer's instructions (e.g., 1:100 to 1:500 dilution in supplied amplification buffer).
- Incubate the embryo sample with the tyramide working solution for 2-10 minutes, monitoring for signal development.
- Stop the reaction by washing with a stop solution or PBS.
Tissue Clearing and Imaging:
- Clear the stained embryos using a BABB (Benzyl Alcohol / Benzyl Benzoate) solution to render the tissue transparent by matching its refractive index with the solution [43].
- Image using a confocal or light-sheet microscope.
Workflow Visualization: Enhanced Staining and Clearing
The following diagram outlines the key steps for preparing and imaging thick embryo samples, integrating both staining and clearing techniques.
The Scientist's Toolkit: Key Reagents and Materials
Table 2: Essential Research Reagents for Signal Amplification and Thick-Sample Imaging
| Item | Function/Benefit | Example/Note |
|---|---|---|
| Tyramide Reagents | Fluorophore- or hapten-conjugated tyramides are the substrate for HRP, leading to localized signal deposition [37]. | TyraMax dyes; Alexa Fluor Tyramide SuperBoost Kits. Available from blue to near-IR for multiplexing [37] [38]. |
| Poly-HRP Secondary Antibodies | Conjugated with multiple HRP molecules, providing superior sensitivity over standard HRP-secondaries for TSA [38]. | Can boost signal 2-10x over other TSA techniques. Essential for very low-abundance targets [38]. |
| Heptakis(2,6-di-O-methyl)-β-cyclodextrin | A potent cholesterol-extracting agent that dramatically enhances membrane permeabilization for whole-body antibody penetration in fixed samples [42]. | Key component of the wildDISCO method. Prevents antibody aggregation and enables homogeneous staining [42]. |
| BABB Clearing Solution | A mixture of Benzyl Alcohol and Benzyl Benzoate used to render fixed tissues transparent for deep imaging [43]. | Enables high-resolution 3D imaging of structures >200 µm deep. Compatible with many fluorescent labels [43]. |
| Glucose Oxidase (GOD) | The core sensing enzyme for glucose-sensitive systems. Catalyzes the oxidation of glucose, producing a pH change [39] [40]. | Often used alongside Catalase to improve reaction efficiency and longevity [39]. |
| pH-Responsive Polymers | Materials that change structure (swell/shrink/degrade) in response to the pH change created by GOD activity [39]. | Used as the drug release mechanism in self-regulated delivery systems (e.g., for insulin) [39]. |
| 4-Bromobenzonitrile-d4 | 4-Bromobenzonitrile-d4, CAS:771534-56-6, MF:C7H4BrN, MW:186.04 g/mol | Chemical Reagent |
| 3-Fluorobutan-1-amine hydrochloride | 3-Fluorobutan-1-amine hydrochloride, CAS:1780799-10-1, MF:C4H11ClFN, MW:127.59 g/mol | Chemical Reagent |
Frequently Asked Questions (FAQs)
Q1: What is the primary advantage of using TissUExM for studying embryo samples? TissUExM allows for super-resolution imaging of large, mechanically heterogeneous tissues by physically expanding them approximately 4-fold. This process enables the quantitative characterization of protein complexes and subcellular structures, such as centrioles and cilia, in whole vertebrate embryos (e.g., zebrafish, mouse) using conventional microscopes, which is otherwise challenging with standard super-resolution techniques [44] [45].
Q2: My expanded embryo samples show cracking, particularly in later developmental stages. How can this be resolved? Cracking in older embryos (e.g., 3-5 days post-fertilization zebrafish) is often due to the development of a resistant collagen network. To resolve this, incorporate a collagenase VII digestion step between the gelation and denaturation phases of the protocol. This enzymatic treatment breaks down the collagen matrix, enabling successful, non-disruptive 4-fold expansion of whole embryos at these stages [45].
Q3: Why is my immunofluorescence labeling for endogenous proteins inhomogeneous or weak in expanded whole-mount embryos? TissUExM is optimized for post-expansion labeling, which provides superior epitope access in high molecular density environments compared to pre-expansion labeling. Ensure you are using the optimized protocol for fixation, embedding, and denaturation. Specifically, the method involves:
- Supplementation with 0.1% Triton until embedding for homogeneous chemical penetration.
- Increased acrylamide concentration during crosslinking.
- Optimized embedding incubation time, temperature, and initiator concentrations.
- Lowered denaturation temperature to preserve epitopes [45].
Q4: How isotropically does TissUExM expand tissue, and how can I quantify any distortion? TissUExM preserves whole embryo morphology with minimal distortion. Quantitative analysis using an automated approach on landmark regions (e.g., the excretory canal) shows a root mean square error (RSME) of 1.49 ± 0.9 μm over 100 μm, which corresponds to less than 2.5% distortion. This level is within the 1%–4% generally tolerated for whole organisms [45].
Troubleshooting Guide
| Common Issue | Possible Cause | Recommended Solution |
|---|---|---|
| Heterogeneous embryo cracking [45] | Inadequate crosslinking, embedding, or denaturation; resistant collagen in later stages. | Increase acrylamide concentration at crosslinking; optimize embedding time/temperature/initiators; add collagenase VII digestion for embryos >3 dpf. |
| Poor antibody penetration/weak signal [45] | Pre-expansion labeling; high molecular crowding. | Use post-expansion immunofluorescence; validate with specific antibodies (e.g., anti-actin, MF20 myosin). |
| Gel damage or incomplete expansion [46] | Suboptimal gelation or mechanical resistance. | Ensure homogeneous penetration of chemicals with 0.1% Triton; follow optimized gelation and polymerization steps. |
| Morphological distortion [45] | Sample handling or non-isotropic expansion. | Confirm protocol isotropy (expansion factor ~4.1); use landmark regions for distortion quantification (target RSME <2.5%). |
Key Experimental Protocol: TissUExM for Whole Vertebrate Embryos
The following workflow details the core TissUExM protocol, optimized for whole-mount zebrafish and mouse embryos to enhance antibody penetration and ultrastructural analysis [46] [45].
Protocol Steps
- Tissue Fixation: Fix whole embryos (e.g., 2 days post-fertilization zebrafish) using a standard aldehyde-based fixative (e.g., formaldehyde) to preserve the native ultrastructure [45].
- Embedding and Crosslinking: Incubate fixed embryos in a solution containing acrylamide and a crosslinker. The protocol requires increased acrylamide concentration compared to standard U-ExM. Supplement all solutions with 0.1% Triton until embedding to ensure homogeneous penetration of chemicals throughout the dense tissue [45].
- Polymerization (Gelation): Transfer the embryo to a gelation chamber and initiate polymerization. This step is critical for creating the expandable hydrogel network. The incubation time, temperature, and concentrations of polymerization initiators (e.g., TEMED, APS) must be optimized for large tissues [45].
- Denaturation: Denature the proteins to linearize them within the gel. TissUExM uses a lower denaturation temperature (compared to original U-ExM) to preserve most epitopes, paired with an increased incubation time to overcome intra-specimen mechanical resistance [45].
- Protease Digestion (Optional for older embryos): For embryos at later developmental stages (e.g., 3-5 dpf zebrafish), which have developed a collagen network, a digestion step with collagenase VII is essential. This step is performed after gelation and before denaturation to prevent cracking [45].
- Mechanical Expansion: Place the gel in a large volume of deionized water to trigger isotropic physical expansion. The typical expansion factor achieved is 4.1 ± 0.2, meaning structures are enlarged over four times their original size [45].
- Post-Expansion Immunolabeling: Label the expanded gel with antibodies against your target endogenous proteins (e.g., actin, tubulin, myosin). Post-expansion labeling is a key feature of TissUExM, as it provides better epitope access in the expanded, less crowded environment and downscales the antibody linkage error by the expansion factor [45].
- Super-Resolution Imaging: Image the expanded sample. TissUExM is compatible with various microscopy objectives, allowing for large-scale overviews (e.g., 10×/0.40 NA) or ultrastructural analysis (e.g., 63×/1.20 NA) of subcellular compartments [44] [45].
Research Reagent Solutions
| Essential Material | Function in TissUExM |
|---|---|
| Acrylamide | Forms the backbone of the polygel matrix that swells upon water absorption, enabling physical expansion of the specimen [45]. |
| Crosslinker | Chemically anchors cellular biomolecules (proteins, nucleic acids) to the polygel network to retain spatial information during expansion [46]. |
| Triton X-100 | A detergent used at 0.1% to permeabilize the tissue, ensuring homogeneous penetration of all chemicals (acrylamide, crosslinker, antibodies) throughout the thick embryo sample [45]. |
| Collagenase VII | An enzyme critical for digesting the resistant collagen network in older embryos (>3 dpf), preventing gel cracking and enabling uniform expansion [45]. |
| Primary Antibodies | Used for post-expansion immunolabeling to detect specific endogenous proteins (e.g., anti-PolyE tubulin, anti-actin) with high specificity in the expanded gel [44] [45]. |
| ATTO647N NHS-ester | A fluorescent dye that binds primary amines; used as a control for labeling homogeneity and to visualize overall tissue morphology and bulk protein distribution [45]. |
| Performance Metric | Result | Experimental Context |
|---|---|---|
| Expansion Factor [45] | 4.1 ± 0.2 | Whole 2 dpf zebrafish embryos, measured post-expansion. |
| Distortion (RMS Error) [45] | 1.49 ± 0.9 μm | Quantified over 100 μm in landmark regions of whole embryos. |
| Distortion (Percentage) [45] | < 2.5% | Relative distortion after full expansion process. |
| Sarcomere Periodicity (Actin) [45] | 0.9 ± 0.1 μm | Measured in expanded zebrafish embryo muscle tissue. |
| Sarcomere Periodicity (Myosin) [45] | 1.8 ± 0.2 μm | Measured in expanded zebrafish embryo muscle tissue. |
Fine-Tuning Your Protocol: A Step-by-Step Guide to Optimization and Problem-Solving
For researchers studying development in thick embryo samples, effective fixation is the critical first step upon which all subsequent data depends. The primary challenge lies in achieving a balance: the fixative must thoroughly penetrate the sample to preserve morphology and immobilize antigens without destroying the very epitopes that antibodies need to bind to. This technical support center is designed to address the specific fixation problems encountered in embryology and developmental biology, providing evidence-based guidelines and troubleshooting advice to improve the reliability of your immunohistochemistry and immunofluorescence results.
Core Principles & Frequently Asked Questions (FAQs)
FAQ 1: What is the fundamental difference between PFA and glyoxal as fixatives?
Both paraformaldehyde (PFA) and glyoxal are aldehyde-based fixatives that work by creating cross-links between protein molecules, thereby stabilizing cellular architecture. However, they have distinct properties:
- PFA: This is the most widely used fixative. It is typically used at a concentration of 3-4% and is favored for its relatively good preservation of protein epitopes for antibody binding [47] [48] [49].
- Glyoxal: This is a smaller dialdehyde fixative. Some studies indicate it has a faster reaction rate and can penetrate cells more quickly than PFA. It is also considered to have a better safety profile (less toxic) [50]. Importantly, its performance is highly dependent on the preparation of an acidic solution (pH 4-5), often containing 10-20% ethanol [50].
FAQ 2: For thick embryo samples, should I choose PFA or glyoxal?
The choice is not straightforward and appears to be cell-type and target-specific. Contradictory evidence in the literature means you will likely need to optimize for your specific sample and antigen.
- Evidence for PFA's Superiority: One 2020 study directly compared the two and concluded that PFA was "superior to Gly in retaining cellular proteins in situ with little/no background staining," providing more reliable and consistent results in mouse oocytes, embryos, and human somatic cells [47].
- Evidence for Glyoxal's Superiority: A 2017 study argued that glyoxal can be a valuable alternative, as it acted faster, cross-linked proteins more effectively, and better preserved cellular morphology in their tested models. They reported that glyoxal fixation resulted in brighter immunostaining for the majority of targets [50].
- Recommendation: For foundational work on a new embryonic model or antigen, starting with a standard 4% PFA protocol is advisable. If you encounter issues with poor morphology or slow penetration, glyoxal presents a promising alternative to empirically test.
FAQ 3: How long should I fix my embryo samples?
Fixation duration is a critical and often overlooked variable. The general guideline for immersion fixation is 2 to 24 hours at 4°C [49]. However, the optimal time depends on sample size and density.
- Under-fixation leads to poor structural preservation and loss of antigens.
- Over-fixation, especially over 24 hours, can mask epitopes by excessive cross-linking, reducing antibody binding intensity. One study on neutrophils found that PFA fixation for 24 hours decreased the signal for citrullinated histone H3 (H3cit) compared to a 30-minute fixation [48].
- Best Practice: For thick embryos, begin with a longer fixation (e.g., 12-24 hours at 4°C) and test shorter durations if you suspect over-fixation is harming your signal.
Comparative Fixation Data at a Glance
The table below summarizes key quantitative findings from recent studies to aid in your decision-making.
Table 1: Comparative Analysis of PFA and Glyoxal Fixatives
| Fixative | Typical Working Concentration | Optimal pH | Key Advantages | Reported Disadvantages | Best For |
|---|---|---|---|---|---|
| Paraformaldehyde (PFA) | 3.5% - 4% [47] [48] | Neutral (7.2-7.4) [47] | Consistent, reliable protein retention; little background [47]. Gold standard. | Slow penetration; can cause membrane blebs and vacuoles [47] [50]. | Foundational studies; when consistency is paramount. |
| Glyoxal | 3% [47] [50] | Acidic (4-5) [50] | Faster penetration & action; less toxic; better morphology preservation in some studies [50]. | Inconsistent performance (poor in some cell types) [47]; requires fresh preparation. | Troubleshooting penetration/morphology issues in PFA; when a faster fixative is needed. |
| Methanol | 100% [48] | N/A | Good for some cytoskeletal targets; requires no permeabilization. | Poor morphology preservation; can displace/leach cytoplasmic proteins [50]. | Specific targets like microtubules; not generally recommended for thick embryos. |
Table 2: Effect of PFA Fixation Duration on Signal Intensity
| Target Antigen | Short Fixation (15-30 min) | Long Fixation (24 hours) | Recommendation |
|---|---|---|---|
| Myeloperoxidase (MPO) | Strong Signal [48] | Strong Signal [48] | 15-30 min fixation is sufficient. |
| DNA/Histone-1 Complexes | Strong Signal [48] | Strong Signal [48] | 15-30 min fixation is sufficient. |
| Citrullinated Histone H3 (H3cit) | Strong Signal [48] | Decreased Signal [48] | Avoid prolonged fixation; use 15-30 min. |
Decision Workflow and Experimental Protocol
The following diagram outlines a logical workflow for optimizing fixation, from sample preparation to validation, specifically tailored for challenging thick samples.
Detailed Protocol for Fixation of Thick Embryo Samples
This protocol is adapted for immersion fixation of early-stage avian or mammalian embryos [49] [51].
Step 1: Fixative Preparation
- 4% PFA Solution: Dilute from a sealed, electron microscopy-grade ampule or prepare from powder in Phosphate Buffered Saline (PBS). Heat gently (to ~60°C) in a fume hood to dissolve, using a few drops of 1N NaOH to clear the solution. Adjust pH to 7.4, let cool, and filter. Use freshly prepared or aliquot and store at -20°C.
- 3% Glyoxal Solution: Combine 79.5 mL of 40% glyoxal, 197.25 mL absolute ethanol, and 7.5 mL glacial acetic acid to 709.75 mL distilled water. Vortex and adjust to pH 5.0 with 1N NaOH (~62.0 mL). Store at 4°C and use within a few days [47] [50].
Step 2: Fixation Process
- Dissection: Dissect embryos in ice-cold PBS or physiological buffer as quickly as possible to minimize hypoxia and degradation.
- Immersion: Immediately transfer the embryo to a volume of fixative that is at least 20 times the volume of the tissue.
- Time and Temperature: Fix for 12-24 hours at 4°C with gentle agitation. Avoid fixation at room temperature for prolonged periods, as it can increase autofluorescence.
Step 3: Post-Fixation Wash and Permeabilization
- Washing: Rinse the sample 3-4 times in PBS over 1-2 hours to remove all traces of fixative.
- Permeabilization: This is critical for antibody penetration in thick samples. Incubate embryos in a permeabilization buffer such as PBS with 0.5-1.0% Triton X-100 for 12-24 hours at 4°C with agitation. For even better penetration, consider using a specialized commercial penetration buffer designed for 3D cultures [52].
- Blocking: Incubate samples in a blocking buffer (e.g., 3% BSA, 5% normal serum, 0.1% Triton X-100 in PBS) for 24-48 hours at 4°C to prevent non-specific antibody binding.
Troubleshooting Guide
Problem: Weak or No Fluorescence Signal
- Cause: Over-fixation. Excessive cross-linking from prolonged PFA exposure can mask epitopes.
- Solution: Shorten fixation time. Implement an antigen retrieval step after fixation. For fluorescence, a heat-induced epitope retrieval (HIER) method using 10 mM Sodium Citrate buffer (pH 6.0) is common [49].
- Cause: Inadequate Permeabilization. Antibodies cannot access intracellular targets.
- Solution: Increase the concentration of Triton X-100 (up to 2%) or extend the permeabilization time. For very dense tissues, consider adding a detergent like SDS (0.01%) to the blocking buffer.
- Cause: Antibody Incompatibility. The antibody may not recognize the cross-linked epitope.
- Solution: If using PFA, test glyoxal. Always check the antibody datasheet for recommended fixation protocols.
Problem: High Background Staining
- Cause: Incomplete Blocking.
- Solution: Extend blocking time to 48 hours. Ensure you are using a blocking agent compatible with your secondary antibody (e.g., normal serum from the host species of the secondary antibody).
- Cause: Non-specific Antibody Binding.
- Solution: Titrate your primary and secondary antibodies to find the optimal concentration. Ensure thorough washing between steps (3 x 30 min with 0.1% Triton in PBS).
- Cause: Tissue Autofluorescence.
- Solution: Treat samples with a reducing agent like sodium borohydride (1 mg/mL in PBS for 30 min) after fixation to reduce aldehyde-induced autofluorescence.
Problem: Poor Morphology (Blebs, Vacuoles)
- Cause: Osmotic or pH Shock.
- Solution: Ensure all buffers are isotonic and at the correct pH. The use of PFA alone has been shown to generate membrane blebs; adding a low concentration of glutaraldehyde (0.1-0.25%) can improve membrane preservation but may require more stringent antigen retrieval [47].
The Scientist's Toolkit: Essential Research Reagents
Table 3: Key Reagents for Fixation and Immunostaining Optimization
| Reagent | Function | Example Use Case |
|---|---|---|
| Paraformaldehyde (PFA) | Primary cross-linking fixative. | Standard fixation for most embryo IHC/IF protocols [49] [51]. |
| Glyoxal | Alternative dialdehyde fixative. | Troubleshooting PFA issues; when faster penetration or reduced toxicity is desired [50]. |
| Triton X-100 | Non-ionic detergent for permeabilization. | Creating pores in lipid membranes to allow antibody entry after fixation [47] [53]. |
| Normal Serum (e.g., Donkey) | Blocking agent. | Reduces non-specific binding of secondary antibodies [49] [53]. |
| Sodium Borohydride (NaBH4) | Reducing agent. | Treating fixed samples to reduce aldehyde-induced autofluorescence. |
| Heat-Induced Epitope Retrieval Buffers (e.g., Citrate, EDTA) | Reverses cross-linking. | Unmasking epitopes after over-fixation to restore antibody binding [49]. |
| Dimethylformamide (DMF) | Solvent. | Preparing stock solutions of dyes like DAPI for nuclear counterstaining [52]. |
| SlowFade or similar Antifade Mountant | Preserves fluorescence. | Mounting samples for microscopy to prevent fluorescence quenching [52]. |
| Tetrabutylammonium Bromodiiodide | Tetrabutylammonium Bromodiiodide, CAS:3419-99-6, MF:C16H36BrI2N, MW:576.18 g/mol | Chemical Reagent |
A critical challenge in developmental biology research is achieving specific and high-quality staining in thick embryo tissues. A core part of the thesis work on improving antibody penetration in such samples hinges on effectively permeabilizing the tissue without compromising its structural integrity or the antigenicity of targets. Permeabilization agents disrupt lipid bilayers, allowing antibodies access to intracellular compartments. The selection of an appropriate agent—primarily Triton X-100, digitonin, or saponin—is therefore not a mere procedural step but a fundamental determinant of experimental success. This guide provides a focused troubleshooting and FAQ resource to help researchers navigate this complex decision-making process.
FAQs and Troubleshooting Guides
Frequently Asked Questions
1. What is the primary functional difference between these permeabilization agents?
The key difference lies in their mechanism of action and membrane selectivity.
- Triton X-100: A non-ionic, non-selective detergent that solubilizes all lipid bilayers, including the plasma and internal organelle membranes [54] [55].
- Digitonin and Saponin: These are mild detergents that selectively permeabilize cholesterol-rich membranes. They form pores in the plasma membrane but leave many internal organelle membranes, such as endosomes, largely intact [54] [55] [56]. This is crucial for retaining materials within intracellular vesicles.
2. My antibody fails to stain internal targets in my whole-mount embryo. What could be wrong?
This is a common problem with several potential causes rooted in permeabilization:
- Insufficient Permeabilization: The agent or concentration may not be strong enough to allow large antibody molecules to penetrate deep into the tissue. For thick embryo samples, a combination of agents (e.g., saponin with a brief Triton X-100 treatment) may be necessary.
- Loss of Target: If you are detecting exogenously delivered nucleic acids (e.g., siRNA, mRNA) or molecules trapped in endosomes, a strong detergent like Triton X-100 can cause their loss. One study showed an 83.5% loss of Cy5-labeled mRNA after Triton X-100 permeabilization. Switching to digitonin retained 93.56% of the signal [54].
- Antibody Penetration Limit: There is a physical limit to how far antibodies can diffuse. For whole-mount mouse embryos, sufficient staining of internally located structures (like the dorsal aorta) may require careful physical trimming of the sample to bring the target within ~150 µm of the surface [43].
3. I am seeing high background fluorescence. Could permeabilization be the cause?
Yes. Over-permeabilization with Triton X-100 can destroy cellular structures and increase non-specific antibody binding, leading to high background [57] [58]. Switching to a milder, cholesterol-specific agent like saponin can help maintain structure and reduce background. Additionally, ensure you are using adequate blocking serum (e.g., 10% normal serum from the secondary antibody host species) and optimizing antibody concentrations [57] [59].
Troubleshooting Common Problems
| Problem | Possible Cause | Recommended Solution |
|---|---|---|
| Weak or No Signal | Inadequate permeabilization for antibody penetration [58]. | Optimize detergent concentration and incubation time; consider a stronger agent (Triton X-100) for nuclear targets. |
| Target loss during permeabilization [54]. | Switch from Triton X-100 to a milder, cholesterol-selective agent like digitonin. | |
| High Background | Over-permeabilization and non-specific antibody binding [57] [58]. | Titrate down detergent concentration; increase blocking serum concentration to 10% [57]. |
| Poor Antibody Penetration in Deep Tissue | Physical diffusion limit of antibodies [43]. | Trim embryo or body walls to bring target within ~150 µm of the surface [43]. |
| Incompatible agent for the target location. | Use a selective agent (saponin/digitonin) for endosomal targets; use a non-selective agent (Triton X-100) for nuclear targets. |
Quantitative Data Comparison
The choice of permeabilization agent can have a dramatic, quantifiable impact on your results. The following table summarizes key experimental data from the literature, providing a basis for informed agent selection.
Table 1: Quantitative Comparison of Permeabilization Agent Performance
| Permeabilization Agent | Target / System | Key Quantitative Finding | Recommended Application |
|---|---|---|---|
| Triton X-100 | Cy5-mRNA in primary human adipocytes [54] | Caused 83.5% ± 0.5% loss of delivered mRNA signal. | General cytoplasmic and nuclear targets; not suitable for retaining vesicular contents. |
| Digitonin | Cy5-mRNA in primary human adipocytes [54] | Retained 93.56% ± 2.48% of delivered mRNA signal. | Ideal for preserving endosomal/vesicular contents; staining of internal membranes. |
| Saponin | Cy5-mRNA in primary human adipocytes [54] | Retained only 12.5% ± 0.54% of mRNA signal. | Selective permeabilization of the plasma membrane; often used in flow cytometry. |
| Saponin | Mitochondrial function in H9c2 cells [56] | Showed a higher mitochondrial calcium retention capacity (CRC) compared to digitonin-permeabilized cells. | Studies of organelle function where internal membrane integrity is critical. |
| 70% Ethanol | Nuclear proteins in neutrophils [59] | Provided lower background fluorescence and better peak resolution than methanol or saponin in flow cytometry. | Flow cytometry analysis of nuclear and transcription factors. |
Experimental Protocols
Detailed Protocol: Improved Intracellular Retention for IF/smFISH
This protocol is adapted from a study focused on quantitatively retaining delivered RNAs and is ideal for visualizing siRNA, miRNA, or mRNA in conjunction with organelle markers [54].
1. Fixation:
- Replace culture media and wash cells with fixative immediately after treatment.
- Fix cells using 4% formaldehyde (FA) in PBS for 2 hours at room temperature.
- Critical Note: The standard fixation (e.g., 3.7% FA for 10 min) is insufficient. Higher concentration and longer incubation are crucial for cross-linking and trapping nucleic acids in the cytoplasm [54].
2. Permeabilization:
- After fixation, wash cells twice with PBS.
- Permeabilize cells using 50-100 µM digitonin in PBS for 10-15 minutes at room temperature.
- Critical Note: Avoid Triton X-100, which was shown to cause significant loss of nucleic acid signal. Digitonin permeabilizes the plasma membrane but preserves endosomal membranes, preventing the loss of vesicular contents [54].
3. Immunostaining & smFISH:
- Proceed with standard blocking and immunostaining protocols for your organelle markers (e.g., anti-EEA1 for early endosomes).
- This optimized fixation and permeabilization method is compatible with subsequent RNA detection using smFISH or molecular beacons [54].
Workflow: Permeabilization Agent Selection
The following diagram outlines the decision-making workflow for selecting the appropriate permeabilization agent based on your experimental goals.
Core Protocol: Whole-Mount Embryo Staining for Deep Tissue Imaging
This protocol is designed for staining thick embryo samples, such as E10.5-E11.5 mouse embryos, and includes a tissue clearing step for 3D imaging [43].
1. Tissue Preparation and Fixation:
- Dissect embryos and remove heads and lateral body walls to reduce the distance antibodies must travel to ~120 µm [43].
- Fix embryos with 4% paraformaldehyde (PFA) overnight at 4°C.
2. Permeabilization and Staining:
- Wash embryos extensively with PBS.
- Permeabilize and block in a single solution containing 0.1-0.3% Triton X-100 and 2-10% normal serum (from the secondary antibody species) in PBS for 24-48 hours at 4°C.
- Incubate with primary antibodies diluted in permeabilization/blocking solution for 2-3 days at 4°C.
- Wash for 24 hours with several changes of PBS containing 0.1% Tween-20.
- Incubate with fluorescent secondary antibodies for 2 days at 4°C.
- Wash again for 24 hours with PBS containing 0.1% Tween-20.
3. Tissue Clearing and Imaging:
- Dehydrate the stained embryos through a graded methanol series (25%, 50%, 75%, 100% methanol).
- Render the embryos transparent by incubating in a 1:2 mixture of benzyl alcohol and benzyl benzoate (BABB).
- Mount the cleared embryos in BABB for imaging with a confocal microscope [43].
The Scientist's Toolkit
Table 2: Essential Research Reagent Solutions
| Reagent | Function / Explanation | Example Use Case |
|---|---|---|
| Digitonin | Mild detergent that selectively permeabilizes cholesterol-rich plasma membranes. Preserves internal organelle integrity. | Retaining delivered RNA in endosomes for colocalization studies [54]. |
| Formaldehyde (4%) | Crosslinking fixative. Preserves cellular architecture by creating covalent bonds between proteins. | Standard fixation for immunofluorescence; essential for retaining soluble proteins [54] [60]. |
| Benzyl Alcohol/Benzyl Benzoate (BABB) | Tissue clearing agent. Matches the refractive index of the tissue, making it transparent for deep imaging. | 3D imaging of whole-mount embryos after immunostaining [43]. |
| Bovine Serum Albumin (BSA) & Normal Serum | Blocking agents. Reduce non-specific antibody binding to minimize background staining. | Essential step before antibody incubation; use up to 10% serum for high background [57] [59]. |
| Saponin | Mild detergent that selectively permeabilizes cholesterol-rich membranes. Often used in cyclic or continuous protocols. | Studying mitochondrial function in permeabilized cells [56]. |
| Triton X-100 | Non-ionic, non-selective detergent. Solubilizes all lipid bilayers for maximum permeabilization. | Staining for nuclear antigens or when deep, general permeabilization is required [43] [55]. |
Core Principles of Antibody Incubation
Optimizing antibody incubation is critical for achieving high-specificity staining with low background noise. The key parameters—duration, temperature, and pH—work in concert to control the binding kinetics and specificity of antibody-antigen interactions. Longer incubations at lower temperatures (such as overnight at 4°C) often promote deeper penetration and specific binding in thick tissue sections, while higher temperatures (room temperature) can accelerate binding for easier-to-access epitopes. The pH of the incubation buffer significantly influences antibody affinity and should be optimized for each antibody-epitope pair. [61]
Optimization Strategies at a Glance
The tables below summarize key optimization parameters and their effects on staining outcomes.
Table 1: Primary Antibody Selection and Starting Points
| Parameter | Monoclonal Antibody | Polyclonal Antibody |
|---|---|---|
| Specificity | Single epitope [61] | Multiple epitopes [61] |
| Advantage | High specificity; ideal for discriminating between protein family members [61] | Less vulnerable to epitope masking by fixation; often more robust [61] |
| Starting Concentration (Tissue) | 5-25 µg/mL [61] | 1.7-15 µg/mL [61] |
| Starting Incubation (Tissue) | Overnight at 4°C [61] | Overnight at 4°C [61] |
| Starting Incubation (Cells) | 1 hour at room temperature [61] | 1 hour at room temperature [61] |
Table 2: Optimizing Incubation Conditions
| Condition | Impact on Staining | Recommendation |
|---|---|---|
| Duration & Temperature | Longer, cooler incubations favor specificity and penetration; shorter, warmer incubations speed up kinetics. | For tissues, start with overnight at 4°C. For cells, 1 hour at room temperature is common. [61] |
| pH | Affects antibody affinity and stability; suboptimal pH can reduce binding or cause precipitation. | Use a buffer system appropriate for your antibody. Citrate (pH 6.0) and EDTA (pH 8.0-9.0) are common for antigen retrieval. [49] [62] |
| Antibody Concentration | High concentration increases background; low concentration reduces signal. | Titrate the antibody using a consistent time and temperature. [61] |
Specialized Protocol for Thick Embryo Samples
Working with thick embryo samples for whole-mount immunohistochemistry requires significant adjustments to standard protocols to ensure adequate antibody penetration and epitope accessibility. [34]
Key Considerations:
- Penetration Challenge: Reagents must diffuse into the entire sample, not just the surface. This necessitates extended incubation times for all steps. [34]
- Fixation Sensitivity: Standard paraformaldehyde (PFA) fixation can mask epitopes through protein cross-linking. Since heat-induced antigen retrieval is not feasible without destroying embryo structure, testing alternative fixatives like methanol is often necessary. [34]
- Visualization: Confocal microscopy is recommended to image through the three-dimensional structure of the stained embryo. [34]
Materials:
- Embryos (e.g., zebrafish, mouse, chick)
- Fixative (e.g., 4% PFA or Methanol)
- Permeabilization Buffer (e.g., PBS with 0.1% Triton X-100)
- Blocking Buffer (e.g., PBS with 0.1% Triton X-100 and 5-10% normal serum)
- Primary Antibody
- Fluorophore-conjugated Secondary Antibody
- Phosphate-Buffered Saline (PBS)
- Mounting Medium (e.g., Glycerol-based)
Workflow: The following diagram outlines the multi-day workflow for whole-mount immunostaining, highlighting the extended incubation times required for each step.
Procedure:
- Fixation: Fix embryos in 4% PFA for 30 minutes at room temperature or overnight at 4°C. For some antibodies, methanol may be a superior fixative. [34]
- Permeabilization and Blocking: Incubate embryos in a permeabilization buffer (e.g., with Triton X-100) for several hours to overnight. Subsequently, incubate in blocking buffer for several hours to overnight to prevent non-specific antibody binding. [34]
- Primary Antibody Incubation: Incubate embryos with the primary antibody diluted in blocking buffer for 24-72 hours at 4°C. Gently agitate the samples. [34]
- Washing: Wash the embryos extensively with a wash buffer (e.g., PBS with Triton X-100) over 6-24 hours, with frequent buffer changes. [34]
- Secondary Antibody Incubation: Incubate with the fluorophore-conjugated secondary antibody diluted in blocking buffer for 24-48 hours at 4°C. Protect from light. [34]
- Final Washing: Perform a final extensive wash over 6-24 hours to remove unbound antibody. [34]
- Mounting and Imaging: Mount embryos in an anti-fade mounting medium. Image using a confocal microscope to visualize staining in three dimensions. [34]
Troubleshooting FAQs
Q1: I get high background staining in my embryo samples. How can I reduce this? A1: High background is often due to insufficient blocking or non-specific antibody interactions.
- Increase blocking: Extend the blocking step to 24 hours and ensure you are using a blocking agent matched to the host species of your primary antibody (e.g., normal serum from the same species). [63] [34]
- Optimize antibody concentration: A too-high concentration of primary or secondary antibody is a common cause of background. Perform a dilution series to find the optimal concentration. [61]
- Increase wash stringency and duration: Add a low-concentration detergent like Tween-20 or Triton X-100 to your wash buffer and significantly increase the wash time and frequency after antibody incubations. [34]
Q2: My antibody fails to penetrate the center of my thick embryo sample. What can I do? A2: Poor penetration is a fundamental challenge in whole-mount staining.
- Extend incubation times: Ensure all incubation steps (permeabilization, blocking, antibody, and washing) are conducted over multiple days to allow for full diffusion. [34]
- Increase permeabilization: Optimize the concentration of detergent (e.g., Triton X-100) in your buffers or test alternative permeabilization agents.
- Fragment the sample: For larger embryos, it may be necessary to dissect them into smaller segments before staining to ensure reagents reach the core. [34]
Q3: I have no signal. What are the first things to check? A3: Start with the most common points of failure.
- Epitope masking: If using PFA, the cross-linking may have masked the epitope. Try a different fixative like methanol. [34]
- Antibody compatibility: Confirm the antibody is validated for IHC under your fixation conditions. Antibodies that work on paraffin sections may not work on whole-mount samples. [34]
- Antibody concentration: Your antibody concentration may be too low. Concentrate the antibody or try a shorter incubation at room temperature to test binding. [61]
Research Reagent Solutions
Table 3: Essential Reagents for Antibody Staining Optimization
| Reagent | Function | Example Use-Case |
|---|---|---|
| Normal Sera | Blocks non-specific binding via Fc receptors. Use serum from the host species of your primary antibody. [63] | Added to blocking and antibody dilution buffers to reduce background. [63] |
| Tandem Dye Stabilizer | Prevents degradation of susceptible fluorescent tandem dyes, which can cause erroneous signal spillover. [63] | Added to antibody cocktails and sample buffer during acquisition on a flow cytometer. [63] |
| Brilliant Stain Buffer | Contains additives that prevent polymer dye interactions (e.g., between Brilliant Violet dyes) in multiplex panels. [63] | Used to reconstitute lyophilized antibodies or as part of the antibody master mix in flow cytometry. [63] |
| Antigen Retrieval Buffers | Unmasks epitopes cross-linked by aldehyde fixatives. Common buffers include Sodium Citrate (pH 6.0) and Tris-EDTA (pH 9.0). [49] [62] | Used in Heat-Induced Epitope Retrieval (HIER) for FFPE or frozen sections. Not suitable for whole-mount embryos. [49] [62] [34] |
| Permeabilization Detergents | Solubilizes cell membranes to allow intracellular antibody access. | Essential for intracellular targets and for enabling penetration in thick whole-mount samples. [49] [34] |
Overcoming Background Staining and Non-Specific Binding in Complex Embryo Samples
Technical Support Center: Troubleshooting Guides and FAQs
This technical support center provides targeted solutions for researchers facing the common challenges of high background staining and poor antibody penetration in complex embryo samples. The following guides and FAQs are framed within the broader thesis of improving immunostaining outcomes in thick tissue research.
Frequently Asked Questions
What are the most common causes of high background staining in embryo samples? High background, or non-specific staining, is frequently caused by inadequate blocking of the tissue, leading to nonspecific antibody binding [64]. It can also result from endogenous enzyme activity (e.g., peroxidase or alkaline phosphatase) that is not properly quenched before staining [65] [64]. Furthermore, using an antibody concentration that is too high can cause excessive binding to off-target sites [64].
My antibody fails to penetrate mid- to late-stage embryos. What can I do? As embryos develop, their tissues become denser and less permeable. To increase permeability without damaging tissue integrity, a critical step is the use of Proteinase K to digest proteins that are blocking antibody access to the epitope [65]. For pea aphid embryos from germ band extension onward (stage 11+), incubation with 1 µg/ml Proteinase K for 10 minutes was found to be essential for antibody penetration [65].
I am using a standard BSA blocking solution, but my background is still high. Are there alternatives? Yes. Research on pea aphid embryos found that replacing traditional blockers like normal goat serum (NGS) or bovine serum albumin (BSA) with the blocking reagent from a Digoxigenin (DIG) buffer set significantly reduced background staining [65]. This specialized blocking reagent is more effective at suppressing non-specific interactions in these challenging samples.
How can I effectively suppress endogenous peroxidase activity? While hydrogen peroxide (Hâ‚‚Oâ‚‚) is commonly used, it can sometimes be insufficient. An optimized protocol for aphid embryos found that a methanol incubation step was significantly more effective at bleaching endogenous peroxidase and reducing background [65]. Note that methanol should not be used if you are performing Phalloidin staining or if your antibody's epitope is sensitive to methanol [65].
Is there a novel explanation for non-specific antibody binding? Recent research suggests that nonspecific binding can be mediated by sulfhydryl interactions. Spontaneously reduced disulfide bonds in antibodies can form disulfide bridges with thiol groups in the tissue. Co-incubating primary antibodies with thiol-reactive compounds like reduced Glutathione (GSH) can interrupt this process and significantly improve the signal-to-noise ratio [66].
Troubleshooting Guides
Guide 1: Overcoming High Background Staining
High background can mask specific signals and compromise data integrity. The table below summarizes the primary causes and solutions.
| Problem | Cause | Solution |
|---|---|---|
| General High Background | Inadequate blocking of nonspecific sites. | Use a specialized blocking reagent (e.g., from a DIG buffer set) instead of, or in addition to, BSA/NGS [65]. |
| Endogenous Enzyme Background | Peroxidase or alkaline phosphatase activity in the tissue. | Use methanol incubation to quench peroxidase activity [65] or levamisole to inhibit alkaline phosphatase [64]. |
| Non-specific Antibody Binding | Antibodies binding to off-target sites via sulfhydryl groups. | Co-incubate primary antibody with reduced Glutathione (GSH) or other thiol-reactive compounds [66]. |
| Excessive Signal | Primary or secondary antibody concentration is too high. | Titrate both primary and secondary antibodies to find the optimal dilution that provides clear specific staining [64]. |
| Residual Unbound Antibody | Inadequate washing after antibody incubation. | Perform thorough washing steps with an appropriate buffer (e.g., PBS or TBS with a mild detergent) between incubations [64]. |
Guide 2: Improving Antibody Penetration in Thick Embryo Samples
Penetrating dense embryonic tissue is a major hurdle. The following protocol is optimized for complex embryo samples, based on research in pea aphids [65].
Optimized Protocol for Tissue Permeabilization:
- Dissect and fix ovaries/embryos in 4% PFA for 20 minutes at room temperature.
- Wash the samples with 0.2% PBST (PBS with 0.2% Triton X-100) 3 times for 10 minutes each.
- Proteinase K Treatment (Critical for stage 11+ embryos):
- Prepare a working solution of 1 µg/ml Proteinase K in 1x PBS from a 10 mg/ml stock.
- Incubate the samples for 10 minutes with mild shaking.
- Stop the reaction by washing with 2 mg/ml Glycine in PBST, 3 times for 5 minutes each.
- Wash again with 0.2% PBST twice for 10 minutes each.
- Re-fix the samples with 4% PFA for 15 minutes to maintain tissue integrity.
- Perform final washes with 0.2% PBST before proceeding to blocking and antibody staining.
Experimental Protocol: A Comprehensive Workflow for Embryo Immunostaining
The following diagram and detailed protocol outline the complete optimized workflow for immunostaining complex embryo samples, integrating the key troubleshooting solutions.
Detailed Methodology:
- Culture and Dissection: Culture aphids (or your model organism) on host plants under controlled conditions. Dissect ovaries directly into freshly prepared 4% Paraformaldehyde (PFA) in 1x PBS [65] [17].
- Fixation: Fix three pairs of ovaries in 1 ml of PFA for 20 minutes at room temperature with mild shaking. Decant the fixative and wash with 0.2% PBST 3 times for 10 minutes each [65].
- Permeabilization with Proteinase K: For embryos at germ band extension and later stages (stage 11+), incubate with 1 µg/ml Proteinase K in PBS for 10 minutes. Stop the reaction with 2 mg/ml Glycine washes, followed by PBST washes. Re-fix in 4% PFA for 15 minutes and perform final PBST washes [65].
- Bleaching with Methanol: To suppress endogenous peroxidase activity, serially dehydrate and rehydrate the samples using methanol and PBST solutions. Incubate in 100% methanol for 1 hour at room temperature. Serially rehydrate back to PBST. Samples can be stored in methanol at -20°C for up to a month [65].
- Blocking: Dilute the 10x DIG-based blocking solution to 1x. Incubate the ovaries in this blocking solution for 2.5 to 4 hours at room temperature (or overnight at 4°C) [65].
- Antibody Staining: Replace the blocking solution with fresh 1x DIG blocking solution containing the primary antibody at an optimized dilution. Incubate for 4 hours at room temperature or overnight at 4°C. Wash thoroughly with PBST. Incubate with the secondary antibody (also diluted in DIG blocking solution), followed by extensive final washes [65].
- Visualization: Proceed with chromogenic or fluorescent detection as required for your experiment.
The Scientist's Toolkit: Key Research Reagent Solutions
The table below lists essential reagents and their specific functions in overcoming staining challenges in embryo samples.
| Research Reagent | Function in the Protocol | Key Benefit |
|---|---|---|
| Proteinase K | Enzymatically digests proteins to increase tissue permeability [65]. | Enables antibody penetration in mid- and late-stage embryos without damaging tissue integrity. |
| Digoxigenin (DIG) Blocking Buffer | A specialized blocking reagent used to cover nonspecific binding sites [65]. | More effective than standard BSA or NGS at reducing background staining in complex samples. |
| Methanol | Used for dehydration/rehydration to bleach endogenous peroxidase activity [65]. | More effective than hydrogen peroxide (Hâ‚‚Oâ‚‚) at reducing enzyme-related background. |
| Reduced Glutathione (GSH) | A thiol-reactive compound co-incubated with the primary antibody [66]. | Prevents nonspecific binding mediated by sulfhydryl interactions, improving signal-to-noise. |
| Glycine | An amino acid solution used to stop Proteinase K digestion [65]. | Effectively halts the enzymatic reaction, preventing over-digestion of tissue and epitopes. |
Technical Troubleshooting Guides
Common Issues and Solutions with MAX Eraser
Problem: Incomplete Antibody Removal
- Symptoms: High background fluorescence in subsequent staining cycles; nonspecific signal that obscures specific staining.
- Potential Causes and Solutions:
- Insufficient incubation time: Ensure the MAX Eraser solution is applied for the full recommended duration at room temperature.
- Incorrect reagent handling: Verify that the MAX Eraser solution has been stored correctly and has not expired or been contaminated.
- Sample over-fixation: Excessively cross-linked tissues can trap antibodies, making removal more difficult. Optimize fixation time and concentration.
- Antibody concentration too high: Previous rounds with very high antibody concentrations can saturate antigens and challenge removal. Titrate antibodies to the lowest effective concentration.
Problem: Tissue Damage or Antigen Loss
- Symptoms: Degradation of tissue morphology, loss of cellular detail, or weak specific signal in all channels after erasure.
- Potential Causes and Solutions:
- Over-processing: Do not exceed the recommended number of cycles (approximately 10). Excessive processing can compromise tissue integrity [21].
- Incompatible tissue type: Some delicate tissues or structures may require optimization of incubation time. Test the protocol on a control section first.
- Drying of samples: Ensure samples remain adequately hydrated throughout all washing and incubation steps.
Problem: Poor Antibody Penetration in Thick Embryo Samples
- Symptoms: Staining is only present on the surface of the sample, with a gradient of decreasing signal intensity towards the center.
- Potential Causes and Solutions:
- Inadequate permeabilization: Optimize permeabilization conditions (e.g., detergent type, concentration, and incubation time) prior to the first staining cycle.
- Large antibody complexes: Use F(ab) fragments or smaller recombinant antibodies instead of full-length IgG to improve diffusion into thick samples.
- Extended staining duration: Increase the incubation time for primary and secondary antibodies to allow for deeper penetration.
FAQ: Addressing Specific User Concerns
Q1: How many sequential staining cycles can I perform using MAX Eraser? A1: The MAX Eraser method is robust and can preserve tissue architecture for up to approximately 10 repeated immunostaining and imaging cycles, making it suitable for mid-plex protein imaging [21].
Q2: Is MAX Eraser compatible with immunocytochemistry (ICC) and 3D volumetric labeling? A2: Yes. A key advantage of MAX Eraser is its compatibility not only with conventional immunohistochemistry (IHC) on tissue sections but also with formats like immunocytochemistry (ICC) and volumetric labeling of thicker samples [21].
Q3: Can I use MAX Eraser with super-resolution microscopy? A3: Absolutely. The method integrates seamlessly with a broad range of imaging modalities, including super-resolution microscopy, allowing for high-resolution multiplexed imaging [21].
Q4: How does MAX Eraser compare to other antibody removal methods, like enzymatic stripping or low-pH buffers? A4: MAX Eraser is a chaotropic reagent-based solution that works at room temperature without high-temperature denaturation or enzymatic digestion. This simpler and gentler process helps preserve specimen integrity across multiple cycles [21].
Q5: My target antigen is sensitive. Will MAX Eraser destroy it? A5: MAX Eraser is designed to disrupt antigen-antibody interactions without damaging the underlying tissue architecture. However, antigen sensitivity can vary. It is highly recommended to validate the method for your specific antigen of interest using a known positive control sample.
Table 1: Performance Metrics of MAX Eraser in Multiplexed Imaging
| Parameter | Performance / Specification | Notes |
|---|---|---|
| Maximum Cycles | ~10 cycles | Preserves tissue integrity [21] |
| Incubation Temperature | Room Temperature | No high-heat denaturation required [21] |
| Compatible Modalities | IHC, ICC, Volumetric Labeling | Also compatible with super-resolution microscopy [21] |
| Key Advantage | Affordable and simple | Chaotropic reagent-based; no specialized equipment needed [21] |
Table 2: Comparison of Antibody Removal Techniques
| Method | Principle | Typical Cycles | Risk to Tissue/Antigens |
|---|---|---|---|
| MAX Eraser | Chaotropic reagent solution | ~10 | Low (Preserves tissue architecture) [21] |
| Heat-Induced Epitope Retrieval | High-temperature & low-pH buffer | Varies | Moderate (Heat can damage morphology) |
| Enzymatic Stripping | Protease (e.g., pepsin) digestion | Varies | High (Risk of degrading antigens and tissue) |
| Chemical Denaturation | SDS / β-mercaptoethanol | Varies | High (Harsh chemicals can destroy structure) |
Experimental Protocols
Core Protocol: Sequential Staining with MAX Eraser
This protocol is designed for multiplexed imaging of formalin-fixed, paraffin-embedded (FFPE) or fixed-frozen tissue sections, with specific considerations for thick embryo samples.
Materials Needed:
- MAX Eraser solution
- Standard buffers: Phosphate-Buffered Saline (PBS), Wash Buffer (e.g., PBS with 0.1% Tween-20)
- Blocking solution (e.g., serum, BSA)
- Primary antibodies
- Fluorescently-labeled secondary antibodies (or detection system of choice)
- Mounting medium with antifade
- Humidity chamber
Workflow:
Detailed Procedure:
Initial Sample Preparation: Process samples according to standard protocols. For FFPE tissues, this includes deparaffinization, rehydration, and antigen retrieval. For thick embryo samples, ensure adequate fixation and permeabilization.
Blocking: Incubate sections with an appropriate blocking solution for 1 hour at room temperature to minimize nonspecific binding.
Cycle 1 Staining:
- Primary Antibody Incubation: Apply the first panel of primary antibodies diluted in blocking buffer. Incubate in a humidity chamber for the optimized time (e.g., 1 hour at room temperature or overnight at 4°C). For thick embryo samples, consider extending incubation times to improve penetration.
- Wash: Wash the sample 3 x 5 minutes with wash buffer.
- Secondary Antibody Incubation: Apply the corresponding fluorescent secondary antibodies. Incubate for 1 hour at room temperature, protected from light.
- Wash: Wash the sample 3 x 5 minutes with wash buffer, protected from light.
- Imaging: Acquire images for the first set of markers. Do not proceed with mounting if multiple cycles are planned.
Antibody Removal with MAX Eraser:
- Apply the MAX Eraser solution to fully cover the sample.
- Incubate at room temperature for the manufacturer's recommended time (typically 15-30 minutes).
- Wash thoroughly with wash buffer (e.g., 3 x 5 minutes) to remove the eraser solution and eluted antibodies.
Subsequent Staining Cycles:
- Repeat steps 3 and 4 for the next panel of primary antibodies. No additional blocking is usually required between cycles after the erasure step.
- The process of staining, imaging, and erasure can be repeated for up to ~10 cycles [21].
Final Mounting: After the final imaging cycle, apply an antifade mounting medium and coverslip for long-term preservation.
Validation Experiment: Confirming Antibody Removal
Purpose: To ensure that the MAX Eraser treatment effectively removes antibodies from the previous cycle, preventing false-positive signal carryover.
Method:
- Perform a full staining cycle for a specific marker (e.g., Protein A) as described in the core protocol.
- Acquire a reference image (Image A1).
- Apply the MAX Eraser protocol.
- Without applying any new primary antibody, incubate with the fluorescent secondary antibody that was used in step 1.
- Acquire a second image (Image A2) using the exact same imaging settings as for Image A1.
- Compare Image A2 to Image A1. Successful erasure is confirmed by the absence of specific signal in Image A2. Any remaining signal indicates incomplete removal and requires troubleshooting of the erasure step.
The Scientist's Toolkit: Research Reagent Solutions
Table 3: Essential Materials for MAX Eraser Experiments
| Item | Function / Description | Considerations for Thick Embryo Samples |
|---|---|---|
| MAX Eraser | A chaotropic reagent-based solution that disrupts antigen-antibody interactions at room temperature [21]. | Gentle nature helps preserve delicate 3D architecture in volumetric samples. |
| High-Quality Primary Antibodies | Antibodies with high specificity and affinity for the target protein. | Use validated antibodies. For thick samples, F(ab) fragments can improve penetration. |
| Fluorescent Secondary Antibodies | Conjugates that bind to the primary antibody for signal detection. | Choose bright, photostable dyes. Confirm species cross-reactivity is minimized. |
| Permeabilization Buffer | Contains detergents (e.g., Triton X-100, Saponin) to create pores in cell membranes. | Critical for thick samples. May require longer incubation times or optimized detergent concentrations. |
| Blocking Solution | Reduces nonspecific binding of antibodies to the tissue (e.g., BSA, serum, or commercial blockers). | Use a blocking solution that matches the host species of secondary antibodies. |
| Mounting Medium with Antifade | Preserves fluorescence and protects samples during imaging. | Essential for multi-round imaging to prevent photobleaching of signals across cycles. |
Ensuring Accuracy: Quantitative Validation and Comparative Analysis of Penetration Efficiency
This guide provides troubleshooting and methodological support for researchers quantitatively measuring the penetration depth and uniformity of antibodies and other biologics in thick samples like embryos and spheroids.
Key Quantitative Metrics and Measurement Techniques
The table below summarizes the core quantitative metrics and the primary techniques used to measure them.
| Metric | Description | Primary Measurement Techniques |
|---|---|---|
| Penetration Depth | Maximum distance a therapeutic (e.g., antibody) penetrates from the surface or edge into the sample. | Confocal microscopy, image analysis of concentric bands [67]. |
| Distribution Uniformity | Evenness of therapeutic distribution throughout the sample volume, avoiding peripheral accumulation. | Analysis of signal variance across sample regions or concentric bands [67]. |
| Time to 50% Distribution (TD50) | Time taken for a therapeutic to distribute to 50% of the total sample radius or a predefined depth [67]. | Time-course imaging, velocity curve analysis [67]. |
| Maximum Distance of Penetration | The farthest point from the sample edge where the therapeutic signal is detectable above background [67]. | Image analysis of fluorescence or other labels from the sample edge to the center [67]. |
Experimental Protocols for Quantification
Protocol 1: Using Tumor Spheroids to Measure Antibody Pharmacokinetics
This in vitro assay uses tumor spheroids to model penetration into dense tissue environments [67].
Workflow:
- Generate Spheroids: Create free-floating 3D tumor spheroids from relevant cell lines.
- Apply Therapeutic: Treat spheroids with the antibody therapeutic at various concentrations.
- Fix Time Points: At specified intervals (e.g., 0.5, 1, 2, 4, 8, 24, 48 hours), fix the spheroids to stop the process.
- Label and Clear: Label the therapeutic antibody with a fluorescent secondary antibody. Apply a tissue clearing agent (e.g., Visikol) to render the spheroids transparent.
- Image: Perform high-content confocal imaging to capture 3D distribution data.
- Analyze: Use image analysis software to measure the mean pixel intensity of the antibody signal in concentric bands of decreasing radius from the edge towards the center of the spheroid [67].
Protocol 2: Optical Method for Testing Detection and Resolution
This method, inspired by light-sheet microscopy, quantifies system performance by evaluating the Modulation Transfer Function (MTF) to measure resolution and field flatness [68].
Workflow:
- Prepare Sample: Use fluorescent beads embedded in agarose or a dedicated calibration slide.
- Acquire Images: Image the sample across the entire field of view and through the full focus range.
- Calculate 3D MTF: Generate 3D graphs of the Modulation Transfer Function measured at specific spatial frequencies (e.g., 40 line pairs per mm) and angular orientations.
- Evaluate Performance: The MTF provides a quantitative measure of contrast and resolution at different points in the image, allowing you to assess the uniformity of resolution and detect any vignetting or aberrations at the periphery [68].
Frequently Asked Questions (FAQs)
Q1: Our antibodies show poor penetration depth in thick embryo samples. What are the main factors to investigate? The primary factors are antibody size and the sample's physical barrier. Consider using smaller format binders like single-domain antibodies (VHHs or nanobodies), which have a smaller size and can achieve enhanced tissue penetration [69]. Also, evaluate tissue clearing methods to improve optical clarity and reagent access for both treatment and imaging [68] [67].
Q2: How can we quantitatively distinguish between "penetration" and mere "binding" on the sample surface? True penetration is confirmed by measuring the signal gradient from the surface inward. Using image analysis to plot the mean fluorescent intensity in concentric bands from the edge to the center of a 3D sample (like a spheroid or embryo section) provides a quantitative profile. A signal that drops to background levels within a short distance indicates surface binding, while a gradual decrease demonstrates penetration [67].
Q3: What is a good positive control for an antibody penetration assay? An anti-β-integrin antibody has been used as a positive control in tumor spheroid models to benchmark the performance of other therapeutics [67].
Q4: How does sample preparation affect the quantification of penetration uniformity? Sample preparation is critical. Insufficient clearing will render the sample opaque, leading to inaccurate measurements and an underestimation of both depth and uniformity. The clearing protocol must be optimized for your specific sample type to achieve sufficient transparency for accurate 3D imaging [68] [67].
The Scientist's Toolkit: Research Reagent Solutions
| Item | Function |
|---|---|
| Tumor Spheroid Models | 3D in vitro models that mimic the dense structure of tissues and tumors, used for high-throughput testing of therapeutic penetration [67]. |
| Tissue Clearing Agents | Chemicals that render thick biological samples transparent, enabling deep light penetration and accurate 3D imaging of reagent distribution [68] [67]. |
| Single-Domain Antibodies (VHHs) | Small, stable antibody fragments derived from camelids. Their small size promotes deeper and more uniform tissue penetration compared to conventional antibodies [69]. |
| Anti-β-integrin Antibody | A commonly used positive control antibody to benchmark and validate penetration assays in spheroid models [67]. |
| Fluorescent Secondary Antibodies | Used to label the primary therapeutic antibody, allowing for visualization and quantitative measurement of its distribution via fluorescence microscopy [67]. |
A significant hurdle in developmental biology research is the limited ability of conventional antibodies to penetrate deep into thick, intact embryo samples for high-quality imaging. This technical support center addresses this challenge by providing a comparative analysis and practical methodologies for using nanobodies, which offer superior penetration characteristics due to their small size and robust biophysical properties. This resource is designed to help researchers in embryology and drug development overcome the limitations of traditional immunolabelling techniques.
Fundamental Properties: Nanobodies vs. Conventional Antibodies
Structural and Functional Comparison
The table below summarizes the key differences between nanobodies and conventional IgG antibodies that are critical for embryonic research [70] [71] [72]:
| Property | Nanobodies | Conventional IgG Antibodies |
|---|---|---|
| Molecular Weight | ~15 kDa [70] [71] [72] | ~150 kDa [70] [71] [72] |
| Size (Diameter × Length) | 2.5 nm × 4 nm [70] | 14.2 nm × 11-14 nm [70] |
| Structure | Single-domain (VHH), no light chain [73] [70] | Two heavy and two light chains [71] [72] |
| CDR Regions | 3 (VHH); Longer, flexible CDR3 [73] [71] | 6 (3 VH + 3 VL) [70] |
| Tissue Penetration | Excellent, rapid, and deep [70] [74] | Limited by large size [71] [72] |
| Thermal Stability | High (can withstand 60-80°C) [71] [72] | Lower stability [70] |
| Production System | Simple recombinant (e.g., E. coli) [73] [75] | Complex (mammalian cells typically required) |
| Typical Half-Life | Short (0.5 - 2 hours) [70] | Long (days to weeks) [70] |
Quantitative Performance in Tissue Penetration
Recent research directly compares the performance of nanobodies and conventional antibodies in penetrating intact organs, providing quantitative evidence for their superiority in deep-tissue imaging [74]:
| Parameter | Anti-LYVE1 Nanobodies | Anti-LYVE1 Conventional IgG |
|---|---|---|
| Penetration Depth | Significantly greater, enabling labelling of deep vessels [74] | Limited, restricting analysis to superficial vessels [74] |
| Labelling Speed | Rapid penetration [74] | Slower penetration, requiring longer incubation [74] |
| Target Accessibility | Able to access cryptic epitopes in dense tissue [73] [71] | Limited to more accessible, surface-exposed epitopes [73] |
| Suitability for 3D Imaging | Excellent, enables detailed reconstruction of complex structures [74] | Poor for deep structures, often requires tissue sectioning [74] |
Troubleshooting Guides
Poor Signal in Deep Embryo Sections
Problem: Inadequate immunolabelling in the center of thick embryo samples (>200 µm).
Solutions:
- Switch to Nanobodies: Replace conventional antibodies with nanobodies. Their small size (~15 kDa vs. 150 kDa for IgGs) enables superior diffusion into dense embryonic tissues [74].
- Optimize Incubation Time: While nanobodies penetrate faster, for very thick samples (≥500 µm), extend incubation times from hours to 12-24 hours for complete saturation [74].
- Verify Nanobody Quality: Use size exclusion chromatography (SEC) or SDS-PAGE to check for aggregation. AI-engineered scaffolds can improve stability and reduce aggregation [75].
High Background Noise
Problem: Non-specific binding obscures the specific signal.
Solutions:
- Include Blocking Reagents: Use 2-5% serum (from the same host as the secondary nanobody) or 1-3% BSA in the incubation buffer.
- Titrate Nanobody Concentration: Test a concentration series (e.g., 1-20 µg/mL) to find the optimal signal-to-noise ratio. Their high specificity often allows for lower concentrations than conventional antibodies [71].
- Check Cross-Reactivity: Ensure the nanobody does not cross-react with other embryonic antigens by performing appropriate controls (e.g., knockout tissue if available).
Loss of Antigen Binding
Problem: The nanobody fails to bind its target after storage or conjugation.
Solutions:
- Check Storage Conditions: Despite their stability, store nanobodies in PBS at 4°C for short term or -20°C to -80°C for long term. Avoid repeated freeze-thaw cycles.
- Validate with a Positive Control: Always include a known positive control sample in your experiment.
- Verify Conjugation Efficiency: If the nanobody is conjugated to a fluorophore or other tag, use a spectrophotometer to check the degree of labeling (DOL). An inappropriate DOL can quench fluorescence or hinder binding.
Frequently Asked Questions (FAQs)
Q1: Can nanodies be used for live imaging of embryo development? Yes, their small size and high stability make them excellent candidates for live-cell imaging. They can be microinjected into embryos or added to the culture medium to track dynamic processes with minimal disruption [73].
Q2: How can I extend the short half-life of nanobodies for longer-term embryo studies? The short half-life is advantageous for rapid clearance of unbound molecules, reducing background. For studies requiring prolonged presence, nanobodies can be engineered as multimers or fused to half-life extension modules, such as an albumin-binding nanobody or an Fc fragment [71] [72].
Q3: Are nanodies more immunogenic than conventional antibodies? Generally, they are less immunogenic. However, as they are derived from camelids, there is a potential for immunogenicity in long-term in vivo applications. This can be mitigated through humanization strategies [71] [72].
Q4: What is the best way to produce and purify nanodies for lab use? E. coli is the most common and cost-effective expression system for nanobodies. They can be purified from the periplasmic space or from the culture supernatant using affinity chromatography (e.g., His-tag or protein A/G purification) [73] [75].
Q5: Can I use a standard secondary antibody to detect a primary nanobody? No. Nanobodies have a different structure (VHH domain) from conventional antibodies. You must use a secondary reagent that is specifically raised against camelid VHH domains.
Experimental Protocols
Protocol 1: Immunolabelling of Thick Embryo Sections with Nanobodies
This protocol is optimized for imaging thick (≥200 µm) embryonic tissues, such as whole E10.5 mouse embryos or embryonic organs [74].
Reagents and Materials:
- Nanobody: Primary anti-target nanobody (e.g., Anti-LYVE1 [74])
- Detection Reagent: Anti-camelid VHH secondary antibody, conjugated to a fluorophore
- Blocking Buffer: PBS with 1-3% BSA and 0.1-0.3% Triton X-100
- Washing Buffer: PBS with 0.1% Tween-20 (PBS-T)
- Mounting Medium: ProLong Glass or similar hard-setting medium for 3D imaging
Procedure:
- Fixation and Sectioning: Fix embryos with 4% PFA for 6-24 hours at 4°C depending on size. For whole-mount staining, permeabilize by incubating in PBS with 1% Triton X-100 for 24-48 hours.
- Blocking: Incubate samples in Blocking Buffer for 4-12 hours at 4°C on a rotator to reduce non-specific binding.
- Primary Nanobody Incubation: Dilute the primary nanobody in Blocking Buffer. Incubate samples for 12-24 hours at 4°C on a rotator. Troubleshooting Tip: Penetration is faster than with IgGs, but longer incubation ensures even saturation of deep tissues.
- Washing: Wash samples 3-6 times with Washing Buffer, for 1-2 hours each wash, at 4°C on a rotator to remove unbound nanobody.
- Secondary Antibody Incubation: Incubate with fluorophore-conjugated anti-VHH secondary antibody in Blocking Buffer for 12-24 hours at 4°C on a rotator. Note: Use a secondary antibody specific for camelid VHH.
- Final Washing and Mounting: Perform a final series of washes (3-6 times, 1-2 hours each). Clear the tissue if necessary (e.g., using ScaleA2 or CUBIC reagents) and mount in a suitable medium for 3D imaging.
Protocol 2: Generating Nanobodies via Phage Display
For labs interested in generating their own nanobodies against novel embryonic targets [73] [74].
Workflow Diagram:
Key Steps:
- Immunization: A camelid (llama or alpaca) or a transgenic LamaMouse is immunized with the target antigen over several weeks [73].
- Library Construction: Peripheral blood mononuclear cells (PBMCs) are isolated. VHH genes are amplified via PCR and cloned into a phage display vector to create a diverse library [74].
- Biopanning: The library is panned against the immobilized target antigen over 3-4 rounds to enrich for antigen-specific binders [74].
- Screening: Hundreds of individual clones are screened for binding using ELISA or surface plasmon resonance (SPR) to identify high-affinity nanobodies [73].
- Production and Validation: Selected nanobodies are produced in E. coli and purified for validation in embryonic samples [75] [74].
The Scientist's Toolkit: Essential Research Reagents
The following table lists key reagents for implementing nanobody-based techniques in embryonic research.
| Reagent / Material | Function / Application | Example / Note |
|---|---|---|
| Recombinant Nanobodies | Primary detection tool for immunolabelling. | Anti-LYVE1 nanobody for lymphatic imaging [74]. Can be His-tagged for easy purification. |
| Anti-VHH Secondary Antibodies | Detection of primary nanobodies; conjugated to fluorophores or enzymes. | Must be specific for camelid VHH domain, not conventional antibodies. |
| Permeabilization Buffers | Enable antibody access to intracellular targets in fixed tissues. | Triton X-100 (0.1-1.0%) or saponin. Critical for whole-mount embryos. |
| Optical Clearing Reagents | Reduce light scattering for deeper imaging in 3D. | ScaleA2, CUBIC, or commercial kits. Used after nanobody staining. |
| Expression System (E. coli) | Cost-effective production of recombinant nanobodies. | WK6 or TG1 strains; periplasmic extraction for soluble nanobodies [75] [74]. |
| Affinity Purification Resins | Purification of recombinant nanobodies from lysates. | Ni-NTA resin (for His-tagged Nbs); Protein A/G for some VHHs [74]. |
Frequently Asked Questions (FAQs)
FAQ 1: What is the core advantage of using Correlative Light and Electron Microscopy (CLEM) over standalone light or electron microscopy?
CLEM uniquely bridges the gap between functional imaging and ultrastructural analysis. It allows you to first use light microscopy to locate dynamic events or rare cellular structures in a large sample, and then precisely correlate those findings with the high-resolution, subcellular context provided by electron microscopy. This is invaluable for confirming that immunolabeling signals correspond to specific organelles, synaptic complexes, or other nanoscale structures, moving beyond co-localization assumptions to definitive ultrastructural localization [16] [76].
FAQ 2: For my research on thick embryo samples, should I choose pre-embedding or post-embedding IEM?
The choice involves a direct trade-off between labeling efficiency and structural preservation, which is particularly critical for thick samples.
- Pre-embedding IEM: The immunolabeling step is performed before the sample is embedded in resin. This allows antibodies better access to antigens, resulting in higher labeling efficiency. This can be advantageous for detecting low-abundance or sensitive antigens. However, the required permeabilization steps often compromise cellular ultrastructure [16] [77].
- Post-embedding IEM: Labeling is performed after the sample has been sectioned. This method provides superior preservation of fine cellular details but may suffer from lower labeling efficiency because the resin can mask antigen epitopes, limiting antibody access [16] [77].
For thick embryo samples where preserving 3D architecture is paramount, the Tokuyasu cryo-sectioning method is a highly effective post-embedding approach. It involves mild chemical fixation followed by sucrose infusion and freezing. Thin frozen sections are then cut and immunolabeled, offering an excellent balance of antigenicity preservation and acceptable ultrastructure [16] [77].
FAQ 3: How can I minimize background staining and improve signal-to-noise ratio in my IEM experiments?
High background often stems from non-specific antibody binding or endogenous enzyme activity. Key strategies include:
- Optimize Blocking: Use a high-concentration (e.g., up to 10%) serum from the host species of your secondary antibody in your blocking buffer.
- Quench Endogenous Enzymes: If using enzyme-based detection (e.g., HRP), treat samples with hydrogen peroxide to suppress endogenous peroxidase activity [57].
- Titrate Antibodies: Excess primary or secondary antibody concentration is a common cause of background. Systematically reduce antibody concentrations to find the optimal dilution [57].
- Adjust Buffer Ionic Strength: Adding NaCl (final concentration 0.15-0.6 M) to your antibody diluent can reduce ionic, non-specific interactions [57].
Troubleshooting Guides
Problem 1: Weak or Absent Immunolabeling Signal
A weak signal can occur even when the target antigen is present.
| Possible Cause | Verification Method | Solution |
|---|---|---|
| Antigen Masking | Test with a known positive control sample. | For chemical fixation, optimize the fixation duration and concentration. Switch to a gentler fixative like methanol for some antigens [17] [34]. |
| Poor Antibody Penetration | Check if staining is only on the sample surface. | Increase permeabilization agent concentration (e.g., Triton X-100, saponin) and extend incubation times significantly for whole embryos [34]. |
| Antibody Potency Loss | Test antibody on a control tissue known to express the target. | Aliquot antibodies to avoid freeze-thaw cycles. Ensure storage pH is correct (7.0-8.2) and confirm the antibody has been validated for IEM [57] [77]. |
| Suboptimal Epitope Preservation | Compare different fixation methods (e.g., PFA vs. Methanol). | For embryos, where heat-induced antigen retrieval is not feasible, the choice of fixative is critical. If 4% PFA masks the epitope, try methanol fixation [17] [34]. |
Problem 2: Poor Preservation of Ultrastructure
The cellular details appear distorted, making identification of organelles difficult.
| Possible Cause | Verification Method | Solution |
|---|---|---|
| Over-fixation or harsh chemicals | Look for shrunken or distorted organelles. | Use a mixed aldehyde fixative (e.g., PFA with low concentrations of glutaraldehyde, such as 0.01-0.05%) for a better balance between antigenicity and structure [16] [17]. |
| Slow Chemical Fixation | Artifacts like empty spaces or swelling. | For the best ultrastructure, use high-pressure freezing (HPF). This physically vitrifies water within milliseconds, preserving the native state of cellular components without chemical cross-linking artifacts [16]. |
| Improper Resin Embedding | Sections may be brittle or show poor contrast. | For post-embedding IEM, use specialized low-temperature acrylic resins (e.g., LR White, Lowicryl) that are more hydrophilic and less denaturing for antigens compared to standard epoxy resins [16]. |
Experimental Workflow & Methodology
The following diagram outlines a generalized CLEM workflow, from sample preparation to correlated data analysis, integrating both light and electron microscopy.
Detailed Protocol: Tokuyasu Cryo-sectioning for IEM
This protocol is widely used for its excellent preservation of antigenicity [16] [77].
- Fixation: Fix tissue samples with a mild aldehyde solution (e.g., 2-4% Paraformaldehyde, sometimes with a low percentage of Glutaraldehyde, e.g., 0.1-0.5%) to preserve structure while maintaining antigenicity.
- Cryoprotection: Infuse the fixed sample with a concentrated sucrose solution (e.g., 2.3 M) to prevent ice crystal formation during freezing.
- Freezing: Mount the sample on a metal pin and rapidly freeze it in liquid nitrogen.
- Sectioning: Using an ultracryotome, cut thin sections (typically 70-100 nm) at a very low temperature (-120 °C) with a diamond knife.
- Immunolabeling: Retrieve and thaw the sections. Incubate them on EM grids with the primary antibody, followed by a secondary antibody conjugated to an electron-dense marker, most commonly colloidal gold particles of a defined size (e.g., 5-15 nm) [77].
- Contrasting and Imaging: Stain the sections with heavy metal salts (e.g., uranyl acetate) to enhance contrast and view under the transmission electron microscope.
The Scientist's Toolkit: Essential Research Reagents
The table below lists key materials and their specific functions in IEM and CLEM experiments.
| Reagent / Material | Function / Explanation |
|---|---|
| Colloidal Gold Particles | High-electron-density markers (sizes 5-30 nm) conjugated to antibodies for precise nanoscale localization of antigens under EM [16]. |
| Lowicryl / LR White Resins | Hydrophilic acrylic resins for low-temperature embedding. They better preserve antigenicity for post-embedding labeling compared to standard epoxy resins [16]. |
| Sucrose (2.3 M) | A cryoprotectant used in the Tokuyasu method. It infiltrates tissue to prevent destructive ice crystal formation during freezing for cryo-sectioning [77]. |
| Sodium Borohydride | Used to treat aldehyde-fixed samples to reduce fixative-induced autofluorescence, which is critical for clean fluorescent signals in the light microscopy step of CLEM [57]. |
| Heat-Induced Epitope Retrieval Buffers | Solutions like sodium citrate (pH 6.0). While not for embryos, they are standard for recovering antigenicity in formalin-fixed, paraffin-embedded cultured cells or tissue sections masked by cross-linking [57]. |
Advanced Correlation and Data Analysis
After acquiring both light and electron microscopy images, the data must be precisely correlated. Specialized software (e.g., Relate) is used for this task [78]. The general process involves:
- Import and Optimize: Import image datasets from both modalities. Ensure pixel size and units are correctly calibrated for both images.
- Align and Overlay: Manually or automatically align the LM and EM images using recognizable landmarks present in both. Use transparency functions to visually check the alignment quality [78].
- Extract and Analyze: Once aligned, create a multi-layer studiable containing the correlated data. This allows for direct visual validation of fluorescent signals against the underlying ultrastructure and enables quantitative measurements [78] [76].
Frequently Asked Questions
FAQ 1: What is the fundamental trade-off between different immunolabeling techniques for electron microscopy? The core trade-off lies between labeling efficiency and ultrastructural preservation. Pre-embedding immunolabeling, where antibody incubation occurs before resin embedding, offers high labeling efficiency for low-abundance and sensitive antigens but often results in limited cellular structure preservation due to the required permeabilization steps. Conversely, post-embedding immunolabeling, performed on ultrathin sections after embedding, provides superior preservation of tissue architecture but can suffer from antigen epitope masking caused by the resin, potentially reducing the signal [79].
FAQ 2: How does chemical fixation differ from cryofixation, and how does the choice impact my results? The choice fundamentally impacts the balance between structural preservation and antigenicity.
- Chemical Fixation uses aldehydes (e.g., formaldehyde, glutaraldehyde) to form covalent cross-links that stabilize tissue architecture. While it provides fair preservation, the process is slow (seconds to minutes), which can lead to morphological artifacts as cellular structures may deteriorate during the fixation process [80].
- Cryofixation (High-Pressure Freezing) physically immobilizes cellular structures within milliseconds by rapidly freezing samples under high pressure (~2100 bar). This achieves excellent ultrastructural preservation by capturing the sample in a near-native state and avoids the artifacts associated with chemical cross-linking [80].
FAQ 3: My antibody cannot penetrate my thick embryo samples effectively. What are my options? You can consider two main strategies:
- Optimize Your Tissue Clearing: For light microscopy, a novel passive clearing method called OptiMuS-prime can enhance antibody penetration. It uses sodium cholate and urea to clear tissue while preserving protein integrity, facilitating probe penetration into dense samples without specialized equipment [81].
- Choose a Penetration-Friendly IEM Method: For nanoscale resolution, the pre-embedding IEM technique is designed to optimize the pre-exposure of antigenic epitopes, which can improve labeling efficiency for targets that are difficult to access [79].
FAQ 4: Can I combine the superior preservation of cryofixation with genetic EM tags like APEX2? Yes, but this requires a specific protocol. Traditional cryofixation and freeze-substitution leave samples dehydrated, which is incompatible with the aqueous enzymatic reactions required for tags like APEX2. The CryoChem Method (CCM) overcomes this by rehydrating the cryofixed samples after freeze-substitution, making them amenable for DAB labeling reactions, fluorescence imaging, and high-contrast en bloc staining [80].
FAQ 5: What emerging technologies help bridge the gap between subcellular detail and tissue-scale imaging? New multiscale imaging platforms are being developed to address this exact challenge. For example, the multiscale cleared tissue axially swept light-sheet microscopy (MCT-ASLM) platform can perform cm-scale field-of-view imaging and then autonomously switch to a targeted mode with a resolution of approximately 300 nm. This allows researchers to first locate a region of interest within a large sample (like an entire embryo) and then image it in subcellular detail [82].
Troubleshooting Guides
Issue 1: Poor Antibody Penetration in Thick Embryo Sections
Problem: Inconsistent or weak staining in the deep layers of your thick embryo samples.
Solution: Implement a optimized tissue clearing and permeabilization protocol.
- Recommended Method: Use the OptiMuS-prime passive clearing technique [81].
Detailed Protocol:
- Sample Preparation: Fix samples by perfusion or immersion with 4% Paraformaldehyde (PFA) in PBS. Post-fix by immersion in 4% PFA at 4°C overnight. Section samples to the desired thickness using a vibratome.
- Preparation of OptiMuS-prime Solution: Dissolve 100 mM Tris and 0.34 mM EDTA in distilled water, adjusting the pH to 7.5. Then, dissolve 10% (w/v) Sodium Cholate (SC), 10% (w/v) á´…-sorbitol, and 4 M urea in the Tris-EDTA solution.
- Clearing Process: Immerse the fixed samples in the OptiMuS-prime solution and place them in a 37°C incubator with gentle shaking. The required time depends on tissue type and thickness (e.g., 18 hours for a 1-mm-thick mouse brain block).
- Immunostaining: After clearing, proceed with your standard immunostaining protocol. The treatment with SC and urea significantly improves antibody penetration into the dense tissue.
- Refractive Index Matching: For final imaging, immerse the sample in an RI-matching solution (e.g., containing 75% (w/v) iohexol) to achieve optical transparency.
Underlying Principle: Sodium cholate is a non-denaturing detergent with small micelles that enhance tissue transparency and antibody penetration while preserving proteins in their native state. Urea acts as a hyperhydration agent, disrupting hydrogen bonds to reduce light scattering and improve reagent penetration [81].
Issue 2: Compromised Ultrastructure During Sample Preparation for EM
Problem: Cellular organelles appear distorted or shrunken, suggesting poor preservation.
Solution: Replace chemical fixation with high-pressure freezing, and use the CryoChem method to maintain compatibility with downstream labeling.
- Recommended Method: Adopt the CryoChem Method (CCM) [80].
Detailed Protocol:
- Cryofixation: Instantaneously immobilize your samples using high-pressure freezing (~2100 bar) in liquid nitrogen (-196°C).
- Freeze-Substitution: Transfer samples to a freeze-substitution cocktail containing acetone with 0.2% glutaraldehyde, 0.1% uranyl acetate, 2% methanol, and 1% water at low temperatures (e.g., -90°C) to stabilize structures and preserve fluorescence/APEX2 activity.
- Rehydration: Gradually rehydrate the sample on ice using a series of acetone solutions with increasing concentrations of water or 0.1 M HEPES buffer.
- Downstream Processing: Once rehydrated, the sample is accessible for enzymatic reactions (e.g., DAB labeling for APEX2), fluorescence imaging, and high-contrast en bloc staining (e.g., with osmium-thiocarbohydrazide-osmium) that is required for techniques like SBEM.
Underlying Principle: Chemical fixation is slow and can cause artifacts. Cryofixation captures native state instantaneously. The CCM protocol reintroduces water to the cryofixed, dehydrated sample, creating a "best of both worlds" scenario: superior structural preservation and the hydration necessary for biochemical reactions [80].
Issue 3: Choosing the Right Microscopy Method for Your Resolution and Throughput Needs
Problem: Uncertainty in selecting an imaging technique that balances spatial resolution, sample throughput, and structural context.
Solution: Refer to the following comparison table to guide your decision based on your primary research question.
| Method | Best For | Resolution (Approx.) | Throughput | Structural Preservation | Key Trade-off |
|---|---|---|---|---|---|
| Light-Sheet Microscopy (LSM) [83] [82] | High-speed 3D imaging of large, cleared tissues (embryos, organs). | ~300 nm - 2 µm (implementation-dependent) | Very High | Good (with proper clearing) | Highest resolution is traded for a very large field of view and imaging speed. |
| Immunoelectron Microscopy (IEM) [79] | Nanoscale, precise spatial localization of biomolecules. | < 10 nm (up to 0.5 nm with markers) | Low | Fair to Excellent (method & fixation dependent) | Throughput and ease of use are sacrificed for the highest possible spatial resolution. |
| Pre-embedding IEM [79] | Detecting low-abundance or sensitive antigens. | < 10 nm | Low | Limited (due to permeabilization) | Optimal structural preservation is traded for higher labeling efficiency of difficult antigens. |
| Post-embedding IEM [79] | Maximizing ultrastructural integrity. | < 10 nm | Low | Excellent | Potential for reduced labeling efficiency due to antigen masking by the resin. |
| Multiscale MCT-ASLM [82] | Identifying rare events in large tissues and imaging them in high detail. | ~300 nm (targeted mode) | Medium-High | Good (with proper clearing) | A specialized, complex platform is required to achieve both wide-field and high-resolution imaging. |
Experimental Method Comparison & Workflows
Quantitative Comparison of Fixation Techniques
The choice of fixation is a critical first step that dictates the quality of all subsequent data. This table summarizes the performance of key methods.
| Fixation Method | Ultrastructural Preservation | Antigenicity Preservation | Compatible with Genetic Tags (e.g., APEX2) | Compatible with Volume EM (e.g., SBEM) |
|---|---|---|---|---|
| Chemical Fixation (Aldehydes) [80] | Fair | Good | Yes | Yes |
| Cryofixation (HPF) [80] | Excellent | Excellent | No (incompatible with aqueous reactions) | No (inadequate en bloc staining) |
| CryoChem Method (CCM) [80] | Excellent | Excellent | Yes | Yes |
The Scientist's Toolkit: Key Research Reagent Solutions
| Reagent / Material | Function / Application |
|---|---|
| Sodium Cholate (SC) [81] | A mild, non-denaturing bile salt detergent used in tissue clearing (e.g., OptiMuS-prime) to delipidate tissues while preserving protein integrity and enhancing antibody penetration. |
| Paraformaldehyde (PFA) [81] | A standard chemical fixative that cross-links proteins to stabilize tissue architecture. Often used at 4% for perfusion or immersion fixation. |
| Uranyl Acetate [80] | A heavy metal salt used as a contrast agent in electron microscopy. It binds to cellular components, enhancing their electron density. |
| Osmium Tetroxide (OsOâ‚„) [79] [80] | A post-fixative used in EM that strongly cross-links lipids, providing excellent membrane contrast but potentially damaging antigenicity. |
| Lowicryl K4M/HM20 [79] | A class of low-temperature embedding resins that help balance ultrastructural integrity with the retention of antigenic activity for post-embedding IEM. |
| Urea [81] | A chaotropic agent used in clearing solutions (e.g., OptiMuS-prime) to disrupt hydrogen bonds, induce tissue hyperhydration, and reduce light scattering. |
| OptiMuS-prime Solution [81] | A ready-to-use or custom-mixed solution containing SC, urea, and á´…-sorbitol for effective passive clearing and immunostaining of thick tissues. |
Method Selection and Experimental Workflow Diagrams
Diagram 1: A workflow to guide the selection of an imaging method based on primary research goals, highlighting the different technical pathways for achieving nanoscale localization versus large-volume analysis.
Diagram 2: A decision tree for sample preparation, illustrating how the CryoChem Method creates a hybrid pathway that combines the superior preservation of cryofixation with the versatility of chemical fixation.
How can I improve antibody penetration in thick Xenopus embryo samples?
A primary challenge when working with Xenopus laevis oocytes and embryos is the interference caused by abundant yolk platelets, which can obstruct antibody binding and obscure results. [84] An optimized protocol for sample preparation is critical.
Detailed Methodology for Xenopus Sample Preparation: [84]
- Collection: Collect at least five Xenopus oocytes or embryos in a 1.5 mL tube. Remove excess media carefully.
- Homogenization: Add 10 µL of chilled 1x cell lysis buffer per embryo/oocyte. Homogenize the samples immediately on ice using a micropestle.
- Clarification: Centrifuge the homogenized samples at 5000 g at 4°C for 10 minutes. This pellets the yolk and other insoluble debris.
- Supernatant Collection: Transfer the clarified supernatant to a new tube, taking extreme care not to disturb the pellet.
- Denaturation: Add an equal volume of 2x Laemmli sample buffer with 5% 2-mercaptoethanol to the supernatant. Denature the proteins by boiling at 95-100°C for 10 minutes.
This procedure effectively removes vitellogenin (yolk) and pigmented debris, vastly improving the accessibility of target proteins for antibody binding during subsequent immunoblotting. [84]
What are the best antigen retrieval methods for formalin-fixed embryo sections?
The choice of antigen retrieval method is crucial for exposing epitopes that become masked during formalin fixation. The method must be optimized for the specific antibody and tissue.
Comparison of Antigen Retrieval Methods:
| Method | Procedure | Best For | Performance Notes |
|---|---|---|---|
| Microwave Oven | Heating in retrieval buffer (e.g., 10 mM Sodium Citrate, pH 6.0) for 8-15 minutes. [57] | General use; recommended starting point. [85] | Provides a clear performance enhancement over water bath methods. [85] |
| Pressure Cooker | Heating in retrieval buffer under pressure for ~20 minutes. [57] | Stubborn targets; some tissues/antigens. [85] | May enhance signals beyond those obtained with a microwave for certain antibodies. [85] |
| Water Bath | Heating in retrieval buffer using a water bath. | Not recommended. | Not recommended; typically yields inferior results. [85] |
For optimal results, always prepare fresh 1X antigen retrieval solutions daily and consult the antibody's datasheet for product-specific protocols. [85]
How do I reduce high background staining in my embryo sections?
High background can obscure specific signals and is a common issue in immunohistochemistry. The cause must be systematically diagnosed.
Troubleshooting Guide for High Background Staining:
| Potential Cause | Diagnostic Check | Solution |
|---|---|---|
| Endogenous Enzymes | Incubate a control tissue section with only the detection substrate. If signal develops, endogenous enzymes are active. [57] | Quench endogenous peroxidases with 3% Hâ‚‚Oâ‚‚ in methanol or water for 10 minutes. [85] [57] |
| Endogenous Biotin | Particularly problematic in tissues like liver and kidney. [57] | Use a polymer-based detection system (e.g., SignalStain Boost IHC Detection Reagents) or perform a biotin block. [85] [57] |
| Secondary Antibody Cross-reactivity | Include a control stained without the primary antibody. High background indicates secondary antibody issues. [85] | Increase the concentration of normal serum from the secondary antibody host species in the blocking buffer (up to 10%). Alternatively, titrate down the secondary antibody concentration. [57] |
| Primary Antibody Concentration | N/A | Reduce the final concentration of the primary antibody. [57] |
| Inadequate Washes | N/A | Ensure adequate washing by performing three 5-minute washes with TBST after primary and secondary antibody incubations. [85] |
What is an efficient protocol for establishing mouse embryonic stem cells from refractory strains?
Deriving embryonic stem cells (ESCs) from refractory mouse strains like CBA/Ca and NOD requires optimized culture conditions that promote self-renewal and suppress differentiation.
Optimized Protocol for Derivation of ESC Lines: [86]
- Embryo Source: Recover morulae or early blastocysts from the uteri of day 4 pregnant females.
- Feeder Layer: Plate embryos onto mitotically inactivated mouse embryonic fibroblast (MEF) feeders.
- Culture Medium: Use Knockout DMEM supplemented with 15% KnockOut Serum Replacement (KSR).
- Critical Growth Factor: Add a high concentration of recombinant murine Leukemia Inhibitory Factor (rmLIF) at 5x10³ U/mL to the medium.
- Culture Conditions: Maintain cultures at 37°C in a 5% CO₂ humidified incubator.
- Outgrowth Handling: Culture for 5-7 days until substantial epiblast outgrowths form, then proceed to pick and dissociate for ESC line establishment.
This protocol, utilizing high concentrations of LIF and serum-replacement, has been successfully applied to derive germline-competent ESCs from traditionally nonpermissive strains. [86]
Can you provide examples of successful in vivo models using embryos for therapeutic testing?
Yes, zebrafish and mouse embryo xenograft models are powerful tools for pre-clinical testing, each offering unique advantages.
Successful In Vivo Embryo Models:
| Model Organism | Application | Key Advantage | Protocol Summary |
|---|---|---|---|
| Zebrafish Embryo Xenograft [87] | Studying tumor growth, invasion, and metastasis. | Visualization: Transparency allows direct imaging of cancer cells in a living embryo.Throughput: Large numbers of embryos can be used, enabling high-throughput screening. | 1. Use 2-day-old zebrafish embryos.2. Anesthetize and mount in low-melting-point agarose.3. Microinject fluorescently labeled tumor cells (e.g., GFP-expressing) into the pericardial cavity or other sites.4. Image primary tumors and metastases at 4 days post-injection. [87] |
| Humanized Neuroblastoma PDX Mouse Model [88] | Pre-clinical antibody and cytokine studies in immuno-oncology. | Human Relevance: Supports human NK cell development and engrafts patient-derived tumors, preserving human tumor microenvironment complexity. [88] | 1. Utilize mice humanized to support human immune cell development.2. Engraft with orthotopic patient-derived neuroblastoma xenografts (O-PDX).3. Therapeutically redirect human NK cells to induce antibody-dependent cellular cytotoxicity (ADCC). [88] |
Experimental Workflow & Signaling Pathways
Experimental Workflow for Immunoblotting in Xenopus
The following diagram outlines the optimized protocol for analyzing proteins from Xenopus oocytes and embryos, highlighting key steps to overcome challenges like yolk contamination. [84]
Signaling Pathway for Maintaining Pluripotency in mESCs
The derivation of mouse embryonic stem cells relies on key signaling pathways that promote self-renewal and suppress differentiation. The LIF/STAT3 pathway is central to this process in murine cells. [86]
The Scientist's Toolkit: Research Reagent Solutions
- KnockOut Serum Replacement (KSR): A defined, serum-free supplement used in ESC culture medium to support the derivation of embryonic stem cells from refractory mouse strains, providing consistency over variable fetal bovine serum. [86]
- Recombinant Murine Leukemia Inhibitory Factor (rmLIF): A critical cytokine added at high concentrations (5x10³ U/mL) to derivation media to activate the STAT3 pathway, suppressing differentiation and promoting self-renewal of mouse ESCs. [86]
- SignalStain Boost IHC Detection Reagent: A polymer-based detection system that offers enhanced sensitivity over traditional avidin/biotin-based systems and helps reduce background, especially in tissues with high endogenous biotin. [85]
- Sodium Citrate Buffer (pH 6.0): A common antigen retrieval buffer used with heat-induced epitope retrieval (HIER) methods to break protein crosslinks formed during formalin fixation, thereby exposing antibody epitopes. [57]
- Tris-MOPS-SDS Running Buffer: A buffer system optimized for SDS-PAGE to separate proteins by molecular weight during immunoblotting, as part of the optimized Xenopus protocol. [84]
- Polyvinylpyrrolidone (PVP) Solution: Used in zebrafish embryo xenograft protocols to prevent clogging during the microinjection of tumor cells. [87]
- Phosphate Buffered Saline (PBS): A universal saline buffer used in various steps across protocols, including washing cells and tissues, and as a base for antibody dilutions. [87] [89]
Conclusion
Achieving robust and uniform antibody penetration in thick embryo samples is no longer an insurmountable obstacle but a manageable challenge through a strategic combination of advanced reagents, physical methods, and optimized protocols. The integration of nanobodies, proactive tissue clearing, and assisted delivery systems provides a powerful toolkit for researchers aiming to conduct high-resolution 3D spatial analysis. Future directions point toward the increased automation of these workflows, the development of even smaller and more stable synthetic binders, and the deeper integration of these techniques with cutting-edge imaging modalities like super-resolution and volume EM. By adopting these validated strategies, the field of developmental biology and preclinical research is poised to generate unprecedented insights into the molecular architecture of embryonic development, ultimately accelerating discoveries in regenerative medicine and therapeutic development.
References
- 1. Influence of molecular size on tissue distribution ... [https://pmc.ncbi.nlm.nih.gov/articles/PMC5040103/]
- 2. An experimental and theoretical approach to understand ... [https://www.sciencedirect.com/science/article/abs/pii/S1742706122008716]
- 3. Co-administered antibody improves penetration of ... [https://www.nature.com/articles/s41467-020-19498-y]
- 4. Cellular Fluorescence Microscopy Troubleshooting & Best ... [https://www.aatbio.com/resources/application-notes/cellular-fluorescence-microscopy-troubleshooting-best-practices]
- 5. Fluorescence Imaging: Causes of Failures and Tips for ... [https://www.keyence.com/products/microscope/fluorescence-microscope/applications/fluorescence-microscope-applications/fluorescence-imaging.jsp]
- 6. Reflections on the Principles of Fixation in Histochemistry and ... [https://pmc.ncbi.nlm.nih.gov/articles/PMC12173635/]
- 7. Use of fixatives for immunohistochemistry and their ... [https://www.sciencedirect.com/science/article/abs/pii/S0076687920301221]
- 8. Deep Dive: Fixing and Permeabilizing for ... [https://blog.addgene.org/deep-dive-fixing-and-permeabilizing-for-immunofluorescence]
- 9. Fixation - Tissue Preparation [https://www.cellmarque.com/troubleshooting/tissue-prep/fixation]
- 10. Fixation Strategies and Formulations Used in IHC Staining [https://www.thermofisher.com/us/en/home/life-science/protein-biology/protein-biology-learning-center/protein-biology-resource-library/pierce-protein-methods/fixation-strategies-formulations.html]
- 11. IHC Fixation Optimization: Best Practices for Tissue ... [https://www.bosterbio.com/protocol-and-troubleshooting/ihc-optimization/fixation?srsltid=AfmBOooYA146iNg5cGDT_muKCJwwd1XqcM6Nr0lMsfgNxdHUeVS3MKQ_]
- 12. Generation of Antibodies Selectively Recognizing Epitopes ... [https://pmc.ncbi.nlm.nih.gov/articles/PMC10525569/]
- 13. Highly multiplexed 3D profiling of cell states and immune ... [https://www.nature.com/articles/s41592-025-02824-x]
- 14. A novel protein-preserving passive tissue clearing ... [https://pmc.ncbi.nlm.nih.gov/articles/PMC12586516/]
- 15. Effectiveness of fixation methods for wholemount ... [https://pmc.ncbi.nlm.nih.gov/articles/PMC10996528/]
- 16. Immunoelectron microscopy: a comprehensive guide from ... [https://pmc.ncbi.nlm.nih.gov/articles/PMC12420552/]
- 17. Immunohistochemistry (IHC): The Complete Guide [https://www.antibodies.com/applications/immunohistochemistry]
- 18. A Close Look at In-Resin Fluorescence Protocols for CLEM [https://www.frontiersin.org/journals/cell-and-developmental-biology/articles/10.3389/fcell.2022.866472/full]
- 19. ACT-PRESTO: Rapid and consistent tissue clearing ... [https://www.nature.com/articles/srep18631]
- 20. Diverse protocols for correlative super-resolution ... [https://pmc.ncbi.nlm.nih.gov/articles/PMC5514615/]
- 21. MAX Eraser: An affordable and simple reagent for antibody ... [https://www.sciencedirect.com/science/article/pii/S305056232500087X]
- 22. Use of bovine serum albumin might impair ... [https://www.nature.com/articles/s41598-025-06876-z]
- 23. Unleashing the potential of mRNA: Overcoming delivery ... [https://pmc.ncbi.nlm.nih.gov/articles/PMC11883111/]
- 24. Nanobody-Based 3D Immunohistochemistry Enables ... [https://bioengineer.org/nanobody-based-3d-immunohistochemistry-enables-rapid-visualization-of-thick-tissue-samples/]
- 25. A three dimensional immunolabeling method with ... [https://www.nature.com/articles/s42003-025-08317-z]
- 26. New 3D immunohistochemistry method enhances deep ... [https://www.news-medical.net/news/20250619/New-3D-immunohistochemistry-method-enhances-deep-tissue-imaging.aspx]
- 27. Nanobodies in animal infectious disease control [https://pmc.ncbi.nlm.nih.gov/articles/PMC12331703/]
- 28. Screening and Characterization of TAT-Fused Nanobodies ... [https://www.mdpi.com/2218-273X/15/11/1593]
- 29. Nanobody fusion enhances production of difficult-to-produce ... [https://pmc.ncbi.nlm.nih.gov/articles/PMC11930436/]
- 30. Tissue clearing and 3D imaging in developmental biology - PMC [https://pmc.ncbi.nlm.nih.gov/articles/PMC8497915/]
- 31. Three-dimensional visualization of intrauterine conceptus ... [https://www.nature.com/articles/s41598-017-06549-6]
- 32. CUBIC-f: An optimized clearing method for cell tracing and ... [https://www.sciencedirect.com/science/article/pii/S0165027020304258]
- 33. A guidebook for DISCO tissue clearing - PMC - PubMed Central [https://pmc.ncbi.nlm.nih.gov/articles/PMC7995442/]
- 34. IHC staining protocol for whole mount samples | Abcam [https://www.abcam.com/en-us/technical-resources/protocols/wholemount-staining-for-ihc]
- 35. Identification of Critical Conditions for Immunostaining in the Pea Aphid... [https://www.jove.com/t/53883/identification-critical-conditions-for-immunostaining-pea-aphid]
- 36. Biological Tissue Clearing and Immunolabeling Methods ... [https://pmc.ncbi.nlm.nih.gov/articles/PMC5409193/]
- 37. Tyramide Signal Amplification [https://biotium.com/technology/primary-secondary-antibody-conjugates/tyramide-signal-amplification/]
- 38. Tyramide Signal Amplification with SuperBoost Kits [https://www.thermofisher.com/us/en/home/life-science/cell-analysis/cellular-imaging/immunofluorescence/tyramide-signal-amplification-tsa.html]
- 39. Glucose Oxidase-Based Glucose-Sensitive Drug Delivery ... [https://pmc.ncbi.nlm.nih.gov/articles/PMC6432078/]
- 40. Recent advances in glucose monitoring utilizing oxidase ... [https://www.frontiersin.org/journals/chemistry/articles/10.3389/fchem.2025.1591302/full]
- 41. Tyramide Signal Amplification for Immunofluorescent ... [https://pubmed.ncbi.nlm.nih.gov/26160574/]
- 42. Whole-body cellular mapping in mouse using standard IgG ... [https://www.nature.com/articles/s41587-023-01846-0]
- 43. Whole-mount three-dimensional imaging of internally ... [https://pmc.ncbi.nlm.nih.gov/articles/PMC3629302/]
- 44. enables quantitative ultrastructural analysis in whole... TissUExM [https://pubmed.ncbi.nlm.nih.gov/36313808/]
- 45. enables quantitative ultrastructural analysis in whole... TissUExM [https://pmc.ncbi.nlm.nih.gov/articles/PMC9606133/]
- 46. Protocol for tissue expansion microscopy for ultrastructure ... [https://pubmed.ncbi.nlm.nih.gov/40700007/]
- 47. PFA is superior to glyoxal in preserving oocyte, embryo ... [https://pmc.ncbi.nlm.nih.gov/articles/PMC7056772/]
- 48. The effect of chemical fixation with paraformaldehyde ... [https://pmc.ncbi.nlm.nih.gov/articles/PMC11837135/]
- 49. Immunohistochemistry Protocols [https://www.antibodies.com/applications/immunohistochemistry/ihc-protocol]
- 50. Glyoxal as an alternative fixative to formaldehyde in ... [https://pmc.ncbi.nlm.nih.gov/articles/PMC5753035/]
- 51. Comparative analysis of fixation techniques for signal ... [https://www.sciencedirect.com/science/article/pii/S0012160624002276]
- 52. Staining 3D Cell Cultures for Imaging [https://www.thermofisher.com/us/en/home/references/protocols/cell-and-tissue-analysis/protocols/3d-organoid-staining.html]
- 53. Immunofluorescence Protocol & Troubleshooting [https://www.creativebiolabs.net/immunofluorescence.htm]
- 54. Quantitative intracellular retention of delivered RNAs ... [https://pmc.ncbi.nlm.nih.gov/articles/PMC8848937/]
- 55. Guide to Fixation and Permeabilization [https://fluorofinder.com/guide-to-fixation-and-permeabilization/]
- 56. Analysis of Mitochondrial Calcium Retention Capacity in ... [https://www.frontiersin.org/journals/physiology/articles/10.3389/fphys.2021.773839/full]
- 57. IHC Troubleshooting Guide [https://www.thermofisher.com/us/en/home/life-science/protein-biology/protein-biology-learning-center/protein-biology-resource-library/pierce-protein-methods/ihc-troubleshooting-guide.html]
- 58. Immunofluorescence (IF) Troubleshooting Guide [https://www.cellsignal.com/learn-and-support/troubleshooting/if-troubleshooting-guide?srsltid=AfmBOooCtnhta6cjIAsKfMv7fBJuEEPnds4Q_i0TNwZnMNAt3J29zu6P]
- 59. An optimized permeabilization step for flow cytometry ... [https://pmc.ncbi.nlm.nih.gov/articles/PMC6396090/]
- 60. Successful Immunofluorescence: Fixation & Permeabilization [https://blog.cellsignal.com/successful-immunofluorescence-fixation-and-permeabilization]
- 61. Primary Antibody Selection & Optimization [https://www.rndsystems.com/resources/protocols/primary-antibody-selection-optimization]
- 62. Immunohistochemistry (IHC) [https://www.cellsignal.com/learn-and-support/overview-of-ihc?srsltid=AfmBOopjSypgyKwmoIacL37rB_d-lxebo5Nyvj9yCpCWng1QNMAptswZ]
- 63. Optimization of the Blocking and Signal Preservation ... [https://pmc.ncbi.nlm.nih.gov/articles/PMC12462741/]
- 64. How to Avoid or Reduce High Background in ... [https://www.linkedin.com/pulse/how-avoid-reduce-high-background-immunohistochemistry-huang-md-phd-xtvpe]
- 65. Increasing Tissue Permeability and Decreasing Background ... [https://pmc.ncbi.nlm.nih.gov/articles/PMC4781714/]
- 66. Thiol-reactive compounds prevent nonspecific antibody ... [https://www.sciencedirect.com/science/article/pii/S002368372203286X]
- 67. In Vitro Methods Lead the Way In Antibody Pharmacokinetics [https://visikol.com/blog/2025/02/05/in-vitro-methods-lead-the-way-in-antibody-pharmacokinetics/]
- 68. Benchtop mesoSPIM: a next-generation open-source light ... [https://www.nature.com/articles/s41467-024-46770-2]
- 69. Single-Domain Antibodies as Antibody–Drug Conjugates [https://www.mdpi.com/2072-6694/16/15/2681]
- 70. Nanobody® vs antibody - tracer cro [https://www.tracercro.com/resources/blogs/nanobody-vs-antibody/]
- 71. Discovery of nanobodies: a comprehensive review of their ... [https://jnanobiotechnology.biomedcentral.com/articles/10.1186/s12951-024-02900-y]
- 72. Discovery of nanobodies: a comprehensive review of their ... [https://pmc.ncbi.nlm.nih.gov/articles/PMC11515141/]
- 73. Small but mighty: the versatility of nanobodies in modern ... [https://pubs.rsc.org/en/content/articlehtml/2025/nh/d5nh00283d]
- 74. Nanobody Immunolabelling and three-dimensional imaging ... [https://jnanobiotechnology.biomedcentral.com/articles/10.1186/s12951-025-03759-3]
- 75. Improving the production and stability of nanobodies - PMC [https://pmc.ncbi.nlm.nih.gov/articles/PMC12510460/]
- 76. Correlative light and electron microscopy reveals the fine ... [https://pmc.ncbi.nlm.nih.gov/articles/PMC11952533/]
- 77. Immuno-electron Microscopy (IEM) [https://www.embl.org/groups/electron-microscopy-core-facility/immuno-electron-microscopy-iem/]
- 78. A step by step guide for correlative data analysis [https://www.oxinst.com/blogs/a-step-by-step-guide-for-correlative-data-analysis]
- 79. Immunoelectron microscopy: a comprehensive guide from ... [https://link.springer.com/article/10.1186/s11671-025-04346-z]
- 80. High-quality ultrastructural preservation using cryofixation ... [https://pmc.ncbi.nlm.nih.gov/articles/PMC5988420/]
- 81. A novel protein-preserving passive tissue clearing ... [https://www.nature.com/articles/s12276-025-01550-w]
- 82. Feature-driven whole-tissue imaging with subcellular ... [https://www.sciencedirect.com/science/article/pii/S2667237525001845]
- 83. Performance tradeoffs for single- and dual-objective open-top ... [https://pmc.ncbi.nlm.nih.gov/articles/PMC7449713/]
- 84. Optimized Analysis of Proteins from Xenopus Oocytes and ... [https://www.jove.com/t/69139/optimized-analysis-proteins-from-xenopus-oocytes-embryos]
- 85. Immunohistochemistry (IHC) Troubleshooting Guide & the ... [https://www.cellsignal.com/learn-and-support/troubleshooting/ihc-troubleshooting-guide?srsltid=AfmBOor884UC864Ubk77REJMjBrLvXvOsrQsTmX4P2OXW5tnD5D_kk6Z]
- 86. Optimization of Protocols for Derivation of Mouse ... [https://pmc.ncbi.nlm.nih.gov/articles/PMC3376457/]
- 87. Zebrafish Embryo and Metastasis Assay Xenograft [https://bio-protocol.org/en/bpdetail?id=3027&type=0]
- 88. Next-generation humanized patient-derived xenograft ... mouse model [https://pubmed.ncbi.nlm.nih.gov/32915319/]
- 89. A fast, simple, and cost-effective method of expanding patient-derived... [https://translational-medicine.biomedcentral.com/articles/10.1186/s12967-020-02414-9]