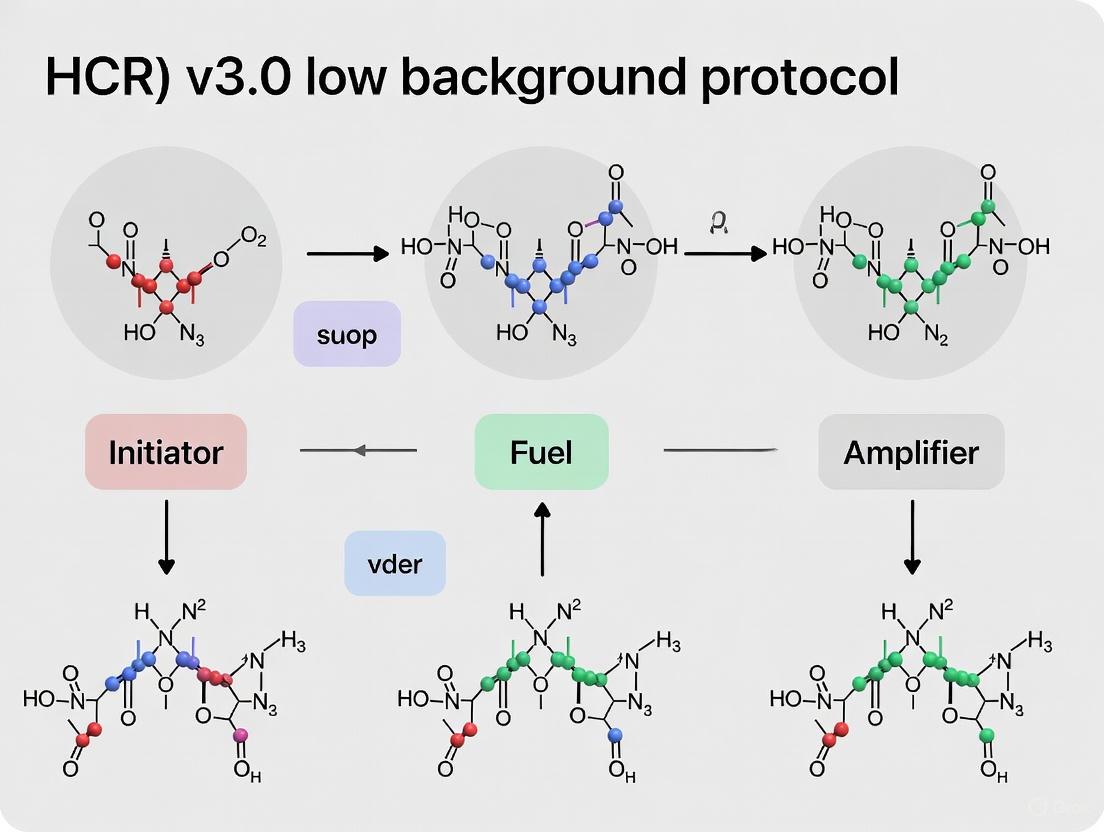
HCR v3.0: Mastering the Low-Background Protocol for Multiplexed, Quantitative RNA and Protein Imaging
This article provides a comprehensive guide to the third-generation in situ Hybridization Chain Reaction (HCR v3.0), a revolutionary protocol that introduces automatic background suppression for superior signal-to-noise ratios.
HCR v3.0: Mastering the Low-Background Protocol for Multiplexed, Quantitative RNA and Protein Imaging
Abstract
This article provides a comprehensive guide to the third-generation in situ Hybridization Chain Reaction (HCR v3.0), a revolutionary protocol that introduces automatic background suppression for superior signal-to-noise ratios. Tailored for researchers and drug development professionals, we detail the foundational mechanism of split-initiator probes, present step-by-step methodological applications across diverse sample types—from whole-mount embryos to FFPE tissues—and offer robust troubleshooting and optimization strategies. Furthermore, we validate the protocol's performance through quantitative analysis and comparative studies, demonstrating its capability for multiplexed, quantitative imaging of mRNA and proteins with subcellular resolution, even in highly autofluorescent samples.
The Core Technology: How HCR v3.0 Achieves Automatic Background Suppression
The Hybridization Chain Reaction (HCR) is a powerful enzyme-free, isothermal amplification technology that enables robust signal amplification for diverse bioimaging and biosensing applications. Operating without protein enzymes, HCR uses kinetically trapped DNA hairpins that self-assemble into long nucleic acid polymers upon initiation by a target strand [1]. This mechanism provides significant advantages over traditional amplification methods, including preserved spatial resolution, straightforward multiplexing capabilities, and compatibility with complex biological samples such as whole-mount vertebrate embryos and clinical tissue specimens [2] [1].
Third-generation HCR (v3.0) represents a substantial advancement with automatic background suppression, enabling multiplexed quantitative mRNA imaging and flow cytometry with dramatically enhanced performance and ease of use [2]. The core HCR mechanism involves two metastable hairpin molecules (H1 and H2) that remain inert until exposed to a specific initiator strand. Upon initiation, a chain reaction of hybridization events occurs where the hairpins sequentially open and assemble into a nicked double-stranded DNA polymer, providing substantial signal amplification without enzymes [1]. This elegant molecular mechanism forms the basis for a wide range of research and diagnostic applications.
HCR Mechanism and Design Principles
Fundamental Molecular Mechanism
The HCR mechanism operates through a triggered self-assembly process driven by the strategic design of DNA hairpin structures:
- Metastable Hairpin States: In the absence of an initiator, H1 and H2 hairpins remain in kinetically trapped states due to their strong stem structures, preventing spontaneous polymerization [1].
- Initiator Recognition: A single-stranded DNA initiator complementary to the H1 hairpin's toehold domain triggers the reaction by hybridizing with and opening the H1 hairpin.
- Polymerization Cascade: The opened H1 hairpin exposes a sequence that nucleates with and opens the H2 hairpin, which in turn exposes a sequence identical to the original initiator, propagating the chain reaction [1].
- Amplification Polymer Formation: This alternating hybridization continues, assembling long, nicked double-stranded DNA polymers that remain tethered to the initiator strand, preserving spatial information about the target location [1].
The following diagram illustrates the core HCR mechanism:
Evolution of HCR Technology
Table: Generational Evolution of HCR Technology
| Generation | Key Features | Reagent Composition | Performance Enhancements | Applications Demonstrated |
|---|---|---|---|---|
| First-Generation | Stringent hybridization conditions; RNA-based | RNA probes and RNA hairpins | Enabled multiplexing in whole-mount embryos; High signal-to-background | Zebrafish embryo imaging [1] |
| Second-Generation | Permissive conditions; Engineered DNA hairpins | DNA probes and DNA hairpins | Increased signal gain; Reduced cost; Improved reagent durability | Whole-mount vertebrate embryos [1] |
| Third-Generation (v3.0) | Automatic background suppression; Robust protocols | Optimized DNA systems | Multiplexed quantitative imaging; Dramatically enhanced performance and ease of use | mRNA imaging; Flow cytometry; Thick tissue sections [2] |
The engineering evolution of HCR has focused on optimizing hairpin dimensions to maximize the free energy benefit per polymerization step while preserving kinetic trapping. Next-generation DNA HCR amplifiers employ 12-nt toeholds/loops and 24-bp stems to maximize the energetic driving force for polymerization while maintaining hairpin metastability in permissive hybridization conditions (0% formamide, room temperature) [1]. This design eliminates the trade-off between background minimization and signal maximization that challenged earlier versions.
HCR v3.0 Low-Background Applications
RNA Fluorescence In Situ Hybridization (FISH)
HCR v3.0 has revolutionized RNA FISH applications with its low-background, high-sensitivity performance:
- Whole-Mount Tissue Imaging: HCR-enabled RNA FISH provides exceptional signal-to-background in intact tissues, enabling high-resolution 3D mapping of gene expression patterns without physical sectioning [3] [4]. The method preserves tissue architecture while allowing deep penetration of nucleic acid probes into thick samples (>500 μm) [3].
- Multiplexed Quantitative Analysis: The linear amplification scheme of HCR scales fluorescence intensity to RNA quantity, enabling precise mRNA quantification in addition to spatial localization [3]. This quantitative capability allows researchers to monitor gene expression changes at single-cell resolution within anatomical contexts.
- Single-Molecule Detection: With optimized protocols limiting amplification time, HCR can resolve individual RNA molecules as discrete fluorescent dots, enabling absolute transcript counting in fixed samples [3].
The compatibility of HCR with various optical clearing methods further enhances its utility for 3D tissue imaging. The LIMPID (Lipid-preserving index matching for prolonged imaging depth) method, an aqueous clearing protocol, preserves fluorescence signals while enabling high-resolution imaging deep within tissues using conventional confocal microscopy [3].
Proximity-Dependent HCR (proxHCR) for Protein Analysis
The proxHCR method extends HCR applications to protein detection, post-translational modifications, and protein-protein interactions:
- Dual Recognition Requirement: proxHCR uses two oligonucleotide-conjugated antibodies that must bind in close proximity to generate an initiator sequence for HCR amplification [5]. This proximity requirement enhances specificity and reduces false-positive signals.
- Enzyme-Free Alternative: Unlike proximity ligation assays (PLA), proxHCR operates without enzymatic steps, making it more robust, cost-effective, and suitable for point-of-care applications [5].
- Versatile Detection Platforms: proxHCR has been successfully implemented in microscopy, flow cytometry, and high-content screening applications, demonstrating robust signal generation within 30 minutes of incubation [5].
The following diagram illustrates the proxHCR mechanism for protein detection:
Electrochemical Biosensing
HCR principles have been successfully adapted for electrochemical detection platforms:
- Redox Recycling Integration: Coupling HCR with catalytic redox recycling strategies enables highly sensitive electrochemical detection of biomarkers. For luteinizing hormone (LH) detection, this approach achieved detection limits as low as 6.03 pM [6].
- Low-Background Signal Enhancement: Direct labeling of HCR hairpins with electrochemical reporters like [Ru(NH₃)₆]Cl₃ (RuHex) significantly reduces background current noise, enhancing signal-to-noise ratios for trace analyte detection [6].
- Aptamer Compatibility: HCR integrates seamlessly with aptamer recognition elements, combining the specificity of aptamer-target interactions with the amplification power of HCR for sensitive detection of proteins and small molecules [6].
Research Reagent Solutions
Table: Essential HCR Reagents and Their Applications
| Reagent/Solution | Composition & Characteristics | Primary Function | Compatible Applications |
|---|---|---|---|
| DNA Hairpins (H1/H2) | Fluorophore-labeled; 12-nt toeholds/loops; 24-bp stems | Signal amplification via polymerization | RNA FISH; Protein detection; Biosensing [1] |
| Initator Probes | Single-stranded DNA; Target-complementary with initiator sequence | Target recognition and HCR initiation | All HCR applications [1] [5] |
| LIMPID Clearing Solution | Saline-sodium citrate, urea, and iohexol | Refractive index matching for deep tissue imaging | 3D tissue imaging; Whole-mount samples [3] |
| proxHCR Conjugates | Antibody-DNA chimeras (PH1/PH2) | Proximity-dependent protein recognition | Protein-protein interactions; Post-translational modifications [5] |
| HCR v3.0 Buffer Systems | Permissive conditions (0% formamide) | Enable high-gain polymerization with low background | Multiplexed quantitative imaging [2] [1] |
Experimental Protocols
HCR RNA-FISH for Whole-Mount Tissues
This protocol enables high-sensitivity RNA detection in intact tissue samples with low background, based on the v3.0 HCR system [3] [4]:
Sample Preparation and Fixation:
- Dissect fresh tissues and immediately place in ice-cold fixation buffer (e.g., 4% paraformaldehyde in PBS).
- Fix for 6-24 hours at 4°C depending on tissue size and density.
- Wash with PBS and gradually dehydrate through methanol series (25%, 50%, 75%, 100%) for storage at -20°C.
Hybridization and Detection:
- Rehydrate samples through methanol series to PBS.
- Permeabilize with proteinase K (1-10 μg/mL for 5-30 minutes depending on tissue).
- Pre-hybridize with hybridization buffer for 30 minutes at 37°C.
- Hybridize with initiator probes (0.5-5 nM in hybridization buffer) overnight at 37°C.
- Wash with 30% formamide in SSCT at 37°C (4 times, 15 minutes each) to remove unbound probes.
- Amplify with HCR hairpins (50-100 nM in 5× SSCT) for 2-4 hours at room temperature.
- Wash with 5× SSCT (4 times, 15 minutes each) to remove unamplified hairpins.
- Counterstain with DAPI (1 μg/mL) and mount for imaging.
Imaging and Analysis:
- Image using confocal microscopy with appropriate filter sets.
- For 3D reconstruction, acquire z-stacks with optimal step size (0.5-1 μm).
- Quantify signal intensity using image analysis software (e.g., HALO AI or FIJI) [7].
proxHCR for Protein-Protein Interactions
This protocol detects endogenous protein interactions and post-translational modifications in situ without enzymatic steps [5]:
Sample Preparation:
- Culture cells on glass coverslips or use tissue sections.
- Fix with 4% paraformaldehyde for 15 minutes at room temperature.
- Permeabilize with 0.1% Triton X-100 in PBS for 10 minutes.
proxHCR Staining:
- Block with 2% BSA in PBS for 30 minutes at room temperature.
- Incubate with primary antibodies (1-10 μg/mL) for 1 hour at room temperature or overnight at 4°C.
- Wash with PBS (3 times, 5 minutes each).
- Incubate with proximity probes (PH1 and PH2 conjugated to secondary antibodies, 50 nM each) for 1 hour at room temperature.
- Wash with PBS (3 times, 5 minutes each).
- Add activator oligonucleotide (50 nM in amplification buffer) for 15 minutes at 37°C.
- Amplify with fluorophore-labeled HCR hairpins (50 nM each in amplification buffer) for 30-60 minutes at 37°C.
- Wash with PBS (3 times, 5 minutes each).
- Counterstain with DAPI and mount for imaging.
The following workflow diagram summarizes the key steps in HCR experiments:
Technical Considerations and Troubleshooting
Optimization Strategies
Successful implementation of low-background HCR protocols requires attention to several key parameters:
- Hairpin Design Validation: Always validate new hairpin designs using polyacrylamide gel electrophoresis to confirm metastability and specific initiation before biological application [5].
- Hybridization Condition Optimization: While HCR v3.0 operates effectively in permissive conditions (0% formamide), specific applications may require adjustment of salt concentrations or temperature to balance signal intensity with background levels [1].
- Sample Permeabilization Adjustment: Different tissue types require optimized permeabilization strategies. Over-permeabilization can damage morphology, while under-permeabilization limits probe access [3].
Troubleshooting Common Issues
- High Background Signal: Ensure proper washing stringency after probe hybridization and HCR amplification. Increase formamide concentration in wash buffers (up to 30%) if necessary [3].
- Weak or No Signal: Check hairpin functionality and concentration. Extend hybridization time or increase probe concentration for low-abundance targets [5].
- Poor Tissue Penetration: For thick samples, increase hybridization times or use smaller probe sets. Consider incorporating tissue clearing methods like LIMPID to enhance penetration [3].
- Non-Specific Amplification: Verify hairpin metastability and include appropriate negative controls. Redesign hairpins with longer stems if spontaneous amplification occurs [1].
The integration of HCR with automated staining platforms like the Leica BOND RX and Biocare Medical ONCORE Pro X systems has improved reproducibility and throughput while maintaining the low-background characteristics essential for quantitative analysis [8] [9]. These advancements make HCR technology increasingly accessible for both research and clinical applications.
The advent of third-generation in situ hybridization chain reaction (HCR v3.0) represents a transformative advancement in molecular imaging, fundamentally reshaping probe architecture through the implementation of split-initiator probes. This revolutionary approach addresses a fundamental limitation of previous HCR versions by incorporating automatic background suppression throughout the protocol, enabling researchers to achieve unprecedented signal-to-background ratios without the laborious process of probe set optimization [10]. The core innovation replaces single probes carrying full HCR initiators with cooperative probe pairs that each carry half of the initiator sequence, ensuring that signal amplification occurs only when both probes bind specifically to adjacent sites on the target mRNA [10] [11].
This technological shift has expanded the accessibility and robustness of multiplexed RNA imaging across diverse biological samples, from whole-mount vertebrate embryos to clinical specimens with high autofluorescence. The split-initiator system maintains all the advantages of HCR—including isothermal amplification, straightforward multiplexing, and enzyme-free operation—while solving the critical problem of amplified background that previously necessitated extensive validation of individual probes [10]. By fundamentally reengineering the probe-target interaction mechanism, HCR v3.0 provides the scientific community with a powerful tool for spatial transcriptomics, drug discovery, and developmental biology research.
Mechanism of Action: From Single Probes to Cooperative Pairs
Fundamental Design Principles
The split-initiator probe system operates on an elegantly simple yet powerful principle: conditional initiator assembly through target-mediated probe cooperation. Whereas HCR v2.0 employed single DNA probes that each contained a full HCR initiator (I1), HCR v3.0 utilizes pairs of split-initiator probes (P1 and P2) that each contain half of the initiator sequence [10] [12]. This architectural change creates a fundamental dependency on target recognition for signal amplification to occur, as illustrated in the following mechanism:
Table: Comparison of Probe Architectures in HCR v2.0 vs. v3.0
| Feature | HCR v2.0 (Standard Probes) | HCR v3.0 (Split-Initiator Probes) |
|---|---|---|
| Initiator Structure | Full initiator (I1) on each probe | Half initiator on each probe pair |
| Probe Target Binding | 50 nt binding site per probe | 25 nt binding site per probe (×2 per target site) |
| Amplification Trigger | Binding of any single probe | Cooperative binding of two adjacent probes |
| Background Suppression | Limited; non-specific binding causes amplified background | Automatic; non-specific binding doesn't trigger amplification |
| Probe Optimization | Often required to remove "bad probes" | Typically unnecessary due to built-in suppression |
In the HCR v3.0 system, each probe within a pair contains a 25-nucleotide target-binding region that hybridizes to adjacent sites on the target mRNA [10]. Only when both probes are correctly colocalized on their specific target sequences do the two initiator halves come together to form a complete, functional initiator capable of triggering the HCR amplification cascade.
Visualization of the Split-Initiator HCR Mechanism
The following diagram illustrates the fundamental mechanism of the split-initiator probe system in HCR v3.0:
Automatic Background Suppression Mechanism
The automatic background suppression capability of HCR v3.0 stems from two complementary mechanisms operating at different stages of the protocol. First, at the amplification stage, individual H1 or H2 hairpins that bind non-specifically within the sample cannot self-trigger polymerization, as HCR requires the specific initiator sequence to begin the chain reaction [10]. This inherent property of HCR hairpins provides the first layer of background control.
The second, more crucial layer of suppression occurs at the probe binding stage, where the split-initiator design ensures that individual probes binding non-specifically throughout the sample cannot generate amplified background. This is because a single probe contains only half of the required initiator sequence and cannot trigger the HCR cascade alone [10] [12]. Experimental validation has demonstrated that this approach provides approximately 50-60-fold suppression of non-specific amplification compared to full-initiator probes [10].
The practical consequence of this two-layer suppression system is that researchers can utilize large, unoptimized probe sets without fear of generating excessive background signal. This dramatically reduces the time and resources required for assay development, particularly when working with new targets or organism systems where optimal probe sequences have not been previously established.
Quantitative Performance Assessment
Systematic Evaluation of Signal and Background Characteristics
Rigorous quantification of the split-initiator system's performance reveals dramatic improvements in key metrics for RNA imaging applications. In comparative studies using whole-mount chicken embryos—a challenging, thick, and autofluorescent sample—HCR v3.0 demonstrated fundamentally different performance characteristics compared to the previous v2.0 system [10].
Table: Quantitative Performance Comparison in Whole-Mount Chicken Embryos
| Performance Metric | HCR v2.0 (Standard Probes) | HCR v3.0 (Split-Initiator Probes) |
|---|---|---|
| Background with 20-probe set | High, increases with probe count | Minimal, unchanged with probe count |
| Signal-to-Background Ratio | Decreases monotonically with added probes | Increases monotonically with added probes |
| Amplified Background Suppression | Limited (non-specific binding triggers amplification) | ~50-fold suppression in situ |
| Probe Set Optimization Requirement | Often necessary | Typically unnecessary |
| Multiplexing Capability | Up to 5 targets simultaneously | Up to 10 targets simultaneously |
The quantitative superiority of the split-initiator approach is particularly evident when examining the relationship between probe set size and performance. With standard probes, adding untested probes to a validated set from 5 to 20 probes resulted in a dramatic increase in background and a corresponding decrease in signal-to-background ratio [10]. In striking contrast, using split-initiator probe pairs targeting nearly identical sequences caused no measurable change in background while the signal-to-background ratio increased monotonically with additional probes [10].
Enhancement of Quantitative Imaging Modalities
The split-initiator revolution has substantially improved three specialized quantitative analysis modes for mRNA imaging. The automatic background suppression enables more precise analog quantitation and more faithful digital counting of individual mRNA molecules:
qHCR Imaging: Enables analog mRNA relative quantitation with subcellular resolution in the anatomical context of whole-mount vertebrate embryos, with improved precision due to reduced background variability [10] [11].
qHCR Flow Cytometry: Provides analog mRNA relative quantitation for high-throughput expression profiling of mammalian and bacterial cells, with enhanced accuracy for detecting subtle expression differences [10].
dHCR Imaging: Allows digital mRNA absolute quantitation via single-molecule imaging in thick autofluorescent samples, with improved fidelity in molecule counting due to superior background suppression [10] [11].
The enhanced performance of these modalities directly stems from the split-initiator architecture, which minimizes the background fluctuations that complicate quantitative analysis, particularly in complex tissue environments with inherent autofluorescence.
Research Reagent Solutions
Implementing the split-initiator HCR v3.0 methodology requires specific reagent systems designed to work in concert. The following essential components constitute the core toolkit for researchers adopting this technology:
Table: Essential Research Reagents for Split-Initiator HCR v3.0
| Reagent / Solution | Function & Importance | Implementation Notes |
|---|---|---|
| Split-Initiator Probe Pairs | Core detection elements; contain complementary initiator halves that only trigger HCR when both bind target | Typically designed with 25-nt target binding regions; multiple pairs used per target (often 20+) [10] |
| HCR Hairpin Amplifiers | Meta-stable DNA hairpins (H1, H2) that undergo chain reaction polymerization upon initiation | Fluorophore-labeled for direct detection; kinetically trapped to prevent leakage amplification [10] |
| HCR Probe Hybridization Buffer | Optimal environment for specific probe-target hybridization | Critical for maintaining stringency while allowing efficient binding [13] |
| Amplification Buffer | Supports efficient HCR polymerization while minimizing non-specific hairpin interactions | Formulated to maintain hairpin stability while permitting triggered amplification [13] |
| HCR-Compatible Fluorophores | Signal detection across multiple channels for multiplexed experiments | Bright, photostable dyes compatible with sample autofluorescence profile [11] |
For researchers developing custom split-initiator probe sets, computational tools like HCRProbeMakerCL provide an accessible solution for designing probe pairs compatible with published HCR amplifier systems [14]. This open-source Python script enables rapid creation of probe sets for large libraries of mRNAs and includes features for controlling parameters such as GC content, homopolymer limits, and off-target binding potential through BLAST functionality [14].
Experimental Protocol: Implementing Split-Initiator HCR v3.0
Sample Preparation and Probe Hybridization
The following detailed protocol outlines the standard procedure for implementing split-initiator HCR v3.0 in whole-mount specimens, incorporating optimization strategies for enhanced performance:
Sample Fixation and Permeabilization
- Fix samples appropriately for your tissue type (e.g., 4% PFA for 20-60 minutes at room temperature for embryonic tissues)
- Permeabilize with appropriate detergent (e.g., 0.5-2.0% Triton X-100, 0.1-1.0% SDS, or proteinase K treatment for tougher tissues)
- Include post-fixation after permeabilization if necessary to maintain RNA integrity
Probe Hybridization
- Prepare probe hybridization solution containing split-initiator probe pairs at 20 nM concentration (improves signal over earlier 4 nM recommendations) [13]
- Hybridize for 12-16 hours (overnight) at the appropriate temperature (typically 37°C for RNA targets)
- Perform post-hybridization washes to remove unbound probes (stringency washes)
HCR Amplification and Signal Detection
The amplification phase leverages the automatic background suppression inherent in the split-initiator system while providing robust signal development:
HCR Amplification Setup
- Prepare HCR hairpin working solution from snap-cooled hairpin stocks (H1 and H2 at 60 nM each in 5× SSCT)
- Pre-heat amplification solution to reaction temperature before adding to samples
Signal Amplification
- Incubate samples with HCR hairpin solution for 12-16 hours (overnight) at room temperature in darkness [13]
- Perform post-amplification washes to remove unincorporated hairpins (3×15 minutes with 5× SSCT, 0.1% Tween-20)
- Mount samples for imaging with appropriate mounting medium that preserves fluorescence
For challenging targets or highly autofluorescent samples, consider these enhanced approaches:
- Boosted Probes: For longer RNA targets, increase the number of probe pairs beyond standard recommendations to enhance signal without protocol modifications [13]
- HCR-Cat: Combine HCR v3.0 with enzymatic amplification (catalysis) for dramatically increased sensitivity (240-fold signal enhancement reported) [15]
- HCR-Immuno: Employ antibody-based detection of haptens conjugated to HCR hairpins for ~4.5-fold signal increase while maintaining spatial resolution [15]
- HCR-Multi: Perform multiple rounds of HCR amplification for the same target for ~70-fold signal enhancement [15]
Advanced Applications and Workflow Integration
Visualization of the Experimental Workflow
The complete HCR v3.0 experimental process, from sample preparation to imaging, follows a structured workflow that leverages the unique advantages of split-initiator probes:
Integration with Spatial Transcriptomics and Drug Discovery
The split-initiator probe technology serves as a powerful enabling platform for advanced applications in spatial biology and therapeutic development:
Multiplexed Spatial Transcriptomics: HCR v3.0 enables simultaneous imaging of up to 10 mRNA targets in thick tissue sections, providing single-cell resolution while preserving spatial context [11]. This capability complements sequencing-based spatial transcriptomics methods by providing higher spatial resolution for targeted gene panels.
Drug Mechanism Elucidation: The technology allows precise localization of drug target expression within tissue architectures, enabling researchers to understand cell-type-specific drug engagement and potential off-target effects during therapeutic development.
Biomarker Validation: The combination of high sensitivity and minimal background makes split-initiator HCR ideal for confirming putative biomarkers in complex clinical tissues, particularly for low-abundance transcripts that challenge other detection methods.
Whole-Mount Embryonic Imaging: The deep tissue penetration and automatic background suppression enable detailed mapping of gene expression patterns in intact vertebrate embryos, providing unprecedented views of developmental processes [10] [11].
Recent advancements building upon the split-initiator foundation, such as HCR-Cat, HCR-Immuno, and HCR-Multi, further extend the application range to include challenging targets like short RNAs and low-abundance transcripts that were previously difficult or impossible to robustly detect in complex tissues [15]. These next-generation approaches maintain the specificity benefits of split-initiator design while dramatically enhancing sensitivity through enzymatic amplification or multi-round detection schemes.
The split-initiator probe revolution has thus established a new paradigm in molecular detection—one that combines rigorous specificity with practical experimental flexibility, empowering researchers to explore biological systems with unprecedented clarity and confidence.
In situ hybridization chain reaction (HCR) is a powerful method for imaging mRNA expression within fixed biological specimens, enabling signal amplification above inherent sample autofluorescence. Third-generation in situ HCR (v3.0) introduces a fundamental innovation: automatic background suppression throughout the protocol. This enhancement ensures that reagents do not generate amplified background even if they bind non-specifically within the sample, addressing a critical vulnerability of previous HCR versions [10].
The core challenge with HCR v2.0 was that each DNA probe carried a full HCR initiator (I1). If any single probe bound non-specifically, it would trigger the HCR amplification cascade, generating amplified background noise that reduced the signal-to-background ratio and could necessitate laborious probe set optimization. HCR v3.0 overcomes this limitation through a split-initiator probe design that conditionally generates the amplification trigger only upon specific target recognition [10].
This protocol details the principles, validation data, and methodologies for implementing automatic background suppression in HCR v3.0 experiments, enabling researchers to achieve multiplexed quantitative mRNA analysis with dramatically enhanced performance and robustness.
Core Principle: Split-Initiator Probe Design
The automatic background suppression in HCR v3.0 is achieved by re-engineering the probe architecture. The system replaces single probes carrying full initiators with cooperative split-initiator probe pairs that each carry half of the HCR initiator I1 [10].
Diagram Title: HCR v2.0 vs. v3.0 Probe Design and Background Suppression Mechanism
In this mechanism, when both probes in a pair hybridize specifically to adjacent binding sites on the target mRNA, they colocalize the two halves of initiator I1, enabling cooperative initiation of HCR signal amplification. However, if individual probes bind non-specifically at different locations within the sample, they fail to colocalize the initiator halves and cannot trigger the amplification cascade. This design provides inherent background suppression while maintaining robust signal generation for true targets [10].
The HCR hairpins themselves (H1 and H2) already provide inherent background suppression during the amplification stage, as individual hairpins that bind non-specifically do not trigger polymerization. The split-initiator probes extend this suppression principle to the target recognition stage, creating a comprehensive automatic background suppression system throughout the entire protocol [10].
Quantitative Performance Validation
In Vitro and In Situ Suppression Efficiency
The automatic background suppression system was rigorously validated through both in vitro and in situ experiments. Gel studies demonstrated strong conversion of HCR hairpins into amplification polymers only when both split-initiator probes (P1 and P2) were introduced together with the target. Critically, minimal conversion occurred when either P1 or P2 was introduced alone, demonstrating the HCR suppression capabilities of the split-initiator design [10].
Table 1: Quantitative HCR Suppression Efficiency with Split-Initiator Probes
| Experimental Condition | Polymer Conversion | HCR Suppression Factor | Context |
|---|---|---|---|
| Both P1 + P2 with target | Strong conversion | Baseline (signal) | In vitro gel study |
| P1 alone with target | Minimal conversion | ≈60-fold suppression | In vitro gel study |
| P2 alone with target | Minimal conversion | ≈60-fold suppression | In vitro gel study |
| Full probe sets (odd + even) | Strong signal | Baseline (signal) | In situ validation |
| Partial probe sets (odd or even only) | Minimal signal | ≈50-fold suppression | In situ validation |
These results indicate that replacing a standard probe (v2.0) with a pair of split-initiator probes (v3.0) modestly decreases amplified signal but dramatically decreases amplified background by approximately 50-60 fold across five different HCR amplifiers [10].
Performance in Whole-Mount Chicken Embryos
The technology was further tested in whole-mount chicken embryos, representing a challenging imaging setting with thick, autofluorescent samples. Researchers compared standard probes versus split-initiator probes while systematically increasing probe set size [10].
Table 2: Performance Comparison in Whole-Mount Chicken Embryos
| Probe Type | Probe Set Size | Background Level | Signal-to-Background Ratio | Representative Image Quality |
|---|---|---|---|---|
| Standard probes (v2.0) | 5 probes | Low | High | Acceptable |
| Standard probes (v2.0) | 10 probes | Moderate | Medium | Elevated background |
| Standard probes (v2.0) | 20 probes | High | Low | High background, overlapping histograms |
| Split-initiator probes (v3.0) | 5 probe pairs | Low | Medium | Good |
| Split-initiator probes (v3.0) | 10 probe pairs | Low | High | Very good |
| Split-initiator probes (v3.0) | 20 probe pairs | Low | Very high | Excellent, non-overlapping histograms |
With standard probes, increasing the probe set size by adding untested probes to a validated set caused dramatic background increases and monotonically decreasing signal-to-background ratios. In contrast, with split-initiator probe pairs addressing nearly identical target subsequences, increasing the probe set size caused no measurable change in background while the signal-to-background ratio increased monotonically [10].
This performance advantage enables researchers to use large, unoptimized probe sets without the risk of generating amplified background, simplifying experimental design and enhancing robustness when exploring new targets or organisms.
Research Reagent Solutions
Table 3: Essential Research Reagents for HCR v3.0 with Automatic Background Suppression
| Reagent / Material | Function / Role | Specifications / Notes |
|---|---|---|
| Split-initiator probe pairs | Target mRNA recognition | Each probe: ~25 nt target-binding site, carries half of HCR initiator I1 |
| HCR hairpin H1 | Signal amplification | Kinetically trapped DNA hairpin, fluorophore-labeled, opens upon initiator binding |
| HCR hairpin H2 | Signal amplification | Kinetically trapped DNA hairpin, fluorophore-labeled, propagates chain reaction |
| DNA initiator I1 | Trigger for amplification | Full initiator sequence reconstructed by probe pair colocalization |
| Fixation reagents | Sample preparation | Tissue/organism-dependent (e.g., vertebrate embryos, mammalian cells) |
| Hybridization buffers | In situ hybridization | Protocol-specific formulation for target accessibility |
| Mounting media | Sample preservation | Compatible with fluorescence imaging and preservation |
| Flow cytometry buffers | Cell suspension analysis | For qHCR flow cytometry applications [16] |
Experimental Protocols
Protocol 1: Validation of Split-Initiator HCR Suppression In Vitro
Purpose: To quantitatively verify the background suppression capability of split-initiator probes using gel-based analysis [10].
Diagram Title: In Vitro Validation Workflow for HCR Suppression
Methodology Details:
- HCR hairpin preparation: Prepare metastable H1 and H2 hairpins in appropriate buffer. These should co-exist without polymerization in the absence of initiator [10].
- Reaction setup: Assemble six reaction conditions as outlined in the workflow, ensuring equivalent concentrations of probes and targets where applicable.
- Incubation: incubate reactions at room temperature for the required polymerization period (typically 4-6 hours, protocol-dependent).
- Gel analysis: Run reactions on appropriate percentage non-denaturing gel to separate hairpins from amplification polymers.
- Quantification: Measure band intensities to calculate HCR suppression factor as: (polymer conversion with both probes) / (polymer conversion with single probe) [10].
Expected Results: Typical results should show strong polymer formation only in conditions with full I1 or both P1+P2 with target, with approximately 60-fold suppression in single-probe conditions.
Protocol 2: Multiplexed mRNA Imaging in Whole-Mount Specimens
Purpose: To perform multiplexed quantitative mRNA imaging in challenging thick samples such as whole-mount chicken embryos using large unoptimized split-initiator probe sets [10].
Methodology:
- Sample preparation: Fix whole-mount chicken embryos following standard protocols for in situ hybridization. Permeabilize tissues to ensure probe accessibility [10].
- Probe set design: Design 20 split-initiator probe pairs for each target mRNA. No individual probe validation is required due to automatic background suppression.
- Hybridization: Co-hybridize all split-initiator probe sets simultaneously overnight at appropriate temperature.
- Washing: Perform stringent washes to remove non-specifically bound probes.
- Amplification: Add H1 and H2 hairpins for all amplifiers simultaneously. Incubate 4-6 hours at room temperature.
- Imaging: Image samples using appropriate fluorescence microscopy setup.
- Analysis: Quantify mRNA expression with subcellular resolution. Perform analog mRNA relative quantitation (qHCR imaging) or digital mRNA absolute quantitation (dHCR imaging) [10].
Critical steps for success:
- Use split-initiator probes throughout; reverting to even one full-initiator probe per pair increases background by an order of magnitude
- Simultaneous amplification for all channels maintains straightforward multiplexing
- No probe set optimization is required, but increasing probe set size improves signal-to-background ratio
Protocol 3: qHCR Flow Cytometry for Mammalian or Bacterial Cells
Purpose: To perform high-throughput expression profiling of mammalian or bacterial cells in suspension via qHCR flow cytometry [16].
Diagram Title: qHCR Flow Cytometry Workflow for Cell Suspensions
Methodology Details:
- Cell preparation: Harvest mammalian or bacterial cells and prepare single-cell suspensions in appropriate media [16].
- Fixation and permeabilization: Fix cells to preserve RNA and permeabilize to enable probe access. Conditions are cell type-dependent.
- Hybridization: Incubate cells with split-initiator probe sets targeting mRNAs of interest.
- Washing: Remove unbound probes through series of buffer washes.
- HCR amplification: Add H1 and H2 hairpins to trigger amplification cascade. Incubate to enable polymer formation.
- Flow cytometry: Analyze cells using standard flow cytometry instrumentation. Fluorescence intensity correlates with mRNA expression levels [16].
Applications: This protocol supports multiplexed quantitative in situ hybridization for high-throughput expression profiling, enabling analog mRNA relative quantitation (qHCR flow cytometry) for drug discovery and basic research applications [16].
Application Notes and Troubleshooting
The automatic background suppression technology in HCR v3.0 enables three multiplexed quantitative analysis modes: (1) qHCR imaging for analog mRNA relative quantitation with subcellular resolution in whole-mount vertebrate embryos; (2) qHCR flow cytometry for analog mRNA relative quantitation for high-throughput expression profiling of mammalian and bacterial cells; and (3) dHCR imaging for digital mRNA absolute quantitation via single-molecule imaging in thick autofluorescent samples [10].
For optimal results, always use complete split-initiator probe pairs rather than mixing full- and split-initiator designs, as even one full-initiator probe per pair can increase background by an order of magnitude. When moving to new targets or organisms, automatic background suppression eliminates the need for probe set optimization, allowing researchers to confidently use large probe sets (20+ probe pairs) to maximize signal-to-background ratios [10].
The robustness of this approach has been demonstrated in four-channel multiplexed experiments using large unoptimized split-initiator probe sets in complex samples, confirming that automatic background suppression enables reliable performance even with probe sets that have not undergone individual validation [10].
Key Advantages Over Previous Generations and Other Amplification Methods
In situ hybridization chain reaction (HCR) represents a powerful method for visualizing mRNA expression within fixed biological specimens. The third-generation HCR (v3.0) technology introduces a fundamental architectural innovation that addresses a critical limitation plaguing previous amplification methods: non-specific amplified background. This advancement transforms HCR into a more robust, quantitative, and user-friendly platform, enabling researchers to obtain high-quality data even when exploring new targets or working in challenging sample environments. This application note details the key advantages of HCR v3.0, provides a structured comparison of its performance, and outlines detailed protocols for its implementation in research and drug development.
Core Technological Innovation: Automatic Background Suppression
The principal breakthrough of HCR v3.0 lies in its implementation of automatic background suppression throughout the experimental protocol. This is achieved through a novel probe and amplifier design that ensures reagents will not generate amplified background even if they bind non-specifically within the sample [10].
- HCR v2.0 Limitation: In the previous generation, each DNA probe carried a full HCR initiator (I1). If any single probe bound non-specifically, it would trigger the self-assembly of fluorescent HCR polymers, leading to amplified background that could obscure the true signal [10].
- HCR v3.0 Solution: This version replaces each standard probe with a pair of cooperative split-initiator probes. Each probe in the pair carries only half of the HCR initiator I1. Signal amplification is triggered only when both probes hybridize specifically to adjacent binding sites on the target mRNA, colocalizing the two initiator halves. A single probe binding non-specifically lacks its partner and cannot initiate the amplification cascade, thereby suppressing amplified background [10].
Diagram Logic: The split-initiator system creates a conditional AND gate where both probes must be correctly bound for amplification to proceed.
Quantitative Performance Advantages
The automatic background suppression of HCR v3.0 translates directly into superior experimental outcomes, characterized by higher signal-to-background ratios and exceptional robustness.
Performance Comparison: HCR v3.0 vs. v2.0
Table 1: Quantitative Comparison of HCR v2.0 and HCR v3.0 Performance
| Feature | HCR v2.0 | HCR v3.0 | Experimental Context |
|---|---|---|---|
| Probe Architecture | Single probe with full initiator [10] | Pair of probes with split initiator [10] | Core design principle |
| Amplified Background | High (triggered by any non-specific probe) [10] | Dramatically reduced (requires two adjacent probes) [10] | Whole-mount chicken embryos |
| HCR Suppression Factor | Not Applicable | ~60-fold (in vitro), ~50-fold (in situ) [10] | Gel studies and tissue imaging |
| Probe Set Optimization | Often required to remove "bad probes" [10] | Not required; use of large, unoptimized sets is feasible [10] | Validation with 20 unoptimized probe pairs |
| Signal-to-Background Trend | Decreases with larger probe sets [10] | Increases with larger probe sets [10] | Whole-mount chicken embryos |
Application Versatility and Quantitative Analysis
The robust performance of HCR v3.0 enables several advanced, multiplexed quantitative analysis modes that are critical for modern biological research and drug development [10]:
- qHCR Imaging: Provides analog mRNA relative quantitation with subcellular resolution within the anatomical context of intact samples, such as whole-mount vertebrate embryos.
- qHCR Flow Cytometry: Enables analog mRNA relative quantitation for high-throughput expression profiling of single cells, applicable to mammalian and bacterial systems.
- dHCR Imaging: Allows for digital mRNA absolute quantitation via single-molecule imaging, even in thick, autofluorescent samples.
Detailed Experimental Protocol
The following protocol for multiplexed whole-mount RNA fluorescence in situ hybridization using HCR v3.0 is adapted from established methodologies [10] [17]. The workflow is summarized in the diagram below, followed by a detailed step-by-step guide.
Diagram Logic: The protocol is a linear sequence of major stages across three days, with key incubation and preparation steps detailed.
Day 1: Sample Preparation and Probe Hybridization
Solutions Required: 10X PBS, PTw (1X PBS + 0.1% Tween 20), Detergent Solution, Probe Hybridization Buffer [17].
- PTw Washes: If samples are stored in methanol, rehydrate them stepwise (75%, 50%, 25% methanol in PTw). Perform three washes in PTw (10 min, 5 min, 5 min) [17].
- Permeabilization: Incubate samples in 300-500 µL of Detergent Solution for 30 minutes at room temperature. During this step, pre-warm the Probe Hybridization Buffer to 37°C [17].
- Pre-hybridization: Replace the solution with 200 µL of pre-warmed Probe Hybridization Buffer. Incubate for 30 minutes at 37°C [17].
- Prepare Probe Solution: For each target, add 0.8-4.0 µL of split-initiator probe (from a 1 µM stock) to 200 µL of pre-warmed Probe Hybridization Buffer. If signal is weak, increasing the probe concentration by 2-3x is recommended [17].
- Hybridization: Remove the pre-hybridization buffer and add the probe solution. Incubate overnight (12-16 hours) at 37°C [17].
Day 2: Washes and Signal Amplification
Solutions Required: Probe Wash Buffer, 5X SSCT (5X SSC + 0.1% Tween 20), Amplification Buffer [17].
- Post-Hybridization Washes: Pre-heat Probe Wash Buffer to 37°C. Wash the samples 4 times for 15 minutes each with 1 mL of pre-warmed Probe Wash Buffer at 37°C [17].
- SSCT Washes: Wash the samples 2 times for 5 minutes each with 1 mL of 5X SSCT at room temperature [17].
- Pre-amplification: Incubate samples in 1 mL of Amplification Buffer for 30 minutes at room temperature [17].
- Prepare Hairpins: During the pre-amplification step, prepare the HCR hairpins (H1 and H2). For each amplifier, mix 2 µL of each hairpin (from a 3 µM stock) into 100 µL of Amplification Buffer. Heat the mixture to 95°C for 90 seconds, then allow it to cool to room temperature in a dark drawer for 30 minutes. To boost signal, hairpin concentration can be doubled [17].
- Amplification: Remove the pre-amplification buffer and add the prepared hairpin solution. Incubate overnight (2-16 hours) at room temperature in the dark [17].
Day 3: Final Washes and Mounting
Solutions Required: 5X SSCT, Glycerol Solutions (50% and 70% in 1X PBS, pH 7.4) [17].
- Save Hairpins: Collect and save the hairpin mixture. It can be reused multiple times when stored at -20°C [17].
- Remove Excess Hairpins: Wash samples with 1 mL of 5X SSCT at room temperature as follows: 5 min, 5 min, 30 min, 30 min, 5 min [17].
- Nuclear Stain (Optional): Incubate samples in 50% glycerol solution in 1X PBS containing DAPI (1.0 µg/mL for 30-60 min, or 0.1 µg/mL for 2 h-overnight at 4°C) [17].
- Mount and Image: Replace the solution with 50%-70% glycerol in 1X PBS (pH 7.4 is critical to prevent signal loss). Store at 4°C, mount, and image [17].
The Scientist's Toolkit: Essential Research Reagents
Table 2: Key Reagent Solutions for HCR v3.0 Experiments
| Reagent | Function | Key Components | Notes |
|---|---|---|---|
| Probe Hybridization Buffer | Creates environment for specific probe-target binding [17] | Formamide, SSC, Dextran Sulfate, Denhardt's, Heparin, Tween | High dextran sulfate crowds probes for efficiency. Store at -20°C. |
| Probe Wash Buffer | Removes unbound and non-specifically bound probes [17] | Formamide, SSC, Heparin, Tween | Formamide concentration stringency prevents off-target binding. |
| Amplification Buffer | Medium for HCR hairpin self-assembly [17] | SSC, Dextran Sulfate, Tween | Dextran sulfate crowds hairpins to promote polymerization. |
| HCR Hairpins (H1 & H2) | Fluorophore-labeled, metastable DNA hairpins for signal amplification [10] [17] | Kinetically trapped DNA hairpins | Store protected from light. Can be reused to reduce costs. |
| Split-Initiator Probe Pairs | Target-specific probes that conditionally trigger amplification [10] | Two ~25nt DNA probes per target site | Commercial sources (e.g., Molecular Instruments) design sets from >1.4 kb sequence. |
| 5X SSCT | Standard washing and storage solution [17] | Saline-Sodium Citrate (SSC), Tween 20 | Maintains pH and ionic strength for sample integrity. |
| Antitumor agent-116 | Antitumor agent-116, MF:C31H23BrN4O4S, MW:627.5 g/mol | Chemical Reagent | Bench Chemicals |
| IRS-1 Peptide, FAM labeled | IRS-1 Peptide, FAM labeled, MF:C84H118N20O25S2, MW:1872.1 g/mol | Chemical Reagent | Bench Chemicals |
HCR v3.0 represents a significant leap forward in molecular imaging technology. Its core innovation—the split-initiator probe system with automatic background suppression—confers unmatched robustness, ease of use, and quantitative power. By eliminating the need for tedious probe optimization and enabling high-fidelity multiplexing and quantitation in complex samples, HCR v3.0 empowers researchers and drug developers to push the boundaries of spatial biology with greater confidence and reliability. The provided protocols and reagent overview offer a practical foundation for integrating this advanced methodology into diverse research pipelines.
Implementing the Protocol: A Step-by-Step Guide for Diverse Sample Types
Within the framework of third-generation in situ Hybridization Chain Reaction (HCR v3.0) research, a transformative advancement has been the development of probe sets that operate effectively without extensive optimization. The core innovation of HCR v3.0 lies in its automatic background suppression mechanism, which fundamentally changes how probe sets are designed and applied [10]. This protocol details the methodology for leveraging large, unoptimized split-initiator probe sets, enabling researchers to achieve high signal-to-background ratios with minimal probe validation.
The shift from standard "v2.0" probes to split-initiator probes is crucial. In HCR v2.0, each DNA probe carries a full HCR initiator sequence (I1); if such a probe binds non-specifically, it still triggers amplification, generating amplified background [10]. The v3.0 approach replaces each standard probe with a pair of cooperative split-initiator probes, each carrying only half of the initiator sequence. Specific signal amplification occurs only when both probes hybridize adjacently on the target mRNA, colocalizing the two initiator halves. Individual probes binding non-specifically lack the full initiator and cannot trigger HCR, thus providing automatic background suppression [10] [18].
Figure 1: Split-initiator HCR v3.0 mechanism. Two half-initiator probes must bind adjacently on the target mRNA to form a complete initiator, triggering the HCR polymerization cascade.
Key Principles and Quantitative Performance
Core Advantages of Unoptimized Probe Sets
The automatic background suppression inherent to the split-initiator design confers three significant advantages for probe set design and application:
- Elimination of Probe Optimization: Researchers can utilize large probe sets (e.g., 20 probe pairs) without pre-screening individual probes for non-specific binding [10]. This dramatically reduces development time and cost for new targets.
- Scalable Signal-to-Background Ratio: With conventional probes, adding more untested probes often increases background. With split-initiator probes, adding more probe pairs increases specific signal without measurably increasing background, allowing the signal-to-background ratio to be raised simply by expanding the probe set [10].
- Enhanced Robustness: The method is highly tolerant to variations in sample type and fixation conditions, making it exceptionally robust for screening applications across different organisms and tissues [19] [20].
Quantitative Performance Metrics
Experimental validation in challenging samples, such as whole-mount chicken embryos, demonstrates the quantitative performance benefits of this approach.
Table 1: Performance comparison of standard vs. split-initiator probe sets in whole-mount chicken embryos
| Probe Type | Probe Set Size | Background Level | Signal-to-Background Ratio | Amplified Background Suppression |
|---|---|---|---|---|
| Standard (v2.0) | 5 probes | Low | High | Not applicable |
| Standard (v2.0) | 20 probes | High | Low (~2-3 fold decrease from 5-probe set) [10] | No |
| Split-Initiator (v3.0) | 20 probe pairs | Low (No measurable change from 5-pair set) [10] | High (~2-3 fold increase from 5-pair set) [10] | Yes (≈50-fold in situ) [10] |
The data in Table 1 show that while the background using standard probes increases dramatically with larger, unoptimized sets, the background using split-initiator probes remains low, directly resulting in a superior signal-to-background ratio [10]. Gel studies further confirm the mechanism, demonstrating typical HCR suppression of approximately 60-fold when using split-initiator probes in solution [10].
Research Reagent Solutions
The successful implementation of this protocol relies on a set of core reagents. The following table details the essential components and their functions.
Table 2: Essential reagents for HCR v3.0 with split-initiator probe sets
| Reagent / Material | Function / Description | Key Notes |
|---|---|---|
| Split-Initiator Probe Pairs | 39-nt and 36-nt DNA probes that hybridize to the target mRNA and colocalize initiator halves [18]. | Design 5-10 pairs per target [20]. Standard desalting purification is sufficient [18] [20]. |
| Metastable DNA Hairpins (H1 & H2) | Fluorophore-labeled hairpins that self-assemble into amplification polymers. | Commercially available (e.g., Molecular Instruments). Must be snap-cooled before use [19] [20]. |
| Probe Hybridization Buffer | Buffer enabling specific probe binding. Typically contains formamide, SSC, and dextran sulfate [19]. | Formamide concentration (e.g., 30%) can be adjusted for stringency [20]. |
| Amplification Buffer | Buffer for HCR polymerization, containing salts and dextran sulfate to promote hairpin assembly [19]. | Dextran sulfate crowds the environment, enhancing polymerization kinetics. |
| Siliconized Tubes/Plates | Low-adhesion labware for sample processing. | Critical for handling delicate specimens like amphioxus embryos or dissected Drosophila larvae to prevent loss [19] [20]. |
Experimental Protocol for Using Large, Unoptimized Probe Sets
Probe Set Design and Preparation
Principle: The goal is to design a large set of probe pairs (e.g., 20 pairs) targeting the mRNA of interest without the need to optimize each one individually.
- Sequence Selection: Using the target mRNA sequence (FASTA format), design multiple probe pairs (e.g., 5-20) [10] [20]. For isoform-specific detection, target unique exons or UTR regions. To detect all isoforms, target constitutive exons [20].
- Probe Design Specifications:
- Synthesis and Pooling: Synthesize probes with standard desalting purification [20]. Pool all probe pairs for a single target into a single stock solution. A typical working concentration for the pooled probe set is 1 µM, diluted in TE buffer or nuclease-free water [20].
Sample Preparation and HCR v3.0 Staining Workflow
The following workflow is adapted for robust performance across various sample types, including whole-mount embryos and tissue sections [10] [19] [20].
Figure 2: HCR v3.0 experimental workflow. The protocol involves hybridization with the pooled probe set, followed by stringent washes and signal amplification.
Detailed Step-by-Step Methodology:
Fixation and Permeabilization:
- Fix samples appropriately (e.g., 4% PFA for 30 minutes at room temperature for Drosophila larvae) [20].
- Permeabilize tissues (e.g., with PBSTx or detergent) to allow probe access. Note: Proteinase K treatment is often unnecessary in HCR v3.0, which better preserves morphology and antigenicity for subsequent immunohistochemistry [19] [18].
Pre-hybridization and Hybridization:
- Equilibrate samples in wash solution (e.g., 5x SSC, 30% formamide, 0.1% Tween) at 37°C for 30 minutes [20].
- Pre-hybridize in hybridization solution (e.g., 5x SSC, 30% formamide, 10% Dextran sulphate, 0.1% Tween) at 37°C for 20-30 minutes [19] [20].
- Hybridize overnight at 37°C in hybridization solution containing the pooled probe set at a final concentration of 10 nM [20].
Post-Hybridization Washes:
- Remove unbound probes with four 15-minute washes in wash solution at 37°C [20]. This stringent wash is critical for maintaining a low background.
HCR Amplification:
Post-Amplification and Imaging:
Applications and Validation
The use of large, unoptimized split-initiator probe sets has been successfully demonstrated in diverse biological contexts:
- Multiplexed mRNA Imaging: This approach enables robust multiplexing (e.g., 4-plex imaging) in thick, autofluorescent samples like whole-mount chicken embryos, using large, unoptimized probe sets for each target without cross-talk [10].
- Sensitive Detection in Challenging Specimens: The protocol is effective in organisms like amphioxus and Drosophila, where it allows for high-resolution gene expression profiling without the limitations of chromogenic methods [19] [20].
- Cost-Effectiveness for Screening: The high signal amplification per probe pair means that only five pairs of probes can be sufficient for clear detection, significantly reducing the cost for medium-throughput screening of tens of genes [20].
Troubleshooting and Optimization
- High Background: Ensure stringent post-hybridization washes and confirm that formamide concentration is appropriate. Verify that hairpins are properly snap-cooled.
- Low Signal: Increase the number of probe pairs in the set (e.g., from 5 to 10). Check probe binding site accessibility and ensure the target is not degraded.
- Multiplexing Controls: When setting up a multi-target experiment, always include a no-probe control and single-target hybridizations first to confirm channel specificity.
Sample Preparation and Fixation for Whole-Mount Embryos and Tissue Sections
The fidelity of gene expression analysis via third-generation in situ hybridization chain reaction (HCR v3.0) is fundamentally dependent on the quality of the initial sample preparation and fixation. Proper fixation preserves morphological integrity while maintaining mRNA accessibility for split-initiator probes, the innovation that enables HCR v3.0's automatic background suppression [10]. This application note details optimized protocols for preparing whole-mount embryos and tissue sections for multiplexed mRNA imaging, enabling researchers to leverage the full quantitative potential of HCR v3.0 while maintaining sample architecture.
The critical advancement of HCR v3.0 lies in its automatic background suppression mechanism, which replaces standard probes carrying full HCR initiators with pairs of split-initiator probes that each carry half of the initiator sequence [10]. This ensures that HCR signal amplification occurs only when both probes bind adjacently to the target mRNA, dramatically reducing non-specific amplification. However, this sophisticated detection system requires optimally fixed samples where cellular morphology and nucleic acid integrity are preserved without introducing barriers to probe penetration or hybridization.
Principles of Sample Preservation for HCR v3.0
Fixation Chemistry and Mechanisms
Effective fixation for HCR v3.0 represents a balance between macromolecular cross-linking and maintaining probe accessibility. Paraformaldehyde (PFA), the primary fixative recommended for HCR studies, works by forming reversible cross-links between primary amines in proteins, thereby stabilizing cellular structures while retaining sufficient mRNA accessibility for hybridization. The standard 4% PFA concentration provides adequate tissue penetration while preventing over-fixation that can mask target epitopes or impede probe penetration, particularly in thicker whole-mount specimens [21].
Methanol dehydration, commonly employed after PFA fixation, serves multiple purposes: it permeabilizes lipid membranes, precipitates proteins, and enables long-term sample storage at -20°C. For whole-mount octopus embryos, a graded methanol series (25%, 50%, 75%, 100% methanol in PBST) has been successfully implemented, with dehydrated embryos remaining viable for HCR analysis after storage at -20°C for extended periods [21].
Optimization for Diverse Sample Types
Sample preparation parameters must be adjusted based on specimen type, size, and developmental stage. The following table summarizes key optimization parameters for different sample types:
Table 1: Sample Preparation Optimization for Different Specimen Types
| Specimen Type | Fixation Method | Permeabilization | Key Considerations | Documented Applications |
|---|---|---|---|---|
| Whole-mount vertebrate embryos (zebrafish, chicken) | 4% PFA overnight | Proteinase K (duration varies by size) | Thick, autofluorescent samples require enhanced permeabilization | qHCR and dHCR imaging in anatomical context [10] [22] |
| Whole-mount invertebrate embryos (Octopus vulgaris) | 4% PFA overnight, methanol dehydration series | Proteinase K (15 min at room temperature) | Small size (1.25 mm × 0.88 mm), manual dechorionation required | Multiplexed HCR with clearing and LSFM [21] |
| Drosophila embryos | Standard heptane/PEM-FA fixation, methanol devitellinization | Detergent solution (30 min) | Compatible with HCR v3.0 after rehydration from methanol | Protocol adaptation from Patel Lab [17] |
| Tissue sections | 4% PFA (duration based on thickness) | Proteinase K or detergent | Thinner samples require reduced permeabilization time | Not explicitly covered in results but methodologically applicable |
Step-by-Step Protocols
Protocol A: Whole-Mount Embryo Fixation and Preparation
This protocol, optimized for octopus embryos and adaptable to other whole-mount specimens, ensures optimal mRNA preservation for HCR v3.0 [21] [17].
Reagents and Solutions:
- 4% Paraformaldehyde (PFA) in phosphate buffered saline (PBS)
- PBS-Tween (PBST): 1X PBS with 0.1% Tween-20
- Methanol (high purity)
- Proteinase K (10 μg/ml in PBS-DEPC)
- Detergent solution: 1% SDS, 0.5% Tween-20, 50 mM Tris-HCl (pH 7.5), 2 mM EDTA, 150 mM NaCl
Procedure:
- Fixation: Transfer freshly dissected embryos to 4% PFA in PBS. Fix overnight at 4°C with gentle agitation. For stage XV octopus embryos (approximately 1.25 mm × 0.88 mm), this duration provides complete fixation without excessive cross-linking [21].
- Washing: Rise embryos with PBS-DEPC (diethyl pyrocarbonate-treated PBS to inhibit RNases) to remove residual fixative.
- Dechorionation: Manually remove chorions using fine tweezers (Dumont #5 Forceps) in PBST if working with encapsulated embryos [21].
- Dehydration: Transfer embryos through a graded methanol/PBST series (25%, 50%, 75%, 100% methanol), allowing 10 minutes per step at room temperature.
- Storage: Store dehydrated embryos in 100% methanol at -20°C until use. Samples preserved this way remain stable for several years without RNA degradation [17].
- Rehydration: When ready for HCR, gradually rehydrate embryos through a reverse methanol/PBST series (75%, 50%, 25% methanol), followed by multiple washes in 100% PBST.
- Permeabilization: Treat embryos with Proteinase K (10 μg/ml in PBS-DEPC) for 15 minutes at room temperature. Alternatively, for more challenging specimens, use detergent solution for 30 minutes at room temperature [21] [17].
- Post-fixation (optional): Re-fix briefly in 4% PFA if extensive permeabilization was required, followed by additional PBST washes.
The following workflow diagram illustrates the complete sample preparation and HCR v3.0 procedure:
Protocol B: Tissue Section Preparation
While whole-mount preparations provide three-dimensional context, tissue sections offer alternative advantages for certain applications.
Reagents and Solutions:
- Optimal Cutting Temperature (OCT) compound or paraffin embedding materials
- Poly-L-lysine or gelatin-coated slides
- Ethanol series (50%, 70%, 95%, 100%)
- Histoclear or xylene substitute (for paraffin sections)
Procedure:
- Fixation: Immerse fresh tissue in 4% PFA for 4-24 hours depending on tissue size (typically 4-6 hours for 5mm thick specimens).
- Cryopreservation: For frozen sections, transfer fixed tissue to 30% sucrose in PBS until sunk (overnight), then embed in OCT compound on dry ice.
- Sectioning: Cut 10-20μm sections using a cryostat and collect on coated slides.
- Storage: Store slides at -80°C with desiccant until use.
- Rehydration: For HCR processing, gradually rehydrate through ethanol series to PBST if starting from dehydrated sections.
Quantitative Performance Metrics
The effectiveness of proper sample preparation is reflected in the quantitative performance of HCR v3.0. The following table summarizes key performance metrics achieved with optimized protocols:
Table 2: HCR v3.0 Performance Metrics with Optimized Sample Preparation
| Performance Parameter | Standard Probes (v2.0) | Split-initiator Probes (v3.0) | Improvement Factor |
|---|---|---|---|
| HCR suppression (in situ) | Not applicable | ≈50-fold background suppression | Enables use of unoptimized probe sets [10] |
| Signal-to-background ratio (with 20 probe pairs in whole-mount chicken embryos) | Decreases monotonically with added probes | Increases monotonically with added probes | Enables larger probe sets without optimization [10] |
| Multiplexing capacity | Up to 5 targets | Demonstrated with 4 targets (potential for more) | Robust automatic background suppression [10] [21] |
| Compatibility with 3D imaging | Limited by background | Excellent (validated with LSFM) | Enables detailed spatial organization analysis [21] |
| Tissue clearing compatibility | Not specified | Fructose-glycerol clearing preserves signal | Maintains signal integrity through processing [21] |
The Scientist's Toolkit: Essential Research Reagent Solutions
Table 3: Key Research Reagent Solutions for HCR v3.0 Sample Preparation
| Reagent / Solution | Function | Composition / Preparation | Critical Notes |
|---|---|---|---|
| Fixative Solution | Preserves cellular architecture and mRNA localization | 4% paraformaldehyde in PBS, pH 7.4 | Must be freshly prepared or properly aliquoted and frozen |
| Permeabilization Agents | Enables probe access to intracellular targets | Proteinase K (10μg/ml) or detergent solutions | Concentration and duration must be optimized for each sample type |
| Hybridization Buffer | Creates optimal environment for specific probe binding | Formamide, SSC, dextran sulfate, Denhardt's solution, heparin | Dextran sulfate molecular weight affects signal intensity [17] |
| HCR Hairpins (H1 & H2) | Signal amplification through chain reaction | DNA hairpins with fluorophore labels | Snap-cooling (90s at 95°C, then 30min at room temperature) is essential for proper folding [21] [17] |
| Wash Buffers | Remove non-specifically bound probes | SSCT (SSC with Tween-20) or probe wash buffer | Stringency controlled by formamide concentration and temperature |
| Clearing Solution | Reduces light scattering for deep imaging | Fructose-glycerol solution | Optimal for preserving HCR fluorescent signal [21] |
| Mounting Media | Preserves samples for microscopy | Glycerol solutions (50-70% in PBS, pH 7.4) | Acidic glycerol causes rapid signal loss [17] |
| Cav 3.2 inhibitor 4 | Cav 3.2 inhibitor 4, MF:C21H32Cl2N4O3, MW:459.4 g/mol | Chemical Reagent | Bench Chemicals |
| Elenestinib phosphate | Elenestinib phosphate, CAS:2832013-93-9, MF:C27H32FN10O5P, MW:626.6 g/mol | Chemical Reagent | Bench Chemicals |
Troubleshooting Common Sample Preparation Issues
Problem: High Background Fluorescence
Potential causes and solutions:
- Incomplete washing: Increase wash frequency and duration, particularly after hybridization and amplification steps. Implement 4×15 minute washes with pre-warmed probe wash buffer at 37°C [17].
- Over-fixation: Reduce PFA concentration or fixation time. Test 2-4% PFA for 2-16 hours depending on sample size.
- Inadequate permeabilization: Optimize Proteinase K concentration (5-20μg/ml) or duration (10-30 minutes). Alternatively, use detergent-based permeabilization for 30 minutes [17].
Problem: Weak or Absent Signal
Potential causes and solutions:
- RNA degradation: Use RNase-free techniques throughout, including DEPC-treated water and clean equipment. Ensure proper sample storage at -20°C in methanol.
- Under-fixation: Increase PFA concentration to 4% or extend fixation time to overnight.
- Inadequate probe penetration: Increase permeabilization time or consider sectioning thicker samples. For challenging tissues, extend proteinase K treatment incrementally.
- Suboptimal probe concentration: Increase probe concentration up to 2-3x, particularly when dealing with shorter target sequences or low-abundance mRNAs [17].
Problem: Poor Tissue Morphology
Potential causes and solutions:
- Over-permeabilization: Reduce proteinase K concentration or treatment time. Add a post-permeabilization fixation step (10-15 minutes in 4% PFA).
- Physical damage: Handle samples gently during solution changes. Use wide-bore pipette tips for fragile embryos.
Advanced Applications and Integration
Combination with Immunohistochemistry
HCR v3.0 can be successfully combined with immunohistochemistry (IHC) for simultaneous detection of mRNA and protein. The sequential detection has been optimized for octopus embryos, first performing HCR v3.0 followed by IHC for phosphorylated-histone H3, enabling correlation of gene expression with mitotic activity [21]. This combined approach offers flexibility when antibodies are unavailable for all targets of interest and allows investigation of potential spatial discrepancies between mRNA and protein localization.
Three-Dimensional Imaging and Tissue Clearing
The compatibility of HCR v3.0 with tissue clearing methods enables detailed three-dimensional analysis of gene expression patterns. For octopus embryos, fructose-glycerol clearing has been identified as optimal for preserving HCR fluorescent signals while sufficiently reducing opacity for light sheet fluorescence microscopy (LSFM) [21]. This approach has revealed spatial organization details not apparent in two-dimensional analyses, particularly in studying brain development and neural patterning.
Quantitative and Single-Molecule Imaging Modes
Proper sample preparation enables researchers to leverage the full quantitative potential of HCR v3.0, including both analog relative quantitation (qHCR imaging) and digital absolute quantitation (dHCR imaging) [10] [22]. qHCR provides mRNA relative quantitation with subcellular resolution in anatomical context, while dHCR enables absolute quantitation via single-molecule imaging, even in thick autofluorescent samples. Both modalities require optimal sample fixation that preserves mRNA integrity and accessibility while minimizing background.
Hybridization Chain Reaction version 3.0 (HCR v3.0) represents a significant advancement in in situ hybridization technology, enabling multiplexed, quantitative, and sensitive imaging of mRNA expression within intact biological specimens. This enzyme-free, isothermal amplification method addresses multi-decade challenges in mRNA imaging, offering a unique combination of straightforward multiplexing, precise quantitation, and excellent resolution even in thick, autofluorescent samples like whole-mount vertebrate embryos [10]. The defining innovation of the third-generation HCR is the implementation of automatic background suppression throughout the protocol. This ensures that reagents do not generate amplified background even if they bind non-specifically within the sample, dramatically enhancing performance and robustness compared to previous versions [10] [22]. This protocol article details the standardized three-day workflow, providing researchers with a comprehensive guide to implementing this powerful technique for high-resolution transcriptomic studies.
The core principle behind HCR v3.0's improved performance lies in its novel split-initiator probe design. Unlike second-generation HCR (v2.0) where each standard probe carries a full HCR initiator (I1) that can trigger amplification regardless of binding specificity, v3.0 replaces each standard probe with a pair of cooperative split-initiator probes [10]. Each split probe carries only half of the HCR initiator I1. The full initiator is only assembled when both probes hybridize specifically to adjacent binding sites on the target mRNA. This colocalization enables cooperative initiation of HCR signal amplification. If an individual probe binds non-specifically, it cannot trigger the amplification cascade, thereby suppressing amplified background at its source [10]. This conceptual advancement means researchers can use larger, unoptimized probe sets for new targets without the tedious process of individual probe validation, significantly accelerating experimental workflows.
Key Principles and Components of HCR v3.0
Mechanism of Automatic Background Suppression
The automatic background suppression in HCR v3.0 operates through a elegantly simple yet powerful mechanism involving two complementary strategies:
Split-Initiator Probes for Targeted Activation: Each mRNA target is detected using multiple pairs of split-initiator probes (typically 15-20 pairs per transcript) [23]. Each probe within a pair contains a 25-nucleotide target-binding region and half of the HCR initiator sequence. Only when both probes in a pair bind adjacently to their specific target mRNA is the complete initiator sequence assembled, triggering the HCR amplification cascade [10]. Gel studies demonstrate that this approach provides typical HCR suppression of approximately 60-fold in vitro and 50-fold in situ compared to full-initiator probes [10].
Conditional Hairpin Polymerization: The HCR amplification hairpins (H1 and H2) themselves contribute to background suppression. These hairpins remain in a kinetically trapped state until exposed to the full initiator sequence. Individual H1 or H2 hairpins that bind non-specifically in the sample cannot self-trigger polymerization, preventing non-specific amplification [10]. This dual-layer suppression system ensures high signal-to-background ratios even when exploring new targets or organisms.
Quantitative Imaging Modalities
HCR v3.0 supports two powerful quantitative imaging modes, enabling researchers to select the appropriate method based on their experimental questions:
qHCR Imaging (Analog Relative Quantitation): This mode provides analog mRNA relative quantitation with subcellular resolution in the anatomical context of whole-mount specimens. The signal intensity correlates with mRNA expression levels, allowing for comparative expression analysis across different regions or conditions [22]. This approach is ideal for mapping expression gradients or comparing relative abundance of transcripts.
dHCR Imaging (Digital Absolute Quantitation): For ultimate sensitivity and precision, dHCR imaging enables digital mRNA absolute quantitation via single-molecule imaging. This method is particularly valuable in thick autofluorescent samples where precise molecule counting is required [10] [22]. By identifying and counting individual mRNA molecules, researchers can obtain absolute quantitation of transcript numbers within their biological context.
Table 1: HCR v3.0 Quantitative Imaging Modes
| Imaging Mode | Quantitation Type | Resolution | Best Applications |
|---|---|---|---|
| qHCR Imaging | Analog relative quantitation | Subcellular | Expression gradients, comparative expression analysis |
| dHCR Imaging | Digital absolute quantitation | Single-molecule | Low-abundance transcripts, precise molecule counting |
The Scientist's Toolkit: Essential Research Reagents
Successful implementation of the HCR v3.0 workflow requires careful preparation and selection of key reagents. The following table outlines the essential components and their functions:
Table 2: Essential Research Reagents for HCR v3.0 Workflow
| Reagent / Material | Function / Purpose | Specifications / Notes |
|---|---|---|
| Split-Initiator Probe Pairs | Target mRNA recognition and initiator assembly | 15-20 pairs per transcript; 25-nt binding regions; designed for specificity |
| HCR Hairpin Amplifiers (H1/H2) | Signal amplification via polymerization | Fluorophore-labeled; kinetically trapped until initiated |
| Paraformaldehyde (PFA) | Tissue fixation and morphology preservation | 4% solution in PBS; often with 0.3% Triton X-100 for permeabilization [23] |
| Hybridization Buffer | Enables specific probe-target hybridization | Formamide-based for stringency control |
| Amplification Buffer | Facilitates HCR hairpin polymerization | Optimized salt concentrations for specific HCR amplifiers |
| Sylgard Dish | Specimen manipulation and processing | Provides resilient, non-reactive surface for dissections [23] |
| Antifungal agent 53 | Antifungal agent 53, MF:C18H15Cl3N2Se, MW:444.6 g/mol | Chemical Reagent |
| Hpk1-IN-35 | Hpk1-IN-35, MF:C30H32N8O3S, MW:584.7 g/mol | Chemical Reagent |
The Three-Day HCR v3.0 Workflow: Day-by-Day Protocol
Day 1: Sample Preparation and Probe Hybridization
The first day focuses on sample preparation and the crucial hybridization step where split-initiator probes recognize their target mRNA sequences.
Sample Fixation and Permeabilization: Begin with dissection of fresh tissue followed by immediate fixation in 4% paraformaldehyde (PFA). For optimal probe penetration, include 0.3% Triton X-100 in the PFA solution [23]. Fixation time varies by sample size and type (typically 30 minutes to 2 hours). After fixation, wash samples thoroughly with PBS and, if needed, perform additional permeabilization steps based on sample density and thickness.
Probe Hybridization: Prepare the hybridization mixture containing all split-initiator probe pairs for your target mRNAs. For multiplexed experiments, carefully design probe sets to avoid cross-reactivity. The standard hybridization protocol involves:
- Pre-hybridize samples in hybridization buffer for 15-30 minutes at the appropriate temperature (typically 37-45°C)
- Replace with fresh hybridization buffer containing probe sets (0.5-2 pmol per probe per 100 μL reaction)
- Hybridize overnight (12-16 hours) at the optimal temperature for your probes and sample type [23]
Day 2: Signal Amplification and Washes
The second day focuses on removing unbound probes and executing the controlled HCR amplification process.
Post-Hybridization Washes: Thorough washing is critical to remove non-specifically bound probes while retaining specifically bound ones. Perform a series of washes with SSC buffer (typically 5× SSC to 2× SSC) with appropriate additives to control stringency. Include a pre-amplification wash to equilibrate the sample in amplification buffer. All washes should be performed with gentle agitation at the hybridization temperature or slightly below [23].
HCR Amplification Reaction: Prepare the HCR hairpin working solution by annealing the H1 and H2 hairpins (typically 30-60 nM each in 5× SSC) according to the manufacturer's recommendations. Incubate samples in the hairpin solution for 2-4 hours at room temperature protected from light. This incubation period allows for the controlled, conditional self-assembly of amplification polymers exclusively on target-bound split-initiator pairs [10] [23].
Day 3: Mounting and Imaging
The final day prepares samples for imaging and data acquisition, with considerations for different quantification modalities.
Sample Mounting and Clearing: For optimal imaging, especially in thick samples, mount specimens in suitable mounting media. For whole-mount embryos or thick tissues, consider optical clearing techniques to reduce scattering and improve imaging depth. For delicate samples like whole-mount brains, embedding in polyacrylamide gel can provide structural support while maintaining optical clarity [23] [24].
Image Acquisition and Analysis: Acquire images using appropriate microscopy systems based on sample thickness and resolution requirements. For qHCR imaging, ensure the detection system operates in the linear range for accurate intensity measurements. For dHCR imaging, use high-sensitivity detectors (e.g., EMCCD or sCMOS) capable of detecting single fluorescent particles. For multiplexed experiments, acquire each channel sequentially to minimize bleed-through, using appropriate filter sets matched to your fluorophore combinations [10] [22].
Performance Metrics and Quantitative Data
The implementation of HCR v3.0 with automatic background suppression delivers measurable performance improvements across key parameters essential for high-quality mRNA imaging.
Signal-to-Background Performance
Comparative studies in challenging samples like whole-mount chicken embryos demonstrate the dramatic impact of automatic background suppression:
Background Suppression Efficiency: When using split-initiator probes, increasing probe set size from 5 to 20 probe pairs causes no measurable increase in background, whereas standard probes show dramatic background increases with larger probe sets [10]. This enables researchers to use larger probe sets for enhanced signal without background penalty.
Signal-to-Background Ratio: With split-initiator probes, the signal-to-background ratio increases monotonically with probe set size, while standard probes show a decreasing ratio as more probes are added [10]. Representative images show overlapping pixel intensity histograms for high-expression versus no-expression regions with standard probes, but clearly non-overlapping histograms with split-initiator probes, indicating superior discrimination capability [10].
Table 3: Quantitative Performance Comparison of HCR v3.0
| Performance Parameter | Standard Probes (v2.0) | Split-Initiator Probes (v3.0) |
|---|---|---|
| HCR Suppression Factor | 1x (baseline) | 50-60x improvement [10] |
| Background vs. Probe Set Size | Increases dramatically with size | No measurable increase with size [10] |
| Signal-to-Background Ratio Trend | Decreases with larger probe sets | Increases monotonically with size [10] |
| Probe Set Optimization Need | Often required for new targets | Minimal; unoptimized sets work well [10] |
Multiplexing Capabilities and Applications
HCR v3.0 maintains robust performance in multiplexed experiments, enabling researchers to visualize multiple mRNA targets simultaneously:
Simultaneous Multiplexing: The technology supports straightforward multiplexing with simultaneous one-stage signal amplification for multiple targets (demonstrated for up to five targets) [10]. This enables complex gene expression pattern analysis within an anatomical context.
Diverse Sample Compatibility: The protocol has been successfully applied to various challenging sample types, including whole-mount vertebrate embryos (zebrafish, chicken, mouse) [22], whole-mount insect brains (Anopheles gambiae) [23], and thick tissue sections [25]. The robust performance across diverse organisms highlights its versatility for comparative studies.
Advanced Applications and Integration
Combined RNA and Protein Detection
HCR v3.0 can be integrated with immunohistochemistry for simultaneous detection of mRNA and protein within the same sample:
Unified Detection Framework: Researchers have developed protocols for simultaneous quantitative protein and RNA imaging with one-step HCR signal amplification performed for all targets simultaneously [25]. This unified approach maintains subcellular resolution while providing accurate relative quantitation for both biomolecule types.
Workflow Integration: The combined protocol typically involves performing HCR first, followed by antibody labeling, though the order can be optimized based on antigen preservation needs [23]. Careful fluorophore selection is essential to minimize spectral overlap when designing multiplexed experiments.
Specialized Adaptations and Modifications
The core HCR v3.0 protocol can be adapted for specific research needs and sample types:
Tissue-Specific Optimizations: For challenging samples like insect brains, modifications include optimized polyacrylamide gel embedding and permeabilization strategies to balance morphology preservation with probe accessibility [23] [24]. These adaptations enable high-resolution imaging in tissues with inherent autofluorescence or structural complexity.
Alternative Amplification Strategies: Researchers have combined HCR with in situ rolling circle amplification (ISRCA) to create ISRCA-HCR, achieving an additional 17-fold signal amplification for detecting extremely low-abundance targets [26]. Such enhancements further expand the sensitivity frontier for specialized applications requiring ultra-sensitive detection.
Troubleshooting and Technical Considerations
Successful implementation of HCR v3.0 requires attention to several technical aspects that can impact result quality:
Probe Design Specificity: While HCR v3.0 is more tolerant of unoptimized probe sets, careful bioinformatic design remains important. Utilize available probe designer tools that assess melting temperature, GC content, and sequence similarity to other transcripts in the target genome [23]. Filter out oligos with high sequence similarity to non-target mRNAs (typically >60% identity) to ensure specificity.
Experimental Controls: Always include appropriate controls such as:
- No-probe controls to assess autofluorescence and non-specific hairpin binding
- Single-probe set controls for multiplexing experiments
- Known positive and negative expression controls for method validation
- For split-initiator probes, controls with only odd or even probes to verify suppression efficiency [10]
Fluorophore Selection and Imaging: When planning multiplexed experiments, use fluorescence spectra viewers to select fluorophore combinations with minimal emission overlap. For sequential imaging, establish optimal exposure times and acquisition order to minimize photobleaching and channel cross-talk.
Multiplexed mRNA imaging represents a cornerstone of spatial biology, enabling the precise mapping of gene expression patterns within their native cellular and tissue contexts. By moving beyond single-target detection, these techniques allow researchers to uncover complex gene regulatory networks, cellular heterogeneity, and spatiotemporal dynamics of expression that drive health and disease [27]. Among the various methodologies available, the Hybridization Chain Reaction v3.0 (HCR v3.0) protocol stands out for its unique combination of multiplexing capability, high specificity, and exceptionally low background, making it particularly valuable for applications requiring high signal-to-noise ratios in complex tissue environments [15] [28].
The fundamental principle underlying HCR v3.0 is a triggered, isothermal amplification process using split-initiator probes. This design ensures that signal amplification only occurs upon specific hybridization to the target mRNA, dramatically reducing non-specific background compared to traditional enzymatic amplification methods. The system operates through metastable DNA hairpin amplifiers that remain stable in solution until initiated by a target-bound probe, upon which they undergo a chain reaction of hybridization events to form a fluorescent polymer tethered directly to the mRNA molecule of interest [15]. This mechanism provides the foundation for robust, quantitative, and multiplexed RNA imaging that maintains subcellular resolution while enabling the simultaneous detection of multiple targets through orthogonal amplifier systems.
Performance Comparison of mRNA Imaging Techniques
The landscape of multiplexed mRNA imaging technologies has evolved significantly, with each method offering distinct advantages and limitations. MERFISH (Multiplexed Error-Robust Fluorescence In Situ Hybridization) utilizes combinatorial barcoding and sequential hybridization rounds to achieve exceptionally high multiplexing capabilities, potentially profiling tens of thousands of RNA species [29] [27]. In contrast, seqFISH (sequential FISH) employs direct hybridization of fluorescent probes in multiple rounds with intermediate stripping, while smFISH (single-molecule FISH) relies on multiple fluorophore-labeled probes per transcript to generate diffraction-limited spots detectable by standard microscopy [29] [27] [30]. Live-cell imaging approaches, such as the SunRISER (SunTag-based Reporter for Imaging Signal-Enriched mRNA) system, utilize bacteriophage-derived stem-loop arrays fused to target mRNAs, which are then bound by fluorescently labeled coat proteins, enabling long-term tracking of individual mRNA molecules in living cells [31] [32].
Table 1: Comparison of Multiplexed mRNA Imaging Technologies
| Technique | Multiplexing Capacity | Resolution | Cellular Context | Key Advantages | Primary Limitations |
|---|---|---|---|---|---|
| HCR v3.0 | Moderate (4-8 targets simultaneously) | Single-molecule | Fixed cells/tissues | Low background, quantitative, works in thick tissues | Limited signal for short/low-abundance targets |
| Next-Gen HCR (HCR-Cat/Immuno/Multi) | Moderate (4-8 targets) | Single-molecule to subcellular | Fixed cells/tissues, including thick cleared tissues | High sensitivity for challenging targets, retains specificity | HCR-Cat reduces spatial resolution |
| MERFISH | High (hundreds to thousands) | Single-molecule | Fixed cells/tissues | Extremely high multiplexing, error-robust encoding | Complex protocol, requires specialized instrumentation |
| seqFISH | High (dozens to hundreds) | Single-molecule | Fixed cells/tissues | High multiplexing with direct labeling | Multiple rounds of hybridization and stripping |
| smFISH | Low to moderate (typically 4-8) | Single-molecule | Fixed cells/tissues | Simple protocol, high specificity | Limited multiplexing without sequential rounds |
| SunRISER | Low to moderate (1-3 in practice) | Single-molecule | Living cells | Dynamic tracking over hours to days | Genetic modification required, limited multiplexing |
Table 2: Quantitative Performance Enhancement of Next-Generation HCR Methods Over HCR v3.0
| Method | Signal Increase (Fold) | Key Applications | Spatial Resolution | Implementation Complexity |
|---|---|---|---|---|
| HCR-Cat | ~240x (average across laser powers) | Short targets, low-abundance transcripts, thick tissues with autofluorescence | Reduced due to reporter diffusion | Moderate |
| HCR-Immuno | ~4.5x (average across laser powers) | Targets requiring enhanced sensitivity with preserved resolution | Maintains single-molecule resolution | Low to Moderate |
| HCR-Multi | ~70x (average across laser powers) | Extremely low-abundance targets | Maintains single-molecule resolution | High |
The data reveals that while HCR v3.0 provides exceptional specificity with low background, its sensitivity can be limiting for challenging targets. Next-generation HCR methods address this limitation while retaining the core advantages of the HCR system. HCR-Cat is particularly effective for difficult imaging environments such as thick tissues with high autofluorescence or for detecting short RNA targets that accommodate only a limited number of probes [15]. In one demonstration, HCR-Cat enabled robust detection of hypocretin (hcrt) mRNA in zebrafish using just a single probe pair, whereas HCR v3.0 failed to produce any detectable signal under the same conditions [15].
Advanced HCR Workflows for Enhanced Detection
HCR v3.0 with Immunofluorescence (WICHCR)
The Whole-mount Immuno-Coupled Hybridization Chain Reaction (WICHCR) protocol enables simultaneous detection of mRNA and protein targets in complex samples such as zebrafish embryos and larvae. This integrated approach expands the flexibility of multiplexed HCR by combining it with traditional immunofluorescence, allowing researchers to correlate transcriptional and translational events within the same spatial context [28].
The WICHCR workflow begins with sample fixation and permeabilization, followed by co-hybridization of HCR probe sets targeting specific mRNAs. After hybridization and washes, the HCR amplification is performed with fluorophore-conjugated hairpins. The sample is then processed for immunofluorescence, with incubation of primary antibodies against target proteins followed by fluorophore-conjugated secondary antibodies with spectral properties distinct from the HCR signals [28]. Critical to success is the careful selection of HCR B isoforms and antibody serotypes to ensure minimal cross-talk between detection channels.
Table 3: Essential Reagents for WICHCR Implementation
| Reagent Category | Specific Examples | Function | Source/Reference |
|---|---|---|---|
| HCR Probe Sets | zebrafish elavl3 (B2), phox2bb (B1) | Target-specific mRNA detection | Molecular Instruments, Inc. [28] |
| HCR Amplifiers | B1 546, B2 488, B3 514 | Signal amplification via hairpin polymerization | Molecular Instruments, Inc. [28] |
| Primary Antibodies | Rabbit anti-Sox10, Mouse anti-Hu C/D | Protein target recognition | Various commercial sources [28] |
| Secondary Antibodies | Alexa Fluor conjugates (488, 594, 647) | Fluorescent detection of primary antibodies | Thermo Fisher Scientific [28] |
| Specialized Buffers | HCR Hybridization, Wash, and Amplification Buffers | Optimized reaction conditions for HCR | Molecular Instruments, Inc. [28] |
Next-Generation HCR Methods for Challenging Targets
For targets that prove difficult to detect with standard HCR v3.0, three advanced approaches have been developed: HCR-Cat, HCR-Immuno, and HCR-Multi. Each provides substantially enhanced sensitivity through different mechanisms, with varying impacts on spatial resolution and implementation complexity [15].
HCR-Cat (HCR with Catalytic Reporter Deposition) replaces conventional fluorophores on HCR hairpins with haptens such as FITC or DIG. After HCR amplification, enzyme-conjugated antibodies (HRP or AP) specific to these haptens are applied, followed by catalytic deposition of fluorescent reporters. This method provides the greatest signal enhancement (~240-fold on average) but reduces spatial resolution due to diffusion of the deposited reporters [15].
HCR-Immuno retains hapten-labeled hairpins but detects them with primary antibodies followed by Alexa Fluor-conjugated secondary antibodies. This approach provides more moderate signal enhancement (~4.5-fold on average) while preserving spatial resolution, as the antibodies remain tethered to the HCR amplifiers at the target site [15].
HCR-Multi extends this concept through multiple rounds of HCR amplification for the same target. After the first round of HCR-Immuno, a secondary antibody labeled with an initiator enables additional rounds of HCR with hairpins conjugated to different haptens, followed by antibody detection. This method can provide dramatic signal enhancement (~70-fold on average) while maintaining spatial resolution [15].
Experimental Protocol: HCR v3.0 for Multiplexed mRNA Detection
Probe and Amplifier Design
Target Selection and Validation: Identify target mRNA sequences and corresponding NCBI Accession numbers. For each target, design an HCR probe set targeting specific regions of the transcript. A probe set consisting of 20 probe pairs is ideal, though smaller sets may still yield sufficient detection for abundant targets [28].
B Isoform Selection: Assign a unique B isoform to each target mRNA to enable multiplexing. Each B isoform corresponds to a specific initiator sequence that will trigger polymerization of its cognate amplifier hairpins. Carefully select non-overlapping B isoforms for simultaneous detection [28].
Amplifier Selection: Choose fluorophore-conjugated HCR amplifiers corresponding to the selected B isoforms. Ensure spectral compatibility between fluorophores and your imaging system's detection channels. For multiplexed experiments, select fluorophores with minimal spectral overlap to enable clear signal separation [28].
Sample Preparation and Hybridization
Sample Fixation and Permeabilization: Fix samples with 4% paraformaldehyde for 24 hours at room temperature. For tissue samples, embed in paraffin and section at appropriate thickness (5-20 μm). Deparaffinize and rehydrate sections following standard protocols. Permeabilize with proteinase K (10-20 μg/mL) for 15-30 minutes at room temperature [28].
Probe Hybridization: Apply HCR probe sets in HCR hybridization buffer to samples. Use approximately 2-4 pmol of each probe set per 100 μL of hybridization buffer. Hybridize overnight at 37°C in a dark, humidified chamber [28].
Post-Hybridization Washes: The following day, perform stringent washes with HCR wash buffer at 37°C. Use 4 washes of 15 minutes each with gentle agitation to remove non-specifically bound probes [28].
Signal Amplification and Detection
Hairpin Amplifier Preparation: Prepare HCR hairpin amplifiers by snap-cooling. Heat hairpins to 95°C for 90 seconds in HCR amplification buffer, then cool to room temperature in the dark for 30 minutes to allow proper secondary structure formation [28].
Amplification Reaction: Apply snap-cooled hairpins to samples and incubate at room temperature for 4-16 hours in complete darkness. The amplification time can be optimized based on target abundance and desired signal intensity [15] [28].
Final Washes and Mounting: After amplification, wash samples with 5× SSCT buffer (4 times, 15 minutes each, at room temperature) to remove excess hairpins. Counterstain nuclei with DAPI if desired, and mount samples with appropriate anti-fade mounting medium [28].
Imaging and Data Analysis
Image Acquisition: Image samples using a confocal microscope with appropriate laser lines and filter sets for the fluorophores used. For multiplexed experiments, acquire images sequentially to minimize bleed-through between channels. For thick samples, acquire z-stacks to enable three-dimensional reconstruction [30] [28].
Image Analysis and Quantification: Process images using analytical tools such as FISHtoFigure, which facilitates the analysis of transcript abundance and co-expression patterns in multi-labeled smFISH data without requiring extensive programming expertise [30]. The software enables automated cell segmentation, transcript counting, and differential expression analysis between experimental conditions.
Technical Considerations for Implementation
Optimization Strategies
When implementing HCR v3.0 for multiplexed mRNA imaging, several factors require careful optimization. Probe concentration and hybridization time should be titrated to maximize signal-to-noise ratio. For challenging targets with low abundance or in tissues with high autofluorescence, consider transitioning to next-generation HCR methods (HCR-Cat, HCR-Immuno, or HCR-Multi) that provide enhanced sensitivity while retaining the specificity of the HCR system [15].
The amplification time significantly impacts signal intensity and background. Shorter amplification times (4-6 hours) may be sufficient for abundant targets and can minimize background, while longer incubations (12-16 hours) enhance sensitivity for low-abundance targets. For HCR-Cat, reducing the enzymatic deposition time can help preserve spatial resolution [15].
Multiplexing Experimental Design
Successful multiplexing requires careful experimental design. When planning multi-target experiments, ensure that each RNA target is assigned a unique B isoform with a spectrally distinct fluorophore. Use online tools such as FPbase.org to compare fluorophore emission spectra and select optimal combinations that minimize spectral overlap for your specific imaging system [28].
For simultaneous detection of 3-5 targets, a careful balance of fluorophore brightness and abundance is essential. Assign brighter fluorophores (e.g., Alexa Fluor 488, Alexa Fluor 546) to lower-abundance targets, and less bright fluorophores to more abundant targets to achieve balanced signal intensity across channels [28].
Troubleshooting Common Issues
- High Background: Reduce probe concentration, increase wash stringency (higher temperature or formamide concentration), or shorten amplification time.
- Weak Signal: Increase probe concentration, extend hybridization or amplification time, or transition to next-generation HCR methods for enhanced sensitivity.
- Uneven Staining: Ensure adequate mixing during hybridization and amplification steps, and confirm that samples are fully submerged in solutions.
- Channel Bleed-Through: Reconfigure fluorophore combinations to increase spectral separation, or implement sequential imaging with spectral unmixing.
Multiplexed mRNA imaging using HCR v3.0 and its next-generation derivatives provides a powerful toolkit for spatial transcriptomics in fixed cells and tissues. The exceptional specificity and low background of HCR v3.0 make it ideally suited for applications requiring high confidence in detection, while the enhanced sensitivity of HCR-Cat, HCR-Immuno, and HCR-Multi extends these capabilities to challenging targets such as short transcripts, low-abundance mRNAs, and samples with high autofluorescence. The compatibility of HCR with whole-mount specimens, thick tissue sections, and simultaneous protein detection further expands its utility across diverse research applications from developmental biology to neuroscience and disease mechanism studies. As these technologies continue to evolve, they promise to further unravel the complex spatial organization of gene expression that underpins cellular function in health and disease.
Biological research, drug development, and pathology increasingly demand techniques that can reveal the spatial organization of molecular circuitry within its native anatomical context. For decades, spatial mapping of RNA and protein expression has relied on RNA in situ hybridization (RNA-ISH) and immunohistochemistry (IHC). However, traditional amplification methods, particularly enzyme-mediated catalytic reporter deposition (CARD), have persistent shortcomings. These include cumbersome multiplexing, non-quantitative results, and compromised spatial resolution due to reporter diffusion [33].
The advent of Hybridization Chain Reaction v3.0 (HCR) has introduced an enzyme-free, isothermal amplification method that overcomes these limitations. This approach enables multiplexed, quantitative, high-resolution imaging of RNA in highly autofluorescent samples. Recently, this powerful methodology has been extended to protein detection, creating a unified framework for simultaneous RNA and protein imaging with a single amplification step. This protocol, framed within HCR v3.0 low-background research, provides researchers with a robust tool for sophisticated molecular analyses [33] [34].
Theoretical Foundation of HCR v3.0
HCR is a triggered self-assembly process. The core mechanism involves DNA hairpins that remain metastable until they encounter a specific DNA initiator strand. Upon binding, the hairpins undergo a chain reaction to form a fluorescent amplification polymer, tethered directly to the target site.
Key Innovations in HCR v3.0:
- Split Initiator Probes: HCR v3.0 uses two DNA probes that must bind adjacently on the target to form a complete initiator sequence. This requirement drastically reduces non-specific amplification and background signal, enhancing specificity and sensitivity [35] [36].
- Tethered Amplification: Unlike diffusive enzymatic methods, the HCR polymer grows from the initiation site, ensuring the signal remains localized to the target. This provides subcellular resolution and enables accurate quantitation [33].
- Orthogonal Amplifiers: Multiple, independent HCR systems can operate simultaneously in a single sample. Each system uses unique hairpin pairs that only respond to their corresponding initiator, allowing straightforward multiplexing [33] [34].
The following diagram illustrates the core mechanism of HCR signal amplification for both RNA and protein targets.
Advantages of the Unified HCR Framework
The unified HCR approach offers significant benefits over traditional methods, as summarized in the table below.
Table 1: Key Advantages of Unified HCR Imaging over Traditional Methods
| Feature | Traditional CARD | Unified HCR | Benefit to Researcher |
|---|---|---|---|
| Multiplexing Capability | Cumbersome, requires serial staining [33] | Straightforward, one-step for all targets [33] [34] | Saves time; enables complex co-localization studies |
| Quantitative Nature | Qualitative, non-linear amplification [33] | Quantitative, ~linear signal-to-target relationship [33] | Enables accurate relative quantitation of expression levels |
| Spatial Resolution | Diffused, compromised by reporter deposition [33] | High, tethered amplification polymers [33] | Preserves subcellular and single-molecule resolution |
| Protocol Workflow | Varies with target number and type | Unified and robust, independent of target number [34] [37] | Simplifies experimental planning and execution |
| Sample Compatibility | Challenging in autofluorescent samples | Excellent for highly autofluorescent samples (e.g., whole-mount embryos, FFPE sections) [33] [36] | Expands range of viable specimens for analysis |
Detailed Experimental Protocols
This section provides detailed methodologies for implementing the unified HCR-IHC framework, adaptable for various sample types.
Protocol 1: HCR 2°IHC for Protein Imaging
This approach uses unlabeled primary antibodies followed by initiator-labeled secondary antibodies, leveraging existing antibody libraries [33].
Workflow Diagram: HCR 2°IHC and RNA-FISH
Procedure:
- Sample Preparation: Fix and permeabilize samples. For formalin-fixed paraffin-embedded (FFPE) tissues, perform standard deparaffinization and antigen retrieval [33].
- Primary Antibody Incubation: Apply unlabeled primary antibodies raised in different host species for each target protein. Incubate, then wash.
- Secondary Antibody Incubation: Apply species-specific secondary antibodies, each conjugated to a unique HCR initiator. Incubate, then wash [33].
- HCR Amplification: Simultaneously add all fluorophore-labeled HCR hairpin pairs corresponding to the initiators on the secondary antibodies. Incubate for 4-6 hours at room temperature. This one-step amplification is enzyme-free and isothermal [33] [37].
- Imaging: Wash samples and image using epifluorescence or confocal microscopy.
Protocol 2: HCR 1°IHC for Protein Imaging
This method uses primary antibodies directly labeled with HCR initiators, offering species-free multiplexing.
Procedure:
- Sample Preparation: Identical to Protocol 1.
- Probe Application: Apply initiator-conjugated primary antibody probes. Different protein targets can be detected using antibodies from the same host species [33].
- HCR Amplification: Simultaneously add all fluorophore-labeled HCR hairpin pairs. Incubate and wash as in Protocol 1 [33].
- Imaging: Proceed with image acquisition.
Note: Each initiator-labeled primary antibody must be validated, as the conjugation process can potentially interfere with epitope binding [33].
Protocol 3: Unified HCR for Simultaneous RNA and Protein Imaging (SHInE)
The SHInE protocol combines HCR RNA-FISH, IHC, and optional proliferation labeling (EdU) in a single, streamlined workflow, saving experimental time [35].
Procedure:
- Sample Preparation: Includes steps for EdU incorporation if labeling proliferating cells [35].
- Unified Binding:
- Apply unlabeled primary antibodies for protein targets.
- Apply HCR split-initiator probe pairs for RNA targets.
- Unified Detection & Amplification:
- Apply initiator-labeled secondary antibodies.
- Simultaneously perform HCR amplification for all RNA and protein targets.
- Perform the EdU "click" reaction if applicable [35].
- Optional Tissue Clearing: Compatible with clearing methods like DEEP-Clear for improved imaging in thick or opaque samples [35].
- Imaging: Acquire high-resolution images via confocal microscopy.
Applications and Validation
The unified HCR framework has been rigorously validated across diverse sample types and experimental needs.
Table 2: Quantitative Performance of HCR Imaging Across Sample Types
| Sample Type | Targets Imaged | Method | Estimated Signal-to-Background (Range) | Key Demonstration |
|---|---|---|---|---|
| FFPE Mouse Brain Sections | 4-plex protein [33] | HCR 1°IHC & 2°IHC | 15 to 609 (Median: 90) [33] | High-resolution imaging in highly autofluorescent tissue |
| Mammalian Cells | 3-plex protein [33] | HCR 1°IHC & 2°IHC | Not Specified | Subcellular protein localization |
| Whole-Mount Zebrafish Embryos | Protein and RNA [33] [34] | Unified HCR | Not Specified | Quantitative imaging in complex, opaque specimens |
| Drosophila Brain | IEG hr38 RNA [36] | HI-FISH (HCR v3.0) | Low background, high specificity [36] | Brain-wide mapping of neuronal activity during social behavior |
| Marine Bristleworm | RNA, Protein, EdU [35] | SHInE Protocol | Not Specified | Validation of single-cell sequencing data; study of regeneration |
Key Biological Insights:
- Neuroscience: The HI-FISH method maps neuronal activation in Drosophila brains during social behaviors like aggression and courtship, identifying specific activated neurons with high sensitivity and low background [36].
- Development & Disease: The ability to perform relative quantitation of RNA and protein in FFPE human breast tissue sections and whole-mount vertebrate embryos provides a powerful tool for analyzing developmental and disease-related regulatory networks [33].
- Cross-Species Research: Compatibility with non-model organisms like the marine bristleworm enables functional insights in a wide range of species, aided by protocols that work with custom probes and antibodies [35].
The Scientist's Toolkit
Essential reagents and materials for implementing unified HCR imaging.
Table 3: Essential Research Reagent Solutions for Unified HCR Imaging
| Item | Function | Specification & Notes |
|---|---|---|
| HCR HiFi Probes | Detect specific RNA targets via split-initiator design [34] [37] | Designed for any organism; available from commercial sources or custom-designed. |
| HCR Hairpin Amplifiers | Fluorophore-labeled DNA hairpins for signal amplification [33] [34] | Purchased as orthogonal sets (B1, B2, B3, etc.) for multiplexing. |
| HCR 2° Antibody Probes | Detect primary antibodies and carry HCR initiators [33] [37] | Anti-host species antibodies; validate for minimal cross-reactivity. |
| HCR HiFi Encoder | Conjugate HCR initiators to primary antibodies for HCR 1°IHC [34] | Enables use of same-host species antibodies for multiplexed protein detection. |
| Buffers | For hybridization, washing, and amplification [33] [35] | Follow standardized protocols for optimal signal and low background. |
| Primary Antibodies | Detect protein targets of interest. | For HCR 2°IHC, must be raised in different host species. Validated for specific application. |
| Click-iT EdU Kit (Optional) | Label proliferating cells for combination assays [35] | Compatible with SHInE protocol for multi-parameter analysis. |
| MraY-IN-3 | MraY-IN-3, MF:C35H45N3O5, MW:587.7 g/mol | Chemical Reagent |
| Lerzeparib | Lerzeparib, CAS:2459693-01-5, MF:C21H20FN3O2, MW:365.4 g/mol | Chemical Reagent |
The unified RNA and protein imaging framework based on HCR v3.0 represents a significant advancement in spatial molecular biology. By providing a single, robust, and quantitative amplification protocol for both types of biomolecules, it overcomes the long-standing limitations of traditional methods. The key features of straightforward multiplexing, high signal-to-background, subcellular resolution, and application in highly autofluorescent samples make it an indispensable tool for researchers and drug developers aiming to unravel complex gene and protein regulatory networks within their native anatomical context.
In situ hybridization chain reaction v3.0 (HCR v3.0) represents a significant advancement in molecular imaging, offering multiplexed, quantitative mRNA detection with inherent low background due to its automatic background suppression mechanism [10]. This technology employs split-initiator probes that only trigger amplification upon co-localization on a target mRNA, dramatically reducing non-specific signal [10]. While HCR v3.0 has proven effective for standard samples, challenging specimens such as formalin-fixed paraffin-embedded (FFPE) tissues, complex neuronal tissues, and environmentally complex marine sediments present unique barriers to optimal performance. This application note provides detailed protocols and optimization strategies to adapt HCR v3.0 for these demanding environments, enabling researchers to achieve high-quality spatial RNA data across diverse experimental contexts.
Core Principles and Advantages
HCR v3.0 utilizes an enzyme-free, isothermal amplification system where two kinetically trapped DNA hairpins (H1 and H2) undergo chain reaction polymerization upon exposure to an initiator sequence [10]. The key innovation in v3.0 is the replacement of standard full-initiator probes with cooperative split-initiator probes, where each probe carries only half of the HCR initiator sequence [10]. This design ensures that amplification occurs conditionally only when both probes hybridize adjacently on the target mRNA, providing automatic background suppression throughout the protocol.
The technology offers three primary analysis modes: (1) qHCR imaging for analog mRNA relative quantitation with subcellular resolution; (2) qHCR flow cytometry for high-throughput expression profiling; and (3) dHCR imaging for digital mRNA absolute quantitation via single-molecule imaging [10]. These capabilities make HCR v3.0 particularly valuable for spatial transcriptomics in anatomical context.
Workflow Visualization
The following diagram illustrates the core mechanism of HCR v3.0 with split-initiator probes:
Sample-Specific Challenges and Solutions
Different sample types present unique challenges for HCR v3.0. The table below summarizes key obstacles and corresponding adaptation strategies:
Table 1: Challenges and Adaptation Strategies for Different Sample Types
| Sample Type | Primary Challenges | Adaptation Strategies |
|---|---|---|
| FFPE Tissue Sections | Protein cross-linking, nucleic acid fragmentation, high autofluorescence [38] | Enhanced antigen retrieval, optimized permeabilization, protease treatment [38] |
| Neuronal Tissue | High lipid content, complex morphology, low-abundance targets, need for volumetric imaging [15] | Tissue clearing, enhanced signal amplification (HCR-Cat, HCR-Immuno), multiplexed protocols [15] |
| Marine Sediments | Environmental inhibitors, microbial diversity, low biomass, non-specific binding [10] | Extensive controls, probe validation, sample purification, buffer optimization |
FFPE Tissue Sections
Protocol Adaptations for FFPE Samples
Based on established methodologies for HCR v3.0 in FFPE human tissue sections [38], the following protocol has been optimized for challenging specimens:
Deparaffinization and Rehydration:
- Bake paraffin sections at 65°C for 30 minutes
- Deparaffinize with Xylene (2 × 4 minutes)
- Rehydrate through ethanol series: 100% EtOH (3 × 4 minutes), 95% EtOH (2 minutes), 70% EtOH (2 minutes), nuclease-free water (2 × 2 minutes)
Permeabilization and Protein Digestion:
- Treat with proteinase K (Roche, 1:3000 in PBS-DEPC) for 5 minutes at 37°C [38]
- Rinse slides 2 × 2 minutes with nuclease-free water
- Immediately process for HCR hybridization
Hybridization and Amplification:
- Perform 30-minute pre-hybridization in probe hybridization buffer
- Incubate with probe solution (0.4 pmol per probe in probe hybridization buffer) overnight at 37°C [38]
- Prepare HCR hairpins (4.5 pmol of H1 and 4.5 pmol of H2) by snap-cooling (95°C for 90 seconds, 5 minutes on ice, followed by 30 minutes at room temperature)
- Add hairpins to 75 µL of amplification buffer and incubate overnight at room temperature
- Wash 3 × 10 minutes with 5X SSCT to remove excess hairpins
Neuronal Tissue
Enhanced Detection Methods
For low-abundance neuronal targets and thick tissue imaging, next-generation HCR methods significantly improve detection sensitivity while maintaining the specificity of HCR v3.0 [15]:
HCR-Cat (HCR with Catalytic Deposition):
- Use HCR amplifiers labeled with fluorescein isothiocyanate (FITC) instead of conventional fluorophores
- Detect FITC with specific antibodies conjugated to horseradish peroxidase (HRP) or alkaline phosphatase (AP)
- Perform catalytic deposition of fluorescent or chromogenic reporters
- This approach increases signal intensity up to 240-fold compared to standard HCR v3.0 [15]
HCR-Immuno:
- Detect haptens conjugated to HCR hairpins with primary antibodies
- Use Alexa Fluor-conjugated secondary antibodies for detection
- Provides ~4.5-fold signal increase while preserving spatial resolution [15]
HCR-Multi:
- Perform multiple rounds of HCR for the same target
- After HCR-Immuno, use a secondary antibody labeled with an initiator for another round of HCR
- Achieves ~70-fold signal increase compared to HCR v3.0 [15]
Workflow for Enhanced Detection
The following diagram illustrates the HCR-Cat method for improved sensitivity in neuronal tissue:
Tissue Clearing for Volumetric Imaging
For thick neuronal tissues, combine HCR v3.0 with tissue clearing techniques:
- Use PACT-clearing for 600 μm brain sections [15]
- Perform HCR v3.0 or HCR-Cat before clearing
- Refractive index matching after amplification
- Enables deep-tissue imaging with minimal signal loss
Marine Sediments
Special Considerations for Environmental Samples
Marine sediments present unique challenges including environmental inhibitors, diverse microbial communities, and potential non-specific binding. While specific HCR v3.0 protocols for marine sediments are not detailed in the available literature, the following adaptations are recommended based on general principles:
Sample Pre-treatment:
- Implement gentle homogenization to preserve microbial morphology
- Include controls for non-specific binding using scrambled probes
- Consider sample purification to remove PCR inhibitors and humic acids
Probe Design and Validation:
- Design probes targeting conserved regions of microbial rRNA
- Validate specificity using Blast2GO or similar tools to minimize off-target hybridization [38]
- Test probe performance with fluorescence in situ hybridization (FISH) before HCR application
Hybridization Optimization:
- Adjust formamide concentrations in hybridization buffer to maximize specificity
- Extend hybridization times for difficult-to-penetrate samples
- Include negative controls without probes and with competitor DNA
Quantitative Performance Data
The quantitative performance of HCR v3.0 and its enhanced variants across different sample types is summarized below:
Table 2: Quantitative Performance of HCR Methods Across Sample Types
| Method | Signal Enhancement | Background Suppression | Optimal Application |
|---|---|---|---|
| HCR v3.0 Standard | Baseline | ~50-fold suppression with split-initiator probes [10] | General use, high-abundance targets |
| HCR-Cat | ~240-fold increase [15] | Maintains low background of HCR v3.0 | Low-abundance targets, short RNAs, thick tissues |
| HCR-Immuno | ~4.5-fold increase [15] | Maintains spatial resolution | Multiplexing, subcellular localization |
| HCR-Multi | ~70-fold increase [15] | Requires optimization to minimize background | Extremely low-abundance targets |
Research Reagent Solutions
The following table details essential reagents and materials for implementing HCR v3.0 in challenging samples:
Table 3: Essential Research Reagents for HCR v3.0 Applications
| Reagent/Material | Function | Example Specifications |
|---|---|---|
| Split-Initiator Probe Pairs | Target-specific detection with automatic background suppression | 25 nt target-binding sites, BLAST-validated [38] |
| DNA HCR Hairpins (H1, H2) | Signal amplification through chain reaction polymerization | Snap-cooled (95°C, 90s), fluorophore-labeled [38] |
| Proteinase K | Tissue permeabilization and antigen retrieval | 1:3000 dilution in PBS-DEPC, 5min at 37°C [38] |
| HCR Amplification Buffer | Optimal conditions for HCR polymerization | Provided in commercial kits or formulated in-lab |
| Anti-FITC Antibody (HRP-conjugated) | Enzyme conjugation for HCR-Cat detection | Used with FITC-labeled HCR hairpins [15] |
| Tyramide Signal Amplification Reagents | Catalytic deposition for enhanced signal | Fluorophore-tyramide conjugates for HCR-Cat [15] |
| Tissue Clearing Reagents | Volumetric imaging of thick samples | PACT clearing for 600μm sections [15] |
Troubleshooting and Quality Control
Optimization of Probe Sets
For all sample types, proper probe validation is essential:
- Test probes individually before multiplexing [38]
- Perform HCR on at least three biological replicates per probe
- Include controls for autofluorescence in different channels
- Assess non-specific amplifier binding with no-probe controls
- For FFPE tissues, optimize proteinase K concentration and incubation time to balance signal preservation with tissue integrity
Signal Intensity Optimization
For low-signal samples:
- Increase probe concentration (typically 0.4-2 pmol per probe)
- Extend hybridization time (overnight to 48 hours)
- Use HCR-Cat or HCR-Multi for low-abundance targets [15]
- For neuronal tissues, consider tissue clearing to improve probe accessibility
Background Reduction
For high-background samples:
- Verify split-initiator probe design (avoid using single full-initiator probes)
- Increase stringency of washes (adjust salt concentration and temperature)
- Include additional pre-hybridization steps with blocking agents
- For marine sediments, include extensive negative controls with environmental samples
HCR v3.0 provides a robust platform for spatial RNA detection across diverse challenging sample types. The adaptations detailed in this application note – including enhanced permeabilization for FFPE tissues, signal amplification strategies for neuronal targets, and rigorous controls for complex environmental samples – enable researchers to overcome the unique barriers presented by these specimens. By implementing these optimized protocols and leveraging the automatic background suppression inherent to HCR v3.0, researchers can achieve high-quality, quantitative spatial gene expression data even from the most difficult sample preparations.
Optimizing Performance and Overcoming Common Challenges
Hybridization Chain Reaction v3.0 (HCR v3.0) represents a significant advancement in in situ hybridization technology, introducing a mechanism of automatic background suppression that fundamentally changes how researchers approach probe design and experimental optimization [10]. Unlike previous generations of HCR that utilized standard probes carrying a full HCR initiator (I1), HCR v3.0 employs pairs of split-initiator probes, each carrying only half of the initiator sequence [10]. This innovative design ensures that HCR signal amplification occurs conditionally—only when both probes bind specifically to adjacent sites on the target mRNA. This automatic background suppression dramatically enhances experimental robustness by eliminating amplified background from non-specifically bound probes, allowing researchers to use larger, unoptimized probe sets while maintaining high signal-to-background ratios [10]. Within this framework, optimizing initiator probe concentration and hybridization conditions becomes paramount for achieving maximum sensitivity and specificity, particularly for challenging targets such as short RNAs or low-abundance transcripts in complex tissue environments.
Key Optimization Parameters and Quantitative Data
The performance of HCR v3.0 is governed by several critical parameters that interact to determine the final signal-to-background ratio, sensitivity, and specificity. The transition from HCR v2.0 to HCR v3.0 has shifted the optimization focus from probe selection to biochemical conditions, as the split-initiator system inherently suppresses background. The table below summarizes the core parameters and their optimal ranges based on empirical studies.
Table 1: Critical Optimization Parameters for HCR v3.0
| Parameter | Recommended Range | Impact on Performance | Notes and References |
|---|---|---|---|
| Probe Concentration | 1-10 nM per split-initiator probe | Higher concentrations increase signal but risk off-target binding; optimal balance is crucial. [10] | Varies by target accessibility and abundance. |
| Probe Set Size | 10-20 probe pairs | Larger sets improve signal-to-background; HCR v3.0 allows use of unoptimized large sets. [10] | In v3.0, background remains low even with 20 probe pairs. [10] |
| Hybridization Temperature | 37°C | Critical for specificity; lower temperatures may increase non-specific binding. | Must be optimized for specific tissue and fixation conditions. |
| Hybridization Time | 12-48 hours | Longer incubations can improve probe penetration in thick samples. | Duration depends on sample size and permeability. |
| HCR Amplification Time | 4-12 hours | Longer amplification increases signal intensity. | Signal scales approximately linearly with target molecules. [15] |
| Sample Thickness | 100 μm - whole mount | HCR v3.0 with optimization is effective in thick, autofluorescent samples. [15] [10] | Enhanced protocols (HCR-Cat) enable deep tissue imaging. [15] |
The quantitative impact of these optimizations is profound. Gel studies demonstrate that split-initiator probes provide typical HCR suppression of approximately 60-fold compared to standard probes, meaning dramatically reduced background [10]. In biological samples, this translates to HCR suppression of about 50-fold, enabling clear discrimination between signal and background [10]. When further enhanced with methods like HCR-Cat (HCR with catalytic reporter deposition), signal intensities can be increased by an average of 240-fold compared to standard HCR v3.0, enabling detection of targets even with a single probe pair where traditional HCR v3.0 fails completely [15].
Detailed Experimental Protocols
Protocol A: Standard HCR v3.0 for mRNA Detection in Whole-Mount Samples
This protocol is optimized for detecting mRNA in whole-mount zebrafish embryos or similar model systems, providing a balance between signal intensity and spatial resolution.
Reagents and Materials:
- Split-initiator probe sets (20 probe pairs per target, 25 nt binding site each)
- HCR v3.0 hairpin amplifiers (H1 and H2) labeled with fluorophores (e.g., Alexa Fluor dyes)
- Hybridization buffer (e.g., with 30% formamide for stringency)
- Probe wash buffer (e.g., SSC buffer with 0.1% Tween-20)
- Amplification buffer (5x SSC, 0.1% Tween-20)
- Molecular biology grade water
Procedure:
- Sample Preparation:
- Fix samples with appropriate fixative (e.g., 4% PFA for zebrafish embryos) for 24 hours at 4°C.
- Permeabilize with proteinase K (e.g., 10 μg/mL for 30 minutes) and post-fix if necessary.
Hybridization:
- Dilute split-initiator probes to a final concentration of 2 nM each in hybridization buffer.
- Incubate samples with probe solution for 36-48 hours at 37°C with gentle agitation.
- Perform stringent washes: 4x15 minutes with wash buffer at 37°C to remove unbound probes.
Signal Amplification:
- Prepare HCR hairpins (H1 and H2) by snap-cooling: heat to 95°C for 90 seconds and cool to room temperature for 30 minutes in the dark.
- Dilute snap-cooled hairpins to 60 nM in amplification buffer.
- Incubate samples with hairpin solution for 12-16 hours at room temperature in the dark.
- Wash samples 3x for 20 minutes with amplification buffer to remove unbound hairpins.
Imaging and Analysis:
- Mount samples in appropriate mounting medium for confocal or light-sheet microscopy.
- For quantitative analysis, ensure laser power and detector settings are consistent across comparisons.
Protocol B: Enhanced Sensitivity HCR-Cat for Challenging Targets
This protocol builds on HCR v3.0 by adding enzymatic amplification, providing extreme sensitivity for detecting short or low-abundance targets in thick, autofluorescent tissues [15].
Reagents and Materials:
- HCR v3.0 hairpin amplifiers labeled with FITC instead of standard fluorophores
- Primary antibody: Anti-FITC conjugated to Horseradish Peroxidase (HRP)
- Fluorescent tyramide substrates for signal development
- Blocking solution (e.g., 5% normal goat serum in PBS)
- Antibody dilution buffer
Procedure:
- Perform HCR v3.0:
- Complete steps 1-3 from Protocol A using FITC-labeled HCR hairpins.
Immunostaining and Catalytic Amplification:
- Block samples with blocking solution for 2 hours at room temperature.
- Incubate with anti-FITC-HRP antibody (1:500 dilution) overnight at 4°C.
- Wash 4x for 15 minutes with PBS containing 0.1% Tween-20.
- Develop signal with fluorescent tyramide substrate according to manufacturer's instructions, typically for 10-30 minutes.
- Stop the reaction with multiple washes of PBS.
Tissue Clearing (Optional for Thick Samples):
- For samples >200 μm, clear using PACT or iDISCO+ methods [15].
- Refractive index matching for deep imaging.
Visualization of Workflows and Mechanisms
HCR v3.0 Mechanism with Split-Initiator Probes
Diagram 1: HCR v3.0 mechanism with split-initiator probes for low background.
HCR-Cat Workflow for Enhanced Sensitivity
Diagram 2: HCR-Cat workflow for enhanced sensitivity in challenging samples.
Comparison of HCR Generations and Enhancements
Diagram 3: Evolution of HCR generations and enhancement methodologies.
Research Reagent Solutions
The successful implementation of HCR v3.0 and its enhanced variants requires specific reagents designed to maintain the automatic background suppression while providing the necessary detection signals. The table below outlines the essential research reagent solutions and their functions in HCR experiments.
Table 2: Essential Research Reagents for HCR v3.0 Optimization
| Reagent Category | Specific Examples | Function and Importance | Optimization Notes |
|---|---|---|---|
| Split-Initiator Probes | 25 nt DNA probes with partial initiator sequences | Fundamental to HCR v3.0; enable conditional initiation and automatic background suppression. [10] | Design 10-20 pairs per target; binding sites should be adjacent on target mRNA. |
| HCR Hairpin Amplifiers | H1 and H2 DNA hairpins with fluorophore labels (Alexa Fluor dyes) | Form amplification polymers upon initiation; provide primary signal detection. [10] | Must be snap-cooled before use to ensure proper kinetically trapped structure. |
| Hapten-Labeled Hairpins | FITC-conjugated or DIG-conjugated HCR hairpins | Enable enhanced detection methods (HCR-Cat, HCR-Immuno) for increased sensitivity. [15] | Essential for detecting short RNAs or low-abundance targets with limited probes. |
| Enzyme-Conjugated Antibodies | Anti-FITC-HRP, Anti-DIG-AP | Used in HCR-Cat for catalytic deposition of fluorescent reporters; dramatically increase signal. [15] | Titration required to minimize background while maximizing signal enhancement. |
| Catalytic Substrates | Fluorescent tyramide reagents | Precipitated by HRP enzyme to deposit multiple fluorophores per target; enables extreme signal amplification. [15] | Development time must be optimized to prevent diffusion artifacts and maintain resolution. |
| Tissue Clearing Reagents | PACT, iDISCO+ solutions | Enable deep imaging in thick tissue samples by reducing light scattering and autofluorescence. [15] | Required for samples >200 μm to achieve adequate probe penetration and imaging depth. |
Autofluorescence, the non-specific background emission of light by biological structures and pigments, presents a significant challenge in fluorescence microscopy. This is particularly true in the context of advanced, highly sensitive detection methods like Hybridization Chain Reaction v3.0 (HCR v3.0), where it can obscure specific signal and compromise data quality. The issue is especially pronounced in aging tissues, fixed samples, and whole-mount embryos. Among the most problematic autofluorescent substances is lipofuscin, an age-related pigment that accumulates in lysosomes of post-mitotic cells and exhibits a broad emission spectrum that overlaps with common fluorophores [39] [40]. This application note details the primary sources of autofluorescence and provides validated, quantitative strategies for its effective management within HCR v3.0 workflows, enabling clearer imaging and more robust data for researchers and drug development professionals.
Autofluorescence arises from multiple endogenous and exogenous sources. Key contributors include:
- Lipofuscin: A non-degradable intralysosomal, yellow-brown pigment composed of oxidized proteins, lipids, and metals. Its accumulation is a hallmark of cellular senescence and aging, and it emits strong, broad-spectrum autofluorescence from blue to red wavelengths, making it a primary confounder in neural, retinal, and aged tissues [41] [39] [40].
- Aldehyde Fixation: Fixation with paraformaldehyde or glutaraldehyde can induce autofluorescence through cross-linking, which is often most problematic in the green and red channels [42] [40].
- Extracellular Matrix Components: Collagen and elastin fibers are naturally autofluorescent [39] [40].
- Red Blood Cells and Hemosiderin: These can contribute significant background, particularly in highly vascularized tissues [39] [40].
The broad emission spectrum of lipofuscin and other sources often overlaps with the emission spectra of standard fluorophores (e.g., Alexa Fluor dyes), leading to a low signal-to-background ratio that can mask specific labeling and complicate multiplexed imaging [39] [40].
Quantitative Comparison of Autofluorescence Reduction Strategies
The following table summarizes the performance and characteristics of the primary autofluorescence management strategies discussed in this note.
Table 1: Quantitative Comparison of Autofluorescence Reduction Methods
| Method | Reported Efficacy | Key Mechanism | Compatibility with HCR v3.0 | Key Advantages | Key Limitations |
|---|---|---|---|---|---|
| HCR v3.0 Split-Initiator Probes [10] | ~50-fold background suppression in situ | Automatic background suppression via split-DNA initiators that require co-localization on target mRNA | Native to the technology | Dramatically reduced amplified background; enables use of unoptimized probe sets | Requires specific probe design |
| TrueBlack Lipofuscin Quencher [43] [40] | N/A (Qualitatively "very effective") | Lipophilic dye that binds to and quenches lipofuscin granules | Compatible (Validated for use with HCR on human neuronal tissue [43]) | Effective lipofuscin quenching; lower far-red fluorescence than Sudan Black B | May slightly quench specific fluorescent signal |
| mLED Photo-Quenching [39] | 95 ± 1% LAF reduction | High-intensity, multispectral LED exposure to photobleach autofluorophores | Compatible (Validated with RNAscope FISH [39]) | Preserves specific probe fluorescence; effective across species | Requires specialized LED equipment |
| Sudan Black B (SBB) [41] [42] | N/A (Qualitatively "effective") | Lipophilic dye that binds to lipid component of lipofuscin | Not Compatible (Causes V3HCR signal loss [43]) | Cost-effective; widely documented | Fluoresces in red/far-red; not suitable for HCR v3.0 |
| Chemical Quenchers (e.g., CuSOâ‚„) [42] | Variable | Chemical reduction of autofluorescence | Not Compatible (Causes V3HCR signal loss [43]) | Simple protocol | Can reduce specific staining; not robust across tissues |
Detailed Experimental Protocols
Protocol 1: Integrating TrueBlack Lipofuscin Autofluorescence Quencher with HCR v3.0
This protocol is adapted for HCR v3.0 on tissue sections, using a pre-treatment method to minimize effects on fluorophores [43] [40].
- Reagents: TrueBlack Lipofuscin Autofluorescence Quencher (Biotium, #23007), 70% Ethanol, Phosphate Buffered Saline (PBS), standard HCR v3.0 reagents (probes, amplifiers, buffers).
- Equipment: Fluorescence microscope, humidification chamber, standard slide staining setup.
Procedure:
- Tissue Pre-processing: Process frozen or FFPE tissue sections according to your standard HCR v3.0 protocol [43]. For FFPE, perform deparaffinization and antigen retrieval. For frozen sections, air-dry and fix.
- Permeabilization: Permeabilize sections with detergent if required for your antigen.
- Rinse: Rinse slides thoroughly in PBS to remove detergent.
- Prepare TrueBlack Solution: Dilute the 20X TrueBlack stock solution 1:20 in 70% ethanol to make a 1X working solution.
- Quenching Incubation: Blot excess PBS from slides and place them on a level rack. Completely cover each tissue section with 50-100 µL of 1X TrueBlack solution. Incubate for 30 seconds.
- Rinse: Rinse slides 3 times with PBS to remove all traces of the quencher.
- HCR v3.0 Protocol: Proceed immediately with the HCR v3.0 protocol (hybridization, amplification, and washing steps). Crucially, from this point forward, do not use detergent in any buffers (e.g., during antibody incubations or washes), as it can leach the dye and restore autofluorescence. Use PBS or SSC-based buffers only [40].
- Mounting: After final washes, mount slides using an aqueous antifade mounting medium, with or without DAPI.
Protocol 2: mLED Photo-Quenching for Lipofuscin Elimination
This protocol describes using high-intensity multispectral LEDs to eliminate lipofuscin autofluorescence (LAF) prior to HCR v3.0, compatible with human, primate, and murine tissues [39].
- Reagents: PBS.
- Equipment: Custom mLED photo-quenching chamber (broad spectral range: UV to infrared) capable of holding multi-well plates, free-floating tissue sections (30-50 µm thickness).
Procedure:
- Tissue Preparation: Fix tissue in 4% PFA and section free-floating at 30-50 µm thickness using a vibratome or cryostat.
- Sample Immersion: Place tissue sections in 6-well plates, filling each well to the brim with PBS to prevent drying and ensure even light exposure. The chamber used in the cited study could hold six 6-well plates simultaneously [39].
- Photo-Quenching Exposure: Place the uncovered plates inside the mLED chamber. Expose tissues to high-intensity mLED light for 24 to 72 hours. The optimal time may require empirical determination.
- Completion: Following exposure, retrieve the tissues from the plates. They can now be mounted on slides and subjected to the standard HCR v3.0 in situ hybridization protocol. This treatment has been shown to preserve specific FISH signal while effectively eliminating LAF [39].
Protocol 3: HCR v3.0 with Automatic Background Suppression
The core strength of HCR v3.0 is its inherent design for minimal background. This protocol highlights the critical conceptual step [10] [44].
- Reagents: HCR v3.0 split-initiator probe sets, fluorescent DNA hairpin amplifiers (H1 and H2), HCR hybridization and amplification buffers.
- Equipment: Humidification chamber, incubator or oven set to 37°C.
Procedure:
- Probe Design (Key Step): For each target mRNA, design a set of probe pairs. Each pair consists of two probes that bind to adjacent sites on the target. Each probe carries half of the HCR initiator sequence (I1). This ensures that the full initiator is only assembled when both probes bind correctly to their specific target, preventing non-specific amplification [10].
- Hybridization: Hybridize the split-initiator probe sets to the sample.
- Amplification: Add the fluorescent HCR hairpins (H1 and H2). The chain reaction and signal amplification will only occur on initiators assembled by correctly bound probe pairs.
- Imaging: Individual probes that bind non-specifically lack a partner to form the full initiator and thus cannot trigger amplification, resulting in automatic background suppression and a high signal-to-background ratio even with large, unoptimized probe sets [10].
The Scientist's Toolkit: Essential Research Reagents
Table 2: Key Reagent Solutions for Managing Autofluorescence in HCR v3.0 Workflows
| Reagent / Solution | Function | Example Use Case |
|---|---|---|
| HCR v3.0 Split-Initiator Probes [10] [45] | Core detection reagent providing automatic background suppression for mRNA targets. | Multiplexed mRNA imaging in whole-mount vertebrate embryos or thick, autofluorescent tissue sections. |
| TrueBlack Lipofuscin Autofluorescence Quencher [43] [40] | Lipophilic dye that specifically quenches lipofuscin fluorescence. | Pre-treatment of human brain or retinal sections prior to HCR v3.0 to eliminate pervasive lipofuscin background. |
| Sudan Black B (SBB) [41] [42] | Histochemical dye that stains the lipid component of lipofuscin; can quench autofluorescence. | Not recommended for HCR v3.0 due to signal loss, but used in standard IF and histology. |
| Multispectral LED (mLED) Array [39] | Equipment for photobleaching a broad spectrum of autofluorophores prior to labeling. | Quenching lipofuscin in free-floating aging brain sections from humans and non-human primates. |
| Tubulin polymerization-IN-52 | Tubulin polymerization-IN-52, MF:C21H18F3N5O3, MW:445.4 g/mol | Chemical Reagent |
Strategic Workflow and Decision Pathways
The following diagram illustrates the decision-making process for selecting the appropriate autofluorescence management strategy within an HCR v3.0 experimental framework.
Diagram 1: Autofluorescence management decision pathway
Effective management of autofluorescence is not merely an optimization step but a fundamental requirement for unlocking the full potential of sensitive techniques like HCR v3.0. By understanding the sources of background and implementing a strategic combination of probe-based suppression (inherent in HCR v3.0) and post-fixation quenching methods (like TrueBlack or mLED photo-quenching), researchers can achieve exceptionally clear and quantifiable results. The protocols and data provided here offer a clear pathway for researchers in drug development and basic science to overcome the persistent challenge of autofluorescence, particularly from lipofuscin, ensuring that specific signal faithfully represents underlying biological reality.
Blocking Non-Specific Binding and Improving Cell Permeabilization
The development of third-generation in situ hybridization chain reaction (HCR v3.0) represents a significant leap forward in multiplexed quantitative mRNA imaging, offering unparalleled capabilities for analog relative quantitation (qHCR) and digital absolute quantitation (dHCR) within complex biological samples such as whole-mount vertebrate embryos [10]. A cornerstone of this technology is its automatic background suppression, achieved through innovative split-initiator probes. These probes ensure that HCR amplification polymers form only when both halves of an initiator colocalize upon specific binding to the target mRNA, dramatically reducing amplified background from non-specifically bound probes [10]. However, the full potential of this elegant biochemical system can only be realized with meticulously prepared samples. The integrity of the cellular structure and the specific accessibility of the target epitopes are prerequisites for high-fidelity signal detection. Effective blocking of non-specific binding and optimized cell permeabilization are, therefore, not mere preliminary steps but critical, deterministic factors for achieving the high signal-to-background ratios that define a successful HCR v3.0 experiment. This protocol details these foundational sample preparation steps, framing them within the context of maximizing performance in low-background HCR applications.
Theoretical Foundation: Principles of Blocking and Permeabilization
The Critical Role of Blocking in Immunoassays
In antibody-based applications, including HCR that utilizes immuno-detection, the goal is to generate accurate expression data through specific binding to the target epitope. Non-specific binding occurs when antibodies or other detection reagents adhere to sites other than the target antigen through charge-based, hydrophobic, or other non-covalent interactions [46]. If unmitigated, this leads to high background staining, obscuring the specific signal and compromising data integrity [47] [48].
The objective of blocking is to incubate the sample with a solution of irrelevant molecules that occupy these non-specific reactive sites before introducing the primary detection reagents. An optimized blocking step is empirically determined and is vital for achieving a high signal-to-noise ratio, a key metric for assay quality [47]. Insufficient blocking results in elevated background, while excessive blocking can potentially mask the target epitope, leading to a diminished specific signal [48].
Permeabilization for Intracellular Target Accessibility
For intracellular targets, particularly mRNA for HCR, permeabilization is an indispensable step. Crosslinking fixatives like formaldehyde preserve cellular architecture but leave the plasma membrane largely intact, rendering internal targets inaccessible to probes [49]. Permeabilization agents, such as detergents or alcohols, create pores in the cellular and nuclear membranes, allowing HCR initiator probes and amplification hairpins to reach their intracellular targets [49] [50].
The choice of permeabilization agent and protocol can significantly impact the outcome. Agents differ in their mechanism, the size of pores they create, and their compatibility with different cellular structures and target molecules. For instance, alcohol-based permeabilization can be superior for nuclear protein targets in some cell types, offering lower background fluorescence and better peak resolution in flow cytometry [50].
Table 1: Common Blocking Agents and Their Applications
| Blocking Agent | Mechanism of Action | Optimal Use Case | Considerations |
|---|---|---|---|
| Normal Serum [46] [47] | Antibodies in the serum bind to non-specific sites. Proteins (e.g., albumin) compete for binding. | Gold standard for many applications; especially effective with polyclonal antibodies [48]. | Must be from the same species as the secondary antibody host to prevent recognition [46] [47]. |
| Bovine Serum Albumin (BSA) [46] [50] | Inexpensive protein that competes with antibodies for non-specific binding sites. | General-purpose blocker; economical for monoclonal antibodies [48]. Often used at 1-5% (w/v) [46]. | A 1% BSA solution is commonly used in combination with serum for effective blocking [50]. |
| Non-fat Dry Milk [46] | Complex mixture of proteins that acts as a competitive blocker. | An economical and effective option for many protocols. | Contains biotin; incompatible with detection systems using biotin-streptavidin [46] [48]. |
| Commercial Blocking Buffers [46] [48] | Often contain proprietary protein-free compounds or highly purified single proteins. | When traditional blockers fail or for standardized, ready-to-use solutions with improved shelf life. | Can offer superior performance but at a higher cost. |
Comprehensive Protocols for Blocking and Permeabilization
A Generalized Workflow for Sample Preparation
The following diagram outlines the core procedural workflow for preparing samples for an HCR v3.0 experiment, from fixation to the final staining step. The blocking and permeabilization stages are highlighted as they are the focus of this document.
Protocol 1: Blocking Non-Specific Binding for IHC/IF
This protocol is designed to be performed after fixation, permeabilization, and antigen retrieval (if required), and immediately prior to incubation with the primary antibody or HCR initiator probes [46] [47].
Materials:
- Blocking Buffer: e.g., PBS or TBS containing 1-5% (v/v) normal serum or 1-5% (w/v) BSA [46] [47].
- Note on Serum: The normal serum must be from the same species as the host of the secondary antibody (e.g., use goat serum if using a goat anti-mouse secondary) [46] [47].
- Optional: Additional blocking agents for specific interferences (e.g., avidin/biotin blocking solutions, hydrogen peroxide for endogenous peroxidases) [47].
Procedure:
- Prepare the chosen blocking buffer.
- Completely cover the sample (tissue section or cells) with a sufficient volume of blocking buffer.
- Incubate for 30 minutes to overnight at either room temperature or 4°C. The optimal time and temperature should be determined empirically for each antibody/target combination [46].
- Following incubation, do not wash the blocking buffer away. Instead, carefully remove excess buffer and proceed directly to the next step by diluting the primary antibody or HCR probes in the same blocking buffer used in the previous step. This maintains the blocking effect during the key binding step [46].
Troubleshooting and Optimization:
- High Background: Extend blocking time, try a different blocking agent (e.g., switch from BSA to serum), or include specific blockers for endogenous enzymes like peroxidase or biotin [47] [48].
- Low Signal: Ensure the blocking agent is not interfering with antibody-antigen binding. Test a different blocking protein or a commercial buffer. Avoid over-blocking [48].
- Critical Controls: Always include a negative tissue control (tissue known to lack the target) to assess non-specific background staining [47].
Protocol 2: Optimized Permeabilization for Flow Cytometry and Imaging
This protocol, adapted from an optimized flow cytometry method for neutrophils and HL-60 cells, highlights alcohol-based permeabilization, which can provide lower background and better resolution for certain targets [50].
Materials:
- Phosphate-Buffered Saline (PBS)
- Paraformaldehyde (PFA, 2-4%), methanol-free
- Ice-cold 70% and 90% Ethanol
- Alternative detergents: e.g., 0.1-0.5% Triton X-100, Saponin
Procedure:
- Fixation: Resuspend the cell pellet (e.g., 2 x 10ⶠcells) in 1 mL of PBS containing 2-4% PFA. Incubate at 37°C for 10 minutes [50].
- Wash: Add 5 mL of cold PBS with 0.05% BSA and centrifuge (270 g, 4°C, 6 min). Remove the supernatant.
- Permeabilization: Gently resuspend the pellet in a small volume of cold PBS. Then, add 400 µL of 96% ice-cold ethanol while vortexing to achieve a final concentration of ~70% ethanol. Place on ice for 30 minutes [50].
- Wash: Centrifuge (300 g, 4°C, 6 min) and remove the ethanol supernatant.
- Proceed to the blocking and staining steps as described in Protocol 1.
Table 2: Comparison of Permeabilization Agents
| Agent | Mechanism | Advantages | Disadvantages |
|---|---|---|---|
| Ethanol/Methanol [49] [50] | Dehydrates and precipitates macromolecules in situ. | Can yield lower background and better peak resolution for nuclear targets; suitable for many transcription factors [50]. | Can denature proteins, destroying some epitopes; less suitable for soluble targets [49]. |
| Triton X-100 [49] | Non-ionic detergent that dissolves lipids in membranes. | Standard, widely compatible protocol; good for many intracellular targets. | May decrease staining intensity for some targets compared to alcohols [50]. |
| Saponin [49] | Glycoside that forms pores in cholesterol-containing membranes. | Pores are reversible, allowing for re-sealing of membranes. | May result in lower staining intensity and may not be suitable for all nuclear targets [50]. |
The Scientist's Toolkit: Essential Reagent Solutions
Table 3: Key Research Reagents for Blocking and Permeabilization
| Reagent | Function | Example Application |
|---|---|---|
| Normal Serum | Blocks non-specific binding via antibodies and serum proteins. | Using goat serum to block before applying a goat anti-rabbit secondary antibody [46] [47]. |
| Bovine Serum Albumin (BSA) | A competitive protein blocker that occupies non-specific sites. | Used at 1-5% in buffer as a general-purpose blocking agent [46] [50]. |
| Paraformaldehyde (PFA) | Crosslinking fixative that preserves cellular structure. | 2-4% PFA for 10 min at 37°C is a standard fixation method [49] [50]. |
| Ethanol (70-90%) | Dehydrating fixative and permeabilization agent. | Ice-cold 70% ethanol for 30 min for permeabilization of neutrophils and HL-60 cells [50]. |
| Triton X-100 | Non-ionic detergent for permeabilizing cellular membranes. | 0.1-0.5% solution after PFA fixation for standard immunofluorescence [49]. |
| Hydrogen Peroxide (3%) | Quenches endogenous peroxidase activity. | Treatment for 15 min before primary antibody to reduce background in HRP-based detection [47]. |
| Avidin/Biotin Blocking Kit | Blocks endogenous biotin present in tissues like liver and kidney. | Pre-treatment before applying biotinylated secondary antibodies in ABC methods [47]. |
Concluding Remarks
The pursuit of ultralow background in sophisticated molecular imaging techniques like HCR v3.0 demands a holistic approach. While the signal amplification technology itself has been engineered for exceptional specificity with split-initiator probes [10], its performance is fundamentally constrained by the quality of the underlying sample preparation. Blocking and permeabilization are not one-size-fits-all procedures; they require empirical optimization tailored to the specific cell type, target antigen, and detection modality. By systematically applying and validating the protocols and principles outlined in this document—selecting appropriate blocking agents, optimizing permeabilization conditions, and rigorously employing controls—researchers can fully leverage the power of HCR v3.0. This enables the acquisition of clean, quantitative, and biologically meaningful data, thereby driving discovery in drug development and basic scientific research.
Ensuring RNAse-Free Conditions and Reagent Stability
The Hybridization Chain Reaction v3.0 (HCR v3.0) protocol enables multiplexed, quantitative mRNA imaging with exceptionally low background, achieved through the use of split-initiator probes that provide automatic background suppression [10]. However, the integrity of this sophisticated analysis is entirely dependent on RNA target preservation. Ribonucleases (RNases) are ubiquitous, resilient enzymes that can rapidly degrade RNA targets, compromising experimental results and reagent stability [51] [52]. This application note provides detailed protocols and data to establish and maintain RNase-free conditions, ensuring the robustness and reproducibility of HCR v3.0 research.
The Critical Need for RNase Control in HCR v3.0
Consequences of RNase Contamination
HCR v3.0 provides superior specificity for spatial RNA visualization, but its sensitivity makes it vulnerable to RNase activity. Even trace quantities of RNases can lead to:
- Lower yields during in vitro transcription reactions for probe synthesis.
- Target RNA degradation during purification protocols or in fixed samples.
- Variable results in downstream HCR imaging and quantification [51].
Such degradation directly compromises the unique quantitative analysis modes of HCR v3.0: qHCR imaging (analog mRNA relative quantitation), qHCR flow cytometry, and dHCR imaging (digital mRNA absolute quantitation) [10].
RNases are present in almost all biological tissues and cells, and are also common on laboratory surfaces [52]. The table below summarizes the primary sources of RNase contamination.
Table 1: Common Sources of RNase Contamination in the Laboratory
| Source Category | Specific Examples | Potential Impact on HCR v3.0 |
|---|---|---|
| Environmental Surfaces | Lab benches, pipettes, glassware, benchtop instruments [51] | Introduction of RNases during sample preparation or dissection |
| Airborne Particles | Dust, aerosols [52] | Contamination of exposed samples and reagents |
| Biological Samples | Skin cells (from researchers), bacterial/fungal spores [51] [52] | Accidental introduction during handling; degradation of target RNA |
| Non-Certified Reagents | Water, buffers, tubes, and tips not certified nuclease-free [51] | Direct degradation of RNA targets, probes, and HCR hairpins |
Establishing an RNase-Free Workspace
Decontamination Procedures
A systematic approach to decontamination is the first line of defense.
- Surface Decontamination: Treat all work surfaces, including benchtops, pipettes, and instruments, with a dedicated RNase decontamination reagent [51].
- Personal Protective Equipment (PPE): Wear gloves and a lab coat. Gloves that have contacted bare skin or common surfaces (e.g., door handles, phone screens) should be replaced immediately, as they are no longer RNase-free [51].
Utilizing RNase-Free Supplies
All consumables must be certified nuclease-free.
- Tubes and Tips: Use only certified nuclease-free (RNase- and DNase-free) tubes and pipette tips [51].
- Water and Buffers: Use nuclease-free water and buffers that have been rigorously tested and shown to be nuclease-free for all reagent preparations [51].
Reagent Stabilization with RNase Inhibitors
The Role of RNase Inhibitors
RNase inhibitors are specialized proteins that bind to RNases and block their enzymatic activity without inhibiting other enzymes in the reaction, such as reverse transcriptase or DNA polymerase [52]. They act as a crucial insurance policy to protect RNA integrity during sample preparation and processing.
Selection Criteria for RNase Inhibitors
When choosing an RNase inhibitor for sensitive workflows like HCR v3.0, consider the following factors:
Table 2: Key Considerations for Selecting an RNase Inhibitor
| Factor | Consideration for HCR v3.0 Workflow | Example Specification |
|---|---|---|
| Concentration | Higher concentration allows for more robust protection without compromising reaction chemistry. | A 10x concentrated formulation is available [52]. |
| Formulation | Glycerol-free inhibitors are essential for applications that may require lyophilization. | "Lyo-ready" glycerol-free RNase inhibitor [52]. |
| Quality and Purity | Extensive impurity testing ensures the inhibitor does not introduce new contaminants. | Supplier with rigorous quality control and a strong track record [52]. |
| Specificity | The inhibitor should not interfere with the enzymes or chemical processes of HCR v3.0. | Formulated to not inhibit reverse transcriptase or DNA polymerases [52]. |
Integrated Protocol for HCR v3.0 with RNase Control
This protocol integrates RNase control measures into a standard HCR v3.0 workflow for RNA detection in whole-mount Drosophila larval fillets, based on an optimized pipeline [20].
Materials: Research Reagent Solutions
Table 3: Essential Reagents for RNase-Free HCR v3.0
| Reagent / Supply | Function / Role | RNase-Free Specification |
|---|---|---|
| Certified Nuclease-Free Tubes & Tips | Sample processing and reagent handling | Rigorously tested to be free of RNase and DNase activity [51] |
| Nuclease-Free Water | Solvent for buffers, probe dilution, and reagent preparation | Certified nuclease-free, available in various packaging formats [51] |
| RNase Inhibitor | Protects RNA integrity during sample processing and storage | High-concentration (e.g., 10x), glycerol-free formulation [52] |
| Split-Initiator Probe Sets | Target mRNA detection for HCR v3.0 | Designed in pairs (e.g., 5 pairs per target); aliquots stored at 1 µM working concentration [20] |
| HCR Hairpins (H1 & H2) | Fluorescent signal amplification | Fluorophore-labeled; hairpins are heated to 95°C and cooled before use to fold correctly [20] |
| Fixative (e.g., PFA) | Tissue preservation | Prepared with nuclease-free buffers |
| Hybridization & Wash Buffers | Create optimal stringency conditions for specific probe binding | Contain formamide and dextran sulphate; prepared with nuclease-free components [20] |
Step-by-Step Workflow
Day 1: Sample Preparation and Fixation
- Dissection: Dissect Drosophila larvae in Schneider's media on a Sylgard plate. Decontaminate all tools and surfaces with an RNase decontamination reagent before use.
- Fixation: Transfer tissue to 1.5 mL nuclease-free Eppendorf tubes. Fix with 4% PFA in PBSTx for 30 minutes at room temperature.
- Permeabilization: Rinse tissue 3x in PBSTx. Perform two consecutive 20-minute permeabilization incubations in PBSTx at room temperature.
- Pre-Hybridization:
- Transfer tissue to 5X SSCT (5X SSC, 0.1% Tween) for 5 minutes.
- Replace with wash solution (5X SSC, 30% formamide, 0.1% Tween) and incubate for 30 minutes at 37°C.
- Perform two 20-minute pre-hybridizations at 37°C in hybridization solution (5X SSC, 30% formamide, 10% Dextran sulphate, 0.1% Tween).
Day 1: Probe Hybridization
- Hybridize: Incubate samples overnight at 37°C in hybridization solution containing the split-initiator probes at a final concentration of 10 nM. To improve accuracy, dilute probes from a 1 µM stock prepared in nuclease-free TE buffer. [20]
Day 2: Post-Hybridization Washes and Signal Amplification
- Wash Out Probes: Perform four 15-minute washes in wash solution at 37°C.
- Additional Washes: Perform two 5-minute washes with 5X SSCT at room temperature.
- Pre-Amplification: Incubate samples in amplification solution (5X SSC, 10% Dextran sulphate, 0.1% Tween) at room temperature for 30 minutes.
- Prepare Hairpins:
- Add H1 and H2 hairpins to separate PCR tubes to achieve a final concentration of 60 nM each in the amplification step.
- Heat hairpins to 95°C for 90 seconds, then immediately cool at room temperature for 30 minutes, protected from light.
- Pool the heated hairpins in amplification solution.
- Amplify: Replace the pre-amplification solution with the solution containing the hairpins. Incubate samples overnight at 37°C, protected from light.
Day 3: Final Washes and Mounting
- Final Washes: Rinse samples 3x in 5X SSCT, followed by two consecutive 30-minute washes in 5X SSCT at room temperature.
- Mounting: Incubate samples in mounting medium (e.g., Slowfade Diamond) for at least 10 minutes before mounting for microscopy [20].
Workflow and Contamination Control Diagram
The following diagram illustrates the logical relationships between RNase threats, control strategies, and the protected HCR v3.0 workflow, culminating in reliable experimental outcomes.
Maintaining RNase-free conditions is not merely a preliminary step but a continuous requirement throughout the HCR v3.0 experimental workflow. The integration of rigorous decontamination practices, certified RNase-free supplies, and high-quality RNase inhibitors is fundamental to safeguarding RNA integrity. By adhering to the detailed protocols and guidelines outlined in this document, researchers can ensure the stability of their reagents and the validity of their data, fully leveraging the quantitative and multiplexing capabilities of the HCR v3.0 low-background platform.
Choosing Fluorophores and Mounting Media for Signal Preservation
Fluorescence molecular imaging represents a powerful technique in biomedical research, enabling the visualization of molecular and cellular processes, particularly for tumor and disease characterization [53]. Within this field, Hybridization Chain Reaction v3.0 (HCR v3.0) has emerged as a transformative methodology for multiplexed mRNA imaging, offering exceptional specificity through its mechanism of automatic background suppression [10]. The performance of this sophisticated detection system is critically dependent on two fundamental experimental choices: the selection of appropriate fluorophores and the implementation of optimal mounting media.
The integrity of HCR v3.0 data hinges on effective signal preservation throughout the imaging workflow. Even with the advanced background suppression inherent to HCR v3.0's split-initiator probes [10], inadequate fluorophore selection or improper mounting can compromise signal-to-noise ratios, quantitative accuracy, and experimental reproducibility. This application note provides detailed guidance on these crucial aspects, framed specifically within the context of HCR v3.0 research for scientists and drug development professionals.
Fluorophore Selection for HCR v3.0 Applications
Key Properties for HCR-Compatible Fluorophores
The choice of fluorophore directly impacts the sensitivity, multiplexing capability, and robustness of HCR v3.0 experiments. When selecting fluorophores for HCR applications, researchers should prioritize several critical properties:
- High Quantum Yield: Fluorophores with quantum yields >0.8 maximize signal output per excitation event, crucial for detecting low-abundance targets [53].
- Exceptional Photostability: HCR imaging sessions may be prolonged, especially for thick samples or when collecting z-stacks, necessitating fluorophores resistant to photobleaching [53].
- Tunable Emission Profiles: The ability to structurally modify emission wavelengths (500-700 nm) enables flexible multiplexing panel design [53].
- Minimal Cross-Talk: For multiplexed experiments, fluorophores with non-overlapping excitation and emission spectra reduce channel interference.
Advanced Fluorophore Technologies for Enhanced Detection
Recent advancements in fluorescent materials offer new opportunities for HCR v3.0 applications:
BODIPY derivatives have shown particular promise as versatile fluorescent probes due to their remarkable fluorescence quantum yields, strong extinction coefficients, and tunable emission properties through structural adjustments [53]. Recent developments include BODIPYs modified with targeting moieties such as folic acid for targeted cancer imaging, promoting tumor-specific uptake [53].
For challenging targets with low abundance or in highly autofluorescent tissues, next-generation HCR detection methods that combine the specificity of HCR v3.0 with enzyme-based signal amplification through catalysis (HCR-Cat) or immunostaining (HCR-Immuno, HCR-Multi) can enhance sensitivity while maintaining spatial resolution [54].
Table 1: Properties of Fluorophore Classes Suitable for HCR v3.0 Applications
| Fluorophore Class | Quantum Yield | Photostability | Emission Range | HCR Application |
|---|---|---|---|---|
| BODIPY derivatives | >0.8 [53] | Exceptional [53] | 500-700 nm [53] | Multiplexed target detection |
| Cyanine dyes (Cy3, Cy5) | High | Moderate | 550-670 nm [53] | Standard HCR imaging |
| Alexa Fluor dyes | High | High | 500-700 nm [53] | Sensitive detection in challenging samples |
| PARPi-FL | N/A | N/A | NIR | Topical imaging for skin cancers [55] |
Specialized applications may require tailored fluorophore systems. For instance, PARPi-FL, a topical fluorescent molecular contrast agent, can detect basal cell carcinoma through intact skin in as little as five minutes in ex vivo human tissues [55]. While not directly used in HCR, such targeted fluorophores illustrate the trend toward specific molecular recognition in fluorescence imaging.
Mounting Media for Optimal Signal Preservation
Mounting Media Fundamentals
Mounting medium serves as the environment in which samples are imaged, with critical functions extending beyond simple immobilization. Proper mounting media help maintain specimen integrity, prevent drying, match refractive indices for optimal resolution, and most importantly for HCR applications, prevent photobleaching of fluorophores [56]. The choice between aqueous and solvent-based mounting media represents a fundamental decision point in experimental design.
Aqueous mounting media allow direct transfer of samples from buffer and provide minimal processing requirements, making them suitable for quick validation of staining quality [56]. These media typically use glycerol as a major component (refractive index ~1.47) to better approximate glass (RI 1.51) than water alone (RI 1.33) [57]. Solvent-based mounting media generally provide superior long-term preservation but require sample dehydration steps prior to mounting [56].
Antifade Properties for HCR Signal Preservation
The mechanism of photobleaching involves both oxygen-dependent and oxygen-independent processes that cause permanent damage and quenching of fluorescent molecules [57]. Antifade mounting media function analogously to "sunscreen" for fluorescent detection molecules, containing antioxidant molecules that react with photoexcited species to prevent photodegradation [57].
For HCR v3.0 applications, where signal preservation is paramount for accurate quantitation, specialized antifade mounting media like VECTASHIELD or LumiMount series are strongly recommended [57] [58]. These formulations are specifically engineered to produce high signal intensity for commonly used fluorophores while providing superior protection against photobleaching.
Table 2: Comparison of Mounting Media Properties for HCR Applications
| Mounting Medium | Base Composition | Refractive Index (Cured) | Antifade Properties | Setting Time | Best For |
|---|---|---|---|---|---|
| LumiMount [58] | Aqueous | 1.46 | Yes | 2 hours | Routine HCR imaging |
| LumiMount Plus [58] | Aqueous | 1.52 | Yes | 2 hours | High-resolution imaging |
| LumiMount DAPI [58] | Aqueous | 1.46 | Yes | 2 hours | Counterstained samples |
| VectaMount Express [57] | Solvent | ~1.48 | Formulation-dependent | Varies | Rapid processing |
| VECTASHIELD [57] | Aqueous | ~1.47 | Excellent antifade | Varies | Long-term preservation |
Refractive Index Considerations
Refractive index (RI) matching is crucial for high-quality imaging, particularly at high magnifications. RI mismatching causes spherical aberration, resulting in resolution degradation and reduced sample brightness [57]. The ideal mounting medium should have a refractive index closely matching that of glass slides (1.51), immersion oil (1.51), and the tissue itself (1.38-1.46) [57].
LumiMount Plus, with a cured refractive index of 1.52, provides nearly perfect matching to glass, making it particularly suitable for high-resolution HCR imaging requiring maximal clarity [58]. It's important to note that for some mounting media, the specified refractive index is only achieved after complete curing, which may take up to 24 hours for certain formulations [57].
Integrated Protocols for HCR v3.0 with Optimized Fluorophores and Mounting
Workflow for HCR v3.0 with Signal-Preserving Mounting
The following integrated protocol ensures optimal signal preservation throughout the HCR v3.0 procedure:
Detailed Mounting Protocol for HCR v3.0 Samples
Objective: To preserve HCR-generated fluorescence signals with minimal photobleaching and optimal optical clarity.
Materials Needed:
- LumiMount Plus Antifade Mounting Medium (or equivalent) [58]
- Glass slides and coverslips
- Paper towels or filter paper
- Nail polish (for sealing, optional)
Procedure:
- Preparation: Thaw mounting medium to room temperature. Do not shake or invert the bottle to prevent bubble formation [58].
- Sample Transfer: Blot edges of the slide with a paper towel to remove excess buffer, taking care not to let the specimen dry completely [58].
- Medium Application: Apply 2-3 drops of mounting medium onto the specimen—sufficient to just fill the space under the coverslip [58].
- Coverslipping: Carefully apply the coverslip, avoiding air bubbles. If bubbles form, gently press them toward the edges or remove and reapply.
- Excess Removal: Wipe away excess mounting medium with a paper towel or filter paper [58].
- Curing: Allow the slide to dry for 2 hours or overnight at room temperature in the dark [58]. Note that refractive index and photoprotective properties optimize fully only after complete curing.
- Sealing (Optional): For long-term storage, seal coverslip edges with nail polish or another organic sealant [56].
- Storage: Store mounted slides in the dark at 4°C [58].
Troubleshooting:
- Bubble Formation: Dispense a small amount of mounting medium onto a lab tissue before applying to the slide to eliminate bubbles from the dropper tip [58].
- Incomplete Curing: Ensure curing occurs in a dark environment at stable room temperature; incomplete curing compromises both refractive index matching and antifade properties.
- Sample Movement During Imaging: For non-setting media, seal coverslip edges to prevent drift during extended imaging sessions [56].
Advanced Applications and Integration with Tissue Clearing
For HCR v3.0 applications in thick tissues or whole-mount specimens, integration with tissue clearing techniques may be necessary. Recent advancements in passive tissue clearing methods offer enhanced compatibility with fluorescence preservation.
The OptiMuS-prime method utilizes sodium cholate (SC) combined with urea as a novel passive tissue clearing technique that achieves better reagent infiltration while retaining structural integrity and fluorescence signals [59]. This approach is particularly valuable for HCR v3.0 applications in challenging samples such as whole-mount vertebrate embryos or thick tissue sections [10] [59].
When combining HCR v3.0 with tissue clearing:
- Perform HCR amplification prior to clearing for optimal probe penetration
- Select mounting media compatible with cleared tissue refractive indices
- Consider specialized mounting formulations for 3D imaging applications
Essential Research Reagent Solutions
Table 3: Key Reagents for HCR v3.0 with Optimal Signal Preservation
| Reagent Category | Specific Products | Function in HCR Workflow | Key Considerations |
|---|---|---|---|
| HCR Amplifiers | HCR v3.0 Hairpins (H1, H2) [10] | Signal amplification via hybridization chain reaction | Conditional polymerization prevents background |
| Split-Initiator Probes | HCR v3.0 Probe Pairs [10] | Target recognition with automatic background suppression | 50-fold suppression of non-specific amplification |
| Antifade Mounting Media | LumiMount Plus [58], VECTASHIELD [57] | Preserve fluorescence, prevent photobleaching | Match refractive index to imaging system |
| Aqueous Mounting Media | LumiMount [58], VectaMount AQ [57] | Quick mounting with antifade properties | Ideal for most HCR applications |
| Solvent-Based Mounting Media | VectaMount Permanent [57] | Long-term preservation of samples | Requires dehydration steps before use |
| Tissue Clearing Reagents | OptiMuS-prime [59] | Enable 3D imaging in thick samples | Preserves protein integrity and fluorescence |
The sophisticated background suppression achieved by HCR v3.0 through its split-initiator probe design [10] can only be fully leveraged when paired with appropriate fluorophores and optimized mounting techniques. Careful selection of fluorophores with high quantum yields and exceptional photostability, combined with antifade mounting media matched to the optical system, ensures that the quantitative capabilities of HCR v3.0 are realized in practice.
For researchers implementing these protocols, consistency in mounting procedures is as critical as the HCR hybridization itself for obtaining reproducible, publication-quality results. The integration of these signal preservation strategies supports the broader application of HCR v3.0 in both basic research and drug development contexts, particularly as the method evolves to detect increasingly challenging targets [54].
Validating Results and Benchmarking HCR v3.0 Performance
In situ hybridization based on the mechanism of hybridization chain reaction (HCR) has emerged as a powerful approach for multiplexed quantitative mRNA imaging in diverse sample types. The third-generation in situ HCR (v3.0) incorporates automatic background suppression throughout the protocol, dramatically enhancing performance and ease of use [60]. This technological advancement supports two distinct quantitative imaging modes: qHCR imaging for analog mRNA relative quantitation with subcellular resolution, and dHCR imaging for digital mRNA absolute quantitation with single-molecule resolution [60] [22]. These methods enable researchers to perform precise mRNA expression analysis while maintaining crucial anatomical context, bridging the gap between traditional molecular biology techniques and spatial biology applications.
The fundamental principle underlying both qHCR and dHCR is the hybridization chain reaction mechanism, which provides enzyme-free signal amplification through triggered self-assembly of fluorescent hairpin polymers. This isothermal amplification strategy preserves sample morphology while generating strong, quantifiable signals that correlate with target abundance [61]. The v3.0 platform represents a significant improvement over previous iterations, offering researchers robust, reproducible quantitative data across various experimental systems from cultured mammalian cells to complex whole-mount vertebrate embryos.
Comparative Analysis of qHCR and dHCR
Table 1: Core Characteristics of qHCR and dHCR Imaging Technologies
| Feature | qHCR Imaging | dHCR Imaging |
|---|---|---|
| Quantitation Type | Analog relative quantitation | Digital absolute quantitation |
| Resolution | Subcellular | Single-molecule |
| Output | Fluorescence voxel intensities | Discrete molecular counts |
| Primary Application | mRNA relative expression levels in anatomical context | Absolute mRNA copy numbers with single-molecule resolution |
| Sample Types | Mammalian cells on slides, whole-mount vertebrate embryos | Mammalian cells on slides, whole-mount vertebrate embryos |
| Key Advantage | High dynamic range for expression analysis | Molecular counting precision |
Table 2: Performance Metrics and Experimental Considerations
| Parameter | qHCR Imaging | dHCR Imaging |
|---|---|---|
| Accuracy | High linearity with zero intercept | Single-molecule counting accuracy |
| Precision | Tight scatter around linear fit (enhanced with larger voxels) | Molecular resolution precision |
| Background Suppression | Automatic throughout protocol | Automatic throughout protocol |
| Multiplexing Capacity | High (supports multiplexed imaging) | High (supports multiplexed imaging) |
| Voxel Size Recommendation | ~2×2×2 μm for optimal precision | Sub-diffraction limit for single-molecule separation |
| Data Analysis Approach | Intensity correlation and relative quantification | Discrete localization and counting |
The choice between qHCR and dHCR imaging depends primarily on the research question and required quantification approach. qHCR provides analog relative quantitation ideal for comparing expression levels across different regions or conditions, while dHCR offers digital absolute quantitation suitable for precise molecular counting applications [60] [22] [61]. Both methods maintain the sample's anatomical context, enabling researchers to correlate molecular data with structural information—a significant advantage over bulk analysis methods like qPCR that require tissue homogenization.
Experimental Protocols
qHCR Imaging Protocol for Mammalian Cells on Slides
The qHCR protocol enables analog mRNA relative quantitation with subcellular resolution in mammalian cells, providing spatial expression data while maintaining cellular architecture.
Sample Preparation and Hybridization:
- Fixation and Permeabilization: Begin with appropriately fixed mammalian cells on slides. Permeabilize cells to allow probe access while preserving RNA integrity and cellular morphology.
- Probe Hybridization: Apply HCR initiator probes complementary to target mRNA sequences. Incubate overnight at 37°C to ensure specific hybridization. The v3.0 system incorporates automatic background suppression throughout this process, eliminating non-specifically bound probes without additional washing steps [60] [62].
- Stringency Washes: Perform controlled washes to remove excess unbound probes while maintaining specifically hybridized probes.
Signal Amplification and Imaging:
- HCR Amplification: Add fluorescent hairpin polymers to initiate the hybridization chain reaction. For subcellular quantitative imaging, overnight amplification is recommended to grow long amplification polymers that enhance the signal-to-background ratio [61].
- Imaging Parameters: Acquire images using appropriate fluorescence microscopy systems. For optimal quantitative precision, average pixels to obtain roughly 2×2×2 μm voxels, as precision increases with voxel size while maintaining subcellular resolution [61].
- Multiplexing Capability: The protocol supports simultaneous detection of multiple RNA targets through sequential rounds of hybridization and amplification or using spectrally distinct fluorophores [60].
dHCR Imaging Protocol for Single-Molecule Resolution
The dHCR protocol enables digital absolute quantitation of mRNA molecules with single-molecule resolution, providing precise molecular counting capabilities in situ.
Sample Processing and Detection:
- Probe Design and Hybridization: Utilize HCR initiator probes designed for target mRNA sequences. For whole-mount vertebrate embryos (zebrafish, chicken, and mouse), extended hybridization times may be necessary to ensure complete probe penetration throughout the sample [22] [63].
- Background Suppression: The v3.0 system's automatic background suppression is particularly crucial for dHCR imaging, as it enables clear discrimination of individual molecules by minimizing non-specific signals [22].
Single-Molecule Imaging and Analysis:
- Image Acquisition: Use high-resolution microscopy systems capable of detecting single fluorescent events. Optimize imaging conditions to spatially separate individual mRNA molecules.
- Digital Quantification: Apply single-molecule analysis software (such as Dot Analysis 1.0 software package specifically developed for analyzing dHCR images) to identify and count discrete mRNA molecules [63].
- Validation: For enhanced precision when imaging RNA targets, select boosted options for HCR HiFi Probes, as precision increases with the number of target-binding sites due to the benefits of automatic background suppression [61].
Protocol for Whole-Mount Vertebrate Embryos
The protocol for whole-mount vertebrate embryos (zebrafish, chicken, and mouse) shares similarities with the mammalian cell protocol but includes modifications to address sample thickness and autofluorescence challenges.
Sample Preparation and Clearing:
- Fixation and Permeabilization: Carefully fix embryos to preserve morphology while maintaining RNA accessibility. Permeabilization conditions must be optimized for each embryo type and stage.
- Hydrogel Embedding: For thick samples, utilize tissue hydrogel embedding and clearing techniques to enhance probe penetration and reduce background [22].
- Probe Hybridization: Extend hybridization times compared to cell-based protocols to ensure adequate probe penetration throughout the embryo. The automatic background suppression of v3.0 HCR is particularly valuable for these complex samples [22] [63].
Imaging and Analysis:
- Thick Sample Imaging: Use microscopy systems capable of optical sectioning to image through the entire embryo. Light sheet microscopy is particularly suitable for these applications.
- Data Processing: For multiplexed qHCR images in vertebrate embryos, specialized software tools (such as Read-out/Read-in 1.0 software package) enable sophisticated read-out/read-in analyses [63].
- Quantitative Analysis: Apply appropriate quantification methods accounting for sample thickness and potential attenuation effects when comparing expression levels across different regions.
Signaling Pathways and Workflows
The Scientist's Toolkit
Table 3: Essential Research Reagent Solutions for HCR Imaging
| Reagent/Equipment | Function | Application Notes |
|---|---|---|
| HCR Initiator Probes | Sequence-specific binding to target mRNAs | Design for target sequence; boosted options available for enhanced precision |
| Fluorescent Hairpin Polymers | HCR signal amplification | Spectrally distinct fluorophores for multiplexing; form long polymers upon initiation |
| Fixation and Permeabilization Reagents | Sample preservation and probe access | Optimize for sample type (cells vs. whole-mount embryos) |
| Hybridization Buffers | Controlled probe binding | Enable specific hybridization while suppressing background |
| HCR Amplification Buffers | Supporting HCR polymerization | Optimized for enzyme-free hairpin assembly |
| Dot Analysis 1.0 Software | Analyzing dHCR images | Specifically developed for digital quantitation of single molecules |
| Read-out/Read-in 1.0 Software | Multiplexed image analysis | For performing read-out/read-in analyses on multiplexed qHCR images |
Advanced Applications and Future Directions
The applications of qHCR and dHCR imaging extend across diverse research domains, providing powerful tools for spatial transcriptomics in intact biological systems. In developmental biology, these techniques enable mapping of gene expression patterns with single-molecule resolution within the context of whole-mount vertebrate embryos, revealing intricate spatial relationships between gene expression domains and morphological structures [22]. For cancer research, the subcellular quantitative capabilities permit analysis of heterogeneous gene expression within tumor microenvironments while maintaining tissue architecture, offering insights into cancer progression and treatment response [61].
The multiplexing capacity of HCR v3.0 further enhances its utility for complex biological questions. Researchers can simultaneously visualize multiple RNA targets in the same sample, enabling analysis of gene regulatory networks and pathway activities directly in situ. The combination of RNA-FISH with protein immunofluorescence (HCR Gold RNA-FISH/IF) represents a particularly powerful application, allowing correlated analysis of transcript and protein distributions within the same sample at subcellular resolution [61]. This integrated approach provides unprecedented insights into post-transcriptional regulatory mechanisms and their spatial organization within cells and tissues.
Future developments in HCR technology will likely focus on expanding multiplexing capabilities, enhancing quantitative precision, and streamlining protocols for broader accessibility. As these methods continue to evolve, they will further bridge the gap between traditional molecular biology and spatial systems biology, enabling researchers to address increasingly complex questions with quantitative rigor and anatomical context.
In situ hybridization chain reaction (HCR) version 3.0 represents a significant advancement in molecular signal amplification technology for mapping mRNA expression within fixed biological samples. The hallmark of this generation is its automatic background suppression, a feature that ensures reagents do not generate amplified background even if they bind non-specifically within the sample [10]. This capability addresses a fundamental challenge in fluorescence in situ hybridization experiments, where the objective is to image mRNA expression patterns against the inherent autofluorescence of biological specimens.
The core innovation in HCR v3.0 lies in its novel probe design. Previous HCR versions (v2.0) employed standard probes, each carrying a full HCR initiator (I1). If such a probe bound non-specifically, it would still trigger HCR amplification, generating unwanted background signal [10]. The v3.0 approach replaces each standard probe with a pair of cooperative split-initiator probes, with each carrying only half of the HCR initiator I1 [10]. This architectural change means that HCR amplification is triggered only when both probes hybridize specifically to adjacent binding sites on the target mRNA, colocalizing the two initiator halves. Individual probes binding non-specifically cannot initiate the amplification cascade, thereby providing inherent background suppression throughout the protocol [10].
Quantitative Performance Metrics
Background Suppression and Signal-to-Background Ratios
Rigorous testing of HCR v3.0 has demonstrated substantial improvements in key performance metrics essential for high-quality imaging, particularly in challenging environments like whole-mount vertebrate embryos.
Table 1: Quantitative Performance Metrics of HCR v3.0
| Performance Parameter | Metric | Experimental Context | Significance |
|---|---|---|---|
| HCR Suppression (in vitro) | ≈60-fold reduction [10] | Gel studies comparing full vs. partial split-initiator probe sets [10] | Dramatically decreases amplified background from non-specifically bound probes |
| HCR Suppression (in situ) | ≈50-fold reduction [10] | In situ studies in whole-mount chicken embryos [10] | Validates efficacy in complex biological samples |
| Signal-to-Background Ratio | No measurable background increase with larger probe sets [10] | 20 unoptimized split-initiator probe pairs in neural crest of chicken embryos [10] | Enables use of large, unoptimized probe sets without background penalty |
The quantitative evidence shows that while replacing a standard probe with a pair of split-initiator probes modestly decreases the amplified signal, it dramatically decreases amplified background [10]. This results in a vastly improved signal-to-background ratio, which is crucial for detecting low-abundance targets and for precise signal localization.
Performance Comparison: Standard vs. Split-Initiator Probes
Experimental comparisons in whole-mount chicken embryos highlight the practical benefits of the automatic background suppression in HCR v3.0.
Table 2: Performance Comparison: Standard Probes vs. Split-Initiator Probes
| Characteristic | Standard Probes (HCR v2.0) | Split-Initiator Probes (HCR v3.0) |
|---|---|---|
| Probe Architecture | Single probe with full initiator I1 [10] | Pair of probes, each with half of initiator I1 [10] |
| Background with Large Probe Sets | Increases dramatically [10] | No measurable change [10] |
| Signal-to-Background Trend | Decreases monotonically with added probes [10] | Increases monotonically with added probes [10] |
| Probe Set Optimization | Crucial to exclude "bad" probes [10] | Straightforward; non-specific probes do not generate background [10] |
This performance transformation allows researchers to confidently use large, unoptimized probe sets for new targets, simply increasing the number of probe pairs to enhance signal without the risk of escalating background [10]. This capability is particularly valuable for exploratory research in new model organisms or for mapping novel gene targets.
Experimental Protocols for Validation
Protocol 1: Validating Split-Initiator Suppression In Vitro Using Gel Studies
This protocol details the method for quantitatively assessing the background suppression capability of split-initiator probes in a controlled solution environment, as performed in the development of HCR v3.0 [10].
Key Research Reagent Solutions:
- HCR Hairpins (H1 and H2): Metastable DNA hairpins, fluorophore-labeled, forming the core amplification system [10].
- Full Initiator (I1): A DNA strand containing the complete sequence to trigger HCR polymerization [10].
- Split-Initiator Probe Pairs (P1 and P2): Two DNA probes designed to bind adjacent sites on a target; each contains one half of the I1 sequence [10].
- Target Sequence: A synthetic DNA or RNA strand containing the binding sites for P1 and P2.
Methodology:
- Preparation: Prepare separate reaction mixtures in HCR amplification buffer (e.g., 5× SSCT at room temperature) [10] [1].
- Reaction Setup:
- Lane 1 (Hairpin Stability): H1 + H2 hairpins only.
- Lane 2 (Positive Control): H1 + H2 + full initiator I1.
- Lane 3 (Specific Triggering): H1 + H2 + target + probe P1 + probe P2.
- Lane 4 (Background Control): H1 + H2 + target + probe P1 only.
- Lane 5 (Background Control): H1 + H2 + target + probe P2 only.
- Lane 6 (Background Control): H1 + H2 + probe P1 + probe P2 (no target).
- Incubation: Incubate all reactions for 4-6 hours at room temperature.
- Analysis: Load reactions onto a non-denaturing gel. Analyze the conversion of monomeric hairpins into high-molecular-weight amplification polymers via gel electrophoresis. Staining with a DNA intercalating dye (e.g., ethidium bromide) or direct fluorescence imaging will reveal polymer formation.
Expected Outcome: Significant polymer formation should be visible only in Lane 2 (full initiator control) and Lane 3 (both split-initiator probes + target). Minimal conversion should occur in all other lanes, demonstrating that the split-initiator system remains suppressed unless both probes co-localize on the target [10].
Protocol 2: In Situ Validation in Whole-Mount Chicken Embryos
This protocol describes the procedure for comparing standard and split-initiator probes in a thick, autofluorescent biological sample, a key validation step for HCR v3.0 [10].
Key Research Reagent Solutions:
- Probe Sets: A validated set of 5 standard probes, plus additional untested probes to create larger sets of 10 and 20 probes. For v3.0, split-initiator probe pairs targeting nearly identical subsequences [10].
- HCR Amplifiers: Fluorescently labeled DNA HCR hairpins designed for the specific initiator.
- Hybridization and Amplification Buffers: Permissive buffers (e.g., 0% formamide, 5× SSCT) are suitable for DNA HCR v3.0 [1].
- Whole-Mount Chicken Embryos: Fixed specimens, e.g., at stages relevant to neural crest study.
Methodology:
- Sample Preparation: Fix and permeabilize chicken embryos according to standard protocols for whole-mount in situ hybridization.
- Detection Stage (Probe Hybridization):
- For each condition (standard vs. split-initiator, and for each probe set size), incubate embryos in probe hybridization buffer containing the respective probe set.
- A recommended concentration is 20 nM for each probe in hybridization buffer [13].
- Incubate overnight at room temperature.
- Wash thoroughly to remove unbound probes.
- Amplification Stage (HCR Polymerization):
- Incubate embryos in amplification buffer containing the snap-cooled H1 and H2 hairpins.
- Extending this incubation to overnight can enhance signal strength, particularly in thicker samples [13].
- Wash thoroughly to remove un-polymerized hairpins.
- Imaging and Analysis:
- Image the embryos using a fluorescence microscope.
- Quantify the mean signal intensity in regions of high mRNA expression and in background regions with no or low expression.
- Calculate the signal-to-background ratio for each condition.
- Plot the signal-to-background ratio as a function of probe set size.
Expected Outcome: Experiments will show that with standard probes, the background increases and the signal-to-background ratio falls as more probes are added. In contrast, with split-initiator probes, the background remains minimal and the signal-to-background ratio increases with larger probe sets [10].
Protocol 3: Multiplexed mRNA Imaging with Unoptimized Probe Sets
This protocol leverages the robustness of HCR v3.0 to image multiple mRNA targets simultaneously in a single sample using large, unoptimized split-initiator probe sets [10].
Key Research Reagent Solutions:
- Orthogonal HCR Amplifiers: Multiple sets of H1 and H2 hairpins, each set fluorescently labeled with a distinct fluorophore and responding to a unique initiator sequence [10].
- Large, Unoptimized Split-Initiator Probe Sets: For each target mRNA, a set of 20 or more split-initiator probe pairs designed in silico without prior individual validation [10].
Methodology:
- Probe Hybridization: Incubate the sample in a mixture of all probe sets for all target mRNAs in a single hybridization step. Incubate overnight.
- Wash: Remove unbound probes with a series of washes.
- Amplification: Incubate the sample in a mixture of all orthogonal HCR hairpin sets in a single amplification step. Incubate overnight.
- Wash: Remove un-polymerized hairpins.
- Image: Acquire multichannel fluorescence images.
Expected Outcome: The result will be a multiplexed image with sharp, specific signal localization for each target mRNA and minimal background cross-talk, demonstrating the capability for multiplexed quantitative analysis (qHCR imaging) even with unoptimized probe resources [10].
Visualizing the HCR v3.0 Mechanism and Workflow
HCR v3.0 Split-Initiator Probe Mechanism
HCR v3.0 Experimental Workflow
The Scientist's Toolkit: Essential Research Reagents
Table 3: Key Research Reagent Solutions for HCR v3.0 Experiments
| Reagent / Solution | Function / Description | Key Characteristics & Tips |
|---|---|---|
| Split-Initiator Probe Pairs | DNA probes complementary to the target mRNA; each carries one half of the HCR initiator I1 [10]. | Enable automatic background suppression. Design 25-nt binding sites. Can be used as large, unoptimized sets. |
| Metastable DNA HCR Hairpins (H1/H2) | Fluorophore-labeled DNA hairpins that self-assemble into amplification polymers upon initiation [10] [1]. | Engineered for high gain in permissive conditions (e.g., 12-nt toeholds/loops, 24-bp stems). Kinetically trapped to prevent leakage. |
| Permissive Hybridization/Amplification Buffer | Reaction medium for probe hybridization and HCR polymerization [1]. | E.g., 5× SSCT, 0% formamide, room temperature. Maximizes energetic driving force for high-gain HCR polymerization. |
| Boosted Probe Design | A probe set with an increased number of binding sites per target molecule [13]. | Enhances signal for low-abundance targets without protocol changes. Use if target sequence length permits. |
Fluorescence in situ hybridization (FISH) has been a cornerstone technique in microbiology, clinical diagnostics, and cell biology for the phylogenetic identification and localization of microorganisms or specific nucleic acid sequences within cellular environments. While standard FISH techniques using fluorescently labeled oligonucleotide probes provide a straightforward approach, they often suffer from low signal intensity, particularly when targeting cells with low ribosomal content or in autofluorescent samples. To address these limitations, several signal amplification methods have been developed, including Catalyzed Reporter Deposition-FISH (CARD-FISH) and more recently, Hybridization Chain Reaction FISH (HCR-FISH), with the latest iteration being HCR v3.0 featuring split-initiator probes for automatic background suppression. This application note provides a detailed comparative analysis of these techniques, focusing on their mechanisms, performance characteristics, and optimal applications to guide researchers in selecting the most appropriate method for their experimental needs.
Technical Principles and Mechanisms
Standard FISH
The standard FISH technique relies on fluorescently labeled oligonucleotide probes that hybridize specifically to target nucleic acid sequences within fixed cells or tissue sections. The protocol involves sample fixation, permeabilization, hybridization with labeled probes, washing to remove unbound probes, and visualization using fluorescence microscopy. While this method provides a direct approach for detecting microorganisms or specific genes, its limitations become apparent in challenging samples. In ultra-oligotrophic environments like alpine ground waters, standard FISH detected only 15% of total prokaryotic populations compared to DAPI counts, highlighting significant sensitivity limitations for low-biomass applications [64].
CARD-FISH (Catalyzed Reporter Deposition-FISH)
CARD-FISH enhances signal detection through enzymatic amplification. This technique uses oligonucleotide probes labeled with horseradish peroxidase (HRP) rather than direct fluorophore conjugation. After hybridization, the HRP enzyme catalyzes the deposition of multiple fluorescently labeled tyramide molecules at the target site, resulting in substantial signal amplification [64]. This method has demonstrated significantly higher detection efficiency, recovering 83-89% of total prokaryotic cells in ultra-oligotrophic water samples compared to the 15% achieved with standard FISH [64]. However, CARD-FISH presents technical challenges including the large molecular size of HRP-labeled probes (~40 kDa) that can hinder cell entry, frequently requiring additional permeabilization steps. The method also necessitates hydrogen peroxide treatment to inactivate endogenous peroxidases, which may degrade target nucleic acids [65].
HCR-FISH v2.0 and v3.0
HCR-FISH represents a different amplification approach based on enzyme-free, isothermal nucleic acid amplification. In HCR v2.0, DNA probes complementary to the target mRNA are conjugated to a full initiator sequence. Upon hybridization, this initiator triggers a cascade of hybridization events between two fluorescently labeled hairpin molecules (H1 and H2), forming a long amplification polymer that accumulates at the target site [65]. This mechanism provides substantial signal amplification while avoiding enzyme-related challenges.
The advanced HCR v3.0 introduces a fundamental innovation with split-initiator probes that provide automatic background suppression. Instead of a single probe carrying a full initiator, v3.0 employs cooperative pairs of split-initiator probes that each carry half of the HCR initiator sequence. Only when both probes bind adjacently to their specific target sites is the full initiator assembled, triggering the HCR amplification cascade. This design ensures that individual probes binding non-specifically cannot initiate amplification, dramatically reducing background signal. Experimental validation has demonstrated approximately 50-60-fold suppression of amplified background compared to standard HCR implementations [10].
Table 1: Core Principles of FISH Methodologies
| Method | Amplification Mechanism | Probe Design | Key Innovation |
|---|---|---|---|
| Standard FISH | None | Fluorescently labeled oligonucleotides | Direct hybridization with fluorescent probes |
| CARD-FISH | Enzymatic (HRP-tyramide deposition) | HRP-labeled oligonucleotides | Signal amplification via enzyme-catalyzed deposition |
| HCR-FISH v2.0 | Enzyme-free nucleic acid amplification (HCR) | Probes with full HCR initiator | Isothermal amplification without enzymes |
| HCR-FISH v3.0 | Enzyme-free nucleic acid amplification with background suppression | Split-initiator probe pairs | Automatic background suppression via cooperative binding |
Evolution of FISH Technologies and Their Applications
Performance Comparison and Quantitative Data
Sensitivity and Detection Efficiency
The evolution from standard FISH to amplified methods has brought substantial improvements in detection sensitivity:
Table 2: Sensitivity Comparison Across FISH Methods
| Method | Target System | Detection Efficiency | Signal-to-Background Ratio | Reference |
|---|---|---|---|---|
| Standard FISH | Alpine karst spring water | 15% (vs DAPI counts) | Not reported | [64] |
| CARD-FISH | Alpine karst spring water | 83% (vs DAPI counts) | Not reported | [64] |
| CARD-FISH | Bottled mineral water | 89% (vs DAPI counts) | Not reported | [64] |
| HCR-FISH v2.0 | Whole-mount chicken embryos (20 unoptimized probes) | High but variable | Low due to high background | [10] |
| HCR-FISH v3.0 | Whole-mount chicken embryos (20 split-initiator probe pairs) | High and consistent | High with minimal background | [10] |
In direct comparisons, CARD-FISH demonstrated substantially higher detection efficiency than standard FISH for enumerating prokaryotic populations in oligotrophic environments. In alpine karst aquifers, CARD-FISH detected 83% of total cells compared to only 15% with standard FISH [64]. Similarly, in bottled mineral water, CARD-FISH achieved 89% detection efficiency, identifying 78% Bacteria and 11% Archaea of total cells [64].
HCR-FISH v3.0 provides exceptional sensitivity while maintaining low background. In whole-mount chicken embryos, using 20 split-initiator probe pairs, the method achieved high signal-to-background ratios with no measurable background increase, whereas standard HCR v2.0 with 20 unoptimized probes showed dramatically increased background and decreased signal-to-background ratio [10].
Specificity and Background Performance
Specificity is a critical parameter, particularly for complex environmental samples or thick tissues where non-specific binding can generate false-positive signals:
CARD-FISH requires careful optimization of permeabilization conditions to allow large HRP-labeled probes to enter cells while maintaining cell integrity. The method also necessitates Hâ‚‚Oâ‚‚ treatment to quench endogenous peroxidase activity, which can damage cellular structures and nucleic acid targets [65].
HCR-FISH v2.0 is susceptible to amplified background from non-specifically bound probes, as each probe carries a full initiator that can trigger the HCR amplification cascade regardless of whether binding is specific or non-specific. This often necessitates individual probe validation and optimization to exclude "bad probes" that contribute to background [10].
HCR-FISH v3.0 introduces automatic background suppression through its split-initiator design. Gel studies demonstrated approximately 60-fold suppression of non-specific amplification, while in situ validation in whole-mount chicken embryos showed approximately 50-fold suppression compared to v2.0 [10]. This dramatic improvement in specificity allows researchers to use larger, unoptimized probe sets while maintaining high signal-to-background ratios.
Practical Implementation Considerations
Each method presents distinct advantages and challenges for practical laboratory implementation:
Table 3: Practical Implementation Characteristics
| Parameter | Standard FISH | CARD-FISH | HCR-FISH v2.0 | HCR-FISH v3.0 |
|---|---|---|---|---|
| Protocol Complexity | Low | High | Moderate | Moderate |
| Hands-on Time | Short | Long | Moderate | Moderate |
| Equipment Requirements | Basic fluorescence microscope | Standard microscope | Basic fluorescence microscope | Basic fluorescence microscope |
| Probe Design Complexity | Low | Moderate | Moderate | High (paired probes) |
| Sample Permeabilization | Standard | Extensive optimization needed | Standard | Standard |
| Tolerance to Suboptimal Samples | Low | Moderate | Low | High |
| Archival Stability | Limited by fluorobleaching | Permanent slides possible | Limited by fluorobleaching | Limited by fluorobleaching |
Experimental Protocols
HCR-FISH v3.0 Protocol for Low-Background Imaging
The following protocol is adapted from third-generation HCR methodologies for challenging imaging applications such as whole-mount embryos or thick tissue sections:
Sample Preparation and Fixation
- Fixation: Fix samples with 4% paraformaldehyde in PBS for 30 minutes to 2 hours depending on sample size and permeability.
- Permeabilization: Treat with proteinase K (1-10 μg/mL) or lysozyme (10 mg/mL) for optimal probe accessibility, particularly for environmental samples [65] [64].
- Hybridization Buffer Preparation: Prepare hybridization buffer containing 10 μM of each split-initiator probe pair, as increased probe concentration has been shown to improve signal intensity in HCR applications [65].
Hybridization and Amplification
- Hybridization: Incubate samples with hybridization buffer containing split-initiator probe pairs at 37°C for 12-16 hours.
- Post-Hybridization Washes: Perform stringent washes to remove unbound probes (30-60 minutes with agitation).
- HCR Amplification: Prepare HCR hairpin solutions (H1 and H2) at 60-120 nM concentration in amplification buffer. Pre-incubate hairpins for 30 minutes to ensure proper folding before adding to samples.
- Amplification Reaction: Incubate samples with HCR hairpin solution for 4-8 hours at room temperature protected from light.
- Counterstaining and Mounting: Counterstain with DAPI (1 μg/mL) or SYBR Green II for nucleic acid visualization [66]. For tissue sections with autofluorescence, use mounting media with antifade agents.
HCR-FISH v3.0 Workflow with Background Suppression
CARD-FISH Protocol for Oligotrophic Samples
For environmental samples with low microbial biomass, the following CARD-FISH protocol has been optimized:
Permeabilization Optimization
- Embedding: Filter samples onto 0.2 μm polycarbonate filters and embed in low-gelling-point agarose (0.1%-0.2%) to prevent cell loss.
- Enzymatic Treatment: Apply lysozyme (10 mg/mL in 0.05 M EDTA, 0.1 M Tris-HCl, pH 8.0) for 60 minutes at 37°C for Gram-negative bacteria. For Gram-positive bacteria, use additional mutanolysin (0.5 U/μL) treatment.
- Peroxidase Quenching: Incubate with 0.01-0.1% Hâ‚‚Oâ‚‚ in methanol for 10-30 minutes to inactivate endogenous peroxidases [64].
Hybridization and Signal Detection
- Hybridization: Use HRP-labeled probes at optimal concentration (0.5-5 ng/μL) in appropriate hybridization buffer at 35-37°C for 2-8 hours.
- Amplification: Apply fluorescently labeled tyramide working solution (1-10 μg/mL in amplification buffer with 0.0015% H₂O₂) for 10-30 minutes at 37°C.
- Counterstaining: Use DAPI (1 μg/mL) for total cell counts and evaluate hybridization efficiency relative to total counts [64].
Protocol Modifications for Challenging Samples
For Sediment and Soil Samples
- Detachment Methods: Implement gentle detachment methods (e.g., ultrasonic bath with low energy input) to separate cells from sediment particles while maintaining cell integrity.
- Extraction Methods: Combine density gradient centrifugation with specific extraction buffers to separate microbial cells from abiotic particles that may cause non-specific probe binding [65].
- Image Processing: Develop customized image processing protocols to distinguish DAPI-stained microbial cells from abiotic particles based on morphological characteristics [65].
For Thick Tissue Sections
- Tissue Clearing: Implement hydrogel-based tissue clearing methods for thick (300 μm) brain slices to enable probe penetration throughout the sample volume while preserving RNA integrity [67].
- Volumetric Imaging: Combine with high-speed volumetric microscopy systems (e.g., VISoR) for comprehensive 3D imaging of large tissue volumes [67].
- Computational Analysis: Employ self-supervised learning frameworks (e.g., VUSMamba) for automated segmentation and quantification of multiple cell types in volumetric image data [67].
The Scientist's Toolkit: Research Reagent Solutions
Table 4: Essential Reagents for Advanced FISH Methodologies
| Reagent/Category | Specific Examples | Function & Application Notes |
|---|---|---|
| Permeabilization Enzymes | Lysozyme, Proteinase K, Mutanolysin | Enable probe access to intracellular targets; optimal concentration varies by sample type and fixation method |
| HCR Hairpin Systems | H1 and H2 hairpins with fluorophores (Alexa Fluor series) | Signal amplification via hybridization chain reaction; require proper folding before use |
| Split-Initiator Probes | Paired probes with partial initiator sequences | Target recognition with automatic background suppression; designed for adjacent binding sites (~25 nt each) |
| CARD-FISH Amplification System | HRP-labeled probes, fluorescent tyramides | Enzymatic signal amplification; tyramide concentration and reaction time critical for signal intensity |
| Hybridization Buffers | Formamide-based with varying concentrations | Stringency control; formamide concentration optimization essential for probe specificity |
| Counterstains | DAPI, SYBR Green II, Hoechst stains | Total nucleic acid visualization; reference for hybridization efficiency calculations |
| Mounting Media | Antifade mounting media (Citifluor, Vectashield) | Signal preservation and reduction of photobleaching; critical for archival samples |
| Tissue Clearing Reagents | Hydrogel monomer solution, SDS-based clearing buffers | Enable probe penetration in thick samples; maintain structural integrity while clarifying tissue |
Application Scenarios and Method Selection Guidelines
Environmental Microbiology
For environmental samples such as sediments, soils, or oligotrophic waters, HCR-FISH v3.0 offers significant advantages due to its automatic background suppression and ability to detect cells with low ribosomal content. The method's reduced susceptibility to abiotic particle interference makes it particularly valuable for sediment samples where traditional FISH methods generate strong false-positive signals [65]. When combined with appropriate sample pretreatment methods (detachment, extraction) and optimized image processing, HCR-FISH v3.0 enables reliable visualization and quantification of microbial populations in challenging environmental matrices.
Clinical Diagnostics
In clinical settings such as HER2 amplification testing in breast cancer, CARD-FISH and brightfield CISH methods offer practical advantages despite the availability of more advanced amplification techniques. These methods provide permanent slides for archiving, allow simultaneous assessment of morphology and genetic abnormalities, can be implemented with standard brightfield microscopy available in most pathology laboratories. A European multicenter study demonstrated 100% concordance between CISH and FISH for HER2 status determination while reducing scoring time by 28% [68]. For clinical HPV detection, FISH methods offer the additional advantage of visualizing integrated versus episomal viral forms in individual cells [69].
Neuroscience and Developmental Biology
For complex tissue imaging applications such as whole-mount vertebrate embryos, thick brain sections, or spatial transcriptomics, HCR-FISH v3.0 provides unparalleled performance. The method's capabilities for multiplexed quantitative analysis enable:
- qHCR Imaging: Analog mRNA relative quantitation with subcellular resolution in anatomical context
- qHCR Flow Cytometry: Analog mRNA relative quantitation for high-throughput expression profiling
- dHCR Imaging: Digital mRNA absolute quantitation via single-molecule imaging in thick autofluorescent samples [10]
When combined with tissue clearing methods and high-speed volumetric microscopy, HCR-FISH v3.0 enables construction of comprehensive cell-type atlases with single-cell resolution in thick (300 μm) tissue slices [67].
The evolution from standard FISH through CARD-FISH to HCR-FISH v3.0 represents a continuous improvement in sensitivity, specificity, and applicability to challenging samples. While each method has its appropriate application context, HCR-FISH v3.0 with split-initiator probes and automatic background suppression offers the most advanced platform for demanding applications in environmental microbiology, neuroscience, and developmental biology. Its enzyme-free isothermal amplification, straightforward multiplexing capabilities, and robust performance with unoptimized probe sets make it particularly valuable for exploring new targets and organisms. As fluorescence in situ hybridization technologies continue to advance, the integration of these methods with tissue clearing, volumetric imaging, and computational analysis approaches will further expand our ability to visualize and quantify nucleic acids in their native spatial context.
Model organisms serve as indispensable tools in biomedical research, providing accessible, ethical, and cost-effective platforms for studying complex biological processes. Within the context of hybridization chain reaction (HCR) v3.0 low-background protocol research, three model systems—zebrafish, chicken embryos, and Drosophila larvae—offer complementary advantages for validating gene expression patterns, regulatory networks, and disease mechanisms. The development of third-generation in situ HCR with its automatic background suppression capability represents a significant advancement for molecular imaging, enabling multiplexed, quantitative, and sensitive mRNA detection in complex biological specimens [70] [10]. This technical breakthrough is particularly valuable for research using these model organisms, as it allows researchers to obtain high-fidelity spatial and temporal gene expression data without the extensive optimization previously required. The unique biological features of each model system—including the optical clarity of zebrafish embryos, the accessibility of chicken embryos for manipulation, and the genetic tractability of Drosophila larvae—combine with HCR v3.0's technical capabilities to accelerate our understanding of gene regulation and function in development and disease.
Table: Key Advantages of Model Organisms in HCR v3.0 Research
| Organism | Key Advantages | Ideal Applications for HCR v3.0 |
|---|---|---|
| Zebrafish | Transparent embryos, high fecundity, 70% gene homology with humans | Whole-mount mRNA quantification, developmental gene expression profiling |
| Chicken Embryo | Accessible for manipulation, phylogenetically closer to mammals, well-characterized development | Human enhancer validation, neural crest studies, multiplexed mRNA imaging |
| Drosophila Larvae | Compact nervous system, sophisticated genetic tools, uniquely identifiable neurons | Neural circuit mapping, learning behavior studies, high-throughput screening |
HCR v3.0 Methodology: Principles and Advancements
Core Technological Innovations
The third-generation in situ HCR protocol introduces a fundamental improvement in nucleic acid detection through its split-initiator probe design and automatic background suppression mechanism. Unlike previous versions where each DNA probe carried a full HCR initiator (I1), HCR v3.0 employs pairs of cooperative split-initiator probes that each carry only half of the initiator sequence [10]. This architectural innovation ensures that signal amplification occurs conditionally only when both probes bind specifically to adjacent sites on the target mRNA. The practical consequence is a dramatic 50–60-fold suppression of background signal compared to standard HCR protocols, without compromising specific signal amplification [10]. This automatic background suppression remains robust even when using large, unoptimized probe sets, significantly reducing the need for laborious probe validation and optimization when studying new targets or organisms.
The HCR v3.0 system enables three distinct multiplexed quantitative analysis modes: (1) qHCR imaging for analog mRNA relative quantitation with subcellular resolution in whole-mount specimens; (2) qHCR flow cytometry for analog mRNA relative quantitation in high-throughput expression profiling; and (3) dHCR imaging for digital mRNA absolute quantitation via single-molecule detection, even in thick autofluorescent samples [70]. These complementary approaches provide researchers with flexible tools for gene expression analysis across different experimental requirements and sample types.
Experimental Workflow and Visualization
The following diagram illustrates the core mechanism of HCR v3.0, highlighting the split-initiator probe design that enables automatic background suppression:
HCR v3.0 Mechanism: Split-initiator probes enable automatic background suppression.
Zebrafish Applications: Quantitative Developmental Analysis
Protocol: Whole-Mount mRNA Detection and Volumetric Analysis in Zebrafish
Zebrafish serve as particularly valuable models for HCR v3.0 applications due to their optical transparency during embryonic stages and high genetic homology to humans. The following protocol integrates HCR v3.0 with advanced imaging for quantitative developmental analysis:
Sample Preparation and HCR v3.0 Processing:
- Embryo Collection and Fixation: Collect zebrafish embryos at desired developmental stages (1-19 days post-fertilization) and fix in 4% paraformaldehyde for 2 hours at room temperature [71].
- Proteinase K Treatment: Permeabilize embryos with Proteinase K (10 µg/mL) for 15-30 minutes depending on developmental stage.
- HCR v3.0 Hybridization:
- Design split-initiator probe pairs (25 nt binding sites each) targeting mRNA of interest.
- Hybridize probes to target mRNA in hybridization buffer at 37°C overnight.
- Amplification:
- Wash off excess probes with SSCT buffer.
- Add HCR hairpins H1 and H2 fluorescently labeled with appropriate fluorophores.
- Incubate for 45-60 minutes at room temperature for amplification polymerization.
- Imaging: Mount embryos and image using confocal microscopy or light-sheet fluorescence microscopy.
Mueller Matrix OCT and Deep Learning Segmentation:
- 3D Image Acquisition: Acquire zebrafish images using Mueller matrix optical coherence tomography (OCT) with axial resolution of 8.9 µm and lateral resolution of 18.2 µm [71].
- Organ Segmentation: Apply U-Net deep learning network to segment various anatomical structures including body, eyes, spine, yolk sac, and swim bladder.
- Volumetric Analysis: Calculate organ volumes from segmented structures and analyze developmental trends from day 1 to day 19.
Table: Quantitative Zebrafish Organ Development Analysis (1-19 dpf)
| Organ/Structure | Developmental Trend | Key Applications | Measurement Technique |
|---|---|---|---|
| Body Volume | Steady growth trend | Overall development assessment | Deep learning segmentation of OCT images |
| Eyes | Progressive development | Visual system development | Volumetric analysis |
| Spine | Slower relative development | Skeletal formation studies | Quantitative segmentation |
| Yolk Sac | Initial prominence with subsequent regression | Nutrient utilization studies | 3D volume calculation |
| Swim Bladder | Delayed but steady development | Buoyancy organogenesis | Automated detection and measurement |
Visualization: Zebrafish Analysis Workflow
The integrated workflow for zebrafish analysis combining HCR v3.0 and deep learning segmentation can be visualized as follows:
Zebrafish Analysis: Integrated HCR v3.0 and deep learning workflow.
Chicken Embryo Applications: Multiplexed Enhancer Validation
Protocol: Multiplexed mRNA Imaging in Whole-Mount Chicken Embryos
Chicken embryos provide exceptional models for studying human disease mechanisms and gene regulatory networks due to their phylogenetic proximity to mammals and accessibility during development. The HCR v3.0 protocol enables robust multiplexed analysis in this system:
Neural Crest Multiplexed Imaging:
- Embryo Collection: Incubate fertilized chicken eggs at 37–39°C and 45–55% humidity until desired Hamburger and Hamilton (HH) stage [72].
- Fixation and Preparation: Dissect embryos and fix in 4% paraformaldehyde for 2 hours. For whole-mount specimens, permeabilize with detergent solution.
- Multiplexed Probe Design:
- Design 4–5 sets of split-initiator probe pairs (20 pairs per target) against different mRNA targets.
- Ensure minimal sequence complementarity between different probe sets.
- Simultaneous Hybridization and Amplification:
- Hybridize all probe sets simultaneously in a single reaction.
- Amplify with spectrally distinct HCR amplifiers (e.g., Alexa Fluor 488, 546, 594, 647) in one pot.
- No sequential hybridization or signal removal required.
- Image Acquisition and Analysis: Image using confocal or light sheet microscopy. Quantify expression levels using qHCR imaging analysis.
Human Enhancer Validation:
- Enhancer-reporter Construction: Clone putative human enhancer sequences upstream of a minimal promoter driving fluorescent reporter or HCR initiator sequences [73].
- Embryo Electroporation: Introduce enhancer-reporter constructs into specific regions of chicken embryos using in ovo electroporation.
- HCR v3.0 Detection: Detect reporter mRNA expression using HCR v3.0 with automatic background suppression.
- Pattern Analysis: Compare enhancer-driven expression patterns to known gene expression domains to validate enhancer function.
Key Research Applications in Chicken Embryos
The chicken embryo model exhibits particular strength in several research domains relevant to HCR v3.0 applications:
Neurological Disorders Research: Chicken embryos provide excellent models for neurodevelopment studies with a well-characterized central nervous system. The blood-brain barrier matures from 14 EID (embryo incubation day) and shares significant similarities with the human blood-brain barrier [72]. HCR v3.0 enables precise mapping of gene expression patterns critical for understanding neurological disorders.
Cancer Research and Drug Screening: The chorioallantoic membrane (CAM) of chicken embryos provides an efficient platform for studying tumor biology and metastasis. HCR v3.0 multiplexing allows simultaneous monitoring of oncogene expression, tumor suppressor genes, and metastasis markers in the same tissue context [72].
Human Enhancer Characterization: Chicken embryos closely parallel human early embryogenesis, providing an accessible in vivo system for validating putative human enhancer sequences identified through epigenomic data. HCR v3.0 facilitates high-resolution analysis of enhancer-driven expression patterns with minimal background [73].
Drosophila Larvae Applications: Neural Circuits and Behavior
Protocol: Behavioral Analysis and Neural Circuit Mapping
Drosophila larvae offer unparalleled genetic tractability for studying neural circuits and behavior. HCR v3.0 enhances these studies by enabling precise mapping of gene expression in the compact larval nervous system:
Whole-Mount CNS HCR v3.0:
- Larval Collection and Fixation: Collect third-instar larvae and dissect central nervous systems in ice-cold PBS. Fix in 4% paraformaldehyde for 30 minutes.
- HCR v3.0 Processing:
- Permeabilize tissues with 0.3% Triton X-100 for 1 hour.
- Hybridize with split-initiator probes targeting neural genes of interest.
- Amplify with fluorophore-labeled HCR hairpins.
- Imaging and Analysis: Image whole-mount CNS using confocal microscopy. Reconstruct expression patterns in the complete larval EM volume.
Automated Behavioral Analysis:
- Larval Preparation: Wash larvae foraging in food and collect using mesh filtration [74].
- Activity Monitoring:
- Place individual larvae in 8 cm glass assay tubes with agar plugs.
- Monitor activity using TriKinetics Drosophila Activity Monitor with 17 infrared beams per tube.
- Record parameters including number of moves, sensor triggers, and position data.
- Conditioning Paradigms:
- For classical conditioning: Pair odor (CS) with optogenetic activation of reward/punishment pathways (US) [75].
- For operant conditioning: Use real-time behavior detection to trigger optogenetic reward specific to bend directions.
Visualization: Drosophila Larval Analysis Platform
The integrated approach for Drosophila larval analysis combines HCR v3.0 gene expression mapping with automated behavioral assessment:
Drosophila Analysis: Integrated gene expression and behavioral assessment.
Research Reagent Solutions
Table: Essential Research Reagents for HCR v3.0 Applications in Model Organisms
| Reagent Category | Specific Examples | Function and Application |
|---|---|---|
| HCR v3.0 Components | Split-initiator probe pairs, H1 and H2 hairpins | Enable multiplexed mRNA detection with automatic background suppression [10] |
| Imaging Systems | Mueller matrix OCT, confocal microscopy, light-sheet microscopy | High-resolution 3D imaging for volumetric analysis and gene expression mapping [71] |
| Genetic Tools | Gal4/UAS system, LexA/LexAop, Cre/loxP | Cell-specific manipulation of gene expression and neural activity [75] |
| Behavioral Analysis | TriKinetics Drosophila Activity Monitor, real-time tracking systems | Automated quantification of larval locomotion and learning behaviors [74] [75] |
| Electroporation Systems | In ovo electroporation apparatus | Introduction of genetic constructs into specific chicken embryo regions [73] |
The integration of HCR v3.0 technology with established model organisms—zebrafish, chicken embryos, and Drosophila larvae—creates a powerful framework for addressing diverse research questions in developmental biology, neuroscience, and disease mechanisms. The automatic background suppression inherent in HCR v3.0 provides exceptional signal-to-background ratios that are maintained even when using large, unoptimized probe sets, significantly reducing optimization time when exploring new targets or organisms. This technical advancement, combined with the unique strengths of each model system, enables researchers to obtain quantitative, multiplexed gene expression data with spatial and temporal precision. As these methodologies continue to evolve and become more widely adopted, they will undoubtedly accelerate our understanding of gene regulatory networks and their roles in both normal development and disease states, ultimately facilitating translation of basic research findings into therapeutic applications.
In the field of translational research, the accurate visualization of biomarker expression within the complex architecture of human tissues is paramount. Formalin-Fixed Paraffin-Embedded (FFPE) tissues represent the gold standard for pathological specimen preservation, yet obtaining high-quality, multiplexed gene expression data from these samples has historically been challenging due to issues with autofluorescence, background noise, and signal quantification. The advent of Hybridization Chain Reaction v3.0 (HCR v3.0) with its inherent automatic background suppression technology presents a transformative solution for researchers and drug development professionals requiring precise spatial biology data from clinical FFPE samples. This application note details the implementation, optimization, and quantitative benefits of HCR v3.0 for FFPE tissue analysis within the broader context of advancing molecular pathology and therapeutic development.
Technical Principle: HCR v3.0 and Automatic Background Suppression
HCR v3.0 represents a significant evolution in signal amplification technology for in situ hybridization. The core innovation lies in its split-initiator probe system, which fundamentally suppresses non-specific amplified background—a critical advantage when working with autofluorescent FFPE tissues.
The mechanism functions as follows:
- Standard Probe Challenge: Traditional in situ hybridization methods use DNA probes each carrying a full HCR initiator (I1). If such a probe binds non-specifically, it triggers HCR amplification, generating false-positive signal [10].
- Split-Initiator Solution: HCR v3.0 replaces each standard probe with a pair of cooperative split-initiator probes, with each carrying only half of the HCR initiator I1 [10].
- Conditional Amplification: Amplification occurs only when both probes in a pair hybridize specifically to adjacent binding sites on the target mRNA, colocalizing the two initiator halves to form a complete initiator. Any individual probe binding non-specifically lacks its partner and cannot trigger the chain reaction, thus suppressing amplified background [10].
Table 1: Quantitative Performance Comparison of HCR v3.0 vs. v2.0
| Performance Metric | HCR v2.0 (Standard Probes) | HCR v3.0 (Split-Initiator Probes) |
|---|---|---|
| Background Generation | High with non-specific binding [10] | Automatic suppression; minimal increase with larger probe sets [10] |
| Probe Set Optimization | Crucial; requires individual "bad probe" removal [10] | Not required; robust with unoptimized probe sets [10] |
| Typical HCR Suppression | Not Applicable | ≈50-60 fold (in situ and in vitro) [10] |
| Signal-to-Background Ratio | Decreases with added probes [10] | Increases monotonically with added probes [10] |
Figure 1: HCR v3.0 Mechanism. Split-initiator probes must bind adjacently on the target mRNA to colocalize initiator halves and trigger the HCR amplification polymer, ensuring conditional signal amplification [10].
Optimized Protocol for FFPE Tissue Sections
The following protocol is optimized for human FFPE tissue sections, incorporating best practices from vertebrate embryo and octopus whole-mount studies which share challenges with thick, autofluorescent samples [10] [45].
Pre-Hybridization Tissue Preparation
- Sectioning and Deparaffinization: Cut FFPE sections at 5-10 µm thickness. Standard deparaffinization is performed using xylene (or substitutes) and graded ethanol series.
- Rehydration: Rehydrate sections through a descending ethanol series (100%, 95%, 70%) to PBS.
- Permeabilization: Treat slides with a permeabilization agent. For octopus embryos, proteinase K (10 µg/ml in PBS-DEPC) for 15 minutes at room temperature was effective [45]. Optimization Note: For human FFPE tissues, the concentration and duration of proteinase K may require titration (e.g., 1-20 µg/ml for 5-30 minutes) based on fixation conditions.
- Post-fixation: Re-fix tissues in 4% PFA for 10 minutes to maintain tissue integrity after permeabilization.
- Pre-hybridization Wash: Rinse with PBS-DEPC.
Hybridization and Amplification
- Probe Hybridization
- Prepare the probe solution by adding 0.4 pmol of each split-initiator probe to 100 µl of probe hybridization buffer per sample [45].
- Apply the solution to the tissue section and incubate overnight (12-20 hours) at 37°C.
- Post-Hybridization Washes
- Remove unbound probes with 4x 15-minute washes in probe wash buffer at 37°C.
- Follow with 2x 5-minute washes in 5X SSCT (Sodium Chloride Sodium Citrate Buffer with Tween 20) at room temperature.
- Signal Amplification
- Hairpin Preparation: For each amplifier, snap-cool 2 µl of a 3 µM stock of hairpin H1 and H2 separately: heat to 95°C for 90 seconds, then place on ice for 5 minutes, and finally incubate at room temperature for 30 minutes [45].
- Amplification Incubation: Add 3 pmol of each pre-annealed hairpin (H1 and H2) to 100 µl of amplification buffer. Apply this to the tissue and incubate in the dark overnight at room temperature [45].
- Final Washes: Remove excess hairpins with 3x 5-minute washes in 5X SSCT at room temperature.
Counterstaining and Mounting
- Nuclear Counterstain: Apply a nuclear counterstain such as DAPI (e.g., 1:5000 dilution for 10 minutes).
- Mounting: Wash briefly in an appropriate buffer and mount sections with a compatible, anti-fading mounting medium.
Research Reagent Solutions
Table 2: Essential Reagents and Materials for HCR v3.0 on FFPE Tissue
| Reagent/Material | Function/Purpose | Implementation Example |
|---|---|---|
| Split-Initiator Probe Pairs | Target-specific detection; enable automatic background suppression by carrying halves of the HCR initiator [10]. | Designed via automated tools (e.g., Easy_HCR); typical probe sets contain 20-30 probe pairs for strong signal [45]. |
| HCR Hairpin Amplifiers (H1, H2) | Fluorophore-labeled DNA hairpins that undergo chain reaction polymerization upon initiator binding, providing signal amplification [10]. | Obtain from Molecular Instruments; available with different fluorophores (e.g., Alexa Fluor 488, 546, 647) for multiplexing [45]. |
| Probe Hybridization Buffer | Creates optimal conditions for specific hybridization between the split-initiator probes and the target mRNA. | Use standardized buffer as per Molecular Instruments protocol. |
| Amplification Buffer | Provides the ionic and chemical environment necessary for the efficient self-assembly of the HCR hairpins. | Use standardized buffer as per Molecular Instruments protocol. |
| Proteinase K | Enzymatically digests proteins to permeabilize the fixed tissue, allowing probe access to the target mRNA. | Titrate concentration and incubation time for human FFPE; a starting point is 10 µg/ml for 15 min [45]. |
Quantitative Data and Analysis Modes
The robust signal-to-background ratio enabled by HCR v3.0's automatic background suppression unlocks powerful quantitative analysis modes directly in situ, moving beyond simple qualitative detection.
Table 3: Multiplexed Quantitative Analysis Modes Enabled by HCR v3.0
| Analysis Mode | Description | Application Context in Translational Research |
|---|---|---|
| qHCR Imaging | Analog mRNA relative quantitation with subcellular resolution in the anatomical context of intact samples [10]. | Precisely map and compare expression levels of therapeutic targets or biomarkers across different tissue regions (e.g., tumor vs. stroma). |
| dHCR Imaging | Digital mRNA absolute quantitation via single-molecule imaging in thick autofluorescent samples [10]. | Accurately count transcript numbers in FFPE tissues for ultra-sensitive biomarkers or low-abundance targets, crucial for patient stratification. |
| qHCR Flow Cytometry | Analog mRNA relative quantitation for high-throughput expression profiling of dissociated cells [10]. | Correlate spatial expression patterns from tissue sections with high-throughput data from single-cell suspensions derived from adjacent tissue. |
Figure 2: HCR v3.0 Experimental Workflow for FFPE Tissues. The optimized protocol from tissue preparation to quantitative analysis ensures high-fidelity mRNA detection in clinical samples.
The implementation of HCR v3.0 on human FFPE tissue sections directly addresses several long-standing bottlenecks in translational research pathology. The automatic background suppression technology is the cornerstone of this advancement, providing a dual benefit: it dramatically enhances the signal-to-background ratio for clearer, more reliable images, and it eliminates the labor-intensive process of probe-set optimization [10]. This robustness allows researchers to confidently use large, unoptimized probe sets to increase signal strength without the penalty of increased background, a critical factor when analyzing heterogeneous clinical samples where target abundance may vary widely.
The ability to perform multiplexed quantitative analysis—including both analog (qHCR) and digital (dHCR) absolute quantitation—within the anatomical context of FFPE tissues provides a powerful bridge between traditional pathology and modern molecular profiling [10]. This enables drug development professionals to not only identify which cells express a biomarker, but also to precisely quantify its expression levels at and below the single-cell level, directly in the tissue microenvironment. Such data is invaluable for understanding drug mechanism of action, validating pharmacodynamic biomarkers, and identifying patient subgroups most likely to respond to therapy.
In conclusion, HCR v3.0 establishes a new standard for sensitive, multiplexed, and quantitative gene expression analysis in FFPE tissues. Its unique combination of robustness, quantitation, and versatility makes it an indispensable tool for translational researchers and scientists driving innovation in biomarker discovery and targeted therapeutic development.
Conclusion
HCR v3.0 represents a significant leap forward for in situ detection, establishing a unified and robust framework for quantitative spatial biology. Its core innovation—automatic background suppression via split-initiator probes—confers exceptional performance and ease of use, enabling researchers to reliably image low-abundance targets with high specificity in the most challenging samples. The protocol's versatility for multiplexed RNA and protein imaging, combined with its validated quantitative capabilities, positions it as an indispensable tool for validating single-cell sequencing data, elucidating complex disease mechanisms, and advancing drug discovery. Future directions will likely see expanded reagent libraries, increased multiplexing capacity, and deeper integration with other omics technologies, further solidifying its role in biomedical and clinical research.
References
- 1. Next-Generation in Situ Hybridization Chain Reaction [https://pmc.ncbi.nlm.nih.gov/articles/PMC4046802/]
- 2. [PDF] Third-generation in situ hybridization chain reaction [https://www.semanticscholar.org/paper/Third-generation-in-situ-hybridization-chain-robust-Choi-Schwarzkopf/905932a64d04b1def045784f9501085b43416d04]
- 3. A simple and fast optical clearing method for whole-mount ... [https://pmc.ncbi.nlm.nih.gov/articles/PMC12342960/]
- 4. A rapid and sensitive, multiplex, whole mount RNA fluorescence ... [https://web.sas.upenn.edu/wagner-lab/2023/11/27/a-rapid-and-sensitive-multiplex-whole-mount-rna-fluorescence-in-situ-hybridization-and-immunohistochemistry-protocol/]
- 5. Proximity-dependent initiation of hybridization chain reaction [https://www.nature.com/articles/ncomms8294]
- 6. Low background catalytic redox recycling coupled with ... [https://www.sciencedirect.com/science/article/abs/pii/S1567539424002500]
- 7. Indica Labs and Molecular Instruments Announce ... [https://indicalab.com/uncategorized/indica-labs-and-molecular-instruments-announce-partnership/]
- 8. Leica Biosystems & Molecular Instruments Launch HCR ISH [https://www.leicabiosystems.com/us/news/leica-biosystems-announces-partnership-with-molecular-instruments-as-hcrtm-pro-rna-ish/]
- 9. Biocare Medical and Molecular Instruments Partner to ... [https://biocare.net/blog/biocare-medical-and-molecular-instruments-partner-to-revolutionize-automated-bioimaging-through-oncore-pro-x-and-hcr-rna-ish-assays/]
- 10. Third-generation in situ hybridization chain reaction [https://pmc.ncbi.nlm.nih.gov/articles/PMC6031405/]
- 11. HCR RNA-FISH [https://www.moleculartechnologies.org/info/hybridization]
- 12. US11214825B2 - Fractional initiator hybridization chain ... [https://patents.google.com/patent/US11214825B2/en]
- 13. Tips to Boost Performance in Your HCRâ„¢ RNA ... [https://www.hcrimaging.com/articles/boost-performance]
- 14. rwnull/HCRProbeMakerCL [https://github.com/rwnull/HCRProbeMakerCL]
- 15. Next-generation hybridization chain reaction tools with ... [https://pmc.ncbi.nlm.nih.gov/articles/PMC12440025/]
- 16. qHCR Flow Cytometry (v3.0) - PubMed - NIH [https://pubmed.ncbi.nlm.nih.gov/32394379/]
- 17. **Hybridization Chain Reaction (HCR) In Situ Protocol** - HackMD [https://hackmd.io/@ColbyMBL/hcr]
- 18. Modified in situ Hybridization Chain Reaction Using Short ... [https://www.frontiersin.org/journals/molecular-neuroscience/articles/10.3389/fnmol.2020.00075/full]
- 19. Hybridization Chain Reaction for Quantitative and Multiplex ... [https://pmc.ncbi.nlm.nih.gov/articles/PMC7612682/]
- 20. Optimization of hybridization chain reaction for imaging ... [https://pmc.ncbi.nlm.nih.gov/articles/PMC11446410/]
- 21. Optimization of Whole Mount RNA Multiplexed in situ Hybridization Chain Reaction With Immunohistochemistry, Clearing and Imaging to Visualize Octopus Embryonic Neurogenesis - PMC [https://pmc.ncbi.nlm.nih.gov/articles/PMC9196907/]
- 22. Multiplexed Quantitative In Situ Hybridization with Subcellular or Single-Molecule Resolution Within Whole-Mount Vertebrate Embryos: qHCR and dHCR Imaging (v3.0) - PubMed [https://pubmed.ncbi.nlm.nih.gov/32394381/]
- 23. Protocol for multiplex whole-mount RNA fluorescence in situ ... [https://pmc.ncbi.nlm.nih.gov/articles/PMC12509983/]
- 24. Methods Protoc., Volume 8, Issue 2 (April 2025) – 21 articles [https://www.mdpi.com/2409-9279/8/2]
- 25. Hybridization chain reaction enables a unified approach to multiplexed, quantitative, high-resolution immunohistochemistry and in situ hybridization - PubMed [https://pubmed.ncbi.nlm.nih.gov/35020875/]
- 26. Designing a Hybrid Chain Reaction Probe for Multiplex Transcripts Assay with High-Level Imaging - PubMed [https://pubmed.ncbi.nlm.nih.gov/38154106/]
- 27. Multiplexed RNA imaging and in situ profiling in living cells [https://pubs.rsc.org/en/content/articlehtml/2025/sc/d5sc06220a]
- 28. A protocol for whole-mount immuno-coupled hybridization ... [https://pmc.ncbi.nlm.nih.gov/articles/PMC8348268/]
- 29. Protocol optimization improves the performance of ... [https://www.nature.com/articles/s41598-025-17477-1]
- 30. An easy to use tool for the analysis of subcellular mRNA ... [https://www.nature.com/articles/s41598-024-58641-3]
- 31. Label and quantify mRNA molecules in live cell experiments ... [https://pmc.ncbi.nlm.nih.gov/articles/PMC9405536/]
- 32. Long-term imaging of individual mRNA molecules in living ... [https://www.sciencedirect.com/science/article/pii/S2667237522000893]
- 33. Hybridization chain reaction enables a unified approach to ... [https://pmc.ncbi.nlm.nih.gov/articles/PMC8645210/]
- 34. HCRâ„¢ Gold RNA-FISH/IF [https://www.molecularinstruments.com/hcr-gold-rnafish-if]
- 35. A Fast And Versatile Method for Simultaneous HCR ... [https://pmc.ncbi.nlm.nih.gov/articles/PMC10445416/]
- 36. HI-FISH: Whole brain in situ mapping of neuronal activation ... [https://elifesciences.org/reviewed-preprints/92380v1]
- 37. HCR™ Gold RNA-FISH/2ºIF [https://www.molecularinstruments.com/hcr-gold-rnafish-2%C2%BAif]
- 38. Hybridization Chain Reaction v3.0 [https://bio-protocol.org/exchange/minidetail?id=10506390&type=30]
- 39. Multispectral LEDs Eliminate Lipofuscin-Associated ... [https://pmc.ncbi.nlm.nih.gov/articles/PMC9520168/]
- 40. Tech Tip: Battling Tissue Autofluorescence [https://biotium.com/tech-tips-protocols/tech-tip-battling-tissue-autofluorescence/]
- 41. An optimised protocol for the detection of lipofuscin, a versatile ... [https://pmc.ncbi.nlm.nih.gov/articles/PMC11249248/]
- 42. Simple Method for Reduction of Autofluorescence in ... [https://www.semanticscholar.org/paper/Simple-Method-for-Reduction-of-Autofluorescence-in-Neumann-Gabel/47e1a705da5254459fbe00f3f76188205e13d7fb]
- 43. Hybridization Chain Reaction for localization of mRNA in ... [https://pmc.ncbi.nlm.nih.gov/articles/PMC9202517/]
- 44. Third-generation in situ hybridization chain reaction [https://authors.library.caltech.edu/records/ajq80-4k145/latest]
- 45. Optimization of Whole Mount RNA Multiplexed in situ ... [https://www.frontiersin.org/journals/physiology/articles/10.3389/fphys.2022.882413/full]
- 46. Blocking Strategies for IHC [https://www.thermofisher.com/us/en/home/life-science/protein-biology/protein-biology-learning-center/protein-biology-resource-library/pierce-protein-methods/blocking-strategies-ihc.html]
- 47. IHC Blocking Non-Specific Binding [https://www.bio-techne.com/applications/imaging/immunohistochemistry/blocking-non-specific-binding]
- 48. Immunohistochemistry Basics: Blocking Non-Specific ... [https://bitesizebio.com/13466/immunohistochemistry-basics-blocking-non-specific-staining/]
- 49. Successful Immunofluorescence: Fixation & Permeabilization [https://blog.cellsignal.com/successful-immunofluorescence-fixation-and-permeabilization]
- 50. An optimized permeabilization step for flow cytometry ... [https://pmc.ncbi.nlm.nih.gov/articles/PMC6396090/]
- 51. RNase-Free Supplies and Reagents [https://www.thermofisher.com/ws/en/home/references/ambion-tech-support/nuclease-enzymes/tech-notes/rnase-activity-in-mouse-tissue.html]
- 52. RNase inhibitors for molecular diagnostics [https://custombiotech.roche.com/global/en/post-listing/2025/rnase-inhibitors-for-molecular-diagnostics.html]
- 53. An update on recent advances in fluorescent materials for ... [https://pubs.rsc.org/en/content/articlehtml/2025/ra/d5ra03102h]
- 54. Next-generation hybridization chain reaction tools with ... [https://sciety-labs.elifesciences.org/articles/by?article_doi=10.1101/2025.09.09.675218]
- 55. Novel topical fluorescent imaging technique rapidly and ... [https://www.eurekalert.org/news-releases/1095567]
- 56. Mounting Media | Thermo Fisher Scientific - US [https://www.thermofisher.com/us/en/home/life-science/cell-analysis/cell-analysis-learning-center/molecular-probes-school-of-fluorescence/imaging-basics/labeling-your-samples/mounting-media.html]
- 57. The End Of The Line: Considerations For Mounting Media ... [https://vectorlabs.com/blog/considerations-for-mounting-media-selection-html/?srsltid=AfmBOop2zv4hzOnQ_8yG-hSmFNFnKDIy38uPrP0B2wPGVGdUy0fO2JHG]
- 58. Mounting Coverslips with LumiMount® Media [https://www.lumiprobe.com/protocols/covering-with-lumimount]
- 59. A novel protein-preserving passive tissue clearing ... [https://www.nature.com/articles/s12276-025-01550-w]
- 60. qHCR and dHCR Imaging (v3.0) - PubMed - NIH [https://pubmed.ncbi.nlm.nih.gov/32394380/]
- 61. Subcellular Quantitative RNA and Protein Imaging [https://www.molecularinstruments.com/subcellular-rna-protein-imaging]
- 62. qHCR and dHCR Imaging (v3.0) [https://authors.library.caltech.edu/records/xggnq-4z784/latest]
- 63. qHCR and dHCR Imaging (v3.0) [https://authors.library.caltech.edu/records/v0apc-s6s92/latest]
- 64. and drinking water - PMC - PubMed Central [https://pmc.ncbi.nlm.nih.gov/articles/PMC3160464/]
- 65. Optimizing the hybridization chain reaction-fluorescence in ... [https://pmc.ncbi.nlm.nih.gov/articles/PMC10077247/]
- 66. A CARD-FISH protocol for the identification and ... [https://pubmed.ncbi.nlm.nih.gov/16216355/]
- 67. Frontiers | Self-supervised learning analysis of multi- FISH labeled... [https://www.frontiersin.org/journals/neuroscience/articles/10.3389/fnins.2025.1622950/full]
- 68. Determination of HER2 amplification in primary breast ... [https://pmc.ncbi.nlm.nih.gov/articles/PMC2855864/]
- 69. of fluorescence in situ Comparison , hybrid capture... hybridization [https://pubmed.ncbi.nlm.nih.gov/19736868/]
- 70. Third-generation in situ hybridization : multiplexed... chain reaction [https://pubmed.ncbi.nlm.nih.gov/29945988/]
- 71. Quantitative characterization of zebrafish development based ... [https://pmc.ncbi.nlm.nih.gov/articles/PMC10278635/]
- 72. The Chicken Embryo: An Alternative Animal Model in ... [https://pmc.ncbi.nlm.nih.gov/articles/PMC11925699/]
- 73. Leveraging chicken embryos for studying human enhancers [https://www.sciencedirect.com/science/article/pii/S0012160625001320]
- 74. Measurement of Larval Activity in the Drosophila Activity Monitor [https://pmc.ncbi.nlm.nih.gov/articles/PMC4542324/]
- 75. High-throughput automated methods for classical and ... [https://elifesciences.org/articles/70015]