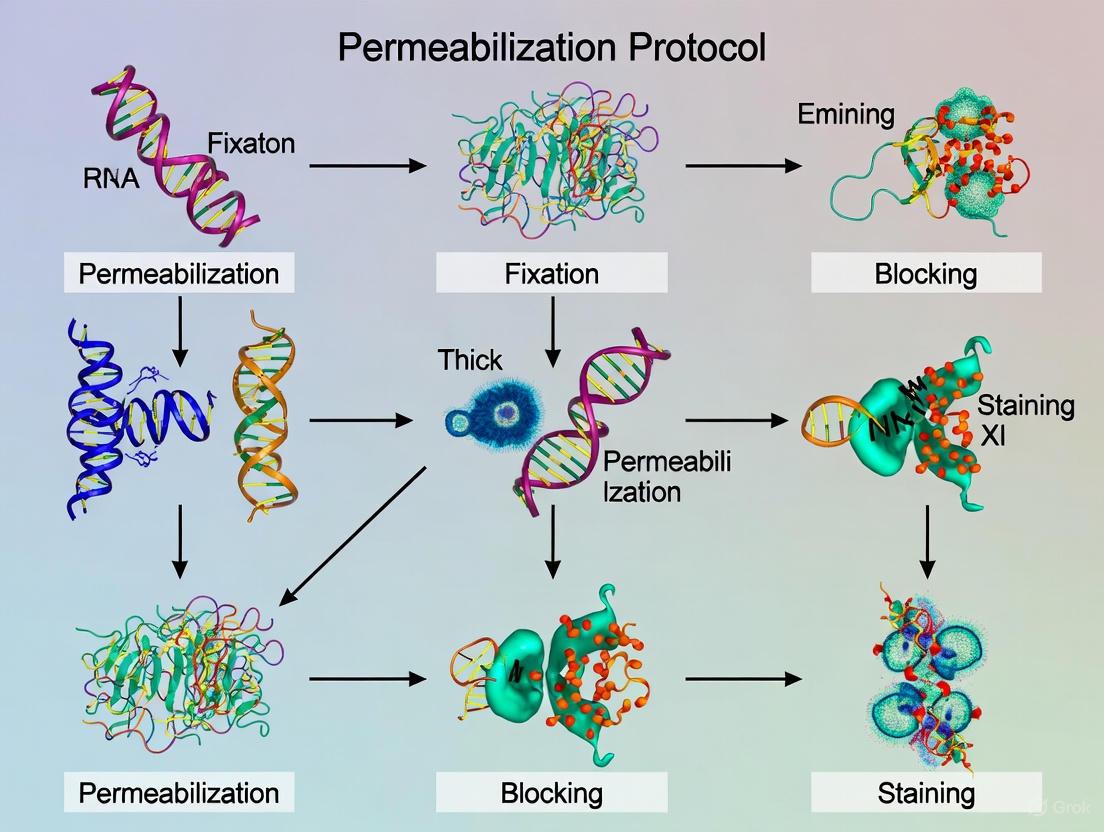
Advanced Permeabilization Strategies for Thick Embryo Samples: A Complete Guide for 3D Imaging and Multiplexing
This article provides a comprehensive guide for researchers and drug development professionals on optimizing permeabilization protocols for thick embryo samples.
Advanced Permeabilization Strategies for Thick Embryo Samples: A Complete Guide for 3D Imaging and Multiplexing
Abstract
This article provides a comprehensive guide for researchers and drug development professionals on optimizing permeabilization protocols for thick embryo samples. Effective permeabilization is a critical, yet challenging, step for deep-tissue immunostaining, 3D imaging, and single-cell multi-omics. We cover the foundational science of fixatives and detergents, detail step-by-step methodologies validated in complex systems like zebrafish larvae and blastocysts, and present rigorous troubleshooting and optimization strategies. Furthermore, we discuss validation techniques to ensure data quality and compare protocol performance. By synthesizing recent advances, this guide aims to empower scientists to overcome the technical barriers in analyzing intracellular and intranuclear targets within thick embryonic tissues.
The Science of Permeabilization: Principles and Challenges in Embryonic Tissues
Why Permeabilization is Critical for Thick Embryo Analysis
The study of whole-mount embryos provides unparalleled insight into the spatial and temporal dynamics of developmental biology. However, the very three-dimensional (3D) architecture that makes these samples so informative also presents a significant analytical barrier: the impermeability of dense tissue layers and membranes to detection reagents. Effective permeabilization is, therefore, not a mere preparatory step but a critical determinant for the success of any experiment aiming to visualize intracellular targets within thick embryo samples. Without optimized protocols to render the entire sample accessible, immunostaining for transcription factors, cytoskeletal components, and phosphorylated signaling proteins yields only superficial data, compromising the integrity of the entire research endeavor. This application note details the necessity of permeabilization and provides validated protocols for achieving consistent and comprehensive labeling in thick embryo specimens.
The Critical Role of Permeabilization
The Problem of Inaccessible Compartments
In thick embryo samples, such as pre-implantation blastocysts or gastrulating embryos, target antigens are often located within deep cell layers or within intracellular compartments like the nucleus. For instance, studying the specification of the primitive endoderm (PrE), pluripotent epiblast, or trophectoderm (TE) in mouse blastocysts requires accurate quantification of key transcription factors, which are nuclear proteins [1]. Similarly, investigating TGF-β superfamily signaling during human embryo development involves detecting phosphorylated SMAD proteins (e.g., pSMAD2/3, pSMAD1/5) within the nucleus [2]. The plasma membrane and nuclear envelope are formidable barriers to large antibody-fluorophore conjugates. Inadequate permeabilization results in:
- Weak or absent signal from internal and nuclear antigens.
- Incomplete or biased data, where only cells on the sample periphery are stained.
- Failed experiments and wasted precious biological samples, such as human embryos.
How Permeabilization Works
Permeabilization is the process of creating openings in the lipid bilayers of cell membranes without completely destroying cellular architecture. This is typically achieved using detergents that solubilize membrane lipids.
- Detergent-Based Permeabilization: Reagents like Triton X-100 and saponin create pores in the membrane. Triton X-100 is a non-ionic detergent that is highly effective for general use, while saponin, which complexes with cholesterol, is often used for more gentle permeabilization and can be reversible.
- Alcohol-Based Permeabilization: Methanol and ethanol, often used in combination with fixation (e.g., methanol fixation at -20°C), simultaneously fix and permeabilize tissues by precipitating proteins and dissolving lipids. However, this method can disrupt scatter profiles and surface antigen recognition [3].
For thick samples, the permeabilization step must be sufficiently prolonged and aggressive to allow reagents to diffuse to the deepest layers, while the fixative (commonly Paraformaldehyde (PFA)) must be strong enough to maintain structural integrity throughout this process.
Quantitative Comparison of Permeabilization Buffers
The choice of permeabilization buffer can dramatically impact the quality of staining for both intracellular and nuclear targets. The table below summarizes key findings from comparative studies.
Table 1: Comparison of Fixation/Permeabilization Buffer Performance
| Buffer Name/Type | Best For | Key Advantages | Key Disadvantages/Considerations |
|---|---|---|---|
| BD Pharmingen FoxP3 Buffer Set [3] | Transcription factors (e.g., FoxP3), Nuclear antigens | Distinct population resolution; Minimal impact on surface markers (e.g., CD25, CD45). | Commercial cost. |
| "Dish Soap" Protocol (Burton's Better Buffer) [4] | Simultaneous detection of transcription factors & fluorescent proteins (e.g., GFP) | Low cost; Effective for nuclear access while retaining cytoplasmic fluorescent proteins. | Not optimal for either application in isolation; Requires recipe optimization. |
| Methanol-based Methods [3] | General intracellular staining | Readily available. | Can significantly decrease light scatter resolution and surface antigen staining. |
| BD Pharmingen Transcription Factor Buffer Set [3] | Transcription factors | Good distinct population resolution. | May not perform as well as the FoxP3 set for some targets. |
| BioLegend FoxP3 Fix/Perm Buffer Set [3] | Transcription factors | Commercial availability. | Poor resolution of T Reg population; Lower CD25 staining. |
Experimental Protocols for Thick Embryo Analysis
Protocol 1: Immunofluorescence and Nuclear Segmentation for Pre-implantation Embryos
This protocol, adapted for mouse and human blastocysts, allows for quantitative single-cell analysis of protein expression [1] [2].
Materials and Reagents:
- Paraformaldehyde (PFA), 4% in PBS (fresh or <7 days old).
- Phosphate-buffered saline (PBS), with and without Ca²⁺ and Mg²⁺.
- Permeabilization Buffer: PBS with 0.1% Triton X-100.
- Blocking Solution: PBS with 1% BSA or serum.
- Primary and Secondary Antibodies.
- DAPI (for nuclear staining).
- M2 or FHM Embryo Manipulation Medium.
- Glass Capillaries (for embryo handling).
Step-by-Step Procedure:
- Embryo Collection and Fixation:
- Flush blastocysts from the uterus and rinse in manipulation medium.
- For unhatched blastocysts (
- Transfer embryos to a well of a 4-well plate containing 500 µl of 4% PFA. Fix for 30 minutes at room temperature.
Permeabilization:
- Remove PFA and wash embryos 3 x 5 minutes in PBS.
- Incubate embryos in Permeabilization Buffer (PBS with 0.1% Triton X-100) for 30-60 minutes at room temperature. Note: This critical step may require optimization of duration for specific embryo stages.
Immunostaining:
- Block non-specific binding by incubating in Blocking Solution for 1-2 hours.
- Incubate with primary antibody diluted in Blocking Solution overnight at 4°C.
- Wash 3 x 20 minutes in PBS with 0.1% Tween-20 (PBS-T).
- Incubate with fluorophore-conjugated secondary antibody and DAPI for 2 hours at room temperature or overnight at 4°C.
- Perform final washes (3 x 20 minutes in PBS-T).
Imaging and Analysis:
- Mount embryos and image using a confocal microscope with Z-sectioning capabilities.
- For 3D nuclear segmentation and quantitative analysis of fluorescence intensity, use specialized software tools like:
Protocol 2: Dish Soap-Based Permeabilization for Challenging Targets
This protocol, utilizing a low-cost detergent, is designed for simultaneous detection of nuclear transcription factors and cytoplasmic fluorescent proteins, a combination often compromised by standard buffers [4].
Reagent Preparation:
- Fixative: 2% formaldehyde, 0.05% Fairy dish soap, 0.5% Tween-20 in PBS.
- Perm Buffer: PBS with 0.05% Fairy dish soap.
- FACS Buffer: PBS with 2-5% FBS or 0.5% BSA, and 2mM EDTA.
Procedure:
- Perform surface staining on fixed embryos as needed, wash, and centrifuge.
- Fixation: Resuspend the cell pellet in 200 µl of Fixative. Incubate for 30 minutes at room temperature in the dark (in a fume hood).
- Centrifuge at 600 x g for 5 minutes. Remove supernatant.
- Permeabilization: Resuspend in 100 µl of Perm Buffer. Incubate for 15-30 minutes at room temperature. Blocking can be performed at this stage.
- Intracellular Staining: Wash twice in FACS buffer. Stain with intracellular antibodies overnight at 4°C.
- Wash twice in FACS buffer and acquire images on a confocal microscope.
The Scientist's Toolkit: Essential Reagent Solutions
Table 2: Key Research Reagents for Embryo Permeabilization
| Reagent | Function | Application Note |
|---|---|---|
| Triton X-100 | Non-ionic detergent for general permeabilization. Creates pores in membranes. | Standard for many protocols; concentration (0.1-0.5%) and incubation time must be optimized for tissue thickness. Banned in the EU; can be omitted or substituted [4]. |
| Saponin | Detergent that complexes with cholesterol in membranes. | Often used for milder, reversible permeabilization; cells may need to be kept in saponin-containing buffers. |
| Tween-20 | Non-ionic detergent. | Commonly used in wash buffers (e.g., PBS-T) to reduce non-specific binding. Also used in fixative/perm recipes [4]. |
| Methanol | Alcohol-based fixative and permeabilizer. | Simultaneously fixes and permeabilizes; can degrade scatter profiles and surface epitopes [3]. |
| Fairy/Dawn Dish Soap | Commercial detergent mixture. | A key component in "Burton's Better Buffer," effective for balancing nuclear and cytoplasmic staining [4]. |
| Paraformaldehyde (PFA) | Cross-linking fixative. | Stabilizes protein structures and prevents leakage of cellular contents during permeabilization. Freshness is critical [2]. |
Visualizing Workflows and Signaling Pathways
Balancing Membrane Access with Cellular Integrity
Application Notes and Protocols In thick embryo samples, achieving effective permeabilization while maintaining cellular integrity is challenging due to limited reagent penetration and susceptibility to mechanical stress. This protocol leverages nanobody-based immunolabeling and optimized clearing techniques to balance membrane access with structural preservation, enabling high-resolution 3D imaging of embryonic tissues.
Table 1: Efficacy of Permeabilization Reagents in Thick Embryo Samples
| Reagent | Concentration | Penetration Depth | Cellular Integrity | Optimal Use Case |
|---|---|---|---|---|
| POD-nAbs (Peroxidase-nanobodies) | 1–2 µg/mL | ~1 mm | High (≥95%) | 3D immunohistochemistry |
| ScaleA2 Solution | 100% (v/v) | ~1 mm | Moderate (85%) | Tissue clearing |
| DMSO (Cryoprotectant) | 1–10% (v/v) | N/A | High (≥90%) | Cryopreservation |
| Sodium Azide (POD Quencher) | 10–20 mM | N/A | High | Multiplexed labeling |
Table 2: Impact of Permeabilization on Sperm Membrane Integrity
| Stress Factor | Effect on Membrane | Preservation Strategy |
|---|---|---|
| Oxidative Stress | Lipid peroxidation; fluidity loss | Antioxidants (e.g., 0.4 mM vitamin C) |
| Temperature Fluctuations | Phase transitions; protein denaturation | Slow freezing (10 cm above LN₂) |
| Osmotic Shock | Membrane rupture | Sucrose-based extenders (e.g., 0.6 M) |
Experimental Protocols
Protocol 1: POD-nAb/FT-GO 3D Immunohistochemistry
Objective: Deep permeabilization and labeling of thick embryo tissues (e.g., mouse brain slices). Workflow:
Steps:
- Tissue Preparation: Fix 1-mm-thick mouse brain slices with 4% PFA.
- Permeabilization: Immerse in ScaleA2 solution for 24 hrs at room temperature (RT).
- Labeling: Incubate with peroxidase-fused nanobodies (POD-nAbs) for 20–24 hrs at 4°C.
- Signal Amplification: Apply FT-GO (Fluorochromized Tyramide-Glucose Oxidase) for 8.5 hrs.
- Imaging: Image using confocal or light-sheet microscopy.
- Multiplexing: Quench peroxidase activity with 10–20 mM sodium azide (NaN₃) between rounds.
Validation:
- Penetration Depth: POD-nAbs achieve homogeneous labeling at 1 mm depth vs. surface-limited IgG antibodies [5].
- Integrity Metrics: >95% cellular integrity post-treatment, assessed by membrane vitality assays [6] [5].
Protocol 2: Cryopreservation for Membrane Integrity
Objective: Preserve sperm membranes in endangered amphibians using optimized cryoprotectants. Workflow:
Steps:
- Collection: Obtain sperm in Amphibian Ringer’s solution [7].
- Cryoprotectant Mixing: Combine with 10% DMF + 0.6 M sucrose (v/v).
- Freezing: Cool straws 10 cm above liquid nitrogen (slow cooling: ~1°C/min).
- Thawing: Restore to RT for 15 mins.
- Viability Assessment: Use SYBR-14/propidium iodide assay for membrane-integrity viability [7].
Outcomes:
- Membrane Integrity: 75–86% post-thaw viability in Dryophytes suweonensis [7].
- DNA Fragmentation: Minimal fragmentation with DMSO/DMF-based protocols [8].
The Scientist’s Toolkit
Table 3: Essential Reagents for Membrane Permeabilization and Integrity
| Reagent | Function | Application Example |
|---|---|---|
| POD-nAbs | Deep-tissue penetration via small size (12–15 kDa); fused to HRP for signal amplification | 3D IHC in mouse brain slices [5] |
| ScaleA2 Solution | Tissue clearing and permeabilization by delipidation and hydration | Embryo sample preparation [5] |
| FT-GO System | Fluorescent tyramide-glucose oxidase for H₂O₂-free signal amplification | High-sensitivity detection in thick tissues [5] |
| DMF/DMSO | Cryoprotectants reducing ice crystal formation | Sperm cryopreservation in amphibians [7] [8] |
| Sucrose | Osmolyte for osmotic balance during cryopreservation | 0.6 M in amphibian sperm extenders [7] |
| Sodium Azide | Quenches peroxidase activity for multiplexed labeling | Sequential IHC in 3D tissues [5] |
Signaling Pathways in Membrane Stability
Diagram: Cholesterol-Lipid Raft-Repair Axis in Sperm Membranes
Key Insights:
- NPC2: Regulates cholesterol homeostasis to maintain fluidity [6].
- Flotillin: Organizes lipid rafts for signal transduction [6].
- Annexin V: Mediates calcium-dependent membrane repair [6].
These protocols emphasize the synergy between advanced permeabilization (e.g., nanobodies) and membrane-stabilizing strategies (e.g., cryoprotectants). By integrating quantitative benchmarks with step-by-step workflows, researchers can achieve reproducible results in thick embryo samples while preserving cellular integrity for downstream analysis.
Permeabilization is a critical step in many biological research protocols, enabling researchers to access intracellular compartments for staining, analysis, or delivery of exogenous molecules. The process involves creating temporary openings in cellular membranes without causing irreversible damage to cellular structures. The selection of appropriate permeabilizing agents is particularly crucial when working with challenging samples such as thick embryo tissues, where penetration efficiency and preservation of structural integrity must be carefully balanced. The two primary categories of permeabilizing agents—detergents and alcohols—each offer distinct mechanisms of action and are suited to different experimental applications.
Detergents function by solubilizing lipid components of cellular membranes, creating pores that allow the passage of antibodies, dyes, and other reagents. Alcohols, primarily methanol and ethanol, act as dehydrating agents that precipitate cellular components and extract lipids, thereby permeabilizing membranes. The choice between these agents depends on multiple factors including the target antigen, sample type, and desired balance between permeability and structural preservation. This application note provides a comprehensive comparison of these permeabilization strategies, with specific consideration for their application in thick embryo samples.
Mechanisms of Action and Properties
Detergents as Permeabilizing Agents
Detergents are amphipathic molecules that disrupt lipid bilayers by integrating into membrane structures and solubilizing lipid components. They create defined pores that allow the passage of macromolecules while ideally preserving protein epitopes and cellular architecture. The effectiveness and aggressiveness of detergent-based permeabilization depend on the specific chemical properties of the detergent, including its critical micelle concentration, hydrophilic-lipophilic balance, and molecular structure.
Triton X-100 is a non-ionic detergent with a relatively large molecular size that creates substantial pores in membranes, making it effective for accessing intracellular targets including those within organelles. However, due to environmental concerns regarding its endocrine-disrupting properties, Triton X-100 has been banned from sale in the European Union [4]. Tween-20 is a milder non-ionic detergent that creates smaller pores, making it suitable for delicate epitopes but less effective for large macromolecules or dense tissues. Saponin functions by extracting cholesterol from membranes, creating reversible pores that can reseal after treatment, which is particularly valuable for live-cell applications or when preserving membrane integrity is essential [9].
A novel approach documented in recent literature utilizes dish soap (specifically Fairy brand) as a cost-effective permeabilization agent. This protocol employs a mixture containing 0.05% Fairy detergent with 0.5% Tween-20 and 2% formaldehyde for fixation, followed by permeabilization with 0.05% Fairy in PBS. This combination has demonstrated efficacy for simultaneous detection of transcription factors, cytokines, and endogenous fluorescent proteins, achieving results comparable to commercial buffers at a fraction of the cost [4].
Alcohols as Permeabilizing Agents
Alcohols, primarily methanol and ethanol, function through a distinct mechanism involving dehydration and precipitation of cellular components. These agents rapidly remove water from cells, leading to protein denaturation and precipitation while simultaneously extracting lipids from membranes. This dual action results in effective permeabilization while fixing cellular structures.
Methanol is commonly used at concentrations of 90-100% and offers the advantage of simultaneous fixation and permeabilization in a single step. It effectively preserves many cytoskeletal structures and is particularly suitable for certain nuclear antigens. However, methanol can destroy the epitopes of some proteins, particularly those that are phosphorylation-dependent, and may cause excessive protein precipitation that can hinder antibody penetration in thick samples [9].
Ethanol typically used at 70-100% concentrations, acts similarly to methanol but is generally considered slightly milder in its effects. Both methanol and ethanol can cause significant tissue shrinkage and hardening, which may present challenges for sectioning or structural analysis of embryo samples. The precipitation of proteins can also create diffusion barriers in thick tissues, potentially leading to uneven staining [9].
Table 1: Properties of Common Permeabilizing Agents
| Agent | Type | Common Concentrations | Mechanism of Action | Key Advantages | Major Limitations |
|---|---|---|---|---|---|
| Triton X-100 | Non-ionic detergent | 0.1-0.5% | Solubilizes membrane lipids | Creates large pores; effective for intracellular targets | Banned in EU; can damage some epitopes |
| Tween-20 | Non-ionic detergent | 0.05-0.5% | Mild membrane solubilization | Gentle on epitopes; suitable for delicate antigens | Limited penetration in dense tissues |
| Saponin | Glycoside | 0.05-0.2% | Cholesterol extraction | Reversible pores; preserves membrane integrity | Weak permeabilization; requires continuous application |
| Fairy Dish Soap | Mixed surfactant | 0.05% in fixative/perm buffer | Membrane solubilization | Extremely cost-effective; compatible with multiple stains | Requires optimization; brand-specific results |
| Methanol | Alcohol | 90-100% | Dehydration & protein precipitation | Simultaneous fixation & permeabilization | Destroys some epitopes; causes tissue shrinkage |
| Ethanol | Alcohol | 70-100% | Dehydration & lipid extraction | Milder than methanol; readily available | Tissue hardening; uneven penetration in thick samples |
Application-Specific Protocol Selection
Guidelines for Thick Embryo Samples
Working with thick embryo samples presents unique challenges for permeabilization protocols. The dense cellular organization and extracellular matrix components create significant diffusion barriers that require careful optimization of permeabilization strategies. For Drosophila melanogaster embryos, researchers have successfully employed a permeabilization approach using a mixture of D-limonene and heptane (LH) to remove the waxy vitelline membrane that would otherwise prevent cryoprotectant agent loading [10]. This method involves a brief 10-second soak in LH solution, which sufficiently permeabilizes the embryo while causing minimal injury, as evidenced by successful rhodamine B dye uptake [10].
For immunohistochemical applications in embryo samples, the choice between detergents and alcohols must consider both the preservation of antigenicity and the penetration requirements. A sequential approach often yields optimal results, beginning with a stronger permeabilization agent to enable initial penetration through the dense tissue, followed by milder conditions for subsequent staining steps. For instance, a protocol might initiate with 0.3% Triton X-100 for 30-60 minutes to establish baseline permeability, followed by 0.05% Tween-20 or saponin in all subsequent washing and antibody incubation steps to maintain accessibility while preserving epitope integrity.
Recent advances in membrane permeabilization include microfluidic cell "unroofing" techniques that physically fracture the upper cell membranes using laminar flow stress, exposing intracellular organelles without chemical permeabilization [11]. While this method offers exceptional preservation of membrane structures, its application to thick embryo samples is currently limited by technical constraints.
Agent Selection for Specific Targets
The optimal permeabilization strategy varies significantly depending on the cellular target. For transcription factors and nuclear antigens, the dish soap protocol (0.05% Fairy in fixative followed by 0.05% Fairy in PBS as perm buffer) has demonstrated excellent results for simultaneous detection of nuclear targets and cytoplasmic fluorescent proteins [4]. This approach represents a significant advance over previous methods that struggled with the competing requirements of sufficient permeabilization for nuclear access while maintaining fluorescent protein integrity.
For cytoskeletal proteins and structural elements, methanol fixation and permeabilization often provides superior preservation of architecture, as evidenced by the improved performance of Keratin 8/18 and β-Actin antibodies with methanol-based protocols [9]. The precipitating action of alcohols effectively stabilizes these structural elements, though researchers should verify epitope compatibility.
For membrane proteins and organelle-specific targets, mild detergents like saponin or digitonin offer the advantage of selectively permeabilizing the plasma membrane while leaving organelle membranes largely intact. This selective permeability is particularly valuable for studies investigating protein localization to specific organelles or maintaining organelle function during experimental procedures.
Table 2: Permeabilization Protocols for Specific Applications
| Application | Recommended Agents | Protocol Details | Incubation Conditions | Compatible Fixatives |
|---|---|---|---|---|
| Transcription Factor Staining | 0.05% Fairy dish soap | Fix with 2% formaldehyde + 0.05% Fairy + 0.5% Tween-20, then perm with 0.05% Fairy in PBS | 30 min fixation RT, 15-30 min perm RT | 2-4% formaldehyde |
| Intracellular Cytokine Staining | 0.05% Fairy dish soap or 0.1% Saponin | Standard surface staining, then fix/perm as above | Overnight 4°C after perm | 2% formaldehyde |
| Cytoskeletal Structures | 100% Methanol | Simultaneous fixation and permeabilization | 10 min at -20°C | Self-fixing |
| Membrane Protein Studies | 0.05-0.1% Saponin | Permeabilization after formaldehyde fixation | 30 min RT with blocking | 4% formaldehyde |
| Embryo Cryopreservation | D-limonene + heptane (LH) | 10s soak for vitelline membrane removal | 10s at RT | Various |
| Fluorescent Protein Preservation | 0.05% Fairy dish soap | Fixation with low Fairy concentration, mild perm | 30 min fixation RT, 15-30 min perm RT | 2% formaldehyde |
Experimental Workflows and Protocols
Standard Detergent-Based Permeabilization Protocol
The following protocol is adapted from the recently published "Dish Soap Protocol" [4] and can be applied to a wide range of sample types, including embryo sections:
- Surface Staining: Perform surface antigen staining as usual on ice using appropriate antibodies in FACS buffer (PBS with 2.5% FBS and 2mM EDTA).
- Fixation: Centrifuge cells at 400-600 × g for 5 minutes, discard supernatant, and resuspend pellet in 200µl fixative (2% formaldehyde with 0.05% Fairy and 0.5% Tween-20). Incubate 30 minutes at room temperature in the dark (perform in fume hood).
- Washing: Centrifuge 5 minutes at 600 × g, room temperature. Remove supernatant (dispose of formaldehyde-containing waste appropriately).
- Permeabilization: Resuspend in 100µl perm buffer (PBS with 0.05% Fairy). Incubate 15-30 minutes at room temperature. Optional: Add Fc receptor block to this step.
- Intracellular Staining: Wash twice in FACS buffer, then stain overnight at 4°C with intracellular antibodies in FACS buffer.
- Final Wash and Analysis: Wash twice in FACS buffer and acquire samples on flow cytometer or prepare for microscopy.
This protocol has demonstrated particular effectiveness for challenging applications such as simultaneous detection of Foxp3 transcription factor and GFP fluorescent protein, which previously required incompatible fixation and permeabilization conditions [4].
Alcohol-Based Permeabilization Protocol
For targets that benefit from alcohol-based permeabilization, such as certain cytoskeletal proteins:
- Simultaneous Fixation/Permeabilization: Add ice-cold 100% methanol directly to cells or tissue sections and incubate at -20°C for 10 minutes.
- Rehydration: Gradually rehydrate samples through a series of PBS washes (90%, 70%, 50% PBS in water) to prevent excessive structural disruption.
- Blocking: Incubate with blocking buffer (PBS with 5% normal serum and 1% BSA) for 1 hour at room temperature.
- Antibody Staining: Proceed with primary and secondary antibody incubations in blocking buffer.
Note that this approach is generally not recommended for phospholipid or membrane structure preservation, as alcohols extensively extract lipid components [9].
Diagram 1: Permeabilization Agent Selection Workflow
Research Reagent Solutions
Table 3: Essential Reagents for Permeabilization Protocols
| Reagent | Function | Example Applications | Preparation Notes |
|---|---|---|---|
| Fairy Dish Soap | Surfactant for membrane permeabilization | Transcription factor staining with fluorescent protein preservation | Use 0.05% in fixative and perm buffer; original formula recommended [4] |
| Triton X-100 | Non-ionic detergent for robust permeabilization | Intracellular staining in dense tissues; nuclear targets | 0.1-0.5% in PBS; note EU sales restrictions [4] |
| Tween-20 | Mild non-ionic detergent for gentle permeabilization | Delicate epitopes; surface antigen preservation | 0.05-0.5% in PBS or FACS buffer [4] |
| Saponin | Glycoside for cholesterol-dependent permeabilization | Membrane protein studies; reversible permeabilization | 0.05-0.2% in PBS; requires presence in all buffers [9] |
| Methanol | Alcohol for simultaneous fixation/permeabilization | Cytoskeletal targets; structural studies | 90-100% ice-cold; use at -20°C [9] |
| D-limonene/Heptane | Organic solvent for waxy layer removal | Drosophila embryo permeabilization | 10-second soak sufficient for vitelline membrane [10] |
| Formaldehyde | Crosslinking fixative | Structural preservation with detergent perm | 2-4% in PBS; use before detergent perm [4] [9] |
The selection between detergent and alcohol-based permeabilization agents requires careful consideration of experimental goals, sample characteristics, and target attributes. For thick embryo samples in particular, a strategic approach that may combine agents or employ novel formulations like the dish soap protocol can overcome the inherent challenges of dense tissue penetration while preserving antigenicity and structural integrity. As research continues to advance, the development of increasingly selective permeabilization agents and physical methods like microfluidic unroofing will provide researchers with more precise tools for interrogating intracellular targets in complex biological systems.
The Trade-off Between Epitope Retention and Antibody Access in Fixed Tissues
In the study of thick biological specimens, particularly whole-mount embryos, researchers face a fundamental dilemma: fixation protocols that optimally preserve tissue structure and epitope integrity often create barriers that limit antibody penetration and binding. This trade-off between epitope retention and antibody accessibility presents a significant bottleneck in developmental biology research, where maintaining three-dimensional architecture is crucial for understanding spatial relationships in embryonic systems. Effective immunostaining in thick samples requires careful optimization of fixation, permeabilization, and antigen retrieval methods to balance these competing demands. The fixation process, while essential for preserving morphological details and preventing degradation, can mask epitopes through protein cross-linking, particularly with aldehyde-based fixatives like paraformaldehyde (PFA). Consequently, researchers must employ strategic approaches to reveal these hidden epitopes without compromising tissue integrity, especially in challenging thick specimens where reagent penetration is inherently limited. This application note examines the key parameters governing this balance and provides optimized methodologies for achieving reliable immunostaining in thick embryo samples.
Quantitative Analysis of Epitope-Antibody Interactions
The efficiency with which antibodies recognize their cognate epitopes varies significantly based on multiple factors including fixation method, epitope characteristics, and antibody properties. Understanding these variables is essential for designing effective staining protocols, particularly for thick specimens where optimization opportunities are limited.
Table 1: Quantitative Performance of Epitope Tags and Antibodies in Fixed Cells
| Epitope Tag | Peptide Sequence | Top-Performing Antibody | Performance at High Concentration (5 μg·mL⁻¹) | Performance at Low Concentration (50 ng·mL⁻¹) | Fixation Compatibility |
|---|---|---|---|---|---|
| EPEA | GGEPEA | AI215 | High (>50) | High | PFA, Methanol |
| HA | YPYDVPDYASLRS | AF291 | High (>50) | High | PFA, Methanol |
| SPOT | PDRVRAVSHWSS | AI196 | High (>50) | High | Better with Methanol |
| DYKDDDDK (FLAG) | DYKDDDDK | AX047, TA001 | High (>50) | Moderate | PFA, Methanol |
| 6xHis | HHHHHH | AD946, AV248 | High (>50) | Moderate | PFA, Methanol |
| Myc | EQKLISEEDLL | TA002 | Moderate (<25 with AI179) | Poor | PFA only (weak in Methanol) |
Recent systematic comparison of epitope tags revealed three distinct performance categories: "good" antibodies that generate high signals even at low concentrations (50 ng·mL⁻¹), "fair" antibodies that require high concentrations (5,000 ng·mL⁻¹) for adequate signal, and "mediocre" antibodies that produce weak signals regardless of concentration [12]. This hierarchy remained consistent across fixation methods, with the notable exception of Myc tags, which performed poorly in methanol-fixed cells [12]. These quantitative findings emphasize that antibody selection critically impacts staining success, especially in thick specimens where limited reagent penetration necessitates highly efficient binding.
Table 2: Antigen Retrieval Methods for Epitope Recovery
| Method | Mechanism | Conditions | Advantages | Limitations | Compatibility with Thick Samples |
|---|---|---|---|---|---|
| Heat-Induced Epitope Retrieval (HIER) | High-temperature heating to reverse cross-links | 95°C, 10-20 min, citrate buffer (pH 6) or Tris-EDTA (pH 9) | Gentler epitope retrieval, more definable parameters | Can damage delicate tissues, uneven heating with microwave | Limited for whole embryos due to heat sensitivity |
| Proteolytic-Induced Epitope Retrieval (PIER) | Enzyme digestion to expose epitopes | 37°C, 10-15 min, proteinase K, trypsin, or pepsin | Effective for difficult epitopes | May damage tissue morphology with over-digestion | More suitable for thick samples with optimization |
| Denaturant-Based Retrieval | Chemical denaturation to unfold proteins | 80°C, 1h, denaturant-rich solution | High protein retention, effective for expanded samples | Requires optimization for different tissues | Compatible with various tissue types including whole organs |
For thick embryo samples, the limitations of conventional antigen retrieval methods present significant challenges. Heat-induced methods may destroy embryonic tissue structure, while enzymatic approaches require careful optimization to prevent over-digestion [13]. Research demonstrates that procedural differences affect each antibody-antigen pair uniquely, emphasizing that optimization should be conducted for each target [14].
Advanced Methodologies for Enhanced Epitope Accessibility
Expansion Microscopy Techniques for Thick Tissues
Expansion microscopy (ExM) technologies provide innovative solutions to the epitope accessibility problem by physically magnifying specimens before imaging. Protein retention ExM (proExM) uses Acryloyl-X, SE (AcX) to modify protein amines with an acrylamide functional group, anchoring them to a swellable gel [15]. This approach preserves approximately 65% of GFP fluorescence and 50% of secondary antibody fluorescence even after strong proteinase K digestion, enabling super-resolution imaging (~70 nm) on conventional microscopes [15].
The recently developed Magnify protocol represents a significant advancement by eliminating separate anchoring steps through methacrolein incorporation during gelation [16]. This approach demonstrates 380% higher protein retention in FFPE kidney tissue and 530% higher retention in mouse brain slices compared to proExM [16]. Magnify achieves up to 11-fold physical expansion, enabling effective resolutions of approximately 25 nm with conventional diffraction-limited optics [16]. This method is particularly valuable for thick samples where antibody penetration is problematic, as it allows labeling after expansion.
Optimized Immunostaining Protocol for Thick Embryo Samples
Based on current research, the following protocol provides a framework for achieving effective epitope retention and antibody access in thick embryo samples:
Stage 1: Fixation and Permeabilization
- Fixation: 4% PFA at 4°C overnight OR methanol fixation for epitopes sensitive to aldehyde cross-linking [13]
- Permeabilization: 0.1-0.2% Triton X-100 in PBS for 10 minutes OR 0.2-0.5% Tween 20 for 10-30 minutes [17]
- Critical Note: For zebrafish embryos, manual or enzymatic dechorionation is required using pronase (1-2 mg/mL for 5-10 minutes) [13]
Stage 2: Epitope Recovery and Blocking
- For PFA-fixed samples: Optimize between HIER (if tissue can withstand heat) and PIER methods [17]
- Enzymatic retrieval: Proteinase K (5-30 minutes at 37°C) for difficult epitopes [17]
- Blocking: 5% serum from secondary antibody host species with 0.1% Triton X-100 for 2-4 hours at room temperature [14]
Stage 3: Antibody Application and Imaging
- Primary antibody: Incubate for 24-48 hours at 4°C with gentle agitation [13]
- Secondary antibody: Apply for 24 hours at 4°C with fluorophore-conjugated reagents [13]
- Mounting: Embed in glycerol or gelatin for imaging; use confocal microscopy for optimal 3D resolution [13]
Troubleshooting Considerations:
- Weak staining: Increase antibody concentration or extend incubation times
- High background: Enhance blocking conditions and increase wash stringency
- Uneven staining: Improve permeabilization or switch to methanol fixation [13]
Research Reagent Solutions for Thick Tissue Studies
Table 3: Essential Research Reagents for Epitope Preservation and Accessibility
| Reagent Category | Specific Examples | Function | Application Notes |
|---|---|---|---|
| Fixatives | 4% Paraformaldehyde, Methanol | Preserve tissue structure and antigenicity | Methanol preferred for epitopes sensitive to cross-linking |
| Permeabilization Agents | Triton X-100, Tween 20, Saponin | Enable antibody penetration | Harsh detergents (Triton) for intracellular targets; mild detergents for membrane-associated epitopes |
| Anchoring Chemicals | Acryloyl-X (AcX), Methacrolein | Link biomolecules to expandable hydrogels | Methacrolein shows 380-530% higher retention than AcX |
| Proteolytic Enzymes | Proteinase K, Trypsin, Pepsin | Expose masked epitopes | Concentration and time critical to prevent tissue damage |
| Epitope Tags | EPEA, HA, SPOT, FLAG | Enable protein detection with validated antibodies | EPEA and HA tags show highest signal efficiency |
| Hydrogel Components | Sodium Acrylate, DMAA, Acrylamide | Create expandable polymer matrix | Magnify formula: 4% DMAA, 34% SA, 10% AA, 0.01% Bis |
The trade-off between epitope retention and antibody accessibility represents a central challenge in thick tissue immunostaining, particularly for embryonic studies where three-dimensional architecture must be preserved. Strategic approaches combining optimized fixation methods, targeted antigen retrieval, and emerging technologies like expansion microscopy provide pathways to overcome these limitations. The quantitative data presented here offers researchers evidence-based guidance for selecting epitope tags, antibodies, and retrieval methods most likely to succeed with challenging thick specimens. As tissue clearing techniques advance and protocol optimization becomes more systematic, researchers will increasingly overcome the traditional limitations of immunostaining in thick embryos, opening new possibilities for understanding developmental processes in their native three-dimensional context.
Three-dimensional (3D) histology represents the new frontier for tissue-based research and clinical diagnostics, promising to advance holistic systems biology by enabling the visualization of molecules and structures throughout intact tissue blocks [18]. However, the transition from two-dimensional to three-dimensional analysis introduces two paramount technical challenges: achieving sufficient depth penetration of staining reagents and ensuring signal uniformity throughout the volumetric sample. These challenges are particularly pronounced in thick embryo samples, where the scale and density of tissues create significant barriers to reliable immunostaining [19]. The obstacle of limited probe penetration remains a significant bottleneck in 3D histology, as insufficiently optimized protocols typically result in antibody deposition predominantly in the tissue periphery, creating substantial signal gradients that hinder quantitative analysis [18]. This application note examines the physicochemical principles underlying these challenges and provides detailed, practical protocols to overcome them, with special consideration for permeabilization strategies for thick embryo samples.
Theoretical Framework: The Physicochemistry of 3D Staining
The Reaction-Diffusion-Advection Model
Antibody movement in fixed tissues is governed by a complex interplay of physical and chemical processes that can be formally described by a reaction-diffusion-advection (RDA) model [18]. In this quantitative framework, the change in concentration of functional antibodies ([Abf]) at any spatial point (r) over time (t) is determined by:
∂[Abf]/∂t = -S + ∇·(D_eff ∇[Abf]) - ∇·(v[Abf])
Where:
- S represents the sink term (loss of antibodies due to binding to antigens and other reactions)
- D_eff denotes the effective diffusivity of antibodies through the tissue matrix
- v is the advective transport velocity field
This model intuitively reveals that enhancing immunolabeling depth requires one or more of three fundamental strategies:
- Increasing antibody availability (modulating concentration and binding kinetics)
- Enhancing effective diffusivity through the tissue (increasing D_eff)
- Implementing advective transport (creating and controlling v) [18]
The following diagram illustrates the key processes and barriers in 3D immunostaining:
Quantifying Penetration Problems
Penetration issues manifest as gradients where signals are much stronger at the tissue surface but weaker in the core, creating a bright "shell" with an "empty core" appearance that leads to severe quantification biases [20]. A peer-reviewed method to quantitatively assess penetration depth involves staining a protein of interest in 3D, cutting the sample in half, re-staining for the same marker with a different fluorophore on the cut surface, and then comparing the signals [20]. The pre-cut 3D staining signal is divided by the post-cut 2D staining signal to obtain a ratio, which is then plotted against penetration depth. In ideal uniform staining, this ratio hovers around a flat line, while penetration problems appear as an exponential decay curve [20].
Practical Protocols for Enhanced Penetration
Comprehensive Permeabilization Protocol for Thick Embryo Samples
The following protocol integrates multiple strategies from the RDA model to achieve uniform staining in challenging specimens like whole mouse embryos or thick embryo sections.
A. Solutions and Reagents
- Fixative: 4% Formaldehyde, Methanol-Free in 1X PBS [21]
- Permeabilization Agents:
- Blocking Buffer: 2-10% normal serum from secondary antibody host species in PBS [22]
- Antibody Dilution Buffer: PBS with 0.5% BSA and 0.1% Triton X-100 [21]
- Wash Buffer: 1X PBS, optionally with 0.05% Tween-20 [22]
B. Stepwise Procedure
Fixation
- Immerse samples in 4% formaldehyde for 24-48 hours at 4°C with gentle agitation.
- For large specimens (>5mm), consider vascular perfusion fixation prior to immersion.
- Wash extensively with 1X PBS (3 × 1 hour each) to remove residual fixative [21].
Decalcification and Pigment Reduction (for developed embryos)
- Treat with decalcifying solution for bone-containing specimens.
- Implement pigment reduction protocols, particularly for eye tissues [19].
- Wash thoroughly with PBS before proceeding.
Permeabilization
- Methanol-Based: Gradually introduce chilled 100% methanol to pre-chilled samples while gently vortexing to a final concentration of 90% methanol. Incubate for a minimum of 10 minutes on ice, though extended incubation (up to 24 hours) at -20°C may enhance penetration [21].
- Detergent-Based: As an alternative or complement, incubate samples in 0.5-1% Triton X-100 in PBS for 24-72 hours at 4°C with agitation [22].
- For particularly challenging samples, consider sequential treatment with multiple permeabilization agents.
Blocking
- Incubate samples in blocking buffer for 24-48 hours at 4°C with agitation.
- For tissues with high Fc receptor expression, include FcR blocking reagents [22].
Primary Antibody Staining
- Dilute primary antibody in antibody dilution buffer. For initial experiments, use concentrations 2-5× higher than standard 2D IHC protocols.
- Incubate samples for 3-7 days at 4°C with constant gentle agitation [18].
- Wash extensively with wash buffer (4-6 × 2 hours each) to remove unbound antibody.
Secondary Antibody Staining
- Dilute fluorophore-conjugated secondary antibodies in antibody dilution buffer.
- Incubate for 2-5 days at 4°C protected from light.
- Perform final washes with PBS (4-6 × 2 hours each) until wash solution shows no detectable fluorescence [18].
Advanced Penetration Enhancement Methods
For particularly challenging samples or when standard protocols yield insufficient penetration, consider these advanced techniques:
iDISCO Method
- Incorporates tissue treatment with methanol, dichloromethane, and hydrogen peroxide [18]
- Suitable for whole adult mouse organs and embryos
- Requires 3-4 days incubation with primary antibody and additional 3-4 days with secondary antibody [18]
SHANEL Method
- Utilizes CHAPS, a zwitterionic detergent, for enhanced tissue permeabilization
- Demonstrated effectiveness in 1.5-cm-thick human brain slices
- Requires extended incubation times (7 days each for primary and secondary antibodies) [18]
Quantitative Comparison of 3D Staining Methods
Table 1: Performance Comparison of Advanced 3D Immunolabeling Methods
| Method | Main Strategy | Max. Staining Scale | Time Required | Compatible Probes | Special Equipment |
|---|---|---|---|---|---|
| iDISCO [18] | Tissue treatment with methanol, DCM, H₂O₂, DMSO | Whole adult mouse brain, kidney | 3-4 days (1° Ab) + 3-4 days (2° Ab) | Fluorescent proteins, EdU, chemical dyes | No |
| SHANEL [18] | Tissue permeabilization with CHAPS detergent | 1.5-cm-thick human brain slice | 7 days (1° Ab) + 7 days (2° Ab) | Chemical dyes, lectin, dextran conjugates | No |
| Methanol-Based [21] | Alcohol dehydration and permeabilization | Thick embryo sections | 1-3 days total | Most fluorophores except PE and APC | No |
Table 2: Troubleshooting Guide for Penetration and Uniformity Issues
| Problem | Possible Causes | Solutions |
|---|---|---|
| Strong surface staining, weak core | Insufficient permeabilization; Antibody depletion | Increase permeabilization time; Use higher antibody concentrations; Add detergent to antibody solution |
| High background throughout sample | Inadequate blocking; Non-specific antibody binding | Extend blocking time; Include FcR blocking; Titrate antibodies more stringently |
| Patchy or irregular staining | Incomplete tissue clearing; Trapped air bubbles | Ensure uniform reagent distribution; Use degassed solutions; Extend incubation times |
| Specific structures not stained | Epitope damage from fixation; Insufficient permeabilization | Optimize fixation time; Try alternative permeabilization methods; Include antigen retrieval |
The Scientist's Toolkit: Essential Reagents for 3D Staining
Table 3: Key Research Reagent Solutions for 3D Immunolabeling
| Reagent Category | Specific Examples | Function | Application Notes |
|---|---|---|---|
| Fixatives | 4% Formaldehyde (methanol-free) [21] | Preserves tissue architecture and antigen integrity | Preferred for most applications; avoids methanol-induced epitope damage |
| Permeabilization Agents | Methanol [21], Triton X-100 [22], CHAPS [18] | Disrupts membranes to allow antibody penetration | Methanol may damage some epitopes; Triton X-100 is broadly applicable |
| Blocking Reagents | Normal serum, BSA, FcR blocking reagents [22] | Reduces non-specific antibody binding | Critical for lowering background; species-matched serum recommended |
| Detergent Additives | Tween-20, Saponin [22] | Maintains permeabilization during staining | Include in antibody solutions and wash buffers (0.05-0.1%) |
| Clearing Agents | BABB [19] | Reduces light scattering for deeper imaging | Implement after immunostaining for improved imaging depth |
Visualization and Analysis of 3D Samples
Workflow for Quality Assessment and Enhancement
The following diagram outlines a comprehensive workflow for assessing and troubleshooting penetration issues in 3D samples:
Computational Correction of Signal Heterogeneity
When physical optimization of staining protocols remains insufficient, computational tools like Intensify3D can normalize signal intensity in large heterogenic image stacks [23]. This algorithm estimates background intensity gradients and corrects both signal and background through local transformation without compromising the signal-to-noise ratio. It is particularly valuable for correcting depth-dependent signal attenuation in large tissue volumes and enables more accurate quantitative analysis of 3D image data [23].
Achieving uniform depth penetration in 3D samples remains a significant challenge in volumetric histology, particularly for thick embryo specimens. Success requires a systematic approach that addresses both the physicochemical barriers to reagent penetration and the optical barriers to visualization. The protocols and methods outlined herein provide a framework for optimizing permeabilization and staining conditions based on a theoretical understanding of the reaction-diffusion-advection processes governing antibody movement in fixed tissues. By implementing these strategies and employing rigorous quality assessment, researchers can overcome the special challenges of depth penetration and signal uniformity, thereby unlocking the full potential of 3D histology for developmental biology research and drug development applications.
Step-by-Step Permeabilization Protocols for Embryos and 3D Structures
A significant technical challenge in the analysis of thick embryo samples is the simultaneous detection of multiple intracellular targets, such as transcription factors, cytokines, and endogenous fluorescent proteins. Achieving this is often limited by the incompatibility of fixation and permeabilization (fix-perm) buffers with the diverse structural and biomolecular requirements of these targets [4]. Traditional protocols frequently force a trade-off, where conditions optimal for accessing intranuclear markers (e.g., transcription factors) often lead to the complete ablation of cytosolic fluorophore signals, and vice versa [4]. This technical limitation restricts our capacity to answer complex scientific questions in developmental biology.
The "Dish Soap Protocol," utilizing a cost-effective buffer known as "Burton's Best Buffer," has been developed to overcome these limitations. This unified approach achieves efficient simultaneous detection of transcription factors, cytokines, and endogenous fluorescent proteins by using a common dishwashing detergent to create a balanced fix-perm environment [4] [24]. This protocol is of particular relevance for thick embryo samples, where robust and uniform permeabilization is paramount, offering a 100-fold lower cost than commercial alternatives while providing superior multi-modal compatibility [4] [25].
Optimized Protocol & Workflow
The following section details the step-by-step methodology for the dish soap-based permeabilization protocol, from reagent preparation to final data acquisition.
Reagent Preparation
| Solution Name | Composition | Storage & Stability |
|---|---|---|
| Fairy in PBS, 5% | 500 µl Fairy dish soap in 9.5 ml PBS. | Stable for 6 months at room temperature. |
| Fixative | 2% formaldehyde, 0.05% Fairy, 0.5% Tween-20, 0.1% Triton X-100 (optional). | Stable for 6 months at room temperature. |
| Perm Buffer | PBS with 0.05% Fairy. | Stable for 6 months at room temperature. |
| FACS Buffer | PBS, 2.5% FBS, 2 mM EDTA. Can substitute FBS with 0.5% BSA. | Stable for 2 weeks at 4°C. |
- Key Reagent Note: The proprietary dishwashing liquid (e.g., Fairy, Dawn, Dreft) is a critical component. It is a green, viscous liquid containing surfactants, and other brands or scientific surfactant preparations do not provide the same quality of results [4].
Step-by-Step Protocol
- Surface Staining: Perform surface antigen staining as per your standard laboratory protocol. Count cells, block Fc receptors, stain, and wash.
- Fixation: After the final wash from surface staining, resuspend the cell pellet in 200 µl of Fixative. Incubate for 30 minutes at room temperature in the dark. Perform this step in a fume hood.
- Wash: Centrifuge cells at 600 × g for 5 minutes at room temperature. Carefully discard the supernatant into appropriate chemical waste.
- Permeabilization: Resuspend the cell pellet in 100 µl of Perm Buffer. Incubate for 15 to 30 minutes at room temperature. Fc receptor blocking can be repeated at this stage by adding the blocking agent directly to the perm buffer.
- Wash: Wash the cells twice in FACS Buffer.
- Intracellular Staining: Resuspend the cells in the desired intracellular antibody cocktail diluted in FACS Buffer. Stain overnight at 4°C. Note: Additional permeabilization during the intracellular staining step is neither necessary nor recommended.
- Final Wash & Acquisition: Wash the cells twice in FACS Buffer and resuspend in an appropriate volume for acquisition on a flow cytometer [4].
Performance Data & Comparative Analysis
The efficacy of the Dish Soap Protocol was validated through systematic comparison against established commercial buffers for key application metrics.
Quantitative Performance Comparison
Table 1: Comparative performance of Burton's Best Buffer against commercial kits for various intracellular targets. [4]
| Target / Application | Burton's Best Buffer | Commercial Foxp3 Kit | eBio Permeabilization | 2% Formaldehyde Only |
|---|---|---|---|---|
| Transcription Factor (Foxp3) | Efficient Detection | Equivalent Efficiency | Not Applicable | Partial/Reduced Detection |
| Cytokine Staining | Efficient Detection | Not Applicable | Equivalent Efficiency | Inconsistent |
| Endogenous GFP | High Retention | Ablated Signal | Moderate Retention | High Retention |
| Epitope Retention | Good | Good | Good | Poor (Crosslinking) |
| Relative Cost | ~100-fold lower | High | High | Low |
Application in Challenging Systems
The protocol's balanced nature makes it suitable for complex samples. While not directly tested in embryos here, its principles are highly relevant. For instance, successful immunodetection of phosphorylated SMAD proteins and other transcription factors in pre-implantation human embryos requires careful fixation with fresh 4% PFA and permeabilization with Triton X-100, underscoring the critical need for optimized buffer conditions in delicate samples [2]. Furthermore, alternative permeabilization strategies, such as using 70% ethanol, have been shown to provide lower background fluorescence and better peak resolution for nuclear protein analysis in sensitive primary cells like neutrophils, highlighting the impact of permeabilization agent choice on final data quality [26].
The Scientist's Toolkit
Table 2: Essential research reagent solutions for implementing the dish soap-based permeabilization protocol.
| Reagent / Material | Function / Role | Protocol Notes |
|---|---|---|
| Fairy Dish Soap | Primary permeabilizing detergent. Solubilizes lipids in membranes to allow antibody entry. | Critical reagent. Use "Original" Fairy or equivalents (Dawn, Dreft). Other brands not validated. [4] |
| Formaldehyde | Crosslinking fixative. Creates a rigid scaffold to maintain structural integrity and prevent loss of intracellular contents. | Use 2% final concentration. Handle in a fume hood. [4] |
| Tween-20 & Triton X-100 | Supplemental detergents. Enhance permeabilization, with Triton X-100 providing a stronger effect. | Triton X-100 is optional and can be omitted in the EU with similar results. [4] |
| FBS/BSA and EDTA | Components of FACS Buffer. BSA/FBS reduces non-specific antibody binding; EDTA helps prevent cell clumping. | Standard component for cell staining and wash buffers. [4] |
Mechanism Visualization
The protocol's success lies in achieving a critical balance between fixation and permeabilization, enabling simultaneous access to multiple intracellular compartments.
The Dish Soap Protocol represents a significant simplification and enhancement of intracellular staining for flow cytometry. Its primary advantages are its unified nature, allowing for multi-modal data acquisition from a single sample, and its extremely low cost without sacrificing performance [4] [25].
For research on thick embryo samples, where preservation of structure, endogenous fluorescence, and access to nuclear antigens are often concurrently required, this protocol provides a robust and accessible solution. It successfully resolves the long-standing technical trade-off between preserving fluorescent proteins and accessing nuclear staining, enabling more comprehensive phenotypic analysis in developmental biology contexts [4].
Within the broader scope of developing permeabilization protocols for thick embryo samples, the accurate visualization of DNA replication presents a significant technical challenge. The study of cell proliferation and DNA synthesis dynamics in complex three-dimensional (3D) tissues, such as whole embryos and organoids, is crucial for understanding organismal development and disease. While the thymidine analog 5-Ethynyl-2′-deoxyuridine (EdU) has revolutionized DNA replication analysis via efficient click chemistry detection, commercial EdU kits are often prohibitively expensive, possess limited multiplexing capabilities, and are not optimized for larger biological specimens [27].
To address these limitations, Open-source EdU Multiplexing Methodology for Understanding DNA replication dynamics (OpenEMMU) provides an affordable, open-source click chemistry platform. This protocol utilizes off-the-shelf reagents to enhance the efficiency, brightness, and multiplexing capabilities of EdU staining, making it particularly suitable for the deep-tissue 3D imaging required in embryological research [27]. This Application Note details the integration of OpenEMMU for high-resolution DNA replication imaging within permeabilized thick samples, providing a validated framework for researchers and drug development professionals.
Research Reagent Solutions
The following table catalogues the essential materials and reagents required for implementing the OpenEMMU protocol.
Table 1: Key Research Reagents and Their Functions in the OpenEMMU Protocol
| Item Name | Function/Description | Example Notes/Alternatives |
|---|---|---|
| EdU (5-Ethynyl-2′-deoxyuridine) | Thymidine analog incorporated into newly synthesized DNA during S-phase; contains an alkyne group for bioorthogonal click reaction [27]. | Typically used at 10 µM for a 2-hour pulse. |
| Picolyl Azide Dye (AZDye) | Copper-chelating azide-containing fluorophore (e.g., AZDye 488, 555, 633, 680); reacts with EdU's alkyne group via CuAAC [27]. | Optimal working concentration is 0.2 µM. |
| Copper (II) Sulfate (CuSO₄) | Catalyst for the click reaction; reduced to Cu(I) in situ by the reducing agent [27]. | A limiting reagent; optimal concentration is 0.8 mM. |
| L-Ascorbic Acid | Reducing agent that converts Cu(II) to the active Cu(I) catalyst for the CuAAC reaction [27]. | Use at 1 mg/mL. Concentrations below 0.5 mg/mL are ineffective. |
| Embryo Permeabilization Solvent (EPS) | Water-miscible solvent containing D-limonene and surfactants that permeabilizes the waxy layer of dechorionated embryo eggshells [28]. | A less toxic alternative to heptane/octane. |
| Permeabilization/Wash Buffer | Buffer containing a low-cost serum to reduce non-specific background staining. | 2% Newborn Calf Serum (NCS) or 4% Fetal Bovine Serum (FBS) in PBS [27]. |
| DNA Stain | Fluorescent dye for total DNA content counterstaining and cell cycle analysis. | Compatible with Vybrant DyeCycle Violet, Hoechst 33342, and others [27]. |
Optimized OpenEMMU Reaction Formulation
A systematic optimization of the Cu(I)-Catalyzed Azide−Alkyne Cycloaddition (CuAAC) reaction was performed to achieve maximum signal-to-noise ratio for EdU detection in complex samples. The finalized reaction formulation is below.
Table 2: Optimized OpenEMMU Click Reaction Mixture [27]
| Component | Final Concentration | Role in Reaction | Effect of Deviation |
|---|---|---|---|
| AZDye-conjugated Picolyl Azide | 0.2 µM | Fluorescent label that covalently binds to EdU. | >0.5 µM causes overstaining & reduced signal-to-noise. |
| CuSO₄ · 5H₂O | 0.8 mM | Catalytic metal center for the cycloaddition. | <0.8 mM reduces labeling efficiency; >2 mM diminishes DNA dye intensity. |
| L-Ascorbic Acid | 1 mg/mL | Reducing agent to maintain Cu(I) state. | <0.5 mg/mL fails to facilitate the reaction. |
| Reaction Buffer | 1X PBS | Aqueous physiological buffer for the reaction. | Provides mild conditions suitable for biological samples. |
Integrated Experimental Workflow for Embryo Samples
The following diagram and protocol outline the complete process, from embryo permeabilization to final 3D image analysis.
Diagram 1: Integrated workflow for 3D DNA replication imaging in permeabilized embryos, combining EPS treatment with the OpenEMMU click chemistry protocol.
Sample Preparation and Permeabilization
- Embryo Collection and Fixation: Collect and dechorionate embryos according to standard protocols for your model organism. For Drosophila embryos, a 2-minute immersion in 50% bleach is typical [28].
- Critical Permeabilization Step: Immerse dechorionated embryos in a 1:5 to 1:40 dilution of Embryo Permeabilization Solvent (EPS) in a suitable buffer (e.g., Modified Basic Incubation Medium) for 30 seconds to 4 minutes [28].
- Optimization Note: Permeabilization efficiency is age-dependent. Early-stage embryos (first 6-8 hours after egg laying) show higher heterogeneity and sensitivity. Monitor permeabilization using a marker like Rhodamine B dye [28].
- Washing: After EPS treatment, immediately wash embryos four times with phosphate-buffered saline (PBS) followed by two washes with PBS containing 0.05% Tween-20 (PBStw) to remove all traces of the solvent [28].
EdU Labeling and OpenEMMU Click Reaction
- EdU Pulse: Incubate permeabilized embryos in a solution containing 10 µM EdU for 2 hours at the appropriate physiological temperature to allow incorporation into nascent DNA [27].
- Fixation: Fix the embryos with 4% paraformaldehyde (PFA) to preserve tissue architecture and halt biological activity.
- Click Reaction Mixture Preparation: In a microcentrifuge tube, prepare the OpenEMMU click reaction mixture to the final concentrations specified in Table 2. The typical order of addition is PBS, followed by CuSO₄, then AZDye-conjugated picolyl azide, and finally L-ascorbic acid. Mix gently by pipetting.
- Click Reaction Incubation: Aspirate the fixative from the embryos and incubate them in the freshly prepared click reaction mixture for 30 minutes at room temperature, protected from light.
- Washing: Remove the click reaction mixture and wash the embryos thoroughly with PBStw containing 2% Newborn Calf Serum to terminate the reaction and reduce non-specific background.
Multiplexing and 3D Imaging
- Immunostaining (Optional): The OpenEMMU protocol is compatible with subsequent antibody-based immunodetection for multiplexed protein marker analysis. This can be performed after the click reaction step. It is also compatible with advanced multiplexing imaging platforms like IBEX (Iterative Bleaching Extends Multiplexity) [27].
- Counterstaining: Incubate samples with a DNA counterstain (e.g., Vybrant DyeCycle Violet, Hoechst 33342) according to the manufacturer's instructions.
- 3D Image Acquisition: Mount the samples for 3D imaging. Acquire z-stacks using confocal, light-sheet, or other suitable fluorescence microscopes. For super-resolution details on DNA architecture, techniques like Binding Activated Localization Microscopy (BALM) can be applied [29].
Troubleshooting and Data Interpretation
Table 3: Common Issues and Recommended Solutions
| Problem | Potential Cause | Solution |
|---|---|---|
| Weak or No EdU Signal | Insufficient catalyst (CuSO₄) or reducing agent. Incomplete permeabilization. | Ensure CuSO₄ is at 0.8 mM and L-ascorbic acid at 1 mg/mL. Verify embryo permeabilization with a control dye like Rhodamine B [27] [28]. |
| High Background Noise | Concentration of picolyl azide dye is too high. Inadequate washing post-click reaction. | Do not exceed 0.2 µM for the picolyl azide dye. Increase the number and duration of washes with buffer containing 2% NCS [27]. |
| Poor Sample Viability (Embryos) | EPS exposure was too long or concentration too high. | Titrate the EPS dilution and exposure time. Early-stage embryos require gentler conditions [28]. |
| Poor Depth of Imaging in 3D | Sample scattering or insufficient clearing. | Consider combining with mild tissue clearing agents. Ensure the mounting medium is compatible with deep-tissue imaging. |
Application Notes
The OpenEMMU platform has been rigorously validated across diverse applications relevant to developmental biology and drug discovery [27]:
- Profiling Cell Proliferation: Successfully used in T cell activation and proliferation assays in response to antigens and infections.
- 3D Imaging of Organogenesis: Enabled high-resolution 3D visualization of DNA replication dynamics in embryonic hearts, forelimbs, and 3D hiPSC-derived cardiac organoids.
- Whole-Organism Analysis: Facilitated deep-tissue 3D imaging of DNA synthesis in entire zebrafish larvae, demonstrating its utility for complex specimens under replication stress.
This protocol provides a robust, cost-effective, and highly adaptable solution for integrating high-quality DNA replication analysis into the study of thick embryo samples, overcoming a major bottleneck in 3D spatial biology.
Single-cell multi-omics technologies have revolutionized molecular profiling by enabling the simultaneous analysis of multiple molecular layers within individual cells, providing unprecedented resolution to explore cellular heterogeneity in complex systems [30]. However, a significant technical challenge in this field lies in the integration of intracellular proteomic measurements with other omics data, as the fixation and permeabilization steps required for intracellular antibody staining often compromise RNA integrity and yield [31]. This challenge is particularly pronounced when working with thick embryo samples, which present additional barriers due to their structural complexity and opacity.
This protocol addresses these limitations by evaluating and optimizing fixation and permeabilization methods specifically for single-cell multi-omics applications. We provide a standardized approach that minimizes transcriptomic loss while enabling robust intracellular protein detection, with particular consideration for challenging sample types such as developing embryos. The methodology described herein has been validated using the BD Rhapsody Single-Cell Analysis System and can be adapted for other high-throughput platforms [31].
Background and Significance
The Critical Role of Fixation and Permeabilization in Multi-omics
In single-cell multi-omics, the ability to simultaneously profile transcriptomic and proteomic features within the same cell provides powerful insights into the linkage between RNA expression levels and phenotypic cellular states [31]. While most commercially available technologies successfully combine transcriptomics with surface proteomics, intracellular proteomic measurement remains challenging due to the disruptive effects of standard permeabilization methods on RNA quality [31].
Recent technological advances have enabled the development of methods that can jointly profile epigenetic features, such as scEpi2-seq for simultaneous detection of histone modifications and DNA methylation at single-cell resolution [32]. Similarly, droplet-based single-cell DNA–RNA sequencing (SDR-seq) now allows confident linking of precise genotypes to gene expression in their endogenous context [33]. These emerging methodologies all share a common dependency on optimized sample preparation, particularly where membrane integrity must be compromised for intracellular access.
Special Considerations for Thick Embryo Samples
Embryonic tissues present unique challenges for multi-omics protocols due to their three-dimensional architecture, extracellular matrix density, and increasing opacity during development. Standard protocols often fail to penetrate deeper layers, leading to inconsistent results throughout the sample [34]. Research on chicken embryos has demonstrated that methodological adjustments, including specialized clearing techniques such as ethyl cinnamate (ECi) clearing, are necessary to enable comprehensive molecular analysis in later developmental stages (E3.5 to E5.5) [34]. These adaptations are crucial for successful integration with advanced imaging modalities like light sheet microscopy.
Quantitative Comparison of Permeabilization Methods
We systematically evaluated two permeabilization methods for their effects on transcriptomic and proteomic data quality in single-cell multi-omics experiments. The table below summarizes the quantitative performance metrics for each method across key parameters.
Table 1: Performance Comparison of Fixation and Permeabilization Methods
| Parameter | Method 1: BD Cytofix/Cytoperm | Method 2: PFA/Tween-20 |
|---|---|---|
| Chemical Composition | BD Cytofix/Cytoperm Buffer followed by BD Perm/Wash Buffer | 2% paraformaldehyde (PFA) followed by 0.2% Tween-20 |
| Incubation Conditions | 20 minutes at 4°C | Cold, freshly prepared PFA for fixation |
| Impact on Transcriptome Detection | Significant negative impact on whole transcriptome detection | Lower transcriptomic loss compared to Method 1 |
| Stimulation Signature Preservation | ~60% of transcriptomic signature retained [31] | More precise proteomic fingerprint detected |
| Recommended Application | Standard intracellular protein detection | Combined surface and intracellular marker measurement |
The data clearly indicate that while both methods enable intracellular access, Method 2 (PFA/Tween-20) demonstrates superior performance for integrated multi-omics applications, particularly when preserving transcriptomic information is prioritized.
Materials and Reagents
Research Reagent Solutions
The following table provides a comprehensive list of essential materials and their functions for implementing the combined fixation and permeabilization protocol.
Table 2: Essential Research Reagents for Fixation and Permeabilization
| Reagent Category | Specific Examples | Function in Protocol |
|---|---|---|
| Fixation Agents | 2-4% Paraformaldehyde (PFA), BD Cytofix Buffer | Preserve cellular states and protein epitopes; terminate enzymatic activity |
| Permeabilization Detergents | Tween-20 (0.2%), BD Perm/Wash Buffer, Saponin | Disrupt lipid membranes to enable intracellular antibody access |
| Antibody Staining Reagents | Oligonucleotide-tagged antibodies (Oligo-Ab) | Target-specific detection of surface and intracellular proteins |
| Buffers and Solutions | Phosphate-buffered saline (PBS), RPMI 1640 Complete Medium | Maintain physiological pH and osmolarity; support cell viability |
| Nucleic Acid Protection | RNase inhibitors, Custom freezing media (e.g., Synth-a-Freeze) | Preserve RNA integrity during processing and storage |
Specialized Reagents for Embryo Samples
For thick embryo samples, additional reagents are necessary to overcome penetration barriers and tissue opacity:
- Ethyl cinnamate (ECi): Clearing agent that reduces light scattering in 3D samples [34]
- Hybridization chain reaction (HCR) RNA-FISH reagents: Enable multiplex RNA detection in whole-mount embryos [34]
- Methanol or ethanol series: For gradual dehydration prior to clearing procedures [34]
Step-by-Step Protocol
Sample Preparation and Fixation
Cell Isolation and Handling:
- Isolate peripheral blood mononuclear cells (PBMCs) using Ficoll-Paque PLUS density gradient centrifugation (30 min at 1700 rpm) [31].
- For embryonic tissues, carefully dissect the region of interest and prepare a single-cell suspension using appropriate dissociation enzymes.
- Control cell viability before fixation (>95% recommended) and use technical replicates to minimize variation introduced by apoptosis [31].
Fixation Procedure:
Permeabilization and Staining
Membrane Permeabilization:
Intracellular Staining:
- Prepare antibody cocktail in permeabilization buffer.
- Use oligonucleotide-tagged antibodies (Oligo-Ab) targeting intracellular proteins of interest.
- Incubate for 30 minutes at 4°C with gentle agitation.
- Wash twice to remove unbound antibodies.
Specialized Processing for Embryo Samples
Post-fixation Treatment:
- After HCR RNA-FISH procedures, post-fix samples for 20 minutes with 4% PFA to preserve signal during subsequent steps [34].
Tissue Clearing:
- Dehydrate samples through graded ethanol series (30%, 50%, 70%, 95%, 100%).
- Clear tissues using ethyl cinnamate (ECi) [34].
- For light sheet microscopy, mount cleared samples in ECi for imaging.
Workflow for Combined Fixation and Permeabilization
Quality Control and Troubleshooting
Assessment of Method Performance
Rigorous quality control is essential for successful single-cell multi-omics experiments. The following parameters should be monitored:
- Cell Quality Metrics: Maintain viability >95% before processing to minimize technical variation [31].
- Sequencing Quality: Utilize high-throughput platforms (e.g., HiseqX) with advanced quality metrics for multi-omics readout [31].
- Transcriptomic Preservation: Expect approximately 60% retention of stimulation-induced transcriptomic signatures with optimized protocols [31].
- Data Integration: Apply unsupervised clustering to verify that biological signals (e.g., separated helper and cytotoxic T cell clusters) remain detectable after processing [31].
Troubleshooting Common Issues
Table 3: Troubleshooting Guide for Common Protocol Challenges
| Problem | Potential Cause | Solution |
|---|---|---|
| High RNA Degradation | Over-fixation or harsh permeabilization | Reduce fixation time; optimize detergent concentration; include RNase inhibitors |
| Poor Antibody Signal | Incomplete permeabilization | Increase detergent concentration; extend permeabilization time; validate antibodies |
| High Background Noise | Inadequate washing or non-specific binding | Increase wash stringency; include serum in buffers; optimize antibody concentrations |
| Incomplete Tissue Penetration (Embryos) | Limited reagent diffusion | Increase incubation times; employ gentle agitation; consider smaller tissue fragments |
| Low Cell Yield | Excessive processing or centrifugation | Reduce centrifugal force; include carrier proteins; minimize processing steps |
Applications and Integration with Other Methods
The optimized fixation and permeabilization protocol enables diverse research applications across multiple biological systems:
Immunological Studies
This method has been successfully applied to profile lymphocyte responses under stimulated and unstimulated conditions, clearly resolving helper and cytotoxic T cell subpopulations through unsupervised clustering analysis [31]. The ability to capture approximately 60% of the transcriptomic signature following stimulation makes it particularly valuable for immunology research [31].
Developmental Biology
When adapted for embryonic tissues, this protocol can be integrated with HCR RNA-FISH and tissue clearing techniques to enable comprehensive 3D mapping of gene expression patterns during organogenesis [34]. The combination with light sheet microscopy provides unprecedented spatial resolution in complex samples.
Multi-omics Integration
The methodology supports emerging techniques that require simultaneous assessment of multiple molecular features, including:
- scEpi2-seq: For joint profiling of histone modifications and DNA methylation [32]
- SDR-seq: For correlated analysis of genomic DNA loci and transcriptomes [33]
- OpenEMMU: An open-source platform for studying DNA replication dynamics through enhanced click chemistry [27]
Integration with Downstream Applications
This protocol provides a standardized methodology for combined fixation and permeabilization in single-cell multi-omics studies, with specific adaptations for challenging sample types such as developing embryos. The systematic comparison of two permeabilization approaches demonstrates that method selection significantly impacts data quality, with the PFA/Tween-20 method offering superior preservation of transcriptomic information.
The integration of this protocol with emerging spatial transcriptomics, tissue clearing, and advanced imaging technologies enables comprehensive molecular profiling in complex biological systems. As single-cell multi-omics continues to evolve, optimized sample preparation methods will remain fundamental to generating high-quality, biologically meaningful data across diverse research applications.
Permeabilization is a critical step in the study of cellular and subcellular structures within thick tissue samples, such as embryos. For researchers investigating developmental biology, the ability to allow antibodies and dyes access to intracellular targets without compromising structural integrity is paramount. The selection of a permeabilizing agent is highly specific to the target, the sample type, and the downstream application. This application note provides a detailed comparison of four common detergents—Triton X-100, Tween-20, Saponin, and Digitonin—framed within the context of permeabilization protocols for thick embryo samples. We summarize their properties in an easy-to-reference table, provide detailed protocols for their use, and visualize their mechanisms of action to guide researchers in making informed methodological choices.
Detergent Characteristics and Selection Guide
The table below summarizes the key properties of the four detergents to guide your selection for permeabilizing thick embryo samples.
Table 1: Characteristics of Common Permeabilization Detergents
| Detergent | Mechanism of Action | Typical Working Concentration | Primary Use Cases | Key Considerations for Thick Samples |
|---|---|---|---|---|
| Triton X-100 | Solubilizes lipids, disrupting all membranes [35] | 0.1% - 0.5% | General intracellular antigen access; strong permeabilization | Can destroy delicate ultrastructure; use for robust targets. |
| Tween-20 | Mild surfactant, weak membrane permeabilization | 0.05% - 0.2% | Blocking agent; mild washing buffer additive | Insufficient for most intracellular targets in thick tissues. |
| Saponin | Binds cholesterol, forming pores in plasma membrane [36] | 0.05% - 0.2% | Preserving organelle and vesicle integrity; labile structures | Permeabilization is reversible; must be included in all steps. |
| Digitonin | Binds cholesterol with high specificity, permeabilizing plasma membrane [37] | 10 - 100 µg/mL | Selective plasma membrane permeabilization; studying organelles | Spares cholesterol-poor organelle membranes (e.g., mitochondria). |
Experimental Protocols for Thick Embryo Samples
The following protocols are adapted for use with thick embryo sections or whole-mount embryos, such as precision-cut lung slices (PCLSs) or early-stage mouse embryos.
General Immunofluorescence Workflow for Thick Samples
The diagram below outlines the core workflow for processing thick embryo samples, with the permeabilization step being a critical branching point.
Protocol 1: Saponin-Based Permeabilization for Labile Structures
This protocol is ideal for preserving the integrity of membrane-bound vesicles and organelles, such as the DDX1-containing Membrane Associated RNA-containing Vesicles (MARVs) found in early mouse embryos [38].
Materials:
- Blocking/Permeabilization Buffer: 5% (w/v) Bovine Serum Albumin (BSA), 0.3% (v/v) Saponin in PBS [35].
- Antibody Dilution Buffer: 1% BSA, 0.1% Saponin in PBS.
- Wash Buffer: 0.1% Saponin in PBS.
Procedure:
- Fixation: Fix embryo samples with 4% Paraformaldehyde (PFA) for 24 hours at 4°C to ensure complete penetration.
- Washing: Rinse samples 3x with PBS for 30 minutes each to remove residual PFA.
- Blocking and Permeabilization: Incubate samples in Blocking/Permeabilization Buffer for 4 hours at room temperature or overnight at 4°C on a rocker. Note: The permeabilization effect of Saponin is reversible; it must be included in all subsequent buffers.
- Primary Antibody Incubation: Incubate with primary antibody diluted in Antibody Dilution Buffer for 24-48 hours at 4°C.
- Washing: Wash samples 3x with Wash Buffer for 1-2 hours each.
- Secondary Antibody Incubation: Incubate with fluorescent-conjugated secondary antibody diluted in Antibody Dilution Buffer for 24 hours at 4°C, protected from light.
- Final Washes: Wash 3x with Wash Buffer, followed by a final wash in PBS before mounting for imaging.
Protocol 2: Digitonin-Based Selective Plasma Membrane Permeabilization
This protocol uses digitonin to selectively permeabilize the plasma membrane while leaving most intracellular organelles intact, perfect for studying mitochondrial or nuclear import [37].
Materials:
- Extracellular Buffer (ECB): 155 mM NaCl, 4.5 mM KCl, 2 mM CaCl₂, 3 mM MgCl₂, 0.1 mM ZnCl₂, 10 mM D-glucose, 5 mM HEPES, pH 7.2 [37].
- Digitonin Stock Solution: 10 mM digitonin in DMSO.
- Permeabilization Buffer: ECB with 10-50 µg/mL digitonin (from stock). Note: Optimal concentration must be determined empirically.
Procedure:
- Sample Preparation: Secure your thick embryo sample in a flow chamber or microfluidic device if possible, to allow for rapid solution exchange [37].
- Integrity Check (Optional): Test plasma membrane integrity by exposing the sample to a non-membrane-permeant dye like fluorescein (20 µM) and confirm no uptake.
- Permeabilization: Expose the sample to Permeabilization Buffer for 30-120 seconds. Critical: The exposure time and concentration are crucial and must be calibrated to avoid over-permeabilization. Monitor under a microscope if feasible.
- Rapid Quenching: Immediately remove digitonin by washing extensively with ECB containing 1% BSA.
- Downstream Processing: Proceed immediately with your assay, such as immunofluorescence or in situ enzymatic reactions. For antibody staining, use buffers without strong detergents like Triton X-100 to maintain organelle integrity.
The Scientist's Toolkit: Research Reagent Solutions
Table 2: Essential Reagents for Permeabilization and Downstream Processing
| Reagent | Function | Example Application in Context |
|---|---|---|
| Paraformaldehyde (PFA) | Cross-linking fixative that preserves cellular architecture. | Standard fixation for thick embryo samples prior to permeabilization [35]. |
| Bovine Serum Albumin (BSA) | Blocking agent to reduce non-specific antibody binding. | Used at 1-5% in blocking and antibody buffers to improve signal-to-noise ratio [35]. |
| Ultra-Low Melting Point (ULMP) Agarose | Support matrix for tissue during sectioning. | Used for embedding lungs before generating Precision-Cut Lung Slices (PCLSs) [35]. |
| Picolyl Azide Dyes | Fluorescent dyes for click chemistry reactions. | Used in OpenEMMU, an open-source method for detecting EdU-labeled DNA replication sites [27]. |
| Tamoxifen | Inducer of Cre-ERT2 recombinase activity for inducible genetic labeling. | Used in lineage tracing studies in mouse models (e.g., Fgf10-expressing cells) [35]. |
| L-Ascorbic Acid | Reducing agent in click chemistry. | Essential component in the copper-catalyzed reaction for EdU detection [27]. |
Mechanistic Pathways of Detergent Action
Understanding how each detergent interacts with cellular membranes informs their appropriate application. The following diagram illustrates their distinct mechanisms.
The choice of permeabilization agent is a critical determinant of success in imaging thick embryo samples. Triton X-100 provides robust, general-purpose permeabilization but at the cost of ultrastructural detail. For more sophisticated applications, particularly those involving the study of specific organelles, vesicles, or membrane-bound complexes, Saponin and Digitonin offer superior alternatives. Their cholesterol-dependent mechanisms allow for selective access to the cytosol while preserving the integrity of intracellular membranes, as demonstrated in the study of MARVs in early embryogenesis [38]. By calibrating the detergent type, concentration, and exposure time as outlined in these protocols, researchers can optimize their permeabilization strategy to answer specific biological questions with greater precision and fidelity.
Adapting Protocols for Different Embryonic Stages and Organisms
Permeabilization of thick embryo samples presents a significant technical challenge in developmental biology, requiring precise adaptation of protocols to accommodate vast differences in embryonic developmental stages and species-specific morphological characteristics. The primary biological barrier across diverse organisms is the lipid-rich layer surrounding the embryo, which provides essential waterproofing and desiccation resistance but prevents the influx of cryoprotectants, dyes, and other small molecules critical for experimental manipulation and preservation [39]. This application note provides a structured framework for adapting permeabilization methodologies across embryonic models, supported by quantitative data and detailed protocols.
Success in this domain hinges on understanding two critical factors: the developmental stage of the embryo, which affects membrane composition and permeability, and the species-specific eggshell architecture, which dictates which chemical or physical permeabilization approaches will be effective while maintaining viability. The following sections synthesize recent research findings into actionable protocols and analytical frameworks for researchers working across model organisms.
Quantitative Data Analysis of Permeabilization Efficiency
The table below summarizes key quantitative findings on how embryonic stage and permeabilization agent selection impact viability and efficiency across different species. This data provides an evidence base for protocol selection and adaptation.
Table 1: Quantitative Analysis of Permeabilization Efficiency Across Embryonic Stages and Reagents
| Organism | Developmental Stage | Permeabilization Agent | Exposure Time | Key Outcome Metric | Efficiency/Viability |
|---|---|---|---|---|---|
| Bombyx mori (Silkworm) | 160 h AEL at 25°C [39] | Hexane [39] | 30 seconds [39] | Embryos growing to 2nd larval instar [39] | >62% [39] |
| Bombyx mori (Silkworm) | 166 h AEL at 25°C [39] | Hexane [39] | 30 seconds [39] | Embryo viability [39] | Significantly reduced [39] |
| Bombyx mori (Silkworm) | 160 h AEL at 25°C [39] | Heptane [39] | 30 seconds [39] | Permeabilization effectiveness [39] | Effective [39] |
| Bombyx mori (Silkworm) | 160 h AEL at 25°C [39] | Triton X-100 (7% v/v) [39] | 2 minutes [39] | Permeabilization effectiveness [39] | Less effective than alkanes [39] |
| Drosophila sp. (Fruit Fly) | Stages 12-16 (Late) [40] | EPS (d-Limonene based) [40] | Not Specified | Successful Permeabilization [40] | Enabled by pre-treatment at 18°C [40] |
| Musca domestica (Housefly) | Stage-selected [41] | Not Specified | Not Specified | Post-cryopreservation hatching [41] | 86.5 ± 5.5% [41] |
| Musca domestica (Housefly) | Non-stage-selected [41] | Not Specified | Not Specified | Post-cryopreservation hatching [41] | 33.3 ± 4.5% [41] |
Critical Interpretation of Tabulated Data
The data in Table 1 reveals several fundamental principles for protocol adaptation. First, the narrow developmental window for effective permeabilization is evident in silkworm, where a mere 6-hour difference (160 h vs. 166 h AEL) resulted in a dramatic viability loss, underscoring the necessity for precise embryonic staging [39]. Second, the choice of chemical agent is paramount; non-polar alkanes like hexane and heptane consistently outperform surfactants like Triton X-100 in removing the lipid layer in insect embryos [39]. Third, the practice of manual stage selection can more than double the success rate of downstream applications like cryopreservation, as demonstrated by the 2.6-fold increase in post-cryopreservation hatching in houseflies [41]. Finally, for challenging late-stage embryos, modifying pre-treatment conditions—such as reducing incubation temperature to 18°C for Drosophila—can maintain the eggshell in a permeabilization-sensitive state, enabling otherwise impossible interventions [40].
Stage-Dependent Permeabilization Workflow
The following diagram illustrates the critical decision points for selecting and adapting a permeabilization protocol based on embryonic stage and species. This workflow synthesizes the key findings from multiple studies into a logical, actionable pathway.
Detailed Experimental Protocols
Chemical Permeabilization of Silkworm (Bombyx mori) Embryos
This protocol is optimized for the 160 h AEL developmental stage of silkworm embryos, which provides the optimal balance between permeability and post-treatment viability [39].
4.1.1 Solutions and Reagents
- Potassium Hydroxide (KOH) solution: 30% in deionized water [39]
- Sodium Hypochlorite (NaClO) solution: 2% (from 6% stock) [39]
- Phosphate-Buffered Saline (PBS): pH 7.4, 302 mOsm [39]
- Sodium Carbonate (Na₂CO₃) solution: 1% in deionized water [39]
- Permeabilization solvent: Laboratory-grade hexane or heptane [39]
- Grace's Insect Medium [39]
4.1.2 Step-by-Step Procedure
- Dechorionation:
- Attach intact eggs to a 30 μm nylon net.
- Expose to 30% KOH for 7 minutes at 27°C.
- Transfer to 2% NaClO for 5 minutes at 27°C.
- Rinse in PBS for 10 minutes.
- Immerse in 1% Na₂CO₃ for 1 minute.
- Perform final rinse in PBS for 5 minutes [39].
Preparation for Permeabilization:
- Blot the nylon net containing dechorionated eggs on sterilized filter paper.
- Place the net in a basket with a 140 μm stainless-steel mesh strainer.
- Secure with weights to prevent movement.
- Air-dry by blowing air with a small fan for 15 seconds [39].
Permeabilization:
- Expose dechorionated eggs to hexane for exactly 30 seconds.
- Remove chemical by blotting on filter paper.
- Air-dry for 5 seconds using a small fan.
- Let eggs remain in room air for 50 seconds [39].
Post-treatment Processing:
- Transfer permeabilized eggs to Grace's insect medium for 5 minutes.
- Culture using an appropriate dry-moist method [39].
4.1.3 Critical Notes
- Embryonic staging is crucial. Use precisely timed collections (160 h AEL at 25°C) [39].
- Exposure time to alkane solvents must be rigorously controlled to prevent toxicity.
- The 1% Na₂CO₃ step is essential for neutralizing residual bleach.
d-Limonene-Based Permeabilization of Late-Stage Drosophila Embryos
This protocol overcomes the inherent resistance of late-stage Drosophila embryos (>8 hours, stages 12-16) to permeabilization through temperature manipulation and a specialized solvent system [40].
4.2.1 Solutions and Reagents
- Embryo Permeabilization Solvent (EPS): Combine 18 mL d-limonene with 1 mL cocamide DEA and 1 mL ethoxylated alcohol (5% final concentration each). Mix thoroughly. Stock is stable for ~2 months at room temperature [40].
- Bleach solution: 50% commercial bleach in deionized water [40].
- Modified Basic Incubation Medium (MBIM) [40].
- Permeabilization dye (optional): CY5 carboxylic acid, 10 mM in DMSO [40].
4.2.2 Step-by-Step Procedure
- Staging and Pre-treatment:
- Collect embryos by timed laying (2-hour collection window).
- Immediately transfer collected embryos to 18°C incubator for further development.
- Note: 1 hour of development at 25°C equals approximately 2 hours at 18°C [40].
Dechorionation:
- Rinse embryos from plate into mesh basket using tap water and a soft brush.
- Immerse basket in 50% bleach for 2 minutes with occasional gentle agitation.
- Wash embryos thoroughly under a stream of tap water [40].
EPS Permeabilization:
- Prepare an EPS working dilution (e.g., 75 μL EPS in 10 mL PBS).
- Transfer dechorionated embryos to EPS solution for the optimized duration.
- Perform serial washes in PBS (typically six washes of 1 minute each) [40].
Viability and Permeability Assessment:
- For permeability tracking, include CY5 dye (10 μM final concentration) in the incubation medium.
- Monitor dye uptake visually or fluorometrically after fixation [40].
4.2.3 Critical Notes
- The 18°C pre-treatment is essential for maintaining EPS sensitivity in late-stage embryos.
- d-Limonene can dissolve some plastics; use glass containers for stock solutions.
- Embryo-handling baskets should be fabricated from polypropylene welded to nylon mesh for optimal fluid exchange.
The Scientist's Toolkit: Essential Research Reagents
The table below catalogs key reagents and their specific functions in embryo permeabilization protocols, serving as a quick reference for laboratory preparation and troubleshooting.
Table 2: Essential Research Reagents for Embryo Permeabilization
| Reagent/Chemical | Primary Function in Protocol | Application Examples & Notes |
|---|---|---|
| Hexane/Heptane [39] | Non-polar solvent that dissolves the waxy lipid layer of the eggshell [39] | Silkworm embryos; short exposure (30 sec) critical for viability [39] |
| d-Limonene (EPS) [40] | Primary solvent in a less-toxic permeabilization system [40] | Late-stage Drosophila; requires surfactant additives (cocamide DEA) [40] |
| Potassium Hydroxide (KOH) [39] | Chemical dechorionation; degrades the outer chorionic layers [39] | Silkworm embryos; used in sequence with hypochlorite [39] |
| Sodium Hypochlorite (NaClO) [39] | Chemical dechorionation and sterilization [39] | Silkworm embryos; typically used as 2% solution after KOH [39] |
| Triton X-100 [39] | Non-ionic surfactant for membrane permeabilization [39] | Less effective than alkanes for silkworm lipid layer [39] |
| Methanol [42] | Fixation and permeabilization agent for intracellular targets [42] | Standard flow cytometry protocols; requires chilled application [42] |
| Paraformaldehyde [31] | Cross-linking fixative for structural preservation [31] | Often used prior to permeabilization for immunofluorescence (2-4%) [31] |
| CY5 Carboxylic Acid [40] | Far-red fluorescent permeability tracer [40] | Compatible with common green/red dyes; stable after fixation [40] |
| Rhodamine B [39] | Visible red dye for permeability assessment [39] | Molecular weight 479.02 Da; 0.1% solution for 10 min incubation [39] |
Successful permeabilization of thick embryo samples requires a methodical approach that respects both species-specific barriers and developmental timelines. The protocols and data presented here demonstrate that chemical selection must be paired with precise developmental staging and, in some cases, strategic pre-conditioning of embryos. The alkane-based methods for early-stage silkworm embryos and the temperature-modulated d-limonene approach for late-stage Drosophila represent two adaptive frameworks that can be modified for related organisms. As research progresses with spatial transcriptomics and metabolomics in embryonic systems [43], the ability to gently but effectively permeabilize complex tissues will remain a cornerstone technique for developmental biology and drug discovery applications.
Solving Permeabilization Problems: A Troubleshooting Guide for Deep Tissues
Permeabilization is a critical step in sample preparation for biological research, enabling dyes, antibodies, and nucleic acid probes to access intracellular targets. For thick embryo samples, incomplete permeabilization presents a significant technical challenge that can compromise experimental outcomes. The trypan blue exclusion test provides a straightforward, quantitative method for diagnosing permeabilization efficacy. This application note details the integration of trypan blue staining within a broader framework of embryo permeabilization protocols, establishing a quality control measure to ensure subsequent experimental success.
Theoretical Basis of the Trypan Blue Test
The trypan blue test operates on the principle of membrane integrity assessment. Trypan blue is an azo dye that is impermeable to intact cell membranes [44]. Viable cells with uncompromised plasma membranes actively exclude the dye and remain unstained. In contrast, nonviable cells or cells with chemically permeabilized membranes allow the dye to enter and bind to intracellular proteins, rendering the cells blue [45] [44]. When applied to fixed embryo samples subjected to permeabilization treatments, trypan blue staining directly reports on the success of the permeabilization protocol, with successful permeabilization resulting in widespread blue staining throughout the sample.
Experimental Workflow and Interpretation
The following diagram illustrates the logical workflow for using the trypan blue test to diagnose the success of an embryo permeabilization protocol, leading to a definitive decision on sample processing.
Key Research Reagent Solutions
The table below catalogues the essential reagents required for executing the trypan blue test and associated permeabilization protocols in embryo research.
Table 1: Essential Research Reagents for Permeabilization and Staining
| Reagent | Function/Application | Key Considerations |
|---|---|---|
| Trypan Blue (0.4%) | Viability/perm. dye; stains cytoplasm of membrane-compromised cells [44]. | Use serum-free solutions; filter before use; incubate 3-5 min [44]. |
| D-Limonene & Heptane (LH) Mixture | Embryo permeabilization; removes waxy vitelline layer [10]. | Critical for Drosophila embryos; 10s soak is often sufficient [10]. |
| Tween 20 | Mild detergent for cell permeabilization [46] [47]. | Used in low concentrations for gentle permeabilization of cultured cells. |
| Methanol | Organic solvent for fixation and permeabilization [47]. | Effective for permeabilizing embryonic tissues for whole-mount protocols. |
| Trypsin-EDTA | Protease for enhanced permeability in hydrogel-expanded samples (TT-ExM) [48]. | Improves antibody & dye access to intracellular targets. |
| Antibody Penetration Buffer | Commercial solution for 3D sample permeabilization [49]. | Essential for staining thick spheroids and organoids. |
Quantitative Assessment and Data Interpretation
The table below summarizes quantitative metrics and expected outcomes from applying the trypan blue test, drawing from published viability and permeabilization studies.
Table 2: Quantitative Guide to Trypan Blue Staining Outcomes
| Observation | Interpretation | Reference/Likely Cause |
|---|---|---|
| Clear, unstained cytoplasm | Intact membrane / Incomplete Permeabilization. | Viable cell indicator [44]; insufficient permeabilization agent/duration. |
| Blue-stained cytoplasm | Compromised membrane / Successful Permeabilization. | Non-viable cell indicator [44]; successful chemical permeabilization. |
| ~50% stained cells in 1:1 live:dead mix | Assay validation and calibration. | Confirms test accuracy in controlled mixtures [50]. |
| High background staining | Dye binding to serum proteins. | Perform staining/washing in protein-free medium [44]. |
| >50% embryo hatch rate post-treatment | Functional viability post-permeabilization. | Indicator of successful Drosophila embryo perm. with minimal damage [10]. |
| Precision (CV) of 2.0-6.2% | High repeatability of quantitative methods. | Achievable with automated microscopic cell counters [50]. |
Detailed Experimental Protocol
Embryo Permeabilization and Trypan Blue Test
This protocol combines specialized embryo permeabilization techniques [10] with the standard trypan blue staining assay [44].
Materials:
Procedure:
- Permeabilization: Following fixation and dechorionation, transfer embryos to a mesh basket. Permeabilize by soaking embryos in a D-limonene and heptane (LH) mixture for approximately 10 seconds to remove the waxy vitelline layer [10].
- Washing: Thoroughly wash permeabilized embryos with serum-free PBS to remove all traces of the organic solvent. Note: Serum proteins can bind trypan blue and create high background.
- Staining: Prepare a mixture of embryo suspension and 0.4% trypan blue solution. Incubate for 3-5 minutes at room temperature [44]. Avoid longer incubations to prevent artificial cell death.
- Washing (Optional): Gently wash the stained embryo sample with PBS to remove excess, unbound dye. This step can reduce background and improve contrast for imaging.
- Microscopy & Analysis: Apply a drop of the embryo-dye mixture to a hemacytometer or transfer to a glass-bottom dish for imaging. Use a brightfield microscope to assess staining.
- For quantitative, traceable determination of dye uptake, absorbance microscopy can be employed, converting pixel intensity to moles of trypan blue per cell [45].
- Decision Point: Refer to the workflow in Section 3. If staining is widespread and uniform, proceed with your primary application (e.g., FISH, immunofluorescence). If staining is weak or patchy, re-optimize the permeabilization step.
Troubleshooting Common Issues
- Patchy or Weak Staining: This indicates incomplete permeabilization. Solution: Re-optimize the permeabilization step by increasing the concentration of the permeabilization agent (e.g., LH mixture, detergent) or the incubation duration [10]. Ensure the permeabilization agent is appropriate for the specific embryo model.
- Excessive Background Stain: Caused by residual serum proteins or insufficient washing after staining. Solution: Perform all staining and washing steps in protein-free buffers and include additional washes after dye incubation [44].
- Low Post-Permeabilization Viability (Live Embryos): If working with live embryos for culture, harsh permeabilization can reduce viability. Solution: Titrate the permeabilization agent and time to find the minimal effective exposure. Using embryos at the optimal developmental stage (e.g., 22 hours for Drosophila) is also critical for survival [10].
Optimizing Detergent Concentration and Incubation Time
Permeabilization is a critical step in the processing of thick embryo samples for techniques such as whole-mount immunohistochemistry (IHC) and fluorescence in situ hybridization (FISH). It enables the penetration of antibodies and nucleic acid probes through cellular membranes and into the deep tissue layers of intact embryos. The core challenge lies in balancing efficient reagent penetration with the preservation of tissue morphology and antigenicity. Excessive detergent concentration or prolonged incubation can compromise sample integrity, while insufficient treatment results in inadequate staining of inner tissue layers. This application note synthesizes current protocols to provide a structured framework for optimizing these two pivotal parameters—detergent concentration and incubation time—specifically for thick embryo samples, thereby enhancing the reliability and reproducibility of 3D spatial biology research.
Fundamental Principles and Key Reagents
The Scientist's Toolkit: Essential Research Reagent Solutions
The following table details key reagents and their specific functions in the permeabilization process for embryo samples.
Table 1: Key Research Reagent Solutions for Embryo Permeabilization
| Reagent | Function in Permeabilization | Application Notes |
|---|---|---|
| Triton X-100 [2] | Non-ionic detergent that solubilizes lipid membranes, creating pores for antibody and probe access. | A standard choice for pre-implantation embryo immunostaining; used at 0.1% concentration in PBS [2]. |
| Paraformaldehyde (PFA) [2] [13] | Cross-linking fixative that preserves tissue architecture and antigenicity prior to permeabilization. | Essential pre-permeabilization step; 4% solution is common. Aged or improperly stored PFA adversely affects results [2]. |
| Methanol [13] | Precipitating fixative and permeabilizing agent; can be used as an alternative fixative when PFA masks epitopes. | Useful if PFA cross-linking blocks antibody access; requires optimization for each target [13]. |
| Formamide [51] | Chemical denaturant used in FISH hybridization buffers to balance probe binding efficiency and specificity. | Concentration is optimized based on probe design and target region length (e.g., 20-50 nt) [51]. |
| Proteinase K / RNase [52] | Enzymatic treatments used to selectively degrade proteins or RNA, respectively, to study granule organization. | Used in specialized protocols to query the relative contributions of protein and RNA to structure formation [52]. |
Critical Considerations for Embryo Age and Size
The effectiveness of any permeabilization protocol is heavily constrained by the physical dimensions of the sample. As an embryo develops, it grows in size and complexity, presenting a greater diffusion barrier for reagents. For whole-mount studies, there are practical upper limits for different model organisms to ensure reagents can permeate to the center of the sample [13]. The recommended maximum ages are:
For larger, older embryos, dissection into smaller segments or removal of surrounding muscle and skin may be necessary to facilitate effective permeabilization, staining, and imaging [13].
Quantitative Optimization Data and Protocols
Established Detergent Concentrations from Current Protocols
The table below summarizes detergent concentrations and incubation parameters derived from recent, optimized protocols for embryo and organoid samples.
Table 2: Quantitative Detergent and Incubation Parameters from Current Protocols
| Sample Type | Technique | Detergent / Permeabilization Agent | Concentration | Incubation Time & Temperature | Protocol Source |
|---|---|---|---|---|---|
| Pre-implantation Human Blastocysts | Immunofluorescence (IF) | Triton X-100 | 0.1% | Prepared fresh day-of; RT* [2] | Brumm et al. 2025 |
| Inner Ear Organoids | IF & EdU Detection | Triton X-100 | 0.5% | 1 hour; RT (post-vibratome sectioning) [53] | Matern et al. 2025 |
| General Whole-Mount Embryos | IHC | Not Specified | N/A | Extended times (hours to days) required for center penetration [13] | Abcam Protocol |
| U-2 OS Cells | smFISH / MERFISH | Formamide (in hybridization buffer) | Concentration screened (varies by probe) | 1 day at 37°C [51] | Scientific Reports 2025 |
*RT = Room Temperature (typically 15°C to 25°C)
Detailed Experimental Protocol for Permeabilization Optimization
The following workflow is adapted from established methods for immunofluorescence in blastocysts and whole-mount IHC, providing a template for systematic optimization [2] [13].
Protocol: Optimizing Permeabilization for Thick Embryo Samples
Before You Begin:
- Institutional Permissions: Ensure all necessary ethical and institutional approvals for working with embryo samples are secured [2].
- Fixation: Fix samples in 4% PFA for 30 minutes at room temperature or overnight at 4°C. Ensure PFA is fresh (not older than 7 days) [2] [13].
- Reagent Preparation: Prepare a stock solution of phosphate-buffered saline (PBS) without Ca2+ and Mg2+. Prepare a 10% stock solution of Triton X-100 in PBS for accurate dilution.
Optimization Procedure:
- Post-fixation Wash: Wash the fixed embryos three times in PBS for 5 minutes each on a rocking platform.
- Permeabilization Matrix Setup:
- Prepare a series of permeabilization buffers with varying concentrations of Triton X-100 (e.g., 0.1%, 0.3%, 0.5%, 1.0%) in PBS.
- For each detergent concentration, aliquot the solution into separate wells of a 4-well dish.
- Transfer a subset of fixed embryos into each well.
- Variable Incubation:
- For each detergent concentration, test multiple incubation times (e.g., 30 minutes, 1 hour, 2 hours, 4 hours) at room temperature on a rocking platform.
- Critical: Incubations must be extended for whole-mount samples to allow permeabilization to reach the center. The timing of these steps will need to be optimized for your experiments [13].
- Post-permeabilization Washes: After incubation, wash all samples three times with PBS for 10-15 minutes each to thoroughly remove the detergent.
- Blocking and Staining: Proceed with a standard blocking step (e.g., using 5-10% normal serum in PBS) followed by incubation with primary and secondary antibodies.
- Imaging and Analysis:
- Image the embryos using confocal microscopy to assess staining intensity and uniformity throughout the entire depth of the tissue.
- Compare the signal-to-noise ratio in superficial versus deep tissue layers for each condition in your optimization matrix.
- Assess tissue integrity and morphology for signs of over-permeabilization, such as fragmented or misshapen nuclei.
Diagram 1: Permeabilization optimization workflow for embryo samples.
Advanced Considerations and Integrated Workflows
Integration with Downstream 3D Imaging and Clearing
Successful permeabilization and staining of whole embryos is often a prerequisite for advanced 3D imaging techniques. Optical clearing methods like OptiMuS (Optimized single-step optical clearing Method that preserves fluorescence and Size) are designed to render thick tissues transparent by matching the refractive index of the tissue to that of the imaging medium, thereby reducing light scattering [54]. This process is vital for deep-tissue imaging. The diagram below illustrates how permeabilization is integrated into a complete workflow for 3D volume imaging.
Diagram 2: A complete workflow from permeabilization to 3D imaging.
Specialized Permeabilization for RNA and Protein Interaction Studies
For investigations into ribonucleoprotein granules or spatial transcriptomics, permeabilization strategies can be more specialized. One advanced protocol involves permeabilizing cells and then treating them with proteinase or RNase enzymes to query the relative contributions of protein-protein, protein-RNA, and RNA-RNA interactions to granule organization [52]. Furthermore, in techniques like MERFISH, the permeabilization step is crucial for allowing large encoding DNA probes to access cellular RNA, with performance being highly dependent on protocol choices in hybridization and buffer composition [51]. The key is that the permeabilization must be sufficient to allow entry of encoding probes while preserving the spatial context of the RNA molecules.
Mitigating RNA Degradation in Multi-omics Workflows
A primary obstacle in multi-omics research, particularly in complex samples like thick embryos, is the preservation of RNA integrity. RNA degradation can occur during sample preparation, permeabilization, and extended assay workflows, leading to biased gene expression data and loss of critical biological information. This application note details optimized protocols to mitigate RNA degradation, enabling robust multi-omics integration in challenging tissue contexts.
Key Challenges and Mechanisms of RNA Degradation
In thick embryo samples, standard permeabilization methods often compromise RNA integrity. The opacity of tissues beyond early developmental stages (e.g., E3.5 in chicken embryos) necessitates extended processing, increasing exposure to ribonucleases (RNases) and mechanical stress [34]. Furthermore, multi-omics workflows that combine spatial transcriptomics with immunofluorescence or protein detection require a delicate balance between membrane permeability for probe access and preservation of labile RNA molecules.
Recent findings indicate that chemical inhibitors used in oncology research can inadvertently trigger RNA degradation pathways. For instance, PF-3758309, a PAK4 inhibitor, promotes ubiquitination and proteasomal degradation of RNA polymerase II subunits (POLR2A/B/E) via the cullin-RING ligase pathway, directly impairing transcription [55]. This underscores the need for careful consideration of drug mechanisms in experimental design.
Optimized Protocols for Embryo and Thick Tissue Samples
Enhanced Permeabilization and Fixation for RNA Preservation
Reagents Required:
- Paraformaldehyde (PFA), 4% solution, fresh (prepared within 7 days and stored at 4°C) [2]
- Glyoxal solution (non-crosslinking fixative as PFA alternative) [33]
- Triton X-100 (for permeabilization) [2]
- Methanol and Ethanol (for dehydration) [34]
Procedure:
- Fixation: Immerse embryo samples in fresh 4% PFA for 24 hours at 4°C. For sensitive applications, consider glyoxal-based fixation, which preserves nucleic acids better than crosslinking fixatives [33].
- Permeabilization: Treat samples with 0.1% Triton X-100 in PBS for 2-4 hours at room temperature. For older embryos (E4.5-E5.5), increase duration to 6-8 hours [34].
- Post-fixation: After hybridization steps, perform a second fixation with 4% PFA for 20 minutes to preserve signal integrity during clearing [34].
- Dehydration: Gradually transfer samples to 100% methanol or ethanol for long-term storage at -20°C.
Table 1: Troubleshooting Permeabilization in Embryo Samples
| Issue | Potential Cause | Solution |
|---|---|---|
| High background noise | Over-permeabilization | Reduce Triton X-100 concentration to 0.05% or decrease incubation time |
| Weak signal | Under-permeabilization | Increase Triton X-100 to 0.2% or extend incubation time; add proteinase K step [33] |
| RNA degradation | RNase contamination or prolonged exposure | Use RNase-free reagents and equipment; reduce permeabilization temperature to 4°C |
| Morphology damage | Over-fixation | Optimize PFA concentration to 2-4%; avoid prolonged fixation beyond 24 hours |
HCR RNA-FISH with Ethyl Cinnamate Clearing for 3D Transcriptomics
This optimized protocol combines high-sensitivity RNA detection with tissue clearing for deep tissue imaging [34].
Workflow Overview:
Detailed Steps:
- Probe Hybridization: Hybridize encoding probes targeting mRNAs of interest (e.g., SOX10, ISL1, SLIT2) at 37°C for 36-48 hours. For embryos older than E3.5, extend hybridization time and optimize formamide concentration (10-20%) in the hybridization buffer [34].
- Signal Amplification: Perform HCR amplification with fluorophore-labeled hairpins. Include RNase inhibitors in all buffers.
- Tissue Clearing: Dehydrate samples in an ethanol series (50%, 80%, 100%) before incubation in ethyl cinnamate (ECi). ECi provides superior transparency with minimal RNA signal loss compared to other clearing methods [34].
- Imaging: Acquire data using light sheet microscopy to minimize photobleaching during 3D imaging of large samples.
Integrated Spatial Multi-omics on a Single Tissue Section
A novel approach allows sequential spatial transcriptomics and proteomics on the same section, eliminating variability between adjacent sections [56].
Workflow:
- Sequential Processing: Perform Xenium spatial transcriptomics first, followed by COMET hyperplex immunohistochemistry on the exact same tissue section.
- Co-registration: Align transcriptomic, proteomic, and H&E staining data using computational registration in Weave software, enabling direct RNA-protein correlation at single-cell resolution [56].
- Cell Segmentation: Apply deep learning-based tools (CellSAM) that integrate nuclear (DAPI) and membrane markers for accurate cell boundary definition.
Table 2: Research Reagent Solutions for Multi-omics Workflows
| Reagent/Category | Specific Examples | Function in Workflow |
|---|---|---|
| Fixation Reagents | 4% PFA, Glyoxal | Preserve tissue morphology and nucleic acid integrity |
| Permeabilization Agents | Triton X-100, Proteinase K | Enable probe access while minimizing RNA degradation |
| Spatial Transcriptomics | Xenium, HCR RNA-FISH encoding probes | Target mRNA localization with subcellular resolution |
| Spatial Proteomics | COMET, antibody panels (40+ markers) | Multiplexed protein detection in situ |
| Tissue Clearing | Ethyl Cinnamate (ECi) | Enable deep tissue imaging for 3D reconstruction |
| Nuclease Inhibitors | MLN4924 (Pevonedistat) | Block cullin-RING ligase-mediated RNA degradation [55] |
| Computational Tools | Weave, CellSAM, StarDist | Data integration, cell segmentation, and analysis |
RNA Integrity Quality Control and Validation
Assessment of RNA Quality
Throughout the optimized workflows, implement rigorous QC checkpoints:
- Pre-hybridization RNA Integrity: Use aliquot of sample lysate for Bioanalyzer analysis.
- Post-hybridization Signal Validation: Confirm expected expression patterns of control genes (e.g., SOX10 in neural crest cells, ISL1 in dorsal root ganglia) [34].
- Correlation Analysis: For integrated omics, calculate Spearman correlation between transcript and protein levels for housekeeping genes as quality metric [56].
Inhibition of Specific Degradation Pathways
When working with small molecule inhibitors or under conditions promoting RNA loss, consider adding 1µM MLN4924 (Pevonedistat) to the culture medium. MLN4924 inhibits NEDD8-activating enzyme, blocking cullin-RING ligase activity and preventing RNA polymerase II degradation [55].
The protocols detailed herein provide a systematic approach to preserving RNA integrity in complex multi-omics workflows. By integrating optimized permeabilization strategies, tailored tissue clearing methods, and pathway-specific degradation inhibitors, researchers can significantly enhance data quality from challenging samples like thick embryos. These application notes establish a foundation for reliable integration of transcriptomic with proteomic and spatial data, advancing comprehensive molecular profiling in developmental biology and disease research.
Preventing Tissue Loss and Morphological Damage
Permeabilization is a critical step for introducing small molecules, dyes, or antibodies into biological specimens for developmental biology and drug discovery research. However, this process presents a significant challenge when working with thick, complex samples such as Drosophila embryos, where the inherent structural integrity of the tissue must be preserved to prevent morphological damage and ensure experimental validity. The insect eggshell, particularly its waxy layer and vitelline membrane, constitutes a formidable barrier to solute delivery [57] [58]. Conventional permeabilization methods often employ harsh organic solvents like heptane or octane, which, while effective at rendering the embryo permeable, frequently result in low viability and cellular damage due to their toxicity and the requisite phase transitions between aqueous and organic solvents [57]. This technical note details optimized protocols that effectively balance the competing demands of maximum permeability and minimum structural compromise, enabling high-fidelity pharmacological and teratological screening in an embryological context.
Comparative Analysis of Permeabilization Methods
The choice of permeabilization strategy profoundly impacts sample integrity. The table below summarizes the key characteristics of different approaches.
Table 1: Comparison of Permeabilization Methods for Challenging Samples
| Method | Core Reagents | Key Advantages | Limitations & Risks for Tissue Integrity |
|---|---|---|---|
| d-Limonene EPS | d-Limonene, plant-derived surfactants (cocamide DEA, ethoxylated alcohol) [57] [58] | Water-miscible; low toxicity; high viability; suitable for high-throughput screening [57] | Age-dependent efficacy; heterogeneity in permeability requires dye validation [57] [58] |
| Organic Solvent | Heptane, Octane [57] | Strong permeabilizing action | High toxicity; low viability; risk of embryo desiccation during phase transition [57] |
| Detergent-Based | Triton X-100, Tween-20, Saponin, Digitonin [9] [22] | Tunable pore sizes; compatible with crosslinking fixatives [9] | Can dissolve nuclear membranes; may alter light scatter properties in flow cytometry [22] |
| Alcohol-Based | Methanol, Ethanol [9] [22] | Precipitates proteins in situ; can expose buried epitopes | Poor preservation of soluble targets and protein modifications (e.g., phosphorylation); can disrupt ultrastructure [9] |
| Dish Soap Protocol | Commercial dish soap (e.g., Fairy/Dawn), Tween-20, Formaldehyde [4] | Low-cost; effective for simultaneous nuclear and cytoplasmic marker detection in flow cytometry [4] | Primarily optimized for single-cell suspensions, not intact tissues; requires extensive validation [4] |
Detailed Experimental Protocols
d-Limonene-Based Permeabilization of Drosophila Embryos
This protocol is designed for the introduction of small molecules into Drosophila embryos while maintaining high viability, ideal for teratogenicity studies and pharmacological interrogation of developmental pathways [57] [58].
Materials and Reagents
- Embryo Permeabilization Solvent (EPS) Stock: 18 mL d-Limonene, 1 mL cocamide DEA, 1 mL ethoxylated alcohol. Mix thoroughly and store in a glass vial; stable for ~2 months at room temperature [58].
- Dechorionation Solution: 50% commercial bleach in deionized water.
- Modified Basic Incubation Medium (MBIM): Prepare as per referenced recipes [57] [58].
- Permeabilization Indicator Dye: 10 mM Rhodamine B or CY5 carboxylic acid in DMSO [57] [58].
- Embryo Handling Baskets: Custom-made from 50 mL polypropylene tubes welded to Nitex nylon mesh [58].
Step-by-Step Procedure
Embryo Collection and Staging:
- Collect embryos from fly cage cultures on grape-agar plates with yeast paste.
- For precise staging, perform a 1-hour egg lay at 25°C, discard, and then collect embryos on a fresh plate for a 2-hour window.
- To permeabilize late-stage embryos (Stage 12 and older), a previously significant challenge, transfer the collected plate to an 18°C incubator. This temperature slows development and maintains the eggshell in an EPS-sensitive state. 1 hour at 25°C is developmentally equivalent to 2 hours at 18°C [58].
Dechorionation:
- Gently rinse embryos from the plate into a mesh basket using tap water and a soft paintbrush.
- Immerse the basket in 50% bleach for exactly 2 minutes to dissolve the outer chorionic layers.
- Wash embryos thoroughly with a strong stream of tap water to remove all traces of bleach [58].
EPS Permeabilization:
- Blot excess water from the basket and immediately immerse it in a 1:40 dilution of EPS stock in MBIM (e.g., 75 µL EPS in 2.925 mL MBIM). Swirl continuously for 30 seconds.
- Critical Note: For older embryos (aged at 18°C), extend the exposure time to 60-90 seconds for effective permeabilization [58].
- Remove the basket and blot excess EPS. Immediately proceed with six sequential washes in 10 mL PBS, using a plastic pipette to gently agitate the embryos in each wash [58].
Validation of Permeabilization:
- To control for heterogeneity, incubate a batch of permeabilized embryos in a solution containing a far-red dye like CY5 (10 µM in PBS).
- Under a fluorescence microscope, select only embryos displaying uniform dye uptake for subsequent drug treatments. CY5 is compatible with downstream GFP/RFP reporters and fixation [58].
Integrated Workflow for Embryo Permeabilization and Analysis
The following diagram illustrates the complete experimental workflow, from embryo preparation to analysis, highlighting critical steps for preserving morphology.
Fixation and Permeabilization for Intracellular Staining
For subsequent immunostaining after small molecule treatment, a balanced fixation and permeabilization protocol is essential to preserve antigenicity and morphology.
Fixative Selection:
- Aldehydes (Formaldehyde): Recommended for most targets, especially soluble proteins and post-translational modifications (e.g., phosphorylation). They crosslink proteins, providing excellent structural preservation [9].
- Alcohols (Methanol): Can be ideal for certain cytoskeletal, nuclear, or buried epitopes due to their protein-precipitating effect. However, they can destroy cellular ultrastructure and are not recommended for phospho-specific antibodies [9] [22].
Permeabilization Post-Fixation:
- After aldehyde fixation, membranes must be permeabilized with detergents.
- Mild Detergents (Saponin, Tween-20, 0.2-0.5%): Create small pores, suitable for cytoplasmic and plasma membrane-associated antigens. Saponin is often reversible and requires its presence in all subsequent antibody incubation steps [22].
- Strong Detergents (Triton X-100, NP-40, 0.1-1%): Extract lipids and partially dissolve nuclear membranes, making them necessary for staining many transcription factors. They permanently permeabilize cells but can significantly alter light scatter properties [22].
The Scientist's Toolkit: Essential Research Reagent Solutions
Successful permeabilization with minimal damage relies on a core set of reagents, each fulfilling a specific role.
Table 2: Key Reagent Solutions for Permeabilization Protocols
| Reagent Solution | Function & Rationale | Example Application |
|---|---|---|
| d-Limonene EPS [57] [58] | Water-miscible solvent that compromises the waxy layer of the eggshell with low toxicity. Surfactants aid in emulsion stability and uniform contact. | Primary permeabilization of Drosophila embryos for small molecule uptake. |
| Far-Red Viability/Permeability Dyes (CY5) [58] | Serves as a persistent indicator of successful permeabilization. Far-red emission avoids spectral overlap with common reporters (GFP, RFP). | Quality control post-EPS treatment; selection of optimally permeabilized embryos. |
| Methanol [9] [22] | Acts as a dehydrating fixative and permeabilizer by precipitating proteins and dissolving lipids. Can expose otherwise inaccessible epitopes. | Staining of cytoskeletal antigens or specific nuclear markers; used cold (-20°C). |
| Saponin [4] [22] | Mild detergent that creates pores by complexing with cholesterol in membranes. Permeabilization is often reversible. | Staining of cytoplasmic or intra-organellar antigens after formaldehyde fixation. |
| Triton X-100 [9] [22] | Non-ionic detergent that solubilizes lipid membranes effectively. Creates larger pores for antibody access to dense structures. | Staining of nuclear antigens (transcription factors) after crosslinking fixation. |
| Dish Soap-Based Buffer [4] | Cost-effective surfactant mixture that provides a balance of fixation and permeabilization, preserving both fluorescent proteins and enabling nuclear antigen access. | Simultaneous detection of transcription factors and endogenous GFP in single cells for flow cytometry. |
Decision Framework for Method Selection
Choosing the correct permeabilization strategy depends on multiple experimental variables. The following decision pathway guides researchers toward the optimal protocol for their specific needs.
Preventing tissue loss and morphological damage during permeabilization is not merely a technical goal but a fundamental prerequisite for generating reliable data in developmental biology and pharmacology. The protocols detailed herein, centered on the use of low-toxicity, water-miscible solvents like d-limonene EPS and validated by co-application of permeability indicator dyes, provide a robust framework for researchers. By carefully selecting the method aligned with their sample type and experimental endpoint—whether for live embryo small-molecule screening or high-resolution fixed-tissue imaging—scientists can effectively overcome the barrier of the insect eggshell while preserving the intricate morphological context that is essential for meaningful biological discovery.
Multiplex immunoassays and imaging techniques provide powerful tools for analyzing complex biological systems by enabling simultaneous detection of multiple targets. For researchers investigating thick embryo samples, achieving optimal multiplexing requires careful balancing of permeabilization, antibody validation, and detection conditions. This application note details standardized protocols and optimization strategies for successful multiplex antibody applications within challenging sample types, providing a framework for obtaining precise, reproducible data in developmental biology and drug discovery research. The methods outlined herein are particularly critical for permeabilization protocols in thick embryo samples, where antibody penetration and epitope preservation present unique challenges.
Multiplexing technologies have revolutionized biomedical research by enabling simultaneous measurement of multiple analytes from limited sample volumes. In thick embryo samples, where traditional immunohistochemistry faces limitations of antibody penetration and signal resolution, advanced multiplexing approaches provide unprecedented insights into spatial protein relationships and developmental processes. These techniques are particularly valuable when sample volume is limited, such as in pediatric testing or small animal research [59]. The ability to assay multiple analytes in a single small-volume sample enables more effective use of each sample and provides a more comprehensive biological understanding of protein interactions than traditional single-analyte methods [59].
For researchers studying embryo development, multiplex immunoassays and imaging provide crucial advantages, including the ability to acquire spatial and colocalization information, increase data acquired from each sample, and study several targets simultaneously while conserving valuable samples and reagents [60]. However, implementing these techniques requires careful optimization of multiple parameters, particularly for challenging thick samples where permeabilization represents a critical bottleneck.
Key Principles for Multiplex Antibody Balancing
Antibody Compatibility and Validation
Successful multiplexing depends on ensuring antibody compatibility and thorough validation. When using primary antibodies from the same species, subclass-specific secondary antibodies enable multiplex staining by specifically targeting different immunoglobulin subclasses [60]. Monoclonal antibodies typically fall into IgG subclasses (IgG1, IgG2a, IgG2b, IgG2c, IgG3), and selecting antibodies with different heavy chain constant regions allows their discrimination with subclass-specific secondaries [60]. This approach provides cleaner staining with less background signal and fewer false positives compared to conventional methods [60].
For assay development, antibodies must undergo rigorous validation according to FDA, EMA, and ICH M10 guidelines, assessing precision, accuracy, dilution linearity, assay range, robustness, and solution stability [61]. Specificity should be confirmed through inhibition experiments, with demonstrated specificities of 93-98% for target antigens [61]. Antibody performance characteristics including specificity, sensitivity, precision, and accuracy must be established for each application [59].
Permeabilization Optimization for Thick Embryo Samples
Effective permeabilization represents perhaps the most critical factor for successful multiplexing in thick embryo samples. The Drosophila embryo eggshell presents particular challenges, with its waxy layer acting as the ultimate barrier to small molecule delivery [28]. Conventional protocols using heptane or octane, while effective permeabilization agents, demonstrate significant toxicity and can result in low viability, particularly for early-stage embryos [28].
Table 1: Permeabilization Methods for Embryo Samples
| Method | Composition | Advantages | Limitations | Optimal Applications |
|---|---|---|---|---|
| EPS Method [28] | 90% D-limonene, 5% cocamide DEA, 5% ethoxylated alcohol | Water-miscible, high viability, suitable for early stages | Age-dependent effectiveness (decreases 6-8 hours post-laying) | Drosophila embryos, pharmacological studies |
| Heptane/Octane [28] | Organic solvents | Effective permeabilization | High toxicity, low viability, technical challenging | Limited applications due to toxicity |
| Hydrophilic Clearing [62] | Various aqueous solutions (sucrose, urea, iodinated reagents) | Preserves fluorescent proteins, compatible with IHC | Slow diffusion, potential swelling | Whole mount embryo imaging, IHC |
| Hydrogel Embedding [62] | Acrylamide or epoxy hydrogels | Stabilizes tissue structure, enables expansion microscopy | Complex protocol, potential epitope masking | Ultrastructure analysis, expansion microscopy |
The Embryo Permeabilization Solvent (EPS) method, composed of D-limonene and plant-derived surfactants, provides a water-miscible, highly effective alternative for rendering dechorionated eggshells permeable while maintaining viability [28]. This method enables embryo uptake of dyes up to 995 Daltons and allows assessment of teratogenic activity using both early and late developmental endpoints [28]. The technique is particularly valuable for establishing Drosophila embryos as a model for toxicology research and small molecule screening in high-throughput formats [28].
Signal Detection and Resolution
Multiplexed detection platforms must provide sufficient sensitivity and dynamic range while minimizing cross-reactivity. Grating-coupled fluorescent plasmonic (GC-FP) biosensor platforms offer rapid (30-minute) detection of antibodies with 100% selectivity and sensitivity when measuring serum IgG levels against multiple antigens [63]. This approach measures antibody-antigen binding interactions for multiple targets in a single sample, providing a quantitative, linear response across a wide dilution range [63].
Luminex xMAP technology utilizes color-coded beads coated with specific antibodies to capture multiple targets simultaneously, typically measuring up to 80 protein targets due to biological interference constraints [59]. This bead-based approach allows for high-throughput and flexible multiplexing with broad dynamic range [59]. For imaging applications, multiplex fluorescent immunohistochemistry (mfIHC) enables multi-antigen phenotyping in formalin-fixed paraffin-embedded (FFPE) tissue while preserving tissue architecture and spatial relationships [64].
Experimental Protocols
Materials:
- Embryo Permeabilization Solvent (EPS): 90% D-limonene, 5% cocamide DEA, 5% ethoxylated alcohol
- Dechorionated Drosophila embryos
- Phosphate Buffered Saline (PBS)
- PBS with 0.05% Tween-20 (PBStw)
- Modified Basic Incubation Medium (MBIM)
- Nitex mesh baskets
Procedure:
- Embryo Collection and Preparation: Collect embryos on grape juice-agar plates. Transfer to Nitex baskets and wash with tap water.
- Dechorionation: Immerse embryos in 50% bleach for two minutes followed by thorough washing under gentle tap water flow.
- EPS Treatment: Prepare working dilution of EPS (1:5 to 1:40) in MBIM or Milli-Q water. Immerse dechorionated embryos in EPS solution for 30 seconds to 4 minutes with gentle agitation.
- Washing: Following EPS treatment, perform four successive washes in 5mL PBS followed by two washes in PBStw.
- Validation: Assess permeabilization efficiency using Rhodamine B dye (1mM final concentration) or other appropriate markers.
- Antibody Staining: Proceed with multiplex antibody staining using subclass-specific secondary antibodies.
Optimization Notes:
- Embryos undergo age-dependent decreases in permeabilization efficiency in the first 6-8 hours after egg laying.
- Rhodamine B fluorescence properties serve as an ideal marker for optimally permeabilized embryos.
- Viability is maintained when using proper EPS dilutions and exposure times.
Materials:
- Formalin-fixed paraffin-embedded (FFPE) tissue sections (4-6μm)
- Charged slides
- Antigen retrieval solutions (pH 6 and pH 9)
- Primary antibodies with different subclasses or host species
- Subclass-specific secondary antibodies conjugated to fluorophores
- Blocking solution (BSA in TBST)
- DAPI solution
- Hydrophobic barrier pen
Procedure:
- Slide Preparation: Cut FFPE tissue sections at 4-6μm thickness using a microtome. Place on charged slides and dry at 37°C overnight.
- Deparaffinization and Rehydration:
- Bake slides at 60°C for 1 hour, cool, then place in vertical rack.
- Sequential treatments: xylene (3×10 min), 100% ethanol (10 min), 95% ethanol (10 min), 70% ethanol (10 min).
- Wash in deionized water (2 min), fix in neutral buffered formalin (30 min), final water wash (2 min).
- Antigen Retrieval:
- Place slides in antigen retrieval buffer (pH 6 or pH 9).
- Cover with plastic wrap and microwave: 45 seconds at 100% power followed by 15 minutes at 20% power.
- Cool slides for 15-20 minutes.
- Antibody Staining:
- Wash slides in deionized water (2 min) then TBST (2 min).
- Dry around tissue without letting tissue dry out. Circle tissue with hydrophobic barrier pen.
- Apply blocking solution (4 drops), incubate in humidified chamber.
- Apply primary antibodies at optimized concentrations in antibody diluent.
- Incubate, wash, then apply subclass-specific secondary antibodies conjugated to fluorophores.
- Nuclear Counterstaining and Mounting:
- Apply DAPI working solution (3 drops in 1mL TBST).
- Wash, mount, and image using appropriate fluorescence microscopy.
Troubleshooting:
- For epitope damage concerns, test both pH6 and pH9 antigen retrieval buffers.
- Optimize antibody concentrations using conventional IHC before multiplexing.
- Use tissues with abundant target cell types (e.g., tonsil for CD3) for antibody optimization.
Materials:
- Carboxylated magnetic microspheres (Luminex)
- Purified antigens for coupling
- 1-ethyl-3-(3-dimethyl aminopropyl) carbodiimide (EDAC)
- Sulfo-NHS
- Bovine serum albumin (BSA)
- R-phycoerythrin (R-PE)-conjugated detection antibody
- International reference standards
Procedure:
- Antigen Coupling to Microspheres:
- Activate microspheres with EDAC hydrochloride in buffered solution.
- Stabilize intermediate carboxyl groups with sulfo-NHS solution.
- Wash 3× using magnetic separator.
- Add respective antigens (1-10μg) to activated beads, incubate in dark for 2 hours with mixing.
- Assay Setup:
- Prepare serum samples and standards in appropriate matrix.
- Combine coupled bead sets with samples in 96-well plate.
- Incubate with shaking, wash.
- Add detection antibody (R-PE conjugated), incubate, wash.
- Detection and Analysis:
- Analyze using Luminex instrument with flow-based detection system.
- Measure fluorescence intensity for each bead set.
- Calculate concentrations using standard curves from international references.
Validation Parameters:
- Precision: Coefficient of variation (CV) ≤20% across all assays
- Accuracy: Spike recoveries of 80-120% in different matrices
- Specificity: 93-98% through inhibition experiments
- Assay range: Demonstrated linearity across expected concentration range
Research Reagent Solutions
Table 2: Essential Research Reagents for Multiplex Antibody Applications
| Reagent/Category | Specific Examples | Function/Application | Considerations |
|---|---|---|---|
| Permeabilization Agents | EPS (D-limonene based) [28], Heptane/Octane [28], Triton X-100 [62] | Render samples permeable to antibodies and dyes | Toxicity concerns with organic solvents; EPS preferred for viability |
| Subclass-Specific Secondaries | Anti-mouse IgG1, IgG2a, IgG2b [60] | Enable multiplexing with same-species primaries | Verify subclass of primary antibodies; ensures minimal cross-reactivity |
| Bead-Based Detection | Luminex xMAP beads [59], ProcartaPlex assays [59] | Multiplex protein quantification | Enables 80-plex protein detection; requires specialized instrumentation |
| Index-Matching Reagents | Sucrose, iohexol, 2,2'-thiodiethanol [62] | Tissue clearing for deep imaging | Adjust refractive index; reduces light scattering |
| Hydrogel Embedding | Acrylamide (CLARITY), Epoxy (SHIELD) [62] | Tissue stabilization for expansion microscopy | Anchors biomolecules; enables ultrastructure analysis |
| International Standards | WHO reference standards [61] | Assay standardization and quantification | Essential for validation; allows cross-study comparisons |
| Validation Tools | Rhodamine B [28], Reference sera [61] | Process verification and quality control | Rhodamine B uptake indicates permeabilization efficiency |
Data Analysis and Technical Validation
For bead-based multiplex assays, method validation according to FDA, EMA, and ICH M10 guidelines is essential [61]. Validation parameters must include precision, accuracy, dilution linearity, assay range, robustness, and solution stability [61]. Assay performance should demonstrate coefficients of variation (CV) of ≤20% across all assays, regardless of run, day, or analyst [61].
Multiplex immunoassays typically show strong agreement with conventional commercially available assays while providing significant advantages over traditional ELISAs, including reduced sample volume requirements and increased throughput [61]. The dynamic range of multiplex assays should be validated using international reference standards characterized for their suitability in multiplex formats [61].
For imaging applications, software-based analysis of multiplex fluorescent immunohistochemistry can identify cell locations and analyze spatial context while accounting for tissue autofluorescence through background subtraction algorithms [64].
Visualizing Workflows and Relationships
Diagram 1: Multiplex antibody workflow with critical optimization points.
Diagram 2: Subclass-specific antibody strategy for multiplex staining.
Successful implementation of multiplex antibody techniques in thick embryo samples requires systematic optimization of permeabilization conditions, antibody compatibility, and detection parameters. The EPS method provides an effective permeabilization approach for challenging samples like Drosophila embryos, while subclass-specific secondary antibodies enable multiplexing with primary antibodies from the same species. By following the standardized protocols and validation procedures outlined in this application note, researchers can achieve reliable, reproducible multiplexing results that advance our understanding of developmental processes and therapeutic interventions.
Benchmarking Success: How to Validate and Compare Protocol Efficacy
Quantitative Metrics for Permeabilization Efficiency
Permeabilization is a critical step in biological research for enabling reagents to access intracellular targets or for facilitating transport across biological barriers. In the specific context of a broader thesis on permeabilization protocols for thick embryo samples, quantifying the efficiency of these methods is paramount for reproducibility, optimization, and valid data interpretation. This document outlines standardized quantitative metrics, detailed protocols, and visualization tools for assessing permeabilization efficiency, with a focus on applications in developmental biology and thick tissue samples.
The challenge in thick samples, such as whole embryos, lies in achieving homogenous permeabilization without compromising structural integrity or antigenicity. This application note provides a framework for researchers to rigorously evaluate and compare permeabilization techniques.
Quantitative Metrics and Their Measurements
The evaluation of permeabilization efficiency spans from bulk tissue assessments to single-molecule quantification. The selection of an appropriate metric depends on the permeabilization method and the final application.
Table 1: Core Quantitative Metrics for Permeabilization Efficiency
| Metric | Description | Typical Measurement Technique | Relevant Application Context |
|---|---|---|---|
| Labeling Efficiency | The percentage of target molecules that are successfully bound by a detection probe (e.g., antibody, nanobody). | Single-molecule counting via super-resolution microscopy (e.g., DNA-PAINT, STORM) [65]. | Quantifying binder access to intracellular epitopes in fixed samples. |
| Penetration Depth | The maximum distance from the tissue surface at which a specific immunolabeling signal is detectable. | Confocal/microscopy analysis of re-sectioned tissue slices; measurement of signal decay [5]. | Evaluating homogenous reagent delivery in thick tissues (e.g., embryos, brain slices). |
| Permeability Coefficient (Log Pe) | A quantitative measure of the rate of passive diffusion across a membrane or barrier. | Parallel Artificial Membrane Permeability Assay (PAMPA); cell monolayer assays (Caco-2, MDCK) [66]. | Primarily for drug discovery and cyclic peptide design. |
| Localized Transport Region (LTR) Formation | The percentage of skin surface area exhibiting high-permeability pathways following physical disruption. | Analysis of tracer uptake patterns (e.g., calcein) via fluorescence microscopy [67]. | Evaluating physical permeabilization methods like sonophoresis. |
| Functional Uptake/Extraction | The measurable increase in delivery of a macromolecule (drug, protein) or extraction of an analyte. | HPLC-MS, fluorescence spectroscopy, or activity assays to quantify internalized material [67] [68]. | Assessing efficacy for drug delivery or biosensing. |
Table 2: Exemplary Quantitative Data from Permeabilization Studies
| Permeabilization Method / Agent | Target System | Quantitative Result | Source / Context |
|---|---|---|---|
| Tween-20 (0.2%) | HeLa cells (flow cytometry) | 97.9% of cells showed high fluorescence intensity for intracellular 18S rRNA detection [69]. | Optimal detergent concentration for intracellular RNA FISH. |
| POD-nanobodies | 1-mm thick mouse brain slices | Deep and homogenous labeling throughout the tissue, unlike conventional IgG antibodies restricted to the surface [5]. | Superior penetration in 3D immunohistochemistry. |
| Anti-GFP Nanobody (clone 1H1) | Single-protein super-resolution | ~50% labeling efficiency, improved to 62% with a two-clone mixture [65]. | Quantifying absolute binder efficiency at the single-molecule level. |
| Low-Frequency Sonophoresis + CPE | Porcine skin ex vivo | Formation of Localized Transport Regions (LTRs) covering 5-10% of the treated area, enabling macromolecular transport [67]. | Transdermal drug delivery enhancement. |
| Collagenase Treatment | E5.5 mouse embryo (basement membrane) | Disruption of collective DVE migration; 74% of embryos showed aberrant primitive streak localization [70]. | Functional consequence of basement membrane permeabilization. |
Experimental Protocols for Efficiency Assessment
Protocol 1: Quantifying Antibody and Nanobody Labeling Efficiency via Super-Resolution Microscopy
This protocol enables the absolute quantification of labeling efficiency at the single-protein level, critical for validating permeabilization and staining conditions in thick samples [65].
- Step 1: Molecular Construct Design. Express a model transmembrane protein (e.g., CD86) fused with a reference tag (e.g., ALFA-tag) on its extracellular domain and the target tag (e.g., mEGFP) on its intracellular domain in your cell system.
- Step 2: Sample Preparation and Permeabilization. Culture and transfer cells onto coverslips. Fix cells with a suitable fixative (e.g., 2-4% PFA for 15 minutes). Permeabilize cells using an optimized protocol (e.g., 0.1-0.5% Triton X-100 or Tween-20 for 10-30 minutes). Note: This step must be optimized for your specific sample type and antigen.
- Step 3: Staining with DNA-Conjugated Binders. Label the reference tag with its specific nanobody (e.g., anti-ALFA-tag) conjugated to a dedicated DNA strand. Label the target tag (e.g., mEGFP) with its binder (e.g., anti-GFP nanobody) conjugated to a different DNA strand.
- Step 4: Sequential Super-Resolution Imaging. Perform Exchange-PAINT imaging. Image the reference channel using the complementary DNA imager strand. Subsequently, image the target channel using its complementary DNA imager strand.
- Step 5: Data Analysis and Efficiency Calculation.
- Identify single-molecule localizations and cluster them to determine the center of mass for individual reference and target molecules.
- For each reference molecule localization, find the nearest neighbor distance (NND) to a target molecule.
- Simulate random colocalization for the experimental molecular densities.
- Fit the experimental NND histogram to the simulated ones to calculate the most likely labeling efficiency using the formula: Labeling Efficiency = NRef+Target / (NRef + NRef+Target) where NRef+Target is the number of colocalized molecules and NRef is the number of reference-only molecules.
Protocol 2: Assessing Permeabilization Depth in Thick Tissue Sections
This protocol evaluates the homogeneity and depth of antibody penetration, a key metric for 3D immunolabeling of embryo samples [5].
- Step 1: Tissue Processing. Fix whole embryos or tissue samples (e.g., 1 mm thick mouse brain slices) with 4% PFA. Permeabilize the entire sample using a chosen method (e.g., incubation with ScaleA2 solution for 24 hours, or detergent-based permeabilization).
- Step 2: Immunostaining. Incubate the thick tissue with a primary antibody against a ubiquitous target antigen, followed by a fluorescently-labeled secondary antibody. Use prolonged incubation times (e.g., 24-48 hours) with gentle agitation.
- Step 3: Re-sectioning and Imaging. Embed the immunostained thick tissue in agarose or OCT compound. Section the tissue perpendicularly to its original surface into thin slices (e.g., 40 µm) using a vibratome or cryostat.
- Step 4: Quantitative Analysis. Image the thin re-sections using a confocal microscope. Measure the fluorescence intensity profile from the original tissue surface towards the center. The penetration depth is reported as the distance at which the signal intensity drops below a defined threshold (e.g., 50% of the maximum surface signal).
Protocol 3: Flow Cytometric Analysis of Intracellular RNA Detection
This protocol provides a high-throughput method to optimize permeabilization conditions for nucleic acid detection in cell suspensions [69].
- Step 1: Cell Fixation. Harvest and wash cells. Fix cells in 2% freshly prepared, cold paraformaldehyde in PBS for 15 minutes at room temperature.
- Step 2: Permeabilization Optimization. Test different permeabilizing agents and conditions. A recommended starting point is 0.2% Tween-20 for 30 minutes at 25°C. Compare against other detergents (e.g., saponin, Triton X-100, NP-40) or enzymes (e.g., proteinase K).
- Step 3: In Situ Hybridization. Design a FITC-labeled antisense probe against the target RNA (e.g., 18S rRNA). Resuspend permeabilized cells in hybridization buffer containing the probe (e.g., 0.5 µg/ml). Perform hybridization overnight at 40°C.
- Step 4: Washing and Analysis. Wash cells stringently to remove unbound probe (e.g., with 2x SSC and 0.1x SSC buffers). Analyze cells on a flow cytometer. The mean fluorescence intensity (MFI) of the FITC channel in the test sample compared to a sense-probe negative control serves as the quantitative metric for successful permeabilization and hybridization.
Visualization of Workflows and Pathways
The Scientist's Toolkit: Research Reagent Solutions
Table 3: Essential Reagents for Permeabilization Efficiency Studies
| Reagent / Material | Function | Example Application |
|---|---|---|
| Paraformaldehyde (PFA) | Cross-linking fixative that preserves cellular structure and antigenicity. | Standard initial fixation for most cells and tissues prior to permeabilization. |
| Detergents (Tween-20, Triton X-100, Saponin) | Solubilize lipid membranes to create pores for intracellular access. | Flow cytometry and microscopy for intracellular protein and RNA detection [69]. |
| Nanobodies (VHH Fragments) | Small, recombinant antigen-binding fragments with superior tissue penetration. | 3D immunohistochemistry of thick samples; reference/target binders in super-resolution microscopy [65] [5]. |
| Matrix Metalloproteinases (MMPs e.g., Collagenase) | Enzymatically degrade specific components of the extracellular matrix (ECM). | Creating perforations in basement membranes for studies in embryonic development [70]. |
| DNA-Conjugated Antibodies | Primary antibodies linked to a specific DNA strand for signal amplification and multiplexing. | Used in Exchange-PAINT super-resolution microscopy for precise single-molecule counting [65]. |
| Permeabilization Enhancers (Amphiphilic α-Hydrazido Acids) | Synthetic mimics of antimicrobial peptides that increase membrane fluidity and permeability. | Potential use as adjuvants to enhance antibiotic uptake across bacterial membranes [68]. |
| ScaleA2 Solution | Aqueous tissue clearing and permeabilization reagent for thick tissues. | Treatment of millimeter-thick brain slices to enhance nanobody penetration for 3D-IHC [5]. |
| Fluorochromized Tyramide (FT) & Glucose Oxidase (GO) | Components of a sensitive Tyramide Signal Amplification (TSA) system. | Signal amplification for detecting nanobodies in deep tissue regions (FT-GO system) [5]. |
Comparing Commercial Kits vs. In-House Buffer Formulations
Permeabilization is a critical step in embryological research, enabling the introduction of small molecules, dyes, and antibodies for functional studies. The choice between commercial permeabilization kits and in-house formulated buffers represents a significant methodological crossroads, with implications for experimental reproducibility, cost, and viability of thick embryo samples. Research on Drosophila embryos highlights that the eggshell's waxy layer presents a substantial barrier to solute delivery, necessitating effective permeabilization strategies for pharmacological and toxicological studies [28]. Similarly, work with mouse embryo models demonstrates the importance of visualizing intracellular processes through effective staining techniques [71]. This application note systematically compares these two approaches within the context of a broader thesis on permeabilization protocols for thick embryo samples, providing structured data and optimized protocols to guide researcher decision-making.
Quantitative Comparison of Permeabilization Approaches
Table 1: Performance Metrics of Commercial Kits vs. In-House Formulations
| Parameter | Commercial FoxP3 Buffer Kits [3] | In-House EPS Formulation [28] | Methanol-Based Protocol [71] [3] |
|---|---|---|---|
| Viability Post-Treatment | Varies by product; BD Pharmingen FoxP3 Buffer maintained good cell integrity | High viability maintained, suitable for embryonic development studies | Reduced viability; Chow et al. noted changes in scatter profiles and CD3 staining |
| Permeabilization Efficiency | Effective for intracellular transcription factors (FoxP3) | Effective for molecules up to 995 Daltons | Effective but requires optimization of alcohol concentration |
| Reproducibility | High (standardized formulations) | Requires careful standardization | Variable; sensitive to exact methanol concentration |
| Cost Considerations | Higher (proprietary formulations) | Lower (components purchased separately) | Very low (common laboratory reagents) |
| Technical Handling | Simple, with manufacturer protocols | Requires optimization of dilution and exposure time | Critical timing for alcohol exposure |
| Impact on Surface Epitopes | Minimal with optimized buffers (BD Pharmingen showed distinct CD25+FoxP3+ population) | Not explicitly studied | Significant; high methanol concentrations degrade light scatter resolution and CD3 staining |
| Specialized Applications | Optimized for specific targets (e.g., transcription factors) | Ideal for thick embryo samples | Useful for certain staining applications when optimized |
Table 2: Experimental Outcomes in Embryo Models
| Embryo Model | Permeabilization Method | Key Findings | Optimal Conditions | Reference |
|---|---|---|---|---|
| Drosophila Embryos | Embryo Permeabilization Solvent (EPS) - In-house | Enabled uptake of dyes up to 995 Da; age-dependent permeability; robust for teratogen assessment | 1:5-1:40 EPS dilution; 30 sec-4 min exposure | [28] |
| Mouse Embryos | LysoTracker Staining - Commercial dye | Effective for visualizing programmed cell death (PCD) in whole embryos; superior penetration for thick tissues | 5 μM LysoTracker in Hank's BSS; 45 min at 37°C | [71] |
| Stem Cell-Derived Embryoids | Not explicitly stated | Development through neurulation to organogenesis; model for mammalian development | Not applicable | [72] |
| T Regulatory Cells | Commercial FoxP3 Buffer Sets | Distinct population identification with minimal surface epitope impact | Manufacturer's recommended protocol | [3] |
Experimental Protocols
In-House Embryo Permeabilization Solvent (EPS) Protocol
Based on the methodology for Drosophila embryos, this protocol can be adapted for various thick embryo samples [28]:
Reagents Required:
- D-limonene (Technical grade or high purity orange terpene)
- Cocamide DEA (e.g., Ninol 11CM)
- Ethoxylated alcohol (e.g., Bio-Soft 1-7)
- Phosphate Buffered Saline (PBS)
- PBS with 0.05% Tween-20 (PBStw)
- Modified Basic Incubation Medium (MBIM) - optional
Procedure:
- EPS Formulation: Create stock EPS by combining 90% D-limonene, 5% cocamide DEA, and 5% ethoxylated alcohol. This composition remains stable at room temperature for over two months.
Sample Preparation: Dechorionate embryos if applicable (e.g., immerse Drosophila embryos in 50% bleach for two minutes followed by thorough washing).
Permeabilization: Dilute EPS 1:5 to 1:40 in either Milli-Q water or MBIM. Immerse dechorionated embryos in diluted EPS for 30 seconds to 4 minutes, with optimal time determined empirically for each embryo type.
Washing: Following EPS treatment, perform four successive washes in 5mL PBS followed by two washes in PBStw.
Viability Assessment: Assess permeabilization efficiency using Rhodamine B dye (1mM final concentration) with immersion for 5-30 minutes followed by visualization with fluorescence microscopy.
Long-term Culture: For extended observations, transfer permeabilized embryos to appropriate culture chambers with suitable media for development.
Commercial Buffer Set Protocol for Intracellular Staining
Adapted from flow cytometry applications for use with embryonic tissues [3]:
Reagents Required:
- Commercial fixation/permeabilization buffer set (e.g., BD Pharmingen FoxP3 Buffer Set)
- Fluorescently-labeled antibodies against target antigens
- Flow cytometry staining buffer
Procedure:
- Sample Preparation: Prepare single-cell suspensions from embryo tissues using appropriate dissociation methods.
Surface Staining: Incubate cells with antibodies against surface markers in staining buffer for 30 minutes at 4°C.
Fixation and Permeabilization: Without washing, add fixation/permeabilization solution directly to the cell mixture. Incubate for 30-60 minutes at 4°C.
Intracellular Staining: Wash cells twice with permeabilization/wash buffer, then resuspend in permeabilization/wash buffer containing antibodies against intracellular targets.
Analysis: Wash cells twice with permeabilization/wash buffer and resuspend in staining buffer for flow cytometry analysis.
LysoTracker Staining for Programmed Cell Death Detection
For visualizing programmed cell death in thick embryo samples [71]:
Reagents Required:
- LysoTracker Red DND-99 (or similar LysoTracker dye)
- Hanks' Balanced Salt Solution (BSS, without phenol red)
- 4% paraformaldehyde fixative
- Methanol series (50%, 75%, 80%, 100%)
Procedure:
- Sample Preparation: Dissect embryos in Hanks' BSS, removing extraembryonic membranes.
Staining Solution: Prepare 5 μM LysoTracker in Hanks' BSS (approximately 5mL for 1-2 embryos).
Staining: Incubate embryos in LysoTracker staining solution for 45 minutes at 37°C.
Washing: Gently wash embryos 4 times with Hanks' BSS, 5 minutes per wash.
Fixation: Fix embryos in 4% paraformaldehyde overnight at 4°C.
Dehydration: Wash once with Hanks' BSS for 10 minutes, then dehydrate through methanol series (50%, 75%, 80%, 100%, 5 minutes each).
Imaging: Image using a fluorescence microscope with rhodamine or Texas Red filter sets (excitation/emission: 577/590 nm for LysoTracker Red).
The Scientist's Toolkit: Essential Research Reagents
Table 3: Key Reagents for Embryo Permeabilization Research
| Reagent | Function | Application Notes |
|---|---|---|
| D-Limonene | Primary solvent for waxy layer disruption | Primary component of in-house EPS; less toxic than heptane/octane [28] |
| Cocamide DEA & Ethoxylated Alcohol | Surfactants enhancing water miscibility | Improve EPS compatibility with aqueous solutions [28] |
| LysoTracker Dyes | Fluorescent probes for acidic organelles | Detect programmed cell death; superior penetration in thick tissues [71] |
| Rhodamine B (479 MW) | Permeabilization efficiency marker | Validates successful embryo permeabilization [28] |
| Commercial FoxP3 Buffer Sets | Standardized fixation/permeabilization | Maintain surface epitope integrity while allowing intracellular access [3] |
| Methanol | Fixation and permeabilization agent | Requires concentration optimization to preserve cell morphology [3] |
| Calcein AM (995 MW) | High molecular weight tracer | Tests upper size limit for permeabilization (up to 995 Daltons) [28] |
Workflow and Decision Pathways
Buffer Composition and Performance Relationship
The choice between commercial kits and in-house formulations for embryo permeabilization involves careful consideration of experimental requirements, sample characteristics, and resource constraints. Commercial kits offer standardization and reliability for applications like transcription factor staining and flow cytometry, while in-house formulations provide customization and cost-effectiveness for specialized applications involving thick embryo samples. The EPS formulation demonstrates particular effectiveness for permeabilizing challenging barriers like the waxy layer of Drosophila eggshells, enabling new approaches in toxicology and small molecule screening. Researchers should select permeabilization methods based on specific experimental needs, considering factors such as target molecule size, viability requirements, and the balance between reproducibility and flexibility. As embryo models continue to advance in complexity [72], optimized permeabilization strategies will remain essential for probing developmental processes and screening bioactive compounds.
Impact of Permeabilization on Transcriptomic and Proteomic Data Quality
Permeabilization is a critical sample preparation step that enables access to intracellular components for multi-omics analysis, yet it presents significant methodological challenges for preserving data quality. This is particularly relevant in the context of thick embryo samples, where maintaining spatial context while achieving sufficient reagent penetration requires careful optimization. The fixation and permeabilization process inherently creates a trade-off between preserving cellular integrity and enabling access to intracellular targets, with suboptimal protocols leading to significant data loss or extraction artifacts that compromise downstream analysis [31]. For embryo research specifically, where sample availability is often limited and developmental processes create complex cellular heterogeneity, identifying permeabilization methods that minimize technical artifacts while maximizing information recovery is essential for generating biologically meaningful data.
Quantitative Impact Assessment
Effects of Permeabilization on Multi-Omics Data Quality
Table 1: Comparative Analysis of Permeabilization Methods on Transcriptomic Recovery
| Permeabilization Method | Transcriptomic Recovery | Key Advantages | Major Limitations | Recommended Applications |
|---|---|---|---|---|
| Tween-20 (0.2%) | ~60% stimulation signature detected [31] | Minimal impact on general expression profile [31] | Negative impact on whole transcriptome detection [31] | Intracellular protein combined with surface markers [31] |
| BD Cytofix/Cytoperm | Not quantified | Compatible with BD Rhapsody system [31] | Significant transcriptomic loss [31] | Standardized workflow requirements |
| Saponin (0.1-0.5%) | Variable | Reversible permeabilization [69] | Inconsistent efficiency [69] | Flow cytometry applications |
| Triton X-100 (0.1-0.2%) | Not reported | Strong permeabilization [69] | Potential protein leakage [69] | Robust membrane disruption needs |
| Proteinase K | Not reported | Enzyme-based alternative [69] | Risk of protein degradation [69] | Nucleic acid detection only |
Table 2: Protein Leakage Artifacts Across Subcellular Compartments
| Subcellular Localization | Leakage Propensity | Relative Abundance Change (Permeable vs. Intact Cells) | Implications for Data Quality |
|---|---|---|---|
| Cytosolic Proteins | High | ~2-fold decrease [73] | Significant underestimation of metabolic enzymes |
| Nuclear Proteins | High | ~2-fold decrease [73] | Altered transcription factor quantification |
| Membrane Proteins | Low | Minimal change [73] | More reliable quantification |
| Mitochondrial Proteins | Lowest | No significant difference [73] | Most stable reference proteins |
Experimental Protocols
Protocol 1: Optimized Fixation and Permeabilization for Multi-Omics
This protocol, adapted for thick embryo samples, balances transcriptomic preservation with intracellular protein accessibility [31]:
- Fixation: Immerse samples in 2% cold, freshly prepared paraformaldehyde in PBS. Incubate for 20 minutes at 4°C with gentle agitation.
- Permeabilization: Transfer samples to 0.2% Tween-20 in PBS. Incubate for 30 minutes at 25°C with agitation.
- Washing: Rinse samples twice with 1× PBS to remove permeabilization agents.
- Staining: Incubate with oligonucleotide-tagged antibodies targeting intracellular proteins for 60 minutes at 4°C.
- Washing: Perform three washes with wash buffer to remove unbound antibodies.
- Processing: Proceed to single-cell encapsulation or spatial transcriptomics protocols.
Critical Considerations:
- For embryo samples, extend permeabilization time to 45-60 minutes depending on thickness
- Include viability staining (e.g., Sytox Green) to identify compromised cells [73]
- Use high-throughput sequencing platforms (e.g., HiSeqX) to compensate for transcriptomic losses [31]
Protocol 2: Identification and Compensation for Protein Leakage
This protocol enables detection and computational correction of protein leakage artifacts:
- Viability Staining: Incubate cells with Sytox Green (1:1000 dilution) for 15 minutes at 4°C prior to permeabilization [73].
- Image Acquisition: Record fluorescence intensity for each cell using appropriate filter sets.
- Data Integration: Link permeability measurements with downstream proteomic data using QuantQC [73].
- Classification: Apply XGBoost classifier (available in QuantQC R package) using abundances of top 75 leaking proteins to identify compromised cells [73].
- Filtering: Exclude cells with permeability probability >0.2 from final analysis [73].
Protocol 3: Whole-Mount Preparation for Embryo Samples
Adapted for thick embryo specimens, this protocol enables structural preservation while allowing permeabilization:
- Dissection: Carefully isolate embryo or tissue of interest in cold PBS.
- Fixation: Immerse in 4% paraformaldehyde for 4-6 hours at 4°C with rotation.
- Permeabilization: Transfer to 0.5% Triton X-100 for 24-48 hours at 4°C with rotation.
- Blocking: Incubate in blocking buffer (5% normal serum, 0.1% Triton X-100) for 12 hours.
- Antibody Staining: Incubate with primary antibodies for 24-48 hours, then secondary antibodies for 24 hours.
- Clearing: Use Scale solutions or alternative clearing methods for improved penetration [74].
- Imaging: Proceed with light sheet microscopy or other appropriate acquisition methods.
Visualizing Experimental Workflows
Permeabilization Optimization Pathway
Multi-Omics Integration After Permeabilization
The Scientist's Toolkit
Table 3: Essential Research Reagents for Permeabilization Studies
| Reagent | Function | Application Notes | Quality Considerations |
|---|---|---|---|
| Paraformaldehyde (2-4%) | Cross-linking fixative | Preserves cellular structure; concentration affects epitope availability | Always use fresh preparations [69] |
| Tween-20 (0.2%) | Mild detergent | Optimal for RNA preservation; 30min incubation recommended [31] [69] | Low transcriptomic impact but variable efficiency |
| BD Cytofix/Cytoperm | Commercial kit | Standardized workflow for BD systems [31] | Significant transcriptomic loss reported [31] |
| Saponin (0.1-0.5%) | Glycoside detergent | Reversible permeabilization [69] | Requires concentration optimization [69] |
| Triton X-100 (0.1-0.2%) | Non-ionic detergent | Strong permeabilization for challenging targets [69] | High protein leakage risk [73] |
| Sytox Green | Viability dye | Identifies permeabilized cells pre-analysis [73] | Essential for quality control |
| Oligo-tagged Antibodies | Protein detection | Enables multi-omics integration [31] | Requires validation for intracellular targets |
Discussion and Implementation
The selection of an appropriate permeabilization method must be guided by specific research objectives and sample characteristics. For projects prioritizing transcriptomic completeness, Tween-20 at 0.2% provides the optimal balance, preserving approximately 60% of stimulation signatures while enabling intracellular protein detection [31]. When proteomic accuracy is paramount, particularly for cytosolic and nuclear proteins, incorporating leakage detection methods and computational correction is essential, as these proteins demonstrate approximately 2-fold depletion in permeabilized cells [73].
For embryo research applications, protocol adaptation should consider tissue thickness and structural complexity. The whole-mount approach with extended permeabilization times (24-48 hours) enables adequate reagent penetration while maintaining tissue architecture [74]. Additionally, the integration of clearing methods after permeabilization can enhance antibody penetration and improve imaging quality for spatial analysis [74].
The emerging evidence supporting cross-platform leakage classifiers offers promising tools for standardizing quality control across experiments. The XGBoost classifier trained on leakage signatures demonstrates high accuracy (AUC = 0.92) in identifying compromised cells, providing a robust framework for data quality assurance [73]. Implementation of these computational tools, combined with optimized wet-lab protocols, will significantly enhance the reliability of multi-omics data derived from permeabilized embryo samples.
Transforming Growth Factor β (TGF-β) superfamily signaling, including NODAL and Bone Morphogenetic Protein (BMP) pathways, regulates critical developmental events in human preimplantation embryos [75] [76]. These pathways transmit signals through intracellular SMAD proteins, whose phosphorylation status serves as a key indicator of pathway activity [77]. Detecting phosphorylated SMAD (pSMAD) proteins in human blastocysts presents significant technical challenges due to the thick embryo structure, limited sample availability, and need for precise subcellular localization.
This case study details the validation of an immunofluorescence (IF) protocol specifically optimized for the detection and quantification of pSMAD proteins in human blastocysts, framed within broader research on permeabilization strategies for thick embryo samples. The methodology enables simultaneous investigation of multiple signaling pathways and their correlation with lineage specification events during blastocyst development.
Background: SMAD Signaling in Blastocyst Development
TGF-β Superfamily Signaling Pathways
The TGF-β superfamily comprises multiple ligands, including TGF-β, NODAL, Activin, and BMPs, that regulate key aspects of human preimplantation development [78] [77]. These pathways signal through receptor serine/threonine kinases that phosphorylate distinct intracellular SMAD proteins:
- NODAL/TGF-β/Activin pathways: Phosphorylate SMAD2 and SMAD3
- BMP pathway: Phosphorylates SMAD1, SMAD5, and SMAD8
Upon phosphorylation, these receptor-regulated SMADs form complexes with the common mediator SMAD4 and translocate to the nucleus to regulate transcription of target genes [77]. The dynamics of SMAD nuclear translocation represent a critical readout of pathway activity, with studies revealing temporal stochastic bursts of SMAD signaling that correlate with developmental outcomes [79].
Role of SMAD Signaling in Lineage Specification
During human blastocyst formation, TGF-β superfamily signaling contributes to the first lineage segregations that establish the trophectoderm (TE), epiblast (EPI), and primitive endoderm (PrE) [78]. Research indicates distinct requirements for different SMAD proteins, with SMAD2/3 functioning independently of SMAD4 during certain developmental transitions, particularly in the naïve-to-primed pluripotency transition [77].
Table 1: Key Signaling Pathways in Human Preimplantation Development
| Pathway | Key Components | Role in Blastocyst Development | Experimental Modulators |
|---|---|---|---|
| Hippo | YAP/TAZ, TEAD1-4 | Regulates TE differentiation; inhibited in outer cells to allow YAP nuclear localization [78] | CRT0276121 (activator), TRULI (inhibitor) [78] |
| Wnt/β-catenin | β-catenin, TCF/LEF | Involved in lineage specification; precise role in humans under investigation [78] | 1-Azakenpaullone (activator), Cardamonin (inhibitor) [78] |
| FGF | FGF2, FGFR | Influences ICM lineage segregation; promotes PrE over EPI fate [78] | PD0325901 (inhibitor), FGF2 (activator) [78] |
| TGF-β/Nodal | SMAD2/3, SMAD4 | Regulates EPI and PrE specification; shows temporal activity bursts [78] [79] | SB431542 (inhibitor), Activin A (activator) [78] |
| BMP | SMAD1/5/8, SMAD4 | Contributes to lineage patterning; can influence blastocyst development rates [78] | BMP4 (activator) [78] |
Methodology
Experimental Workflow
The following diagram illustrates the complete experimental workflow for processing and analyzing human blastocysts for SMAD signaling activity:
SMAD Signaling Pathway Mechanism
The molecular mechanism of SMAD-dependent signaling involves a cascade of phosphorylation events and nuclear translocation, as illustrated below:
Detailed Protocol for pSMAD Detection
Sample Preparation and Fixation
- Blastocyst Collection: Obtain donated human blastocysts (days 5-7 post-fertilization) under approved ethical guidelines. Wash blastocysts in pre-warmed PBS to remove residual culture medium.
- Fixation: Transfer blastocysts to 4% paraformaldehyde (PFA) in PBS for 20 minutes at room temperature. The fixation time is critical - under-fixation compromises structural integrity, while over-fixation can mask epitopes.
- Washing: Remove PFA and perform three 5-minute washes in PBS with 0.1% Tween-20 (PBS-T) to thoroughly remove fixative.
Permeabilization and Blocking
- Permeabilization: Treat blastocysts with 0.5% Triton X-100 in PBS for 30 minutes at room temperature. This step is essential for antibody penetration through the thick blastocyst structure.
- Blocking: Incubate samples in blocking solution (5% bovine serum albumin in PBS-T) for 2 hours at room temperature or overnight at 4°C to prevent non-specific antibody binding.
Immunostaining
- Primary Antibody Incubation: Incubate blastocysts with primary antibodies diluted in blocking solution for 24 hours at 4°C with gentle agitation. Critical antibody concentrations:
- Anti-pSMAD2/3 (1:200)
- Anti-pSMAD1/5/8 (1:200)
- Lineage markers (OCT4 for EPI, GATA3 for TE, GATA4 for PrE; 1:250)
- Washing: Perform six 30-minute washes with PBS-T to remove unbound primary antibodies.
- Secondary Antibody Incubation: Incubate with fluorophore-conjugated secondary antibodies (1:500) for 12 hours at 4°C, protected from light.
- Nuclear Counterstaining: Label DNA with Hoechst 33342 (1:1000) for 15 minutes followed by three 10-minute PBS washes.
Mounting and Imaging
- Mounting: Transfer blastocysts to microscope slides using a wide-bore pipette tip. Carefully orient blastocysts and mount in anti-fade mounting medium under a coverslip supported by vacuum grease to prevent compression.
- Imaging: Acquire z-stacks (0.5-1μm steps) using a confocal microscope with consistent laser power and detection settings across samples.
Image Analysis and Quantification
- Nuclear Segmentation: Identify individual nuclei using the DNA channel to create masks for region of interest (ROI) definition.
- Intensity Quantification: Measure mean fluorescence intensity of pSMAD signals within each nuclear ROI.
- Background Subtraction: Subtract background signal from empty regions of the image.
- Normalization: Normalize pSMAD intensities to control samples included in each experiment.
Research Reagent Solutions
Table 2: Essential Research Reagents for SMAD Signaling Detection in Blastocysts
| Reagent | Type | Function | Application Notes |
|---|---|---|---|
| Phospho-Specific SMAD Antibodies | Primary Antibodies | Detect activated (phosphorylated) SMAD proteins; distinguish between pathway activities [75] [76] | Validate for species cross-reactivity; optimal dilution typically 1:200 |
| Fluorophore-Conjugated Secondary Antibodies | Secondary Antibodies | Visualize primary antibody binding; enable multiplexing with different lineage markers [75] | Use cross-adsorbed antibodies to minimize cross-reactivity; protect from light |
| Triton X-100 | Detergent | Permeabilize cell membranes to allow antibody penetration [75] | Critical for thick embryo samples; optimize concentration (0.1-0.5%) to balance access and preservation |
| Paraformaldehyde (PFA) | Fixative | Preserve protein epitopes and cellular architecture [75] | Freshly prepared 4% solution recommended; avoid over-fixation beyond 20 minutes |
| Hoechst 33342 | Nuclear Stain | Identify individual nuclei for segmentation and quantification [75] | Compatible with multiphoton microscopy; use at 1:1000 dilution |
| Anti-fade Mounting Medium | Preservation Reagent | Prevent photobleaching during imaging and storage [75] | Commercial formulations with DAPI available for combined nuclear staining |
Results and Data Interpretation
Quantitative Analysis of SMAD Signaling
Application of this protocol enables quantification of SMAD signaling activity across different blastocyst lineages. The table below summarizes representative quantitative data from studies modulating various signaling pathways in human blastocysts:
Table 3: Quantitative Effects of Signaling Pathway Modulation on Blastocyst Development
| Treatment | Target Pathway | Effect | Blastocyst Development Rate (Control) | ICM Marker | TE Marker | PrE Marker | Reference |
|---|---|---|---|---|---|---|---|
| SB431542 | TGF-β/Activin/Nodal | Inhibition | 25% (28%) | ↑ | - | → | [78] |
| Activin A | TGF-β/Activin/Nodal | Activation | 27% (28%) | → | - | → | [78] |
| A8301 | TGF-β/Activin/Nodal | Inhibition | - | → | - | → | [78] |
| BMP4 | BMP | Activation | 17.4% (61.5%) | → | → | → | [78] |
| PD0325901 | FGF | Inhibition | - | → | - | → | [78] |
| FGF2 | FGF | Activation | - | ↓ | - | ↑ | [78] |
Key: ↑ significantly increased; ↓ significantly decreased; → non-significant change; - not described
Technical Validation
- Specificity: The protocol successfully distinguishes between pSMAD2/3 (NODAL/TGF-β/Activin signaling) and pSMAD1/5/8 (BMP signaling) localization.
- Sensitivity: Detection of heterogeneous signaling activity among individual cells within the same blastocyst, revealing cell-to-cell variability in pathway activation.
- Reproducibility: Consistent results across multiple blastocysts from different donors when normalized to internal controls.
- Multiplexing Capacity: Simultaneous detection of pSMAD signals with lineage-specific transcription factors enables correlation of signaling activity with cell fate decisions.
Discussion
Technical Advantages and Limitations
The validated protocol provides a robust method for investigating SMAD signaling dynamics in human blastocysts. The key advantage lies in the preservation of spatial information, allowing correlation of signaling activity with specific lineages (TE, EPI, or PrE). However, limitations include the inability to perform live imaging and the semi-quantitative nature of immunofluorescence intensity measurements.
The permeabilization approach represents a critical advancement for thick embryo samples, balancing sufficient antibody penetration with maintenance of cellular integrity. Future refinements may incorporate proximity ligation assays to detect protein-protein interactions or expansion microscopy to enhance resolution.
Biological Insights
Application of this methodology has revealed several important aspects of SMAD signaling in human blastocysts:
- Pathway Specificity: Distinct spatial and temporal activation patterns for different TGF-β superfamily pathways during lineage specification.
- Stochasticity: Single-cell analysis reveals temporal bursts in SMAD signaling activity, similar to patterns observed in other cell types [79].
- Species-Specific Differences: Human blastocysts may exhibit differences in SMAD dependency compared to mouse models, particularly in the requirement for SMAD4 during early lineage decisions [77].
Implications for the Broader Thesis on Permeabilization Protocols
This optimized protocol contributes significantly to the development of standardized methods for thick embryo sample processing. The permeabilization conditions established here provide a foundation for:
- Standardization across research laboratories working with limited human embryo samples
- Extension to other signaling pathways and post-translational modifications
- Adaptation to other challenging sample types, such as organoids and tissue explants
- Integration with emerging technologies, including multiplexed imaging and super-resolution microscopy
The methodology enables rigorous investigation of developmental mechanisms in human embryos while respecting ethical guidelines through maximal information extraction from precious samples.
Deep-tissue three-dimensional (3D) imaging is pivotal for advancing our understanding of complex biological processes in developmental biology, regeneration research, and drug development. This case study details optimized methodologies for visualizing DNA replication dynamics and cardiac structures within two key model systems: zebrafish larvae and human cardiac organoids. The protocols are framed within the context of a broader thesis on permeabilization for thick embryo samples, addressing a critical technical challenge in the field. The ability to image deep into intact tissues enables researchers to observe biological processes in a physiologically relevant context, which is essential for accurate interpretation of experimental results. The techniques outlined here overcome significant limitations of traditional 2D imaging and sectioning approaches, which can disrupt native tissue architecture and cellular relationships.
Application Note: Imaging DNA Replication and Cardiac Function
OpenEMMU for DNA Replication Studies
The Open-source EdU Multiplexing Methodology for Understanding DNA replication dynamics (OpenEMMU) provides an affordable, open-source click chemistry platform that utilizes off-the-shelf reagents for studying DNA synthesis and cell proliferation [27]. This methodology addresses limitations of commercial EdU kits, which suffer from high costs, proprietary formulations, and limited multiplexing capabilities, especially in larger biological specimens [27].
OpenEMMU has been successfully validated for fluorescent imaging of nascent DNA synthesis in developing embryos and organs, including embryonic heart, forelimbs, and 3D hiPSC-derived cardiac organoids [27]. It has also enabled the deep-tissue 3D imaging of DNA synthesis in zebrafish larvae and under replication stress in embryos at high spatial resolution [27]. This approach opens new avenues for understanding organismal development, cell proliferation, and DNA replication dynamics with unprecedented precision and flexibility.
Zebrafish Cardiac Imaging
Zebrafish (Danio rerio) serve as a powerful vertebrate model in cardiovascular research due to their genetic similarity to humans, optical transparency during early development, and amenability to in vivo imaging [80] [81]. A standardized, accessible protocol exists for assessing cardiac morphology and function in zebrafish embryos at 96 hours post-fertilization (hpf) using brightfield light microscopy [80]. This method enables quantitative assessment of cardiac performance using widely available equipment, making it suitable for laboratories with limited resources and high-throughput screenings.
For deeper tissue imaging, complementary protocols for time-lapse and three-dimensional (3D) imaging of zebrafish cardiac vasculature have been developed [82]. These techniques are particularly valuable for studying the development and regeneration of coronary vessels, which play a critical role in supporting regeneration of cardiac tissue [82]. The methods include tissue preparation and culture techniques that allow for the stabilization of fluorescent proteins in the heart, passive clearing of heart tissue, and live imaging of the vasculature in transgenic fluorescence-labelled hearts [82].
Table 1: Key Cardiac Parameters Measurable in Zebrafish Embryos
| Parameter | Description | Application |
|---|---|---|
| Ventricular Dimensions | Measurement of ventricle size during contraction and relaxation | Assessment of cardiac morphology |
| Stroke Volume | Volume of blood pumped from the ventricle per beat | Quantification of pumping efficiency |
| Heart Rate | Beats per minute (BPM) | Evaluation of rhythmicity and rate |
| Ejection Fraction | Percentage of blood ejected from the ventricle each beat | Measurement of contractile function |
| Cardiac Output | Total volume of blood pumped by the ventricle per minute | Overall assessment of cardiac performance |
Light Sheet Microscopy for Long-Term Imaging
Light sheet microscopy has emerged as a particularly powerful technique for long-term 3D imaging of complex multicellular systems, including zebrafish embryos and organoids [83]. This modality illuminates only a thin section of the sample at a time, dramatically reducing photodamage and preserving sample health while delivering crisp, volumetric data over hours or days [83].
The application of light sheet microscopy to zebrafish embryo imaging has enabled researchers to capture dynamic processes such as microglia cells moving within the optic tectum and the process of epiboly during gastrulation [83]. For organoid imaging, this technology has been used to track the development of human brain organoids over 40 hours, murine liver organoids over 50 hours, and the growth evolution of human colon cancer organoids for almost 6 days [83].
Protocols
OpenEMMU Click Chemistry Protocol for EdU Detection
This protocol describes an optimized Cu(I)-Catalyzed Azide−Alkyne Cycloaddition (CuAAC) reaction for efficient detection of EdU incorporation in thick samples [27].
Sample Preparation and EdU Labeling
- EdU incubation: Treat cells or tissues with EdU at concentrations ranging from 0-10 μM for 2 hours [27].
- Fixation: Fix samples in 4% PFA for 15-30 minutes depending on sample size [27] [82].
- Permeabilization: Use permeabilization buffer containing 2% Newborn Calf Serum (NCS) or 4% Fetal Bovine Serum (FBS) in PBS [27].
Click Reaction Setup
Prepare the optimized OpenEMMU click reaction mixture with the following components and concentrations:
Table 2: OpenEMMU Click Reaction Components and Concentrations
| Component | Final Concentration | Purpose |
|---|---|---|
| AZDye-conjugated Picolyl Azide (488/555/633/680) | 0.2 μM | Fluorescent detection of EdU |
| Copper Catalyst (CuSO₄·5H₂O) | 0.8-2 mM | Catalyzes the cycloaddition reaction |
| Reducing Agent (L-ascorbic acid) | 1 mg/mL | Maintains copper in reduced Cu(I) state |
| Reaction Buffer | 1X PBS | Provides optimal reaction conditions |
Click Reaction Procedure
- Incubation: Incubate fixed and permeabilized samples with the click reaction mixture for 30 minutes at room temperature [27].
- Washing: Rinse samples thoroughly with PBS to remove unreacted dyes [27].
- Counterstaining: If desired, counterstain with DNA dyes such as Vybrant DyeCycle Violet or Hoechst 33342 [27].
- Imaging: Proceed with appropriate imaging modality based on sample size and transparency.
Zebrafish Heart Preparation and Imaging Protocol
This protocol outlines the steps for preparing zebrafish hearts for deep-tissue 3D imaging, with particular attention to permeabilization strategies for thick samples [82].
Heart Collection and Fixation
- Euthanization: Euthanize zebrafish with Tricaine S solution (4.2 ml of Tricaine stock in 100 ml of fish water) for 15 minutes or longer [82].
- Dissection: Position the unresponsive fish ventral side up and open the chest wall by a small transverse cut at the level of the pectoral fins followed by a longer longitudinal cut between the gills [82].
- Heart removal: Gently peel away the pericardium to expose the heart. While holding the bulbus arteriosus with forceps, gently pull the heart out of the chest cavity and separate it from the fish by severing the ventral aorta and sinus venosus with microscissors [82].
- Cleaning: Place the heart in a 3.5 x 10 mm dish and rinse with 1X PBS solution three times to remove blood and tissue debris [82].
- Fixation: Transfer the heart to 4% PFA solution for 30 seconds to 1 minute for single heart immediate imaging, 15-20 minutes for batch imaging, or 30 minutes for immunostaining [82].
Mounting for Imaging
For consistent orientation and imaging, custom 3D-printed molds can be used to create agarose wells that facilitate reproducible mounting of zebrafish embryos [84]. These molds can be designed for imaging different stages of cardiac development, including cardiac fusion, heart tube formation, cardiac looping, and chamber formation [84].
Tissue Clearing (Optional)
For improved imaging depth, the CUBIC (clear, unobstructed brain imaging cocktails) procedure can be adapted for heart tissue [82]. This method is particularly effective as it not only clears tissue but also decolorizes it with effective removal of heme compounds [82].
Image Restoration for Enhanced Deep-Tissue Contrast
The InfraRed-mediated Image Restoration (IR²) protocol uses convolutional neural networks to augment live-imaging data with deep-tissue images taken on fixed samples [85]. This approach is particularly valuable for restoring deep-tissue contrast in GFP-based time-lapse imaging.
Procedure
- Live imaging: Acquire GFP-based time-lapse images of developing samples [85].
- Fixation and staining: Fix samples and immunostain against GFP with NIR dyes such as AlexaFluor800 [85].
- Fixed tissue imaging: Image the same samples using NIR microscopy [85].
- Image restoration: Use trained convolutional neural networks to restore contrast in the live-imaging data using the paired final-state NIR datasets [85].
The Scientist's Toolkit
Table 3: Essential Research Reagents and Materials for Deep-Tissue Imaging
| Item | Function | Application Notes |
|---|---|---|
| Picolyl Azide Dyes (AZDye 488/555/633/680) | Fluorescent detection of EdU via click chemistry | Optimal at 0.2 μM; higher concentrations reduce signal-to-noise ratio [27] |
| Copper Sulfate (CuSO₄·5H₂O) | Catalyst for click chemistry | Critical component; 0.8 mM determined as optimal concentration [27] |
| L-ascorbic acid | Reducing agent for maintaining Cu(I) state | Effective at ≥0.5 mg/mL; 1 mg/mL recommended [27] |
| Low-melt Agarose | Sample mounting and stabilization | Allows precise orientation for imaging; compatible with various imaging modalities [84] |
| CUBIC Clearing Reagents | Tissue clearing for improved light penetration | Effective for heart tissue; removes heme compounds [82] |
| GFP Nanobody-CF800 Conjugate | Deep-tissue immunostaining | Smaller than antibodies; improved penetration in dense tissues [85] |
| Custom 3D-Printed Molds | Reproducible sample orientation | Enables consistent imaging of specific structures across multiple samples [84] |
Workflow and Signaling Pathways
The following diagrams illustrate key experimental workflows and logical relationships for the protocols described in this case study.
OpenEMMU Experimental Workflow
Zebrafish Heart Processing Workflow
IR² Image Restoration Pathway
Conclusion
Mastering permeabilization is fundamental to unlocking the full potential of thick embryo samples in developmental biology and drug discovery. This synthesis demonstrates that no single protocol is universal; success hinges on a strategic balance between fixation, detergent selection, and sample-specific optimization. The emergence of cost-effective, open-source solutions and rigorous validation methods provides researchers with a powerful toolkit. Future directions will likely involve the development of even more gentle yet effective permeabilization agents to better preserve biomolecular integrity for advanced multi-omics and high-resolution 3D spatial profiling, further illuminating the complex processes of embryonic development and disease.
References
- 1. Quantitative Analysis of Protein Expression to Study ... [https://pmc.ncbi.nlm.nih.gov/articles/PMC4828170/]
- 2. Protocol for immunofluorescence detection and ... [https://pmc.ncbi.nlm.nih.gov/articles/PMC12156156/]
- 3. Comparison of Different Fix/Permeabilization Buffers for use in ... [https://blog.td2inc.com/comparison-of-different-fix-permeabilization-buffers]
- 4. Introducing the Dish Soap Protocol: A Unified Approach for ... [https://pmc.ncbi.nlm.nih.gov/articles/PMC12447862/]
- 5. A three dimensional immunolabeling method with peroxidase ... [https://pmc.ncbi.nlm.nih.gov/articles/PMC12177075/]
- 6. Sperm Membrane Stability: In-Depth Analysis from Structural ... [https://pmc.ncbi.nlm.nih.gov/articles/PMC12300394/]
- 7. Optimizing Sperm Cryopreservation from Four Endangered ... [https://www.mdpi.com/2076-2615/15/20/3013]
- 8. Advanced sperm preservation techniques in yellow spotted ... [https://www.nature.com/articles/s41598-025-93284-y]
- 9. Successful Immunofluorescence: Fixation & Permeabilization [https://blog.cellsignal.com/successful-immunofluorescence-fixation-and-permeabilization]
- 10. Cryopreservation method for Drosophila melanogaster ... [https://www.nature.com/articles/s41467-021-22694-z]
- 11. Microfluidic cell unroofing for the in situ molecular analysis of ... [https://pubs.rsc.org/en/content/articlehtml/2025/lc/d5lc00102a]
- 12. A quantitative comparison of antibodies against epitope ... [https://pmc.ncbi.nlm.nih.gov/articles/PMC10699100/]
- 13. IHC staining protocol for whole mount samples [https://www.abcam.com/en-us/technical-resources/protocols/wholemount-staining-for-ihc]
- 14. Tissue libraries enable rapid determination of conditions ... [https://elifesciences.org/articles/84112]
- 15. Protein-retention expansion microscopy of cells and ... [https://pmc.ncbi.nlm.nih.gov/articles/PMC5068827/]
- 16. Magnify is a universal molecular anchoring strategy for ... [https://www.nature.com/articles/s41587-022-01546-1]
- 17. Antigen retrieval and permeabilization for IHC [https://www.abcam.com/en-us/technical-resources/guides/ihc-guide/antigen-retrieval-and-permeabilization]
- 18. Principles of deep immunohistochemistry for 3D histology [https://pmc.ncbi.nlm.nih.gov/articles/PMC10261851/]
- 19. A see-through whole mouse embryo - El·lipse - PRBB [https://ellipse.prbb.org/a-see-through-whole-mouse-embryo/]
- 20. Penetration Depth in 3D Immunostaining(Part I) - Illumos [https://illumos.co/penetration-depth-in-3d-immunostaining%EF%BC%88part-i/]
- 21. Flow Cytometry, Methanol Permeabilization Protocol [https://www.cellsignal.com/learn-and-support/protocols/protocol-flow-methanol-permeabilization?srsltid=AfmBOoq_JC9LoVyZzScRsGTJfpzNbQ3bosybHnAq-7gTDDT_jXAn2wP8]
- 22. Flow Cytometry Protocol | Abcam [https://www.abcam.com/en-us/technical-resources/protocols/flow-cytometry-for-intracellular-and-extracellular-targets]
- 23. Intensify3D: Normalizing signal intensity in large ... [https://www.nature.com/articles/s41598-018-22489-1]
- 24. A Unified Approach for Multi-Modal Intracellular Staining [https://pubmed.ncbi.nlm.nih.gov/40970846/]
- 25. Adrian Liston's Post - Introducing the Dish Soap Protocol [https://www.linkedin.com/posts/adrian-liston-0157a983_introducing-the-dish-soap-protocol-a-unified-activity-7374815918910119937-UBHq]
- 26. An optimized permeabilization step for flow cytometry ... [https://pmc.ncbi.nlm.nih.gov/articles/PMC6396090/]
- 27. OpenEMMU: A versatile, open-source EdU multiplexing ... [https://pmc.ncbi.nlm.nih.gov/articles/PMC12410529/]
- 28. Permeabilization of Drosophila embryos for introduction of ... [https://pmc.ncbi.nlm.nih.gov/articles/PMC3269133/]
- 29. Three-dimensional super-resolution fluorescence imaging ... [https://www.nature.com/articles/s41598-020-68892-5]
- 30. Advances in single-cell omics and multiomics for high- ... [https://www.nature.com/articles/s12276-024-01186-2]
- 31. Assessing the Influence of Selected Permeabilization ... [https://pmc.ncbi.nlm.nih.gov/articles/PMC11843891/]
- 32. Single-cell multi-omic detection of DNA methylation and ... [https://www.nature.com/articles/s41592-025-02847-4]
- 33. Functional phenotyping of genomic variants using joint ... [https://www.nature.com/articles/s41592-025-02805-0]
- 34. 3D exploration of gene expression in chicken embryos ... [https://bmcbiol.biomedcentral.com/articles/10.1186/s12915-024-01922-0]
- 35. Protocol for the generation and immunostaining of thick ... [https://pmc.ncbi.nlm.nih.gov/articles/PMC12395521/]
- 36. Engineered extracellular vesicles: a breakthrough approach to ... [https://pmc.ncbi.nlm.nih.gov/articles/PMC12093887/]
- 37. Direct Access and Control of the Intracellular Solution ... [https://pmc.ncbi.nlm.nih.gov/articles/PMC3197790/]
- 38. DDX1 vesicles control calcium-dependent mitochondrial ... [https://www.nature.com/articles/s41467-022-31497-9]
- 39. An Effective Chemical Permeabilization of Silkworm Embryos [https://pmc.ncbi.nlm.nih.gov/articles/PMC10215591/]
- 40. A Method of Permeabilization of Drosophila Embryos for ... [https://www.jove.com/t/51634/a-method-permeabilization-drosophila-embryos-for-assays-small]
- 41. Stage selection and restricted oviposition period improves ... [https://www.sciencedirect.com/science/article/pii/S001122401500022X]
- 42. Flow Cytometry, Methanol Permeabilization Protocol [https://www.cellsignal.com/learn-and-support/protocols/protocol-flow-methanol-permeabilization?srsltid=AfmBOor_MtzRN7MLvec-HrlYdZZBKxkmqJFQOq2480MK1tIY2aqY927H]
- 43. Spatiotemporal transcriptome and metabolome landscapes ... [https://www.nature.com/articles/s41467-025-55870-6]
- 44. Trypan Blue Staining Assay [https://www.creative-bioarray.com/support/trypan-blue-staining-assay.htm]
- 45. Quantitative, traceable determination of cell viability using ... [https://journals.plos.org/plosone/article?id=10.1371/journal.pone.0262119]
- 46. Protocol for determining the contribution of protein and ... [https://pmc.ncbi.nlm.nih.gov/articles/PMC12013489/]
- 47. Optimized protocol for whole-mount RNA fluorescent in situ ... [https://pmc.ncbi.nlm.nih.gov/articles/PMC10522992/]
- 48. Protein and lipid expansion microscopy with trypsin and ... [https://www.nature.com/articles/s41598-023-48959-9]
- 49. Staining 3D Cell Cultures for Imaging [https://www.thermofisher.com/us/en/home/references/protocols/cell-and-tissue-analysis/protocols/3d-organoid-staining.html]
- 50. Comparison of the automated fluorescence microscopic ... [https://pmc.ncbi.nlm.nih.gov/articles/PMC6647696/]
- 51. Protocol optimization improves the performance of ... [https://www.nature.com/articles/s41598-025-17477-1]
- 52. Protocol for determining the contribution of protein and ... [https://www.sciencedirect.com/science/article/pii/S2666166725001509]
- 53. Protocol for vibratome sectioning, immunofluorescence ... [https://pmc.ncbi.nlm.nih.gov/articles/PMC12392772/]
- 54. Optimized single-step optical clearing solution for 3D ... [https://www.nature.com/articles/s42003-022-03388-8]
- 55. Multi-omics analysis reveals RNA polymerase II ... [https://www.nature.com/articles/s41420-025-02677-5]
- 56. An integrated approach for analyzing spatially resolved ... [https://www.frontiersin.org/journals/molecular-biosciences/articles/10.3389/fmolb.2025.1614288/full]
- 57. Permeabilization of Drosophila embryos for introduction of small molecules - PubMed [https://pubmed.ncbi.nlm.nih.gov/20727969/]
- 58. A Method of Permeabilization of Drosophila Embryos for Assays of Small Molecule Activity - PMC [https://pmc.ncbi.nlm.nih.gov/articles/PMC4214599/]
- 59. Guide to Multiplex Immunoassays: Multiplex ELISA and More [https://www.thermofisher.com/blog/life-in-the-lab/guide-to-multiplex-immunoassays-multiplex-elisa-and-more/]
- 60. Getting more out of your mouse monoclonal antibodies [https://www.antibodiesinc.com/blogs/news/getting-more-out-of-your-mouse-monoclonal-antibodies-multiplex-staining-with-subclass-specific-secondaries?srsltid=AfmBOoooBZf57DRaWmJ7dwabKJJeF8UxOpSwu33D9JOjcec9WJkXg7sy]
- 61. Quantitative bead–based multiplex assay for simultaneous ... [https://www.frontiersin.org/journals/immunology/articles/10.3389/fimmu.2025.1587567/full]
- 62. Clearing Tissue for Microscopy: Part 2 – Hydrophilic Methods [https://fluorofinder.com/clearing-tissue-for-microscopy-part-2-hydrophilic-methods/]
- 63. Multiplexed detection and quantification of human antibody ... [https://pmc.ncbi.nlm.nih.gov/articles/PMC7545244/]
- 64. Optimization, Design and Avoiding Pitfalls in Manual ... [https://pmc.ncbi.nlm.nih.gov/articles/PMC6786767/]
- 65. Quantification of absolute labeling efficiency at the single- ... [https://www.nature.com/articles/s41592-024-02242-5]
- 66. Systematic benchmarking of 13 AI methods for predicting ... [https://jcheminf.biomedcentral.com/articles/10.1186/s13321-025-01083-4]
- 67. Skin Permeabilization for Transdermal Drug Delivery [https://pmc.ncbi.nlm.nih.gov/articles/PMC3980659/]
- 68. Investigation on the Synergy between Membrane ... [https://www.mdpi.com/1420-3049/29/17/4078]
- 69. Assessment of Different Permeabilization Methods ... [https://pmc.ncbi.nlm.nih.gov/articles/PMC3895578/]
- 70. Basement membrane perforations guide anterior–posterior ... [https://www.nature.com/articles/s41467-025-61441-6]
- 71. 使用LysoTracker检测及鉴别胚胎干细胞在胚胎细胞程序性死亡 [https://www.jove.com/cn/t/4254/use-lysotracker-to-detect-programmed-cell-death-embryos]
- 72. Embryo model completes gastrulation to neurulation and ... [https://www.nature.com/articles/s41586-022-05246-3]
- 73. Limiting the impact of protein leakage in single-cell ... [https://www.nature.com/articles/s41467-025-56736-7]
- 74. Protocol for whole-mount preparation, clearing, and ... [https://www.sciencedirect.com/science/article/pii/S2666166724006567]
- 75. Protocol for immunofluorescence detection and ... [https://pubmed.ncbi.nlm.nih.gov/40440177/]
- 76. Protocol for immunofluorescence detection and ... [https://www.crick.ac.uk/research/publications/protocol-for-immunofluorescence-detection-and-quantification-of-phosphorylated-smad-proteins-in-human-blastocysts]
- 77. A stepwise mode of TGFβ-SMAD signaling and DNA ... [https://www.nature.com/articles/s41467-024-54433-5]
- 78. Signaling Pathways in Human Blastocyst Development [https://pmc.ncbi.nlm.nih.gov/articles/PMC12452331/]
- 79. Data-based stochastic modeling reveals sources of activity ... [https://pmc.ncbi.nlm.nih.gov/articles/PMC9269928/]
- 80. Functional Cardiac Imaging in Zebrafish Embryos Using ... [https://pubmed.ncbi.nlm.nih.gov/41144452/]
- 81. Zebrafish as a Versatile Model for Cardiovascular Research [https://www.mdpi.com/2073-4409/14/7/531]
- 82. Methods for dynamic and whole volume imaging of the ... [https://pmc.ncbi.nlm.nih.gov/articles/PMC10841891/]
- 83. Focus on Long-Term Imaging in 3D with Light Sheet ... [https://www.leica-microsystems.com/science-lab/life-science/focus-on-long-term-imaging-in-3d-with-light-sheet-microscopy/]
- 84. Custom 3D-Printed Molds for Zebrafish Imaging and ... [https://app.jove.com/t/68768/custom-3d-printed-molds-for-zebrafish-imaging-and-cardiac-development]
- 85. Image restoration of degraded time-lapse microscopy data ... [https://www.nature.com/articles/s41592-023-02127-z]