Mastering Limb Development: A Comprehensive Guide to Hox Gene Electroporation in Chick Embryos
This article provides a comprehensive resource for researchers utilizing electroporation to manipulate Hox gene expression in the chick limb bud, a cornerstone model in developmental biology and regenerative medicine.
Mastering Limb Development: A Comprehensive Guide to Hox Gene Electroporation in Chick Embryos
Abstract
This article provides a comprehensive resource for researchers utilizing electroporation to manipulate Hox gene expression in the chick limb bud, a cornerstone model in developmental biology and regenerative medicine. We synthesize current methodologies, from foundational principles of Hox codes that govern limb positioning to advanced, step-by-step electroporation protocols. The content details robust validation techniques for assessing gene manipulation efficacy and explores troubleshooting strategies to overcome common experimental pitfalls. By integrating foundational knowledge with practical application and validation, this guide aims to empower scientists to design and execute precise experiments that unravel the mechanisms of limb patterning, with significant implications for understanding congenital disorders and informing therapeutic development.
Decoding the Hox Code: Principles of Axial Patterning and Limb Positioning
The Hox gene family, a subset of homeobox genes, comprises a group of highly conserved transcription factors that are fundamental to establishing the anterior-posterior (A-P) body plan in metazoans [1]. These genes encode proteins that specify the positional identity of regions along the A-P axis during embryonic development, ensuring that the correct anatomical structures form in their appropriate locations [1]. In vertebrates, this family consists of 39 genes organized into four distinct genomic clusters (HOXA, HOXB, HOXC, and HOXD) located on different chromosomes [2]. A defining feature of Hox genes is their spatial collinearity—the order of genes within each cluster corresponds to their sequential expression domains along the A-P axis, with genes at the 3' end of the cluster governing anterior development and those at the 5' end controlling posterior formation [2] [3]. The pivotal role of Hox genes in limb positioning and patterning makes them a prime subject for investigation via targeted electroporation in chick limb bud experiments.
Core Principles of Hox Gene Function
The Hox Code and Transcriptional Regulation
Hox proteins function by binding to specific DNA sequences via a 60-amino-acid homeodomain, enabling them to activate or repress hundreds of downstream target genes [1]. They often form complexes with co-factor proteins such as Extradenticle (Exd) and Homothorax (Hth) to enhance DNA-binding specificity and affinity [4]. The combinatorial expression of different Hox genes, known as the "Hox code," provides a molecular framework for specifying regional identity [5]. Recent studies in chick embryos reveal that this code operates through both permissive and instructive signals; for instance, Hox4/5 genes create a permissive territory for forelimb formation, while Hox6/7 provide instructive cues that precisely determine the final forelimb position [5].
Temporal Dynamics and Cluster Regulation
The precise spatiotemporal expression of Hox genes is critical for their function. Master regulators such as Nr6a1 control the timely progression of Hox expression signatures along the axis, acting as a central coordinator for trunk development [6]. Furthermore, Hox gene clusters have undergone significant evolutionary changes, with teleost fishes experiencing a third round of genome duplication (3R-WGD), resulting in eight Hox clusters, while mammals generally retain the standard four clusters [3]. This evolutionary plasticity underscores the functional importance of these genes in body plan organization.
Quantitative Analysis of Hox Gene Expression
The expression profiles of Hox genes are highly tissue-specific and are frequently disrupted in disease states. A comprehensive analysis of HOX gene expression across multiple cancer types, comparing data from The Cancer Genome Atlas (TCGA) with healthy tissues from the Genotype-Tissue Expression (GTEx) resource, reveals significant differential expression patterns [2].
Table 1: HOX Gene Differential Expression in Selected Cancer Types
| Cancer Type | Total Samples (TCGA+GTEx) | Number of HOX Genes with Altered Expression | Notable Examples of Dysregulated Genes |
|---|---|---|---|
| Glioblastoma (GBM) | 173 | 36 | Widespread dysregulation of anterior, central, and posterior HOX genes |
| Esophageal Carcinoma (ESCA) | 468 | ≥13 | Associated with metaplastic precursors like Barrett's esophagus |
| Lung Squamous Cell Carcinoma (LUSC) | 551 | ≥13 | Alterations in central and posterior HOX genes |
| Stomach Adenocarcinoma (STAD) | 626 | ≥13 | HOXD10 downregulation linked to increased proliferation and invasion |
| Pancreatic Adenocarcinoma (PAAD) | 350 | ≥13 | Dysregulation of developmental pathways |
Table 2: Functional Classification of Human HOX Genes
| HOX Group | Paralog Members | General Axial Specification Domain | Example Biological Functions |
|---|---|---|---|
| Anterior | HOXA1-3, HOXB1-3, HOXC1-3, HOXD1-3 | Hindbrain, cranial neural crest | Head structure formation, neural patterning |
| Central | HOXA4-8, HOXB4-8, HOXC4-8, HOXD4-8 | Thoracic region, limb buds | Specification of thoracic vertebrae, limb positioning (e.g., Hox4-Hox7) |
| Posterior | HOXA9-13, HOXB9-13, HOXC9-13, HOXD9-13 | Lumbar, sacral, and genital regions | Patterning of posterior trunk structures, urogenital development |
Application Note: Electroporation of Hox Genes in Chick Limb Buds
The chick embryo is a premier model for studying limb development due to its accessibility and the ease of gene manipulation via in ovo electroporation. This technique allows for the precise delivery of genetic constructs into the limb-forming lateral plate mesoderm (LPM) to investigate Hox gene function.
Experimental Workflow for Hox Gene Electroporation
The following diagram illustrates the key stages of the experimental workflow for investigating Hox gene function in chick limb development via electroporation:
Detailed Protocol: Gain-of-Function Analysis
Objective: To investigate the effect of anterior Hox gene misexpression on limb positioning and identity.
Materials & Reagents:
- Fertilized chick eggs (incubated to Hamburger-Hamilton [HH] stage 12-14)
- Plasmid DNA: pCAGGS-Hoxa6-IRES-EGFP or similar Hox expression vector [5]
- Fast Green dye (2-5 mg/mL) for visualization
- Electroporator (e.g., BTX ECM 830)
- Platinum or gold electrodes (1 cm diameter paddle electrodes)
- Micropipette puller and microinjection capillaries
Procedure:
- DNA Preparation: Prepare a Hox expression plasmid (e.g., pCAGGS-Hoxa6-IRES-EGFP) at a concentration of 1-2 µg/µL in Tris-EDTA buffer, with 0.1% Fast Green for visualization [5].
- Embryo Preparation: Window the eggshell and visualize the embryo under a stereomicroscope. Identify the forelimb-forming region in the lateral plate mesoderm at the cervical-thoracic boundary.
- Microinjection: Using a pneumatic picopump, inject approximately 0.1-0.5 µL of the DNA solution into the targeted region of the LPM.
- Electroporation: Position paddle electrodes on either side of the embryo. Deliver five 50-ms pulses of 25-30V with 100-ms intervals to drive the DNA into the cells of the LPM [7] [5].
- Post-Procedure Care: Seal the window with laboratory film and re-incubate the eggs at 38°C in a humidified incubator until the desired developmental stage (typically HH24-HH35 for limb analysis).
- Analysis: Visualize electroporated cells by EGFP fluorescence. Assess changes in limb bud position, morphology, and molecular patterning via in situ hybridization for marker genes like Tbx5 (forelimb identity) or Fstl1 (a HoxA13 downstream target) [8] [5].
Protocol: Loss-of-Function Using Dominant-Negative Constructs
Objective: To inhibit the function of specific Hox genes in the limb-forming region.
Procedure: The workflow is similar to the gain-of-function approach, with the key difference being the construct used. Employ dominant-negative (DN) Hox variants that lack the C-terminal portion of the homeodomain. These DN proteins retain the ability to bind co-factors but cannot bind DNA, thereby sequestering essential transcriptional co-activators [5]. For example, electroporate a construct expressing DN-Hoxa5 to assess its requirement in establishing the permissive field for forelimb development [5].
Table 3: Key Research Reagent Solutions for Hox Gene Electroporation Studies
| Reagent / Resource | Function / Description | Example Application |
|---|---|---|
| Hox Expression Vectors | Plasmid DNA driving Hox cDNA expression (e.g., pCAGGS, pRCAS). | Gain-of-function studies to assess Hox overexpression effects [5]. |
| Dominant-Negative Hox Constructs | Truncated Hox genes that disrupt native Hox/co-factor complex function. | Loss-of-function studies to inhibit specific Hox protein activity in the LPM [5]. |
| EGFP Reporter Vectors | Plasmids encoding Enhanced Green Fluorescent Protein, often bicistronic. | Visualization of electroporated cells and lineage tracing [7] [8]. |
| Electroporation Apparatus | System generating controlled electrical pulses (e.g., BTX ECM 830). | Introduction of charged DNA molecules into specific embryonic cells [7]. |
| Limb Bud Marker Assays | In situ hybridization probes for genes like Tbx5, Fstl1, Enpp2. | Molecular analysis of limb identity and patterning following Hox manipulation [8] [5]. |
Data Interpretation and Analysis
Following electroporation, analysis is critical for drawing meaningful conclusions about Hox gene function. The diagram below illustrates the logical framework for interpreting experimental outcomes related to the Hox code in limb positioning:
Key Analytical Considerations:
- Molecular Phenotyping: A successful Hox gain-of-function experiment in the anterior LPM may result in the ectopic activation of Tbx5, a key determinant of forelimb identity, and the subsequent formation of an ectopic limb bud anterior to the normal limb [5].
- Patterning Defects: Loss-of-function experiments using dominant-negative constructs may result in a posterior shift or complete failure of limb bud initiation, depending on the targeted Hox paralog group [5].
- Downstream Targets: Validate findings by examining the expression of known Hox downstream genes. For example, Hoxa13 regulates targets like Igfbp4 and Fstl1 in the limb interdigital mesenchyme, which can be assessed via in situ hybridization or RT-PCR [8].
The electroporation of Hox genes in the chick limb bud provides a powerful and precise methodological approach to deconstructing the complex regulatory networks that govern A-P patterning and limb positioning. The protocols outlined herein enable functional testing of specific Hox codes and their downstream effectors. The robust, quantitative data generated from such experiments not only advances fundamental developmental biology but also informs our understanding of the mechanisms underlying evolutionary diversity in body plans and the role of Hox gene dysregulation in human disease and congenital disorders.
In vertebrate development, the precise positioning of limbs along the anterior-posterior axis is a fundamental patterning event governed by the combinatorial expression of Hox genes. Recent research has elucidated that specific Hox paralog groups provide distinct signaling cues that collectively determine limb formation sites. This application note examines the mechanistic roles of Hox4/5 (permissive signals) and Hox6/7 (instructive signals) in establishing the forelimb formation field within the lateral plate mesoderm (LPM) of chicken embryos, with particular emphasis on experimental approaches utilizing electroporation-based techniques to manipulate Hox gene function.
The conceptual framework of permissive versus instructive signaling represents a significant advance in understanding how Hox genes orchestrate limb positioning. Permissive signals establish a permissive field where limb formation can potentially occur, while instructive signals actively initiate the limb developmental program within this defined territory [5]. This hierarchical regulatory logic ensures precise limb positioning across vertebrate species despite variations in cervical vertebra number.
Key Findings: Quantitative Data on Hox Gene Functions
Table 1: Functional Properties of Hox Paralogs in Forelimb Positioning
| Hox Paralog Group | Signal Type | Expression Domain | Functional Role | Genetic Interactions |
|---|---|---|---|---|
| Hox4/5 | Permissive | Throughout neck region LPM | Establishes permissive field for forelimb formation; necessary but insufficient for limb initiation | Activates Tbx5 expression; required for limb competence |
| Hox6/7 | Instructive | Restricted domain at cervical-thoracic boundary | Determines final forelimb position; sufficient to reprogram neck LPM to form ectopic limbs | Directly regulates Tbx5 via specific enhancer elements |
| Hox9+ | Repressive | Caudal to forelimb field | Suppresses forelimb program; limits Tbx5 expression posteriorly | Antagonizes Hox4/5 and Hox6/7 functions |
Table 2: Experimental Outcomes of Hox Manipulation in Chick Embryos
| Experimental Condition | Tbx5 Expression | Limb Bud Formation | Positional Outcome |
|---|---|---|---|
| Control (Wild-type) | Normal at brachial level | Normal forelimb at cervical-thoracic boundary | Standard limb positioning |
| Hox4/5 Dominant-Negative | Absent or severely reduced | Forelimb initiation failed | No limb formation |
| Hox6/7 Dominant-Negative | Reduced or displaced | Diminished or misshapen limb bud | Altered limb position |
| Hox6/7 Misexpression | Ectopic activation in neck LPM | Additional limb buds anterior to normal position | Anterior limb duplication |
Experimental Protocols: Electroporation-Based Functional Analysis
Plasmid Construct Preparation for Hox Gene Manipulation
A. Dominant-Negative Hox Constructs:
- Generate truncated Hoxa4, Hoxa5, Hoxa6, or Hoxa7 variants lacking C-terminal portion of homeodomain
- Clone into expression vector with IRES-EGFP reporter (e.g., pCIG vector)
- Verify protein expression and DNA binding deficiency via EMSA [5] [9]
B. Gain-of-Function Hox Constructs:
- Clone full-length Hoxc6 or Hoxc7 cDNA into electroporation vectors
- Include nuclear localization signals and flag tags for detection
- Confirm transcriptional activity via luciferase reporter assays with Tbx5 regulatory elements [9]
Chick Embryo Electroporation for LPM Targeting
Day 1: Embryo Preparation and Electroporation
- Incubate fertilized chicken eggs to Hamburger-Hamilton (HH) stage 12 (~45-49 hours) [5]
- Window eggshell and visualize embryo using Indian ink injection beneath embryo
- Inject ~0.5-1 μL plasmid DNA (1 μg/μL concentration with Fast Green tracer) into the lateral plate mesoderm region adjacent to the prospective wing field
- Position platinum electrodes parallel to embryo with anode facing targeted LPM
- Deliver 5 pulses of 20V, 50ms duration with 100ms intervals using square wave electroporator
- Seal window with transparent tape and return eggs to 38°C incubator
Day 2: Analysis of Electroporation Efficiency
- Harvest embryos at HH14 (8-10 hours post-electroporation)
- Screen for EGFP expression in LPM using fluorescence microscopy
- Process embryos for whole-mount in situ hybridization or immunohistochemistry [10]
Phenotypic Analysis Methods
A. Whole-Mount In Situ Hybridization:
- Generate antisense riboprobes for Tbx5, Hox genes, Fgf10, and Shh
- Fix embryos in 4% PFA overnight at 4°C
- Follow standard hybridization protocols with proteinase K permeabilization [9]
- Document expression patterns using high-magnification microscopy
B. Section Immunohistochemistry:
- Cryosection EGFP-positive embryos at 10-20μm thickness
- Immunostain with antibodies against Hox proteins (e.g., anti-Hoxb4), Tbx5, or limb markers
- Counterstain with DAPI for nuclear visualization
- Quantify expression domains and cell counts in targeted versus contralateral control regions [11]
Signaling Pathways and Molecular Mechanisms
Diagram 1: Hox Gene Regulatory Hierarchy in Limb Positioning. Hox4/5 genes establish a permissive field (yellow) throughout the neck region, while Hox6/7 genes provide instructive signals (green) that directly activate Tbx5 expression, initiating the limb development cascade.
The molecular hierarchy of limb positioning involves sequential activation of specific transcriptional programs:
Permissive Phase (Hox4/5-dependent):
- Hox4/5 expression establishes molecular competence in LPM cells
- Creates permissive territory extending through cervical region
- Does not directly initiate limb program but enables cellular responsiveness to limb-inducing signals [5]
Instructive Phase (Hox6/7-dependent):
- Hox6/7 activation within permissive field directly triggers Tbx5 expression
- Tbx5 protein binds and activates Fgf10 transcription in LPM
- Fgf10 signaling induces Fgf8 expression in overlying ectoderm, initiating AER formation
- Positive feedback loop between Fgf10 and Fgf8 promotes limb bud outgrowth [9] [12]
Repressive Boundaries:
- Caudal Hox genes (Hox9 and beyond) suppress limb formation outside proper territory
- Anterior limit established by absence of permissive Hox signals
- This combinatorial code ensures single forelimb per body side at correct axial position [5]
The Scientist's Toolkit: Essential Research Reagents
Table 3: Key Reagents for Hox Gene Electroporation Studies
| Reagent/Category | Specific Examples | Function/Application |
|---|---|---|
| Expression Vectors | pCIG, BGZA reporter | Electroporation constructs with fluorescent reporters for tracking transfection efficiency |
| Hox Constructs | Dominant-negative Hoxa4-7, Full-length Hoxc6, Hoxc7 | Gain-of-function and loss-of-function manipulation of Hox signaling |
| Electroporation Equipment | Square wave electroporator, Platinum electrodes, Microinjector | Physical delivery of DNA constructs to target tissues |
| Detection Reagents | Tbx5 riboprobes, Anti-GFP antibodies, Anti-Hox antibodies | Visualization of gene expression changes and protein localization |
| Embryo Culture | Fertilized chick eggs, Indian ink, Transparent tape | Embryo maintenance and manipulation during experiments |
Advanced Applications and Technical Considerations
Spatiotemporal Control of Hox Expression
For precise temporal control of Hox gene function, consider implementing:
- Inducible systems (tetracycline- or tamoxifen-regulated) for staged activation
- Photoactivatable Hox constructs for spatial restriction of activity
- Electroporation at multiple stages to test temporal requirements in limb positioning
Quantitative Analysis Methods
Image-Based Quantification:
- Measure fluorescence intensity of reporter constructs in defined LPM regions
- Calculate expression domains as percentages of total LPM length
- Quantify ectopic limb bud size relative to endogenous buds
Molecular Quantification:
- qRT-PCR on microdissected LPM regions following electroporation
- RNA-Seq of Hox-manipulated versus control LPM cells
- Chromatin immunoprecipitation to identify direct Hox targets [9]
Troubleshooting Electroporation Efficiency
- Low transfection efficiency: Optimize DNA concentration (0.5-2 μg/μL range), increase pulse duration
- Embryo viability: Ensure electrode placement avoids heart region, optimize voltage parameters
- Mosaic expression: Use multiple electroporation angles or repeated pulses for more uniform coverage
- Specificity issues: Employ LPM-specific promoters (e.g., Tbx5 regulatory elements) to restrict expression
The hierarchical model of permissive (Hox4/5) and instructive (Hox6/7) signaling provides a robust framework for understanding vertebrate limb patterning. The experimental approaches outlined here enable precise functional dissection of this regulatory code using chick embryo electroporation. These protocols support investigation of how Hox combinatorial patterns translate into specific morphological outcomes, with relevance for evolutionary biology, regenerative medicine, and congenital limb defect research.
The permissive-instructive signaling paradigm may extend beyond limb development to other Hox-regulated processes, including axial patterning and organogenesis. The tools and methods described facilitate further exploration of this fundamental mechanism in diverse developmental contexts.
The chick embryo remains a preeminent model for elucidating the fundamental principles of vertebrate limb development. Its longstanding paradigmatic value provides a unique window into the complex cellular interactions and molecular signaling that orchestrate organogenesis [13]. The accessibility of the developing embryo for surgical manipulation, including tissue grafting and microsurgery, combined with modern genetic techniques such as electroporation-mediated gene transfer, offers a powerful, integrative platform for functional genetic analysis. This system is particularly indispensable for research aimed at understanding the roles of Hox genes in conferring positional identity and patterning the limb axes. The ability to perform precise loss-of-function and gain-of-function experiments in vivo allows researchers to dissect the intricate gene regulatory networks that control limb positioning, outgrowth, and patterning with a level of temporal and spatial control that is difficult to achieve in other vertebrate models.
Key Advantages Summarized
The chick embryo system offers a compelling set of advantages for developmental biology research, which are summarized in the table below.
Table 1: Key Advantages of the Chick Model System for Limb Development Studies
| Advantage | Description | Application in Limb Studies |
|---|---|---|
| Accessibility & Manipulability | Embryos develop externally in eggs, allowing direct access for surgical and molecular interventions. | Permits tissue grafting (e.g., ZPA grafts), bead implantation for localized factor delivery, and microinjection/electroporation. |
| Cost-Effectiveness | Significantly lower cost of acquisition and maintenance compared to mammalian models. | Enables higher sample sizes for robust statistical analysis and complex experimental designs. |
| Rapid Development | Relatively short incubation period (~21 days) for complex organogenesis. | Accelerates the timeline from experimental intervention to phenotypic analysis of limb defects. |
| Well-Staged Morphology | Normal embryonic stages are meticulously defined by the Hamburger-Hamilton (HH) staging series. | Provides a precise, standardized reference for comparing experiments and reproducible timing of interventions. |
| Molecular Tractability | Highly amenable to gain-of-function and loss-of-function studies via in ovo electroporation and virus-mediated gene transfer. | Ideal for functional analysis of genes like Hox genes, signaling molecules (FGFs, SHH, BMPs), and transcription factors (Tbx5) [5] [13]. |
The Hox Code in Limb Positioning: An Integrative Analysis
A principal strength of the chick model has been its use in deciphering the Hox code that governs the positioning of limbs along the anterior-posterior axis. Recent research using this system has revealed that limb positioning is not controlled by a single signal but by the combinatorial actions of Hox genes, which can be categorized into permissive and instructive cues [5].
Permissive and Instructive Hox Signals
- Hox4/5 Provide a Permissive Signal: Research employing loss-of-function approaches in chick embryos demonstrates that HoxPG4 and HoxPG5 genes are necessary for forelimb formation. They establish a permissive field within the neck region, a territory where limb formation is possible. However, they are insufficient on their own to initiate limb budding [5].
- Hox6/7 Provide an Instructive Signal: The final position of the forelimb is determined by the instructive action of HoxPG6 and HoxPG7 within the lateral plate mesoderm (LPM). Gain-of-function experiments, where Hox6/7 are misexpressed in the neck LPM, are sufficient to reprogram this tissue, inducing the formation of an ectopic limb bud anterior to the normal limb field. This demonstrates their instructive role in launching the limb developmental program [5].
This model elegantly explains how the forelimb is consistently positioned at the cervical-thoracic boundary across vertebrates, despite variations in neck length. The permissive Hox4/5 domain, which expanded during the evolution of the neck, is acted upon by the more posteriorly restricted instructive Hox6/7 signal to define the precise site of limb emergence.
Initiation of the Limb Program
The initiation of the limb program is marked by the expression of Tbx5 in the forelimb LPM, a master regulator gene functionally required for forelimb formation [5]. The Hox code directly regulates the activation of Tbx5. This process involves two phases: first, Hox-regulated gastrulation movements establish broad limb, interlimb, and hindlimb domains in the LPM; second, the specific Hox code, involving both activating (e.g., Hox4/5) and repressing (e.g., Hox9) factors, directly regulates Tbx5 activation in the forelimb-forming LPM [5].
Table 2: Key Hox Genes and Their Roles in Chick Forelimb Positioning
| Hox Gene | Expression Domain | Functional Role | Experimental Evidence in Chick |
|---|---|---|---|
| HoxPG4/5 (e.g., Hoxa4, Hoxa5) | Anterior LPM, including neck region | Permissive: Demarcates territory with limb-forming potential; necessary but insufficient for forelimb formation. | Loss-of-function using dominant-negative constructs reduces/abolishes forelimb formation [5]. |
| HoxPG6/7 (e.g., Hoxa6, Hoxa7) | LPM at cervical-thoracic boundary | Instructive: Determines precise position of limb bud onset; sufficient to induce ectopic limb buds. | Gain-of-function (electroporation) in neck LPM induces ectopic Tbx5+ limb buds [5]. |
| HoxPG9 | Posterior to the limb field | Repressive: Suppresses limb formation in flank/trunk regions, limiting the limb field. | Not the primary focus of [5], but noted as part of the established forelimb-forming Hox code. |
Signaling Pathways and Gene Regulatory Networks in Limb Bud Development
Limb bud development is governed by a self-regulatory system of interlinked signaling feedback loops that coordinate patterning with growth [13]. The following diagram illustrates the core signaling centers and their key interactions.
Core Signaling Feedback Loop in Limb Development
Detailed Experimental Protocols
Protocol: Electroporation of Hox Genes into Chick Limb Bud Mesoderm
This protocol describes how to misexpress Hox genes or their dominant-negative variants in the lateral plate mesoderm of chick embryos to study their function in limb positioning [5].
I. Materials and Reagents
- Fertilized chick eggs (e.g., White Leghorn)
- DNA plasmid(s): Hoxa6, Hoxa7 (for gain-of-function), or dominant-negative Hoxa4, a5, a6, a7 (for loss-of-function), co-electroporated with an EGFP reporter plasmid.
- Fast Green dye (for visualizing injection)
- Electroporator and electrodes (e.g., 5mm platinum plate electrodes)
- Micropipette puller and injector
- Tyrode's solution or PBS
II. Procedure
- Incubation and Window Preparation: Incubate eggs at 38°C, ~70% humidity until embryos reach Hamburger-Hamilton (HH) stage 12. Create a window in the eggshell and visualize the embryo using Indian ink.
- DNA Preparation: Prepare a mixture of the Hox expression plasmid and EGFP plasmid at a final concentration of 1-2 µg/µL in water or buffer with 0.1% Fast Green.
- Microinjection: Using a finely pulled glass capillary, inject 0.1-0.5 µL of the DNA solution into the dorsal layer of the lateral plate mesoderm in the prospective forelimb field.
- Electroporation: Position platinum plate electrodes on either side of the embryo. Deliver 3-5 pulses of 15-20V, 50ms duration, with 100-500ms intervals.
- Post-Procedure Care: Seal the window with transparent tape and return the eggs to the incubator for 8-48 hours for analysis.
III. Analysis
- After 8-10 hours (to HH14), check for EGFP fluorescence to confirm successful transfection.
- Analyze phenotypes at later stages (HH20-35) via in situ hybridization for markers like Tbx5, Fgf10, and Shh, and assess skeletal morphology by Alcian Blue/Alizarin Red staining.
Protocol: Direct Reprogramming of Non-Limb Mesenchyme
This assay tests the sufficiency of factors to confer limb progenitor identity, relevant to understanding Hox-induced reprogramming [14].
I. Materials and Reagents
- Factors: Prdm16, Zbtb16, Lin28a, Lin41 (optional, for proliferation).
- 3D Culture Scaffold: Hyaluronic acid (HA)-based hydrogel or Matrigel.
- Limb Culture Media Supplements: CHIR99021 (Wnt agonist), Fgf8, Retinoic Acid (RA), SB431542 (TGF-β/BMP antagonist), Y-27632 (ROCK inhibitor).
II. Procedure
- Isolate non-limb fibroblasts (e.g., from flank or neck) from HH19-20 chick embryos or equivalent mouse embryos.
- Transfert fibroblasts with the combination of factors (Prdm16, Zbtb16, Lin28a).
- Culture the transfected cells in a 3D HA-gel scaffold with the supplemented limb culture media.
- Maintain culture for 8 days, monitoring cell proliferation and marker expression.
III. Analysis
- Assess the expression of limb progenitor markers (e.g., Prx1, Lhx2, Sall4) via immunostaining or RT-qPCR.
- Test differentiation potential by grafting reprogrammed cells into a host limb bud and analyzing contribution to cartilage (Sox9+) and tendon (Collagen I+) [14].
The Scientist's Toolkit: Research Reagent Solutions
Table 3: Essential Research Reagents for Chick Limb Development Studies
| Reagent / Tool | Function / Application | Example Use in Context |
|---|---|---|
| Dominant-Negative Hox Constructs | Loss-of-function studies; blocks DNA binding of endogenous Hox proteins. | Elucidating necessity of Hox4/5 in establishing permissive field for limb formation [5]. |
| Hox Expression Plasmids | Gain-of-function studies; misexpresses Hox genes in ectopic locations. | Testing sufficiency of Hox6/7 to instruct limb bud formation in neck LPM [5]. |
| EGFP Reporter Plasmid | Visualizes successfully transfected/electroporated cells. | Co-electroporation with Hox constructs to mark and trace manipulated cells [5]. |
| Limb Progenitor Reprogramming Factors (Prdm16, Zbtb16, Lin28a) | Converts non-limb fibroblasts into limb progenitor-like cells. | Studying the genetic basis of limb progenitor specification and potential [14]. |
| 3D Hydrogel Scaffold (HA-based) | Mimics the early limb bud extracellular matrix for cell culture. | Maintaining limb progenitor cells in a more authentic, proliferative state in vitro [14]. |
| Small Molecule Inhibitors/Agonists (CHIR, Y-27632, SB431542) | Controls specific signaling pathways in cell culture (Wnt, ROCK, TGF-β/BMP). | Creating in vitro culture conditions that sustain limb progenitor identity and potency [14]. |
The initiation of limb development represents a fundamental process in vertebrate embryogenesis, culminating in the formation of correctly positioned and type-specific appendages. A cornerstone of this process is the activation of the T-box transcription factor Tbx5, a master regulator gene whose expression in the lateral plate mesoderm (LPM) is both necessary and sufficient to trigger forelimb bud formation [15] [16] [17]. The precise spatial and temporal restriction of Tbx5 is critical, as it dictates the exact axial position at which the forelimb emerges. Recent research has elucidated that this restricted expression is directly governed by a combinatorial Hox code—a specific set of Hox genes expressed along the anterior-posterior axis of the embryo [9] [18] [19]. This application note provides a detailed experimental framework, grounded in key chick embryo electroporation studies, for investigating how Hox genes directly regulate the Tbx5 enhancer to initiate the limb program. We summarize pivotal quantitative data, provide step-by-step protocols for gain- and loss-of-function experiments, and visualize the core regulatory pathways, offering a practical toolkit for researchers exploring the molecular basis of limb positioning and its implications for evolutionary biology and congenital disorders.
Core Regulatory Logic: The Hox-to-Tbx5 Pathway
The molecular pathway from Hox gene expression to Tbx5 activation and subsequent limb outgrowth can be conceptualized in a two-step model. First, a permissive Hox environment (primarily involving HoxPG4 and HoxPG5 genes) establishes a territory in the LPM with the potential to form a limb [5]. Second, an instructive signal (governed by HoxPG6 and HoxPG7 genes) within this permissive territory actively initiates the limb program by directly activating Tbx5 transcription [5] [20]. This activation is counterbalanced by repressive Hox proteins (like Hoxc9) expressed in caudal LPM, which sharpen the posterior boundary of the Tbx5 expression domain [19]. The following diagram synthesizes this core regulatory logic, illustrating the key genes and their functional interactions in the prospective forelimb field.
Diagram 1: Core regulatory pathway governing Tbx5 activation. HoxPG4/5 genes provide a permissive background, while HoxPG6/7 provide an instructive signal for activation. Repressive Hox genes (e.g., Hoxc9) define the caudal boundary.
Key Experimental Data and Phenotypes
The model above is supported by robust gain-of-function (GOF) and loss-of-function (LOF) experiments in chick embryos. The table below synthesizes the quantitative findings from these studies, detailing the necessity and sufficiency of specific Hox paralogy groups (PG) in inducing Tbx5 expression and limb bud formation.
Table 1: Summary of Hox Gene Gain/Loss-of-Function Phenotypes in Chick Limb Initiation
| Hox Paralogy Group | Necessary for Endogenous Limb? (LOF Phenotype) | Sufficient for Ectopic Limb? (GOF Phenotype) | Effect on Tbx5 Expression | Key Molecular Readouts |
|---|---|---|---|---|
| HoxPG4/5 (e.g., Hoxa4, Hoxa5) | Necessary: DN* mutants downregulate Tbx5 [5] | Not Sufficient: Does not induce ectopic Tbx5 or buds in neck LPM [5] [20] | Downregulated in LOF [5] | Fgf10 downregulated in LOF [5] |
| HoxPG6/7 (e.g., Hoxa6, Hoxa7) | Necessary: DN mutants downregulate Tbx5 [5] | Sufficient: Induces ectopic Tbx5 and bud formation in neck LPM [5] [20] | Downregulated in LOF; Ectopically induced in GOF [5] [20] | Fgf10 induced in GOF; Ectopic buds lack Fgf8 [20] |
| HoxPG9/10 (e.g., Hoxc9) | Not directly tested via LOF in chick | N/A | Represses Tbx5 enhancer activity [19] | Confines Tbx5 expression to rostral LPM [18] [19] |
| *DN: Dominant-Negative |
Detailed Experimental Protocols
This section provides standardized protocols for the key experiments that established the regulatory relationship between Hox genes and Tbx5, utilizing the chick embryo as a model system.
Protocol 1: Gain-of-Function via Electroporation to Induce Ectopic Limb Buds
This protocol tests the sufficiency of Hox genes to initiate the limb program in non-limb forming territories, such as the neck LPM [5] [20].
- Plasmid Preparation: Subclone the full-length cDNA of the Hox gene of interest (e.g., Hoxa6 or Hoxa7) into the pCIG or RCAS expression vector. The pCIG vector contains an IRES-eGFP element, enabling co-expression of the Hox gene and a GFP reporter from a single transcript [9] [5].
- Embryo Preparation: Incubate fertilized chicken eggs until embryos reach Hamburger-Hamilton (HH) stage 10-12. Window the eggs under sterile conditions to access the embryo.
- DNA Injection and Electroporation:
- Inject the plasmid DNA (1 µg/µL in PBS with Fast Green tracer) into the lumen of the neural tube at the level of the neck (cervical) LPM.
- Position the embryo so that the positive electrode is on the same side as the injected DNA. Deliver five pulses of 50 ms each at 25V with a 100-150 ms interval using a square-wave electroporator.
- Incubation and Harvest: Reseal the windowed egg with tape and return it to the 37°C incubator for 22-48 hours, allowing the embryo to develop until HH14-18.
- Analysis:
- Screening: Identify successfully electroporated embryos by visualizing GFP fluorescence in the targeted LPM.
- Whole-mount In Situ Hybridization (WMISH): Fix embryos and analyze the expression of key markers: Tbx5 (initiation), Fgf10 (mesenchymal outgrowth signal), and Fgf8 (AER formation) [9] [20].
- Phenotypic Analysis: Observe the formation of ectopic limb buds anterior to the native forelimb location.
Protocol 2: Loss-of-Function using Dominant-Negative Electroporation
This protocol assesses the necessity of specific Hox genes for endogenous limb formation by disrupting their function in the prospective wing field [5].
- Construct Design: Generate a dominant-negative (DN) form of the target Hox gene (e.g., Hoxa4-dn). The DN construct lacks the C-terminal portion of the homeodomain, rendering it unable to bind DNA but retaining the ability to sequester essential co-factors, thereby disrupting the function of the endogenous wild-type protein [5].
- Embryo Preparation and Electroporation: Follow steps 2-4 from Protocol 1, but electroporate the DN-encoding plasmid into the LPM at the level of the prospective forelimb (rather than the neck).
- Analysis:
- After 8-10 hours of incubation (to HH14), screen for GFP-positive embryos.
- Perform WMISH for Tbx5. A successful knockdown will show a marked downregulation or absence of Tbx5 expression on the electroporated side compared to the control side.
- Analyze subsequent markers like Fgf10 and Fgf8 to confirm the failure to establish the FGF signaling feedback loop.
- Monitor the development of the wing bud; a severe reduction or absence is expected.
Protocol 3: Analyzing Direct Regulation using Enhancer Reporter Assays
This protocol tests the direct action of Hox proteins on the identified Tbx5 forelimb enhancer [9] [19].
- Reporter and Effector Constructs:
- Co-electroporation: Co-inject both the reporter and effector plasmids into the chick hindbrain or LPM and electroporate as in Protocol 1. The hindbrain provides a well-characterized system for testing enhancer function [9].
- Analysis:
- After 22 hours, harvest embryos and process for β-galactosidase activity to visualize reporter expression.
- Compare the expression pattern of the wild-type enhancer versus mutant versions when co-expressed with different Hox genes. Mutagenesis of specific Hbs should ablate Hox responsiveness [19].
The following workflow diagram encapsulates the key stages of Protocol 1 and 2.
Diagram 2: Generalized experimental workflow for chick in ovo electroporation studies.
The Scientist's Toolkit: Essential Research Reagents
The following table catalogues the critical reagents and their applications for studying Hox-Tbx5 interactions in limb initiation.
Table 2: Key Research Reagents for Hox/Tbx5 Limb Initiation Studies
| Reagent / Tool | Type / Species | Primary Function in Experiment | Key Application / Note |
|---|---|---|---|
| pCIG Vector | Plasmid | Bicistronic expression vector; expresses gene of interest and eGFP via IRES. | Visualizes electroporated cells; pCIG-Hoxa6/a7 for GOF [5]. |
| Dominant-Negative Hox (e.g., Hoxa4-dn) | Engineered DNA | Loss-of-function; disrupts activity of endogenous Hox proteins. | Used to test necessity in prospective wing field [5]. |
| Tbx5 forelimb enhancer (361 bp) | DNA Regulatory Element | Reporter construct; recapitulates forelimb-restricted Tbx5 expression. | Contains 6 Hox binding sites; used to test direct regulation [9] [19]. |
| Tbx5, Fgf10, Fgf8 probes | RNA (for WMISH) | Gene expression analysis; markers for limb initiation and outgrowth. | Readout for successful Hox manipulation [9] [5]. |
| Hoxc9 | cDNA / Protein | Repressor of Tbx5; defines caudal expression boundary. | Used to map repressive domains and mechanisms [19]. |
| Chick Embryo (HH10-12) | Animal Model | Electroporation recipient; ideal for rapid functional studies. | Model system of choice for cited gain/loss-of-function studies. |
The experimental data and protocols outlined herein establish a clear and direct regulatory pathway: specific combinations of Hox proteins, expressed in a colinear fashion along the anterior-posterior axis, bind to and directly control a key enhancer of the Tbx5 gene, thereby initiating the limb developmental program at a precise embryonic position [9] [18] [19]. The functional dissection of this pathway relies on the precise application of electroporation-based gain-of-function and loss-of-function strategies in the chick model.
For researchers, several critical considerations are paramount. First, the choice of Hox paralogy group is essential, as HoxPG6/7 genes carry instructive potential that HoxPG4/5 genes lack, despite both being necessary [5] [20]. Second, the specificity of dominant-negative constructs must be empirically validated to avoid misinterpretation of phenotypes [20]. Finally, while the Hox-Tbx5 axis initiates the limb program, successful outgrowth requires coordinated signaling with the overlying ectoderm, which may have its own region-specific competencies [20] [21]. Mastering these protocols provides a powerful means to not only understand fundamental embryological principles but also to model how alterations in this regulatory cascade contribute to evolutionary diversity and congenital limb defects.
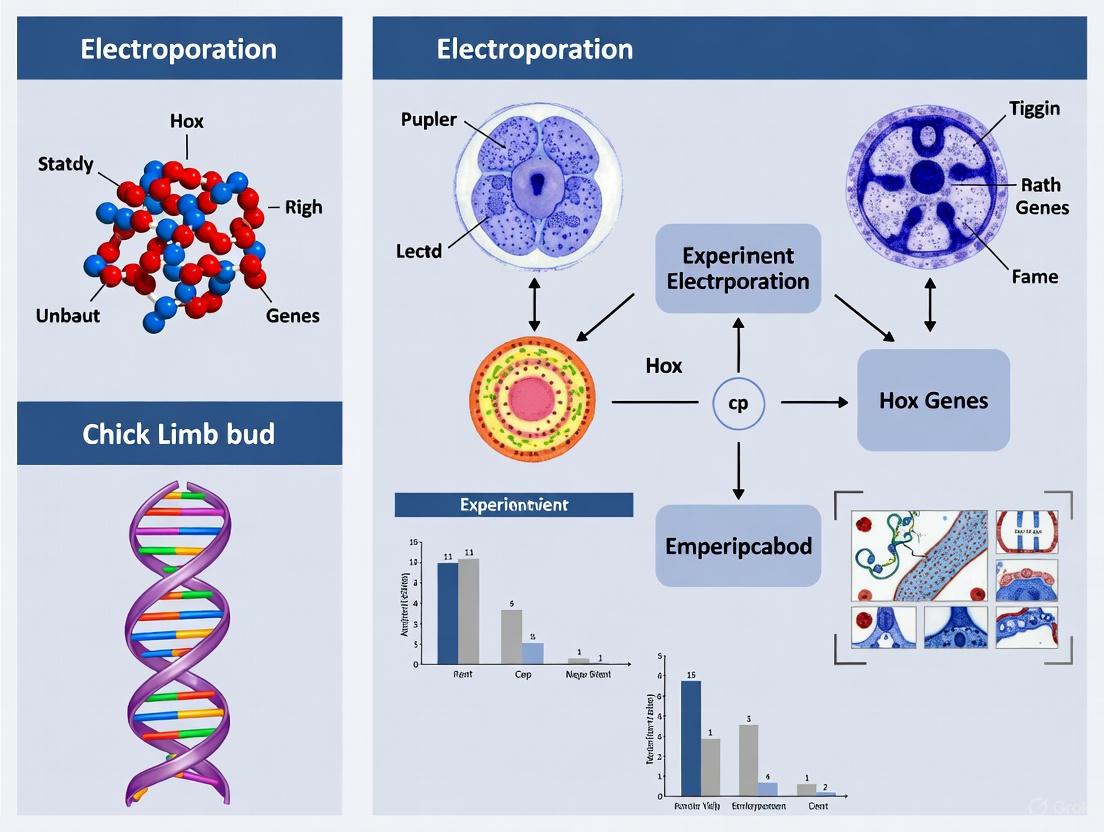
Precision Electroporation: Protocols for Hox Gene Manipulation in Chick Limb Buds
In the field of developmental biology, Hox genes encode a family of transcription factors that play a fundamental role in organizing the anterior-posterior (AP) axis and specifying positional identity in vertebrate embryos [5]. These genes exhibit both spatial and temporal collinearity, meaning they are activated in a sequence reflecting their chromosomal position and are expressed in domains whose anterior boundaries along the body axis correspond to their location within the clusters [22]. A significant body of research has established that Hox genes are crucial for the proper growth and skeletal patterning of tetrapod limbs, with genes from the HoxA and HoxD clusters being particularly important for both fore- and hindlimb development [23]. The precise positioning of limb buds along the AP axis is governed by a combinatorial Hox code in the lateral plate mesoderm (LPM) [5].
Two primary experimental approaches—gain-of-function (GOF) and loss-of-function (LOF)—have been instrumental in deciphering the roles of specific Hox genes in limb positioning and development. GOF experiments involve introducing and expressing a gene of interest in cells or tissues where it is not normally active, allowing researchers to assess its sufficiency to induce specific developmental programs. Conversely, LOF experiments aim to disrupt the function of an endogenous gene, revealing its necessity in a given process. In chick embryos, electroporation of the LPM has emerged as a powerful technique for implementing both strategies, enabling precise spatial and temporal control over gene manipulation [5]. This application note details the experimental design principles and protocols for choosing and implementing these complementary approaches within the context of Hox gene research in the chick limb bud.
Core Principles: GOF vs. LOF Approaches
Scientific Rationale and Application Contexts
Gain-of-Function (GOF) and Loss-of-Function (LOF) approaches answer fundamentally different biological questions. The choice between them depends on the specific hypothesis being tested.
- GOF is used to determine whether a gene is sufficient to initiate a specific developmental program or cell fate. For example, a recent study demonstrated that misexpression of Hox6/7 genes in the neck LPM of chick embryos is sufficient to reprogram this tissue and induce the formation of an ectopic limb bud, revealing an instructive role in forelimb positioning [5]. GOF can also be used to test functional equivalence between genes from different species or paralogous groups.
- LOF is used to determine whether a gene is necessary for a given developmental process. This was exemplified by experiments showing that suppression of Hoxa13 in the chick leads to hindgut and cloacal atresia, demonstrating its requirement for normal posterior development [24]. Similarly, knocking down HoxPG4/5 gene function resulted in changes in limb patterning [5].
Comparative Analysis of Methodological Features
The table below summarizes the key characteristics of each approach to guide experimental selection.
Table 1: Core Characteristics of GOF and LOF Approaches
| Feature | Gain-of-Function (GOF) | Loss-of-Function (LOF) |
|---|---|---|
| Core Question | Is gene X sufficient to induce phenotype Y? | Is gene X necessary for process Z? |
| Typical Outcome | Ectopic expression, homeotic transformation, or induction of specific markers. | Loss of structures, failure to express downstream markers, or patterning defects. |
| Key Strength | Can reveal instructive signals and bypass functional redundancy. | Directly tests the requirement of an endogenous gene. |
| Primary Limitation | May produce non-physiological effects; overexpression can be toxic. | Phenotypes may be masked by functional redundancy from paralogous genes. |
| Example Finding | Hox6/7 can reprogram neck LPM to form a limb bud [5]. | HOXA13 suppression causes hindgut atresia [24]. |
Essential Research Reagents and Tools
Successful execution of GOF and LOF experiments in the chick embryo requires a standardized toolkit. The following table catalogs key reagents and their functions.
Table 2: Essential Research Reagent Solutions for Chick Electroporation Studies
| Reagent / Tool | Function and Description | Example Application |
|---|---|---|
| Full-Length Hox cDNA | A plasmid containing the complete coding sequence of a Hox gene. Used for GOF studies to produce a functional transcription factor. | Misexpressing Hoxc8 to test its ability to alter limb positioning [5]. |
| Dominant-Negative (DN) Hox Construct | A plasmid expressing a truncated Hox protein that binds co-factors but not DNA, thereby inhibiting the function of endogenous wild-type proteins. A common LOF tool. | Electroporation of DN-Hoxa4, a5, a6, or a7 to study their requirement in the forelimb field [5]. |
| Fluorescent Reporter Plasmid (e.g., EGFP) | A plasmid expressing a fluorescent protein. Used to mark successfully electroporated cells, allowing for visualization of the transfection domain. | Co-electroporation with experimental plasmids to identify transfected regions in the LPM [5]. |
| Tbx5 In Situ Hybridization Probe | A labeled RNA probe to detect Tbx5 mRNA, a key marker for the initiation of the forelimb program in the LPM. | Assessing the expansion or reduction of the forelimb field after Hox manipulation [5]. |
| HH Staged Chick Embryos | Fertilized chicken eggs incubated to specific developmental stages according to the Hamburger-Hamilton (HH) staging system. | Using HH12 embryos for electroporation into the prospective wing field [5]. |
Detailed Experimental Protocols
Protocol 1: Gain-of-Function via Electroporation
This protocol describes how to misexpress a Hox gene in the chick LPM to test its sufficiency in altering limb positioning or identity.
- Plasmid Preparation: Maxi-prep a high-purity plasmid containing the full-length Hox cDNA of interest, driven by a constitutive promoter (e.g., CAGGS or CMV). A plasmid expressing a fluorescent reporter (e.g., EGFP) is essential and can be co-electroporated or included on the same vector via an IRES or 2A peptide.
- Egg Windowing and Staining: Incubate fertilized chick eggs to the desired stage (e.g., HH12 for targeting the forelimb field). Create a small window in the eggshell above the embryo. Visualize the embryo by injecting a small volume of India ink diluted in PBS beneath the embryo.
- DNA Injection: Using a finely pulled glass capillary needle and a microinjector, inject ~1 µL of the plasmid DNA mixture (at a concentration of 1-3 µg/µL) into the dorsal part of the lateral plate mesoderm at the desired axial level.
- Electroporation: Position platinum plate electrodes on either side of the embryo. Apply 5 pulses of 20V for 50 ms duration with 100 ms intervals using a square wave electroporator. The polarity should direct the DNA toward the targeted LPM.
- Post-Procedure Care: Seal the window in the eggshell with transparent tape and return the eggs to the incubator for the desired period, typically 8-48 hours, to allow for gene expression and phenotypic analysis.
- Analysis: Harvest the embryos and image the fluorescence to confirm the electroporation domain. Analyze phenotypes using whole-mount in situ hybridization (WISH) for key markers like Tbx5 (forelimb) or Hoxd13 (distal limb patterning) [23] [5], and/or perform immunohistochemistry.
Protocol 2: Loss-of-Function via Dominant-Negative Electroporation
This protocol uses a dominant-negative (DN) strategy to inhibit the function of a specific Hox gene or paralog group.
- DN Construct Design: A dominant-negative Hox construct is generated by deleting the C-terminal portion of the homeodomain. This renders the protein incapable of binding DNA while retaining its ability to dimerize with transcriptional co-factors, thereby sequestering them and blocking wild-type function [5].
- Electroporation: The steps for egg preparation, DNA injection, and electroporation are identical to the GOF protocol (Steps 2-5). The DN construct, along with a fluorescent reporter, is delivered into the limb-forming LPM.
- Phenotypic Assessment: After 8-10 hours of incubation (to HH14), initial validation of transfection is confirmed by EGFP expression. A key early readout is the downregulation of Tbx5 expression in the forelimb field, indicating a failure to initiate the limb program [5]. Later harvests allow for the assessment of morphological defects in limb patterning and skeletal elements.
Diagram 1: Experimental Selection Workflow
Data Analysis and Interpretation
Key Readouts and Phenotypic Scoring
The analysis of GOF and LOF experiments relies on a combination of molecular and morphological readouts.
- Molecular Markers: The most immediate readout is the expression of key marker genes. In the context of limb positioning, Tbx5 is the primary indicator of forelimb field specification [5]. For later limb patterning, the expression of 5' HoxD genes (e.g., Hoxd11-d13) is critical for autopod (hand/foot) development and can be visualized by WISH [23].
- Morphological Phenotypes: Ultimately, changes in marker expression must be correlated with anatomical outcomes. This includes the formation of ectopic limb structures in GOF experiments, or the reduction, loss, or malformation of the native limb in LOF experiments. Skeletal preparations (e.g., Alcian Blue and Alizarin Red staining) are used to analyze the bone and cartilage patterns in developed limbs.
Navigating Complexity: Interpreting Results
Interpreting the outcomes of these experiments requires an understanding of the inherent complexity of Hox gene function.
- Functional Redundancy: A common challenge in LOF studies is the lack of a strong phenotype due to redundancy between Hox paralogs (genes with the same number in different clusters, e.g., Hoxa4 and Hoxb4). This may require simultaneous knockdown of multiple paralogs to reveal a gene's function.
- Combinatorial Code: Hox genes do not act in isolation. The positioning of the forelimb, for instance, depends on a permissive signal from HoxPG4/5 and an instructive signal from HoxPG6/7 [5]. Therefore, the phenotype from manipulating one gene must be interpreted within this broader regulatory context.
- Temporal Considerations: The timing of electroporation is critical, as Hox genes act at different phases of limb field establishment and outgrowth. Electroporating too early or too late may miss the relevant developmental window.
Diagram 2: Hox Gene Signaling Pathway Example
The following table provides a final, consolidated comparison to guide researchers in selecting and applying GOF and LOF approaches effectively in their studies on Hox genes and limb development.
Table 3: Summary Comparison of GOF and LOF Applications
| Aspect | Gain-of-Function (GOF) | Loss-of-Function (LOF) |
|---|---|---|
| Hypothesis | Tests sufficiency of a gene to instruct a cell fate or developmental program. | Tests necessity of a gene for a specific developmental process. |
| Ideal Use Case | Identifying instructive signals; determining if a gene can reprogram cell fate (e.g., Hox6/7 inducing limb in neck LPM). | Assessing the requirement of a gene in its native context; defining the elements of a Hox code. |
| Key Readout | Ectopic expression of markers (e.g., Tbx5); formation of ectopic structures. | Loss or reduction of marker expression; truncation or patterning defects in native structures. |
| Data Interpretation | Can reveal master regulatory potential. Results may be confounded by non-physiological expression levels. | Provides clear evidence for gene function. Null results may be due to paralog redundancy. |
| Complementary Nature | GOF reveals potential; LOF reveals requirement. Used together, they provide a comprehensive understanding of gene function within the combinatorial Hox code governing limb positioning and development. |
In the study of vertebrate limb development, the electroporation of Hox genes in the chick embryo has emerged as a powerful technique for unraveling the molecular mechanisms controlling limb positioning and patterning. Hox genes encode a family of transcription factors that confer positional identity along the anterior-posterior axis, with specific paralog groups determining the precise locations where limbs emerge [5]. The ability to manipulate Hox gene expression through vector-based approaches enables researchers to investigate how these genes control target gene expression, cell ingression, and ultimately, the termination of body elongation and positioning of appendages [25] [22]. This application note provides detailed methodologies for constructing both full-length and dominant-negative Hox vectors, with specific application to chick limb bud electroporation experiments, offering researchers a comprehensive toolkit for probing the functional roles of Hox genes in vertebrate development.
Hox Gene Function and Experimental Rationale
The Role of Hox Genes in Vertebrate Development
Hox genes exhibit remarkable spatial and temporal collinearity—they are activated sequentially along the chromosome and expressed in domains whose anterior boundaries reflect their position in the clusters [25]. In chicken embryos, 39 Hox genes are organized in four clusters containing up to thirteen paralogous genes each [25] [22]. These genes function as key regulators of axial patterning, with posterior Hox genes (paralogs 9-13) playing a crucial role in controlling body elongation through repression of Wnt activity, leading to graded repression of Brachyury/T transcription factor and subsequent reduction of mesoderm ingression [25] [22].
In limb development, Hox genes operate through sophisticated combinatorial codes. Research demonstrates that Hox4/5 genes provide permissive signals for forelimb formation throughout the neck region, while instructive cues from Hox6/7 in the lateral plate mesoderm determine the final forelimb position [5]. This precise regulatory mechanism explains why limbs consistently emerge at specific axial locations despite variations in vertebral numbers across species.
Rationale for Hox Vector Constructs
The strategic design of Hox expression constructs enables distinct functional investigations:
Full-length constructs facilitate gain-of-function studies, allowing researchers to determine the sufficiency of specific Hox genes to induce phenotypic changes or transcriptional programs when misexpressed.
Dominant-negative constructs enable loss-of-function investigations by interfering with endogenous Hox protein function, providing crucial evidence for necessity even when complete genetic knockouts are impractical.
The chick embryo system offers particular advantages for these studies, including accessibility for manipulation and well-characterized developmental timelines, making it an ideal model for Hox gene functional analyses.
Vector Design Strategies
Full-Length Hox Construct Design
Full-length Hox constructs should contain the complete coding sequence to recapitulate all functional domains of the native protein. The design must account for the conserved domain architecture of Hox proteins, which includes the DNA-binding homeodomain and transcriptional regulatory regions.
Key Components:
- Coding Sequence: Amplify the complete open reading frame from cDNA sources, ensuring inclusion of all functional domains.
- Promoter Selection: Use strong, ubiquitous promoters (e.g., CAGGS, CMV) for widespread expression or tissue-specific promoters for targeted manipulation.
- Tagging Strategy: Incorporate epitope tags (e.g., HA, FLAG, GFP) at either N- or C-termini for detection and localization studies.
- Regulatory Elements: Include WPRE (Woodchuck Hepatitis Virus Posttranscriptional Regulatory Element) for enhanced RNA stability and expression.
Dominant-Negative Hox Construct Design
Dominant-negative Hox constructs are engineered to lack DNA-binding capability while retaining protein-protein interaction domains, enabling them to sequester co-factors and block endogenous Hox function [5]. This approach is particularly valuable for interrogating the functional requirements of specific Hox genes in a temporally and spatially controlled manner.
Engineering Strategy:
- Homeodomain Truncation: Delete or disrupt the C-terminal portion of the homeodomain to abolish DNA binding while preserving co-factor interactions [5].
- Dimerization Domains: Retain intact protein-protein interaction domains to facilitate formation of non-functional complexes with endogenous partners.
- Nuclear Localization: Ensure preservation of nuclear localization signals to target the construct to the appropriate cellular compartment.
Table 1: Comparison of Hox Vector Construct Types
| Feature | Full-Length Construct | Dominant-Negative Construct |
|---|---|---|
| DNA-Binding Capacity | Fully functional | Disrupted/eliminated |
| Co-factor Interaction | Intact | Retained |
| Functional Outcome | Gain-of-function | Loss-of-function |
| Primary Application | Sufficiency testing | Necessity testing |
| Typical Promoter | Ubiquitous or tissue-specific | Ubiquitous or tissue-specific |
| Common Tags | GFP, HA, FLAG | GFP, HA, FLAG |
Detailed Experimental Protocols
Protocol 1: Molecular Cloning of Hox Constructs
Materials:
- cDNA source (chick cDNA library, RT-PCR products)
- Expression vector backbone (e.g., pCAGGS, pMES)
- Restriction enzymes or recombination cloning system
- Competent E. coli cells
- Antibiotics for selection
- Plasmid purification kits
Step-by-Step Procedure:
Amplify Hox Coding Sequence
- Design gene-specific primers with appropriate restriction sites or recombination sites
- Perform high-fidelity PCR with proofreading polymerase
- Verify amplicon size by agarose gel electrophoresis
Vector Preparation
- Digest destination vector with appropriate restriction enzymes
- Alternatively, prepare vector for recombination cloning
- Purify linearized vector fragment
Ligation/Recombination
- Mix insert and vector at optimal molar ratios (typically 3:1 to 5:1)
- Perform ligation or recombination reaction according to manufacturer's protocol
- Incubate at appropriate temperature and duration
Transformation and Selection
- Transform competent E. coli cells with the reaction mixture
- Plate on selective media containing appropriate antibiotics
- Incubate overnight at 37°C
Screening and Validation
- Pick individual colonies for culture and plasmid purification
- Verify constructs by restriction digest and analytical gel electrophoresis
- Confirm sequence fidelity by Sanger sequencing
Protocol 2: Chick Embryo Electroporation of Hox Constructs
Materials:
- Fertilized chick eggs (Hamburger-Hamilton stage 12-15 for limb studies)
- Electroporation apparatus (square wave electroporator, electrodes)
- Injection needles (borosilicate glass)
- Microinjector system
- Plasmid DNA purified with endotoxin-free kits
- Fast Green dye (0.1% in PBS) for visualization
Step-by-Step Procedure:
Embryo Preparation
- Window fertilized chick eggs incubated to desired stage (HH12-15)
- Visualize embryos under dissecting microscope
- Remove extraembryonic membranes if necessary
DNA Preparation
- Dilute purified plasmid DNA to 1-2 μg/μL in TE buffer or PBS
- Add Fast Green dye to final concentration of 0.1% for visualization
- Centrifuge briefly to remove particulates
DNA Injection
- Load DNA solution into injection needle
- Position needle in target region (lateral plate mesoderm for limb studies)
- Inject approximately 0.1-0.5 μL per embryo using pneumatic picopump
Electroporation
- Position electrodes flanking the target tissue
- Apply 5 pulses of 20V, 50ms duration, with 100ms intervals
- Ensure current flows through DNA-loaded region
Post-Electroporation Processing
- Add antibiotics (penicillin/streptomycin) to prevent infection
- Seal window with transparent tape
- Return eggs to incubator for desired development period
Analysis
- Harvest embryos at appropriate time points
- Process for in situ hybridization, immunohistochemistry, or other analyses
Applications in Chick Limb Bud Research
Investigating Limb Positioning Mechanisms
The electroporation of Hox constructs in chick limb buds has been instrumental in deciphering the molecular logic of limb positioning. Research has established that Hox4/5 genes create a permissive field for limb formation, while Hox6/7 provide instructive signals that determine the precise position of forelimb emergence [5]. By electroporating dominant-negative Hox constructs targeting Hoxa4, a5, a6, or a7 into the lateral plate mesoderm, researchers have demonstrated that these genes are necessary for proper Tbx5 activation and subsequent forelimb formation [5].
Analyzing Signaling Pathway Interactions
Hox genes function within complex regulatory networks, interacting with key signaling pathways including Wnt, FGF, and retinoic acid (RA) signaling [25] [22]. The electroporation of Hox constructs enables researchers to map these interactions by assessing how Hox misexpression alters pathway activity and downstream gene expression. For example, posterior Hox genes have been shown to repress Wnt activity with increasing strength, leading to graded repression of Brachyury/T and subsequent slowing of axis elongation [25].
Research Reagent Solutions
Table 2: Essential Materials for Hox Electroporation Experiments
| Reagent/Resource | Function/Application | Specifications |
|---|---|---|
| pCAGGS Expression Vector | High-level transgene expression in chick embryos | Contains CAGGS promoter (CMV enhancer + chicken β-actin promoter) |
| Dominant-Negative Hox Constructs | Loss-of-function studies | Truncated homeodomain, intact protein interaction motifs [5] |
| Fast Green FCF Dye | Visualization during microinjection | 0.1% in PBS, non-toxic to embryos |
| Electroporation Electrodes | Directional DNA delivery | Platinum or gold, various configurations for specific tissues |
| Hamburger-Hamilton Stage Series | Embryo staging and timing | Detailed morphological criteria for precise developmental staging |
| Tbx5 Expression Markers | Readout of limb field specification | Early marker of forelimb formation [5] |
Visualization of Experimental Workflows
Diagram 1: Hox Construct Electroporation Workflow
Diagram 2: Hox Signaling in Limb Positioning
Troubleshooting and Optimization
Common Technical Challenges
Low Transfection Efficiency
- Optimize DNA concentration (typically 1-2 μg/μL)
- Verify electrode positioning and orientation
- Test multiple voltage parameters (15-25V range)
Embryo Viability Issues
- Ensure proper temperature maintenance during procedures
- Use minimal anesthesia time
- Implement strict sterile technique
Variable Expression Patterns
- Standardize injection volume and placement
- Use consistent DNA preparation methods
- Confirm plasmid quality and concentration
Validation Methods
- Epitope Tag Detection: Immunostaining for HA, FLAG, or GFP tags to confirm expression
- In situ Hybridization: Monitor endogenous target gene expression changes
- Western Blotting: Verify protein expression levels and sizes
- Phenotypic Analysis: Assess morphological changes in limb development
The strategic application of full-length and dominant-negative Hox constructs in chick limb bud electroporation experiments provides powerful insights into the mechanisms governing vertebrate limb patterning and positioning. The methodologies outlined in this application note offer researchers robust, reproducible techniques for manipulating Hox gene function, enabling precise dissection of their roles in embryonic development. As research advances, these approaches continue to reveal the sophisticated regulatory networks that orchestrate the formation of complex anatomical structures, with implications for evolutionary biology, regenerative medicine, and developmental genetics.
This application note provides a detailed methodology for the electroporation of the lateral plate mesoderm (LPM) in HH12 (Hamburger-Hamilton stage 12) chick embryos. This technique is a cornerstone for investigating the Hox gene code that governs limb positioning and patterning [5]. The targeted electroporation of constructs—such as dominant-negative Hox genes, gain-of-function variants, or fluorescent reporters—into the forelimb-forming region of the LPM allows for the functional dissection of gene roles in conferring positional identity to future limb-forming cells without concurrently altering vertebral identity [5]. The protocol below is optimized for precision and efficiency in this specific developmental context.
The experimental workflow for LPM electroporation, from embryo preparation to analysis, is summarized in the following diagram.
Detailed Step-by-Step Protocol
A. Embryo Preparation (Day 1)
- Incubation: Incubate fertilized chick eggs in a humidified incubator at 38°C for approximately 45-48 hours to reach the desired HH12 stage [5].
- Windowing: Carefully tap a small hole into the blunt end of the egg to create an air sac. Using fine scissors, cut a window of approximately 1.5 cm x 1.5 cm in the eggshell above the embryo.
- Visualization: Dilute Indian ink 1:10 in Howard Ringer's solution or phosphate-buffered saline (PBS). Using a sharp glass capillary needle or micropipette, inject a small volume of diluted ink beneath the embryo to create a dark background, enhancing contrast for clear visualization.
- Verification: Confirm the embryo is at HH12 under a dissection microscope. Key characteristics include:
- Formation of 13 somite pairs.
- The head turning to the right.
- Well-developed heart loops.
B. Electroporation Setup
- DNA Preparation: Prepare a DNA solution containing your plasmid of interest (e.g., pCAGGS-EGFP for visualization, or Hoxa4/5/6/7 constructs for functional studies [5]) at a concentration of 1-3 µg/µl in PBS with a fast-green dye (0.1-0.5%) for visual tracking during injection.
- Microelectrode Preparation: Pull borosilicate glass capillaries (1.0 mm outer diameter) to a fine tip (5-10 µm) using a micropipette puller.
- Electrode Positioning: Fill the microelectrode with the DNA solution and mount it on a micromanipulator. Position the anode (positive electrode) over the dorsal layer of the LPM in the prospective wing field of the embryo [5]. Position the cathode (negative electrode) on the opposite side of the embryo.
C. Electroporation Execution
- DNA Injection: Using a picopump or air pressure system, inject a small bolus of the DNA solution (typically 0.1-0.5 µl) into the target region of the LPM. The fast-green dye will allow you to confirm the precise location of the injection.
- Pulse Application: Immediately after injection, deliver electrical pulses. The exact parameters are critical and should be optimized. The table below summarizes parameters from published research and provides a starting point for optimization [5] [26].
- Post-Pulse Care: Gently withdraw the electrode. Add a few drops of antibiotic-containing PBS (1x Penicillin-Streptomycin) to the egg to prevent contamination. Seal the window in the eggshell with transparent tape and return the egg to the 38°C incubator for further development.
D. Post-Electroporation Analysis
After an incubation period of 8-10 hours (to HH14 for initial expression checks) or longer (e.g., 48-72 hours for phenotypic analysis), re-open the egg and harvest the embryo [5].
- Fixation: Fix embryos in 4% paraformaldehyde (PFA) for 2-4 hours at 4°C.
- Imaging: Analyze electroporation efficiency and localization using fluorescence microscopy for EGFP or other fluorescent reporters.
- In Situ Hybridization/Immunohistochemistry: Perform to assess changes in gene expression (e.g.,
Tbx5) resulting from your experimental manipulation [5].
Key Experimental Parameters & Optimization
Electroporation efficiency and cell viability are a complex function of multiple electrical parameters. The following table consolidates key quantitative data from the literature to guide protocol development [5] [26].
Table 1: Electroporation Parameters for LPM Targeting
| Parameter | Example from Literature | Optimization Range | Notes & Rationale |
|---|---|---|---|
| Stage | HH12 [5] | HH10-HH14 | HH12 is specified as the origin of wing mesoderm. |
| Field Strength | Not explicitly stated | 10 - 50 V/mm | Must exceed the electropermeabilization threshold of the cell membrane [26]. |
| Pulse Length | Not explicitly stated | 1 - 50 ms | Millisecond pulses are common for GET; length influences molecular uptake and viability [27] [26]. |
| Number of Pulses | Not explicitly stated | 3 - 5 | Multiple pulses can increase uptake but reduce viability; a balance is required [27]. |
| Waveform | Not explicitly stated | Square-wave, Exponential decay | Exponential decay pulses may exceed square-wave efficiency in some contexts [26]. |
| DNA Concentration | 1-3 µg/µl (implied) [5] | 0.5 - 5 µg/µl | Higher concentration increases uptake but can be toxic. Fast-green dye at 0.1-0.5% is used for visualization [5]. |
| Viability Assessment | 24+ hours post-electroporation [5] | 8-48 hours | Assessed by continued development and DAPI staining versus control samples [26]. |
| Efficiency Readout | EGFP expression after 8-10h [5] | 8-72 hours | Initial expression detectable at HH14. Confirmed via fluorescence microscopy [5]. |
The Scientist's Toolkit: Essential Research Reagents
Table 2: Key Reagent Solutions for LPM Electroporation
| Item | Function/Application in Protocol |
|---|---|
| pCAGGS-EGFP Plasmid | Ubiquitous mammalian expression plasmid driving EGFP. Serves as a vital reporter for visualizing electroporated cells and assessing targeting efficiency [5]. |
| Dominant-Negative Hox Constructs | Engineered Hox genes (e.g., Hoxa4, a5, a6, a7) lacking DNA-binding domains. Used in loss-of-function studies to compete with and suppress endogenous Hox gene function in the LPM [5]. |
| Fast-Green Dye | A visible dye mixed with the DNA solution. Allows for real-time visual confirmation of the injection site within the LPM before pulse delivery [5]. |
| Hyaluronic Acid (HA) Hydrogels | A major component of the limb bud extracellular matrix. Used in 3D culture systems to maintain limb progenitor cells in a more authentic state after electroporation [14]. |
| FUCCI Cell Cycle Reporter | A fluorescent ubiquitination-based cell cycle indicator. Used in live-cell imaging to track the effects of electroporation and PEFs on cell cycle progression in real-time [26]. |
Critical Pathway & Mechanistic Insight
Understanding the biological context of Hox genes in LPM patterning is crucial for designing electroporation experiments. The following diagram illustrates the key regulatory interactions that this protocol enables researchers to manipulate and study.
The diagram shows that HoxPG4/5 genes provide a permissive signal, demarcating a territory in the neck region where a limb can form [5]. Within this permissive field, HoxPG6/7 genes provide an instructive signal that is sufficient to reprogram neck LPM to activate the key limb initiation gene Tbx5 and induce ectopic limb bud formation [5]. Successful electroporation of constructs that manipulate these Hox genes allows for direct testing of this model.
The chicken embryo has long been a cornerstone model in developmental biology due to its accessibility for surgical manipulation and observation. The recent advent of reliable transgenic technologies has dramatically enhanced its utility, creating powerful tools for visualizing dynamic cellular behaviors in living embryos. These tools are particularly transformative for studying complex processes like vertebrate limb development, where understanding cell lineage and morphogenesis requires observing cells over time. By enabling high-resolution, live imaging of specific cell populations, transgenic chick lines bridge a critical gap between classical embryology and modern cell biology, allowing researchers to move from static snapshots to dynamic movies of development.
Available Transgenic Chick Lines and Their Applications
Reporter Lines for Limb Bud Compartments
A significant advancement is the generation of a dual-reporter transgenic chicken line specifically designed for limb bud studies. This line uses the Tol2 transposon system for genomic integration and is created via cultured Primordial Germ Cells (PGCs), a method that has made generating genetically modified chicken lines relatively feasible [28].
The table below summarizes the key features of this transgenic line:
- Table 1: Dual-Fluorescence Reporter Chick Line for Limb Bud Analysis
| Feature | Limb Mesenchyme Reporter | Apical Ectodermal Ridge (AER) Reporter |
|---|---|---|
| Promoter | Mouse Prrx1 limb mesenchymal promoter [28] | Mouse Msx2 AER-specific promoter [28] |
| Fluorescent Reporter | ZsGreen [28] | DsRed [28] |
| Labeled Cell Types | Limb bud mesenchyme (gives rise to cartilage, bones, connective tissues) [28] | Apical Ectodermal Ridge cells [28] |
| Primary Application | Visualizing dynamics and differentiation states of limb mesenchymal cells in living embryos [28] | Visualizing the dynamics and role of the AER, a key signaling center [28] |
| Key Utility | Facilitates detailed characterization of limb mesenchyme and AER cells during development [28] | A powerful tool for advancing the study of vertebrate limb development [28] |
Ubiquitous Nuclear Labeling for Cell Tracking
Beyond tissue-specific lines, transgenic avians with ubiquitous fluorescent expression are invaluable for large-scale cell tracking. A comparable transgenic quail model, Tg(PGK1:H2B-chFP), ubiquitously expresses a nuclear-localized monomer cherry fluorescent protein (chFP) under the control of the human PGK1 promoter [29]. This model offers several key advantages:
- Nuclear Localization: The H2B-chFP fusion protein localizes to the nucleus, simplifying the identification and automated tracking of individual cells during complex morphogenetic events [29].
- Ubiquitous Expression: The reporter is expressed in all embryonic cells from stage X through later stages (e.g., stage 11), allowing for the visualization of any tissue or cell population [29].
- Quantitative Analysis: This system is ideal for 4D (xyzt) live imaging and quantitative analysis of cell behaviors, such as those during gastrulation, head fold formation, and dorsal aortae formation [29].
Detailed Experimental Protocols
Protocol: Generating a Transgenic Reporter Chick Line via PGCs
The following protocol outlines the key steps for creating a novel transgenic chick line, as used for the limb bud reporter line [28].
- Step 1: Vector Construction. Clone the tissue-specific promoters (e.g., the 2.4-kb mouse Prrx1 promoter and the Msx2 proximal promoter) upstream of their respective fluorescent protein genes (e.g., ZsGreen, DsRed) within a plasmid containing Tol2 transposable elements [28].
- Step 2: Transfection and Selection. Transfert the constructed plasmid into cultured chicken Primordial Germ Cells (PGCs). Use a clonal culture system to select PGCs that have successfully integrated the transgene [28].
- Step 3: Embryo Transplantation. Transplant the transgenic PGCs into the vasculature of recipient embryos (e.g., stage 14-16 JuliaLite strain). These PGCs will migrate to and colonize the genital ridges [28].
- Step 4: Breeding and Line Establishment. Raise the recipient embryos (chimeras) to sexual maturity. Cross the male chimeras harboring the transgenic PGCs with wild-type females to obtain F1 offspring. Screen the hatched F1 chicks for germline transmission using fluorescence in the chorioallantoic membrane (CAM) or other tissues. Establish a stable transgenic line from a positive founder [28].
Protocol: Live Imaging of Transgenic Chick Embryos
This protocol describes the procedure for dynamic imaging of fluorescent transgenic chick or quail embryos, adapted from established methods [29].
- Step 1: Embryo Preparation. Incubate fertilized transgenic eggs to the desired stage (e.g., HH stage 10-12 for early limb bud formation). Open a small window in the eggshell under sterile conditions using sharp forceis and scissors.
- Step 2: Ex Ovo Culture (Optional but Recommended). For extended imaging sessions, transfer the embryo to an ex ovo culture system, such as a Petri dish or a culture ring apparatus. This provides better optical access and stability for the microscope stage.
- Step 3: Microscope Setup. Use a confocal or two-photon microscope equipped with an environmental chamber to maintain the embryo at 38°C and high humidity throughout the imaging process. This is critical for normal development.
- Step 4: Image Acquisition. Select appropriate laser lines and filters for the fluorescent proteins used (e.g., 488 nm for ZsGreen, 561 nm for DsRed and mCherry). Acquire z-stacks at regular time intervals (e.g., every 5-15 minutes) over the desired period (e.g., 12-48 hours) to generate a 4D dataset (x, y, z, time).
- Step 5: Data Analysis. Use image analysis software (e.g., Imaris, Fiji/ImageJ) to process the 4D data. Perform tasks such as maximum intensity projection, cell segmentation, and automated cell tracking to quantify cell behaviors like migration speed, division patterns, and tissue deformation.
Protocol: Electroporation of Hox Genes in Limb Bud Mesenchyme
This protocol can be used to manipulate gene expression, such as Hox genes, in the limb bud of transgenic chick embryos, combining the power of transgenics with functional studies [5].
- Step 1: Plasmid DNA Preparation. Prepare a plasmid expressing your gene of interest (e.g., a Hox gene like Hoxa7 or a dominant-negative version). Use a vector with a strong promoter like CAG. It is standard practice to co-electroporate a plasmid expressing GFP (or a different fluorophore than your transgenic background) as a tracer. Purify the DNA and resuspend it in TE buffer or PBS at a high concentration (1-3 µg/µL). Add a fast-green dye to the solution for visualization during injection [5].
- Step 2: Embryo Preparation. Incubate transgenic reporter eggs to Hamburger-Hamilton (HH) stages 12-14, when the limb bud is forming. Open a small window in the eggshell, taking care not to rupture the underlying membranes.
- Step 3: DNA Injection. Using a finely pulled glass capillary needle and a microinjector, inject ~0.5 µL of the DNA solution into the dorsal layer of the lateral plate mesoderm (LPM) in the forelimb region [5].
- Step 4: Electroporation. Immediately after injection, position platinum plate electrodes on either side of the limb bud. Deliver a series of square-wave electrical pulses (e.g., 5 pulses of 50 ms duration at 25-30V) to drive the negatively charged DNA into the cells on the anode-facing side [5].
- Step 5: Incubation and Analysis. Reseal the egg window with tape and re-incubate the embryo for 8-48 hours. Analyze the embryos by fluorescence microscopy to confirm successful electroporation (GFP+) and to assess the effect of Hox misexpression on the transgenic reporter expression and limb bud morphology (e.g., by examining changes in Tbx5 expression or the induction of ectopic limb buds) [5].
The Scientist's Toolkit: Essential Research Reagents
- Table 2: Key Research Reagent Solutions for Transgenic Chick Work
| Reagent / Material | Function and Application | Specific Examples / Notes |
|---|---|---|
| Tol2 Transposon System | A highly active transposon system used for stable genomic integration of transgenes in PGCs [28]. | Critical for generating the Prrx1-ZsG/Msx2-DsR chick line; provides efficient and reliable transgenesis [28]. |
| Primordial Germ Cells (PGCs) | The embryonic precursors to gametes. Can be cultured in vitro, genetically modified, and transplanted to generate transgenic offspring [28]. | A clonal culture system of PGCs was used to generate the transgenic limb bud reporter line [28]. |
| Lentiviral Vectors | A common method for delivering transgenes into the genome of avian germ cells, useful for creating ubiquitous expression lines [29]. | Used to generate the ubiquitous Tg(PGK1:H2B-chFP) quail model [29]. |
| Tissue-Specific Promoters | DNA sequences that drive gene expression in a particular cell type or tissue, enabling targeted labeling. | Mouse Prrx1 promoter (limb mesenchyme) and Msx2 promoter (AER) are active in the same cell types in chick [28]. |
| Plasmid Vectors for Electroporation | Engineered DNA constructs used for transient gene expression or mis-expression studies in specific tissues. | Used for Hox gene gain-of-function (full-length cDNA) and loss-of-function (dominant-negative) studies in the limb bud [5]. |
The integration of transgenic chick lines with techniques like electroporation and live imaging creates a powerful, multi-faceted platform for developmental biology research. The ability to track specific cell lineages in real-time, while simultaneously manipulating gene function, allows researchers to move beyond correlation and directly test hypotheses of cellular behavior and genetic regulation. These advanced tools, as exemplified by their application in limb bud and Hox gene research, provide an unprecedented window into the dynamic processes that build a vertebrate embryo.
Solving Experimental Challenges: Ensuring Specificity and Reproducibility
A fundamental challenge in developmental biology is accurately interpreting mutant phenotypes, particularly when distinguishing between a true homeotic shift in organ position and a defect in the organ's patterning or size. This distinction is critical in the context of limb development, where Hox gene function is essential for assigning positional identity along the anterior-posterior axis. Research in chick embryos demonstrates that the position of the forelimb is governed by a combinatorial Hox code in the lateral plate mesoderm (LPM), involving both permissive (Hox4/5) and instructive (Hox6/7) signals [5]. Misinterpreting a patterning defect for a positional shift can lead to incorrect conclusions about gene function. These Application Notes provide a structured framework and detailed protocols to help researchers make this crucial distinction, with a specific focus on electroporation-based experiments in the chick limb bud.
Defining the Phenotypic Spectrum
The table below outlines the core characteristics that differentiate a true limb shift from a patterning or growth defect.
Table 1: Key criteria for distinguishing limb positioning defects from patterning defects.
| Criterion | True Limb Shift (Homeosis) | Patterning or Growth Defect |
|---|---|---|
| Axial Position | Altered relative to somites/vertebrae; ectopic limb formation possible [5]. | Unchanged relative to somites/vertebrae. |
| Skeletal Pattern | Pattern is appropriate for the new position (e.g., a forelimb structure in a neck location) [5]. | Pattern is disrupted (e.g., loss/gain of elements, fused bones, truncations). |
| Shoulder Girdle | Appropriately patterned for the limb type, but in a new location. | Often malformed (e.g., "shrugged" or reduced scapula), making the limb appear shifted [5]. |
| Molecular Domains | Underlying Hox code and marker expression (e.g., Tbx5) are re-specified in the LPM [5]. | Hox code is intact, but downstream effectors of growth/patterning (e.g., SHH, FGFs) are disrupted. |
| Genetic Requirement | Requires alteration of Hox genes that confer positional identity (e.g., Hox4-7) [5]. | Involves genes in signaling centers (e.g., SHH, GLI3, FGFs) or differentiation pathways. |
A Framework for Phenotype Interpretation
A systematic approach is necessary to conclusively classify a phenotype. The following workflow integrates anatomical, molecular, and genetic data.
Anatomical and Skeletal Analysis
- Stain Cartilage and Bone: Use Alcian Blue and Alizarin Red staining to visualize the entire skeletal pattern of the limb and girdle.
- Use Axial Skeleton as Reference: Compare the position of the limb bud and girdle to the adjacent somites or vertebrae, which serve as internal positional landmarks. A true shift will change this relationship.
- Assess Pattern Fidelity: Determine if the limb skeleton, though potentially miniature or oversized, is well-patterned. A true shift often results in a well-formed limb in the wrong place.
Molecular Marker Analysis
The core of the analysis lies in examining the expression of key regulatory genes.
- Early Markers of Positional Identity: Probe for Tbx5 (forelimb determinant) and the Hox code itself (e.g., Hoxa4, a5, a6, a7). A true limb shift is indicated by the ectopic induction of Tbx5 and its underlying permissive/instructive Hox genes in the LPM [5].
- Markers of Signaling Centers: Examine expression of genes like Shh (ZPA) and Fgf8 (AER). Their disruption typically indicates a patterning defect rather than a positional shift.
Genetic Requirement
Interpret loss-of-function phenotypes in the context of the Hox code model.
- Permissive Signal (Hox4/5): Loss-of-function should result in the absence of the forelimb, as the permissive field for limb formation is lost [5].
- Instructive Signal (Hox6/7): Loss-of-function may lead to a failure to initiate the limb program within the permissive field. Gain-of-function can reprogram neck LPM to form an ectopic limb, providing the strongest evidence for a true positional respecification [5].
Detailed Experimental Protocols
Electroporation of Chick Limb Bud Mesenchyme
This protocol is for introducing DNA constructs (e.g., Hox expression vectors, dominant-negative variants) into the lateral plate mesoderm of HH stage 12-14 chick embryos [5].
Materials:
- Fertilized chick eggs (incubated to ~HH12-14)
- Fast Green solution (2-5 mg/mL in PBS)
- DNA plasmid (1-3 µg/µL in dH₂O or TE buffer)
- Electroporator and electrodes (e.g., 5mm platinum paddle electrodes)
- Micropipette puller and microinjector
Procedure:
- Window the Egg: Create a small window in the eggshell over the embryo after removing ~2-3 mL of albumin. Visualize the embryo under a dissection microscope.
- Inject DNA Solution: Using a finely pulled glass capillary needle, inject ~0.5 µL of DNA/Fast Green solution into the posterior region of the forelimb-forming lateral plate mesoderm.
- Electroporate: Position paddle electrodes on either side of the embryo. Deliver 5 pulses of 20V, 50ms duration, with 100ms intervals.
- Re-seal and Re-incubate: Seal the window with tape and return the egg to the incubator until the desired collection stage (e.g., HH20-25 for early marker analysis, HH30+ for skeletal analysis).
Whole-Mount In Situ Hybridization (WMISH)
For analyzing gene expression patterns following electroporation.
Materials:
- Diethylpyrocarbonate (DEPC)-treated water
- Digoxigenin (DIG)-labeled RNA probe
- Anti-DIG alkaline phosphatase-conjugated antibody
- NBT/BCIP staining solution
Procedure:
- Fixation: Harvest embryos in cold PBS and fix in 4% PFA overnight at 4°C.
- Pre-hybridization: Permeabilize with Proteinase K, post-fix, and pre-hybridize in hybridization buffer for several hours at the probe hybridization temperature.
- Hybridization: Incubate with DIG-labeled RNA probe in hybridization buffer overnight.
- Washes and Blocking: Perform stringent washes (e.g., with SSC buffer/Formamide) to remove unbound probe. Block in a solution containing serum and blocking reagent.
- Antibody Incubation: Incubate with anti-DIG-AP antibody overnight at 4°C.
- Detection: Wash thoroughly and incubate with NBT/BCIP substrate in the dark until the desired signal-to-noise ratio is achieved. Stop the reaction with PBS and post-fix.
Skeletal Staining (Alcian Blue & Alizarin Red)
For visualizing cartilage and bone in late-stage embryos.
Materials:
- Acetic acid, Ethanol
- Alcian Blue 8GX, Alizarin Red S
- Trypsin
Procedure:
- Fixation and Staining: Fix embryos in 95% Ethanol. Stain in Alcian Blue solution (for cartilage) for 8-24 hours.
- Trypsinization and Bone Staining: Transfer to a trypsin solution to clear tissue. Subsequently stain with Alcian Blue and Alizarin Red S (for bone) for 1-2 days.
- Clearing and Storage: Clear in graded glycerol/KOH solutions and store in 100% glycerol for long-term preservation and analysis.
The Scientist's Toolkit: Research Reagent Solutions
Table 2: Essential reagents and tools for Hox gene and limb patterning research.
| Reagent/Tool | Function/Description | Key Application |
|---|---|---|
| Hox Expression Plasmids | Vectors for gain-of-function (full-length cDNA) or loss-of-function (dominant-negative, CRISPR/Cas9) studies. | Testing sufficiency and necessity of specific Hox genes in limb positioning [5]. |
| Dominant-Negative Hox Constructs | Truncated Hox proteins that dimerize with wild-type proteins and co-factors but cannot bind DNA, inhibiting native function [5]. | Specific knockdown of Hox paralog groups (e.g., Hoxa4, a5, a6, a7) to assess requirement [5]. |
| Fluorescent Reporter Plasmids | Plasmids expressing EGFP, mCherry, etc., often co-electroporated or part of a bicistronic vector. | Visualizing electroporation efficiency and tracing transfected cells [5]. |
| In Situ Hybridization Probes | DIG-labeled antisense RNA probes for key markers (Tbx5, Shh, Hox genes, Fgf8). | Mapping gene expression domains to assess molecular identity and patterning. |
| Chick Embryos (Gallus gallus) | Model organism with accessible, flat embryos ideal for microsurgery and electroporation. | Main in vivo system for perturbing and observing limb development. |
Quantitative Data Analysis and Presentation
When analyzing your results, compile quantitative data to support your phenotypic interpretations. The following table provides a template based on hypothetical experimental outcomes.
Table 3: Example quantitative data from Hox gene perturbation experiments in chick embryos.
| Experimental Condition | n | Embryos with Ectopic Tbx5 Domain | Embryos with Altered Limb Skeletal Pattern | Average Somite Position of Limb Bud (Control = 15-20) | Key Molecular Signatures |
|---|---|---|---|---|---|
| Control (Empty Vector) | 25 | 0% | 4% (minor) | Somites 16.2 ± 0.8 | Normal Tbx5, Hox, Shh domains |
| Hoxa5 Overexpression | 22 | 0% | 9% | Somites 16.5 ± 1.1 | Expanded Tbx5, normal Shh |
| Hoxa6 Overexpression | 20 | 35% (anterior) | 45% (ectopic limbs) | Somites 16.1 ± 0.9 / Ectopic at 10-12 | Ectopic Tbx5 & Hoxa4 anteriorly |
| DN-Hoxa5 Electroporation | 18 | 0% | 100% (limb agenesis) | N/A (No limb) | Absent Tbx5, normal axial Hox |
| DN-Hoxa6 Electroporation | 19 | 0% | 95% (severe truncation) | Somites 16.8 ± 1.2 | Weak Tbx5, disrupted Shh |
Visualizing the Molecular Logic of Limb Positioning
The following diagram summarizes the core Hox gene interactions governing forelimb position, as revealed by recent research [5]. This model provides the molecular basis for interpreting phenotypes.
In gain- and loss-of-function studies, such as those investigating Hox gene function in chick limb development, establishing a causal link between molecular manipulation and phenotypic outcome is paramount. The use of dominant-negative (DN) constructs is a powerful strategy to disrupt specific gene functions. However, phenotypic changes resulting from DN experiments can be misleading, potentially caused by off-target effects or nonspecific toxicity rather than the specific inhibition of the intended target [5]. This document outlines essential application notes and protocols for implementing critical negative controls to validate the construct specificity of DN Hox genes in chick limb bud electroporation experiments, thereby strengthening causal inference in developmental biology.
Core Principles: Negative Controls in Experimental Biology
Negative controls are experiments designed to produce a known null result, verifying that the observed outcomes in the main experiment are due to the specific manipulation and not spurious factors [30]. In biological experiments, two classic strategies are:
- Leaving out an essential ingredient: Demonstrating that the effect requires a specific component of the system.
- Checking for an impossible effect: Showing the manipulation has no effect in a context where the hypothesized mechanism cannot operate [30].
In epidemiology, analogous approaches use "negative control outcomes" (e.g., testing if a vaccine protects against injuries) or "negative control exposures" to detect unmeasured confounding [30]. These same logical principles are directly applicable to ensuring the specificity of DN constructs in developmental genetics.
Validating Dominant-Negative Hox Constructs: A Practical Framework
A primary risk with DN constructs is that the observed phenotype is an experimental artifact. The following controls are designed to detect such non-specific effects. The table below summarizes a suite of validation strategies.
Table 1: Control Strategies for Dominant-Negative Hox Experiments
| Control Strategy | Description | Interpretation of a Valid Result |
|---|---|---|
| Full-length Rescue | Co-electroporate the DN construct with a matching, full-length, functional Hox gene (rescue construct) that is not susceptible to the DN inhibition [5]. | The full-length gene should overcome the DN effect, restoring wild-type or near-wild-type phenotype, confirming the phenotype's specificity. |
| Null Mutant Analysis | Electroporate a DN construct with a mutation that ablates its ability to bind co-factors, rendering it functionally "null" [5]. | The null construct should produce no phenotype, demonstrating that the effects of the active DN construct are due to its specific inhibitory function. |
| Irrelevant DN Control | Electroporate a DN construct targeting an unrelated transcription factor not involved in limb patterning. | No limb-specific phenotype should occur, indicating that the effects of the Hox DN are not a general consequence of expressing any DN protein. |
| Domain-Specific Misexpression | Misexpress the Hox gene in a tissue or embryonic region where its function is known to be irrelevant (e.g., a "check for an impossible effect") [30]. | No ectopic phenotype should be induced, confirming that the gene's effect is specific to its normal developmental context. |
| Multiple Assay Endpoints | Analyze a panel of downstream target genes (e.g., Tbx5 for forelimb formation) rather than a single readout [5]. | The DN should consistently affect only the relevant target genes within the pathway, not cause widespread, nonspecific transcriptional dysregulation. |
The following workflow diagram integrates these control strategies into a coherent experimental plan.
Diagram 1: Experimental workflow for validating DN construct specificity.
Detailed Protocol: Electroporation and Validation in Chick Limb Buds
This protocol is adapted from established methods for manipulating chick embryos [7] [5].
Reagent and Plasmid Preparation
- DN Hox Constructs: Generate DN forms (e.g., Hoxa4-DN, Hoxa5-DN) by deleting the C-terminal portion of the homeodomain while retaining the co-factor binding domain [5]. Clone into a vector with a strong ubiquitous promoter (e.g., CAGGS) and an internal ribosome entry site (IRES) driving a fluorescent reporter like EGFP.
- Rescue Construct: Clone the corresponding full-length, wild-type Hox cDNA into a separate plasmid with a different fluorescent reporter (e.g., mCherry) or a tag (e.g., Myc).
- Control Plasmids: Generate the null mutant and irrelevant DN control plasmids as described in Table 1.
- Fast Green Dye: Add to plasmid DNA solutions (2-3 µg/µL final concentration) to visualize injection.
Microinjection and Electroporation
- Embryo Preparation: Incubate fertilized chick eggs to Hamburger-Hamilton (HH) stage 12-14 [5]. Create a window in the eggshell, and visualize the embryo using Indian ink injection under the vitelline membrane if necessary.
- Microinjection: Using a pulled glass capillary needle and a picopump, inject ~0.5 µL of plasmid DNA solution into the dorsal layer of the forelimb-forming lateral plate mesoderm (LPM).
- Electroporation: Position platinum plate electrodes on either side of the embryo. Deliver square-wave pulses (5-10V, 50ms duration, 4-5 pulses) to drive the negatively charged DNA into the cells on the targeted side. The non-electroporated side serves as an internal control.
Post-Electroporation Analysis and Validation
- Incubation and Harvest: Re-seal the windowed eggs with tape and incubate for 8-48 hours, or until desired stages (e.g., HH14 for early gene expression analysis [5]).
- Fluorescence Screening: Harvest embryos and screen for EGFP expression under a fluorescence microscope to confirm successful targeting of the limb bud.
- In Situ Hybridization and Immunohistochemistry: Fix embryos and process for whole-mount in situ hybridization to analyze the expression of the targeted Hox gene and key downstream markers like Tbx5 [5].
- Quantitative Data Collection: For rigorous validation, collect quantitative data as outlined below.
Table 2: Quantitative Data from a Hypothetical Hoxa5-DN Validation Experiment
| Experimental Condition | n | % with Reduced Tbx5 | % with Normal Limb Bud | % with Off-target Gene Dysregulation |
|---|---|---|---|---|
| Hoxa5-DN | 25 | 92% | 20% | 8% |
| Hoxa5-DN + Hoxa5-Full (Rescue) | 22 | 27% | 82% | 9% |
| Hoxa5-DN-Null Mutant | 20 | 5% | 95% | 10% |
| Irrelevant-DN Control | 18 | 0% | 100% | 5% |
| Uninjected Control | 30 | 0% | 100% | 3% |
Note: This table exemplifies how data should be structured to clearly show the effect of the DN construct and its subsequent rescue and control, supporting a claim of specificity. The "n" represents the number of embryos analyzed per condition [31] [32].
The Scientist's Toolkit: Essential Research Reagents
Table 3: Key Reagent Solutions for Chick Limb Bud Electroporation
| Item | Function/Description |
|---|---|
| Dominant-Negative (DN) Plasmid | Engineered construct lacking DNA-binding domain but retaining protein-protein interaction domain to sequester co-factors and inhibit native gene function [5]. |
| Fluorescent Reporter Plasmid | Plasmid expressing EGFP, mCherry, etc., often via an IRES sequence; enables visualization of electroporated cells and serves as a transfection control [5]. |
| Electroporator and Electrodes | Device for generating controlled electrical pulses and specialized platinum electrodes (e.g., plate or needle) for delivering pulses to the embryo. |
| Full-length Rescue Construct | A wild-type, functional version of the gene of interest, used in co-electroporation experiments to confirm the specificity of the DN-induced phenotype [5]. |
| Null Mutant Control Plasmid | A DN construct with an additional mutation that ablates its ability to bind co-factors, serving as a critical control for nonspecific effects [5]. |
Integrating these rigorous control strategies into the experimental workflow for dominant-negative studies in chick limb buds is not optional but essential. The application of full-length rescue, null mutants, and irrelevant controls, combined with quantitative assessment of multiple endpoints, provides a robust framework to distinguish specific, causal gene functions from experimental artifacts. This rigorous approach elevates the standard of evidence in developmental genetics, ensuring that conclusions about the "Hox code" governing limb positioning [5] are built upon a solid experimental foundation.
Electroporation is a pivotal technique in developmental biology for delivering transgenes into specific tissues in a spatially and temporally restricted fashion. Within the context of studying Hox gene function during chick limb bud development, optimizing electroporation parameters is critical to balancing high transfection efficiency with satisfactory embryo survival rates. This protocol details a standardized approach, drawing from established methodologies to ensure reproducible and reliable results for researchers investigating the roles of patterning genes in limb development [33] [34] [35]. The precise dissection of developmental processes using relevant transgenes requires a method that minimizes trauma to the delicate embryonic tissues while achieving effective gene delivery.
Core Electroporation Parameters
The key to successful electroporation lies in the careful calibration of electrical parameters and DNA solution preparation. The values in the table below have been optimized for introducing Hox genes and other constructs into the chick limb bud at Hamburger Hamilton (HH) stage 10–11 [34].
Table 1: Optimized Electroporation Parameters for Chick Limb Buds
| Parameter | Optimal Value | Purpose & Rationale |
|---|---|---|
| Developmental Stage | HH stage 10-11 | Ensures optimal tissue accessibility and developmental relevance for limb bud studies [34]. |
| DNA Concentration | 1.5 - 2.0 µg/µL | Balances high delivery efficiency with minimal toxicity; higher concentrations can be detrimental [34]. |
| Voltage | 20 - 25 V | Creates sufficient electric field for membrane permeabilization without excessive cell death [34]. |
| Pulse Number | 5 pulses | Allows cumulative effect for efficient DNA uptake while managing thermal and physical stress [34]. |
| Pulse Duration | 50 milliseconds | Provides adequate time for pore formation and DNA migration across the membrane [34]. |
| Pulse Interval | 1 second | Enables membrane recovery between pulses, maintaining cell viability [34]. |
The following diagram illustrates the core workflow and the logical relationship between parameter optimization and the desired experimental outcomes.
Detailed Experimental Protocol
Equipment and Reagent Setup
This section lists the essential materials required to perform the electroporation procedure.
Table 2: Research Reagent Solutions and Essential Materials
| Item | Function/Application |
|---|---|
| Fertilized Chick Eggs | The model system for in ovo electroporation and limb development studies. |
| pCAGGS-IRES-NLS-GFP Vector | A common mammalian expression vector used for controlling transgene expression, often co-electroporated as a marker [34]. |
| Hox Gene Plasmid(s) | Purified plasmid DNA containing the Hox gene of interest (e.g., Hoxb1, Hoxa2) for functional studies [34]. |
| Electroporator | A device capable of delivering precise square-wave pulses (e.g., BTX ECM830) [34]. |
| Electroporation Cuvettes/Electrodes | Specific electrodes for targeting the limb bud tissue in ovo. |
| Phosphate-Buffered Saline (PBS) | A physiological buffer for handling embryos and preparing DNA solutions. |
Step-by-Step Electroporation Procedure
The following workflow provides a visual summary of the key experimental steps, from embryo preparation to post-electroporation analysis.
- Embryo Preparation: Incubate fertilized chick eggs in a humidified incubator at 38°C until the embryos reach the desired Hamburger-Hamilton (HH) stage 10–11 [34]. Carefully window the eggshell using sharp forceps and scissors, ensuring the inner shell membrane is removed to expose the embryo.
- DNA Solution Preparation: Dilute the purified plasmid DNA (e.g., Hox gene construct, often with a co-electroporated GFP reporter at ~0.5 µg/µL) in phosphate-buffered saline (PBS) to a final concentration of 1.5–2.0 µg/µL [34]. Use a vital dye like Fast Green at a concentration of 0.1% to visualize the solution during injection.
- Microinjection: Using a finely pulled glass capillary needle and a microinjector, inject approximately 0.5-1.0 µL of the DNA solution directly into the mesenchyme of the target region of the limb bud.
- Electrode Positioning and Electroporation: Position platinum plate electrodes on either side of the limb bud. Deliver electrical pulses using the optimized parameters: five pulses of 20-25 V, each with a 50-millisecond duration and 1-second intervals [34].
- Post-Electroporation Care: After pulsing, carefully add a small amount of warm PBS or albumen supplemented with antibiotics to the embryo. Reseal the window on the eggshell with transparent tape and return the eggs to the incubator. Monitor embryo survival and harvest at the desired time points for analysis, typically between 24 to 48 hours post-electroporation.
Signaling Pathways in Hox Gene Function
Hox genes, such as Hoxb1, can induce key features of neural crest fates, including an epithelial-to-mesenchymal transition (EMT), by interacting with crucial signaling pathways. The following diagram outlines the logical relationship and key interactions identified in functional studies [34].
The introduction of anterior Hox genes into the trunk neural tube can rapidly induce a neural progenitor to neural crest cell fate switch. This process is characterized by the upregulation of key transcription factors like Snail2 and Msx1/2, changes in cell adhesion, and a full epithelial-to-mesenchymal transition (EMT) [34]. The mobilization of this genetic cascade is dependent upon Bone Morphogenetic Protein (BMP) signaling and requires optimal levels of Notch signaling. Hoxb1 itself has been shown to potentiate Notch signaling while repressing Hes5 to create permissive conditions for NC specification and EMT [34].
Troubleshooting and Optimization
Even with a standardized protocol, challenges may arise. The table below addresses common issues and provides evidence-based solutions.
Table 3: Troubleshooting Guide for Chick Limb Bud Electroporation
| Problem | Potential Cause | Solution |
|---|---|---|
| Low Transfection Efficiency | Suboptimal DNA concentration or purity; insufficient voltage/pulse number. | Increase DNA concentration within the 1.5-2.0 µg/µL range; ensure high-quality plasmid prep; verify electrical parameters and electrode contact [34]. |
| High Embryo Mortality | Excessive voltage or pulse duration; DNA toxicity; physical damage during procedure. | Lower voltage towards 20 V; ensure pulse duration does not exceed 50 ms; use minimal effective DNA concentration; practice precise microinjection technique [34]. |
| Non-Specific or Patchy Expression | Poor injection technique; DNA leakage; electrodes placed incorrectly. | Use Fast Green dye to monitor injection spot; ensure electrodes are positioned to encompass the target area precisely [35]. |
| Failure to Induce Phenotype | Insufficient expression of electroporated Hox gene; functional redundancy. | Use a strong, ubiquitous promoter (e.g., CAGGS) in the expression vector; consider co-electroporation with CRISPR/Cas9 components for knockout studies [34]. |
This application note addresses a critical challenge in developmental biology research: the inability to induce complete, patterned limb outgrowth at ectopic locations, such as the neck, despite successful initiation of limb budding through Hox gene misexpression. We synthesize recent experimental evidence that identifies the non-permissive nature of non-limb ectoderm as the primary limiting factor. The document provides a detailed experimental framework, including optimized protocols for in ovo electroporation and tools for analyzing the resulting molecular and morphological outcomes, to enable researchers to systematically investigate and potentially overcome this ectodermal competence barrier.
The precise positioning of limbs along the anterior-posterior body axis is a fundamental process in vertebrate embryogenesis. A key breakthrough in this field demonstrated that electroporation of specific Hox genes (Hoxa6/Hoxa7) into the neck-level lateral plate mesoderm (LPM) of chick embryos is sufficient to initiate the formation of ectopic forelimb buds [20]. These buds express early limb markers such as Tbx5 and Fgf10, confirming the transformation of mesodermal identity. However, these ectopic buds consistently fail to undergo substantial outgrowth and never develop into patterned limbs [20]. This arrest points to a deficiency that lies not in the mesoderm, but in the overlying ectoderm. The non-limb ectoderm, such as that at the neck level, appears to lack the competence to form a functional Apical Ectodermal Ridge (AER), a signaling center essential for sustained limb outgrowth [20] [36]. This note details the experimental approaches for probing the mechanisms of this ectodermal limitation.
Key Experimental Findings and Underlying Molecular Data
The core problem is highlighted by a clear discrepancy between the sufficiency of certain Hox genes to induce limb bud initiation and their inability to confer full ectodermal competence.
| Hox Gene / Factor | Sufficient for Bud Initiation? | Sufficient for Full Outgrowth? | Key Molecular Outcomes in Neck Mesoderm | AER Marker (Fgf8) Expression? |
|---|---|---|---|---|
| Hoxa6 / Hoxa7 | Yes [20] | No [20] | Induction of Tbx5, Fgf10; activation of Lmx1b, Hoxa9/a10/d9/d10 [20] | No [20] |
| Hoxa4 / Hoxa5 | No [20] | No [20] | Not sufficient to induce Tbx5 or Fgf10 [20] | No [20] |
| FGF Protein Beads | Yes (in flank, pre-EMT) [14] [36] | No (in neck, post-EMT) [20] [14] | Induction of Tbx5/Tbx4 and Fgf10 [36] | No (in neck ectoderm) [20] |
The data in Table 1 show that while Hoxa6/a7 can posteriorize the neck mesoderm to a forelimb fate, the program fails to be fully executed. Subsequent transcriptomic analysis of these ectopic buds reveals a specific failure to activate a complete suite of limb patterning genes, including Shh and critical Hox12/13 paralogs, which are essential for autopod (hand/foot) formation [20]. This suggests that the instructed mesoderm cannot elicit the necessary reciprocal signaling from the native neck ectoderm to complete the limb gene regulatory network.
Detailed Experimental Protocols
The following protocols are adapted from established techniques to specifically address the question of ectodermal competence.
Protocol: In ovo Electroporation of Hox Genes into Chick Neck Mesoderm
This protocol is designed for targeted gene misexpression in the prospective neck region of a chick embryo to test its limb-forming competence.
I. Materials and Reagents
- Fertilized chick eggs (e.g., White Leghorn), incubated to Hamburger-Hamilton (HH) stage 12-14.
- Plasmid DNA (1-2 µg/µL): Full-length coding sequence of Hoxa6 or Hoxa7 in a CMV-driven expression vector (e.g., pCAGGS). Include a fluorescent reporter (e.g., pCAGGS-GFP) for lineage tracing, either co-electroporated or as part of an IRES vector.
- Fast Green dye (0.1%) for visualization.
- Phosphate-Buffered Saline (PBS), sterile.
- Tyrode's solution or Howard's Ringer solution.
- Electroporator and electrodes (e.g., 0.5-1.0 mm diameter platinum electrodes).
- Micropipette puller and microinjector.
II. Procedure
- Window the Egg: Candle eggs to mark the air sac. Cut a small window (~1.5 cm²) in the shell over the embryo. Add a few drops of Tyrode's solution to lower the vitelline membrane.
- Injection Setup: Load the DNA mix (plasmid + 0.1% Fast Green) into a sharp glass micropipette.
- Target and Inject: Position the pipette over the lateral plate mesoderm at the neck level (somite level 1-5). Gently penetrate the ectoderm and inject ~50-100 nL of DNA solution into the mesoderm.
- Electroporation: Orient the embryo so the injected area lies between the electrodes, with the positive anode over the targeted mesoderm to draw negatively charged DNA into the tissue. Deliver five 50-ms pulses of 20-25 V with 100-ms intervals.
- Recovery and Incubation: Seal the window with tape and return the egg to a humidified incubator at 38°C. Allow the embryo to develop to the desired stage (e.g., HH24-28 for early bud analysis, HH30+ for outgrowth assessment).
Protocol: Assessing Ectodermal Response via Whole-Mount In Situ Hybridization (WMISH)
This protocol is critical for analyzing the molecular consequences of Hox electroporation, specifically the ectoderm's response.
I. Materials and Reagents
- Fixed electroporated embryos (in 4% PFA).
- Digoxigenin (DIG)-labeled riboprobes for key markers:
- Fgf8: AER marker.
- Hox-7 (Msx2): A marker for the AER and limb bud mesenchyme, regulated by the AER [37].
- Proteinase K.
- Anti-DIG-AP antibody.
- NBT/BCIP staining solution.
II. Procedure
- Re-hydration and Permeabilization: Following standard WMISH pre-treatment, treat embryos with Proteinase K (5-10 µg/mL for 15-30 minutes) to permit probe penetration.
- Hybridization and Detection: Hybridize with the DIG-labeled riboprobe overnight at 65-70°C. After stringent washes, incubate with Anti-DIG-AP antibody. Develop the color reaction with NBT/BCIP.
- Analysis: Document the staining pattern. A successful experiment will show Fgf8 expression in the normal limb AER but its absence in the neck ectoderm overlying the ectopic bud. Hox-7 expression, which depends on a functional AER [37], will likewise be absent, confirming the ectodermal defect.
Visualization of Signaling Pathways and Experimental Logic
The following diagrams illustrate the core signaling feedback loop that fails to establish in the neck context and the logical workflow for the proposed experiments.
Diagram 1: Signaling Pathway Failure in Neck Ectoderm. The diagram contrasts the successful Fgf10-Fgf8 feedback loop established in competent limb ectoderm with the failed loop in non-competent neck ectoderm, leading to arrested outgrowth.
Diagram 2: Experimental Workflow to Probe Ectoderm Competence. A logical flow for experiments designed to identify the stage and cause of ectodermal failure in supporting limb outgrowth.
The Scientist's Toolkit: Key Research Reagents
Table 2: Essential Reagents for Investigating Ectoderm Competence
| Research Reagent | Function in Experiment | Example Application in this Context |
|---|---|---|
| Hoxa6/Hoxa7 Expression Plasmids | Instructive factors to posteriorize mesoderm and initiate limb program. | Testing sufficiency of mesoderm reprogramming at neck level [20]. |
| Dominant-Negative Hox Constructs | Loss-of-function tool to block specific Hox protein activity. | Validating specificity and testing necessity in co-electroporation experiments [20]. |
| Fgf8 / Fgf10 Soaked Beads | Ectopic source of FGF signaling. | Testing if direct FGF provision can bypass the need for an endogenous AER in the neck [36]. |
| Lin28a & Prdm16, Zbtb16 | Reprogramming factors that confer limb progenitor-like properties. | Testing if priming non-limb mesenchyme (and potentially ectoderm) enhances competence [14]. |
| DIG-labeled Riboprobes (Fgf8, Hox-7/Msx2) | In situ hybridization detection of key marker genes. | Visualizing the presence/absence of the AER and its dependent gene expression [37]. |
| 3D Hyaluronic Acid (HA) Gel | Mimics limb bud extracellular matrix for progenitor cell culture. | Maintaining limb progenitor identity in vitro for co-culture competence assays [14]. |
The experimental evidence confirms that the non-permissive nature of neck ectoderm is a major barrier to inducing full limbs outside the native limb fields. The provided protocols and tools establish a foundation for a deeper mechanistic investigation. Future research should leverage transcriptomic comparisons (e.g., RNA-seq) of neck versus limb ectoderm to identify the specific "competence factors" that are missing [20] [38]. Furthermore, testing combinations of Hox genes with candidate ectodermal factors, or using direct reprogramming approaches with factors like Prdm16, Zbtb16, and Lin28a, may provide a strategy to endow non-limb ectoderm with the full competence needed to support a complete, patterned limb [14]. Overcoming this barrier is not only a fundamental question in developmental biology but also holds long-term significance for regenerative medicine strategies aimed at reconstructing complex appendages.
Beyond the Bud: Techniques for Phenotypic and Molecular Validation
In the functional analysis of genes, such as those from the Hox family during chick limb bud development, confirming endogenous expression patterns and splicing is a critical step following experimental manipulation. Techniques like electroporation of Hox genes can alter the transcriptional landscape, making accurate molecular confirmation essential for validating phenotypic observations. This document details two powerful methodologies for this purpose: RNA sequencing (RNA-seq) and In Situ Hybridization (ISH). RNA-seq provides a quantitative, genome-wide overview of transcriptional changes and splicing alterations, while ISH offers precise spatial localization of gene expression within the tissue context. Framed within the context of Hox gene research in chick embryos, these Application Notes and Protocols provide researchers, scientists, and drug development professionals with detailed workflows for robust molecular confirmation of gene expression.
Application Note: RNA Sequencing for Transcriptome Analysis
RNA sequencing has revolutionized the detection and quantification of gene expression, enabling the discovery of novel splice variants and the confirmation of transcript alterations resulting from genetic manipulations.
Key Applications in Hox Gene Research
- Detection of Ectopic Expression: Following electroporation of Hox genes (e.g., Hoxa4, Hoxa5, Hoxa6, Hoxa7) into the lateral plate mesoderm (LPM) of chick embryos, RNA-seq can quantify the successful induction and relative abundance of the transfected genes [5].
- Identification of Splicing Defects: RNA-seq is particularly adept at revealing complex splicing events, such as exon skipping or intron retention, which may be caused by synonymous or intronic variants. This is crucial for characterizing the functional outcomes of Hox gene mutations [39].
- Discovery of Downstream Targets: By providing a global view of the transcriptome, RNA-seq can identify genes and pathways whose expression is altered by Hox gene misexpression, shedding light on the mechanisms governing limb positioning [5].
Protocol: RNA-seq from Accessible Tissues
For research on developing systems like the chick limb bud, a minimally invasive RNA-seq protocol is highly desirable.
Sample Preparation (Cell Culture and Lysis)
- Tissue Source: Isolate Peripheral Blood Mononuclear Cells (PBMCs) or equivalent progenitor cells. In chick embryos, the lateral plate mesoderm is the relevant tissue for limb bud formation [39] [5].
- Cell Culture: Culture cells short-term. To capture transcripts subject to nonsense-mediated decay (NMD), treat a portion of the culture with an NMD inhibitor such as Cycloheximide (CHX). CHX treatment has been shown to successfully inhibit NMD, allowing for the detection of aberrant transcripts that would otherwise be degraded [39].
- RNA Extraction: Lyse cells and extract total RNA using a standard method (e.g., phenol-chloroform extraction or commercial kits). Ensure RNA Integrity Number (RIN) > 8.5 for high-quality libraries.
Library Preparation and Sequencing
- Library Construction: Use a stranded mRNA-seq library preparation kit. For full-length transcript coverage and improved mapping of complex regions, consider a protocol utilizing template switch oligos (TSOs) [40].
- Unique Molecular Identifiers (UMIs): Incorporate UMIs during reverse transcription to correct for PCR amplification biases and enable accurate digital counting of transcripts. For long-read sequencing (e.g., Oxford Nanopore), using longer, 50-nucleotide UMIs with a purine-pyrimidine (RYN) design can improve error correction and mapping accuracy, especially for repetitive elements [40].
- Sequencing: Perform sequencing on an appropriate platform (e.g., Illumina for short-read, PacBio or Oxford Nanopore for long-read) to a sufficient depth (e.g., 30-50 million paired-end reads per sample).
Data Analysis
- Alignment: Map sequencing reads to the chick reference genome (e.g., Galgal6) using a splice-aware aligner like STAR.
- Quantification: Generate counts of reads/UMIs per gene using tools like FeatureCounts or HTSeq.
- Differential Expression: Identify significantly differentially expressed genes between experimental and control groups using packages such as DESeq2 or edgeR.
- Splicing Analysis: Use specialized tools like FRASER or OUTRIDER to detect aberrant splicing events and outlier expression [39].
Table 1: Key Reagents for RNA-seq Protocol
| Research Reagent | Function | Application Note |
|---|---|---|
| Cycloheximide (CHX) | Inhibits nonsense-mediated decay (NMD) | Allows detection of aberrant transcripts that would otherwise be degraded; use at optimized concentration to avoid cellular toxicity [39]. |
| Template Switch Oligo (TSO) | Enables full-length cDNA synthesis | Used in reverse transcription to capture complete 5' ends of mRNAs; a blocked TSO with a 3' amine group prevents primer generation artifacts [40]. |
| Unique Molecular Identifier (UMI) | Tags individual mRNA molecules | Corrects for PCR duplication bias; long (50nt) RYN-designed UMIs improve error correction in long-read sequencing [40]. |
| ET SSB Protein | Single-stranded DNA binding protein | Reduces secondary structure during RT, increasing cDNA yield, particularly for structured RNA [40]. |
Workflow Diagram: RNA-seq for Expression Validation
The following diagram illustrates the core workflow for using RNA-seq to validate gene expression after experimental manipulation:
Application Note: In Situ Hybridization for Spatial Profiling
In Situ Hybridization (ISH) is an indispensable technique for visualizing the spatial distribution of RNA transcripts within the context of intact tissues, such as the chick embryo.
Key Applications in Hox Gene Research
- Mapping Expression Domains: ISH is ideal for confirming that electroporated Hox genes are expressed in the correct region of the lateral plate mesoderm and for visualizing the resulting patterns, such as the anterior expansion of Tbx5 expression upon Hox6/7 misexpression [5].
- Validating Endogenous Patterns: It allows researchers to confirm the precise anterior-posterior boundaries of endogenous Hox gene expression and how they are perturbed by experimental interventions [5].
- Co-localization Studies: Multiplexed ISH variants enable the simultaneous detection of multiple RNAs (e.g., different Hox genes or downstream targets like Tbx5) within the same tissue section, revealing potential interactions and regulatory hierarchies [41] [42].
Protocol: Single-Molecule RNA Fluorescence In Situ Hybridization (smFISH)
smFISH provides single-transcript sensitivity and precise subcellular localization, making it superior for quantitative spatial gene expression analysis.
Probe Design and Synthesis
- Probe Set: Design a pool of 30-48 short (20mer) DNA oligonucleotides, each complementary to a different region of the target Hox mRNA.
- Labeling: Label each oligonucleotide with a single fluorophore (e.g., Cy3, Cy5, Alexa Fluor dyes) at its 3' end. Using a large number of singly labeled probes increases the signal-to-noise ratio, as the collective fluorescence of many bound probes creates a detectable spot representing a single mRNA molecule [43].
- Pooling: Synthesize and purify the probes individually, then pool them into a single probe set for the target transcript.
Sample Preparation and Fixation
- Tissue Collection: Dissect chick embryos at the desired Hamburger-Hamilton (HH) stage following electroporation.
- Fixation: Fix tissues immediately in 3.7% formaldehyde in 1x PBS for 30-60 minutes at room temperature. This preserves morphology and immobilizes RNA [43].
- Permeabilization: Treat tissues with a permeabilization buffer containing detergents (e.g., 0.1% Triton X-100) and/or protease (e.g., proteinase K) to allow probe access to the RNA. Optimization is critical, as over-digestion can damage tissue structure [42].
Hybridization and Imaging
- Hybridization: Resuspend the pooled probe set in a hybridization buffer and apply to the fixed tissue sections. Incubate in a dark, humidified chamber at 37°C overnight [43].
- Washing: The next day, perform stringent washes to remove unbound and non-specifically bound probes.
- Mounting and Imaging: Mount the samples in an anti-bleaching mounting medium. Image using a standard epifluorescence or confocal microscope equipped with appropriate filters. Each individual mRNA molecule will appear as a diffraction-limited spot [43].
Image Analysis
- Spot Detection: Use image analysis software (e.g., FIJI/ImageJ with custom scripts or commercial packages) to identify and count the fluorescent spots in each cell automatically.
- Quantification: Transcript counts per cell or per tissue region can be extracted and statistically analyzed to compare expression levels between experimental conditions.
Table 2: Key Reagents for smFISH Protocol
| Research Reagent | Function | Application Note |
|---|---|---|
| Fluorophore-labeled Oligos | Hybridize to target mRNA for detection | 20mer DNA oligos, singly labeled at 3' end; 30-48 probes per target mRNA ensure single-molecule sensitivity and low false-positive rates [43]. |
| Formaldehyde | Tissue fixative | Crosslinks and preserves tissue architecture and retains RNA in situ; typically used at 3.7-4% in PBS [42] [43]. |
| Proteinase K / Triton X-100 | Permeabilization agents | Remove proteins surrounding RNA and make cell matrix permeable to probes; concentration must be optimized to avoid RNA degradation [42]. |
| Hybridization Buffer | Creates optimal annealing conditions | Contains salts, denaturants, and buffering agents to promote specific probe-target binding while minimizing non-specific background [42]. |
Workflow Diagram: smFISH for Spatial Expression Analysis
The following diagram outlines the procedural steps for smFISH to visualize and quantify RNA molecules in situ:
Integrated Data Analysis and Interpretation
Combining RNA-seq and ISH data provides a comprehensive view of gene expression, marrying quantitative breadth with spatial resolution.
Correlating Quantitative and Spatial Data
When assessing the outcomes of Hox gene electroporation, a synergistic approach is most powerful. For instance, a significant increase in Tbx5 transcript levels detected by RNA-seq in electroporated limb buds should be accompanied by an anterior expansion of the Tbx5 expression domain visualized by ISH. This correlation confirms both the molecular and functional consequences of the Hox code manipulation [5]. Conversely, RNA-seq might detect aberrant splicing in a Hox gene that ISH cannot; however, the spatial context provided by ISH is irreplaceable for understanding the phenotypic outcome.
Advanced Multiplexing and Live-Cell Imaging
The field is rapidly advancing beyond static, single-target analyses. Techniques like MERFISH (Multiplexed Error-Robust FISH) allow for the simultaneous imaging of hundreds to thousands of RNA species in the same sample, enabling the construction of complex spatial gene expression maps [41]. Furthermore, emerging technologies for live-cell RNA imaging using CRISPR-dCas systems or fluorescent RNA aptamers now offer the potential to monitor RNA dynamics in real-time [41]. While currently more challenging in intact tissues, these methods hold future promise for tracking the kinetics of Hox gene expression and downstream responses following electroporation in living embryos.
Within the context of a broader thesis investigating the electroporation of Hox genes in chick limb buds, this application note provides detailed protocols for the subsequent phenotypic analysis, focusing specifically on tracking changes in limb bud morphology and the expression of the key marker genes Tbx5 and Fgf10. The chick embryo is a premier model for such studies due to its accessibility for surgical and genetic manipulation, including electroporation, which allows for the precise misexpression of genes like the Hox family members that are critical for specifying positional identity along the body axis [28] [10]. A fundamental application of this technique is to understand how Hox genes determine the location of the limb fields. This document outlines standardized methods for analyzing the phenotypic outcomes of such experiments, enabling researchers to quantitatively assess how alterations in the genetic program affect the earliest stages of limb formation.
Background and Significance
The Molecular Framework of Limb Initiation
Limb bud development is initiated at precise locations along the anterior-posterior axis of the embryo, a process tightly regulated by a network of transcription factors and signaling molecules. Tbx5 and Fgf10 are central players in this network, and their expression serves as a key indicator of limb field specification and budding [36] [44].
- Tbx5: This T-box transcription factor is a primary initiator of forelimb bud formation. Its expression domain in the lateral plate mesoderm (LPM) prefigures the forelimb field. Genetic studies in mice have demonstrated that Tbx5 is essential for forelimb bud initiation, directly activating the expression of Fgf10 [36] [45]. The position of the Tbx5 expression domain is itself restricted by the nested expression of Hox genes, such as Hoxc9, which acts as a repressor [44].
- Fgf10: A paracrine signaling molecule expressed in the underlying mesoderm of the nascent limb bud. It is a direct transcriptional target of Tbx5 and is responsible for inducing the formation of the Apical Ectodermal Ridge (AER), a key signaling center, in the overlying ectoderm [36] [46]. Once established, the AER expresses Fgf8, which in turn maintains Fgf10 expression in the mesoderm, creating a positive feedback loop that drives limb bud outgrowth [36] [46].
The following diagram illustrates the core genetic and signaling interactions involved in early limb bud initiation, a pathway that can be perturbed through Hox gene electroporation.
Hox Genes as Regulators of Limb Positioning
The electroporation of Hox genes provides a direct method to test their role in patterning the LPM and positioning the limb buds. Research has shown that the combination of Hox genes expressed in the LPM creates a "code" that delineates where the limb buds will form. For instance, the expression boundary between Hoxb4 and Hoxb9 is correlated with the posterior limit of the forelimb bud in avian species [44]. Misexpressing a posterior Hox gene (e.g., Hoxc9) in the prospective forelimb region can repress Tbx5 and suppress forelimb development, whereas disrupting the function of posterior Hox genes can lead to an anterior expansion of the Tbx5 domain and a subsequent posterior shift in limb bud position [44]. Therefore, tracking Tbx5 and Fgf10 expression is a critical readout for the success and effect of Hox gene electroporation experiments.
Experimental Protocols
This section details a workflow for introducing Hox genes into the chick limb field via electroporation and the subsequent methods for analyzing the resulting phenotype.
Workflow for Hox Gene Electroporation and Phenotypic Analysis
The entire process, from embryo preparation to final analysis, is outlined below.
Protocol 1: Electroporation of Hox Genes into the Chick Lateral Plate Mesoderm
This protocol is adapted from established techniques for the in ovo electroporation of early chick embryos [10] [47].
I. Materials
- Fertilized chick eggs (e.g., White Leghorn), incubated to Hamburger-Hamilton (HH) stages 10-12.
- Plasmid DNA: Hox gene of interest (e.g., Hoxc9) in a replication-competent vector, driven by a strong promoter (e.g., CAGGS). Prepare at a concentration of 1-5 µg/µL.
- Electroporation equipment: Electroporator (e.g., CUY21), platinum plate electrodes (e.g., LF501P7), and a microinjector.
- Injection dye: 0.1% Fast Green in PBS.
- Tools: Forceps, tungsten needle, paper rings.
II. Procedure
- Window the egg: Use forceps to create a small window in the shell over the embryo.
- Visualize the embryo: Add a few drops of sterile PBS to prevent drying. Identify the embryo under a dissection microscope.
- Inject DNA solution: Using a glass micropipette, inject ~0.5 µL of the DNA/Fast Green solution into the target region of the lateral plate mesoderm, just beneath the ectoderm.
- Electroporate: Position the electrodes flanking the embryo, with the cathode on the side of the injected DNA. Deliver five pulses of 10-15 V, each 50 ms in duration, with 100 ms intervals [47].
- Seal and incubate: Seal the window with tape and return the egg to a 39°C incubator until the desired harvest stage (typically HH St. 18-25 for early limb bud analysis).
Protocol 2: Whole-Mount In Situ Hybridization (WISH) for Tbx5 and Fgf10
This protocol describes the detection of mRNA for key marker genes.
I. Materials
- Digoxigenin (DIG)-labeled RNA probes for Tbx5 and Fgf10.
- Fixative: 4% Paraformaldehyde (PFA) in PBS.
- Pre-hybridization buffer, hybridization buffer, and washing buffers (SSC, MAB).
- Anti-DIG-AP antibody and NBT/BCIP staining solution.
II. Procedure
- Harvest and fix: Dissect electroporated embryos in PBS and fix in 4% PFA overnight at 4°C.
- Dehydrate and rehydrate: Pass embryos through a graded methanol series (25%, 50%, 75% in PBS, then 100%) for storage and permeabilization.
- Hybridize: Rehydrate embryos, treat with proteinase K, pre-hybridize for 2-4 hours, and then hybridize with the DIG-labeled probe (e.g., ~500 ng/mL) overnight at 65-70°C.
- Wash and block: Perform stringent washes with SSC buffers and block in MAB containing blocking reagent.
- Antibody incubation and stain: Incubate with anti-DIG-AP antibody (1:2000) overnight at 4°C. Wash thoroughly and develop the color reaction using NBT/BCIP.
- Image: Clear embryos in glycerol and image using a stereomicroscope.
Protocol 3: Morphometric Analysis of Limb Bud Phenotypes
Quantitative assessment of limb bud size and position is crucial for objective phenotypic scoring.
I. Image Acquisition
- Capture high-resolution dorsal and lateral images of stained embryos using a calibrated stereomicroscope camera system.
II. Measured Parameters
- Limb Bud Area: Outline the limb bud perimeter and calculate the pixel area, converting to µm² using the scale bar.
- Antero-Posterior (A-P) Width: Measure the width of the bud at its broadest point along the A-P axis.
- Position along A-P Axis: Record the somite level at which the bud emerges.
Expected Results and Data Interpretation
Quantitative Data from Perturbation Experiments
The table below summarizes the expected phenotypic changes upon misexpression of a posterior Hox gene (e.g., Hoxc9) in the prospective forelimb region, based on published research [44].
Table 1: Expected Phenotypic Outcomes of Hoxc9 Misexpression in the Chick Forelimb Field
| Parameter | Control Embryo | Experimental Embryo (Hoxc9+) | Biological Significance |
|---|---|---|---|
| Tbx5 Expression Domain | Robust, localized expression in the forelimb-forming LPM. | Severe reduction or absence of Tbx5 signal in the electroporated region. | Indicates successful repression of the forelimb-specific genetic program. |
| Fgf10 Expression Domain | Strong, focused expression co-localized with Tbx5. | Absent or dramatically downregulated. | Confirms disruption of the core limb initiation signaling pathway. |
| Limb Bud Area (at HH St. 20) | ~150,000 - 200,000 µm² (approximate) | >50% reduction or complete absence of bud. | Demonstrates the functional consequence on limb bud outgrowth. |
| Limb Bud Position | Emerges at somite levels 16-21. | No bud formation or a shifted position. | Validates Hox gene role in setting positional boundaries. |
Representative Findings
- Successful Electroporation: Embryos showing a localized loss of Tbx5 and Fgf10 expression specifically on the electroporated side, with a normal pattern on the control side, provide clear evidence of Hox-mediated repression.
- Dose-Dependent Effects: A gradient of phenotype severity may be observed, with the strongest loss of marker expression and the smallest limb buds in areas of highest plasmid uptake.
- Morphological Correlates: The molecular changes will be directly correlated with a failure to form a limb bud or the formation of a severely hypomorphic bud.
The Scientist's Toolkit: Research Reagent Solutions
Table 2: Essential Reagents and Resources for Limb Bud Electroporation and Analysis
| Reagent / Resource | Function / Application | Example & Notes |
|---|---|---|
| Hox Expression Plasmids | To misexpress or knock down Hox genes in the LPM. | pCAGGS-Hoxc9: Drives strong, ubiquitous expression. Available from Addgene or constructed in-house. |
| DIG-Labeled RNA Probes | Detection of specific mRNA transcripts via WISH. | Tbx5 & Fgf10 probes: Key for visualizing limb field specification. Can be generated from cDNA templates. |
| Anti-DIG-AP Antibody | Immunological detection of hybridized probes. | Roche Anti-Digoxigenin-AP, Fab fragments: Used at 1:2000 dilution for WISH. |
| Electroporation System | Introduction of foreign DNA into embryonic cells in ovo. | CUY21 Electroporator & Plate Electrodes: Standard setup for chick embryo work [47]. |
| Transgenic Reporter Chickens | Visualizing specific cell populations in living embryos. | Prrx1-ZsGreen / Msx2-DsRed line: Labels limb mesenchyme and AER, respectively [28]. |
| 3D Culture System | Maintaining limb progenitor cells in vitro for follow-up studies. | Hyaluronic Acid (HA) Hydrogel: Mimics the native limb bud extracellular matrix [14]. |
Troubleshooting and Technical Notes
- Low Electroporation Efficiency: Ensure DNA is of high purity and concentration. Optimize electrode placement and pulse parameters. The use of the Tol2 transposon system can improve stable integration and sustained expression [28].
- High Embryo Mortality: The vitality of the embryos is sensitive. Work quickly but carefully during windowing and electroporation. Ensure the PBS and other solutions are at the correct pH and temperature.
- High Background in WISH: Increase the stringency of post-hybridization washes. Ensure all reagents are RNase-free. Include control embryos with a sense probe to check for non-specific staining.
- Phenotype Variability: The precise stage of the embryo is critical. Use the HH staging system rigorously. Analyze a sufficient number of embryos (n > 10 per condition) to ensure statistical significance.
A fundamental challenge in modern developmental biology is the integration of mechanistic insights gained from different model organisms. Research on Hox genes, key regulators of embryonic patterning, often employs the chick embryo for gain-of-function and loss-of-function studies via electroporation, and the mouse for constitutive or conditional knockout models. While both models are powerful, reconciling data from them is crucial for building a unified understanding of gene function in vertebrate development. This Application Note provides a structured comparison of these approaches, focusing on their application in studying limb positioning and axial patterning. We summarize key quantitative findings, detail standardized protocols for cross-validation, and visualize core regulatory pathways to equip researchers with the tools for robust comparative analysis.
Quantitative Data Synthesis
Data from chick electroporation and mouse knockout studies reveal complementary insights into the roles of Hox genes. The table below synthesizes quantitative findings on phenotypic outcomes and gene expression changes from key experiments.
Table 1: Comparative Phenotypic and Molecular Outcomes of Hox Manipulation
| Model / Manipulation | Target Gene(s) | Key Phenotypic Outcome | Molecular/Expression Change | Source |
|---|---|---|---|---|
| Chick Electroporation (Loss-of-function) | Hoxa4, a5, a6, a7 (Dominant-negative) | Disruption of forelimb bud formation | Altered Tbx5 expression in lateral plate mesoderm (LPM) | [5] |
| Chick Electroporation (Gain-of-function) | Hox6/7 in neck LPM | Induction of ectopic limb buds anteriorly | Reprogramming of neck LPM to a limb-forming state | [5] |
| Mouse Knockout (Conventional) | Prtg (Protogenin) | Anterior homeotic transformation of vertebrae; Increased rib-bearing vertebrae (from 13 to 15) | Posterior shift in Hoxc8, Hoxb6, Hoxb9 expression; Down-regulation of Hoxa10 | [48] |
| Mouse Knockout (Conventional) | Epop | Posterior homeotic transformations of the axial skeleton | Anterior shift in the expression boundary of specific Hox genes | [49] |
| Mouse Knockout (Multi-strain) | Hr (across 8 inbred strains) | Variable hairless phenotype penetrance (42.9% in BALB/c to 77.8% in B6N) | N/A (Phenotype confirmation) | [50] |
Core Signaling Pathways in Axial Patterning
The following diagram illustrates the core genetic and signaling pathway governing anterior-posterior vertebral patterning, integrating findings from both chick and mouse models. This pathway highlights how Hox gene expression is regulated and how it determines axial identity.
Detailed Experimental Protocols
Protocol 1: Dominant-Negative Hox Gene Electroporation in Chick Limb Bud
This protocol, adapted from fundamental chick studies, is used to interrogate the function of specific Hox genes in limb positioning [5].
- Principle: Electroporation delivers plasmids encoding dominant-negative (DN) forms of Hox genes into the lateral plate mesoderm (LPM). These DN proteins lack DNA-binding capability but sequester essential co-factors, thereby blocking the function of endogenous Hox proteins.
- Procedure:
- Embryo Preparation: Incubate fertilized chick eggs to Hamburger-Hamilton (HH) stage 12. Window the egg and visualize the embryo using vital dyes.
- DNA Solution Preparation: Prepare a solution containing the DN-Hox plasmid (e.g., DN-Hoxa4, a5, a6, or a7) and a tracer plasmid (e.g., pEGFP) in a Tris-EDTA buffer or PBS. A final concentration of 1-2 µg/µL with 0.05% fast green is typical.
- Microinjection: Using a pulled glass capillary needle and a microinjector, inject 0.1-0.5 µL of the DNA solution into the dorsal layer of the LPM at the prospective forelimb level.
- Electroporation: Position platinum plate electrodes on either side of the embryo. Apply five square pulses of 20 V for 50 ms duration, with 100 ms intervals, using an electroporator.
- Post-Operative Care: Seal the window with tape and return the eggs to the incubator for 8-10 hours until HH14.
- Analysis: Screen embryos for EGFP fluorescence to confirm successful transfection. Analyze phenotypes via whole-mount in situ hybridization for markers like Tbx5 and skeletal preparations.
Protocol 2: Generating Hox-Related Knockout Mice via Zygote Electroporation
This protocol outlines a universal method for creating knockout mice in multiple genetic backgrounds, relevant for validating Hox phenotypes observed in chicks [50].
- Principle: CRISPR-Cas9 ribonucleoproteins (RNPs) are delivered into mouse zygotes via electroporation to generate loss-of-function mutations in target genes, bypassing the need for complex embryonic stem cell manipulation.
- Procedure:
- Zygote Collection: Collect zygotes from super-ovulated female mice (e.g., C57BL/6, BALB/c) after mating or in vitro fertilization (IVF).
- RNP Complex Formation: Complex purified Cas9 protein with synthetic sgRNAs targeting an essential exon of the Hox gene of interest. Incubate to form RNP complexes. A concentration of 200 ng/µL Cas9 and 100 ng/µL sgRNA is effective.
- Electroporation Setup: Place approximately 50 zona-intact zygotes in an electroporation cuvette or glass slide with a 1 mm gap, submerged in the RNP solution.
- Pulse Delivery: Apply poring pulses (e.g., 30 V, 3 ms ON, 97 ms OFF, 4 pulses) followed by transferring pulses (e.g., 20 V, 50 ms ON, 50 ms OFF, 5 pulses) using a specialized electroporator (e.g., NEPA21).
- Embryo Culture and Transfer: Wash electroporated zygotes and culture them in KSOM medium overnight. Transfer viable two-cell embryos into the oviducts of pseudo-pregnant foster females.
- Genotyping and Phenotyping: Genotype founder (G0) pups and subsequent generations using long-range PCR and sequencing (e.g., nanopore sequencing) to characterize mutation spectra. Analyze skeletal phenotypes using Alcian Blue/Alizarin Red staining.
The Scientist's Toolkit: Essential Research Reagents
Table 2: Key Reagent Solutions for Hox Gene and Limb Development Research
| Reagent / Resource | Function / Application | Example Use in Context |
|---|---|---|
| Dominant-Negative Hox Plasmids | Loss-of-function studies by blocking endogenous Hox protein activity. | Investigating the role of Hox4/5 in establishing a permissive field for limb formation in chick [5]. |
| CRISPR-Cas9 RNP Complexes | Efficient generation of knockout alleles via zygote electroporation. | Creating mutant mouse lines targeting Hox genes or regulators like Prtg across multiple inbred strains [50] [48]. |
| Tol2 Transposon System | Stable genomic integration of transgenes in chicken. | Generating transgenic chicken reporter lines (e.g., Prrx1-ZsGreen) for visualizing limb mesenchyme [28]. |
| 3D Hyaluronic Acid (HA) Gel | In vitro 3D culture scaffold mimicking the limb bud extracellular matrix. | Maintaining and reprogramming limb progenitor cells (LPCs) in a defined in vitro system [14]. |
| Limb Progenitor Reprogramming Factors (Prdm16, Zbtb16, Lin28a) | Direct reprogramming of non-limb fibroblasts to a limb progenitor state. | Testing the sufficiency of factors to confer limb-forming potential, revealing core specification mechanisms [14]. |
Integrated Experimental Workflow for Cross-Model Validation
The following diagram outlines a logical workflow that integrates chick and mouse models to validate and generalize findings on Hox gene function, from initial discovery to mechanistic insight.
This workflow can be implemented as follows:
- Initial Discovery in Chick: Use chick electroporation for rapid screening and hypothesis generation. For example, experiments can establish that Hox4/5 genes create a permissive field for limb formation, while Hox6/7 provide an instructive signal [5].
- Genetic Validation in Mouse: Test the necessity of the genes identified in Step 1 using mouse knockout models. For instance, the discovery of Hox-mediated limb positioning in chick can be validated by examining LPM-specific conditional knockouts in mice to control for secondary effects from vertebral transformations [5] [48].
- In vitro Mechanistic Studies: Employ reprogramming assays and 3D culture systems to dissect the molecular mechanisms underlying the phenotypes observed in vivo. The combination of factors like Prdm16, Zbtb16, and Lin28a can be tested for their ability to reprogram non-limb fibroblasts into cells with limb progenitor properties, directly testing hypotheses about limb specification [14].
- Develop a Unified Model: Synthesize data from all models to build a comprehensive and conserved model of Hox gene function in vertebrate patterning, accounting for species-specific differences.
Functional assays provide critical insights into the biological potential and state of progenitor cells, serving as indispensable tools for developmental biologists and regenerative medicine researchers. Within the context of chick limb bud development and Hox gene electroporation experiments, these assays enable researchers to quantitatively measure fundamental cellular properties, including differentiation capacity, self-renewal capability, and functional maturation. The precise manipulation of Hox gene expression patterns through electroporation creates defined experimental systems where resulting changes in progenitor cell behavior must be rigorously characterized through standardized functional assessments. This application note details comprehensive methodologies for evaluating reprogramming potential and progenitor cell states, with specific consideration for integration within chick limb bud experimental systems. The protocols described herein incorporate recent advances in stem cell biology, including techniques for assessing and even reversing age-related dysfunction in stem cell populations, providing researchers with a contemporary toolkit for progenitor cell analysis.
Quantitative Functional Assay Data
The following tables summarize key quantitative parameters and outcomes for essential functional assays used in progenitor cell research. These data provide benchmark values for interpreting experimental results from chick limb bud systems and other progenitor cell models.
Table 1: Core Functional Assays for Progenitor Cell Characterization
| Assay Type | Measured Parameters | Key Readouts | Experimental Timeline |
|---|---|---|---|
| Clonogenic Assay | Colony formation efficiency, Colony size distribution | Number of colonies per plated cell, Colony diameter measurements | 7-14 days |
| Trilineage Differentiation | Differentiation efficiency toward specific lineages | Percentage of cells expressing lineage-specific markers | 14-21 days |
| Metabolic Reprogramming Assessment | Lysosomal activity, Mitochondrial function | Lysosomal pH, Metabolic flux measurements | 24-48 hours |
| Transplantation/Engraftment | Regenerative capacity in vivo | Engraftment percentage, Tissue reconstitution metrics | 4-8 weeks |
Table 2: Quantitative Reversal of Stem Cell Aging Parameters
| Intervention | Target | Functional Improvement | Reference Model |
|---|---|---|---|
| Lysosomal suppression | Vacuolar ATPase | >8-fold increase in blood-forming capacity | Aged hematopoietic stem cells [51] |
| Acidity reduction | Lysosomal pH | Restored metabolic and mitochondrial function | Murine model [51] |
| Epigenetic resetting | DNA methylation patterns | Improved epigenome and reduced inflammation | Ex vivo treatment [51] |
Experimental Protocols
Protocol: Clonogenic Assay for Progenitor Cell Potential
Background: This assay quantifies the self-renewal capacity of progenitor cells isolated from electroporated chick limb buds by measuring their ability to form distinct colonies from single cells.
Materials:
- Single-cell suspension from dissociated limb bud tissue
- Growth medium supplemented with appropriate cytokines
- 35mm low-attachment culture dishes
- Fixation solution (4% paraformaldehyde)
- Staining solution (crystal violet or cell-type-specific antibodies)
Methodology:
- Cell Preparation: Following electroporation and 48-hour expression period, dissociate limb bud tissue into single-cell suspension using collagenase/dispase treatment.
- Cell Plating: Seed cells at clonal density (500-1000 cells/cm²) in triplicate 35mm dishes containing growth medium optimized for progenitor cell expansion.
- Culture Conditions: Maintain cultures at 37°C with 5% CO₂ for 7-10 days without disturbance to allow colony formation.
- Fixation and Staining: Carefully remove medium, rinse with PBS, and fix colonies with 4% paraformaldehyde for 15 minutes. Stain with crystal violet solution (0.5% w/v) for 30 minutes.
- Quantification: Count colonies containing >50 cells using automated colony counter or manual microscopy. Calculate colony-forming efficiency as (number of colonies/number of cells plated) × 100%.
Technical Notes: For progenitor-specific analysis, perform immunocytochemistry for limb bud markers (e.g., HOX proteins) instead of crystal violet staining. Include control dishes from non-electroporated limb buds for baseline comparison.
Protocol: Assessment of Lysosomal Function in Progenitor Cells
Background: Adapted from recent breakthroughs in stem cell aging research, this protocol evaluates lysosomal activity as a key indicator of progenitor cell health and metabolic state following experimental manipulation [51].
Materials:
- LysoTracker Red DND-99 (or similar lysosomal pH indicator)
- Vacuolar ATPase inhibitor (e.g., Bafilomycin A1)
- Live-cell imaging setup with environmental control
- Flow cytometer with appropriate laser lines
Methodology:
- Cell Preparation: 72 hours post-electroporation, harvest progenitor cells from limb buds and culture in 96-well glass-bottom plates for imaging.
- Staining: Incubate cells with 50 nM LysoTracker Red in serum-free medium for 30 minutes at 37°C.
- Image Acquisition: Acquire fluorescence images using TRITC filter set (excitation/emission: 577/590 nm). Maintain temperature at 37°C throughout imaging.
- Quantitative Analysis: Measure fluorescence intensity per cell using ImageJ or similar software. Higher intensity indicates increased lysosomal acidity.
- Inhibition Assay: Treat parallel cultures with vacuolar ATPase inhibitor (10 nM Bafilomycin A1) for 4 hours before LysoTracker staining to assess functional reserve.
Technical Notes: This assay is particularly relevant for studies investigating the maintenance of progenitor cell potential during extended culture or following genetic manipulation that may affect metabolic state. LysoTracker signal intensity correlates with lysosomal activity, with hyperacidification indicating aged or dysfunctional states [51].
Protocol: Trilineage Differentiation Potential Assessment
Background: This protocol evaluates the multipotency of limb bud progenitor cells by directing their differentiation toward mesenchymal lineages (chondrogenic, osteogenic, and adipogenic), providing functional evidence of their developmental potential following Hox gene manipulation.
Materials:
- Chondrogenic differentiation medium: DMEM-HG, 1% ITS+, 100 nM dexamethasone, 50 μg/mL ascorbate-2-phosphate, 40 μg/mL proline, 10 ng/mL TGF-β3
- Osteogenic differentiation medium: DMEM, 10% FBS, 100 nM dexamethasone, 10 mM β-glycerophosphate, 50 μg/mL ascorbate-2-phosphate
- Adipogenic differentiation medium: DMEM, 10% FBS, 1 μM dexamethasone, 0.5 mM IBMX, 10 μg/mL insulin, 200 μM indomethacin
- Lineage-specific staining solutions: Alcian Blue (chondrogenic), Alizarin Red (osteogenic), Oil Red O (adipogenic)
Methodology:
- Chondrogenic Differentiation: Pellet 2.5×10⁵ cells in 15 mL polypropylene tube and culture in chondrogenic medium for 21 days, changing medium every 3-4 days. Assess differentiation with Alcian Blue staining for sulfated proteoglycans.
- Osteogenic Differentiation: Seed cells at 2×10⁴ cells/cm² in monolayer and culture in osteogenic medium for 14-21 days with medium changes every 3-4 days. Visualize mineralized matrix with Alizarin Red staining.
- Adipogenic Differentiation: Culture confluent monolayers in adipogenic induction medium for 3 days followed by 1-3 days in maintenance medium (DMEM with 10% FBS and 10 μg/mL insulin) for 2-4 cycles. Detect lipid vacuoles with Oil Red O staining.
Technical Notes: Include appropriate controls (cells maintained in growth medium without differentiation inducers) to account for spontaneous differentiation. Quantify differentiation efficiency by counting stained cells or extracting and measuring dyes spectrophotometrically.
Signaling Pathways and Experimental Workflows
Lysosomal Regulation of Progenitor Cell State
Progenitor Cell Functional Characterization Workflow
Research Reagent Solutions
Table 3: Essential Research Reagents for Progenitor Cell Functional Assays
| Reagent/Category | Specific Examples | Function in Assays | Application Notes |
|---|---|---|---|
| Cell Lineage Markers | CD34, CD133, KDR antibodies [52] | Identification and isolation of progenitor cell populations | Triple-positive cells (CD34+CD133+KDR+) indicate endothelial progenitor capacity |
| Lysosomal Probes | LysoTracker Red, Acridine Orange | Assessment of lysosomal activity and pH | Hyperacidification indicates aged/dysfunctional state; reversible with vATPase inhibition [51] |
| Differentiation Inducers | TGF-β3, BMP-2, Dexamethasone, IBMX | Direction of progenitor cells toward specific lineages | Specific cytokine combinations drive chondrogenic, osteogenic, or adipogenic differentiation |
| Vacuolar ATPase Inhibitors | Bafilomycin A1, Concanamycin A | Experimental reversal of lysosomal dysfunction | Restores youthful function in aged stem cells at nanomolar concentrations [51] |
| Electroporation Components | pCAGGS expression vectors, GFP reporters [7] | Hox gene delivery and lineage tracing in chick limb buds | Specific promoters enable targeted expression in limb bud progenitor populations |
| Metabolic Probes | MitoTracker, JC-1, 2-NBDG | Evaluation of mitochondrial function and glucose uptake | Complementary to lysosomal assays for comprehensive metabolic profiling |
The functional assays detailed in this application note provide a comprehensive framework for evaluating reprogramming potential and progenitor cell states within the context of chick limb bud development and Hox gene manipulation. The integration of classic differentiation assays with emerging metabolic assessment techniques, particularly the evaluation of lysosomal function, enables multidimensional characterization of progenitor cell biology. The recent demonstration that aged stem cells can be functionally rejuvenated through lysosomal modulation [51] opens new avenues for investigating how Hox gene networks influence progenitor cell aging and regenerative potential. By implementing these standardized protocols and analytical frameworks, researchers can generate quantitatively robust data that advances our understanding of progenitor cell biology in developmental systems and informs therapeutic applications in regenerative medicine.
Conclusion
Electroporation of Hox genes in the chick limb bud remains an indispensable technique for dissecting the complex mechanisms of vertebrate limb patterning. This synthesis confirms that a combinatorial Hox code, involving both permissive (Hox4/5) and instructive (Hox6/7) signals, precisely determines limb position. Mastering the methodological nuances—from rigorous experimental design and execution to comprehensive validation—is paramount for generating reliable data. Future research directions should leverage emerging technologies, such as inducible CRISPR-Cas9 systems and single-cell transcriptomics, to achieve temporal-spatial precision in gene editing and unravel the downstream networks controlled by Hox factors. The insights gained not only deepen our fundamental understanding of developmental biology but also directly inform biomedical research into congenital limb defects, evolutionary adaptations, and the principles of cellular reprogramming for regenerative medicine.
References
- 1. Hox gene [https://en.wikipedia.org/wiki/Hox_gene]
- 2. Quantitative Analysis of Differential Expression of HOX Genes ... [https://pmc.ncbi.nlm.nih.gov/articles/PMC7352544/]
- 3. HOX-Gene Cluster Organization and Genome Duplications ... [https://www.mdpi.com/1422-0067/23/17/9990]
- 4. Comparing anterior and posterior Hox complex formation ... [https://www.sciencedirect.com/science/article/pii/S0012160610002344]
- 5. Permissive and instructive Hox codes govern limb positioning [https://elifesciences.org/reviewed-preprints/100592]
- 6. Nr6a1 controls Hox expression dynamics and is a master ... [https://www.nature.com/articles/s41467-022-35303-4]
- 7. Congenic Method in the Chick Limb Buds by Electroporation [https://pubmed.ncbi.nlm.nih.gov/18638168/]
- 8. Candidate downstream regulated genes of HOX group 13 ... [https://www.sciencedirect.com/science/article/pii/S001216060400867X]
- 9. Hox genes regulate the onset of Tbx5 expression in the forelimb [https://pmc.ncbi.nlm.nih.gov/articles/PMC3413163/]
- 10. Electroporation into the Limb: Beyond Misexpression [https://link.springer.com/chapter/10.1007/978-4-431-09427-2_9]
- 11. Genetic and Functional Modularity of Hox Activities in the ... [https://pmc.ncbi.nlm.nih.gov/articles/PMC3554521/]
- 12. Genetic Regulation of Embryological Limb Development with ... [https://pmc.ncbi.nlm.nih.gov/articles/PMC2656784/]
- 13. Vertebrate limb bud development: moving towards integrative analysis of organogenesis | Nature Reviews Genetics [https://www.nature.com/articles/nrg2681]
- 14. Direct Reprogramming of Non-limb Fibroblasts to Cells with ... [https://pmc.ncbi.nlm.nih.gov/articles/PMC10932627/]
- 15. Article Tbx5 and Tbx4 Are Not Sufficient to Determine Limb ... [https://www.sciencedirect.com/science/article/pii/S1534580704004216]
- 16. Tbx5 and Tbx4 are not sufficient to determine limb-specific ... [https://pubmed.ncbi.nlm.nih.gov/15621531/]
- 17. Reconstruction and in vivo analysis of the extinct tbx5 gene ... [https://bmcecolevol.biomedcentral.com/articles/10.1186/1471-2148-14-75]
- 18. Article Timed Collinear Activation of Hox Genes during ... [https://www.sciencedirect.com/science/article/pii/S0960982218314751]
- 19. A Combination of Activation and Repression by a Colinear ... [https://journals.plos.org/plosgenetics/article?id=10.1371/journal.pgen.1004245]
- 20. Permissive and instructive Hox codes govern limb positioning [https://elifesciences.org/reviewed-preprints/100592/reviews]
- 21. Limb bud [https://en.wikipedia.org/wiki/Limb_bud]
- 22. Hox genes control vertebrate body elongation by collinear ... [https://elifesciences.org/articles/04379]
- 23. Similarities and differences in the regulation of HoxD ... [https://pmc.ncbi.nlm.nih.gov/articles/PMC6283595/]
- 24. Hox gene activity directs physical forces to differentially ... [https://pmc.ncbi.nlm.nih.gov/articles/PMC11537829/]
- 25. Hox genes control vertebrate body elongation by collinear ... [https://pmc.ncbi.nlm.nih.gov/articles/PMC4384752/]
- 26. An electroporation cytometry system for long-term, live cell ... [https://pmc.ncbi.nlm.nih.gov/articles/PMC11364459/]
- 27. Quantitative study of electroporation-mediated molecular ... [https://pmc.ncbi.nlm.nih.gov/articles/PMC1301274/]
- 28. Generation of a transgenic chicken line with reporters for ... [https://www.sciencedirect.com/science/article/abs/pii/S0012160625000090]
- 29. A transgenic quail model that enables dynamic imaging of ... [https://pmc.ncbi.nlm.nih.gov/articles/PMC4550965/]
- 30. Negative Controls: A Tool for Detecting Confounding and ... [https://pmc.ncbi.nlm.nih.gov/articles/PMC3053408/]
- 31. Presenting data in tables and charts - PMC [https://pmc.ncbi.nlm.nih.gov/articles/PMC4008059/]
- 32. Presentation of Quantitative Data [https://ihatepsm.com/blog/presentation-quantitative-data]
- 33. Transgene Introduction into the Chick Limb Bud by ... [https://pubmed.ncbi.nlm.nih.gov/28809023/]
- 34. Anterior Hox Genes Interact with Components of the Neural ... [https://pmc.ncbi.nlm.nih.gov/articles/PMC3184476/]
- 35. Congenic method in the chick limb buds by electroporation [https://tohoku.elsevierpure.com/en/publications/congenic-method-in-the-chick-limb-buds-by-electroporation/]
- 36. Limb positioning and initiation: an evolutionary context of ... [https://pmc.ncbi.nlm.nih.gov/articles/PMC10623539/]
- 37. The apical ectodermal ridge regulates Hox-7 and Hox-8 gene ... [https://pubmed.ncbi.nlm.nih.gov/1684333/]
- 38. Conserved and species-specific chromatin remodeling ... [https://www.nature.com/articles/s41467-021-25935-3]
- 39. Cracking rare disorders: a new minimally invasive RNA- ... [https://www.nature.com/articles/s41525-025-00502-7]
- 40. Long read RNA sequencing of transposable elements from ... [https://pmc.ncbi.nlm.nih.gov/articles/PMC7617990/]
- 41. Multiplexed RNA imaging and in profiling in living cells - Chemical... situ [https://pubs.rsc.org/en/content/articlehtml/2025/sc/d5sc06220a]
- 42. In Situ Hybridization: Tips, Techniques, and Expert Insights [https://www.the-scientist.com/tips-and-tricks-for-in-situ-hybridization-71928]
- 43. Detection of Individual Endogenous RNA Transcripts In ... [https://www.sciencedirect.com/science/article/abs/pii/S0076687910720048]
- 44. Current research on mechanisms of limb bud development ... [https://www.jstage.jst.go.jp/article/ggs/99/0/99_23-00287/_html/-char/en]
- 45. Tbx5 is essential for forelimb bud initiation following ... [https://pubmed.ncbi.nlm.nih.gov/12490567/]
- 46. Fibroblast Growth Factor 10 and Vertebrate Limb ... [https://www.frontiersin.org/journals/genetics/articles/10.3389/fgene.2018.00705/full]
- 47. Transfection into Chick Embryos in Ovo/Others by ... [https://nepagene.jp/en/applications/electroporation-en/in-vivo-other-e/chick-embyros]
- 48. Protogenin facilitates trunk-to-tail HOX code transition via ... [https://www.nature.com/articles/s42003-024-07342-8]
- 49. The PRC2-associated factor EPOP is required for Hox ... [https://pubmed.ncbi.nlm.nih.gov/40834979/]
- 50. A universal method for generating knockout mice in ... [https://pmc.ncbi.nlm.nih.gov/articles/PMC10497038/]
- 51. Mount Sinai scientists reverse aging in blood stem cells by ... [https://www.eurekalert.org/news-releases/1107277]
- 52. Unlocking the potential of endothelial progenitor cells [https://pmc.ncbi.nlm.nih.gov/articles/PMC12497398/]