Optimizing Chromatin Immunoprecipitation (ChIP) in Embryonic Tissue: A Complete Guide for Researchers
This article provides a comprehensive resource for scientists and drug development professionals seeking to master Chromatin Immunoprecipitation (ChIP) in embryonic tissue contexts.
Optimizing Chromatin Immunoprecipitation (ChIP) in Embryonic Tissue: A Complete Guide for Researchers
Abstract
This article provides a comprehensive resource for scientists and drug development professionals seeking to master Chromatin Immunoprecipitation (ChIP) in embryonic tissue contexts. Covering foundational principles through advanced applications, we detail specialized protocols for mouse embryonic stem cells (mESCs) and in vivo embryonic tissues, addressing critical challenges like limited starting material and complex chromatin states. The guide offers step-by-step methodological workflows, targeted troubleshooting for common pitfalls, and rigorous validation approaches to ensure robust, reproducible data for studying developmental gene regulation, epigenetic mechanisms, and transcription factor dynamics.
Navigating Unique Challenges in Embryonic Tissue Epigenetics
Why Embryonic Tissue Poses Unique Challenges for ChIP
FAQs: Navigating Common Experimental Hurdles
FAQ 1: What is the most common cause of low chromatin yield from embryonic tissues, and how can I mitigate it?
Low chromatin yield most commonly results from the inherently small starting amount of biological material and incomplete cell or tissue lysis due to the complex structure of embryonic samples [1].
To mitigate this:
- Ensure complete tissue disaggregation: Use a Dounce homogenizer or a Medimachine system to create a single-cell suspension before cross-linking. Note that a Dounce homogenizer is strongly recommended for brain tissue [1].
- Verify complete lysis: Visually inspect cell nuclei under a microscope before and after sonication to confirm the nuclear membrane has been broken [1].
- Pool samples: If working with very early embryos, pool tissues from multiple specimens (e.g., 30 chicken spinal neural tube segments) to accumulate sufficient cellular material for one ChIP reaction [2].
FAQ 2: How does chromatin fragmentation for embryonic tissue differ from standard cell culture protocols?
Chromatin fragmentation must be meticulously optimized for embryonic tissue because over- or under-fragmentation is a major point of failure. Embryonic tissue can be more sensitive, and the presence of various cell types and extracellular matrix requires rigorous standardization [1] [2].
- For enzymatic fragmentation (Micrococcal Nuclease): You must perform a digestion test by titrating the amount of enzyme against a fixed amount of tissue. The goal is to achieve a DNA fragment range of 150–900 base pairs [1].
- For sonication: Conduct a sonication time-course experiment. For tissue fixed for 10 minutes, optimal sonication should produce a DNA smear with approximately 60% of fragments less than 1 kb. Over-sonication (over 80% of fragments <500 bp) can damage chromatin and lower IP efficiency [1].
FAQ 3: My ChIP efficiency is low. What are the key steps to optimize for embryonic samples?
Low ChIP efficiency with embryonic tissue often stems from suboptimal antibody binding or excessive sample loss during numerous protocol steps. A simplified protocol minimizes these steps to reduce loss [2].
Key optimization points include:
- Antibody Validation: Use "ChIP-grade" antibodies that are affinity-purified and at high concentration (~1 mg/mL) [3].
- Reduce Protocol Steps: Follow low-input protocols that reduce the number of tube transfers and purification steps to minimize sample loss [2] [4].
- Cross-linking Time: Avoid over-crosslinking, which can mask epitopes. Keep cross-linking with formaldehyde within the 10–30 minute range [1].
Troubleshooting Guide: Identifying and Solving Problems
| Problem | Possible Causes | Recommended Solutions |
|---|---|---|
| Low Chromatin Concentration [1] | Insufficient starting material; Incomplete cell/tissue lysis. | Pool embryonic samples; Accurately count/disseect tissue; Visually confirm complete nuclear lysis under a microscope. |
| Chromatin Under-Fragmentation [1] | Over-crosslinked cells; Too much input material processed. | Shorten crosslinking time (10-30 min); Reduce amount of tissue per sonication; Increase MNase enzyme or sonication time. |
| Chromatin Over-Fragmentation [1] | Excessive enzymatic digestion or sonication. | Titrate MNase enzyme carefully; Perform a sonication time-course; Use minimal sonication cycles needed for desired fragment size. |
| High Background & Low Resolution [1] | Large chromatin fragments; Non-specific antibody binding. | Ensure fragmentation to 150-900 bp; Use validated ChIP-grade antibodies; Include necessary controls (e.g., species-matched IgG). |
Essential Data for Experimental Planning
Expected Chromatin Yield from Various Tissues
This data is critical for planning your experiments and knowing what to expect when working with limited embryonic samples. Yields are from 25 mg of tissue or 4 x 10⁶ HeLa cells [1].
| Tissue / Cell Type | Total Chromatin Yield (Enzymatic Protocol) | Expected DNA Concentration (Enzymatic Protocol) |
|---|---|---|
| Spleen | 20–30 µg | 200–300 µg/ml |
| Liver | 10–15 µg | 100–150 µg/ml |
| Kidney | 8–10 µg | 80–100 µg/ml |
| HeLa Cells | 10–15 µg | 100–150 µg/ml |
| Brain | 2–5 µg | 20–50 µg/ml |
| Heart | 2–5 µg | 20–50 µg/ml |
Research Reagent Solutions
This table details key materials and their specific functions in ChIP protocols for embryonic tissues.
| Reagent / Tool | Function in the Protocol | Key Consideration for Embryonic Tissue |
|---|---|---|
| Dounce Homogenizer [1] | Tissue disaggregation to create a single-cell suspension. | Essential for tough tissues like brain; ensures uniform cross-linking and lysis. |
| Magnetic Protein G/A Beads [3] | Immunoprecipitation of antibody-bound chromatin complexes. | Preferred over slurry beads for easier handling and reduced sample loss in low-input protocols. |
| Micrococcal Nuclease (MNase) [1] | Enzymatic fragmentation of cross-linked chromatin. | Requires careful titration for each embryonic tissue type to achieve ideal 150-900 bp fragments. |
| Sodium Butyrate [2] | Optional additive to DMEM/PBS during cross-linking. | Critical for preserving histone acetylation marks (e.g., H3K27ac) during the ChIP process. |
| Protease Inhibitors & PMSF [2] | Protect chromatin from degradation during lysis and sonication. | Vital for embryonic tissues rich in proteases; must be added fresh to lysis buffers. |
| "ChIP-grade" Antibodies [3] | Target-specific immunoprecipitation of proteins or histone marks. | High concentration, affinity-purified antibodies are non-negotiable for low-abundance samples. |
Optimized Workflow for Embryonic Tissue ChIP
The diagram below outlines a generalized workflow, highlighting steps that require special attention when working with embryonic tissue.
Advanced Methodology: ChIP for Low-Abundance Embryonic Samples
The following protocol is adapted from a established methodology designed for low to medium cell numbers (5 x 10⁴ - 5 x 10⁵ cells), making it suitable for embryonic tissues like the spinal neural tube, frontonasal prominences, and epiblast [2] [4].
Day 1: Crosslinking
- Tissue Preparation: Microdissect embryonic tissue (e.g., chicken SNT at stage HH19) and pool as necessary. Perform all steps on ice with pre-chilled solutions [2].
- Crosslinking: Add 500 µL of DMEM with 10% FBS (or PBS with 0.1% BSA) to the tissue. Add 13.5 µL of 37% formaldehyde (1% final concentration) and rotate for 15 minutes at room temperature [2].
- Quenching: Add 25 µL of 2.5 M glycine and rotate for 10 minutes at room temperature [2].
- Washing: Pellet the cells by centrifugation at 850 x g for 5 minutes at 4°C. Discard the supernatant and wash the pellet once with 500 µL of a cold wash buffer. Centrifuge again and discard the supernatant [2].
Chromatin Extraction and Shearing
- Lysis: Resuspend the pellet in 300 µL of complete Lysis Buffer (containing fresh protease inhibitors and PMSF). Incubate on a rocking platform for 10 minutes at 4°C [2].
- Sonication: Sonicate the samples to shear DNA to fragments between 200-500 bp. This is a critical step that requires pre-optimization via a time-course experiment for each tissue type and sonicator. For example, chicken SNT may require 11 cycles of 30-second pulses [2] [5].
- Clarification: Centrifuge the sonicated lysate at 16,000 x g for 10 minutes at 4°C. Transfer the supernatant (containing sheared chromatin) to a fresh tube. Discard the pellet of cellular debris [2].
Immunoprecipitation and DNA Recovery
- Pre-clearing and Incubation: Dilute the lysate and set aside a small aliquot as the "Input" control. Incubate the remaining sample with the target-specific antibody (e.g., against H3K4me3 or H3K27me3) on a rotator overnight at 4°C [2] [5].
- Capture: The next day, add antibody-bound chromatin to pre-washed magnetic Protein A/G beads. Rotate vertically for at least 4 hours at 4°C [5].
- Washing: Place the tube on a magnetic stand, and after the beads settle, pour off the liquid. Wash the beads 3-4 times with 1 mL of ice-cold RIPA wash buffer, followed by a final wash with TE buffer containing 50 mM NaCl [2] [5].
- Elution and Reverse Cross-links: Add 210 µL of elution buffer to the beads and incubate at 65°C for 15 minutes with shaking. Centrifuge and transfer the supernatant to a new tube. Also, add elution buffer to the saved "Input" control. Incubate all samples at 65°C overnight to reverse the cross-links [5].
- DNA Purification: The following day, treat samples with RNase A and then Proteinase K. Purify the DNA using a standard method like phenol-chloroform extraction or a commercial PCR purification kit [2] [5]. The purified DNA is now ready for qPCR analysis or preparation of a sequencing library (ChIP-seq).
Key Biological Questions Addressable with Embryonic Tissue ChIP
Chromatin Immunoprecipitation (ChIP) is an antibody-based technique used to investigate interactions between proteins and DNA within the native chromatin context of living cells [6] [7]. When applied to embryonic tissue research, this method becomes particularly powerful for deciphering gene regulatory networks that control development, cell differentiation, and tissue specification [2] [8]. This technical support guide addresses the specific challenges and optimized protocols for implementing ChIP in embryonic research contexts, enabling scientists to investigate protein-DNA interactions during critical developmental stages.
Fundamental Principles & Method Selection
FAQ: What types of biological questions can ChIP address in embryonic tissues?
ChIP enables researchers to address several key biological questions in embryonic development:
- Mapping Transcription Factor Binding: Identify specific genomic regions where transcription factors and co-regulators bind to control gene expression programs during development [9] [6].
- Characterizing Histone Modifications: Map the genomic location of histone modifications (e.g., H3K4me3, H3K27me3, H3K27ac) that define chromatin states and influence gene activity [2] [10].
- Identifying Regulatory Elements: Discover and characterize enhancers, promoters, and other regulatory sequences active during embryogenesis [2].
- Tissue-Specific Gene Regulation: Investigate the molecular mechanisms underlying tissue-specific gene expression patterns, even in heterogeneous embryonic tissues [8].
FAQ: How do I choose between Native ChIP (N-ChIP) and Crosslinked ChIP (X-ChIP)?
The choice between N-ChIP and X-ChIP depends on your protein of interest and experimental goals [10]:
| Method | Best For | Advantages | Disadvantages |
|---|---|---|---|
| Native ChIP (N-ChIP) | Histone modifications and variants [11] [10] | Better antibody specificity; higher chromatin recovery efficiency [11] | Not suitable for non-histone proteins; potential nucleosome rearrangement during digestion [11] |
| Crosslinked ChIP (X-ChIP) | Transcription factors, co-activators, and other chromatin-associated proteins [9] [11] | Captures transient interactions; works with both histone and non-histone proteins [10] | Less efficient immunoprecipitation; potential epitope disruption from crosslinking [11] |
The following diagram illustrates the core workflow for a crosslinked ChIP (X-ChIP) experiment from embryonic tissue:
Optimized Protocols for Embryonic Tissues
Protocol 1: ChIP from Low-Abundance Embryonic Samples
This protocol is optimized for limited embryonic material (5×10⁴ - 5×10⁵ cells) and has been successfully applied to chicken embryonic tissues and adult mouse tissues [2]:
Day 1: Crosslinking
- Tissue Preparation: Homogenize freshly dissected or frozen embryonic tissue in DMEM with 10% FBS. For histone acetylation studies, include 1M Na-butyrate [2].
- Crosslinking: Add 37% formaldehyde to 1% final concentration. Incubate 15 minutes at room temperature on a rotator [2] [5].
- Quenching: Add 2.5M glycine to 125mM final concentration. Incubate 10 minutes at room temperature [2].
- Washing: Pellet cells (850 × g, 5 minutes, 4°C). Wash once with cold wash buffer and centrifuge again [2].
Day 1: Lysis and Sonication
- Lysis: Resuspend pellet in 300μL complete lysis buffer (supplemented with protease inhibitors). Incubate 10 minutes at 4°C on a rocking platform [2].
- Sonication: Sonicate samples at 4°C (e.g., 7 minutes total, 30 seconds on/off intervals) until DNA fragments are 200-500bp [2] [5].
- Clarification: Centrifuge (16,000 × g, 10 minutes, 4°C). Transfer supernatant to a fresh tube [2].
Day 1: Immunoprecipitation
- Dilution: Dilute lysate in ChIP dilution buffer [2].
- Antibody Incubation: Add specific antibody (concentration should be optimized) and incubate overnight at 4°C with rotation [6].
- Bead Capture: Add pre-washed magnetic beads (Protein A/G). Rotate vertically at 4°C for 4 hours [2] [5].
- Washing: Wash beads sequentially with:
- RIPA wash buffer (4 times)
- TE with 50mM NaCl (once) [2]
Day 2: DNA Recovery
- Elution: Add 210μL elution buffer (1% SDS, 0.1M NaHCO₃). Incubate 15 minutes at 65°C with shaking [2] [5].
- Crosslink Reversal: Incubate eluates overnight at 65°C [2].
- DNA Purification: Treat with RNase A (0.2mg/mL, 37°C, 2 hours) followed by Proteinase K (0.2mg/mL, 55°C, 2 hours). Purify DNA using silica columns or phenol-chloroform extraction [2] [5].
Protocol 2: ChIP from Early-Stage Mouse Embryos
This protocol is optimized for single E8.5 mouse embryos (yielding 3-5×10⁶ cells) and allows division into multiple aliquots for investigating different proteins or controls [8]:
Embryo Dissociation
- Isolation: Isolate E8.5 embryos in dissection medium (DMEM, 10% FBS, 20mM HEPES, antibiotics) [8].
- Dissociation: Add 20 units Collagenase type II in 200μL DPBS. Shake at 100rpm, 37°C for 20 minutes [8].
- Filtering: Pass cell suspension through 40μm cell strainer. Wash with 600μL DPBS and centrifuge (4000 × g, 5 minutes, 4°C) [8].
Crosslinking and Sonication
- Crosslinking: Resuspend cells in 200μL dissection medium. Add formaldehyde to 1% final concentration. Incubate 10 minutes at room temperature [8].
- Quenching: Centrifuge (4000 × g, 3 minutes, 4°C). Wash with DPBS containing protease inhibitors [8].
- Lysis and Sonication: Resuspend pellet in 100μL SDS lysis buffer. Add another 100μL SDS lysis buffer. Sonicate using Bioruptor (5 minutes × 8 cycles, 30 seconds on/off, high power) to shear DNA to 200-500bp [8].
- Aliquoting: Divide sonicated sample into up to 5 aliquots. Dilute 10-fold in ChIP dilution buffer [8].
Immunoprecipitation
- Pre-clearing: Incubate with 75μL Salmon Sperm DNA/Protein A or G Agarose slurry for 1 hour at 4°C with rotation [8].
- IP: Add 4μg specific antibody per sample. Incubate overnight at 4°C with rotation [8].
- Bead Capture: Add 60μL Salmon Sperm DNA/Protein A or G Agarose slurry. Incubate 1 hour at 4°C with rotation [8].
- Washing: Wash sequentially with:
- Low salt wash buffer (2 times)
- High salt wash buffer (1 time)
- LiCl wash buffer (1 time)
- TE buffer (2 times) [8]
DNA Purification
- Elution: Elute DNA with freshly prepared elution buffer (1% SDS, 0.1M NaHCO₃) [8].
- Crosslink Reversal: Reverse crosslinks by adding 5M NaCl and incubating at 65°C for 4 hours or overnight [8].
- DNA Recovery: Treat with Proteinase K, then purify DNA by phenol-chloroform extraction and ethanol precipitation [8].
Troubleshooting Guides
FAQ: How can I optimize chromatin shearing for embryonic tissues?
Chromatin shearing is a critical step that requires careful optimization. The following table summarizes common issues and solutions:
| Problem | Possible Causes | Solutions |
|---|---|---|
| Incomplete shearing (DNA fragments >1000bp) | Insufficient sonication/digestion; over-crosslinking | - Increase sonication time/duration [10]- Optimize crosslinking time (typically 10-15 min for embryos) [6] [8]- Verify sonicator settings and sample volume |
| Over-shearing (DNA fragments <150bp) | Excessive sonication | - Reduce sonication time/duration [10]- Use cooler conditions to prevent overheating- Test different sonication intervals |
| Variable fragment sizes | Inconsistent sample handling | - Ensure uniform sample volume across tubes [7]- Keep samples cold during sonication [2]- Use focused ultrasonicator for more consistent results |
| Low chromatin yield | Insufficient starting material; sample loss | - Pool embryos if necessary [2]- Use carrier molecules in extreme cases [11]- Minimize transfer steps |
FAQ: How do I address high background or non-specific signals?
High background signals can arise from multiple sources. Key troubleshooting approaches include:
- Antibody Specificity: Validate antibodies using positive and negative control regions [6]. Include species-matched IgG controls for each experiment [6].
- Washing Stringency: Ensure appropriate salt concentrations in wash buffers. Implement sequential washing with low salt, high salt, LiCl, and TE buffers [6] [8].
- Pre-clearing: Pre-clear chromatin lysates with Protein A/G beads before immunoprecipitation to reduce non-specific binding [8].
- Blocking: Use appropriate blocking agents (e.g., BSA, salmon sperm DNA) to reduce non-specific antibody binding [6].
FAQ: What controls are essential for interpreting embryonic ChIP results?
Proper controls are critical for valid interpretation of embryonic ChIP data:
- Input DNA: Reserve an aliquot of sonicated chromatin before immunoprecipitation (typically 1-10% of total) [6] [8].
- Negative Control Antibody: Use species-matched non-specific IgG or antibodies against unrelated proteins [6].
- Positive Control Regions: Include primers for genomic regions known to be enriched or not enriched for your target [6].
- Negative Control Regions: Amplify genomic regions not expected to bind your protein of interest (e.g., silent genes) [10].
- Tissue Specificity Controls: For tissue-specific factors, include control regions from tissues where the factor is not expressed [8].
The Scientist's Toolkit: Essential Research Reagents
The following table outlines key reagents and their functions for successful embryonic tissue ChIP experiments:
| Reagent Category | Specific Examples | Function | Optimization Tips |
|---|---|---|---|
| Crosslinking Agents | Formaldehyde [2] [8] | Crosslinks proteins to DNA | Optimize concentration (typically 1%) and time (10-15 min for embryos) [6] |
| Protease Inhibitors | PMSF, Leupeptin, Aprotinin [6] [7] | Prevent protein degradation | Add fresh before use; use appropriate cocktails for embryonic tissues |
| Lysis Buffers | SDS Lysis Buffer [8], RIPA Buffer [6] | Release chromatin from nuclei | Adjust detergent concentration based on embryonic tissue type |
| Antibodies | Specific to target proteins (e.g., H3K4me3, H3K27ac, transcription factors) [2] [8] | Immunoprecipitate target protein-DNA complexes | Validate for ChIP applications; titrate for optimal signal-to-noise [6] |
| Magnetic Beads | Protein A/G Magnetic Beads [6] | Capture antibody-protein-DNA complexes | Wash thoroughly before use; use appropriate bead:antibody ratio |
| DNA Purification Kits | Silica-based columns [6] [7] | Purify DNA after crosslink reversal | Ensure removal of proteins and reagents that inhibit downstream applications |
| Enzymes | RNase A, Proteinase K [2] [6] | Remove RNA and proteins from final DNA preparation | Quality matters; use molecular biology grade enzymes |
Advanced Applications & Future Directions
FAQ: Can ChIP be applied to study heterogeneous embryonic tissues?
Yes, ChIP can be applied to heterogeneous embryonic tissues, with certain considerations [8]:
- Tissue-Specific Factors: Immunoprecipitation of tissue-specific factors primarily isolates chromatin from the cell type where the factor is expressed [8].
- Chromatin Modifications: Histone modifications associated with gene activation will primarily be detected in cell types where those genes are active [8].
- Interpretation Limitations: Results represent an average across all cell types in the sample, which may mask cell type-specific effects in minor populations [5].
- Emerging Approaches: New low-cell methods (μChIP, Q2ChIP) enable future applications to smaller, more defined embryonic cell populations [11].
FAQ: What downstream applications are most suitable for embryonic ChIP samples?
The choice of downstream application depends on your research question and available resources:
| Application | Best For | Input Requirements | Advantages |
|---|---|---|---|
| ChIP-qPCR | Analyzing specific candidate regions [9] [10] | Low DNA requirements | Quantitative; cost-effective; rapid turnaround [10] |
| ChIP-seq | Genome-wide mapping [9] [2] | Higher DNA requirements | Comprehensive; high resolution; identifies novel sites [2] [11] |
| ChIP-chip | Genome-wide mapping when sequencing is unavailable | Moderate DNA requirements | Established technology; good coverage [11] |
The decision framework below illustrates the process for selecting appropriate downstream analysis methods based on experimental goals and sample characteristics:
Chromatin Immunoprecipitation (ChIP) has become an indispensable technique for studying protein-DNA interactions and epigenetic mechanisms governing gene expression. When applied to embryonic tissue research, this technique faces two paramount challenges: the inherently limited biological material available and the significant cellular heterogeneity present within developing tissues. This technical support center provides targeted troubleshooting guides and FAQs to help researchers overcome these specific obstacles, enabling robust ChIP experiments even with the most challenging embryonic samples.
Core Challenges in Embryonic Tissue ChIP
Limited Starting Material
Embryonic tissue samples, particularly from early developmental stages or specific micro-dissected regions, often provide extremely low cell numbers, falling far below the 10⁵-10⁷ cells required for conventional ChIP-seq protocols [12]. This scarcity necessitates specialized approaches throughout the experimental workflow.
Table 1: Impact of Low Cell Numbers on Conventional ChIP Steps
| Experimental Step | Conventional Requirement | Challenges at Low Cell Numbers |
|---|---|---|
| Crosslinking | 10⁵-10⁷ cells [12] | Reduced representation of binding sites; increased technical variability |
| Chromatin Shearing | Standardized for high input | Inefficient shearing; significant material loss |
| Immunoprecipitation | 100-500 μg chromatin [13] | Antibody excess; poor equilibrium; high background noise |
| Library Preparation | Standard PCR amplification | Increased amplification bias; reduced complexity |
Cellular Heterogeneity
Embryonic tissues comprise diverse cell types undergoing dynamic differentiation states. Bulk ChIP methods mask this crucial heterogeneity, potentially obscuring critical regulatory events unique to rare subpopulations [14]. Single-cell technologies have revealed that subsets of cells within tissues can possess distinct chromatin states that predict functional behaviors, such as therapy resistance in cancer [14].
Frequently Asked Questions (FAQs)
Q1: What is the absolute minimum number of cells needed for a successful ChIP experiment?
While conventional ChIP requires 10⁵-10⁷ cells [12], advanced methodologies have dramatically reduced this requirement. CUT&RUN can be performed with 100-1,000 cells [12], and techniques like ULI-NChIP can generate quality histone modification maps from as few as 1,000 cells [12]. The practical minimum depends on your specific protein of interest and the technology employed.
Q2: How can I validate that my ChIP results aren't biased by cellular heterogeneity in my embryonic tissue samples?
Employ single-cell control strategies when possible. For bulk experiments, validate findings using complementary techniques such as immunofluorescence or RNA-seq on sorted populations. Computational deconvolution approaches can also help infer cellular composition from bulk ChIP-seq data, though these require appropriate reference datasets.
Q3: What are the key considerations when choosing between X-ChIP and N-ChIP for embryonic tissues?
X-ChIP (crosslinking ChIP) uses formaldehyde to fix protein-DNA interactions and is preferred for transcription factors and co-factors. However, it may cause epitope masking [12]. N-ChIP (native ChIP) avoids crosslinking and uses micrococcal nuclease for digestion, better preserving chromatin structure but potentially losing weak protein-DNA interactions [12]. For limited embryonic material, N-ChIP often provides superior signal-to-noise ratio for histone modifications.
Q4: How critical is sonication optimization for small-scale ChIP experiments?
Extremely critical. Oversonication can destroy rare epitopes, while undersonication reduces resolution and increases background. Always test fragmentation efficiency by running de-crosslinked chromatin on an agarose gel, aiming for 200-600 bp fragments [7]. For low cell numbers, consider focused ultrasonication with microTUBEs to minimize sample loss.
Troubleshooting Guides
Problem: High Background Noise in Low-Input ChIP
Potential Causes and Solutions:
- Insufficient pre-clearing: Pre-clear chromatin with 50 μL Protein A/G PLUS-Agarose for 30 minutes at 4°C before adding primary antibody [13].
- Inadequate washing: Perform sequential washes with low salt, high salt, LiCl, and TE buffers [15]. Increase wash volumes relative to bead volume.
- Antibody specificity: Include appropriate controls: biotinylated normal IgG for negative control [7] and primers for a known target gene as positive control [7].
- Chromatin over-fragmentation: Optimize sonication conditions. For a Heat Systems-Ultrasonics sonicator, try 4% output power, 70% duty, output control 3, with 4 rounds of 15 pulses (2-second pulses) with 2-minute rests on ice between rounds [7].
Problem: Inconsistent Results Across Embryonic Tissue Replicates
Potential Causes and Solutions:
- Cellular heterogeneity: Implement cell sorting prior to ChIP or adopt single-cell ChIP approaches. Single-cell ChIP-seq has identified subpopulations with distinct chromatin states within seemingly homogeneous tissues [14].
- Variable crosslinking efficiency: Standardize fixation conditions precisely. Use 1% formaldehyde final concentration for exactly 10 minutes at room temperature [13] [15], then quench with 0.125 M glycine [7] [13].
- Epitope instability: Add protease inhibitors (10 μg/mL leupeptin, 10 μg/mL aprotinin, and 1 mM PMSF) to lysis and dilution buffers [7] and process samples on ice whenever possible.
Advanced Methodologies for Limited Material
Table 2: Comparison of Low-Input ChIP Methodologies
| Method | Cell Number | Advantages | Limitations |
|---|---|---|---|
| ULI-NChIP [12] | 10³-10⁶ | High-quality histone maps; minimal background | Limited to robust histone modifications |
| ChIPmentation [12] | ~10,000 | Fast library prep; cost-effective | May miss weak binding sites |
| MOWChIP-seq [12] | ~100 | Microfluidic precision; genome-wide coverage | Specialized equipment required |
| CUT&RUN [12] | 100-1,000 | High signal-to-noise ratio; in situ digestion | Protocol optimization needed |
| CUT&Tag [12] | Single-cell level | Highest sensitivity; streamlined workflow | Requires high-quality pA/G-Tn5 enzyme |
Protocol: Modified ULI-NChIP for Embryonic Tissues
Day 1: Sample Preparation and Chromatin Digestion
- Tissue Processing: Grind frozen embryonic tissue to powder under liquid nitrogen using pre-cooled mortar and pestle [15].
- Crosslinking (Optional): For N-ChIP, omit crosslinking. For X-ChIP, add 1% formaldehyde to powdered tissue in PBS and incubate 10 minutes at room temperature with agitation [15].
- Nuclear Isolation: Resuspend powder in Cell Lysis Buffer (5 mM HEPES, 85 mM KCl, 0.5% NP40, pH 8.0) with protease inhibitors. Incubate 15 minutes at 4°C [15].
- MNase Digestion: Digest chromatin with 0.5-2 U MNase/μL for 5-15 minutes at 37°C to achieve mostly mononucleosomes.
- Stop Reaction: Add EDTA to 5 mM final concentration and place on ice.
Day 2: Immunoprecipitation
- Pre-clearing: Incubate chromatin with 25 μL magnetic beads for 1 hour at 4°C [15].
- Antibody Binding: Divide pre-cleared chromatin into aliquots. Add specific antibody or control IgG. Incubate overnight at 4°C with rotation [15].
- Bead Capture: Add 45 μL pre-washed magnetic beads and incubate 2 hours at 4°C [15].
Day 3: Washes and Elution
- Stringent Washes: Wash beads sequentially with:
- Low salt buffer (twice)
- High salt buffer (twice)
- LiCl buffer (twice)
- TE buffer (twice) [15]
- DNA Elution: Elute DNA with 100 μL Elution Buffer, incubating 10 minutes at 65°C. Repeat for total 200 μL eluate [15].
- Reverse Crosslinks: Incubate samples overnight at 65°C [15].
Day 4: DNA Purification and Analysis
- Proteinase K Treatment: Add Proteinase K (50 μg/mL final) and incubate 1 hour at 42°C [15].
- DNA Purification: Purify DNA using silica-based columns or chelating resin [7].
- Quality Assessment: Analyze DNA fragment size using bioanalyzer and quantify by qPCR.
Workflow Visualization
The Scientist's Toolkit: Essential Research Reagents
Table 3: Key Reagents for Limited-Input Embryonic Tissue ChIP
| Reagent Category | Specific Examples | Function | Considerations for Embryonic Tissue |
|---|---|---|---|
| Crosslinking Agents | 37% Formaldehyde [7] | Fixes protein-DNA interactions | Concentration and time critical for small samples; 1% for 10 min recommended |
| Chromatin Digestion Enzymes | Micrococcal Nuclease (MNase) [12] | Digests chromatin without crosslinking | Preferred for N-ChIP; preserves native interactions |
| Magnetic Beads | Protein A/G magnetic beads [7] [15] | Antibody capture and purification | Reduce non-specific binding; enable small elution volumes |
| Protease Inhibitors | Leupeptin, Aprotinin, PMSF [7] | Prevent protein degradation | Essential for embryonic tissues with high protease content |
| DNA Purification | Silica-based columns [7] | DNA clean-up and concentration | Maximize DNA recovery; minimize carryover |
| Library Preparation | Tn5 transposase [12] | Tagmentation-based library prep | Reduces hands-on time and material loss |
Successfully performing ChIP on limited embryonic tissue while accounting for cellular heterogeneity requires meticulous optimization at every experimental step. By implementing the specialized protocols, troubleshooting guides, and reagent strategies outlined in this technical support center, researchers can overcome these challenges to uncover crucial epigenetic mechanisms governing embryonic development. The continuous development of low-input and single-cell epigenomic technologies promises to further revolutionize this field, enabling increasingly refined analysis of chromatin dynamics in rare cell populations and limited tissue samples.
Chromatin Immunoprecipitation (ChIP) is an antibody-based technique used to investigate the interaction between proteins and DNA in the cell [11] [10]. It determines whether specific proteins are associated with specific genomic regions, such as transcription factors on promoters or other DNA binding sites, and identifies the specific location in the genome that various histone modifications are associated with [11] [16]. ChIP is crucial for advancements in the field of epigenomics and learning more about epigenetic phenomena, enabling researchers to map transcription factors, histones, and other DNA-associated proteins across the genome [11] [16]. This approach unravels mechanisms of gene regulation, epigenetic modifications, and chromatin dynamics, offering a detailed view of how cells respond to developmental cues and environmental signals.
Core ChIP Methodologies: XChIP vs. NChIP
There are two primary types of ChIP, primarily differing in the starting chromatin preparation: cross-linked ChIP (XChIP) and native ChIP (NChIP) [11] [10]. The table below summarizes their key characteristics, applications, and advantages.
Table 1: Comparison of Cross-linked ChIP (XChIP) and Native ChIP (NChIP)
| Feature | Cross-linked ChIP (XChIP) | Native ChIP (NChIP) |
|---|---|---|
| Primary Application | Mapping DNA targets of transcription factors and other weakly-binding or non-histone chromatin-associated proteins [11] [10] [16]. | Mapping DNA targets of histone modifiers and studying histone modifications [11] [10] [16]. |
| Chromatin Preparation | Uses reversibly cross-linked chromatin (e.g., with formaldehyde) [11] [10]. | Uses native, non-cross-linked chromatin [11] [10]. |
| Fragmentation Method | Sonication (or nuclease digestion) providing fragments of 300–1000 bp [11] [10]. | Micrococcal nuclease (MNase) digestion, providing fragments of one nucleosome (200 bp) to five nucleosomes (1000 bp) [11] [10]. |
| Key Advantage | Captures transient/weak protein-DNA interactions; suitable for any organism where native protein is hard to prepare [11]. | High antibody specificity and better chromatin recovery efficiency, as the native protein structure is intact [11] [16]. |
| Main Disadvantage | Cross-linking can disrupt antibody epitopes, reducing efficiency; may cause false positives from transient protein fixation [11] [10]. | Generally unsuitable for non-histone proteins; potential for nucleosome rearrangement during digestion [11] [16]. |
Cross-linked ChIP (XChIP) Workflow and Applications
XChIP is mainly suited for mapping the DNA target of transcription factors or other chromatin-associated proteins [11]. It uses reversible cross-linking agents like formaldehyde to "fix" proteins to the DNA they are bound to at that moment, preserving transient interactions [10] [6]. The cross-linked chromatin is then sheared, typically by sonication, into fragments of 300–1000 base pairs [11]. The protein-DNA complexes of interest are selectively immunoprecipitated using a specific antibody, after which the cross-links are reversed, and the associated DNA is purified and analyzed [11] [10].
Native ChIP (NChIP) Workflow and Applications
NChIP is primarily used for mapping the DNA target of histone modifications [11]. As histones are naturally tightly wrapped around DNA, no cross-linking is required [10]. Native chromatin is isolated and fragmented using micrococcal nuclease (MNase) digestion, which cuts linker DNA, leaving nucleosomes intact [11]. This results in DNA fragments ranging from one nucleosome (∼200 bp) to five nucleosomes (∼1000 bp) in length [11]. The subsequent steps of immunoprecipitation and DNA analysis are similar to XChIP [11]. The major advantage of NChIP is superior antibody specificity, as the epitopes are not altered or masked by cross-linking [11].
Troubleshooting Common ChIP Workflow Issues
The following section addresses frequent challenges encountered during ChIP experiments in a question-and-answer format.
Cross-Linking
Q: My ChIP yield is low. Could cross-linking be the issue? A: Yes, both under- and over-cross-linking can cause poor yields [17]. Under-cross-linking may prevent proper stabilization of protein-DNA complexes, while over-cross-linking can mask antibody epitopes and hinder efficient chromatin shearing [18] [17]. Optimize by testing fixation times (e.g., 10, 20, 30 minutes) with a fixed formaldehyde concentration (e.g., 1%) [18]. Do not cross-link for longer than 30 minutes, as this can make shearing impossible [18]. Always use high-quality, fresh formaldehyde and quench the reaction with glycine [18].
Chromatin Shearing and Fragmentation
Q: How can I optimize chromatin fragmentation? A: The optimal method depends on whether you are performing XChIP or NChIP.
- For XChIP (Sonication): Perform a sonication time-course. Take samples after different durations of sonication, purify the DNA, and run it on a gel. Ideal sonication produces a smear with most fragments between 200–1000 bp [19] [10]. Over-sonication (over 80% of fragments <500 bp) can damage chromatin and lower IP efficiency [19]. Keep samples on ice to prevent heat degradation [17].
- For NChIP (MNase Digestion): Perform a digestion assay by testing different amounts of MNase on your chromatin sample. The goal is to achieve a distinct nucleosome ladder, with the bulk of fragments between 150–900 bp [19]. Over-digestion will result primarily in mononucleosomes, which may diminish signal for longer amplicons [19].
Q: I see foaming during sonication. What should I do? A: Foaming can make the chromatin sample unsuitable for ChIP, likely by disrupting protein conformations [20]. To prevent it, ensure you are using low sonication power and that the sonicator tip is positioned very close to the bottom of the tube [20] [17]. Using 1.7 ml microcentrifuge tubes with no more than 400 µl of sample can also help [17].
Immunoprecipitation and Antibodies
Q: How do I choose the right antibody and ensure it works? A: The antibody is the most critical factor for a successful ChIP [20]. Always use ChIP-validated antibodies whenever possible [17]. If not available, verify that the antibody can work in immunoprecipitation (IP) on fresh cell extracts [18]. Be aware that an antibody that works for Western blotting does not guarantee it will work in ChIP, as cross-linking can alter or destroy epitopes [20]. Also, check the species and isotype of your antibody to ensure it binds efficiently to your chosen Protein A or G beads [18].
Q: What are the necessary negative controls for my IP? A: Essential negative controls include [18]:
- Non-immune IgG: Use an IgG fraction from the same species as your specific antibody.
- No-antibody control: Incubate sheared chromatin with beads only.
- Blocked antibody control: Pre-incubate the specific antibody with its epitope peptide before the IP.
PCR and Analysis
Q: I get high background amplification in my no-antibody control. What is the cause? A: High background can be caused by [17]:
- Insufficient washing: Increase the stringency of your wash buffers.
- Improperly sheared chromatin: Check fragment size on a gel; large fragments increase background.
- Too much antibody or template DNA: Titrate the antibody and use the recommended amount of input chromatin.
Q: I get no amplification of my product. What should I check? A: Check the following [17]:
- Antibody amount: You may not have used enough antibody.
- Template DNA: Verify the concentration of your purified DNA and use more if needed.
- Primers and PCR protocol: Ensure your primers are designed correctly and your thermal cycler protocol is compatible with your PCR master mix.
Experimental Protocols for Key Steps
Protocol: Optimizing Cross-Linking for Embryonic Tissue
Efficient cross-linking in tissues requires penetration of the fixative. For embryonic tissue, which may be more delicate, follow this general strategy [20]:
- Vacuum Infiltration: Submerge the tissue in buffer containing 1% formaldehyde and apply a vacuum until the tissue appears translucent or "water-soaked." This ensures complete penetration.
- Optimization Test: To determine the optimal cross-linking time, perform a test where you cross-link separate samples for different durations (e.g., 10, 20, 30 minutes).
- Assessment: After cross-linking, lysing nuclei, and reversing cross-links, isolate the DNA. The optimal time is when a substantial amount of DNA can be recovered, but cannot be efficiently isolated without the decrosslinking step, indicating successful cross-linking without being excessive [20].
- Quenching: Stop the fixation by adding glycine to a final concentration of 125 mM and incubating for 5 minutes at room temperature [18].
- Storage: Cross-linked material can be stored at -80°C for several months.
Protocol: Optimizing Chromatin Shearing for XChIP via Sonication
This protocol helps establish the ideal sonication conditions for your specific tissue and equipment [19].
- Prepare cross-linked nuclei from your embryonic tissue.
- Fragment the chromatin by sonication. Remove a 50 µl aliquot after each round or duration of sonication (e.g., after 1, 2, 3, and 4 minutes).
- Clarify each aliquot by centrifugation.
- Reverse the cross-links in each sample and purify the DNA.
- Analyze the DNA fragment size by electrophoresis on a 1% agarose gel.
- Choose the minimal sonication conditions that generate a smear with the majority of fragments between 200–1000 bp. Using minimal required conditions helps preserve chromatin integrity and antibody epitopes [10].
Workflow Visualization: XChIP vs. NChIP
The following diagram illustrates the core procedural differences and decision points between the XChIP and NChIP methodologies.
The Scientist's Toolkit: Essential Research Reagents
Table 2: Key Reagents for Chromatin Immunoprecipitation Experiments
| Reagent / Material | Function / Application | Key Considerations |
|---|---|---|
| Formaldehyde | Reversible cross-linking agent for XChIP; "fixes" proteins to DNA. | Use high-quality, fresh preparations (e.g., 1% final concentration). Optimize incubation time (typically 10-20 min at RT) [18]. |
| Micrococcal Nuclease (MNase) | Enzymatic digestion of chromatin for NChIP and some XChIP protocols. | Digestion must be optimized for each cell/tissue type to achieve 150-900 bp fragments [19] [10]. |
| ChIP-Validated Antibody | Selective immunoprecipitation of the protein-DNA complex. | The most critical reagent. Verify specificity (e.g., by WB). Check compatibility with Protein A/G beads [18] [20] [17]. |
| Protein A/G Magnetic Beads | Capture of the antibody-protein-DNA complex for easy washing and elution. | Resuspend beads into a uniform suspension before use. Gentle centrifugation is required [18]. |
| Protease Inhibitors | Prevent degradation of proteins and protein complexes during the procedure. | Add to buffers immediately before use. Some inhibitors are unstable; store aliquots at -20°C [18] [6]. |
| Glycine | Quenches formaldehyde to stop the cross-linking reaction. | Used at 125 mM final concentration for 5 min at room temperature [18]. |
| Proteinase K | Digests proteins after IP; crucial for reversing cross-links and digesting proteins before DNA purification. | Typically used at 65°C for 2 hours or more to ensure complete reversal of cross-links [17] [19]. |
Step-by-Step Protocols for Embryonic and Stem Cell Systems
Chromatin Immunoprecipitation (ChIP) followed by next-generation sequencing is a powerful technique for characterizing genome-wide DNA-binding profiles of proteins of interest. When applied to mouse Embryonic Stem Cells (mESCs), this method is fundamental for dissecting the transcriptional networks that govern pluripotency and differentiation. However, the general ChIP-seq workflow requires sample-specific optimization to achieve high-quality data, particularly for challenging cell types like embryonic stem cells. This guide provides detailed troubleshooting and optimized methodologies for performing successful ChIP experiments with differentiated mESCs, framed within the broader context of optimizing chromatin immunoprecipitation for embryonic tissue research.
Troubleshooting Common ChIP Issues
Table 1: Frequent Technical Challenges and Solutions in mESC ChIP
| Problem | Potential Cause | Solution |
|---|---|---|
| High Background Signal [21] [22] | Incomplete reversion of crosslinks | Increase incubation time/temperature for crosslink reversal; ensure proper proteinase K treatment [21]. |
| Non-unique sequences in analysis | Filter out probes/targets with non-unique sequences during data analysis [21]. | |
| Insufficient RNase treatment | Incorporate a rigorous RNase digestion step for immunoprecipitated DNA [21]. | |
| Retention of protein in spin-columns | Avoid using spin-columns for washing agarose beads; use standard tube washing instead [21]. | |
| Low Signal/Enrichment | Inefficient chromatin shearing | Optimize sonication conditions (duration, intensity, cycles) for mESC chromatin; analyze fragment size on agarose gel [23]. |
| Low antibody quality or specificity | Validate antibody for ChIP using positive controls; titrate antibody for optimal concentration [23]. | |
| Insufficient crosslinking | Optimize formaldehyde concentration and incubation time [24]. | |
| Inconsistent Results Between Replicates | Cell culture condition variability | Maintain consistent mESC culture and differentiation protocols; check pluripotency markers [24] [25]. |
| Chromatin input quantity variability | Accurately quantify DNA concentration after shearing; use consistent input material across IPs [23]. | |
| "Hyper-ChIPable" Regions | Non-specific enrichment | Prior to sequencing, check sample quality for non-specific enrichment at known "hyper-ChIPable" regions [24]. |
Frequently Asked Questions (FAQs)
Q1: What are the critical checkpoints for ensuring high-quality ChIP data from mESCs?
A1: Key quality control checkpoints include:
- Cell Quality: Confirm the pluripotent or differentiated state of mESCs by checking relevant markers (e.g., OCT4, NANOG for pluripotency) before ChIP [24] [25].
- Chromatin Shearing: Verify that sonication produces DNA fragments between 200-500 bp using gel electrophoresis [23].
- Background Assessment: Always include a control immunoprecipitated with a non-specific IgG antibody. High signal in the IgG control indicates background issues [21].
- Positive Control Genes: Validate your ChIP results with qPCR at genomic regions known to be bound (positive control) and not bound (negative control) by your protein of interest [23].
Q2: How does the ChIP protocol for mESCs differ from protocols for other tissues or cell lines?
A2: mESC ChIP requires special attention to:
- Culture Conditions: mESCs are often grown in specific conditions to maintain pluripotency, which can affect chromatin architecture [24] [25].
- Transcription Factor Dynamics: The binding of key pluripotency factors like OCT4, SOX2, and NANOG is highly dependent on the cell state. Differentiation must be tightly controlled [25] [26].
- Chromatin State: The epigenetic landscape of mESCs is unique, with abundant transcription factor binding sites in both promoter and distal enhancer regions [25] [26]. Protocol optimizations for hESCs have been shown to be highly relevant for mESCs as well [24].
Q3: What are the best practices for analyzing genome-wide binding data of pluripotency factors like OCT4 and NANOG?
A3: When analyzing factors central to the mESC regulatory network:
- Integrate Datasets: Be aware that different genomic platforms (e.g., ChIP-chip vs. ChIP-PET) can identify overlapping but non-identical sets of targets. Integrating data from multiple sources provides a more comprehensive network view [25].
- Focus on Combinatorial Binding: Many functional enhancers in mESCs are characterized by being co-bound by multiple transcription factors (e.g., OCT4, SOX2, and NANOG), known as Multiple Transcription Factor Bound Loci (MTL) [26].
- Use Relevant Genomic Features: Enhancer prediction is improved by integrating signatures like p300 binding, H3K4me1 marks, and binding of mediator (MED12) and cohesin (NIPBL) complex proteins [26].
Experimental Workflow & Protocol
The following diagram illustrates the core optimized workflow for a ChIP experiment in mESCs, incorporating critical steps for quality control.
Detailed Methodology for Key Steps:
Cell Culture & Crosslinking:
- Grow mESCs under conditions that maintain their pluripotent or desired differentiated state. Confirm cell status using relevant markers [24] [25].
- Crosslink proteins to DNA by adding 1% formaldehyde directly to the culture medium and incubating for 10-15 minutes at room temperature. Quench the reaction with glycine [23].
Cell Lysis & Chromatin Shearing:
- Lyse cells using a suitable lysis buffer (e.g., containing SDS or NP-40) [23].
- Shear chromatin to fragments of 200-500 bp using sonication. The optimal settings (duration, intensity, number of pulses) must be determined empirically for your cell type and equipment. Using a focused ultrasonicator like a Bioruptor is recommended [23].
Immunoprecipitation (IP):
- Pre-clear the sheared chromatin with Protein A/G beads to reduce non-specific binding.
- Incubate the chromatin supernatant with a validated antibody against your target protein (e.g., anti-OCT4, anti-NANOG) overnight at 4°C. Include a control reaction with a non-specific IgG [23].
- The next day, add Protein A/G magnetic beads to capture the antibody-chromatin complexes. Wash the beads thoroughly with low- and high-salt buffers to remove non-specifically bound DNA. Avoid using spin-columns for washing, as this can increase background [21].
Reverse Crosslinks & DNA Purification:
- Elute the chromatin from the beads and reverse the crosslinks by incubating with elution buffer (e.g., containing 1% SDS) and heating at 65°C for several hours or overnight. Treatment with Proteinase K is essential for complete reversal, especially for protein-rich DNA regions [21] [23].
- Purify the DNA using phenol-chloroform extraction or a PCR purification kit. Treat the sample with RNase to remove any residual RNA [21] [23].
The Scientist's Toolkit: Essential Research Reagents
Table 2: Key Reagent Solutions for mESC ChIP
| Reagent | Function | Example & Note |
|---|---|---|
| Specific Antibodies | Immunoprecipitation of the target protein-DNA complex. | Anti-NRF1 (CST #8052), Anti-NRF2 (CST #12721) [23]. For mESCs, antibodies against OCT4, SOX2, and NANOG are widely used [25] [26]. |
| Magnetic Beads | Capture of antibody-bound complexes. | ChIP-Grade Protein G Magnetic Beads (e.g., CST #9006) [23]. |
| Formaldehyde | Crosslinking agent to fix protein-DNA interactions. | Use methanol-free, high-purity formaldehyde (e.g., Thermo Fisher #28908) [23]. |
| Protease Inhibitors | Prevent proteolytic degradation of proteins and complexes during extraction. | Use a broad-spectrum protease inhibitor cocktail (e.g., Roche #3115879001) [23]. |
| Sonication System | Fragmentation of chromatin to appropriate size. | Bioruptor Pico Sonicator (Diagenode) or focused ultrasonicator [23]. |
| RNase | Degrades RNA to prevent contamination and background in the final DNA sample. | Essential for reducing background signal [21]. |
| p300/CBP Antibodies | Marker for identifying active enhancer regions in mESCs. | p300 is a top predictive signature for functional enhancers in stem cells [26]. |
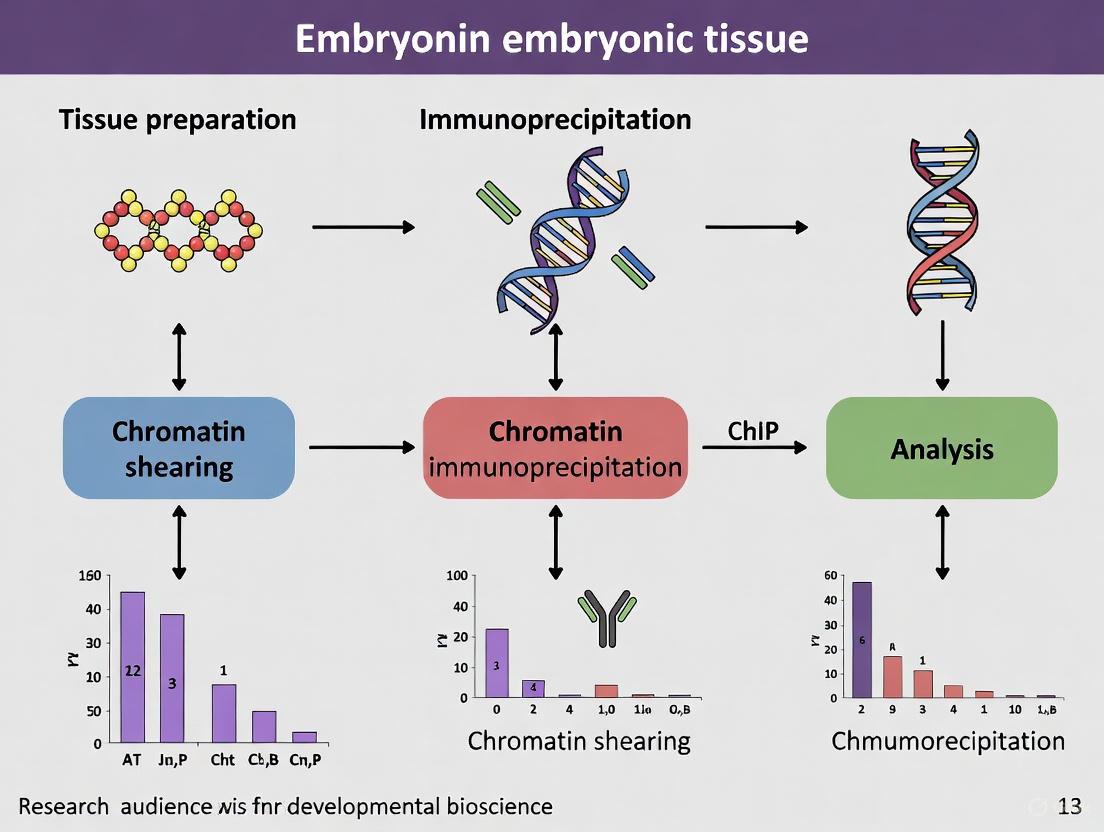
Experimental Workflow
The following diagram outlines the key stages of the Chromatin Immunoprecipitation (ChIP) protocol for mouse embryonic tissues, from tissue preparation to data analysis.
Key Research Reagent Solutions
The success of the ChIP protocol relies on several critical reagents. The table below details their specific functions.
| Reagent/Material | Function & Application |
|---|---|
| Formaldehyde | Covalently cross-links proteins to DNA in vivo, "freezing" protein-DNA interactions for analysis [27] [3] [6]. |
| Protease Inhibitors | Added to lysis and wash buffers to prevent proteolytic degradation of the target protein and chromatin during the extraction process [6] [7]. |
| Specific Antibody | Immunoprecipitates the protein-DNA complex of interest; "ChIP-grade" antibodies are recommended for specificity [3] [28]. |
| Protein A/G Magnetic Beads | Provide a solid support for efficient antibody capture and subsequent washing of the immunoprecipitated complexes [3] [6]. |
| Glycine | Quenches the formaldehyde cross-linking reaction by reacting with the excess reagent, thereby stopping the fixation process [3] [29] [7]. |
| Sodium Butyrate | Optional reagent; used when investigating histone acetylation, as it inhibits deacetylase enzymes, thereby preserving the acetylation state of histones [29]. |
Critical Protocol Parameters
Specific quantitative parameters are crucial for experimental reproducibility. The following table summarizes the key conditions for major steps in the ChIP protocol.
| Protocol Step | Key Parameter | Optimal Condition | Reference |
|---|---|---|---|
| Cross-linking | Formaldehyde Concentration & Time | 1% for 15 minutes at room temperature | [27] [3] [7] |
| Cell Input | Minimum Cell Number per IP | 5 x 10^4 - 1 x 10^5 cells | [4] [3] [29] |
| Chromatin Shearing | Target DNA Fragment Size | 100-300 base pairs (bp) | [3] [28] |
| Antibody Incubation | Incubation Time (Standard) | Overnight at 4°C | [3] [6] |
| Antibody Incubation | Incubation Time (Rapid) | 15 minutes at room temperature (ultrasonic bath) | [7] |
Troubleshooting Guide and FAQs
Q1: My final DNA yield is very low after immunoprecipitation. What could be the cause and how can I improve it?
A: Low DNA yield is a common challenge with low-abundance embryonic samples. The causes and solutions are multi-faceted:
- Insufficient Cross-linking: Under-cross-linking fails to efficiently capture transient protein-DNA interactions. Ensure a 15-minute fixation with 1% formaldehyde at room temperature [27] [3].
- Inefficient Chromatin Shearing: Overshooting or undershooting the target DNA fragment size (100-300 bp) affects IP efficiency and resolution. Always run a test gel to optimize sonication conditions for your specific tissue and equipment [3] [28]. The shearing efficiency can be checked by running an aliquot on an agarose gel [7].
- Inadequate Antibody: The antibody may have poor affinity or specificity for the target in its cross-linked state. Use validated "ChIP-grade" antibodies whenever possible [28]. For low-abundance targets, increasing the antibody concentration and extending the incubation time to overnight at 4°C can significantly improve yields [3] [7].
- Sample Loss: The protocol has been simplified to minimize sample loss, but precautions are still critical. Using non-stick tubes and a two-step nuclear isolation can help maximize chromatin recovery from small tissue amounts [4] [3].
Q2: I am observing high background signal in my ChIP-qPCR. How can I increase the signal-to-noise ratio?
A: High background often stems from non-specific antibody binding or incomplete washing.
- Optimize Antibody Specificity: A primary cause is a non-specific antibody. Characterize your antibody using immunoblot or immunofluorescence to ensure it recognizes a single band of the expected size or shows the correct sub-cellular localization [28].
- Include Rigorous Controls: Always perform a parallel IP with a non-specific IgG control. This provides the baseline background signal which must be subtracted from your specific antibody signal [6]. Additionally, design primers for a genomic region known not to bind your protein as a negative control [7].
- Increase Wash Stringency: Perform sequential washes with buffers of increasing salt concentration (e.g., low salt wash, high salt wash, and LiCl wash) to remove weakly bound, non-specific complexes without disrupting the specific interactions [6].
Q3: The protocol suggests different cell numbers. How do I determine the right amount of starting material for my embryonic tissue?
A: The required cell number depends on your target and analytical goal.
- Histone Modifications: These are abundant and can be successfully analyzed with as few as 50,000 cells per immunoprecipitation reaction [4] [29].
- Transcription Factors: These are typically less abundant and require more material. A good starting point is 100,000 to 500,000 cells per IP [3] [29].
- Pilot Experiments: If material is extremely limited, start with a pilot ChIP-qPCR experiment targeting a known binding site to determine the minimum input that provides a clear enrichment over the control.
Q4: How do I confirm that my chromatin shearing has been successful and is consistent across samples?
A: Consistent and adequate chromatin shearing is critical for high-quality data.
- Gel Electrophoresis: After sonication and reverse cross-linking, run a 1-2% agarose gel to visualize the DNA fragment size distribution. You should see a smear centered around 200-600 bp [3] [7].
- Fragment Analyzer/Bioanalyzer: For a more precise and quantitative assessment, these instruments provide an electrophoretogram that accurately displays the fragment size distribution, ensuring consistency between samples before proceeding to IP or sequencing [3].
For researchers studying gene regulation in embryonic development, Chromatin Immunoprecipitation (ChIP) provides a powerful window into protein-DNA interactions. However, working with embryonic tissues presents unique challenges, including limited sample availability and cellular heterogeneity. The initial steps of tissue processing—homogenization and cross-linking—are critically important, as they directly impact chromatin quality, yield, and the success of downstream applications. This guide addresses frequent challenges and provides optimized protocols specifically for embryonic tissue research.
FAQs: Homogenization and Tissue Disaggregation
Q1: What is the best method for homogenizing embryonic tissue for ChIP? The optimal homogenization method depends on your specific embryonic tissue type. Mechanical disaggregation is essential for liberating cells and nuclei, but the choice of tool must be tailored to the tissue's physical properties to avoid damaging the chromatin.
The table below compares common homogenization methods and their suitability for different embryonic tissues.
| Method | Recommended Embryonic Tissues | Technical Notes |
|---|---|---|
| Dounce Homogenizer | Brain tissue, soft tissues [19] | Strongly recommended for brain; provides gentle, controlled shear force. |
| Medimachine System | Spleen, liver, kidney; tissues that easily form single-cell suspensions [19] | Typically yields higher IP efficiency than Dounce for suitable tissues. |
| Fine Scissors & Forceps | Early-stage embryos, specific structures (e.g., neural tube) [5] | Essential for micro-dissection of small embryonic structures prior to homogenization. |
Q2: How much chromatin can I expect from a small embryonic sample? Chromatin yield varies significantly between tissue types due to differences in nuclear density. The table below provides expected yields from 25 mg of various tissues, which is a relevant scale for embryonic work [19].
| Tissue / Cell Type | Total Chromatin Yield (per 25 mg tissue) |
|---|---|
| Spleen | 20–30 µg |
| Liver | 10–15 µg |
| HeLa Cells (4x10^6 cells) | 10–15 µg |
| Brain | 2–5 µg |
| Heart | 2–5 µg |
For optimal ChIP results, 5–10 µg of fragmented chromatin is recommended per immunoprecipitation reaction [19]. The low yields from tissues like brain and heart mean you may need to pool multiple embryonic samples to obtain sufficient material.
FAQs: Cross-Linking Optimization
Q3: How do I optimize cross-linking for my embryonic tissue? Crosslinking preserves the in vivo protein-DNA interactions but must be carefully balanced. Under-crosslinking leads to poor preservation of complexes, while over-crosslinking can mask antibody epitopes and hinder chromatin shearing [30] [31].
A method to determine optimal crosslinking is to test whether decrosslinking is required to isolate DNA from fixed nuclei [20]:
- Under-crosslinked: Most DNA can be recovered without decrosslinking.
- Optimally crosslinked: Decrosslinking is required to efficiently isolate DNA.
- Over-crosslinked: It is impossible to recover a substantial amount of DNA even after decrosslinking.
For most tissues, crosslinking with 1% formaldehyde for 10-15 minutes at room temperature is a standard starting point [7] [5]. However, embryonic tissues are often more delicate. A good practice is to perform a time-course experiment (e.g., 5, 10, 20, 30 minutes) to find the ideal condition for your specific tissue.
Q4: My protein of interest doesn't bind DNA directly. Will standard cross-linking work? For proteins that associate with chromatin indirectly through other proteins (e.g., chromatin remodelers like ATRX), standard cross-linking may be insufficient. In these cases, a double cross-linking strategy is recommended [32]. This involves using a longer-range cross-linker like EGS (ethylene glycol bis(succinimidyl succinate)) followed by standard formaldehyde cross-linking. This two-step process better stabilizes complex, multi-protein interactions with DNA.
Troubleshooting Guide
| Problem | Possible Causes | Recommendations |
|---|---|---|
| Low chromatin concentration [19] | Incomplete tissue disaggregation or cell lysis; not enough starting material. | • Visualize nuclei under a microscope after lysis to confirm completeness.• Ensure thorough homogenization. If yield is close to 50 µg/mL, use more chromatin per IP to reach the 5-10 µg minimum. |
| Chromatin is under-fragmented (large fragments) [19] [20] | Over-crosslinking; too much input material per sonication volume; insufficient sonication or enzymatic digestion. | • Shorten cross-linking time.• Reduce amount of tissue per sonication tube.• Conduct a sonication or enzymatic digestion time-course to optimize fragmentation. |
| Chromatin is over-fragmented [19] | Excessive sonication or enzymatic digestion. | • Use the minimal sonication cycles required. Over-sonication (>80% fragments <500 bp) can damage chromatin and lower IP efficiency.• For enzymatic digestion, titrate the amount of micrococcal nuclease. |
| Inefficient immunoprecipitation | Over-crosslinking masking the antibody epitope [31]; antibody not suitable for ChIP. | • Re-optimize cross-linking duration.• Use antibodies validated for ChIP on cross-linked chromatin, not just western blot [30] [20]. |
Experimental Protocols
This protocol determines the optimal sonication conditions for your specific tissue and sonicator.
- Prepare Cross-linked Nuclei: From 100–150 mg of tissue or 1–2 x 10^7 cells, prepare nuclei as per your standard protocol.
- Sonication Time-Course: Resuspend the nuclear pellet in 1 ml of ChIP Sonication Nuclear Lysis Buffer. Sonicate the sample and remove 50 µl aliquots after different time intervals (e.g., after each 1-2 minutes of total sonication).
- Clarify and Reverse Cross-Links: Centrifuge each aliquot and transfer the supernatant to a new tube. Add RNAse A and incubate at 37°C for 30 minutes. Then add Proteinase K and incubate at 65°C for 2 hours.
- Analyze Fragment Size: Run the DNA samples on a 1% agarose gel. The ideal condition produces a DNA smear with the majority of fragments between 200–1000 bp.
- Application Note for Embryonic Tissue: When using limited embryonic samples, scale down this optimization protocol volume-wise, or use a dedicated, low-volume sonicator (e.g., Bioruptor Pico with 0.65 ml tubes) [23].
This method assesses whether your cross-linking conditions are appropriate.
- Cross-link Samples: Subject identical tissue samples to different cross-linking times (e.g., 5, 10, 20, 30 minutes) with 1% formaldehyde.
- Isolate Nuclei: Purify nuclei from each sample.
- Split and Process: Divide each nuclei preparation into two parts.
- Without Decrosslinking: Extract DNA directly with phenol-chloroform from one part.
- With Decrosslinking: Incubate the other part with Proteinase K at 65°C to reverse cross-links, then extract DNA.
- Analyze DNA Recovery: Compare DNA yields. Optimal cross-linking is achieved when DNA recovery is low without decrosslinking but high after decrosslinking.
Workflow Visualization
The following diagram illustrates the key decision points and steps in the tissue processing workflow for ChIP.
The Scientist's Toolkit: Research Reagent Solutions
| Category | Item | Function & Application Note |
|---|---|---|
| Homogenization | Dounce Homogenizer | Gold standard for gentle disaggregation of delicate tissues like embryonic brain [19]. |
| Medimachine System | Ideal for tissues that form single-cell suspensions, often giving higher IP efficiency [19]. | |
| Cross-linking | Formaldehyde (37%) | Creates reversible protein-DNA cross-links. Use a final concentration of 1% [7]. Always use fresh. |
| Glycine | Quenches formaldehyde to stop the cross-linking reaction [7] [5]. | |
| EGS (Ethylene glycol bis(succinimidyl succinate)) | Long-range cross-linker for "double cross-linking" of indirect DNA-protein interactions [32]. | |
| Chromatin Preparation | Micrococcal Nuclease (MNase) | Enzymatic fragmentation for "Native ChIP"; gentler but can introduce sequence bias [19] [30]. |
| SDS-based Lysis Buffer | Aids in efficient sonication and nuclear lysis [20]. | |
| General Reagents | Protease Inhibitor Cocktail (PIC) | Prevents protein degradation during chromatin preparation [7] [23]. |
| Protein A/G Magnetic Beads | For capturing antibody-chromatin complexes. Magnetic beads ease washing and reduce sample loss [5] [23]. |
Chromatin immunoprecipitation (ChIP) has revolutionized our understanding of gene regulation by enabling researchers to map protein-DNA interactions across the genome. At the heart of every successful ChIP experiment lies a critical step: chromatin fragmentation. The method chosen to break down chromatin into appropriately sized fragments can significantly impact the outcome of your experiments, particularly when working with precious embryonic tissue samples. Two principal methods dominate current practice: sonication (physical shearing) and enzymatic digestion (using micrococcal nuclease). Each approach offers distinct advantages and limitations that must be carefully considered within the context of your research goals, target proteins, and sample availability. This technical guide provides comprehensive troubleshooting and methodological frameworks to help you optimize chromatin shearing for your embryonic tissue research, ensuring robust and reproducible results in both drug development and basic science applications.
Method Comparison: Sonication vs. Enzymatic Digestion
The choice between sonication and enzymatic digestion involves multiple experimental considerations. The table below summarizes the key characteristics of each method to guide your selection process.
Table 1: Comparison of Sonication and Enzymatic Digestion for Chromatin Fragmentation
| Parameter | Sonication | Enzymatic Digestion |
|---|---|---|
| Principle | Uses high-frequency acoustic energy to physically shear chromatin [33] | Uses micrococcal nuclease (MNase) to cut linker DNA between nucleosomes [33] |
| Typical Fragment Size | 100-600 bp (optimized for 100-400 bp for ChIP-seq) [34] | 150-700 bp (mononucleosomes to pentanucleosomes) [35] |
| Process Conditions | Harsh conditions (high heat, detergent) [33] | Mild conditions without high heat or detergents [33] |
| Reproducibility | Variable; depends on sonicator type, probe condition, and technique [33] | High; consistent with controlled enzyme-to-cell ratio [33] |
| Optimal For | Histones, stable protein-DNA interactions [33] [36] | Transcription factors, cofactors, less stable interactions [33] [36] |
| Impact on Epitopes | Can damage antibody epitopes and genomic DNA [33] | Better preserves antibody epitopes and DNA integrity [33] |
| Sequence Bias | relatively random fragmentation | Preferential cleavage in certain genomic regions [37] |
Visual Workflow Comparison
The following diagram illustrates the key procedural differences and decision points between the two chromatin shearing methods:
Method Selection Guide
Based on Target Protein Type
The nature of your protein-DNA interaction of interest should primarily guide your method selection:
Choose enzymatic digestion when studying:
Choose sonication when studying:
Based on Experimental Requirements
- Sample quantity: Enzymatic digestion typically requires less input chromatin due to increased IP efficiency [35]
- Reproducibility needs: Enzymatic digestion provides more consistent results between experiments [33]
- Downstream applications: For ChIP-seq with enzymatic digestion, paired-end sequencing is preferable as computational PCR deduplication becomes challenging with this method [36]
Troubleshooting Guides
Sonication-Specific Issues
Table 2: Troubleshooting Sonication Problems
| Problem | Potential Causes | Solutions |
|---|---|---|
| Insufficient fragmentation | • Incorrect power settings• Too concentrated sample• Inadequate duration | • Optimize power and time settings [34]• Keep cell density ≤ 15×10⁶ cells/mL [18]• Ensure proper probe placement [7] |
| Over-sonication | • Excessive duration or power• Inadequate cooling | • Reduce sonication time [34]• Use 5-10 sec ON/OFF pulses with ice-cold water bath [34] |
| Inconsistent results between runs | • Variable probe condition• Positional effects in water bath sonicators | • Check probe for deterioration [33]• Use consistent tube position in water bath [34] |
| Protein degradation | • Excessive sonication time | • Use combination of brief sonication and benzonase digestion [34] |
| Foaming | • Incorrect probe placement | • Avoid foaming as it decreases energy transfer [37] |
Enzymatic Digestion-Specific Issues
Table 3: Troubleshooting Enzymatic Digestion Problems
| Problem | Potential Causes | Solutions |
|---|---|---|
| Over-digestion | • Too much enzyme• Excessive incubation time | • Titrate enzyme concentration [33]• Optimize digestion time [37] |
| Under-digestion | • Insufficient enzyme• Incomplete cross-linking reversal | • Optimize enzyme-to-cell ratio [33]• Ensure proper cross-linking conditions [18] |
| Sequence bias | • MNase sequence preference | • Be aware that certain loci may be over-represented [37] |
| Inconsistent digestion | • Enzyme quality variations• Chromatin preparation differences | • Aliquot enzyme stock and run time course with fresh aliquot for each experiment [37] |
General Chromatin Shearing Problems
- Poor ChIP efficiency overall: Check cross-linking conditions (typically 1% formaldehyde for 10-30 minutes at room temperature) [18] [39]
- High background: Optimize wash buffer stringency and include appropriate controls (non-immune IgG) [18] [37]
- Low signal: Increase antibody concentration (typically 3-5 μg per IP) and extend incubation time [37]
Frequently Asked Questions
Q1: Can I use enzymatic digestion for fully cross-linked samples?
- Enzymatic digestion is less effective on fully cross-linked samples. While it can be used, sonication is more appropriate for extensively cross-linked chromatin [37].
Q2: How do I determine the optimal cross-linking time?
- Perform a time-course experiment testing different incubation times (e.g., 10, 20, and 30 minutes). For transcription factors, 10-30 minutes is recommended; for cofactors, 30 minutes may be better. Do not exceed 30 minutes as over-cross-linking reduces shearing efficiency and antigen availability [18] [37] [39].
Q3: My chromatin is already fragmented, but I'm getting weak ChIP signals. What should I do?
- First, verify your antibody is ChIP-grade and try increasing the antibody concentration [37]. For enzymatic digestion, ensure the enzyme-to-cell ratio is optimized [33]. For sonication, check that protein integrity is maintained by avoiding excessive sonication [34].
Q4: Can I combine both methods?
- Yes, a combination of brief sonication followed by benzonase digestion can generate appropriately sized fragments while preserving the integrity of large proteins [34].
Q5: How should I handle low-abundance embryonic samples?
- Use enzymatic digestion for increased sensitivity [35] [38]. Reduce protocol steps to minimize sample loss [38], and ensure uniform fragmentation through limited sonication or MNase digestion [37].
Q6: What controls are essential for my ChIP experiment?
- Always include:
Research Reagent Solutions
Table 4: Essential Reagents for Chromatin Shearing Protocols
| Reagent/Category | Specific Examples | Function/Application |
|---|---|---|
| Enzymatic Digestion Kits | SimpleChIP Enzymatic Chromatin IP Kit (Cell Signaling Technology) [33] | All-inclusive kit for MNase-based chromatin fragmentation |
| Sonicators | Bioruptor (Diagenode), EpiShear probe sonicator (Active Motif) [34] [38] | Instrumentation for acoustic chromatin shearing |
| Core ChIP Reagents | Protein G Magnetic Beads, ChIP Buffer, ChIP Elution Buffer [39] | Essential components for immunoprecipitation |
| Cross-linking Reagents | Formaldehyde (37%), Glycine [34] [7] [39] | Fix protein-DNA interactions and quench cross-linking |
| Protease Inhibitors | PMSF, Leupeptin, Aprotinin [34] [7] | Prevent protein degradation during processing |
| Antibodies for Controls | Histone H3 (D2B12) XP Rabbit mAb, Normal Rabbit IgG [39] | Positive and negative controls for ChIP validation |
| DNA Purification | DNA binding buffer, wash buffer, elution buffer, purification columns [39] | Clean-up and concentrate immunoprecipitated DNA |
Workflow Optimization for Embryonic Tissues
Working with embryonic tissues presents unique challenges, including limited material and potential sensitivity to processing conditions. The following optimized workflow has been specifically adapted for embryonic tissue research:
Key Adaptations for Embryonic Tissues
- Minimize sample loss: Use a simplified ChIP protocol with reduced steps when working with low cell numbers (5×10⁴ - 5×10⁵ cells) [38]
- Preserve protein integrity: Enzymatic digestion is often preferable for preserving the integrity of transcription factors important in embryonic development [33]
- Optimize cross-linking: For embryonic tissues, test cross-linking times between 10-20 minutes to balance DNA-protein cross-linking with shearing efficiency [18] [37]
- Ensure representative sampling: When working with small embryonic structures, pool samples from multiple embryos if necessary to obtain sufficient material [38]
Selecting between sonication and enzymatic digestion for chromatin shearing requires careful consideration of your experimental goals, target proteins, and sample limitations. For embryonic tissue research, where material is often precious and targets may include developmentally important transcription factors, enzymatic digestion frequently offers advantages in sensitivity and epitope preservation. However, sonication remains a valid choice for more stable interactions like histone modifications. By applying the troubleshooting guides, optimized protocols, and reagent solutions outlined in this technical support document, researchers can overcome common challenges in chromatin preparation and generate robust, reproducible ChIP data that advances our understanding of embryonic development and gene regulation.
Within the framework of optimizing chromatin immunoprecipitation (ChIP) for embryonic tissue research, the selection of appropriate antibodies and the proper preparation of beads are critical steps that significantly impact the success and reproducibility of your experiments. This guide provides targeted troubleshooting and FAQs to address the specific challenges faced by researchers working with low-abundance embryonic samples, where minimizing sample loss and maximizing signal-to-noise ratio are paramount [29] [4].
Antibody Selection for Immunoprecipitation
Choosing the right antibody is the most crucial determinant of a successful IP or ChIP experiment. The antibody must be specific, sensitive, and compatible with the experimental conditions, especially after cross-linking.
How do I select a high-quality antibody for IP?
For an antibody to be suitable for IP, it must recognize the target antigen in its native, often cross-linked, state. The following table summarizes the key selection criteria [40] [18]:
| Selection Criteria | Description and Importance |
|---|---|
| Antibody Application | Verify that the antibody datasheet explicitly states it is validated for "Immunoprecipitation (IP)" or "ChIP." Antibodies that work only for western blot may not recognize cross-linked or conformational epitopes. |
| Species Reactivity | Ensure the antibody is confirmed to react with the species of your embryonic tissue (e.g., chicken, mouse) [29]. |
| Specificity Validation | Look for antibodies characterized by mass spectrometry (MS) to confirm that the target antigen is the most abundant protein in the immunoprecipitate [40]. |
| Epitope Accessibility | Be aware that the cross-linking step in ChIP can mask epitopes. If possible, use polyclonal antibodies, which recognize multiple epitopes, increasing the chance of successful binding [41] [18]. |
What are the essential negative controls for my IP experiment?
Including the correct controls is non-negotiable for interpreting your results accurately. The table below lists the necessary controls [18]:
| Control Type | Purpose and Implementation |
|---|---|
| Non-immune IgG | Use an IgG fraction from the same species as your IP antibody. This controls for non-specific binding to the beads or chromatin. |
| No-Antibody Control | Incubate your chromatin sample with beads only. This identifies any background binding attributable to the beads themselves. |
| Peptide-Blocked Antibody | Pre-incubate the IP antibody with a saturating amount of its specific antigenic peptide. This confirms that the signal is specifically due to the antibody-epitope interaction. |
The following workflow outlines the key decision points for selecting and validating an antibody for your ChIP experiment:
Bead Preparation and Selection
The choice and handling of beads used to capture the antibody-antigen complex are vital for minimizing background and maximizing yield.
How do I choose between Protein A, Protein G, or Magnetic Beads?
The selection depends on the species and isotype of your antibody, as well as your experimental workflow. The affinity of Protein A and Protein G for immunoglobulins from different species varies significantly [18].
| Bead Type | Key Application and Notes |
|---|---|
| Protein A vs. Protein G | Consult the affinity table (see below) to match your antibody's host species and isotype with the optimal protein. For example, Protein G is superior for mouse IgG1 and most rat antibodies, while Protein A works well for rabbit antibodies [18]. |
| Mixed Protein A/G | Using a mixture of Protein A and G coupled to beads can increase the binding capacity for a broader range of antibody types and is often recommended for general use [41]. |
| Magnetic vs. Agarose | Magnetic beads are ideal for low-abundance samples and high-throughput workflows as they minimize mechanical loss during washing. Agarose beads are a cost-effective and widely used alternative [41] [42]. |
What is the protocol for preparing beads for IP?
Proper preparation of beads is essential for reproducibility. The general workflow is consistent, though buffer compositions may vary.
- Resuspend: Gently vortex the bead stock to create a uniform suspension [18].
- Wash: Pellet the beads by gentle centrifugation (e.g., 500-2,000 x g for 2-3 minutes) and carefully remove the storage solution. Resuspend the beads in an appropriate volume of your IP lysis or dilution buffer to remove preservatives and equilibrate them [18].
- Incubate with Antibody: Add your specific antibody (typically 3-10 µg per IP) or control IgG to the washed beads and incubate for a short period (e.g., 30-60 minutes) on a rotator at 4°C. This pre-coupling can sometimes reduce background.
- Combine with Sample: Add the pre-cleared or clarified cell lysate or chromatin preparation to the antibody-bound beads and incubate on a rotator for several hours to overnight at 4°C [42].
The table below provides a quick reference for choosing the right bead based on your antibody:
| Antibody Host Species | Recommended Isotypes | Protein A | Protein G | Recommended Choice |
|---|---|---|---|---|
| Rabbit | All Isotypes | +++ | ++ | Protein A [18] |
| Mouse | IgG1 | + | +++ | Protein G [18] |
| Mouse | IgG2a | +++ | +++ | Protein A or G [18] |
| Chicken | All Isotypes | - | ++ | Protein G [18] |
| Goat | All Isotypes | - | ++ | Protein G [18] |
Troubleshooting Common IP Issues
What should I do if I get no or low signal in my ChIP?
A weak or absent signal is a common challenge, especially with low-input embryonic samples [29]. The following FAQ table addresses the primary causes and solutions:
| Problem & Cause | Potential Solution |
|---|---|
| Insufficient starting material.Too few cells will produce poor results. | Use more starting material. For low-abundance embryonic tissues, pool samples from multiple embryos [29] [41]. A protocol for 5x10⁴ - 5x10⁵ cells has been successfully used [29]. |
| Excessive crosslinking.Over-crosslinking can mask epitopes. | Optimize cross-linking time and formaldehyde concentration. For many applications, 10-15 minutes with 1% formaldehyde at room temperature is sufficient. Avoid exceeding 30 minutes [41] [18]. |
| Inefficient chromatin shearing.Large chromatin fragments can reduce efficiency. | Optimize sonication conditions to achieve fragments between 200-1000 bp. Avoid over-sonication, which can produce fragments that are too small [41] [18]. |
| Antibody is not suitable or sufficient.The antibody may not work for IP, or the amount is too low. | Use a ChIP-validated antibody. Increase the amount of antibody used (e.g., up to 10 µg if no signal is observed) [41]. |
| Incorrect bead choice.Poor affinity between the antibody and the bead protein. | Match the bead type (Protein A vs. G) to the species and isotype of your antibody, as detailed in the table above [41] [18]. |
How can I reduce high background in my IP experiment?
High background signal is often caused by non-specific binding. The troubleshooting table below outlines the common culprits and their fixes:
| Problem & Cause | Potential Solution |
|---|---|
| Non-specific binding to beads.Proteins or chromatin stick to the beads non-specifically. | Pre-clear the lysate by incubating it with beads alone (without antibody) for 30-60 minutes before the IP step [42]. |
| Excess antibody.Too much antibody can lead to binding to non-target proteins. | Titrate the antibody to find the optimal concentration that maximizes specific signal while minimizing background [41]. |
| Low-quality beads or buffers.Beads may have high inherent background; buffers may be contaminated. | Use high-quality beads. Prepare fresh lysis and wash buffers for each experiment [41]. |
| Stringent wash buffers.Wash buffers with high salt concentration can be too harsh. | Use wash buffers with no more than 500 mM salt to avoid eluting the specific complex while removing non-specific binders [41]. |
The following diagram summarizes the logical steps for diagnosing and resolving the most common IP issues:
The Scientist's Toolkit: Essential Research Reagent Solutions
A successful ChIP experiment relies on a suite of carefully selected reagents. The table below details key materials and their functions specific to optimizing IP for embryonic tissue [29] [41] [42].
| Reagent | Function and Application Notes |
|---|---|
| ChIP-Grade Antibody | A highly specific antibody validated for immunoprecipitation of cross-linked chromatin. This is the most critical reagent. |
| Protein A/G Beads | Agarose or magnetic beads coated with Protein A, Protein G, or a mixture, used to capture the antibody-target complex. |
| Formaldehyde | A reversible cross-linking agent that fixes proteins to DNA. Use high-quality, fresh formaldehyde at a final concentration of 1% [29] [18]. |
| Glycine | Used to quench the cross-linking reaction by neutralizing formaldehyde, preventing over-fixation [29] [18]. |
| Lysis Buffer (with inhibitors) | Buffer used to lyse cells and release chromatin. Must include protease inhibitors (and phosphatase inhibitors for studying phosphorylation) to prevent protein degradation [42] [18]. |
| Sodium Butyrate (NaBu) | An optional additive specifically recommended for ChIP targeting acetylated histones (e.g., H3K27ac), as it inhibits deacetylases and helps preserve the modification [29] [18]. |
| Sonication Device | Equipment used to shear cross-linked chromatin into fragments of 200-1000 bp, which is crucial for resolution and specificity. |
| Magnetic Rack (for magnetic beads) | A specialized rack that separates magnetic beads from solution during washing and elution steps, minimizing physical sample loss. |
Frequently Asked Questions (FAQs)
Q1: Why is it crucial to integrate hematovascular function assays with ChIP analysis in developmental studies? Integrating these techniques allows researchers to directly connect epigenetic mechanisms, revealed by ChIP, with functional cellular outcomes in hematopoiesis and vascular development. This combined approach can uncover how transcription factor binding or histone modifications at specific loci directly regulate lineage commitment and the functional potency of progenitor cells during embryogenesis [43].
Q2: What are the primary hematovascular assays used after ChIP in embryonic stem cell differentiation models? The primary functional assays include:
- EB Vascular Sprouting Assay: Assesses the angiogenic potential and vascular maturation of differentiated cells.
- Hematopoietic Colony-Formation Unit (CFU) Assay: Quantifies the number and types of hematopoietic progenitors.
- Flow Cytometry: Identifies and quantifies specific hematopoietic and endothelial cell populations using surface markers [43].
Q3: My ChIP yields low-quality chromatin from precious embryonic tissues. What steps can I take to optimize this? Low chromatin quality and yield are common challenges with low-abundance embryonic samples. Key optimization steps include:
- Cross-linking Optimization: Avoid over- or under-crosslinking. Test durations between 5-30 minutes with 1% formaldehyde. Shorter times (e.g., 10 min) can improve shearing efficiency [18] [5].
- Efficient Quenching: Always quench formaldehyde with 125 mM glycine for 5 minutes at room temperature [7] [5].
- Lysis and Sonication: Perform all steps on ice with pre-chilled buffers containing fresh protease inhibitors. For small samples, optimize sonication conditions to achieve fragments between 200-500 bp, which is critical for high-resolution data [5] [19].
Q4: How can I improve the inter-laboratory reproducibility of my hematopoietic CFU assays? The CFU assay is known for inter-laboratory variability. Standardization is key:
- Cell Counting: Use automated cell counters over manual methods to improve accuracy.
- Culture Conditions: Standardize the source and composition of methylcellulose-based media, the cell seeding density, and the incubation duration (typically 14-16 days) [44].
- Colony Scoring: Establish and adhere to strict, documented morphological criteria for identifying and classifying different colony types (e.g., BFU-E, CFU-GM, CFU-GEMM) [44].
Troubleshooting Guides
ChIP Troubleshooting for Embryonic Tissues
Table 1: Common ChIP Issues and Solutions in Embryonic Research
| Problem | Possible Cause | Recommended Solution |
|---|---|---|
| Low chromatin yield [19] [5] | Insufficient starting material; incomplete tissue dissociation or lysis. | - Confirm cell counts/tissue mass.- Visually inspect nuclei under a microscope before and after sonication to confirm complete lysis. [19] |
| Chromatin under-fragmented (large fragments) [19] [18] | Over-crosslinking; insufficient enzymatic digestion or sonication. | - Shorten cross-linking time (<30 min). [18]- For enzymatic shearing: increase MNase concentration or time. [19]- For sonication: perform a time-course experiment to establish optimal conditions. [19] |
| Chromatin over-fragmented (mostly <500 bp) [19] | Excessive sonication or enzymatic digestion. | - Reduce the number of sonication cycles or power setting. [19]- For enzymatic shearing: reduce the amount of MNase or digestion time. [19] |
| High background in PCR/qPCR | Non-specific antibody binding; insufficient washing. | - Use high-affinity, ChIP-validated antibodies. [7] [18]- Include the correct negative controls (e.g., non-specific IgG, beads-only). [45] [18]- Ensure wash buffers are cold and perform all recommended wash steps. [7] [45] |
Hematovascular Assays Troubleshooting
Table 2: Troubleshooting Common Issues in Hematovascular Function Assays
| Problem | Possible Cause | Recommended Solution |
|---|---|---|
| Low or no colony formation in CFU assay [44] | Non-viable or low-potency progenitor cells; suboptimal culture conditions. | - Verify cell viability post-dissociation.- Use fresh, quality-controlled methylcellulose media with the appropriate cytokine combinations.- Ensure correct cell seeding density and avoid over-dispensing the culture mixture. [44] |
| Poor vascular sprouting in EB assay | Defective endothelial differentiation; inadequate matrix or growth factors. | - Quality-control the extracellular matrix (e.g., Matrigel) and use it when cold.- Confirm the presence of essential angiogenic factors (e.g., VEGF) in the culture medium.- Ensure EBs are healthy and at the correct developmental stage for plating. |
| High variability in flow cytometry results | Inconsistent cell preparation; non-optimal antibody titration. | - Standardize the single-cell dissociation protocol to minimize clumping.- Titrate all antibodies to determine the optimal signal-to-noise ratio.- Use appropriate viability dyes to exclude dead cells from the analysis. |
Experimental Protocols
Detailed Protocol: Hematopoietic Colony-Forming Unit (CFU) Assay
This protocol is used to quantify hematopoietic progenitor cells based on their ability to form distinct colonies in a semi-solid medium [43] [44].
Key Reagents:
- Semi-solid medium: Methylcellulose-based medium supplemented with a defined cocktail of cytokines (e.g., SCF, GM-CSF, IL-3, EPO).
- Cells: Single-cell suspension from differentiated embryoid bodies (EBs) or dissociated embryonic tissues.
- Equipment: 35 mm culture dishes, humidified CO₂ incubator.
Step-by-Step Method:
- Prepare Cell Suspension: Create a single-cell suspension and determine viable cell count using an automated cell counter or hemocytometer with trypan blue exclusion [44].
- Inoculate Medium: Thoroughly mix the cell suspension with the methylcellulose medium according to the manufacturer's instructions and the desired final cell density (e.g., 1x10⁴ to 5x10⁴ cells/dish). Vortexing is often necessary to ensure an even mix.
- Plate Cells: Using a blunt-ended needle and syringe, dispense 1.0 - 1.5 mL of the cell-methylcellulose mixture into 35 mm culture dishes. Gently tilt the dishes to ensure the mixture evenly covers the bottom.
- Culture: Place the dishes in a humidified incubator at 37°C with 5% CO₂ for 14-16 days. Avoid disturbing the cultures during this period.
- Score Colonies: After the culture period, count and classify colonies under an inverted microscope according to their distinct morphological characteristics:
- BFU-E (Burst-Forming Unit-Erythroid): Large, dense clusters with hemoglobinized (pink/red) cells.
- CFU-GM (Colony-Forming Unit-Granulocyte/Macrophage): Large, diffuse colonies with non-hemoglobinized cells.
- CFU-GEMM (Colony-Forming Unit-Granulocyte, Erythrocyte, Monocyte, Megakaryocyte): Large, mixed colonies containing multiple cell lineages.
Detailed Protocol: EB Vascular Sprouting Assay
This protocol assesses the angiogenic potential and vascular maturation capacity of cells within embryoid bodies [43].
Key Reagents:
- Extracellular Matrix: Growth factor-reduced Matrigel or similar basement membrane extract.
- Culture Medium: Endothelial cell growth medium (e.g., supplemented with VEGF).
- Equipment: Lab-Tek chamber slides or 24-well plates, inverted microscope.
Step-by-Step Method:
- Matrix Coating: Thaw Matrigel on ice overnight at 4°C. Coat the wells of a chamber slide or plate with a thin, even layer of cold Matrigel. Allow it to polymerize for 30-60 minutes in a 37°C incubator.
- Plate EBs: Carefully place 10-20 day-old EBs onto the surface of the polymerized Matrigel, ensuring they are evenly spaced.
- Induce Sprouting: Gently overlay the EBs with pre-warmed endothelial cell growth medium containing pro-angiogenic factors. Place the culture in a 37°C, 5% CO₂ incubator.
- Monitor and Analyze: Observe the EBs daily under an inverted microscope. Over 3-5 days, endothelial cells will migrate out of the EB and form capillary-like tubular structures and sprouts. Quantify the sprouting area, number of branch points, or total tubule length using image analysis software.
Signaling Pathways and Workflows
Simplified Hematovascular Signaling Pathway
This diagram outlines key signaling pathways regulating hematovascular lineage commitment from embryonic stem cells, as identified in integrated ChIP and functional studies [43].
Integrated Experimental Workflow
This workflow visualizes the sequential integration of ChIP with hematovascular functional assays, from embryonic stem cells to final analysis [43] [5].
The Scientist's Toolkit: Research Reagent Solutions
Table 3: Essential Reagents for Integrated ChIP and Hematovascular Studies
| Reagent / Material | Function / Application | Technical Notes |
|---|---|---|
| ChIP-Validated Antibodies [7] [18] | Immunoprecipitation of specific transcription factors or histone modifications. | Critical for success. Verify specificity by Western blot. Check compatibility with protein A/G based on species and isotype [18]. |
| Magnetic Protein A/G Beads [7] [45] | Capture and isolation of antibody-chromatin complexes. | Offer easier handling and washing compared to agarose beads. |
| Micrococcal Nuclease (MNase) [19] | Enzymatic shearing of chromatin for ChIP-seq. | Can provide more uniform fragmentation than sonication. Requires optimization of enzyme-to-cell ratio [19]. |
| Methylcellulose-based Media [44] | Semi-solid matrix for hematopoietic CFU assays. | Supports colony formation from single progenitors. Use pre-tested, quality-controlled commercial kits for best reproducibility [44]. |
| Growth Factor-Reduced Matrigel | Substrate for EB vascular sprouting and other angiogenesis assays. | Mimics the natural basement membrane. Must be kept on ice and handled cold to prevent premature polymerization. |
| Protease Inhibitor Cocktail (PIC) [7] [18] | Prevents protein degradation during chromatin preparation and cell lysis. | Add fresh to all lysis and dilution buffers immediately before use. |
Solving Common Problems and Enhancing ChIP Efficiency
Optimizing Cross-Linking Conditions for Developmental Tissues
For researchers studying embryonic development, Chromatin Immunoprecipitation (ChIP) presents unique challenges due to the limited availability and cellular complexity of developmental tissues. Cross-linking conditions serve as a critical foundation for successful ChIP experiments, directly impacting both the preservation of in vivo protein-DNA interactions and the subsequent immunoprecipitation efficiency. This technical support center provides targeted guidance to overcome these specific hurdles, enabling robust epigenomic profiling of embryonic samples.
Key Research Reagent Solutions
The following reagents are essential for optimizing ChIP experiments in developmental tissues:
| Reagent Type | Specific Examples & Functions | Considerations for Developmental Tissues |
|---|---|---|
| Cross-linker | Formaldehyde (1% final concentration): Reversibly cross-links proteins to DNA. [ [29] [46]] | Critical parameter; requires precise timing (typically 10-20 min at room temperature). [ [18] [47]] |
| Quenching Solution | Glycine (125 mM final concentration): Stops the cross-linking reaction. [ [29] [48]] | Prevents over-cross-linking, which is crucial for preserving epitope integrity. [ [18]] |
| Protease Inhibitors | Protease Inhibitor Cocktails: Prevent protein degradation during cell lysis. [ [18]] | Essential for maintaining complex integrity in sensitive embryonic samples. |
| Chromatin Shearing | Sonication (e.g., using a Diagenode Biodisruptor): Physically shears chromatin. [ [47]] | Must be optimized for each tissue type; aim for 200-1000 bp fragments. [ [18] [46]] |
| Immunoprecipitation Beads | Protein A/G Bead Blend: Binds antibodies for immunoprecipitation. [ [47] [31]] | A blend eliminates the need to match bead type to antibody species. [ [47]] |
| Specialized Additives | Na-butyrate (e.g., 10 µL of 1M): Optional for histone acetylation studies. [ [29]] | Helps preserve specific labile histone modifications in embryonic cells. |
Frequently Asked Questions (FAQs)
How does embryonic tissue research differ from cell line ChIP protocols?
Embryonic tissues are often limited in quantity and more heterogeneous than cell lines. Protocols must be adapted for low cell numbers (as few as 5 x 10⁴ - 5 x 10⁵ cells per ChIP reaction) and may require pooling samples from multiple embryos. [ [29]] Furthermore, microdissection must be performed under cold conditions to maintain chromatin integrity. [ [29]]
What is the recommended formaldehyde concentration and cross-linking time for embryonic tissues?
A final concentration of 1% formaldehyde is standard. [ [29] [46]] The optimal duration must be determined empirically but typically ranges from 10 to 20 minutes at room temperature. [ [18]] Over-cross-linking beyond 30 minutes can mask epitopes and create shearing difficulties, while under-cross-linking reduces yield. [ [18] [31]]
Why is quenching with glycine necessary, and when is it most critical?
Glycine quenches the formaldehyde reaction. This step is particularly vital when cross-linking is performed in growth media containing serum proteins, as it prevents non-specific cross-linking that elevates background noise. [ [47]]
How can I verify that my cross-linking conditions are optimal?
Suboptimal cross-linking manifests in two ways:
- Under-cross-linking: Results in poor yield and inefficient immunoprecipitation. [ [31]]
- Over-cross-linking: Leads to high background, epitope masking, difficulty in shearing chromatin, and poor reversal of cross-links. A key indicator is a location-independent signal at both known binding sites and negative control loci. [ [47] [48]]
My ChIP signal is low. Could cross-linking be a factor?
Yes. To boost a low signal, first try reducing the cross-linking time, as over-fixation can mask antibody epitopes. [ [49]] Furthermore, ensure you are using a sufficient number of cells as a starting point, as embryonic samples often have limited material. [ [29] [49]]
Troubleshooting Cross-Linking Issues
The following table outlines common symptoms, their causes, and solutions related to cross-linking in ChIP for developmental tissues.
| Problem Symptom | Potential Cause | Recommended Solution | Supporting Experimental Protocol |
|---|---|---|---|
| High Background Noise | Over-cross-linking ( >30 min), trapping non-specific proteins. [ [48]] | • Reduce cross-linking time to 10-15 min.• Ensure fresh, quality formaldehyde is used.• Quench thoroughly with 125 mM glycine. [ [18] [48]] | Test cross-linking for 10, 20, and 30 minutes. Use qPCR to compare signal at a specific binding site versus a known negative locus; optimal conditions show high fold-enrichment. [ [18] [47]] |
| Low or No Signal | Under-cross-linking or epitope masking from over-cross-linking. [ [31] [49]] | • For suspected under-linking, increase time within the 10-20 min window.• For over-linking, reduce time. [ [18] [49]] | Titrate the cross-linking time while keeping formaldehyde concentration constant at 1%. Use a validated positive control antibody (e.g., Histone H3) to assess performance. [ [31]] |
| Poor Chromatin Shearing | Over-cross-linking creates durable, difficult-to-shear complexes. [ [18] [31]] | • Optimize cross-linking duration. Do not exceed 30 min.• Re-optimize sonication power/cycles for the fixed tissue. [ [18]] | After cross-linking and lysis, purify DNA from a sheared chromatin aliquot. Analyze on a 1% agarose gel; the ideal fragment size is a smear of 200-1000 bp, peaking around 500 bp. [ [47] [46]] |
| Inconsistent Results Between Tissues | Different cell types in heterogeneous embryonic tissues have unique optimal cross-linking times. [ [18]] | Empirically determine the optimal fixation time for each new embryonic tissue type. [ [18]] | Fix parallel samples of the new tissue for 10, 20, and 30 minutes. Process them simultaneously and compare ChIP-qPCR signals at a conserved positive locus to find the ideal time. |
Experimental Workflow and Optimization Logic
Workflow for Cross-Linking Optimization in Embryonic Tissue
The following diagram summarizes the key decision points and steps in the optimization protocol.
Relationship Between Cross-Linking Time and Experimental Outcomes
This diagram illustrates the cause-and-effect relationship between cross-linking duration and key ChIP experimental outcomes.
Addressing Low Chromatin Yield from Limited Embryonic Material
Troubleshooting Guide: Common Issues and Solutions
Problem 1: Concentration of Fragmented Chromatin is Too Low
- Possible Cause: Incomplete cell or tissue lysis during chromatin preparation, or simply that the starting amount of embryonic material was insufficient.
- Recommendation: Visually inspect cell nuclei under a microscope before and after sonication to confirm complete lysis. If the DNA concentration is close to 50 µg/ml, you can add additional chromatin to each immunoprecipitation (IP) to reach at least 5 µg per IP. Always accurately count cells before cross-linking if possible [19].
Problem 2: Chromatin is Under-Fragmented
- Possible Cause: Embryonic cells may be over-crosslinked, or too much input material was processed at once. Large chromatin fragments lead to increased background and lower resolution in downstream analysis.
- Recommendation: Shorten the cross-linking time (within a 10-30 minute range) and/or reduce the amount of tissue processed per sonication. For enzymatic fragmentation, increase the amount of Micrococcal Nuclease or perform a digestion time course [19].
Problem 3: Chromatin is Over-Fragmented
- Possible Cause: Excessive sonication or enzymatic digestion. This can disrupt chromatin integrity, denature antibody epitopes, and diminish signal, especially for PCR amplicons greater than 150 bp.
- Recommendation: Conduct a sonication or enzymatic digestion time course to determine the minimal conditions required to achieve the desired fragment size. Over-sonication is indicated when more than 80% of DNA fragments are shorter than 500 bp [19].
Frequently Asked Questions (FAQs)
Q1: What is the minimum number of embryonic cells required for a successful ChIP assay? A1: Standard ChIP protocols often require millions of cells, but specialized low-input protocols have been successfully used with low to medium cell numbers, ranging from 5 × 10⁴ to 5 × 10⁵ cells per ChIP reaction for histone modifications [29] [4]. For lower-abundance targets like transcription factors, more material (5 × 10⁵ to 5 × 10⁶ cells) is typically needed [29].
Q2: How can I improve chromatin recovery from my precious embryonic samples? A2: Employ a simplified ChIP protocol that reduces the number of handling and purification steps to minimize sample loss. Using carrier chromatin (e.g., from Drosophila cells) in a technique called Carrier ChIP (CChIP) can also facilitate precipitation and reduce loss when working with as few as 100 cells [11].
Q3: What size should my chromatin fragments be for optimal results? A3: A desirable size range is 150–900 base pairs (approximately 1–6 nucleosomes), with a focus on mononucleosome-sized fragments of 150–300 bp for high-resolution sequencing [29] [50]. This size provides a good balance for antibody avidity and mapping precision.
Essential Reagents and Materials for Low-Input ChIP
The success of low-input ChIP experiments depends on using high-quality, purpose-selected reagents. The following table details key solutions and their functions.
Table: Key Research Reagent Solutions for Low-Input ChIP
| Reagent/Material | Function in the Protocol | Key Considerations for Low-Yield Embryonic Tissue |
|---|---|---|
| Formaldehyde | Reversibly cross-links proteins to DNA, stabilizing interactions for analysis [50] [11]. | Optimization of concentration and incubation time is critical to avoid epitope masking while ensuring sufficient fixation [50]. |
| Micrococcal Nuclease (MNase) | Enzymatically digests and fragments chromatin, often yielding precise mononucleosome-sized pieces [19] [11]. | Preferred for Native ChIP (NChIP); requires careful titration to avoid over- or under-digestion [50]. |
| High-Specificity Antibodies | Immunoprecipitates the protein or histone modification of interest along with its bound DNA [50]. | The most critical factor. Use ChIP-validated antibodies. For histone modifications, check for cross-reactivity [50]. |
| Protein A/G Magnetic Beads | Facilitates the capture and purification of antibody-bound chromatin complexes [50]. | Bead-based separation is efficient and minimizes sample loss compared to other methods, making it ideal for low-input protocols. |
| Sodium Butyrate | An optional additive that inhibits histone deacetylases (HDACs) [29]. | Highly recommended when studying histone acetylation marks (e.g., H3K27ac) to preserve the epigenetic state during the assay [29]. |
Optimized Experimental Protocols for Embryonic Tissue
Protocol 1: Simplified Low-Input ChIP for Embryonic Samples
This protocol is designed to minimize sample loss by reducing processing steps [29].
Tissue Dissection and Collection:
- Perform microdissections of embryonic tissue (e.g., chicken spinal neural tube) under cold conditions to preserve chromatin integrity.
- Pool tissue from multiple embryos if necessary (e.g., ~30 chicken SNT sections per ChIP reaction).
- Flash-freeze tissue in liquid nitrogen and store at -80°C, or proceed directly to cross-linking if sufficient material is available [29].
Cross-linking:
- Resuspend tissue in DMEM with 10% FBS (or PBS with 0.1% BSA). Add 1% formaldehyde final concentration and rotate for 15 minutes at room temperature.
- Quench the reaction by adding glycine and rotating for another 10 minutes.
- Centrifuge, discard supernatant, and wash the pellet with cold PBS [29].
Chromatin Fragmentation via Sonication:
- Resuspend the cross-linked pellet in ChIP Sonication Nuclear Lysis Buffer.
- Critical Optimization Step: Perform a sonication time-course. Take 50 µL samples after different durations of sonication.
- Reverse cross-links, purify DNA, and run samples on an agarose gel. The optimal time produces a DNA smear with the majority of fragments between 150–900 bp [19].
Immunoprecipitation and DNA Purification:
- Incubate sheared chromatin with your target-specific antibody overnight at 4°C.
- Add Protein A/G magnetic beads the next day to capture the immune complexes. Wash beads with buffers of increasing stringency.
- Reverse cross-links, treat with Proteinase K and RNase A, and purify the final DNA for qPCR or sequencing library preparation [50].
Protocol 2: Optimization of Chromatin Fragmentation
Achieving the correct chromatin fragment size is one of the most critical and challenging steps [50].
For Enzymatic Fragmentation (using Micrococcal Nuclease):
- Prepare cross-linked nuclei from a test batch of tissue.
- Aliquot 100 µL of nuclei into several tubes.
- Add a dilution series of Micrococcal Nuclease (e.g., 0, 2.5, 5, 7.5, 10 µL of a diluted stock) to each tube and incubate at 37°C for 20 minutes.
- Stop the reactions, purify the DNA, and analyze fragment size by agarose gel electrophoresis.
- Select the nuclease volume that produces DNA in the 150–900 bp range for your main experiment [19].
Workflow and Decision-Making Diagrams
Low-Input ChIP Workflow
Fragmentation Optimization
This guide provides troubleshooting and FAQs for achieving ideal DNA fragment sizes during chromatin fragmentation, a critical step in Chromatin Immunoprecipitation (ChIP) for embryonic tissue research.
FAQs and Troubleshooting Guides
What is the ideal DNA fragment size for ChIP experiments?
The ideal DNA fragment size range for most ChIP-seq applications is 150–900 base pairs, which corresponds to 1–6 nucleosomes [19]. For optimal resolution and data quality, the majority of fragmented chromatin should be less than 1 kb [19]. The exact distribution depends on your fixation time:
- For cells fixed for 10 minutes: Approximately 90% of total DNA fragments should be less than 1 kb.
- For cells fixed for 30 minutes: Approximately 60% of total DNA fragments will be less than 1 kb [19].
How can I troubleshoot under-fragmented chromatin?
Problem: Chromatin is under-fragmented, yielding fragments that are too large. This leads to increased background noise and lower resolution [19].
Possible Causes and Solutions:
- Cause: Over-crosslinked cells and/or too much input material [19].
- Solutions:
- Shorten the crosslinking time within the 10–30 minute range [19].
- Reduce the amount of cells or tissue processed per sonication sample [19].
- For sonication: Conduct a sonication time course to determine the optimal duration [19].
- For enzymatic fragmentation: Increase the amount of Micrococcal nuclease or perform a time course for enzymatic digestion [19].
How can I troubleshoot over-fragmented chromatin?
Problem: Chromatin is over-fragmented, with >80% of fragments shorter than 500 bp. Over-sonication can damage chromatin integrity, denature antibody epitopes, and diminish PCR signals [19].
Possible Causes and Solutions:
- Cause: Excessive sonication cycles or power [19].
- Solutions:
My chromatin yield is too low. What should I do?
Problem: Concentration of the fragmented chromatin is too low for effective IP [19].
Possible Causes and Solutions:
- Cause: Insufficient cells/tissue used or incomplete cell/tissue lysis [19].
- Solutions:
Expected Chromatin Yields from Different Tissues
Chromatin yield varies significantly between tissue types. Below are expected yields to help you plan your experiments [19].
Table 1: Expected Chromatin Yields from Tissues and Cells
| Tissue / Cell Type | Total Chromatin Yield | Expected DNA Concentration |
|---|---|---|
| Spleen | 20–30 μg per 25 mg tissue | 200–300 μg/ml |
| Liver | 10–15 μg per 25 mg tissue | 100–150 μg/ml |
| Kidney | 8–10 μg per 25 mg tissue | 80–100 μg/ml |
| Brain | 2–5 μg per 25 mg tissue | 20–50 μg/ml |
| Heart | 1.5–5 μg per 25 mg tissue | 15–50 μg/ml |
| HeLa Cells | 10–15 μg per 4 x 10⁶ cells | 100–150 μg/ml |
Experimental Protocols for Optimization
Protocol 1: Optimizing Sonication Conditions
This protocol helps determine the optimal sonication settings for your specific tissue or cell type [19].
- Prepare Cross-linked Nuclei: Prepare nuclei from 100–150 mg of tissue or 1 x 10⁷–2 x 10⁷ cells as per standard protocols. Stop after resuspending the nuclear pellet in ChIP Sonication Nuclear Lysis Buffer [19].
- Fragment Chromatin: Begin sonication. Perform a time-course experiment by removing 50 μl samples of chromatin after different durations (e.g., after each 1-2 minutes of cumulative sonication) [19].
- Clarify Chromatin: Centrifuge samples at 21,000 x g for 10 minutes at 4°C. Transfer the supernatants to new tubes [19].
- Reverse Cross-linking and Digest RNA:
- Add 100 μl nuclease-free water, 6 μl of 5 M NaCl, and 2 μl RNase A to each 50 μl sample.
- Vortex and incubate at 37°C for 30 minutes [19].
- Digest Protein:
- Add 2 μl Proteinase K to each sample.
- Vortex and incubate at 65°C for 2 hours [19].
- Analyze Fragment Size: Run 20 μl of each sample on a 1% agarose gel with a 100 bp DNA marker. Visualize the DNA smear to identify the sonication conditions that produce the ideal fragment size (most DNA between 200-600 bp) [19].
Protocol 2: Example of Optimized Sonication Parameters
The following parameters were optimized for the Kasumi-1 suspension cell line and can serve as a starting point for suspension cells [51]:
- Peak Incident Power: 150 W
- Duty Factor: 7.0%
- Cycles per Burst: 200
- Sonication Duration: 7 minutes
- SDS in Sonication Buffer: 0.15%
- DOC in Sonication Buffer: 0.05%
These settings generated chromatin fragments of ~250-600 bp [51]. For other systems, a semi-automated protocol using a ChIP liquid handler with cycles of 16 seconds ON and 32 seconds OFF has also been successfully used [52].
Workflow for Chromatin Fragmentation Optimization
The diagram below outlines the key steps and decision points for optimizing your chromatin fragmentation.
The Scientist's Toolkit: Research Reagent Solutions
Table 2: Essential Reagents for Chromatin Fragmentation
| Reagent / Kit | Function | Example Use Case |
|---|---|---|
| Formaldehyde | Crosslinks proteins to DNA to preserve in vivo interactions. | Standard 1% concentration for 10-30 min fixation [39]. |
| Glycine Solution | Stops the cross-linking reaction by quenching formaldehyde. | Added to a final 0.125-0.25 M concentration after fixation [52] [39]. |
| Protease Inhibitor Cocktail (PIC) | Prevents proteolytic degradation of proteins and epitopes during sample preparation. | Added fresh to all lysis and wash buffers [52] [39]. |
| ChIP Sonication Cell Lysis Buffer | Lyse the cell membrane while keeping nuclei intact. | Initial lysis of cross-linked cells prior to nuclear lysis or chromatin shearing [39]. |
| ChIP Sonication Nuclear Lysis Buffer | Lyse the nuclear membrane to release chromatin for fragmentation. | Used in the final step before sonication [39]. |
| Micrococcal Nuclease (MNase) | Enzyme that digests linker DNA between nucleosomes for enzymatic fragmentation. | Used in SimpleChIP Enzymatic protocol to generate mono- and poly-nucleosomes [19]. |
| RNase A | Degrades RNA in the sample to prevent interference with DNA quantification and analysis. | Added during the de-crosslinking step after fragmentation [52] [19]. |
| Proteinase K | Digests proteins and reverses formaldehyde cross-links. | Essential for de-crosslinking DNA-protein complexes before purification and analysis [52] [19]. |
Antibody Validation and Selection for Low-Abundance Transcription Factors
Transcription factors (TFs) are pivotal regulators of gene expression, orchestrating critical processes in embryonic development and cellular function. However, their characterization remains challenging as they compose less than 0.1% of total nuclear protein [53]. In the context of chromatin immunoprecipitation (ChIP) using embryonic tissues, where sample availability is often limited to 5×10⁴ - 5×10⁵ cells [2] [4], selecting and validating appropriate antibodies becomes paramount for generating reliable, interpretable data. This technical guide addresses the specific challenges researchers face when working with low-abundance transcription factors in precious embryonic samples, providing troubleshooting advice and frequently asked questions to navigate this complex methodological landscape.
Core Concepts: Transcription Factors and ChIP
What makes transcription factors particularly challenging for ChIP?
Transcription factors present unique challenges in ChIP experiments due to their low abundance, transient DNA-binding behavior, and the potential requirement for crosslinking. Unlike histone modifications that are abundant and stable, TFs are typically present in very low quantities—often requiring 5-10 times more cellular material than histone ChIP protocols [2] [29]. Their binding to DNA can be transient and context-dependent, necessitating optimal crosslinking conditions that preserve these interactions without masking antibody epitopes [30].
Why is embryonic tissue especially difficult to work with?
Embryonic tissues pose additional challenges due to their limited availability, cellular heterogeneity, and the dynamic nature of developmental processes. Researchers often must work with low to intermediate cell numbers (5×10⁴ - 5×10⁵ cells per ChIP reaction) obtained through meticulous microdissection [2] [4]. These constraints demand protocols specifically optimized to minimize sample loss throughout the ChIP procedure while maintaining signal specificity.
Antibody Selection Guide
Monoclonal vs. Polyclonal Antibodies for TF ChIP
Table: Comparison of Antibody Types for Transcription Factor ChIP
| Antibody Type | Advantages | Disadvantages | Best Use Cases |
|---|---|---|---|
| Monoclonal | High specificity; minimal non-specific binding; consistent batch-to-batch performance [54] | Epitope may be masked by crosslinking; single epitope recognition [54] | Well-characterized TFs; quantitative studies requiring reproducibility |
| Polyclonal | Recognizes multiple epitopes; more likely to work if some epitopes are masked by crosslinking [54] | Higher potential for non-specific binding; potential batch-to-batch variability [54] | Newly characterized TFs; when crosslinking significantly impacts epitope availability |
Essential Validation Criteria for TF Antibodies
- ChIP-Specific Validation: An antibody that works well for Western blotting may not perform in ChIP, as Western blot detects denatured proteins while ChIP requires recognition of the native protein [54].
- Specificity Demonstrations: Look for antibodies with data showing reliable performance in ChIP and other key applications [54].
- Epitope Characterization: Understand what part of the transcription factor the antibody recognizes, as this affects crosslinking compatibility [54] [30].
- Lot-to-Lot Consistency: For polyclonal antibodies, ensure the manufacturer has quality control measures to minimize batch variability [54].
Troubleshooting Guide
Common Challenges and Solutions in TF ChIP
Table: Troubleshooting Low-Abundance Transcription Factor ChIP
| Problem | Potential Causes | Solutions | Preventive Measures |
|---|---|---|---|
| Low signal-to-noise ratio | Antibody concentration too high or too low; non-specific binding; insufficient washing [54] [30] | Titrate antibody; optimize wash stringency; include bead-only controls [54] [55] | Test multiple antibody dilutions; use ChIP-validated antibodies; implement rigorous controls |
| High background | Non-specific antibody binding; insufficient washing; over-crosslinking [54] [30] | Increase wash stringency; optimize crosslinking time; use peptide competition elution [54] | Pre-clear samples; optimize crosslinking time; include specificity controls |
| Inconsistent results between replicates | Cell number variability; inconsistent fragmentation; antibody performance issues [30] | Standardize cell counts; optimize fragmentation method; use monoclonal antibodies for consistency [54] [30] | Use consistent starting material; validate fragmentation efficiency; aliquot antibodies |
| No signal | Epitope masking from crosslinking; insufficient starting material; antibody not compatible with crosslinked chromatin [54] [30] | Try different antibody (polyclonal may work better); increase cell input; reduce crosslinking time [54] | Use ChIP-validated antibodies; validate on crosslinked samples; ensure adequate starting material |
Workflow Optimization for Low-Cell Numbers
Addressing Antibody-Specific Challenges
The diagram below illustrates the decision process for addressing common antibody-related issues in TF ChIP:
Experimental Protocols for Validation
Antibody Titration Protocol for Low-Abundance TFs
- Prepare chromatin from a test sample (embryonic tissue or cell culture) using your standard protocol [2].
- Set up multiple IP reactions with varying antibody concentrations (e.g., 0.5 µg, 1 µg, 2 µg, 5 µg per reaction).
- Include controls: no-antibody control, bead-only control, and input sample.
- Process through standard ChIP protocol with consistent washing conditions [54].
- Analyze by qPCR using positive and negative control genomic regions.
- Select the antibody concentration that provides optimal signal-to-noise ratio without excessive background [54] [55].
Crosslinking Optimization for Embryonic Tissues
Based on low-abundance embryonic protocols [2] [4]:
- Resuspend freshly dissected or frozen tissue in 500 µL DMEM with 10% FBS.
- Add 13.5 µL of 37% formaldehyde (1% final concentration).
- Place on rotator for 15 minutes at room temperature.
- Quench with 25 µL of 2.5 M glycine for 10 minutes.
- Pellet cells at 850 × g for 5 minutes at 4°C.
- Wash once with cold wash buffer before proceeding to lysis.
Specificity Validation Using siQ-ChIP Principles
Recent advances in quantitative ChIP suggest that antibody specificity can be assessed directly in sequencing experiments [55]:
- Perform ChIP with antibody titration across multiple concentrations.
- Sequence at relatively low depth (∼12 million reads per IP).
- Analyze binding isotherms - specific interactions will show saturable binding while non-specific interactions may not plateau.
- Identify "narrow spectrum" antibodies that recognize primarily the intended target versus "broad spectrum" antibodies with multiple off-target interactions [55].
Frequently Asked Questions
Q: How critical is antibody validation for transcription factor ChIP? A: Antibody validation is absolutely critical for TF ChIP success. Unlike highly abundant histone modifications, transcription factors are present in low quantities, making specificity paramount. Always use antibodies validated for ChIP rather than assuming Western blot validation translates to ChIP compatibility [54] [30].
Q: What cell number is required for transcription factor ChIP from embryonic tissues? A: For low-abundance transcription factors, protocols have been successfully used with 5×10⁵ - 5×10⁶ cells per ChIP reaction [2] [29]. This is substantially higher than requirements for histone modifications (5×10⁴ - 5×10⁵ cells) due to the lower abundance of TFs.
Q: Can I use the same antibody concentration for all transcription factors? A: No. Antibody concentration must be optimized for each specific transcription factor and antibody lot. Using excess antibody can increase non-specific binding, while too little antibody results in low recovery of your target [54]. Always perform titration experiments when establishing new protocols.
Q: What fragmentation method is best for transcription factor ChIP? A: While sonication is common, MNase digestion provides more reproducible fragment sizes (primarily mono-nucleosomal fragments), which improves quantification accuracy [55]. MNase also makes the protocol more accessible to labs without specialized sonication equipment.
Q: How can I verify my antibody is specific in ChIP experiments? A: Beyond using pre-validated antibodies, you can:
- Perform peptide competition experiments [54]
- Use siQ-ChIP principles to assess binding isotherms [55]
- Compare patterns to published data for well-characterized TFs
- Test multiple antibodies against the same target
The Scientist's Toolkit
Table: Essential Reagents for Low-Abundance Transcription Factor ChIP
| Reagent/Category | Specific Examples | Function/Purpose | Considerations for Embryonic Tissues |
|---|---|---|---|
| Validated Antibodies | ChIP-validated monoclonal or polyclonal antibodies | Specific recognition of target transcription factor | Prioritize antibodies tested in ChIP with crosslinked chromatin [54] |
| Crosslinking Reagents | Formaldehyde (1% final concentration), Glycine quenching solution | Preserve protein-DNA interactions | Optimize crosslinking time for each TF; over-crosslinking can mask epitopes [2] [30] |
| Fragmentation Enzymes | Micrococcal Nuclease (MNase) | Chromatin fragmentation to nucleosome-sized pieces | Provides more uniform fragment sizes than sonication [55] |
| Protease Inhibitors | PMSF, protease inhibitor cocktails | Prevent protein degradation during processing | Essential for preserving low-abundance transcription factors [2] |
| Immunoprecipitation Beads | Protein A/G magnetic beads | Antibody capture and complex isolation | Magnetic beads simplify washing and elution steps [54] |
| Wash Buffers | Low salt, high salt, LiCl wash buffers | Remove non-specifically bound material | Stringent washing is critical for reducing background with low-abundance TFs [54] |
| Elution Buffers | Sodium carbonate buffers, SDS elution buffer | Release captured complexes from beads | Peptide competition elution can reduce background but is more expensive [54] |
| Crosslink Reversal Agents | Proteinase K, NaCl | Reverse formaldehyde crosslinks | Essential for recovering DNA after immunoprecipitation [54] [2] |
Successfully mapping transcription factor binding in embryonic tissues demands rigorous antibody validation and protocol optimization. The limited availability of embryonic material necessitates careful consideration of antibody selection, with emphasis on ChIP-validated reagents and appropriate controls. By implementing the troubleshooting strategies and validation protocols outlined in this guide, researchers can navigate the challenges of low-abundance transcription factor ChIP and generate robust, interpretable data that advances our understanding of gene regulatory mechanisms in development.
Quality Control Checkpoints Throughout the ChIP Workflow
This technical support guide provides troubleshooting and quality control checkpoints for chromatin immunoprecipitation (ChIP) experiments, with a specific focus on challenges related to embryonic tissue research.
Critical Control Points and Expected Metrics
Establishing and verifying key metrics at the start of your experiment is crucial for success. The table below outlines critical quality control checkpoints and their expected values.
| Checkpoint | Parameter Measured | Target / Expected Value | Troubleshooting Action |
|---|---|---|---|
| Chromatin Quantity | DNA concentration post-fragmentation | Varies by tissue:• Brain/Heart: 2–5 µg per 25 mg tissue [19]• Liver/HeLa: 10–15 µg per 25 mg tissue/4x10^6 cells [19] | If low, add more chromatin to IP (≥5 µg) or increase starting material [19]. |
| Chromatin Fragmentation | DNA fragment size | 150–900 bp (sonication) [19] or 200–1000 bp [49]; ideal 250–750 bp [20] | Under-fragmented: Increase sonication or MNase [19]. Over-fragmented: Reduce sonication or MNase [19] [49]. |
| Cross-linking | Fixation efficiency | 1% formaldehyde, 10–20 min at room temperature [18] | Over-crosslinking masks epitopes; reduce fixation time [49] [18]. |
| Immunoprecipitation | Antibody specificity | 1–10 µg antibody per IP [49]; use ChIP-validated antibodies [18] [20] | High background: Pre-clear lysate; use fresh buffers and high-quality beads [49]. |
| Input DNA Analysis | DNA quality and quantity | Use for data normalization (% Input or Fold Enrichment) [20] | Critical for accurate QPCR data interpretation [20]. |
Frequently Asked Questions and Troubleshooting
Low Signal or No Signal
- Q: My ChIP yields little to no DNA after immunoprecipitation. What are the main causes?
- A: This is a common issue with several potential causes:
- Insufficient Chromatin or Lysis: Ensure you are using an adequate amount of starting material (5–10 µg of chromatin per IP is recommended) [19]. Check cell counting and confirm complete lysis of nuclei under a microscope [19] [56].
- Over-fragmentation: Excessive sonication can damage chromatin integrity and epitopes. Optimize your sonication time to achieve fragments between 200–1000 bp [49].
- Inefficient Cross-linking: Over-crosslinking can mask antibody epitopes. Reduce formaldehyde fixation time and ensure proper quenching with glycine [49] [18].
- Antibody Issues: The antibody may not be suitable for ChIP. Verify its ChIP-grade quality and increase the amount used (1-10 µg) [49] [56]. Polyclonal antibodies can sometimes perform better than monoclonals for low-abundance targets [20].
- A: This is a common issue with several potential causes:
High Background/Non-Specific Signal
- Q: I get a strong signal, but it appears to be non-specific. How can I reduce the background?
- A: High background noise can be mitigated by:
- Pre-clearing: Pre-clear your chromatin lysate with protein A/G beads before adding your specific antibody to remove proteins that bind non-specifically [49].
- Fresh Buffers: Always prepare fresh lysis and wash buffers, as contaminated buffers are a common source of error [49].
- Quality Beads: Use high-quality protein A/G beads to prevent non-specific binding [49].
- Wash Stringency: Reduce the salt concentration in your wash buffers to no more than 500 mM [49].
- Chromatin Fragment Size: Large chromatin fragments can increase background. Ensure optimal fragmentation to the 250–750 bp range [19] [20].
- A: High background noise can be mitigated by:
Antibody and Specificity Issues
- Q: How do I select the right antibody and controls for my ChIP experiment?
- A: Antibody choice is arguably the most critical factor.
- Validation: Use antibodies that are documented for ChIP applications. Success in Western blot does not guarantee ChIP performance [18] [20].
- Negative Controls: Always include a non-immune IgG from the same species as your specific antibody. For the highest specificity, pre-incubate your antibody with its specific epitope peptide (blocking) and use the blocked antibody as a control [18].
- Positive Controls: Use known ChIP-grade antibodies for your tissue or a common model (e.g., HeLa cells) to validate your entire workflow [18].
- Protein A/G Binding: Check the binding affinity of your antibody's host species and isotype to protein A or G to ensure efficient pulldown [18].
- A: Antibody choice is arguably the most critical factor.
Detailed Optimization Protocols
Optimizing Chromatin Fragmentation by Sonication
Proper fragmentation is essential for resolution and efficiency. Follow this protocol to establish optimal conditions for your embryonic tissue [19]:
- Prepare Cross-linked Chromatin: From 100–150 mg of tissue, prepare cross-linked nuclei according to your standard protocol.
- Sonication Time-Course: Fragment the chromatin by sonication. Remove 50 µL aliquots after increasing durations of sonication (e.g., after each 1-2 minute interval).
- Reverse Cross-links and Purify DNA: Clarify each aliquot by centrifugation. Reverse the cross-links by adding NaCl and RNase A, followed by Proteinase K treatment at 65°C for 2 hours [19].
- Analyze Fragment Size: Run the purified DNA on a 1% agarose gel. The optimal condition produces a DNA smear where ~60% of fragments are less than 1 kb for tissue fixed for 10 minutes [19].
- Avoid Over-sonication: >80% of fragments shorter than 500 bp indicates over-sonication, which can damage the chromatin and lower IP efficiency [19].
Optimizing Micrococcal Nuclease (MNase) Digestion
For enzymatic fragmentation, the MNase-to-tissue ratio must be optimized [19]:
- Prepare Nuclei: Prepare cross-linked nuclei from 125 mg of tissue and aliquot into 5 tubes.
- Titrate Enzyme: Add increasing volumes (e.g., 0, 2.5, 5, 7.5, 10 µL) of a diluted MNase stock to each tube. Incubate at 37°C for 20 minutes.
- Stop Reaction and Analyze: Stop the digestion with EDTA, lyse the nuclei, and purify the DNA as in the sonication protocol.
- Determine Optimal Dose: Analyze DNA on a gel. The volume that produces a distinct nucleosome ladder (150–900 bp) is optimal. For example, if 5 µL of diluted enzyme works, use 0.5 µL of stock enzyme per IP [19].
The Scientist's Toolkit: Essential Research Reagents
| Reagent / Material | Critical Function | Key Considerations |
|---|---|---|
| Formaldehyde | Crosslinks proteins to DNA to preserve in vivo chromatin interactions. | Use high-quality, fresh stocks. Concentration (typically 1%) and fixation time (10-30 min) must be optimized for embryonic tissue to avoid over/under-linking [18] [20]. |
| Micrococcal Nuclease (MNase) | Enzymatically digests chromatin to yield mononucleosomes. | The enzyme-to-cell ratio is critical and must be titrated for each tissue type to achieve 150-900 bp fragments [19]. |
| ChIP-Grade Antibody | Specifically immunoprecipitates the protein or histone modification of interest. | Must be validated for ChIP. Check species and isotype for compatibility with Protein A/G beads. Polyclonals can offer higher signal for some targets [18] [20]. |
| Protein A/G Beads | Magnetic or agarose beads that bind the antibody-chromatin complex. | Quality is vital to prevent high background. Choose based on antibody binding affinity (see table in [18]). Resuspend into a uniform suspension before use [49] [18]. |
| Protease Inhibitors | Prevent proteolytic degradation of proteins and epitopes during chromatin preparation. | Add to lysis buffers immediately before use. Some are unstable; store aliquots at -20°C. Phosphatase inhibitors may be added for specific targets [18]. |
| Glycine | Quenches formaldehyde to stop the cross-linking reaction. | Essential for preventing over-crosslinking. Use a final concentration of 125 mM for 5 minutes at room temperature [18]. |
ChIP Experimental Workflow and QC Checkpoints
The following diagram maps the entire ChIP workflow, highlighting the critical quality control checkpoints where the parameters in the first table should be verified.
Advanced Troubleshooting and Data Normalization
For persistent issues, consider these advanced aspects:
Data Normalization: The method of normalizing your ChIP-QPCR data significantly impacts interpretation. Common methods include:
- % Input: Expresses the precipitated DNA as a percentage of the total input chromatin. This is straightforward but can be affected by background [20].
- Fold Enrichment: Compares the IP signal to a background reference (e.g., IgG control or a repressed genomic region). This is useful for showing specificity but relies on a good negative control [20].
- Choosing the right normalization method and controls (e.g., using endogenous controls for both active and repressed chromatin) is crucial for accurate biological interpretation [20].
Tissue-Specific Challenges: Embryonic tissue can be particularly sensitive. It is often enriched for unexpanded cells, which can provide a better yield and purity of chromatin [20]. However, its delicate nature may require shorter cross-linking times and careful handling during homogenization to prevent release of proteases.
Ensuring Data Rigor and Selecting Advanced Methodologies
Essential Controls for Validating Embryonic Tissue ChIP Results
Chromatin Immunoprecipitation (ChIP) followed by next-generation sequencing (ChIP-seq) has become an indispensable technique for generating global epigenomic maps, particularly for investigating histone modifications and transcription factor binding in embryonic tissues [2]. However, embryonic samples present unique challenges, including limited cellular material (typically 5×10⁴ to 5×10⁵ cells per ChIP reaction) and cellular heterogeneity within tissues [5] [2]. Without proper controls, researchers cannot distinguish true biological signals from technical artifacts, potentially leading to erroneous conclusions. This guide outlines the essential controls and troubleshooting strategies required to validate ChIP results from embryonic tissues, framed within the context of optimizing embryonic tissue ChIP research.
FAQs: Fundamental Questions About ChIP Controls
What are the critical negative controls for a ChIP experiment?
Negative controls are essential to establish background signal levels and identify non-specific antibody binding. The following negative controls should be incorporated:
- Non-immune IgG: Use an IgG fraction from the same species as your primary antibody as a control for non-specific immunoprecipitation [18].
- No-antibody control: Incubate sheared chromatin with beads only to control for background binding to the beads or capture system [18].
- Peptide-blocked antibody: Pre-incubate the primary antibody with saturating amounts of its specific epitope peptide for 30 minutes at room temperature before use in ChIP to confirm binding specificity [18].
- Negative genomic regions: Include primers for genomic regions not expected to bind your protein or histone modification of interest [5] [10].
Why is an input control necessary, and how should it be prepared?
The input control serves as a reference representing your starting chromatin before immunoprecipitation and is critical for normalizing ChIP data. For embryonic tissue ChIP:
- Preparation: Before adding antibody, remove a small aliquot of sheared chromatin (typically 1-10%) and process it alongside your IP samples through crosslink reversal and DNA purification [5] [2].
- Normalization: Use the input DNA to calculate percent input or enrichment fold-changes in ChIP-qPCR analyses [10].
- Quality assessment: Analyze the input DNA on an agarose gel to verify optimal sonication efficiency (200-500 bp fragments) [5] [18].
How do I validate antibody specificity for ChIP?
Antibody quality is arguably the most critical factor for successful ChIP experiments. Validation strategies include:
- Use ChIP-grade antibodies: Prioritize antibodies specifically validated for ChIP applications [18] [10].
- Western blot analysis: Verify antibody specificity by Western blot to confirm recognition of the correct antigen [18].
- Epitope characterization: For polyclonal antibodies, consider antigen affinity purification to increase titer and specificity [18].
- Positive control targets: Include primers for genomic regions with known binding patterns to verify antibody functionality [5].
What are the key considerations for cross-linking embryonic tissues?
Cross-linking conditions significantly impact ChIP outcomes:
- Formaldehyde concentration: Use 1% final concentration for 10-20 minutes at room temperature [2] [18].
- Tissue-specific optimization: Embryonic tissues may require optimization of cross-linking time; test 10, 20, and 30 minutes [18].
- Quenching: Always quench formaldehyde with 125 mM glycine for 5 minutes at room temperature [2] [18].
- Avoid over-fixation: Cross-linking for longer than 30 minutes can compromise chromatin shearing efficiency and antigen accessibility [18] [10].
Experimental Protocols for Key Validation Controls
Protocol 1: Input DNA Preparation and Quality Control
Purpose: To obtain a reference sample representing total chromatin before immunoprecipitation.
Materials:
- Sheared chromatin from embryonic tissue
- Elution buffer (1% SDS, 0.1M NaHCO₃)
- 5M NaCl
- RNase A (0.2 mg/mL final concentration)
- Proteinase K (0.2 mg/mL final concentration)
- DNA purification kit or phenol-chloroform extraction reagents
Method:
- After chromatin shearing and centrifugation, set aside 1-10% of the supernatant as input chromatin [5].
- Add elution buffer to the input sample to match the volume of IP samples [5].
- Reverse cross-links by incubating at 65°C overnight [5] [2].
- Add RNase A to a final concentration of 0.2 mg/mL and incubate at 37°C for 2 hours [5].
- Add Proteinase K to a final concentration of 0.2 mg/mL and incubate at 55°C for 2 hours [5].
- Purify DNA using a commercial kit or standard phenol-chloroform extraction [5].
- Analyze DNA fragment size by agarose gel electrophoresis (1-1.5% gel); optimal range is 200-500 bp [5] [18].
Protocol 2: Negative Control Implementation
Purpose: To establish background binding levels and confirm antibody specificity.
Materials:
- Species-matched non-immune IgG
- Protein A or G magnetic beads/agarose
- Specific peptide for your target antigen (for blocking experiments)
- Wash buffers (RIPA and TE with NaCl)
Method:
- Non-immune IgG control:
- Replace specific antibody with equivalent amount of non-immune IgG [18].
- Process identical to experimental samples throughout IP and wash steps.
Bead-only control:
- Omit antibody during IP incubation [18].
- Process with beads only to assess non-specific chromatin binding to beads.
Peptide-blocking control:
- Pre-incubate primary antibody with 5-10× molar excess of specific peptide for 30 minutes at room temperature [18].
- Use this mixture for IP alongside unblocked antibody.
Include all controls in downstream analysis (qPCR or sequencing).
Troubleshooting Guide for Embryonic Tissue ChIP
Table: Common ChIP Issues and Solutions in Embryonic Tissues
| Problem | Potential Causes | Solutions |
|---|---|---|
| Low DNA yield after IP | Insufficient starting material; inefficient cross-linking; suboptimal antibody | Pool tissues from multiple embryos [2]; optimize cross-linking time [18]; validate antibody and use 5×10⁴-5×10⁵ cells per IP [2] |
| High background in controls | Non-specific antibody binding; insufficient washing; over-sonication | Include peptide-blocked control [18]; increase wash stringency [5]; optimize sonication to 200-500 bp fragments [5] |
| Poor chromatin shearing | Over-cross-linking; incorrect sonication settings; chromatin concentration too high | Limit cross-linking to <30 min [18]; optimize sonication empirically [10]; keep cell concentration ≤15×10⁶/mL [18] |
| Inconsistent qPCR results | DNA contamination; primer inefficiency; incomplete cross-link reversal | Include no-antibody control [18]; validate primer efficiency; ensure complete cross-link reversal (overnight incubation) [5] |
| Weak or no signal for positive targets | Antibody not working in ChIP; epitope masked by cross-linking; insufficient IP material | Use ChIP-validated antibodies [18] [10]; try shorter cross-linking [18]; increase input material up to 5×10⁵ cells [2] |
Quantitative Data for Experimental Design
Table: Recommended Cell Numbers and Antibody Amounts for Embryonic Tissue ChIP
| Application | Recommended Cell Number | Antibody Amount | Fragmentation Size | Primary Incubation |
|---|---|---|---|---|
| Histone Modifications | 5×10⁴ - 2×10⁵ cells [2] | 2-5 μg [7] | 200-500 bp [5] | 4 hours to overnight [5] [7] |
| Transcription Factors | 5×10⁵ - 5×10⁶ cells [2] | 5-10 μg [7] | 200-500 bp [5] | Overnight recommended [7] |
| Low-abundance Factors | ≥5×10⁵ cells [2] | 5-10 μg [7] | 200-500 bp [5] | Overnight at 2-8°C [7] |
Research Reagent Solutions
Table: Essential Reagents for Embryonic Tissue ChIP
| Reagent | Function | Specific Recommendations |
|---|---|---|
| Formaldehyde | Crosslinks proteins to DNA | Use 1% final concentration, high quality and fresh [7] [18] |
| Protease Inhibitors | Prevent protein degradation | Add to lysis buffer immediately before use [2] [18]; include PMSF, Leupeptin, Aprotinin [7] |
| Magnetic Beads | Antibody capture | Protein A/G beads; choose based on antibody species [18] |
| Sodium Butyrate | Inhibit histone deacetylases | Essential for histone acetylation ChIP (e.g., H3K27ac) [2] |
| Micrococcal Nuclease (MNase) | Chromatin fragmentation | For enzymatic shearing; generates 150-750 bp fragments [10] |
| Glycine | Quench formaldehyde | 125-250 mM final concentration [2] [7] |
Control Implementation Workflow
Experimental Validation Pathway
Implementing comprehensive controls is not optional but essential for generating valid, interpretable data from embryonic tissue ChIP experiments. The unique challenges of limited starting material and tissue heterogeneity in embryonic samples make proper experimental design even more critical. By systematically including the controls outlined in this guide—input references, negative controls, antibody validation, and genomic region controls—researchers can confidently distinguish true biological signals from technical artifacts. Following these standardized protocols and troubleshooting approaches will enhance the reliability and reproducibility of epigenomic studies in embryonic development, ultimately contributing to more accurate functional annotation of vertebrate genomes and insights into the molecular basis of development, evolution, and disease.
The following table summarizes the fundamental purpose and primary use cases for each chromatin analysis technology.
| Feature | ChIP-chip | ChIP-seq | ChIA-PET |
|---|---|---|---|
| Core Principle | Hybridization of ChIP-enriched DNA to microarray probes [11]. | High-throughput sequencing of ChIP-enriched DNA [57]. | ChIP followed by proximity ligation and sequencing of paired-end tags to capture interactions [58] [59]. |
| Primary Application | Identifying protein-binding sites or histone modifications on a predefined microarray [11]. | Genome-wide mapping of protein-binding sites or histone modifications [57] [9]. | De novo detection of long-range chromatin interactions mediated by a specific protein [58] [59]. |
| Optimal for Embryonic Research | Limited due to predefined genomic coverage and lower resolution. | Suitable for mapping binding sites in embryonic tissues [4] [9]. | Ideal for unraveling 3D gene regulatory networks in development [58]. |
Technical Specifications & Performance Comparison
This table provides a detailed, quantitative comparison of the technical parameters and performance metrics of each method.
| Feature | ChIP-chip | ChIP-seq | ChIA-PET |
|---|---|---|---|
| Resolution | Limited by microarray probe density [11]. | Single-base pair resolution [58]. | Base-pair resolution for interaction anchors [60] [58]. |
| Throughput | Genome-wide, but limited to array design. | Genome-wide and unbiased [58]. | Genome-wide and de novo [58] [59]. |
| Typical Input Requirements | High (e.g., ~10⁶-10⁷ cells) [11]. | Lower than ChIP-chip; protocols exist for 5x10⁴ - 5x10⁵ cells [4]. | Very high for traditional protocol (≥10⁷ cells); next-gen methods (HiChIP/PLAC-seq) require far fewer (≤10⁵ cells) [60]. |
| Key Advantage | More accessible in some labs due to cost and equipment [11]. | Higher sensitivity and spatial resolution than ChIP-chip; wider genomic coverage [11]. | Uniquely identifies long-range interactions bound by a specific protein of interest [58] [59]. |
| Key Limitation | Lower resolution and dynamic range; limited to predefined genomic regions [11]. | Cannot directly identify long-range interactions between distal genomic elements [60]. | Complex protocol; high input requirement (traditional method); dependent on antibody quality [60] [59]. |
Workflow Diagrams
ChIP-seq and ChIP-chip Shared Workflow
This diagram illustrates the core chromatin immunoprecipitation steps common to both ChIP-seq and ChIP-chip, with the key divergence point occurring before the final analysis step.
ChIA-PET Workflow for Mapping Chromatin Interactions
This diagram outlines the more complex ChIA-PET protocol, highlighting the key steps that enable the capture of long-range chromatin interactions.
Troubleshooting Guides & FAQs
Cross-Linking & Chromatin Shearing
Q: My ChIP efficiency is low. What is the most critical step to optimize? A: Cross-linking is often the culprit. Over- or under-fixation can lead to DNA loss and high background.
- Solution: Optimize fixation time and formaldehyde concentration. For embryonic tissue, start with 1% formaldehyde for 10-20 minutes at room temperature. Always quench with glycine [18].
Q: How can I verify my chromatin shearing is efficient? A:
- Analysis: Reverse cross-link an aliquot of sheared chromatin and run the purified DNA on a 1% agarose gel. You should see a smear between 200-600 bp [61] [18].
- Tip: Keep samples cold during sonication and avoid over-loading the gel with DNA, as this can lead to poor quality images that don't reflect real fragmentation [18].
Immunoprecipitation (IP) & Antibodies
Q: My negative control (IgG) shows high background. What could be wrong? A:
- Verify Antibody Specificity: Ensure you are using a ChIP-grade antibody. Pre-incubate the antibody with its specific peptide epitope to block binding as an additional negative control [18].
- Check Beads: Use protein A or G beads appropriate for your antibody's host species and immunoglobulin isotype to minimize non-specific binding [18].
Q: Can I use any antibody for ChIA-PET? A: No. The quality and specificity of the antibody are paramount for ChIA-PET success. Higher ChIP enrichment yields better ChIA-PET data. Always validate antibody performance in a standard ChIP assay before scaling up to a complex ChIA-PET experiment [61] [59].
Methods for Low-Abundance Embryonic Samples
Q: I have a limited amount of embryonic tissue. Which technique should I choose? A:
- For Binding Sites: Use optimized low-input ChIP-seq protocols, which have been successfully used with 50,000 to 500,000 cells from embryonic tissues [4].
- For Chromatin Interactions: Avoid traditional ChIA-PET, which requires millions of cells. Instead, consider its more efficient successors, HiChIP or PLAC-seq, which can work with 100,000 cells or fewer and offer higher sensitivity for mapping chromatin loops [60].
The Scientist's Toolkit: Essential Research Reagents
This table lists key reagents and materials required for these chromatin analysis techniques.
| Reagent/Material | Function | Key Considerations |
|---|---|---|
| Formaldehyde | Reversibly cross-links proteins to DNA, preserving in vivo interactions [11]. | Use fresh; concentration and incubation time require optimization for specific embryonic tissue and protein of interest [18]. |
| ChIP-Grade Antibody | Immunoprecipitates the protein or histone modification of interest. | Specificity is critical. Verify via Western blot or known positive control. Check compatibility with protein A/G [18] [59]. |
| Protein A/G Magnetic Beads | Captures the antibody-target protein-chromatin complex for purification. | More convenient than agarose/sepharose beads. Choose A or G based on antibody species and isotype for optimal binding [18]. |
| Protease Inhibitors | Prevents degradation of proteins and transcription factors during the procedure. | Add to lysis buffers immediately before use. Keep samples ice-cold throughout lysis and shearing [18]. |
| Barcoded Half-Linkers (ChIA-PET) | Ligate to ChIP-enriched DNA fragments; enable formation of PET constructs for interaction mapping. | Internal barcodes help monitor non-specific ligation rates. Must be biotinylated for purification and contain a Type IIS restriction site (e.g., MmeI) [61] [59]. |
| MmeI Restriction Enzyme (ChIA-PET) | Cuts at a distance from its recognition site to release the paired-end tag (PET) structure from the linker. | Essential for generating short, sequenceable tags from the ends of interacting chromatin fragments [61] [59]. |
Integrating Genomic Controls and Motif Discovery in Data Analysis
Troubleshooting Guides
Common ChIP Experimental Issues and Solutions
| Problem | Possible Causes | Recommended Solutions |
|---|---|---|
| Low chromatin concentration [19] | Incomplete cell or tissue lysis; insufficient starting material. [19] | Visualize nuclei under a microscope to confirm complete lysis. [19] Accurately count cells before cross-linking. If DNA concentration is close to 50 µg/ml, add more chromatin to each IP to reach at least 5 µg. [19] |
| Large chromatin fragments (under-fragmentation) [19] | Over-crosslinking; too much input material per digestion/sonication. [19] | Shorten crosslinking time (10-30 minutes). [19] Enzymatic: Increase amount of Micrococcal Nuclease or perform a digestion time course. [19] Sonication: Conduct a sonication time course. [19] |
| Over-fragmented chromatin [19] | Excessive enzymatic digestion or sonication. [19] | Enzymatic: Titrate the amount of Micrococcal Nuclease or reduce digestion time. [19] Sonication: Use the minimal sonication cycles needed; over-sonication (>80% fragments <500 bp) damages chromatin and lowers IP efficiency. [19] |
| Low signal during PCR quantification | Over-fragmentation (especially to mono-nucleosome length); epitope damage. [19] | Optimize fragmentation to avoid over-digestion or over-sonication. Over-sonication can disrupt chromatin integrity and denature antibody epitopes. [19] |
| Tissue / Cell Type | Total Chromatin Yield (Enzymatic Protocol) | Expected DNA Concentration (Enzymatic Protocol) |
|---|---|---|
| Spleen | 20–30 µg | 200–300 µg/ml |
| Liver | 10–15 µg | 100–150 µg/ml |
| Kidney | 8–10 µg | 80–100 µg/ml |
| Brain | 2–5 µg | 20–50 µg/ml |
| Heart | 2–5 µg | 20–50 µg/ml |
| HeLa Cells | 10–15 µg | 100–150 µg/ml |
Frequently Asked Questions (FAQs)
General ChIP Principles
Q: What is the primary advantage of using a simplified ChIP protocol for embryonic samples? A: The main advantage is compatibility with low-abundance biological material, such as specific tissues isolated from early vertebrate embryos. Standard protocols require large cell numbers, which are often impossible to obtain from rare embryonic cell types. Simplified protocols minimize processing steps to reduce sample loss, enabling ChIP-seq on as few as 50,000 cells. [5] [4]
Q: Why is it crucial to optimize chromatin fragmentation, and how is it done? A: Optimal fragmentation is critical for balancing resolution and immunoprecipitation efficiency. Under-fragmentation leads to high background and low resolution, while over-fragmentation can diminish signals and damage epitopes. [19] Optimization involves running a time course or dose curve with your specific tissue and equipment:
- Enzymatic (MNase) Digestion: Test different volumes of diluted Micrococcal Nuclease on fixed nuclei, then isolate DNA and run it on a gel to find the condition that produces fragments in the 150-900 bp range. [19]
- Sonication: Perform a sonication time-course, taking samples at different intervals. Analyze DNA fragment size on a gel to determine the minimal cycles needed for optimal fragmentation. [19]
Data Analysis & Motif Discovery
Q: What is a key computational method for high-resolution motif discovery and binding event finding? A: Genome wide event finding and motif discovery (GEM) is a method that integrates binding event discovery and motif discovery within a single probabilistic model. GEM improves spatial resolution and can identify novel motifs and spatial binding constraints between transcription factor pairs, such as Klf4 with other factors in mouse ES cells or c-Fos:c-Jun in human data. [62]
Q: How can I perform ChIP-seq analysis when a reference genome is not available? A: A de novo ChIP-seq analysis method can be used. This approach bypasses alignment to a reference genome by first performing de novo assembly of the sequencing reads into longer fragments ("ChIPtigs"). These ChIPtigs are then ranked based on their enrichment in the ChIP sample compared to the control, and the top-ranked ChIPtigs are used for de novo motif discovery. [63] This is particularly useful for studying non-model organisms or cancer genomes with significant rearrangements. [63]
Protocol-Specific Issues
Q: What is a critical step for tissue preparation in ChIP? A: Proper tissue disaggregation is vital. For most tissues, using a system like a BD Medimachine yields higher IP efficiency compared to a Dounce homogenizer. However, for brain tissue, a Dounce homogenizer is strongly recommended, as the Medimachine does not adequately disaggregate it. [19]
Q: How do I handle low-quantity ChIP samples during the immunoprecipitation and wash steps? A: Use magnetic beads for easier handling of small volumes. After binding antibodies to the chromatin, incubate with pre-washed magnetic beads for at least four hours. All subsequent washes (e.g., with RIPA buffer and TE/NaCl buffer) can be performed efficiently by placing the tube in a magnetic holder to settle the beads before removing the supernatant. [5] Transferring the beads to a fresh tube during the final wash steps can help reduce background. [5]
Experimental Workflow: ChIP for Low-Abundance Embryonic Samples
The following diagram outlines the core protocol for conducting Chromatin Immunoprecipitation with limited embryonic material. [5]
Research Reagent Solutions
Essential Materials for Low-Input ChIP
| Reagent / Kit | Function in the Protocol |
|---|---|
| Formaldehyde [5] | Reversible cross-linking of proteins to DNA, preserving in vivo interactions. |
| Glycine [5] | Quenches formaldehyde to stop the cross-linking reaction. |
| Complete Lysis Buffer [5] | Buffer used to lyse nuclei and release chromatin after cross-linking. |
| Magnetic Beads (e.g., Protein A/G) [5] | Solid support for capturing antibody-chromatin complexes, simplifying washing and elution. |
| Micrococcal Nuclease (MNase) [19] | Enzyme used for enzymatic chromatin fragmentation; digests DNA to produce fragments of 150-900 bp. |
| RNAse A [19] [5] | Degrades RNA in the sample during DNA purification to prevent RNA contamination. |
| Proteinase K [19] [5] | Digests proteins during the DNA purification step after reversal of cross-links. |
| ChIP-grade Antibodies | Antibodies with high specificity for the target protein or histone modification. |
Optimization Reagents
| Reagent | Function |
|---|---|
| SimpleChIP Kit [19] | A commercial kit that provides optimized buffers and protocols for both enzymatic and sonication-based ChIP. |
| RIPA Wash Buffer [5] | A buffer used for stringent washing of the antibody-bead complexes to reduce non-specific background. |
| Elution Buffer [5] | Typically containing SDS and sodium bicarbonate, used to release the bound chromatin from the beads. |
Troubleshooting Guides
Low Chromatin Concentration or Yield
Problem: The concentration of fragmented chromatin obtained from embryonic tissue is too low for subsequent immunoprecipitation steps.
| Possible Cause | Recommended Solution |
|---|---|
| Insufficient starting material | For low-abundance embryonic samples, pool material from multiple specimens if possible. A protocol exists specifically for 5 x 10⁴ - 5 x 10⁵ cells [4]. |
| Incomplete tissue disaggregation or cell lysis | For brain tissue, use a Dounce homogenizer. For other tissues, a Medimachine system may provide higher IP efficiencies. Visually confirm complete nuclear lysis under a microscope after sonication [64]. |
| Naturally low-yield tissue | Brain, heart, and early embryonic tissues yield less chromatin. Adjust starting amounts accordingly (e.g., 2–5 µg chromatin per 25 mg of brain tissue is expected) [64]. |
Suboptimal Chromatin Fragmentation
Problem: Chromatin is either under-fragmented (leading to high background) or over-fragmented (which can damage epitopes).
| Problem & Cause | Diagnostic Check | Solution |
|---|---|---|
| Under-fragmentation: Cross-linking is too extensive or enzymatic/sonication is insufficient. | Analyze DNA fragment size on a 1% agarose gel [64]. | - Shorten cross-linking time to 10-30 minutes [64].- Enzymatic: Increase micrococcal nuclease amount or digestion time [64].- Sonication: Perform a sonication time-course; for embryonic SNT, 11 cycles was optimal [5]. |
| Over-fragmentation: Excessive enzymatic or sonication treatment. | >80% of DNA fragments are shorter than 500 bp [64]. | - Enzymatic: Reduce micrococcal nuclease amount [64].- Sonication: Use the minimal sonication cycles needed. Over-sonication disrupts chromatin integrity [64]. |
High Background or Poor Specificity
Problem: The ChIP experiment results in low signal-to-noise ratio, making it difficult to distinguish specific binding.
| Possible Cause | Recommendation |
|---|---|
| Non-specific antibody | Validate antibody for ChIP-specificity. Use a pre-immune serum or species-matched IgG as a negative control [65]. |
| Insufficient washing | Ensure all washing steps are performed completely. A typical low-abundance protocol includes multiple ice-cold RIPA buffer washes and a final TE/NaCl wash [5]. |
| Chromatin fragments too large | Optimize fragmentation to a size range of 200–500 bp for sonication, as confirmed by agarose gel electrophoresis [5]. |
Frequently Asked Questions (FAQs)
Experimental Design and Sample Preparation
Q1: What is the minimum amount of embryonic tissue required for a successful ChIP experiment? A dedicated protocol has been successfully used with low to medium cell numbers, ranging from 50,000 to 500,000 cells [4]. This makes it compatible with the amounts obtainable from early vertebrate embryos, such as dissected chicken spinal neural tube segments [4] [5].
Q2: How do I optimize chromatin fragmentation for a new type of embryonic tissue? You must perform an optimization time-course [64].
- For enzymatic fragmentation: Test a dilution series of micrococcal nuclease on a small aliquot of fixed nuclei. After a 20-minute digestion at 37°C, reverse cross-links and run the DNA on a gel to identify the condition yielding 150-900 bp fragments [64].
- For sonication: Take small aliquots of your chromatin sample after successive sonication cycles (e.g., every 1-2 minutes). Analyze the DNA fragment size on a gel to determine the minimal cycles needed to achieve a smear of 200-500 bp [5] [64].
Q3: What are the critical controls for a ChIP experiment? Essential controls include:
- Input DNA: An aliquot of sonicated, non-immunoprecipitated chromatin used to normalize ChIP signals and check sonication efficiency [5].
- Negative control antibody: A non-specific IgG control to establish background binding levels [65].
- Positive control PCR primers: Primers for a known target locus of your protein or histone mark to confirm successful immunoprecipitation.
- Negative control primers: Primers for a genomic region known not to be bound by your target [5].
Data Analysis and Interpretation
Q4: In ChIP-seq data analysis, should the MA plot be symmetric around the x-axis after normalization as in RNA-seq? No. Unlike RNA-seq, ChIP-seq data should not necessarily be forced to symmetry around zero [66]. Radical shifts in binding between conditions are valid biological outcomes (e.g., a treatment that degrades a transcription factor). Normalization methods that assume symmetry can eliminate true biological effects and lead to false conclusions. The DiffBind default (DESeq2 with full library size normalization) is a safe choice as it makes the smallest adjustment [66].
Q5: How can I validate my ChIP-seq results?
- ChIP-qPCR: The gold standard for validation. Use primers for specific loci identified in your sequencing data to confirm enrichment [67].
- Independent biological replicate: Reproducibility across replicates is the strongest validation.
- Comparison to published data: If available, compare your binding profiles with public datasets for the same factor or mark in similar tissues or cell types.
Experimental Workflow for Embryonic Tissue ChIP
The following diagram outlines the key steps in a chromatin immunoprecipitation protocol optimized for low-abundance embryonic samples.
Research Reagent Solutions
The following table details essential materials and their functions for a successful embryonic tissue ChIP experiment.
| Item | Function & Importance |
|---|---|
| Specific Antibody | Critical for IP specificity. Must be validated for ChIP; binds the target protein or histone modification [67] [65]. |
| Magnetic Protein A/G Beads | Used to capture and purify the antibody-chromatin complex, minimizing sample loss compared to sepharose beads [5]. |
| Formaldehyde | Reversible cross-linking agent that fixes proteins to DNA in living cells, preserving in vivo interactions [67] [65]. |
| Micrococcal Nuclease or Sonication Equipment | For fragmenting chromatin. Enzymatic digestion offers precise size control, while sonication is widely used for cross-linked samples [64]. |
| Protease & RNAse Inhibitors | Protect chromatin from degradation during the isolation and processing steps, preserving sample integrity [5] [65]. |
| Glycine | Used to quench the formaldehyde cross-linking reaction, stopping it at the desired time point [5]. |
| Proteinase K & RNAse A | Enzymes used after IP to digest proteins and RNA, respectively, allowing for the purification of pure DNA for analysis [5] [64]. |
Conclusion
Mastering ChIP in embryonic tissue requires a specialized approach that addresses unique material limitations and biological complexity. By implementing optimized protocols for cross-linking, chromatin preparation, and rigorous validation, researchers can reliably map the dynamic protein-DNA interactions that govern development. The future of this field points toward increasingly sensitive methods like low-input and single-cell ChIP-seq, which will further illuminate cell-fate decisions and epigenetic mechanisms. These advances will undoubtedly accelerate discoveries in developmental biology and provide new therapeutic insights for regenerative medicine and disease modeling.
References
- 1. ChIP Troubleshooting Guide [https://www.cellsignal.com/learn-and-support/protocols/chip-troubleshooting-guide]
- 2. Chromatin Immunoprecipitation (ChIP) Protocol for Low-abundance Embryonic Samples - PMC [https://pmc.ncbi.nlm.nih.gov/articles/PMC5614393/]
- 3. Chromatin Immunoprecipitation with Fixed Animal Tissues and Preparation for High-Throughput Sequencing - PMC [https://pmc.ncbi.nlm.nih.gov/articles/PMC5956515/]
- 4. Chromatin Immunoprecipitation (ChIP) Protocol for Low-abundance Embryonic Samples - PubMed [https://pubmed.ncbi.nlm.nih.gov/28872116/]
- 5. Video: Chromatin Immunoprecipitation ChIP Protocol for... [https://www.jove.com/v/56186/chromatin-immunoprecipitation-chip-protocol-for-low-abundance]
- 6. Chromatin Immunoprecipitation Assay as a Tool for Analyzing Transcription Factor Activity - PMC [https://pmc.ncbi.nlm.nih.gov/articles/PMC3891665/]
- 7. Chromatin Immunoprecipitation (ChIP) Protocol: R&D Systems [https://www.rndsystems.com/resources/protocols/chromatin-immunoprecipitation-chip-protocol]
- 8. Chromatin Immunoprecipitation Assay for Tissue-specific Genes using Early-stage Mouse Embryos - PMC [https://www.ncbi.nlm.nih.gov/pmc/articles/PMC3197424/]
- 9. from Mouse Chromatin or... Immunoprecipitation Embryonic Tissue [https://pubmed.ncbi.nlm.nih.gov/29027164/]
- 10. Overview of Chromatin Immunoprecipitation (ChIP) | Cell Signaling Technology [https://www.cellsignal.com/applications/chip-and-chip-seq/regulation-expression-in-cell-and-tissue]
- 11. Chromatin immunoprecipitation - Wikipedia [https://en.wikipedia.org/wiki/Chromatin_immunoprecipitation]
- 12. Profiling chromatin regulatory landscape: insights into the... [https://link.springer.com/article/10.1186/s43556-020-00009-w]
- 13. Santa Cruz Biotechnology [https://www.scbt.com/resources/protocols/chromatin-immunoprecipitation-assays]
- 14. High-throughput single-cell ChIP -seq identifies heterogeneity of... [https://www.nature.com/articles/s41588-019-0424-9?error=cookies_not_supported&code=74ef4b92-7221-4714-90ba-11b7066eb227]
- 15. | Proteintech Group ChIP Protocol [https://www.ptglab.com/support/immunoprecipitation-protocol/chip-protocol/]
- 16. Chromatin immunoprecipitation: Techniques, advances, and... | Abcam [https://www.abcam.com/en-us/knowledge-center/epigenetics/chromatin-immunoprecipitation-techniques-advances-and-insights]
- 17. Chromatin Immunoprecipitation Troubleshooting: ChIP Help: Novus Biologicals [https://www.novusbio.com/support/support-by-application/chromatin-immunoprecipitation/troubleshooting.html]
- 18. ChIP-Seq Kit Troubleshooting Guide | Boster Bio [https://www.bosterbio.com/protocol-and-troubleshooting/chromatin-immunoprecipitation-chip-troubleshooting-guide]
- 19. Chromatin Immunoprecipitation Troubleshooting Guide | Cell Signaling Technology [https://www.cellsignal.com/learn-and-support/troubleshooting/chip-troubleshooting-guide]
- 20. Chromatin immunoprecipitation: optimization, quantitative analysis and data normalization | Plant Methods | Full Text [https://plantmethods.biomedcentral.com/articles/10.1186/1746-4811-3-11]
- 21. ChIP on Chip: surprising results are often artifacts | BMC Genomics | Full Text [https://bmcgenomics.biomedcentral.com/articles/10.1186/1471-2164-11-414]
- 22. ChIP on Chip: surprising results are often artifacts - PubMed [https://pubmed.ncbi.nlm.nih.gov/20602746/]
- 23. for in vivo Protocol on purified... chromatin immunoprecipitation [https://pmc.ncbi.nlm.nih.gov/articles/PMC11835655/]
- 24. An Optimized Protocol for ChIP -Seq from Human Embryonic ... Stem [https://pubmed.ncbi.nlm.nih.gov/33000002/]
- 25. Analysis of the mouse embryonic stem cell regulatory networks obtained by ChIP-chip and ChIP-PET | Genome Biology | Full Text [https://genomebiology.biomedcentral.com/articles/10.1186/gb-2008-9-8-r126]
- 26. Enhancer identification in mouse embryonic stem cells using integrative modeling of chromatin and genomic features - PMC [https://pmc.ncbi.nlm.nih.gov/articles/PMC3406964/]
- 27. Analysis of In Transcription Factor Recruitment by... | SpringerLink Vivo [https://link.springer.com/protocol/10.1007/978-1-61779-851-1_25]
- 28. ChIP-seq guidelines and practices of the ENCODE and modENCODE consortia - PMC [https://pmc.ncbi.nlm.nih.gov/articles/PMC3431496/]
- 29. Chromatin Immunoprecipitation ( ChIP ) Protocol for Low-abundance... [https://www.jove.com/t/56186/chromatin-immunoprecipitation-chip-protocol-for-low-abundance]
- 30. A basic overview of chromatic immunoprecipitation ( ChIP ) [https://blog.addgene.org/antibodies-101-chip]
- 31. 7 Tech Tips For Successful ChIP | Proteintech Group Experiments [https://www.ptglab.com/news/blog/7-tech-tips-for-successful-chip-experiments/]
- 32. How to Tackle Challenging -Seq, with Long-Range... ChIP [https://pubmed.ncbi.nlm.nih.gov/30073524/]
- 33. How to Choose Enzymatic or Digestion for Sonication ChIP [https://blog.cellsignal.com/how-to-choose-enzymatic-or-sonication-protocol-for-chip]
- 34. Critical Parameters for Efficient Sonication and Improved Chromatin Immunoprecipitation of High Molecular Weight Proteins - PMC [https://pmc.ncbi.nlm.nih.gov/articles/PMC4731078/]
- 35. Benefits of Enzyme-based Chromatin Digestion | Cell Signaling Technology [https://www.cellsignal.com/applications/chip-and-chip-seq/enzyme-based-chip]
- 36. Questions [https://bioinformatics.ccr.cancer.gov/btep/questions/library-chip-preparation-how-do-i-choose-between-sonication-and-enzymaticbased-chromatin-fragmentation-for-chipseq-how-might-this-affect-sequencing-depth]
- 37. ChIP training Part 4: optimization and troubleshooting [https://go.myabcam.com/chip-training-part-4?elqTrackId=f09542b33cab497596a3b1ced3116acf&elq=00000000000000000000000000000000&elqaid=2040&elqat=2]
- 38. ( Chromatin ) Immunoprecipitation for Low-abundance... ChIP Protocol [https://app.jove.com/t/56186/chromatin-immunoprecipitation-chip-protocol-for-low-abundance]
- 39. SimpleChIP® Plus Sonication Chromatin Immunoprecipitation Protocol (Magnetic Beads) | Cell Signaling Technology [https://www.cellsignal.com/learn-and-support/protocols/protocol-simplechip-plus-sonication]
- 40. Assessment of a method to characterize antibody selectivity and... [https://pubmed.ncbi.nlm.nih.gov/26121405/]
- 41. Chromatin Immunoprecipitation Protocol & Troubleshooting - Creative Biolabs [https://www.creativebiolabs.net/chromatin-immunoprecipitation.htm]
- 42. (IP) and co- Immunoprecipitation ... | Abcam immunoprecipitation [https://www.abcam.com/en-us/technical-resources/protocols/immunoprecipitation]
- 43. Protocol for chromatin immunoprecipitation and hematovascular ... [https://pubmed.ncbi.nlm.nih.gov/40938745/]
- 44. Current practices and prospects for standardization of the hematopoietic colony-forming unit assay: a report by the cellular therapy team of the Biomedical Excellence for Safer Transfusion (BEST) Collaborative - ScienceDirect [https://www.sciencedirect.com/science/article/abs/pii/S1465324912000424]
- 45. Chromatin Immunoprecipitation ChIP Protocol Troubleshooting | Bio-Techne [https://www.bio-techne.com/resources/protocols-troubleshooting/chromatin-immunoprecipitation]
- 46. Cross-linking Chromatin immunoprecipitation (ChIP) Protocol -Cusabio [https://www.cusabio.com/m-243.html]
- 47. Frequently Asked Questions About Chromatin Immunoprecipitation (ChIP) [https://www.sigmaaldrich.com/US/en/technical-documents/technical-article/protein-biology/protein-purification/chp1-faqs]
- 48. ChIP bias as a function of cross-linking time - PMC [https://www.ncbi.nlm.nih.gov/pmc/articles/PMC4860130/]
- 49. ChIP Troubleshooting Guide [https://www.bosterbio.com/frequently-asked-questions/chip-troubleshooting-guide]
- 50. Chromatin Mapping Basics: ChIP -seq - EpiCypher [https://www.epicypher.com/resources/blog/chromatin-mapping-basics-chip-seq/]
- 51. Chromatin Shearing in Suspension Cell Line: A Guide for Optimization - PubMed [https://pubmed.ncbi.nlm.nih.gov/40321026/]
- 52. 用于 大 规模表观遗传学研究的半自动 ChIP -Seq程序 [https://www.jove.com/cn/t/61617/a-semiautomated-chip-seq-procedure-for-large-scale-epigenetic-studies]
- 53. Transcription Factor Proteomics: Identification by a Novel Gel Mobility Shift-Three-Dimensional Electrophoresis Method Coupled with Southwestern Blot and HPLC-Electrospray-Mass Spectrometry Analysis - PMC [https://pmc.ncbi.nlm.nih.gov/articles/PMC3174475/]
- 54. Chromatin Immunoprecipitation (ChIP) [https://www.sigmaaldrich.com/US/en/technical-documents/technical-article/protein-biology/protein-and-nucleic-acid-interactions/chip-immunoprecipitation-washing-and-elution]
- 55. Analysis of histone antibody specificity directly in sequencing data using siQ-ChIP - PMC [https://www.ncbi.nlm.nih.gov/pmc/articles/PMC10028865/]
- 56. Chromatin Analysis Support – Troubleshooting | Thermo Fisher Scientific - US [https://www.thermofisher.com/us/en/home/technical-resources/technical-reference-library/epigenetics-support-center/chromatin-analysis-support/chromatin-analysis-support-troubleshooting.html]
- 57. Chromatin immunoprecipitation and chromatin immunoprecipitation with massively parallel sequencing on mouse embryonic tissue - PubMed [https://pubmed.ncbi.nlm.nih.gov/25151167/]
- 58. Chromatin Interaction Analysis with Paired-End Tag ( ChIA - PET )... [https://bmcgenomics.biomedcentral.com/articles/10.1186/1471-2164-15-S12-S11]
- 59. ChIA-PET - Wikipedia [https://en.wikipedia.org/wiki/ChIA-PET]
- 60. 3D Genome Sequencing: HiChIP sequencing vs. PLAC- seq [https://www.cd-genomics.com/longseq/resource-hic-hichip-placseq-comparison.html]
- 61. Video: Chromatin Interaction Analysis with Paired-End Tag Sequencing... [https://www.jove.com/v/3770/chromatin-interaction-analysis-with-paired-end-tag-sequencing-chia]
- 62. High resolution genome wide binding event finding and motif ... [https://pubmed.ncbi.nlm.nih.gov/22912568/]
- 63. De novo ChIP -seq analysis | Genome Biology | Full Text [https://genomebiology.biomedcentral.com/articles/10.1186/s13059-015-0756-4]
- 64. | Cell Signaling Technology ChIP Troubleshooting Guide [https://www.cellsignal.com/learn-and-support/troubleshooting/chip-troubleshooting-guide?_requestid=1075167]
- 65. from Mouse Chromatin or... Immunoprecipitation Embryonic Tissue [https://link.springer.com/protocol/10.1007/978-1-4939-7380-4_5]
- 66. DiffBind's MA plots for ChIP -seq - how to properly interpret ... [https://support.bioconductor.org/p/121504/]
- 67. Mastering ChIP - chip in Molecular Genetics [https://www.numberanalytics.com/blog/mastering-chip-chip-molecular-genetics]