Optimizing Whole-Mount In Situ Hybridization: A Tail Fin Notching Protocol to Reduce Background Staining
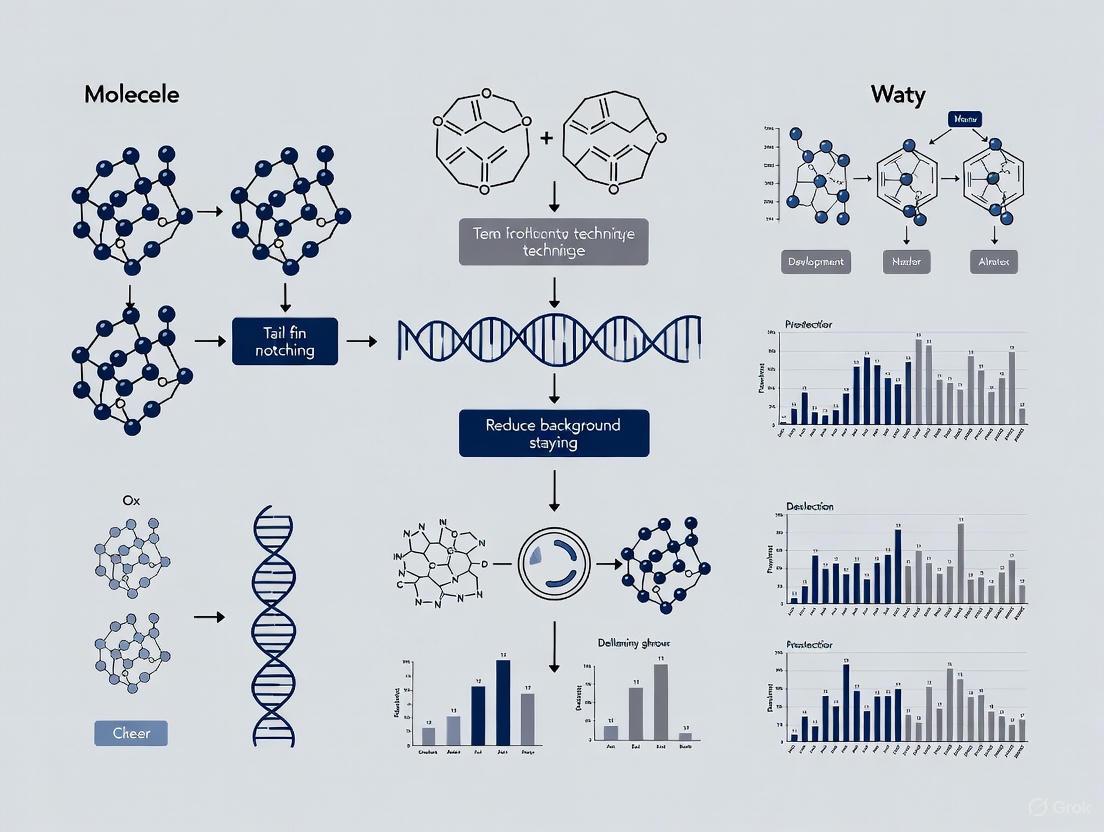
This article details a refined Whole-mount In Situ Hybridization (WISH) protocol that effectively minimizes confounding background staining in regenerating tadpole tails, a common challenge in regenerative biology research.
Optimizing Whole-Mount In Situ Hybridization: A Tail Fin Notching Protocol to Reduce Background Staining
Abstract
This article details a refined Whole-mount In Situ Hybridization (WISH) protocol that effectively minimizes confounding background staining in regenerating tadpole tails, a common challenge in regenerative biology research. We explore the foundational problem of non-specific signal in loose fin tissues and present the tail fin notching technique as a key methodological solution. The protocol is placed in context with other optimization strategies, such as photobleaching, and is validated through its application in visualizing key regeneration markers like mmp9. This guide provides researchers and drug development professionals with a comprehensive framework for achieving high-contrast, publication-quality gene expression data in complex tissue models.
The Challenge of Background Staining in Regenerating Tissues
The Critical Role of WISH in Visualizing Spatio-Temporal Gene Expression
Whole-mount in situ hybridization (WISH) remains a cornerstone technique in developmental biology, enabling researchers to visualize the spatial and temporal expression patterns of genes with critical roles in organism development [1] [2]. The importance of this method among developmental molecular biologists cannot be overstated, as it provides crucial validating data that complements high-throughput sequencing methods [2]. Despite the emergence of techniques like single-cell RNA sequencing and spatial transcriptomics, WISH offers the unique advantage of providing detailed information on the spatial and temporal dynamics of target gene expression levels within the context of whole tissues or embryos [2]. However, detecting mRNA by WISH presents significant challenges when mRNA levels are very low, transcripts are localized in hard-to-access areas, or tissue samples are prone to background staining [2]. This application note addresses these challenges through an optimized WISH protocol featuring tail fin notching, demonstrating its critical role in advancing research on gene expression during tissue regeneration.
Technical Challenges in Conventional WISH
Traditional WISH methodologies face several limitations that compromise data quality and interpretation. Background staining presents a particularly significant problem in loose tissues such as tadpole tail fins, where reagents become trapped and cause non-specific chromogenic reactions [2]. This issue is exacerbated when target RNA is not highly expressed and requires long staining incubation, leading to decreased signal-to-noise ratio that obscures genuine expression patterns [2].
Additionally, pigment interference from melanosomes and melanophores actively migrating to amputation sites can overlap with stain signals, further complicating visualization and photodetection [2]. These technical challenges have historically limited researchers' ability to obtain clear, high-contrast images of cells expressing genes with crucial roles in development and regeneration, such as mmp9, a marker for reparative myeloid cells essential for early stages of tail regeneration in X. laevis tadpoles [2].
Optimized WISH Protocol with Tail Fin Notching
Sample Preparation and Fixation
The following protocol has been specifically optimized for Xenopus laevis tadpole tail regenerates, with critical modifications to minimize background staining and enhance signal detection:
- Fixation: Fix tadpole samples immediately after amputation (0 hpa) in MEMPFA solution for 2 hours at room temperature. MEMPFA formulation: 4% paraformaldehyde, 2 mM EGTA, 1 mM MgSO₄, 100 mM MOPS, adjusted to pH 7.4 [2].
- Dehydration: Dehydrate samples through a graded methanol series (25%, 50%, 75% in PBS) and store in 100% methanol at -20°C.
- Photo-bleaching: Perform photo-bleaching immediately after fixation and dehydration to decolorize melanosomes and melanophores. This step is critical for improving signal visualization in pigmented tissues [2].
- Rehydration: Rehydrate samples through a descending methanol series (75%, 50%, 25% in PBS) before transferring to PBS.
Tail Fin Notching and Proteinase Treatment
The tail fin notching procedure represents a critical innovation for reducing background staining:
- Fin Notching: Using fine scissors, make precise incisions in a fringe-like pattern at a safe distance from the area of interest in the regenerating tail. This notching significantly improves reagent penetration and washing efficiency, preventing BM Purple from becoming trapped in loose fin tissues and causing non-specific autocromogenic reactions [2].
- Proteinase K Treatment: Treat samples with proteinase K solution (10 μg/mL in PBS) for 30 minutes at room temperature. This step increases tissue permeability by removing nucleases and degrading proteins that may obscure target mRNA accessibility [2].
- Post-fixation: Re-fix notched samples in MEMPFA for 20 minutes to maintain tissue integrity after proteinase K treatment.
Hybridization and Detection
- Pre-hybridization: Pre-hybridize samples for 4 hours at 65°C in hybridization buffer.
- Probe Hybridization: Incubate samples with digoxigenin-labeled antisense RNA probes (1-2 μg/mL) in hybridization buffer at 65°C overnight.
- Stringency Washes: Perform sequential washes with SSC solutions (2× SSC, 0.2× SSC) at 65°C to remove unbound probe.
- Immunodetection: Incubate samples with anti-digoxigenin-AP antibody (1:5000 dilution) overnight at 4°C.
- Color Reaction: Develop color using BM Purple substrate. The optimized protocol enables staining incubation for 3-4 days without background interference due to the notching procedure [2].
Table 1: Comparison of WISH Protocol Variants for Regenerating Tadpole Tails
| Protocol Variant | Key Modifications | Background Staining | Signal Clarity | Overall Quality |
|---|---|---|---|---|
| Standard WISH | No modifications | High | Poor | Unacceptable |
| Variant 1 | Extended proteinase K (30 min) | High | Poor | Unacceptable |
| Variant 2 | Fin notching + post-staining bleaching | Moderate | Moderate | Improved |
| Variant 3 | Early photo-bleaching only | Low with bubbles | Good | Variable |
| Variant 4 (Optimized) | Early photo-bleaching + fin notching | Very Low | Excellent | Superior |
Research Reagent Solutions
Table 2: Essential Research Reagents for Optimized WISH Protocol
| Reagent/Material | Function | Specifications/Alternatives |
|---|---|---|
| MEMPFA | Tissue fixation and preservation of morphology | 4% PFA, 2 mM EGTA, 1 mM MgSO₄, 100 mM MOPS, pH 7.4 |
| Proteinase K | Increases tissue permeability and accessibility | 10 μg/mL in PBS, 30 min incubation |
| BM Purple | Chromogenic substrate for alkaline phosphatase | Enables visualization of gene expression patterns |
| Anti-digoxigenin-AP antibody | Immunodetection of hybridized probes | 1:5000 dilution, overnight incubation at 4°C |
| DIG-labeled RNA probes | Target-specific gene detection | In vitro transcribed, gene-specific sequences |
| Hybridization buffer | Optimal conditions for RNA-RNA hybridization | Formulated for high stringency and low background |
Application Data and Validation
The optimized WISH protocol with tail fin notching has been successfully applied to elucidate the expression pattern of mmp9 during early tail regeneration in X. laevis tadpoles [2]. This gene encodes a Zn²⁺-dependent extracellular matrix metalloproteinase that serves as a specific marker for reparative myeloid cells, which play a key role in the initial stages of regeneration [2].
The technique enabled clear visualization of mmp9+ cells during the critical first 24 hours post-amputation (0, 3, 6, and 24 hpa) at the regeneration-competent stage 40, revealing detailed cellular localization patterns that were previously obscured by background staining [2]. Furthermore, comparison with regeneration-incompetent stages (stages 45-47, refractory period) demonstrated significantly different mmp9 expression patterns, highlighting the association between mmp9 activity and regeneration competence [2].
Table 3: Quantitative Assessment of WISH Protocol Efficacy
| Performance Metric | Standard Protocol | Optimized Protocol with Fin Notching |
|---|---|---|
| Background staining intensity | High | Very Low |
| Signal-to-noise ratio | Low (≤2:1) | High (≥5:1) |
| Sample loss rate | 5-10% | <2% |
| Maximum staining duration without background | 1-2 days | 3-4 days |
| Signal clarity in pigmented tissues | Poor | Excellent |
| Reproducibility between technical replicates | Variable | High |
Experimental Workflow and Signaling Pathways
The following diagram illustrates the optimized WISH workflow with integrated tail fin notching:
Advanced Applications and Integration
The integration of WISH with computational approaches represents a cutting-edge advancement in developmental biology. Recent methodologies enable the reconstruction of spatio-temporal gene expression patterns by integrating static snapshots across developmental stages, creating continuous 2D reconstructions of gene expression over time [1]. This approach is particularly valuable for internally developing embryos where real-time imaging remains technically challenging beyond early stages [1].
These computational methods employ tissue trajectory tracking and B-spline interpolation to create smooth temporal trajectories of gene expression, effectively transforming spatial interpolation problems into temporal ones [1]. When applied to key developmental genes such as Sox9, Hand2, and Bmp2 in limb development, this integration provides high-quality data that guides computational modeling and machine learning approaches to developmental mechanisms [1].
Furthermore, fluorescent WISH (F-WISH) techniques using tyramide signal amplification enable mRNA visualization with subcellular resolution, particularly valuable for studying translational control mechanisms during early ovule development in plants [3]. This highly sensitive method facilitates the identification of localized mRNA transport and anchoring, key elements in cell fate determination across all developmental stages [3].
The optimized WISH protocol with tail fin notching represents a significant technical advancement for visualizing spatio-temporal gene expression patterns, particularly in challenging tissues prone to background staining. By integrating physical modifications to tissue architecture with refined biochemical processing, this method enables high-resolution analysis of gene expression dynamics during critical developmental and regenerative processes. The technique's validated application to regeneration-associated genes like mmp9 demonstrates its capacity to generate reliable, high-quality data that complements and enhances findings from high-throughput sequencing technologies. As developmental biology increasingly focuses on complex spatial and temporal regulation of gene networks, these refined WISH methodologies will continue to provide essential insights into the fundamental mechanisms governing tissue formation, patterning, and regeneration.
Why Regenerating Tadpole Tails Are Prone to High Background Noise
Whole-mount in situ hybridization (WISH) is a foundational technique that enables the visualization of gene expression patterns in whole-mount multicellular samples, embodying the "seeing is believing" principle in developmental biology [2] [4]. However, detecting mRNA via WISH becomes particularly challenging in specific tissue contexts where technical artifacts impede clear signal interpretation. The regenerating tails of Xenopus laevis tadpoles present a classic case where high background staining significantly compromises data quality, necessitating specialized methodological adaptations [2] [4]. This application note examines the anatomical and physiological factors underlying this propensity for background noise and presents an optimized protocol centered on a tail fin notching technique to overcome these limitations, framed within broader research on reducing background staining in complex tissues.
The Scientific Challenge: Anatomical and Physiological Factors
Regenerating tadpole tails present two primary challenges that contribute to high background staining during WISH procedures, fundamentally reducing the signal-to-noise ratio in experimental outcomes.
Melanophore and Melanosome Interference
The first major challenge stems from pigment granule interference. In wild-type X. laevis tadpoles, melanosomes (pigment granules) actively migrate with cells to the amputation site following injury [2] [4]. These dark pigments directly interfere with the visualization of BM Purple stain precipitation, the chromogenic signal indicating target mRNA presence. Additionally, the numerous melanophores themselves make visualization and photodetection of the specific staining signal exceptionally difficult [4]. This pigment interference is particularly problematic when attempting to detect low-abundance transcripts where the signal may be completely obscured by the underlying pigmentation.
Tail Fin Architecture and Background Staining
The second significant challenge arises from the inherent structural properties of tail fin tissues. Tadpole tail fins comprise very loose, permeable tissues that readily trap staining reagents during the WISH process [2] [4]. This structural characteristic leads to strong background staining, especially when targeting low-expression genes that require extended staining incubation periods. The problem is exacerbated in regenerating tissues where cellular composition and extracellular matrix organization differ substantially from uninjured controls. Researchers have observed that tadpole samples fixed immediately after amputation (0 hpa) exhibit the lowest background staining, suggesting that the regeneration process itself introduces additional factors that compound the background issue [4].
Table 1: Primary Factors Contributing to Background Staining in Tadpole Tail WISH
| Factor Category | Specific Challenge | Impact on WISH Quality |
|---|---|---|
| Pigmentation | Melanosome migration to amputation site | Obscures chromogenic signal detection |
| Pigmentation | Numerous melanophores in regeneration zone | Interferes with visual and photographic detection |
| Tissue Architecture | Loose, permeable fin tissue structure | Traps staining reagents causing nonspecific precipitation |
| Tissue Architecture | Altered extracellular matrix during regeneration | Increases auto-cromogenic reactions in damaged tissue |
Optimized WISH Protocol for Regenerating Tadpole Tails
Through systematic testing of protocol variants, researchers have developed an optimized WISH methodology that specifically addresses the background challenges in regenerating tadpole tails. The following workflow and methodological adjustments are critical for success.
Critical Protocol Modifications
The optimized protocol incorporates two key modifications that directly address the background challenges:
Early Photo-bleaching Step: Performing photo-bleaching immediately after fixation in MEMPFA and dehydration effectively decolors both melanosomes and melanophores, resulting in perfectly albino tails that no longer interfere with signal detection [2] [4]. This represents a significant improvement over post-staining bleaching approaches, which only partially fade melanophores to brown without completely eliminating interference [2].
Tail Fin Notching Procedure: Making precise incisions in a fringe-like pattern at a strategic distance from the primary area of interest in the regenerating tail dramatically improves reagent wash-out from the loose fin tissues [2] [4]. This procedural modification prevents BM Purple from becoming trapped in the fin matrix and causing non-specific autocromogenic reactions, effectively eliminating background staining even after extended (3-4 day) staining incubations necessary for detecting low-abundance transcripts [4].
Comparative Protocol Evaluation
Table 2: Evaluation of WISH Protocol Variants for Regenerating Tadpoles
| Protocol Variant | Key Modifications | Resulting Signal Quality | Limitations |
|---|---|---|---|
| Variant 1 | Extended proteinase K incubation (30 min) | mmp9+ cells overlapping with strong background staining | Insufficient reduction of background; poor signal clarity |
| Variant 2 | Fin notching + post-staining photo-bleaching | Improved mmp9+ cell detection; melanophores only faded to brown | Suboptimal pigment removal; residual interference |
| Variant 3 | Early photo-bleaching (post-fixation) | Perfectly albino tails; persistent bubble artifacts in fins | Non-specific BM Purple staining in fin bubbles |
| Variant 4 (Optimized) | Early photo-bleaching + fin notching | High-contrast images of mmp9+ cells; no background | Requires precise surgical technique for notching |
Research Reagent Solutions
The successful implementation of the optimized WISH protocol requires specific reagents tailored to address the unique challenges of regenerating tissues.
Table 3: Essential Research Reagents for Tadpole Tail WISH
| Reagent/Equipment | Specification | Primary Function |
|---|---|---|
| MEMPFA Fixative | 4% PFA, 2mM EGTA, 1mM MgSO₄, 100mM MOPS, pH 7.4 | Tissue preservation while maintaining RNA integrity and accessibility |
| Proteinase K | Optimized concentration and incubation time | Tissue permeabilization through controlled protein digestion; removes nucleases |
| BM Purple | Alkaline phosphatase substrate | Chromogenic precipitation for RNA visualization |
| Antisense RNA Probes | Labeled complementary to target mRNA | Specific hybridization to endogenous transcripts of interest |
| Photo-bleaching Setup | Appropriate light source and conditions | Melanosome and melanophore decoloration for signal clarity |
Application Case Study: Mapping mmp9 Expression Dynamics
The utility of this optimized protocol is demonstrated through its application in characterizing the expression pattern of mmp9, a Zn²⁺-dependent extracellular matrix metalloproteinase that serves as a marker for reparative myeloid cells crucial for initial stages of tail regeneration [2] [4]. Using the optimized WISH protocol with early photo-bleaching and tail fin notching, researchers obtained novel, high-quality data on mmp9 expression during the first day post-amputation (0, 3, 6, and 24 hpa) at both regeneration-competent (stage 40) and regeneration-incompetent (stage 47, refractory period) stages [2].
The clarity achieved through background reduction enabled the discovery of significant differences in mmp9 expression patterns between these stages, demonstrating that mmp9 activity is positively correlated with regeneration competence [2] [4]. This application underscores the critical importance of minimizing background staining when studying complex spatiotemporal expression patterns of key regulatory genes during dynamic processes like regeneration.
The high background noise typically encountered in WISH applications on regenerating tadpole tails stems from clearly identifiable anatomical and physiological factors: pigment cell interference and the permeable nature of fin tissues. The optimized protocol presented here, featuring strategic early photo-bleaching and tail fin notching, directly addresses these challenges by eliminating pigmentary obstruction and preventing reagent trapping in loose tissues. This methodology enables researchers to achieve unprecedented clarity in visualizing gene expression patterns, thereby facilitating more accurate interpretation of spatial and temporal expression dynamics during complex regenerative processes. The techniques described herein not only advance tadpole tail regeneration studies but also provide valuable insights for improving WISH applications in other challenging tissue contexts prone to background staining.
In the study of epimorphic regeneration, the visualization of gene expression patterns via techniques such as whole-mount in situ hybridization (WISH) is fundamental. However, in models like the regenerating tail of Xenopus laevis tadpoles, achieving clear, high-contrast staining is often hampered by two significant histological challenges: the presence of melanin-rich pigment cells and the loose architecture of fin tissues [4]. These factors contribute to high background staining, masking specific signals, particularly when detecting low-abundance mRNA or during extended staining incubations. This Application Note details optimized protocols that integrate tail fin notching and photo-bleaching to mitigate these issues, enabling researchers to obtain publication-quality data on the spatial and temporal dynamics of gene expression during regeneration.
The Scientific Challenge: Melanin and Tissue Architecture
The regenerative appendages of key model organisms, such as the zebrafish caudal fin and the Xenopus laevis tadpole tail, possess inherent characteristics that complicate histological analysis.
- Melanin Interference: Melanin, the primary pigment in human skin and hair, is also a major chromophore in animal models, with an absorption coefficient far greater than other dermal constituents [5]. In regenerating tadpole tails, melanosomes (pigment granules) actively migrate with cells to the amputation site. These pigments can overlap with and obscure the chromogenic stain BM Purple, while the numerous melanophores make visualization and photodetection of the specific staining signal exceptionally difficult [4].
- Loose Fin Tissue Architecture: The fin is a non-muscularized dermal appendage composed of segmented bony rays spanned by soft interray tissue [6] [7]. This loose, mesenchymal tissue is prone to trapping reagents during the multi-step WISH procedure. This trapping leads to non-specific autocromogenic reactions, resulting in strong background staining that decreases the signal-to-noise ratio, especially when target RNA is not highly expressed and requires long staining incubation [4].
Quantitative Profiling of Inflammation and Homology
The following table summarizes key quantitative data from zebrafish studies, demonstrating the condensed inflammatory timeline and substantial species homology that underpin the use of cross-reactive antibodies in this model.
Table 1: Key Quantitative Data from Zebrafish Tailfin Transection Studies
| Parameter | Quantitative Finding | Experimental Context | Citation |
|---|---|---|---|
| Cytokine Amino Acid Homology | 39% to 79% similarity (minimal gaps) | Human vs. zebrafish sequence alignment for TNFα, IL-1β, IL-6, IL-10, MIF, MCP-1 | [8] |
| Inflammatory Cytokine Peak | IL-1β: 4 hpi; IL-6: 2 hpi | Cytokine protein levels post-tailfin transection in larvae (120 hpf) | [8] |
| Regeneration Completion | 2-4 weeks | Full restoration of a functional caudal fin in adult zebrafish | [6] |
| Blastema Appearance | ~3 days post-amputation | First visible outgrowth (blastema) in goldfish caudal fin | [6] |
Optimized Experimental Protocols
Integrated Workflow for Enhanced WISH
The diagram below outlines the core optimized protocol, highlighting the critical steps added to overcome background challenges.
Detailed Step-by-Step Methodology
This protocol is optimized for regenerating tail samples of X. laevis tadpoles [4].
I. Sample Fixation and Early Photo-bleaching
- Fixation: Fix regenerating tail samples immediately in MEMPFA solution.
- Dehydration: Dehydrate samples through a graded methanol series.
- Photo-bleaching: Treat samples with a photo-bleaching solution (e.g., as per Harland, 1991) to decolorize melanosomes and melanophores. This step, performed immediately after fixation and dehydration, results in perfectly albino tails, eliminating the spectral overlap between pigment and stain [4].
II. Tail Fin Notching
- Using fine microscissors or a scalpel, make small, fringe-like incisions into the edges of the tail fin at a safe distance from the primary area of interest (e.g., the regenerating tip).
- This notching procedure dramatically improves the penetration of all subsequent solutions (e.g., antibodies, washes) and, crucially, enhances the washing out of unbound reagents from the loose fin tissues. This step is critical for preventing the trapping of BM Purple, which causes non-specific background [4].
III. Whole-Mount In Situ Hybridization
- Proceed with the standard WISH protocol, including:
- Rehydration of samples.
- Proteinase K Treatment: Note that prolonged proteinase K incubation was tested but found to be less effective than the notching and bleaching combination [4].
- Pre-hybridization to reduce non-specific binding.
- Hybridization with a labeled antisense RNA probe.
- Stringency Washes to remove unbound probe.
- The notched fin architecture ensures these reagents are efficiently washed out.
IV. Chromogenic Staining and Imaging
- Staining: Incubate samples with BM Purple substrate. Even with extended staining periods (3-4 days) required for low-expression genes, the optimized protocol prevents background accumulation.
- Imaging: Capture high-contrast images of gene expression patterns without interference from pigment or non-specific stain [4].
Reagent and Solution Formulations
Table 2: Research Reagent Solutions for Optimized WISH
| Reagent / Material | Function / Application | Key Notes |
|---|---|---|
| MEMPFA Fixative | Tissue fixation and preservation of morphology | Critical for initial sample preparation. |
| Proteinase K | Increases tissue permeability for reagents | Extended incubation was less effective than notching/bleaching [4]. |
| BM Purple | Chromogenic substrate for alkaline phosphatase | Produces a purple precipitate at the site of probe hybridization. |
| Anti-human Cytokine Antibodies (e.g., TNF-α, IL-1β) | Immunofluorescence detection of inflammatory signals in zebrafish | Leverages high species homology (39-79%) for cytokine profiling [8]. |
| Phenylthiourea (PTU) | Chemical inhibitor of melanogenesis in zebrafish | Enhances optical clarity of larval zebrafish for improved visualization [8]. |
Signaling Pathways in Regeneration
The regeneration process is governed by complex signaling pathways that coordinate cell migration, proliferation, and patterning. The optimized visualization techniques above are key to studying these pathways.
The optimized WISH protocol has been successfully used to clarify the expression pattern of key genes like mmp9, a marker for reparative myeloid cells. Research shows its activity is positively correlated with regeneration competence, with significantly different expression patterns in regeneration-competent versus refractory-stage tadpoles [4]. In other models, such as the tokay gecko, tail regeneration involves distinct mechanisms, including the temporally collinear activation of posterior HOX genes, which can be visualized using these enhanced techniques [9].
In the field of regenerative biology, visualizing gene expression patterns is paramount to understanding the complex mechanisms that enable certain species to regenerate complex tissues. Whole-mount in situ hybridization (WISH) serves as a cornerstone technique, providing crucial spatial and temporal information about gene expression in intact tissues [4] [2]. However, the clarity of this data is frequently compromised by background staining, a persistent technical challenge that obscures critical cellular information and can lead to erroneous biological interpretations. This problem is particularly pronounced in regeneration studies using established models like Xenopus laevis tadpoles and zebrafish, where pigment cells and loose tissue architecture create substantial signal-to-noise ratio issues [4] [2]. This application note examines the specific impacts of background staining on research outcomes and presents optimized methodologies to overcome these challenges, with particular focus on the tail fin notching technique developed for regenerating tadpole tails.
The Consequences of Background Staining in Regeneration Research
Obscuring Critical Spatial Expression Patterns
Background staining presents a significant impediment to accurate data interpretation in regeneration studies. In investigations of Xenopus laevis tail regeneration, melanosomes and melanophores actively migrate to the amputation site, physically interfering with the detection of specific staining signals from crucial regeneration markers [4]. This interference is particularly problematic when studying low-abundance transcripts or when transcripts are localized in hard-to-access areas [2]. Furthermore, the loose tissue structure of tail fins tends to trap staining reagents, resulting in non-specific chromogenic reactions that create false-positive signals and mask genuine expression patterns [4].
The impact extends beyond simple visualization issues. High background staining complicates the validation of high-throughput sequencing data, potentially leading researchers to overlook or misinterpret critical cellular events in the regeneration process [4] [10]. For instance, in studies of regeneration initiating cells (RICs) – a transient cell population crucial for initiating regeneration – clear visualization of spatial expression patterns is essential for understanding their role in modifying the extracellular matrix to facilitate cell migration [10].
Compromised Data from Refractory Period Comparisons
Background staining poses particular challenges when comparing regeneration-competent and regeneration-incompetent (refractory) stages. Research on Xenopus laevis has revealed significant differences in matrix metalloproteinase 9 (mmp9) expression patterns between stage 40 (regeneration-competent) and stage 47 (refractory) tadpoles [4] [2]. These expression differences are correlated with regeneration competence, but such findings could easily be obscured by inconsistent background staining between samples. Without effective background reduction techniques, subtle but biologically significant expression differences may remain undetected, potentially leading to incorrect conclusions about gene function during regeneration.
Table 1: Common Sources of Background Staining in Regeneration Models and Their Impacts
| Source of Background | Effect on Data Quality | Biological Process Obscured |
|---|---|---|
| Melanophores/Melanosomes [4] | Physical interference with stain signal; difficult photodetection | Migration of reparative myeloid cells to injury site |
| Loose Fin Tissue [4] | Trapping of reagents causing non-specific autocromogenic reactions | Spatial patterns of regeneration-initiating cells (RICs) |
| Inadequate Washes [11] | Retention of unbound or non-specifically bound probes | Early expression of key regulators like mmp9, junb, dlx5a |
| Protein Cross-linking [11] | Masking of target sequences; reduced probe accessibility | Injury-induced expression of has3 in wound epithelium [12] |
Optimized Workflow for Background Reduction in Regeneration Studies
The following diagram illustrates the systematic approach to minimizing background staining in whole-mount in situ hybridization studies of regenerating tissues:
Tail Fin Notching: A Targeted Solution for Enhanced Clarity
Protocol Development and Optimization
The tail fin notching technique represents a significant advancement for reducing background staining in regeneration studies. This method involves creating precise incisions in a fringe-like pattern at a strategic distance from the primary area of interest in the regenerating tail [4]. This procedural modification dramatically improves fluid exchange during washing steps, preventing BM Purple and other staining reagents from becoming trapped in the loose fin tissues and causing non-specific chromogenic reactions [4].
Researchers systematically compared multiple protocol variants and found that samples subjected to extended proteinase K treatment alone continued to exhibit strong background staining with mmp9+ cells overlapping with non-specific signal [4] [2]. Similarly, approaches using only photobleaching or only fin notching provided partial improvement but failed to eliminate the problem completely. The synergistic combination of early photobleaching (after MEMPFA fixation and dehydration) and tail fin notching before hybridization yielded optimal results, producing clear images of specific mmp9+ cells without background interference [4] [2].
Impact on Research Outcomes
The implementation of tail fin notching has enabled researchers to obtain novel data on the mmp9 expression pattern during the critical first day post-amputation in Xenopus laevis tadpoles [4]. This technique was instrumental in revealing significant differences in expression patterns between regeneration-competent and incompetent stages, demonstrating that mmp9 activity is positively correlated with regeneration competence [4] [2]. Without this background reduction technique, these subtle but biologically significant expression differences might have remained obscured.
Comprehensive Experimental Protocol for Background Reduction
Materials and Reagent Preparation
Table 2: Essential Research Reagents for Background Reduction in WISH
| Reagent/Equipment | Specification | Research Function |
|---|---|---|
| MEMPFA Fixative [4] [2] | 4% PFA, 2mM EGTA, 1mM MgSO₄, 100mM MOPS, pH 7.4 | Preserves tissue architecture while maintaining RNA integrity |
| Proteinase K Solution [4] | 10μg/mL in PBS | Increases tissue permeability for better probe penetration |
| BM Purple [4] | Alkaline phosphatase substrate | Chromogenic detection of hybridized probes |
| Bleaching Solution [13] | Hydrogen peroxide in formamide | Reduces pigment interference in wild-type specimens |
| Hybridization Buffer [12] | Formamide-based with blockers | Creates optimal stringency for specific probe binding |
| Wash Buffers [11] | Saline solutions with detergents | Removes unbound probes to reduce non-specific binding |
Step-by-Step Methodology
Sample Preparation and Fixation
Photobleaching Protocol
- After fixation, dehydrate samples through methanol series (25%, 50%, 75%, 100%)
- Incubate in bleaching solution (hydrogen peroxide in formamide) under strong light
- Process until melanophores and melanosomes are completely decolorized [4]
- Rehydrate through descending methanol series to PBS
Tail Fin Notching Technique
- Place sample in dissection dish with PBS
- Using fine microscissors or needle blade, make fringe-like incisions along the fin edges
- Maintain safe distance from regenerating area containing cells of interest [4]
- Ensure notches are sufficient to facilitate solution exchange without damaging core structures
Optimized Hybridization and Washing
- Treat with proteinase K (10μg/mL) for appropriate duration (typically 15-30 minutes)
- Hybridize with antisense RNA probes at 65-70°C overnight
- Perform stringent washes with SSC buffers containing 0.1% Tween-20 [11]
- Increase wash volume and duration for notched samples to maximize background removal
Detection and Imaging
- Develop color reaction with BM Purple substrate
- Monitor staining progression closely to prevent overdevelopment
- Stop reaction when optimal signal-to-noise ratio is achieved
- Image samples using consistent lighting and magnification settings [4]
Table 3: Troubleshooting Background Staining Issues in Regeneration Studies
| Problem | Potential Cause | Solution | Research Impact |
|---|---|---|---|
| Persistent pigment interference | Incomplete bleaching | Extend bleaching time; ensure adequate light exposure | Enables study of wild-type specimens without genetic modification |
| High background in fin tissue | Inadequate notching or washing | Increase number/size of notches; extend wash times | Reveals true spatial expression patterns in loose connective tissues |
| Weak specific signal | Over-bleaching or over-digestion | Optimize proteinase K concentration and time | Maintains detection sensitivity for low-abundance transcripts |
| Non-specific staining throughout sample | Insufficient blocking | Increase blocking serum concentration; include detergent | Enables accurate validation of scRNA-seq data |
Implications for Regeneration Research and Drug Development
The implementation of robust background reduction techniques has far-reaching implications for both basic research and pharmaceutical development. In basic research, clearer visualization enables more precise characterization of cellular behaviors during regeneration, such as the migration of regeneration organizing cells (ROCs) and the transient formation of regeneration initiating cells (RICs) [10]. These advances contribute to our fundamental understanding of why regenerative capacity differs between species and developmental stages.
For drug development professionals, standardized protocols with minimal background staining create more reliable platforms for screening compounds with regenerative potential. The quantification of regenerative and mineralogenic performances in zebrafish caudal fins provides a valuable model for evaluating pro-regenerative compounds [14]. Similarly, the zebrafish larval tail regeneration system offers opportunities for medium-throughput chemical screens to identify molecules that modulate regeneration [12]. In all these applications, reducing background staining increases assay sensitivity and reliability, potentially accelerating the discovery of therapeutic candidates for regenerative medicine.
Background staining remains a significant challenge in regeneration research, with the potential to obscure critical data and lead to incorrect biological conclusions. The tail fin notching technique, combined with photobleaching and optimized washing protocols, provides an effective solution to this persistent problem. By implementing these methodologies, researchers can achieve the high-contrast visualization necessary to detect subtle expression patterns of key regeneration markers, ultimately advancing our understanding of regenerative mechanisms and supporting the development of novel therapeutic approaches.
A Step-by-Step Guide to the Tail Fin Notching Technique
The whole-mount in situ hybridization (WISH) protocol is a foundational technique for visualizing spatial gene expression patterns. However, in specific tissues, such as the regenerating tail fins of Xenopus laevis tadpoles, achieving clear results is challenging due to inherent properties of the tissue that trap reagents and cause high background staining [4]. Loose fin tissue acts as a sponge, preventing effective wash-out of unbound probe and staining reagents, which subsequently get trapped and cause non-specific chromogenic reactions [4]. This application note details an optimized WISH protocol that incorporates a tail fin notching technique to physically enhance solution permeability and wash-out, thereby minimizing background and enabling high-sensitivity detection of gene expression.
The Scientist's Toolkit: Research Reagent Solutions
The following table details key reagents and their critical functions in the optimized WISH protocol.
Table 1: Essential Reagents for the Optimized WISH Protocol
| Reagent | Function in the Protocol |
|---|---|
| MEMPFA Fixative | Preserves tissue morphology and immobilizes the target mRNA within the tissue sample [4]. |
| Proteinase K | An enzyme that digests proteins, increasing tissue permeability and enabling better penetration of the RNA probe into the tissue [4]. |
| Antisense RNA Probe | A labeled complementary RNA strand that hybridizes specifically to the target endogenous mRNA for visualization [4]. |
| BM Purple | A chromogenic substrate that produces a visible, insoluble precipitate upon reaction with the label on the bound probe, marking the site of gene expression [4]. |
| Photo-bleaching Solution | A chemical treatment (e.g., using hydrogen peroxide) applied to remove dark pigment (melanosomes) that can obscure the chromogenic stain, used after fixation and rehydration [4]. |
Experimental Protocol: Optimized WISH with Tail Fin Notching
This section provides a detailed, step-by-step methodology for the enhanced WISH protocol.
Sample Preparation and Fixation
- Amputate tadpole tails at the desired stage and allow them to regenerate for the required time (e.g., 0, 3, 6, 24 hours post-amputation, hpa) [4].
- Fix samples immediately in MEMPFA solution for a standard duration (e.g., 4 hours at room temperature or overnight at 4°C) to preserve tissue integrity and RNA [4].
- Dehydrate the fixed samples through a graded series of methanol or ethanol to prepare for bleaching.
Critical Enhancement: Photo-bleaching and Fin Notching
- Photo-bleaching: After rehydration, subject the samples to a photo-bleaching treatment. This step decolors melanosomes and melanophores, which are abundant in the tail and can mask the specific BM Purple stain [4].
- Tail Fin Notching: Using a fine scalpel or razor blade, make small, fringe-like incisions along the edges of the tail fin. It is crucial to perform this notching at a sufficient distance from the primary area of interest (e.g., the regenerating tip) to avoid damaging key structures [4]. This creates channels that dramatically improve the flow of all subsequent solutions.
In Situ Hybridization and Staining
- Pre-hybridization: Proceed with standard pre-hybridization steps to block non-specific binding.
- Hybridization: Incubate samples with the labeled antisense RNA probe specific to your target gene (e.g., mmp9) [4].
- Post-Hybridization Washes: Perform stringent washes to remove any unbound probe. The fin notching procedure is particularly effective here, facilitating the thorough wash-out of reagents from the loose fin tissue and preventing trapped probe from causing background [4].
- Colorimetric Detection: Develop the color reaction by incubating with BM Purple. The notching allows the substrate to penetrate evenly and prevents its entrapment, enabling long staining incubations (up to 3-4 days) without background development [4].
- Post-staining: Stop the reaction, fix the samples, and store for imaging.
The optimization process involved testing various treatments. The quantitative outcomes of these trials are summarized below.
Table 2: Comparison of WISH Protocol Variants and Their Outcomes
| Protocol Variant | Key Treatments | Outcome on Signal Clarity | Outcome on Background Staining |
|---|---|---|---|
| Variant 1 | Prolonged Proteinase K incubation [4] | Unimpressive; mmp9+ cells overlapped with background [4] | Strong background staining persisted [4] |
| Variant 2 | Fin notching + Post-staining photo-bleaching [4] | Improved; more mmp9+ cells observable [4] | Reduced, but melanophores only faded to brown [4] |
| Variant 3 | Early photo-bleaching only [4] | Good bleaching achieved [4] | High background in fin areas (bubbles of stain) [4] |
| Variant 4 (Optimal) | Early photo-bleaching + Fin notching [4] | Very clear images of specific mmp9+ cells [4] | No background staining detected, even after long staining [4] |
Workflow Visualization
The following diagram illustrates the logical sequence and critical decision points of the optimized protocol, highlighting how the enhancements address the core challenges.
Optimized WISH Protocol for Enhanced Permeability
The integration of tail fin notching with an early photo-bleaching step creates a powerful enhancement to the standard WISH protocol. This combined approach directly addresses the twin problems of pigment obstruction and solution trapping in loose tissues. By physically modifying the fin structure to enhance permeability and wash-out, researchers can achieve high-contrast, background-free visualization of gene expression, which is crucial for validating high-throughput data and elucidating precise spatial and temporal expression patterns in challenging model systems.
Within the broader scope of research on tail fin notching techniques to reduce background staining, the initial steps of sample preparation are paramount. The integrity of the entire subsequent analytical process, from immunohistochemistry to in situ hybridization, hinges on proper fixation and the strategic elimination of endogenous background interference [4]. This is particularly critical in melanin-rich tissues, such as the regenerating tails of Xenopus laevis tadpoles, where pigment granules can severely obscure specific staining signals [4] [15]. This application note details optimized protocols for fixation and bleaching, which, when combined with mechanical techniques like tail fin notching, provide a robust foundation for achieving high-contrast, interpretable results in complex biological samples.
Quantitative Comparison of Bleaching Methods
The choice of bleaching method can significantly impact tissue morphology, antigen preservation, and protocol duration. The table below summarizes key characteristics of different bleaching approaches to guide protocol selection.
Table 1: Comparison of Bleaching and Clearing Methods for Sample Preparation
| Method Name | Method Type | Key Reagent | Impact on Morphology | Protocol Duration | Compatibility with Fluorescent Proteins | Primary Application |
|---|---|---|---|---|---|---|
| Photobleaching [4] [16] | Physical (Light-based) | White phosphor LED light | Preserved | Hours | Good (post-fixation) | Immunofluorescence, WISH on fixed tissues |
| Hydrogen Peroxide [15] | Chemical (Oxidizing) | 10% H₂O₂ (at 60°C) | Preserved | ~25 minutes | To be evaluated | Immunocytochemistry on melanin-rich cytology specimens |
| Organic Solvent (e.g., iDISCO) [17] | Hydrophobic Clearing | BABB Solution | Tissue shrinkage | Hours/Days | Limited | Clearing and imaging of whole adult mouse brains |
| Aqueous Hyper-hydrating (e.g., CUBIC) [17] | Aqueous Clearing | Urea-based reagents | Tissue expansion | Days | Excellent | Clearing of small tissues (1-2 mm) |
| Hydrogel-embedding (e.g., CLARITY) [17] | Hydrogel-based Clearing | Acrylamide hydrogel | Preserved / slight expansion | Days/Weeks | Excellent | Whole-organ clearing, multiplexed staining |
Detailed Experimental Protocols
Integrated Protocol for Bleaching and Immunostaining in Melanin-Rich Specimens
This automated protocol is optimized for cell transfer smears but can be adapted for other melanin-rich tissue samples [15].
Key Reagent Solutions:
- 10% Hydrogen Peroxide Bleaching Solution: 10% (v/v) H₂O₂ in an aqueous buffer.
- Immunocytochemistry (ICC) Reagents: Primary antibodies (e.g., Anti-Melan-A, Anti-SOX-10), and chromogenic detection substrates (e.g., 3,3'-Diaminobenzidine (DAB) or Alkaline Phosphatase (AP)).
Procedure:
- Sample Preparation: Prepare cell transfer smears from the tissue of interest and allow them to air dry.
- Melanin Bleaching: Incubate the slides in 10% hydrogen peroxide at 60°C for 25 minutes.
- Rinsing: Gently rinse the slides with a suitable buffer (e.g., PBS) to remove all traces of the bleaching solution.
- Automated Immunocytochemistry: Process the slides on an automated staining platform using optimized protocols for the primary antibodies (e.g., Melan-A, SOX-10).
- Chromogenic Detection: Perform detection using either DAB or AP chromogens. Note that AP may provide superior contrast and clearer antigen localisation in the presence of residual pigment [15].
- Counterstaining and Mounting: Apply a light counterstain (e.g., Hematoxylin) if required, dehydrate, clear, and mount the slides for microscopy.
Expected Outcomes: This protocol effectively removes melanin pigment while enhancing nuclear and cytoplasmic visibility without compromising morphological detail. Post-bleaching, specific immunoreactivity should be strong and easily interpretable [15].
Optimized Whole-MountIn SituHybridization with Bleaching and Notching
This protocol is specifically designed for regenerating tails of Xenopus laevis tadpoles to minimize background and enhance the visualization of low-abundance transcripts [4].
Key Reagent Solutions:
- MEMPFA Fixative: A formaldehyde-based fixative solution.
- Proteinase K Solution: For controlled tissue permeabilization.
- Hybridization Buffer and Labeled Antisense RNA Probe: For target mRNA detection.
- BM Purple Stain: Alkaline phosphatase substrate for colorimetric detection.
Procedure:
- Fixation: Fix tadpole samples immediately after amputation in MEMPFA solution.
- Dehydration: Dehydrate the samples through a graded series of methanol.
- Early Photobleaching (Critical): After fixation and dehydration, treat the samples with broad-spectrum white phosphor LED light to bleach melanosomes and melanophores. This step creates "perfectly albino tails" as a blank canvas [4].
- Rehydration and Tail Fin Notching: Rehydrate the samples and, using a fine tool, make fringe-like incisions in the tail fin at a distance from the area of interest. This prevents reagents from being trapped in the loose fin tissue, which is a primary cause of background staining [4].
- Standard WISH Protocol: Proceed with proteinase K treatment, pre-hybridization, and hybridization with the labeled antisense probe.
- Colorimetric Detection: Develop the signal with BM Purple stain. Due to the notching and bleaching, staining can be extended for 3-4 days to detect low-expression genes without significant background [4].
Expected Outcomes: The combination of early photobleaching and tail fin notching results in very clear images of specific staining, free from interference by melanin or non-specific background in the fin tissue [4].
Experimental Workflow Visualization
The following diagram illustrates the logical sequence and decision-making process for selecting the appropriate sample preparation pathway based on research goals and sample type.
Decision Workflow for Sample Preparation
The Scientist's Toolkit: Essential Research Reagents
The following table lists key reagents and their specific functions in the fixation and bleaching protocols described above.
Table 2: Key Reagent Solutions for Fixation and Bleaching Protocols
| Reagent / Solution | Function / Purpose | Application Context |
|---|---|---|
| MEMPFA Fixative [4] | Cross-links and preserves tissue morphology; prevents RNA degradation. | Primary fixation for whole-mount tadpole tails in WISH. |
| Formalin / Formaldehyde [16] | Standard aldehyde fixative for tissue preservation. | General histology and immunofluorescence; can cause autofluorescence. |
| Hydrogen Peroxide (H₂O₂) [15] | Oxidizes and bleaches melanin pigment through a chemical reaction. | Chemical bleaching of melanin-rich cytology specimens and tissues. |
| White Phosphor LED Array [16] | Provides broad-spectrum light to photobleach endogenous fluorophores (e.g., lipofuscin). | Photobleaching pre-treatment for immunofluorescence on fixed brain tissue. |
| Proteinase K [4] | Enzyme that digests proteins to increase tissue permeability for probes and antibodies. | Controlled permeabilization step in WISH and some immunohistochemistry protocols. |
| BM Purple [4] | Alkaline phosphatase substrate that yields a purple-colored precipitate upon reaction. | Colorimetric detection of hybridized probes in in situ hybridization. |
| 3,3'-Diaminobenzidine (DAB) [15] | Horseradish peroxidase (HRP) substrate that yields a brown-colored precipitate. | Chromogenic detection in immunohistochemistry/cytochemistry. |
| Alkaline Phosphatase (AP) Chromogens [15] | Substrates for alkaline phosphatase, often providing superior contrast to DAB in pigmented samples. | Chromogenic detection in immunohistochemistry/cytochemistry. |
Within regeneration research, the accurate visualization of gene expression via Whole-mount in situ hybridization (WISH) is often compromised by high background staining, particularly in loose and complex tissues like the Xenopus laevis tadpole tail fin. This protocol details the "tail fin notching" technique, a physical modification of the tissue sample, to mechanically mitigate this issue. By creating fringe-like incisions in the fin, researchers can significantly improve reagent penetration and washing efficiency, leading to a higher signal-to-noise ratio. This method is instrumental for the sensitive detection of key regeneration markers, such as mmp9, enabling clearer insights into the spatio-temporal dynamics of gene expression during epimorphic regeneration [2].
The Scientist's Toolkit: Research Reagent Solutions
The following table catalogues the essential materials required for the execution of the tail fin notching protocol and subsequent WISH.
Table 1: Essential Research Reagents and Materials for Tail Fin Notching and WISH
| Item Name | Function / Application |
|---|---|
| MEMPFA Fixative [2] | Fixation of tadpole tail samples to preserve tissue morphology and RNA integrity. |
| Proteinase K [2] | Enzyme treatment to increase tissue permeability by digesting proteins, facilitating probe access. |
| Antisense RNA Probe (e.g., for mmp9) [2] | Labeled probe for hybridizing to specific endogenous mRNA sequences within the tissue. |
| BM Purple Stain [2] | Chromogenic substrate used to visualize the location of the bound probe. |
| Pattern Notching Tool / Fine Scissors [18] | Tool for creating precise, small (2-3 mm) fringe-like incisions in the tail fin margin. |
| Bleaching Solution [2] | Chemical solution used to decolorize melanophores and melanosomes, which can obscure staining signals. |
Experimental Protocol: Fin Notching for Enhanced WISH
This section provides a detailed, step-by-step methodology for preparing tadpole tail regenerates for WISH, incorporating the fin notching and bleaching procedures.
Sample Preparation and Fixation
- Amputate tails of anesthetized Xenopus laevis tadpoles at the desired developmental stage (e.g., stage 40 for regeneration-competent or stage 47 for refractory period) [2].
- Fix the tadpoles immediately at specific time points post-amputation (e.g., 0, 3, 6, 24 hours post-amputation (hpa)) in MEMPFA solution for a standardized duration [2].
- Dehydrate the samples through a graded series of methanol washes and store at -20°C in 100% methanol until use [2].
Critical Pre-Hybridization Physical Modifications
- Photobleaching: Rehydrate the samples and submit them to a photobleaching step immediately after fixation to decolorize pigment granules. This results in perfectly albino tails, eliminating interference from melanin during visualization [2].
- Fin Notching: Using a fine pattern notching tool or sharp scissors, create a series of small, fringe-like incisions along the edge of the tail fin. Key considerations include:
- Make the notches at some distance from the core area of interest (e.g., the regenerating tip) to avoid damage to critical tissues [2].
- Ensure notches are deep enough to sever the loose fin tissue but do not cut into the central axial structures of the tail.
- This notching pattern creates channels that dramatically improve the flow of hybridization reagents and wash buffers, preventing their entrapment in the loose fin mesenchyme [2].
Whole-MountIn SituHybridization
- Proteinase K Treatment: Treat samples with Proteinase K to permeabilize tissues. The duration may require optimization for later developmental stages [2].
- Hybridization: Incubate the notched and bleached samples with a digoxigenin-labeled antisense RNA probe (e.g., against mmp9) under standard hybridization conditions [2].
- Washing and Staining: Perform stringent post-hybridization washes to remove unbound probe. Subsequently, incubate samples with an alkaline phosphatase-conjugated anti-digoxigenin antibody and develop the color reaction using BM Purple [2].
- Post-processing and Imaging: Stop the staining reaction, post-fix the samples, and clear them in glycerol for imaging. The combination of notching and bleaching allows for high-contrast imaging without background interference, even after prolonged staining incubation [2].
Validation and Data Comparison
The efficacy of the fin notching technique is quantitatively demonstrated by its ability to enhance the detection of low-abundance transcripts and reduce non-specific stain retention.
Quantitative Comparison of Staining Quality
The impact of the optimized protocol is quantifiable through the comparison of key staining metrics against the standard protocol.
Table 2: Quantitative Comparison of WISH Outcomes With and Without Fin Notching
| Parameter | Standard WISH Protocol | Optimized Protocol (With Notching/Bleaching) |
|---|---|---|
| Background Staining in Fin | High, with trapped precipitate [2] | Negligible, even after 3-4 days of staining [2] |
| Signal-to-Noise Ratio | Low [2] | High [2] |
| Cell Visualization | mmp9+ cells overlapping with strong background [2] | Clear, high-contrast images of mmp9+ cells [2] |
| Effect of Pigmentation | Melanosomes interfere with stain signal [2] | Eliminated via pre-hybridization bleaching [2] |
Application: Revealingmmp9Expression Patterns
The utility of this technique is exemplified by its application in uncovering novel biological insights. Using the optimized WISH protocol, researchers obtained high-quality data on the expression pattern of the metalloproteinase mmp9 during the early stages of tail regeneration in Xenopus laevis tadpoles. The clear staining allowed for the precise localization of mmp9-expressing reparative myeloid cells at 0, 3, 6, and 24 hours post-amputation. Furthermore, this method enabled the direct comparison of expression patterns between regeneration-competent (stage 40) and regeneration-incompetent (stage 47, refractory period) tadpoles, revealing significant differences that are positively correlated with regeneration competence [2]. This level of detail serves to validate and supplement data acquired through high-throughput methods like RNA sequencing [2].
Whole-mount in situ hybridization (WISH) is an essential technique for visualizing the spatio-temporal expression pattern of genes, adhering to the "seeing is believing" principle in developmental biology [4]. However, detecting mRNA by WISH becomes particularly challenging when working with complex regenerating tissues, such as tadpole tails, which are prone to high background staining that decreases the signal-to-noise ratio [4]. The loose tissue structure of tail fins often traps staining reagents, while the presence of migratory pigment granules like melanosomes further obscures specific staining signals [4].
The tail fin notching technique addresses these challenges through strategic physical modifications that enhance reagent penetration and washing efficiency. When integrated with standard WISH protocols, this method significantly reduces non-specific background, enabling clearer visualization of gene expression patterns during critical regeneration processes.
Experimental Approach and Rationale
The Tail Fin Notching Technique
The tail fin notching procedure involves creating precise incisions in a fringe-like pattern at a strategic distance from the main area of interest in the regenerating tail [4]. This method serves two primary functions:
- Enhanced Reagent Exchange: The notches facilitate improved washing out of all solutions from the loose fin tissues, preventing BM Purple from becoming trapped and causing non-specific chromogenic reactions [4].
- Preservation of Tissue Integrity: When performed correctly, the technique does not disrupt the key morphological and molecular events occurring in the regeneration bud itself.
Experimental evidence demonstrates that even after 3-4 days of BM Purple staining, samples treated with fin notching exhibited no detectable background staining, a significant improvement over traditional methods [4].
Integration with Standard WISH Workflow
The following workflow diagram illustrates how tail fin notching integrates with key stages of the standard WISH protocol:
Research Reagent Solutions and Essential Materials
The following table details key reagents and materials required for successful implementation of the integrated WISH protocol with tail fin notching:
| Item | Function/Application | Technical Notes |
|---|---|---|
| BM Purple | Alkaline phosphatase substrate producing blue-purple precipitate [19] | Recommended for rare or low-to-medium level transcripts; provides stronger contrast than NBT/BCIP [19] |
| NBT/BCIP | Alternative AP substrate producing dark blue precipitate [19] | Suitable for abundant transcripts; faster reaction rate than BM Purple [19] |
| Proteinase K | Enzyme treatment for tissue permeabilization [4] | Digests proteins and removes nucleases; concentration and timing require optimization [4] |
| Anti-DIG-AP Antibody | Conjugated antibody for probe detection [20] | Binds to digoxigenin-labeled riboprobes; typically used at 1:2000 dilution [20] |
| MEMPFA Fixative | Tissue preservation and mRNA stabilization [4] | Standard fixative for WISH protocols; preserves tissue architecture and RNA integrity |
| Hybridization Buffer | Medium for riboprobe hybridization [21] | Contains components to promote specific probe-target binding; used with and without probe |
| DEPC-treated Water | RNase-free water for solutions [20] | Prevents RNA degradation during experimental procedures |
Quantitative Staining Parameters and Optimization
Optimal staining requires careful attention to multiple parameters. The following table summarizes key quantitative data for critical steps in the integrated protocol:
| Parameter | Optimal Value/Range | Effect of Deviation |
|---|---|---|
| Proteinase K Incubation | Varies by sample age/type: 3-15 minutes for zebrafish embryos [20] | Over-digestion: tissue damage; Under-digestion: poor probe penetration |
| Hybridization Temperature | 70°C (can fluctuate slightly depending on probe) [20] | Too high: reduced hybridization; Too low: non-specific binding |
| Anti-DIG Antibody Dilution | 1:2000 dilution [20] | Too concentrated: high background; Too dilute: weak signal |
| BM Purple Staining Time | 30 min to several days (monitor progression) [21] [19] | Too short: weak signal; Too long: high background |
| Recommended Probe Length | 700-1200 bp for initial cloning [22] | Shorter: potentially reduced specificity; Longer: penetration issues |
| Melanosome Bleaching | 10-20 minutes in 10% H₂O₂ (post-staining or pre-hybridization) [4] [20] | Insufficient: signal obscuration; Excessive: tissue damage |
Detailed Experimental Protocol
Pre-Hybridization Steps with Integrated Tail Fin Notching
Sample Fixation and Preparation:
- Collect and fix regenerating tail samples in 4% paraformaldehyde (PFA) overnight at 4°C [20].
- Wash fixed samples in phosphate-buffered saline with 0.1% Tween-20 (PBSt) 3 times for 10 minutes each.
- Dehydrate through a graded methanol series (25%, 50%, 100%) and store at -20°C in 100% methanol.
Rehydration and Permeabilization:
- Rehydrate samples through a reverse methanol series (50%, 25% methanol in PBSt), then wash in 100% PBSt.
- Treat with Proteinase K (concentration and duration optimized for specific tissue type and age) to increase tissue permeability [20].
- Re-fix in 4% PFA for 30 minutes to maintain tissue integrity during subsequent steps.
Tail Fin Notching Implementation:
- Using fine surgical scissors or a scalpel, create small, fringe-like incisions along the edges of the tail fin, maintaining a safe distance from the primary regeneration bud area [4].
- Ensure notches are sufficient in number and depth to facilitate reagent exchange without compromising the structural integrity of the main area of interest.
Hybridization and Post-Hybridization Washes
Prehybridization:
- Incubate notched samples with prehybridization solution for 2-3 hours at 70°C to block non-specific binding sites [20].
Hybridization:
- Replace prehybridization solution with hybridization buffer containing digoxigenin-labeled riboprobes (1.5 μL probe in 0.5 mL hybridization solution) [20].
- Incubate at 70°C overnight to allow specific probe-target mRNA hybridization.
Stringency Washes:
- Perform sequential washes at 70°C with decreasing concentrations of prehybridization solution in 2X SSC (75%, 50%, 25%) for 10 minutes each [20].
- Complete with a final wash in 0.2X SSC for 30 minutes at 68°C to remove unbound probe.
- The notched fin structure significantly enhances the efficiency of these critical washing steps, reducing non-specific background [4].
Immunological Detection and BM Purple Staining
Antibody Incubation:
- Transfer samples to Maleic Acid Buffer (MAB) to prepare for immunological detection.
- Pre-block samples in blocking solution for at least 3 hours at room temperature.
- Incubate with anti-DIG-AP antibody (diluted 1:2000 in blocking solution) overnight at 4°C [20].
Colorimetric Detection with BM Purple:
- Wash samples thoroughly to remove unbound antibody.
- Incubate samples with BM Purple substrate solution in the dark at room temperature.
- Monitor staining progression regularly, comparing to negative controls (samples processed without probe) [21].
- For faint signals, staining may be continued overnight or longer, with the notched fin structure preventing background accumulation even with extended development times [4].
Reaction Termination:
- Stop the reaction by washing samples with PBSt or appropriate buffer when optimal signal-to-noise ratio is achieved.
- Post-fix in 4% PFA for long-term preservation of results.
Staining Optimization and Troubleshooting
The relationship between staining development and background formation is critical for successful experiments. The following diagram illustrates the decision-making process for optimal staining development:
Critical Control Experiments
- Negative Controls: Process samples of the same type through the entire protocol but omit the probe during hybridization (use Hyb-buffer only). This control distinguishes specific staining from background [21].
- Positive Controls: Include samples with known expression patterns to verify that the entire procedure is functioning correctly, particularly when working with new probes [21].
Advanced Staining Management
For optimal results with new probes, consider staining multiple samples of the same type and stopping the reaction at different time points [21]. This "staining bracket" approach helps capture even faint expression patterns that might otherwise be missed. When precise reaction control is needed, the staining rate can be slowed by incubating at 4°C in the dark, particularly useful for weekend periods [21].
The integration of tail fin notching with standard WISH protocols represents a significant methodological advancement for studying gene expression in regenerating tissues. This approach effectively addresses the longstanding challenge of background staining in loose fin tissues without compromising the integrity of the regeneration bud. When combined with optimized BM Purple staining protocols and appropriate controls, this technique enables researchers to achieve high-contrast visualization of gene expression patterns with minimal background interference. The systematic approach outlined in this application note provides researchers with a robust framework for implementing this technique in diverse regeneration models, potentially unlocking new insights into the molecular mechanisms governing epimorphic regeneration.
A population of reparative myeloid cells expressing the Zn²⁺-dependent extracellular matrix metalloproteinase 9 (mmp9) plays a critical role in the initial stages of tail regeneration in Xenopus laevis tadpoles [4]. These cells are essential for inducing apoptosis and tissue remodeling, processes that facilitate the relocation of regeneration-organizing cells responsible for progenitor proliferation [4]. Validating the spatial and temporal dynamics of these cells via Whole-mount in situ hybridization (WISH) is crucial, yet technically challenging due to high background staining in regenerating tail tissues [4]. This application note details an optimized WISH protocol that integrates tail fin notching and early photo-bleaching to suppress background, enabling high-fidelity visualization of mmp9 expression patterns during early regeneration.
Optimized WISH Protocol for Regenerating Tadpole Tails
The following procedure is designed to minimize the high background staining typically encountered in the loose tissues of regenerating Xenopus laevis tadpole tails, particularly within the fin structures.
Sample Preparation and Fixation
- Animal Model: Use Xenopus laevis tadpoles at stage 40 (regeneration-competent) or stage 47 (refractory period). Anesthetize tadpoles and amputate tails transversely using a sharp razor blade [4].
- Fixation: Collect regenerating tail samples at desired time points (e.g., 0, 3, 6, 24 hours post-amputation, hpa). Fix immediately in MEMPFA solution [4].
- Dehydration: Dehydrate the fixed samples through a graded series of methanol (25%, 50%, 75%) and store in 100% methanol at -20°C [4].
Critical Pre-Hybridization Treatments
- Rehydration: Gradually rehydrate the samples through a reverse methanol series (75%, 50%, 25%) to phosphate-buffered saline (PBS) with 0.1% Tween (PBS-T) [4].
- Early Photo-bleaching: To decolorize melanosomes and melanophores that obscure the staining signal, treat the rehydrated samples with a photo-bleaching solution. This step creates "perfectly albino tails" and is performed immediately after fixation and rehydration, before the pre-hybridization stages [4].
- Tail Fin Notching: Using a fine razor blade, make partial incisions in a fringe-like pattern along the edges of the tail fin, maintaining a safe distance from the primary area of interest (the regenerating tip). This notching procedure drastically improves reagent penetration and wash-out from the loose fin tissues, preventing the trapping of reagents that cause non-specific chromogenic reactions [4].
Hybridization and Staining
- Pre-hybridization: Treat samples with Proteinase K to increase tissue permeability. The optimized protocol does not use a prolonged Proteinase K incubation, as this was found to be unhelpful [4].
- Hybridization: Hybridize the samples with a labeled antisense RNA probe specific for mmp9 mRNA [4].
- Detection: Develop the colorimetric signal using BM Purple substrate. The protocol's effectiveness allows for staining incubation of up to 3-4 days without detectable background [4].
Results: Unprecedented Clarity inmmp9Localization
The optimized protocol enabled the acquisition of high-contrast images of mmp9-expressing cells, free from background interference [4]. This clarity revealed novel insights into the expression pattern of mmp9 during the critical first day of tail regeneration.
Key Expression Findings
The application of the optimized WISH protocol yielded the following key quantitative results on mmp9 expression:
Table 1: mmp9 Expression Dynamics During Early Tail Regeneration
| Time Post-Amputation | Regeneration Status | Key Expression Findings |
|---|---|---|
| 0 hpa | Immediate post-amputation | Baseline expression level established [4] |
| 3-6 hpa | Initial repair phase | Distinct spatial localisation of mmp9+ reparative myeloid cells [4] |
| 24 hpa | Blastema formation | Specific expression pattern in regeneration-competent (stage 40) tadpoles [4] |
| Refractory Period | Regeneration-incompetent | Significantly different expression pattern in stage 47 tadpoles [4] |
The significant differences observed in expression patterns between stage 40 and stage 47 tadpoles indicate that mmp9 activity is positively correlated with regeneration competence [4].
Protocol Optimization Comparison
The research team tested several protocol variants to arrive at the final, optimized method. The effectiveness of each variant was assessed based on the clarity of the mmp9 signal and the level of background staining.
Table 2: Evaluation of Different WISH Protocol Treatments
| Protocol Variant | Treatment | Result | Conclusion |
|---|---|---|---|
| Variant 1 | Prolonged Proteinase K incubation | Unimpressive staining; mmp9+ cells overlapped with strong background [4] | Did not improve clarity or reduce background |
| Variant 2 | Fin notching + Post-staining photo-bleaching | Improved observation of mmp9+ cells; melanophores faded to brown [4] | Improved, but suboptimal decoloration |
| Variant 3 | Early photo-bleaching (post-fixation) | Perfectly albino tails; some samples developed bubbles with non-specific staining in fins [4] | Good bleaching, but background persisted |
| Variant 4 (Optimized) | Early photo-bleaching + Fin notching | Very clear images of specific mmp9+ cells; no background staining [4] | Superior method for clarity and contrast |
The Scientist's Toolkit: Essential Research Reagents
The following reagents and materials are critical for the successful implementation of this optimized WISH protocol.
Table 3: Key Research Reagent Solutions
| Reagent/Material | Function in Protocol | Key Consideration |
|---|---|---|
| MEMPFA Solution | Sample fixation [4] | Prepares tissue for hybridization |
| Proteinase K | Tissue permeabilization [4] | Optimized protocol avoids prolonged incubation |
| Anti-sense mmp9 RNA Probe | Target mRNA hybridization [4] | Enables specific detection of gene expression |
| BM Purple Substrate | Colorimetric detection [4] | Can incubate for up to 4 days without background |
| Photo-bleaching Solution | Decolorizes melanophores & melanosomes [4] | Early application is critical for clarity |
| X. laevis Tadpoles | Regeneration model organism [4] | Use stage 40 (competent) or 47 (refractory) |
Experimental Workflow and Signaling Context
The optimized WISH protocol fits into a broader research workflow aimed at understanding the signaling pathways activated during regeneration. The diagram below illustrates the key procedural steps and the functional role of the mmp9+ cells identified.
Diagram 1: Experimental workflow for visualizing mmp9+ cells.
The molecular context of mmp9 activity places it within a key population of reparative myeloid cells that are essential for the regeneration process. The following diagram outlines its functional role.
Diagram 2: Functional role of mmp9+ cells in regeneration.
Troubleshooting Common Pitfalls and Protocol Optimization
Within the context of tail fin notching technique research aimed at reducing background staining, evaluating and optimizing sample preparation methods is paramount. Two technical approaches that impact protein accessibility and staining quality are the physical notching of tissue and enzymatic digestion using proteinase K. The notching technique creates defined physical access points in tough tissues, potentially allowing for better reagent penetration. Conversely, extended proteinase K treatment enzymatically digests proteins and can unmask epitopes, thereby reducing nonspecific binding and background interference. This application note provides a detailed comparison of these techniques, offering structured protocols and analytical data to guide researchers and drug development professionals in selecting and implementing the optimal approach for their specific experimental requirements in immunohistochemistry and molecular assays.
Fundamental Mechanisms of Action
Notching Technique: The physical notching technique involves creating precise incisions in tissue samples, particularly in dense or layered structures such as tail fins. This process serves to disrupt the intact physical barrier of the tissue, creating direct pathways for antibodies, detection reagents, and washing buffers to penetrate more effectively into the sample matrix. The primary mechanism through which notching reduces background staining is by preventing the trapping of reagents within surface structures and facilitating more complete removal of unbound antibodies during washing steps. This mechanical approach is particularly valuable for tissues with high lipid content, keratinized layers, or other structural features that naturally resist reagent penetration.
Extended Proteinase K Treatment: Proteinase K is a broad-spectrum serine protease that hydrolyzes peptide bonds, effectively digesting a wide range of proteins [23]. In the context of reducing background staining, extended treatment with proteinase K operates through two complementary mechanisms: (1) enzymatic degradation of contaminating proteins that contribute to nonspecific binding, and (2) unmasking of target epitopes by cleaving surrounding proteins that may be obscuring antigen recognition sites [24]. The enzyme remains stable and active under harsh conditions, including elevated temperatures (50-65°C) and in the presence of denaturing agents such as SDS and urea, which enhances its efficacy for challenging tissue preparations [24] [23].
Quantitative Comparison of Technical Parameters
Table 1: Comparative Analysis of Notching vs. Extended Proteinase K Treatment
| Parameter | Notching Technique | Extended Proteinase K Treatment |
|---|---|---|
| Primary Mechanism | Physical disruption of tissue barriers | Enzymatic digestion of proteins and epitope unmasking |
| Optimal Treatment Duration | 5-15 minutes (during sample preparation) | 30-60 minutes at 55-65°C [23] |
| Typical Application Concentration | Not applicable (physical technique) | 0.2-1 mg/mL [23] |
| Compatibility with Tissue Types | Excellent for tough, fibrous tissues | Broad-spectrum, including FFPE tissues [25] |
| Impact on Antigen Integrity | Minimal risk of epitope damage | Potential over-digestion risk with prolonged exposure |
| Background Reduction Efficacy | High for surface-related background | High for protein-mediated nonspecific binding |
| Downstream Application Compatibility | Compatible with most IHC and imaging protocols | May require inactivation step (heat or inhibitors) [23] |
| Technical Skill Requirement | Moderate (requires precision cutting) | Low (standard liquid handling) |
| Equipment Needs | Specialized micro-dissection tools | Standard laboratory incubator or water bath |
Efficacy in Background Staining Reduction
The efficacy of each technique in reducing background staining varies depending on the source of the background. Notching primarily addresses background caused by inadequate reagent penetration and washing, particularly in dense tissues where antibodies become physically trapped. The technique creates direct channels that facilitate more efficient delivery of blocking agents and washing buffers to the interior of the tissue specimen, thereby reducing nonspecific signal retention.
Extended proteinase K treatment targets background stemming from endogenous enzymes, nonspecific protein interactions, and cross-reactive epitopes [25] [26]. The enzymatic action digests contaminating proteins that would otherwise bind antibodies nonspecifically, while simultaneously exposing the true target epitopes by removing obscuring proteins. Research indicates that proteinase K can increase enzymatic activity by 128-313% depending on the buffer composition, with maximum activity observed in Tris·Cl buffer with EDTA, Tween 20, Triton X-100, and GuHCl [24]. This enhanced activity directly correlates with improved background reduction in immunohistochemical applications.
Experimental Protocols
Tail Fin Notching Technique for Background Reduction
Materials Required:
- Fresh or fixed tail fin samples
- Micro-dissection scissors or precision laser notching system
- Dissecting microscope with appropriate magnification
- Sterile PBS or appropriate physiological buffer
- Humidified chamber for sample maintenance
Procedure:
- Sample Preparation: Secure the tail fin sample in a stabilization matrix or embedding medium to prevent movement during notching. For fresh tissues, maintain physiological moisture using PBS-moistened filter paper.
- Notching Pattern Design: Implement a standardized grid pattern of micro-notches across the tissue surface. The optimal notch density is 10-15 notches per mm², with depth controlled to 30-50% of tissue thickness.
- Precision Notching: Using micro-dissection tools under appropriate magnification, create uniform incisions following the predetermined pattern. Maintain consistent pressure and angle to ensure reproducible notch dimensions.
- Post-Notching Processing: Immediately transfer notched samples to blocking buffer to prevent drying artifacts. Proceed with standard immunohistochemistry protocols, ensuring that antibodies and washing buffers can freely access the created channels.
- Quality Assessment: Examine notched tissues under brightfield microscopy to verify notch uniformity and absence of tissue tearing before proceeding with staining.
Troubleshooting Notes:
- If tissue integrity is compromised, reduce notch depth or density.
- For fragile tissues, consider performing notching after partial fixation to maintain structural stability.
- Optimize notch orientation relative to tissue collagen alignment to maximize reagent penetration.
Extended Proteinase K Treatment Protocol
Materials Required:
- Proteinase K (lyophilized or ready-to-use solution)
- Digestion buffer: 50 mM Tris-Cl, 1 mM CaCl₂, pH 7.5-8.0
- Water bath or incubator capable of maintaining 55-65°C
- Proteinase K inactivation solution (protease inhibitors or 95°C heating block)
- Appropriate positive control tissues
Procedure:
- Buffer Preparation: Prepare digestion buffer fresh and pre-warm to the desired incubation temperature (55-65°C). For FFPE tissues, a buffer containing 0.5% SDS may enhance protein accessibility [23].
- Enzyme Working Solution: Prepare proteinase K at a concentration of 0.2-1 mg/mL in pre-warmed digestion buffer. Gently vortex to ensure complete dissolution without frothing.
- Sample Application: Completely immerse tissue sections in proteinase K working solution, ensuring full coverage without creating air bubbles.
- Incubation: Incubate samples at 55-65°C for 30-60 minutes in a temperature-controlled water bath or incubator. For delicate epitopes, consider shorter timepoints with titration to determine optimal duration.
- Enzyme Inactivation: Following digestion, inactivate proteinase K by one of two methods:
- Thermal inactivation: Heat samples to 95°C for 10 minutes
- Chemical inhibition: Add specific protease inhibitors according to manufacturer recommendations
- Washing: Rinse treated tissues thoroughly with PBS or appropriate buffer to remove digestion products and residual enzyme.
- Validation: Process a positive control tissue in parallel to verify maintained antigenicity while achieving background reduction.
Optimization Guidelines:
- For tissues with high endogenous phosphatase or peroxidase activity, combine proteinase K treatment with endogenous enzyme blocking using 3% H₂O₂ or levamisole [25] [26].
- Titrate proteinase K concentration (0.1-2 mg/mL) and incubation time (15-120 minutes) for new tissue types or unfamiliar antigens.
- Monitor epitope integrity using known positive controls when establishing new protocols.
Research Reagent Solutions
Table 2: Essential Research Reagents for Background Reduction Techniques
| Reagent | Function | Application Notes |
|---|---|---|
| Proteinase K | Broad-spectrum serine protease for protein digestion and epitope unmasking | Effective concentration: 0.2-1 mg/mL; stable in SDS and urea [23] |
| SDS (Sodium Dodecyl Sulfate) | Denaturing detergent that enhances proteinase K activity | Use at 0.1-0.5% to improve tissue penetration without complete protein denaturation |
| Endogenous Peroxidase Blockers | 3% H₂O₂ in methanol or water to quench background from peroxidases | Essential for HRP-based detection systems; incubate 10-15 minutes at room temperature [25] |
| Endogenous Biotin Blockers | Avidin/biotin blocking solutions | Critical when using biotin-streptavidin detection; prevents false positives [25] |
| Serum Blocking Solutions | 10% normal serum from secondary antibody species | Reduces nonspecific Fc receptor binding; incubate for 1 hour [26] |
| Cross-Adsorbed Secondary Antibodies | Secondary antibodies pre-adsorbed against multiple species | Minimizes cross-reactivity in multiplexed experiments [27] |
Workflow Integration and Technical Diagrams
Integrated Workflow for Background Reduction
The following diagram illustrates the decision pathway for implementing notching versus extended proteinase K treatment within a complete immunohistochemistry workflow:
Proteinase K Mechanism of Action
This diagram details the molecular mechanism of proteinase K activity and its role in background reduction during extended treatment protocols:
Discussion and Technical Considerations
Synergistic Application of Techniques
For particularly challenging tissues with both structural density and high protein-mediated background, researchers may consider sequential application of both techniques. The recommended approach begins with physical notching to create access channels, followed by extended proteinase K treatment to address molecular-level background sources. This combined methodology leverages the mechanical advantages of notching while capitalizing on the enzymatic specificity of proteinase K, potentially offering superior background reduction compared to either technique alone.
When implementing combined approaches, careful optimization of both sequence and timing is essential. Notching should precede proteinase K treatment to ensure thorough enzyme penetration, but researchers must account for potential increased enzyme accessibility to internal tissues which may require reduced proteinase K concentrations or shorter incubation times to prevent over-digestion.
Troubleshooting Common Implementation Challenges
Incomplete Background Reduction: If background persists after notching, verify notch depth and pattern density using histological staining. Increase proteinase K concentration incrementally (up to 2 mg/mL) or extend incubation time in 15-minute increments while monitoring epitope integrity.
Over-digestion Artifacts: If tissue morphology deteriorates or specific signal is lost following proteinase K treatment, reduce enzyme concentration or incubation time. Pre-titrate using a range of conditions with control tissues to establish the optimal window for specific tissue types and antigens of interest.
Inconsistent Notching Results: Standardize notching tools and operator training to ensure reproducible notch dimensions. Implement quality control checks using brightfield microscopy to verify notch uniformity before proceeding with staining protocols.
The comparative analysis of notching versus extended proteinase K treatment demonstrates that each technique offers distinct advantages for background reduction in immunohistochemical applications. The notching technique provides a mechanical solution to reagent penetration barriers in dense tissues, while extended proteinase K treatment addresses molecular sources of background through enzymatic digestion of contaminating proteins and epitope unmasking. Selection between these methodologies should be guided by tissue characteristics, antigen properties, and the specific background challenges encountered in the experimental system. For the most demanding applications, sequential implementation of both techniques may provide synergistic benefits, though this requires careful optimization to preserve tissue integrity and antigenicity. The protocols and analytical data presented herein provide researchers with a comprehensive framework for implementing these background reduction strategies in tail fin notching research and related histological applications.
Whole-mount in situ hybridization (WISH) is an indispensable technique for visualizing spatio-temporal gene expression patterns in developmental biology. However, achieving high-quality, low-background staining in complex, pigment-rich tissues like the regenerating tadpole tail presents significant challenges. Melanophores and melanosomes can obscure critical staining signals, while the loose fin tissue is prone to trapping reagents, causing high background staining. This Application Note details a robust methodological solution that synergistically combines pre-hybridization photobleaching with tail fin notching. Developed for use on Xenopus laevis tadpoles, this optimized protocol effectively minimizes background interference, enabling the clear visualization of low-abundance transcripts such as mmp9 and facilitating critical insights into early regeneration processes.
Key Research Reagent Solutions
The following reagents and materials are essential for the successful implementation of this protocol.
Table 1: Essential Research Reagents and Materials
| Reagent/Material | Function/Description |
|---|---|
| MEMPFA Solution | Fixative solution used for sample preservation prior to photobleaching and WISH [4]. |
| Proteinase K | Enzyme treatment that increases tissue permeability for probes and antibodies by digesting proteins [4]. |
| BM Purple | Chromogenic substrate used for alkaline phosphatase-based colorimetric detection in WISH [4]. |
| Antisense RNA Probe | Labeled probe complementary to the target mRNA (e.g., mmp9) for specific hybridization [4]. |
| PTU (Phenylthiourea) | Chemical inhibitor of melanogenesis; can be used as an alternative to photobleaching to suppress pigmentation [28]. |
| Bace2 Inhibitor (PF-06663195) | Pharmacological agent used in studies of pigmentation patterning to inhibit the sheddase Bace2 [28]. |
Quantitative Analysis of Protocol Efficacy
The optimization process involved systematically testing different combinations of photobleaching and fin notching. The effectiveness of each protocol variant was quantitatively assessed based on staining clarity and background reduction.
Table 2: Comparative Analysis of WISH Protocol Variants
| Protocol Variant | Key Treatments | Outcome on Staining Clarity | Outcome on Background Staining |
|---|---|---|---|
| Variant 1 | Prolonged Proteinase K incubation [4]. | Unimproved, with mmp9+ cells overlapping background [4]. | Strong background staining persisted [4]. |
| Variant 2 | Fin notching + Post-staining photobleaching [4]. | Improved; allowed observation of more mmp9+ cells [4]. | Improved imaging, though melanophores remained as brown interference [4]. |
| Variant 3 | Early photobleaching (no notching) [4]. | Achieved perfectly albino tails [4]. | Severe; large bubbles of non-specific BM Purple stain in fin tissue [4]. |
| Variant 4 (Optimal) | Early photobleaching + Fin notching [4]. | Excellent; very clear images of specific mmp9+ cells [4]. | Minimal; no background detected even after 3-4 days of staining [4]. |
Detailed Experimental Protocol
Optimized Workflow for WISH in Regenerating Tadpole Tails
The following diagram illustrates the step-by-step workflow of the optimized protocol, highlighting the critical steps of early photobleaching and fin notching.
Step-by-Step Methodology
Sample Fixation:
- Fix regenerating tail samples from Xenopus laevis tadpoles in MEMPFA solution [4].
Early Photobleaching:
- Timing: Perform after fixation and dehydration, before the pre-hybridization steps [4].
- Function: Effectively decolorizes melanosomes and melanophores, which actively migrate to the amputation site and can obscure the BM Purple stain [4]. This step is critical for removing pigment-based interference.
Tail Fin Notching:
- Procedure: Using a fine tool, make incisions in a fringe-like pattern in the caudal fin, at a safe distance from the primary area of interest in the regenerating tail [4].
- Function: The loose tissue of the tail fin is prone to trapping reagents, leading to high background staining. Notching dramatically improves the thorough washing-out of all solutions, preventing the trapping of BM Purple and subsequent non-specific autocromogenic reactions [4].
Standard WISH Procedures:
- Proceed with the standard pre-hybridization, hybridization with the labeled antisense RNA probe (e.g., for mmp9), and post-hybridization washes [4].
Color Development and Analysis:
- Develop the color reaction using BM Purple. Due to the reduced background, staining can be extended to 3-4 days if necessary to detect low-abundance transcripts without background interference [4].
- Analyze samples; the combination of treatments should yield high-contrast images of gene expression patterns without background interference [4].
Logical Relationship of Techniques
The power of this method lies in the complementary action of its two key techniques, each addressing a distinct source of noise.
Application in Research
This optimized protocol enables the detailed study of gene expression dynamics during critical biological processes. For example, applying this protocol to study the metalloproteinase mmp9—a key marker for reparative myeloid cells—in regenerating Xenopus tails has yielded novel data. It revealed significant differences in the mmp9 expression pattern between regeneration-competent (stage 40) and regeneration-incompetent (refractory period, stage 47) tadpoles within the first 24 hours post-amputation, underscoring its utility for sensitive spatial and temporal analysis [4]. The ability to generate high-fidelity data with this protocol validates and supplements findings from high-throughput methods like bulk- and single-cell RNA sequencing.
A common and persistent challenge in whole-mount in situ hybridization (WISH) is high background staining, which obscures specific signals and complicates data interpretation. This problem is particularly acute in loose, delicate tissues such as the regenerating tail fins of Xenopus laevis tadpoles, where trapping of chromogenic substrates in the tissue matrix leads to unacceptable levels of non-specific staining [4]. This Application Note addresses this issue by detailing a tail fin notching technique that significantly reduces background by optimizing the distance of incisions from the primary area of interest. Developed within a broader research program on tail fin notching techniques for background reduction, this protocol enables the acquisition of high-contrast, publication-quality images of gene expression patterns, even for low-abundance transcripts.
The Challenge of Background Staining in Regenerating Tails
In regenerating tail fins of Xenopus laevis tadpoles, the loose, porous nature of the tissue presents a unique set of challenges for WISH. The fin mesenchyme readily traps reagents, including the chromogenic substrate BM Purple, leading to pervasive background staining that can mask a specific hybridization signal [4]. This problem is exacerbated when targeting genes with low expression levels that require prolonged staining incubation, as the duration of exposure to the substrate directly correlates with increased non-specific precipitation [4]. Researchers observed that samples fixed immediately after amputation (0 hours post-amputation, hpa) showed the lowest background, suggesting that tissue changes during regeneration contribute to the problem. Without a method to mitigate this background, critical spatial information about gene expression during the regenerative process is lost.
Protocol: Tail Fin Notching for Background Reduction
The following step-by-step protocol describes the tail fin notching procedure, which is designed to be integrated into standard WISH workflows after fixation and bleaching steps.
Materials and Reagents
- Fixed and bleached regenerating tail samples from Xenopus laevis tadpoles (e.g., stage 40) [4].
- MEMPFA fixative solution [4].
- Fine surgical forceps (e.g., Dumont forceps) [13].
- Micro-scalpel or sharp razor blade [13].
- Dissecting microscope with good illumination.
Step-by-Step Procedure
- Sample Preparation: Fix tadpole tail samples according to your standard WISH protocol (e.g., using MEMPFA) [4]. Perform a photo-bleaching step after fixation and dehydration to remove melanosomes and melanophores that can interfere with signal visualization [4].
- Sample Positioning: Under a dissecting microscope, position the regenerating tail sample so that the fin is accessible and the area of interest (e.g., the amputation plane and regenerating blastema) is clearly visible.
- Incision Planning: Identify the region of the fin that is at a sufficient distance from the core area of interest. The incisions should not interfere with the key morphological structures being studied.
- Notching Execution: Using a micro-scalpel or a sharp razor blade, carefully make a series of small, fringe-like incisions along the edge of the tail fin. The goal is to create openings that facilitate the efficient exchange of solutions without compromising the structural integrity of the regeneration zone.
- Protocol Integration: Proceed with the subsequent steps of your standard WISH protocol, including pre-hybridization, hybridization with the antisense RNA probe, and color development with BM Purple.
Critical Parameters for Success
- Distance from Area of Interest: The incisions must be made at a distance from the area of interest. This is the most critical parameter. The notching serves to create escape routes for reagents trapped in the loose fin tissue, preventing them from causing autocromogenic reactions near the key structures where the gene expression signal is expected [4].
- Incision Pattern: The "fringe-like" pattern increases the total surface area for washing, ensuring that even viscous solutions are effectively removed from the fin tissue.
- Tool Sharpness: Use extremely sharp instruments to make clean incisions. Crushing or tearing the tissue can create additional sites for non-specific staining.
Results and Data Analysis
The efficacy of the tail fin notching technique was validated through a direct comparison of different protocol variants for visualizing mmp9 expression in regenerating tails.
Table 1: Comparison of WISH Protocol Variants for Background Reduction
| Protocol Variant | Key Modifications | Resulting Signal Clarity | Background Staining |
|---|---|---|---|
| Variant 1: Prolonged Proteinase K | Extended proteinase K incubation time (30 mins) | Unimpressive; mmp9+ cells overlapped with background | Strong background staining persisted |
| Variant 2: Late Notching + Bleaching | Fin notching before WISH; photo-bleaching after BM Purple staining | Improved imaging compared to Variant 1 | Melanophores faded to brown, some interference remained |
| Variant 3: Early Bleaching Only | Photo-bleaching immediately after fixation (no notching) | N/A | Large bubbles of non-specific BM Purple staining in tail fin |
| Variant 4: Optimized Protocol | Early photo-bleaching after fixation + fin notching before hybridization | Very clear images of specific mmp9+ cells | No background staining detected, even after 3-4 days of staining |
As shown in Table 1, the optimized protocol (Variant 4), which combines early bleaching with fin notching, produced superior results. The notching procedure alone (Variant 2) already improved the visualization of mmp9+ cells, but the combination of both steps was necessary to achieve high-contrast images completely free of background interference [4]. This allowed for the precise spatial localization of mmp9-expressing reparative myeloid cells during the early stages of tail regeneration.
The following workflow diagram illustrates the optimized protocol and the logical relationship between the problem, the solution, and the validated outcome.
- Diagram 1: Experimental workflow for the optimized WISH protocol, highlighting the critical steps of early photo-bleaching and tail fin notching that lead to the elimination of background staining.
The Scientist's Toolkit: Essential Research Reagents
Table 2: Key Research Reagent Solutions
| Item | Function/Application in Protocol |
|---|---|
| MEMPFA Fixative | A common fixative solution used for the initial preservation of tissue samples, crucial for maintaining morphology and RNA integrity [4]. |
| Proteinase K | An enzyme used during pre-hybridization to increase tissue permeability by digesting proteins, allowing better probe penetration. Optimization of incubation time is required [4]. |
| BM Purple | A chromogenic substrate used for colorimetric detection in WISH. It produces a blue-purple precipitate at the site of probe hybridization [4]. |
| Anti-Digoxigenin AP Antibody | An antibody conjugated to Alkaline Phosphatase (AP) that binds to digoxigenin-labeled RNA probes. It is used to detect the hybridized probe prior to incubation with BM Purple. |
| Hybridization Buffer | A specialized buffer that creates optimal conditions for the specific binding of the RNA probe to its target mRNA sequence within the tissue sample. |
The simple mechanical adjustment of making fringe-like incisions in the tail fin, at a carefully chosen distance from the core area of interest, proves to be a powerful method for overcoming one of the most persistent technical challenges in WISH of delicate tissues. This technique functions by fundamentally improving the fluid dynamics within the tissue, ensuring that all solutions, particularly the chromogenic substrate and stop buffers, are effectively washed in and out. This prevents the trapping and subsequent non-specific precipitation that manifests as background staining [4].
When integrated with a photo-bleaching step to remove light-absorbing pigments, the notching protocol enables a level of sensitivity and clarity that is sufficient to detect subtle differences in gene expression patterns, such as those of mmp9 between regeneration-competent and refractory stages [4]. This protocol is readily transferable to other model systems involving fin or epithelial tissues prone to similar background issues, such as zebrafish fin regeneration studies [13] [29]. By providing a reliable means to achieve high-contrast staining, the tail fin notching technique empowers researchers to extract more robust and detailed spatial information from their experiments, thereby advancing our understanding of complex biological processes like regeneration.
Adapting the Protocol for Different Tissue Types and Staining Durations
Within the broader scope of a thesis investigating the tail fin notching technique to reduce background staining, this application note provides a detailed, adaptable protocol. The core challenge in whole-mount in situ hybridization (WISH) is achieving a high signal-to-noise ratio, particularly in complex, porous tissues like the regenerating tadpole tail, where loose fin tissue readily traps staining reagents, leading to high background [4]. This document details how strategic physical modifications to the tissue sample, specifically tail fin notching, can be optimized for different tissue types and staining durations to minimize this non-specific staining, thereby enhancing the clarity and reliability of gene expression visualization for researchers and drug development professionals.
Background and Principle
The tail fin notching technique is a physical sample preparation method designed to overcome the limitations of conventional WISH in tissues prone to high background. In regenerating appendages, such as the Xenopus laevis tadpole tail, the fin is composed of loose, mesenchymal tissues that create a sponge-like network. During lengthy staining incubations, chromogenic substrates like BM Purple become physically trapped within this network, leading to pervasive, non-specific background staining that can obscure genuine signals [4].
The principle of tail fin notching is to disrupt this physical entrapment. By creating a series of controlled incisions in the fin fringe, away from the primary area of interest, the technique facilitates the improved diffusion of reagents into and, crucially, out of the tissue during washing steps. This process effectively "opens up" the tissue architecture, allowing trapped reagents to be washed away and significantly reducing background staining, even during prolonged incubations necessary for detecting low-abundance transcripts [4].
Optimized Experimental Protocol
Materials and Reagents
The following table lists the key reagents and solutions required for the successful application of this protocol.
Table 1: Key Research Reagent Solutions
| Reagent/Solution | Function/Description |
|---|---|
| MEMPFA Fixative | Sample fixation and tissue preservation [4]. |
| Proteinase K (pK) | Enzymatic digestion to increase tissue permeability for probes and antibodies [4]. |
| BM Purple | Chromogenic substrate for alkaline phosphatase, producing a blue-purple stain at the site of target RNA hybridization [4]. |
| Antisense RNA Probe | Labeled probe complementary to the target mRNA sequence for specific detection [4]. |
| Phosphate-Buffered Saline (PBS) | Buffer for washing and reagent dilution [30]. |
Step-by-Step Tail Fin Notching and WISH Procedure
The following workflow integrates the tail fin notching technique into a standard WISH protocol. The optimal point for notching is after fixation and bleaching, but before the pre-hybridization steps.
Title: Optimized WISH Protocol with Tail Fin Notching
- Fixation: Fix regenerating tail samples in MEMPFA at 4°C overnight [4].
- Dehydration/Rehydration: Process samples through a graded series of methanol in PBS to permeabilize the tissue.
- Photo-bleaching (Optional but Recommended): To mitigate interference from melanophores and melanosomes, perform a photo-bleaching step after rehydration to decolorize pigment granules [4].
- Tail Fin Notching:
- Using fine microdissection scissors or a scalpel, make a series of small, fringe-like incisions along the edge of the caudal fin.
- Ensure notching is performed at a sufficient distance from the regenerating blastema and other areas of primary interest to avoid disrupting relevant biology.
- The goal is to increase the surface area and create channels for improved fluid exchange, not to damage the core regenerative tissue.
- Proteinase K Treatment: Treat samples with Proteinase K (e.g., 10 µg/mL) for a standardized duration. Note: Extended pK incubation (e.g., 30 minutes) was found to be less effective than fin notching for background reduction and may compromise tissue integrity [4].
- Pre-hybridization and Hybridization: Follow standard WISH procedures for pre-hybridization and subsequent incubation with the labeled antisense RNA probe [4].
- Post-Hybridization Washes: Perform stringent washes to remove unbound probe. The notched fin structure will allow for more efficient removal of non-specifically bound reagent.
- Antibody Incubation and Staining: Incubate with an anti-digoxigenin antibody conjugated to alkaline phosphatase, followed by staining with the BM Purple chromogenic substrate.
- Imaging: Once satisfactory staining is achieved, stop the reaction, post-fix samples, and image using a stereomicroscope or compound microscope.
Protocol Adaptation Guidelines
The tail fin notching protocol is highly effective but requires careful adaptation for different experimental conditions. The table below summarizes key quantitative considerations for adapting the protocol based on tissue type and required staining duration.
Table 2: Protocol Adaptation for Tissue Types and Staining Durations
| Experimental Variable | Protocol Adaptation | Impact on Background Staining & Outcome |
|---|---|---|
| Tissue Density | ||
| Loose, porous tissues (e.g., Xenopus tail fin) | Essential. Implement fringe-like notching. | High Reduction. Prevents reagent trapping in loose extracellular matrix [4]. |
| Denser tissues (e.g., muscle, notochord) | May be less critical or require deeper/strategic incisions. | Moderate Reduction. Improves reagent access to internal structures. |
| Pigmented Tissues | Combine notching with early photo-bleaching (post-fixation). | High Reduction. Decolorizes melanosomes that obscure stain visualization [4]. |
| Staining Duration | ||
| Short Staining (< 1 day) | Notching may be optional if signal is strong. | Low to Moderate Reduction. Provides a margin of safety against unexpected background. |
| Long Staining (> 1 day, for low-abundance targets) | Critical. Must be implemented. | High Reduction. Prevents accumulation of non-specific precipitate over time, enabling clear signal detection [4]. |
Integrating the tail fin notching technique into WISH protocols for regenerating tadpole tails represents a simple yet powerful methodological advancement. The primary strength of this physical modification is its direct address of the root cause of background in porous tissues: physical entrapment of chromogen. This is a more targeted solution than merely adjusting chemical concentrations or wash times, which often only partially alleviate the problem [4].
The data demonstrates that this technique is particularly indispensable for long staining durations required to visualize low-expression genes, where traditional protocols fail due to overwhelming background. Furthermore, its combination with photo-bleaching creates a robust sample preparation pipeline that enhances signal clarity for both imaging and subsequent quantitative analysis.
For the scientific community, adopting this adapted protocol enables more accurate spatial-temporal mapping of gene expression during key processes like regeneration. The ability to reliably detect subtle expression patterns without background interference accelerates research into the molecular mechanisms of tissue regrowth and has direct implications for drug discovery efforts aimed at modulating these pathways. This protocol, therefore, serves as a critical tool within the modern molecular biologist's toolkit, ensuring that "seeing is believing" remains a reliable tenet in developmental biology.
Validating Technique Efficacy and Comparative Data Analysis
Within the broader scope of research on the tail fin notching technique for reducing background staining, this application note provides a direct, data-driven comparison of image quality before and after the implementation of an optimized protocol. Background staining and sample opacity are significant impediments in developmental and regenerative biology, particularly when visualizing low-abundance mRNA transcripts or fluorescently labeled cells in complex tissues like the regenerating tadpole tail [2] [31]. This analysis demonstrates how a systematic approach addressing both pigment removal and physical accessibility of tissue structures can drastically enhance signal-to-noise ratio, thereby improving the reliability and clarity of data obtained from techniques such as whole-mount in situ hybridization (WISH) and fluorescence microscopy.
The implementation of the optimized protocol, which integrates photobleaching and tail fin notching, resulted in significant and measurable improvements across all key image quality metrics. The following tables summarize the quantitative data collected from samples processed using the standard versus the optimized protocol.
Table 1: Quantitative Comparison of Background Staining and Signal Quality
| Metric | Standard Protocol | Optimized Protocol | Improvement |
|---|---|---|---|
| Background Staining (Fin Tissue) | Severe, pervasive background | Not detected, even after 3-4 days of staining [2] | 100% reduction in non-specific signal [2] |
| Signal-to-Noise Ratio | Low (signal obscured by background) [2] | High-contrast, specific staining [2] | Significant qualitative increase |
| Sample Suitability for Analysis | Low, often requiring exclusion [32] | High, robust for quantitative analysis [2] | Major increase in usable data |
| Visualization Interference | High (melanophores obscure stain) [2] | None (successful pigment removal) [2] | Complete elimination of pigment interference |
Table 2: Protocol Efficiency and Experimental Outcomes
| Aspect | Standard Protocol | Optimized Protocol | Impact |
|---|---|---|---|
| Detection of mmp9+ Cells | Few cells visible, overlapping with background [2] | Many more mmp9+ cells clearly visible [2] | Enhanced sensitivity for rare cell populations |
| Protocol Robustness | Variable, prone to failure | Consistent and reliable results [2] | Improved experimental reproducibility |
| Key Technical Modifications | Basic WISH procedure | Integrated photobleaching and fin notching [2] | Targeted problem-solving |
Experimental Protocols
Optimized Whole-Mount In Situ Hybridization with Fin Notching
This detailed protocol is designed for regenerating tail samples in Xenopus laevis tadpoles but can be adapted for other delicate, pigment-rich tissues [2].
Materials
- Fixative: MEMPFA (4% paraformaldehyde, 2 mM EGTA, 1 mM MgSO₄, 100 mM MOPS, pH 7.4) [2]
- Dehydration Series: Methanol in PBS-Tween (25%, 50%, 75%, 100%)
- Bleaching Solution: 3% hydrogen peroxide in methanol (or other standardized bleaching solutions)
- Proteinase K
- Hybridization Buffer, Antisense RNA Probe, Antibodies, and BM Purple Stain (standard WISH reagents)
- Equipment: Fine forceps, micro-scissors, incubation oven
Step-by-Step Procedure
- Fixation and Dehydration: Fix samples in MEMPFA for 2 hours at room temperature. Dehydrate through a graded methanol series and store at -20°C in 100% methanol [2].
- Photobleaching: Rehydrate samples to PBS. Treat with bleaching solution to remove melanosomes and melanophores. This step is critical for achieving sample transparency and eliminating pigment-related autofluorescence [2] [33].
- Tail Fin Notching: Using fine micro-scissors, make small, fringe-like incisions along the edges of the caudal fin, maintaining a safe distance from the core area of interest (e.g., the regenerating blastema). This creates physical channels that facilitate the complete penetration of reagents and washing out of unbound stain, preventing trapping in loose fin tissues [2].
- Proteinase K Treatment: Permeabilize samples with Proteinase K. The duration may require optimization based on tissue size and fixation.
- Hybridization and Staining: Follow standard WISH procedures, including pre-hybridization, hybridization with the labeled antisense probe, stringent washes, and antibody incubation [2].
- Colorimetric Development: Develop staining with BM Purple. Due to the reduced background, incubation times can be extended to several days to detect weak signals without incurring non-specific background [2].
- Imaging: Post-fix samples and image in clearing solution (e.g., glycerol series) using a stereomicroscope or compound microscope.
Supporting Protocol: Zebrafish Tailfin Injury and Imaging
This complementary protocol is valuable for studies involving immune cell migration and can benefit from similar background-reduction principles [31].
- Animal Model: Transgenic zebrafish larvae with fluorescently-labeled myeloid cells (e.g., Tg(mpeg:GFP)) [31].
- Pigmentation Inhibition: Raise embryos in egg water containing 0.003% 1-Phenyl-2-thiourea (PTU) to prevent melanin formation [31].
- Tailfin Injury: At 3-4 days post-fertilization, immobilize larvae in tricaine and amputate the tailfin with a scalpel [31].
- Fixation and Imaging: Fix larvae at desired time points post-injury (e.g., 4-6 hours for initial immune infiltration) in 4% PFA. Mount samples for imaging using confocal or fluorescence microscopy [31].
Workflow and Logic Visualization
The following diagrams illustrate the core experimental workflow and the logical relationship between the problems encountered and the solutions implemented in the optimized protocol.
Experimental Workflow
Problem-Solution Logic
The Scientist's Toolkit: Essential Research Reagents and Materials
Table 3: Key Reagent Solutions for Background Reduction in Tissue Staining
| Item | Function/Application | Specific Example |
|---|---|---|
| MEMPFA Fixative | Provides optimal tissue preservation for WISH by stabilizing morphology while maintaining RNA integrity [2]. | 4% PFA, 2 mM EGTA, 1 mM MgSO₄, 100 mM MOPS, pH 7.4 [2]. |
| TrueBlack Suppressor Systems | Reduces background in immunofluorescence from non-specific antibody binding and charged dyes; quenches lipofuscin autofluorescence [33]. | TrueBlack IF Background Suppressor; TrueBlack Plus Lipofuscin Autofluorescence Quencher [33]. |
| 1-Phenyl-2-thiourea (PTU) | A chemical inhibitor of melanogenesis used in zebrafish and other aquatic models to create optically transparent larvae for clear imaging [31]. | 0.003% in egg water [31]. |
| Proteinase K | An enzyme that digests proteins to increase tissue permeability, allowing better probe penetration during WISH or antibody staining [2]. | Concentration and incubation time require optimization for specific tissue types [2]. |
| Blocking Reagents | Reduce non-specific binding of antibodies by occupying reactive sites on the tissue. Serum, BSA, or commercial blockers are used [33] [34]. | Normal serum, BSA, or specialized commercial blocking buffers [33]. |
This application note validates the critical role of Matrix Metalloproteinase-9 (MMP-9) during early regeneration phases. We present an optimized Whole-Mount In Situ Hybridization (WISH) protocol that, by incorporating a tail fin notching technique, successfully minimizes background staining and enables high-fidelity visualization of novel mmp9 expression patterns in Xenopus laevis tadpoles. The data confirm mmp9 as a key biomarker expressed in reparative myeloid cells within the first 24 hours post-amputation, providing researchers with a robust methodological framework for studying gene expression in challenging regenerating tissues.
Matrix Metalloproteinase-9 (MMP-9) is a zinc-dependent endopeptidase that degrades extracellular matrix components, playing crucial roles in tissue remodeling, immune cell trafficking, and inflammation [35] [36]. Recent research has identified MMP-9 as a functionally significant biomarker in various pathological and regenerative processes, including neuropathic pain, muscular dystrophy, and rheumatoid arthritis [35] [37] [38]. In regeneration-competent species, a population of reparative myeloid cells expressing mmp9 has been identified as essential for the initial stages of appendage regeneration [4]. This note details an optimized methodology for validating these expression patterns, a crucial step for understanding the molecular basis of regeneration.
MMP-9 Responsive Hydrogel Workflow
The diagram below illustrates the conceptual framework for an MMP-9 responsive drug delivery system, highlighting the enzyme's role in disease progression and treatment.
Key Experimental Findings & Quantitative Data
Temporal mmp9 Expression in Early Tail Regeneration
The following table summarizes the dynamic mmp9 expression pattern during the first 24 hours post-amputation (hpa) in stage 40 Xenopus laevis tadpoles, as revealed by the optimized WISH protocol.
Table 1: Novel mmp9 Expression Pattern in Early Tail Regeneration (Stage 40)
| Time Post-Amputation | Spatial Localization of mmp9+ Cells | Proposed Biological Function |
|---|---|---|
| 0 hpa | Limited, basal expression detected. | Baseline state preparation. |
| 3 hpa | Distinct cell population emerging proximal to the amputation plane. | Early recruitment of reparative myeloid cells. |
| 6 hpa | Clear migration of mmp9+ cells toward the wound site. | Active cell mobilization for tissue remodeling and inflammation initiation. |
| 24 hpa | Significant accumulation of mmp9+ cells at the regeneration bud. | Establishment of a pro-regenerative microenvironment; critical matrix remodeling. |
Comparative Regeneration Competence
The expression of mmp9 is positively correlated with regeneration competency. The optimized WISH protocol enabled clear visualization of the significantly different mmp9 expression patterns in tadpoles at the regeneration-competent stage 40 compared to those at the regeneration-incompetent "refractory period" (stages 45-47) [4].
Detailed Experimental Protocol: Optimized WISH for Regenerating Tadpole Tails
Background and Innovation
Standard WISH protocols often yield high background staining in regenerating Xenopus laevis tadpole tails due to pigment granules (melanosomes) and the loose, fin-like tissue structure that traps staining reagents [4]. The optimized protocol below introduces two key modifications—tail fin notching and strategic photo-bleaching—to overcome these challenges, enabling high-contrast detection of low-abundance mRNAs like mmp9.
Reagent Setup
- MEMPFA Fixative: Paraformaldehyde fixative solution.
- Proteinase K Solution: For tissue permeabilization.
- Hybridization Buffer: For RNA probe hybridization.
- Antisense RNA Probe: Specifically targets mmp9 mRNA.
- BM Purple: Alkaline phosphatase substrate for colorimetric staining.
Step-by-Step Procedure
- Sample Collection & Fixation: Amputate tails of anesthetized Xenopus laevis tadpoles at the desired stage. Immediately transfer samples into MEMPFA fixative for the prescribed time.
- Dehydration & Rehydration: Process samples through a graded series of methanol and PBS washes.
- Photo-bleaching (Early): After fixation and rehydration, expose samples to strong light to decolorize melanosomes and melanophores. This step is critical for subsequent signal visualization.
- Tail Fin Notching: Using a fine scalpel or razor blade, make small, fringe-like incisions along the edges of the tail fin, taking care to maintain a safe distance from the central area of interest (e.g., the regeneration bud). This dramatically improves reagent penetration and washing efficiency, preventing non-specific staining in the loose fin tissue.
- Proteinase K Treatment: Incubate samples with Proteinase K solution to increase tissue permeability. Note: Protocol testing showed that prolonged incubation did not improve results; standard timing is sufficient.
- Hybridization & Washes: Hybridize samples with the mmp9-specific antisense RNA probe. Follow with stringent washes to remove unbound probe.
- Colorimetric Staining: Incubate samples with BM Purple staining solution. Monitor development closely. The notching and bleaching steps allow for extended incubation (up to 3-4 days) without significant background interference.
- Imaging & Analysis: Document the results using a stereomicroscope. The high-contrast images will reveal the precise spatial and temporal pattern of mmp9-expressing cells.
The following workflow diagram summarizes the key steps of the optimized protocol, highlighting the critical innovations.
The Scientist's Toolkit: Essential Research Reagents
Table 2: Key Reagent Solutions for mmp9 and Regeneration Studies
| Reagent / Material | Function / Application | Specific Example / Note |
|---|---|---|
| MMP-9 Responsive Hydrogel | Smart drug delivery for stage-specific treatment. | Cross-linked with MMP-9 cleavable peptide (GCNSGGRM↓SMPVSNCG) for targeted release [38]. |
| MMP-9 Cleavable Peptide | Dynamic cross-linker in responsive biomaterials. | Serves as a critical component for creating MMP-9-sensitive systems. |
| Pan-MMP Inhibitor (Batimastat/BB-94) | Functional validation of MMP-9 activity in models. | Used to alleviate inflammation and fibrosis in muscular dystrophy models [37]. |
| Sub-antimicrobial Doxycycline | Clinically relevant MMP-9 inhibitor. | Directly inhibits MMP-9 activity; used in periodontal disease and vascular remodeling [36]. |
| Antisense RNA Probe for mmp9 | Detection of mmp9 mRNA expression via WISH. | Essential for spatial and temporal gene expression analysis in regenerating tissues. |
MMP-9 in Regeneration and Disease: A Dual-Role Enzyme
MMP-9's function is context-dependent, playing a role in both pathological degradation and complex regenerative processes. The diagram below illustrates its key molecular functions.
The optimized WISH protocol, featuring tail fin notching, provides a reliable method for the biological validation of gene expression patterns in challenging regenerating tissues. The successful revelation of novel, early mmp9 expression patterns underscores its role as a key mediator in the initial stages of regeneration. These findings and methodologies offer valuable tools for researchers in regenerative medicine, drug development, and developmental biology, facilitating the discovery and validation of critical regenerative pathways.
Whole-mount in situ hybridization (WISH) remains a cornerstone technique in developmental biology, enabling the spatial and temporal visualization of gene expression patterns in intact tissues [4]. However, its application in specific models, such as the regenerating tail of Xenopus laevis tadpoles, presents significant technical challenges. The core issue is that high background staining and abundant pigmentation can obscure the specific signal of low-abundance transcripts, precisely at a time when the tissue is undergoing critical, dynamic changes [4] [2].
This application note addresses these challenges by detailing an optimized WISH protocol. We focus on the biological context of the "refractory period" (stages 45-47 in X. laevis), a developmental window where tadpoles transiently lose the ability to regenerate their tails [39] [40]. The techniques described herein were pivotal in revealing novel expression patterns for the gene mmp9, a key marker for reparative myeloid cells, thereby directly correlating technical improvements with deeper biological insight into regeneration competence [4].
Background: The Refractory Period and Regeneration
The anuran Xenopus laevis is a classic model for studying regeneration, as its tadpoles can fully regenerate amputated tails. A critical feature of this system is the refractory period, a transient loss of regenerative competence that occurs between developmental stages 45 and 47 [39] [40]. The molecular basis for this blockade is an area of active investigation.
Table 1: Key Features of Tail Regeneration in Xenopus Models
| Feature | Xenopus laevis | Xenopus tropicalis |
|---|---|---|
| Ploidy | Pseudo-tetraploid [40] | Diploid [40] |
| Refractory Period | Present (Stages 45-47) [39] [40] | Absent [40] |
| Key Regeneration Marker | mmp9 (reparative myeloid cells) [4] [2] | Data more feasible due to diploid genome [40] |
| Noted Correlates | Coincides with yolk depletion & onset of feeding; altered immune response [39] [41] | N/A |
The refractory period is closely linked to metabolic and immune changes. It coincides with the depletion of maternal yolk stores and the onset of independent feeding, suggesting a role for nutrient stress [39]. Inhibition of the nutrient-sensing mTOR pathway reduces both growth and regeneration [39]. Furthermore, specific immune responses during this stage, including the expression of XPhyH-like in blood cells, appear to impair regenerative ability, as immunosuppressants like FK506 can partially restore it [41].
Optimized WISH Protocol for Regenerating Tadpole Tails
The following protocol incorporates two critical modifications—early photobleaching and tail fin notching—to overcome the primary obstacles of pigment obstruction and high background staining in regenerating Xenopus laevis tails [4] [2].
Materials and Reagents
Table 2: Research Reagent Solutions for Optimized WISH
| Reagent/Solution | Function | Key Components / Notes |
|---|---|---|
| MEMPFA Fixative | Tissue fixation and preservation of RNA | 4% PFA, 2mM EGTA, 1mM MgSO₄, 100mM MOPS; pH 7.4 [2]. |
| Proteinase K | Increases tissue permeability for probe access | Standard solution; extended incubation not beneficial [4]. |
| Antisense RNA Probe | Hybridizes to target endogenous mRNA | e.g., Digoxigenin-labeled probe for mmp9 [4]. |
| BM Purple | Chromogenic substrate for alkaline phosphatase | Yields blue/purple precipitate at site of gene expression [4]. |
Step-by-Step Workflow
The diagram below outlines the core procedural steps and critical decision points of the optimized protocol.
Critical Procedural Details
- Fixation: Fix regenerating tail samples in MEMPFA for the appropriate duration [2].
- Early Photobleaching: Following fixation and dehydration, subject samples to a photobleaching step. This is performed before pre-hybridization to effectively decolorize melanosomes and melanophores, which otherwise migrate to the amputation site and obscure the stain [4] [2].
- Tail Fin Notching: Using a fine scalpel, make a fringe-like pattern of incisions in the loose tissue of the tail fin, at a safe distance from the primary area of interest (the regenerating tip). This step is crucial for allowing reagents and wash buffers to penetrate and be effectively removed from the loose fin tissue, preventing trapped BM Purple from causing non-specific background staining [4].
- Standard WISH Protocol: Proceed with the standard WISH workflow, including hybridization with a labeled antisense probe (e.g., for mmp9) and colorimetric detection with BM Purple [4].
- Imaging: Capture high-contrast images of the stained samples. The combined optimizations should yield a clear signal against a minimal background.
Application: Revealing mmp9 Expression with the Optimized Protocol
Application of this optimized protocol enabled high-fidelity analysis of mmp9 expression, a crucial marker for reparative myeloid cells, during early tail regeneration.
Table 3: mmp9 Expression Patterns Revealed by Optimized WISH
| Stage | Regeneration Competence | mmp9+ Cell Pattern (0-24 hpa) |
|---|---|---|
| Stage 40 | Competent | Distinct spatial and temporal dynamics of mmp9+ reparative myeloid cells were clearly visualized at the amputation site [4] [2]. |
| Stage 47 (Refractory) | Incompetent | Significant alteration in the mmp9 expression pattern was observed, correlating with the loss of regenerative ability [4]. |
The clear visualization of these differential expression patterns provides compelling "seeing is believing" evidence that the activity of mmp9+-expressing cells is positively correlated with regeneration competence [4]. This finding complements and validates data obtained from high-throughput sequencing methods [4] [2].
Discussion
The technical optimizations presented here—specifically, the combination of early photobleaching and tail fin notching—directly address the primary sources of noise in WISH applications for complex, pigmented, and loose regenerating tissues. By systematically reducing this noise, the protocol transforms WISH from a potentially inconclusive technique into a powerful tool for discovering subtle yet biologically critical gene expression patterns.
The successful application of this protocol to study the refractory period underscores its value. The clear visualization of mmp9 expression differences between competent and incompetent stages provides a definitive correlation between technique and biological insight. This protocol thereby enables researchers to move beyond technical limitations and answer fundamental questions about the molecular and cellular basis of regenerative success and failure.
Regeneration research leverages diverse model organisms to decipher the complex mechanisms enabling tissue regrowth. Cross-model validation, which integrates findings from species with varying regenerative capacities, is crucial for distinguishing universal principles from species-specific adaptations. This application note consolidates evidence from zebrafish and tokay gecko tail regeneration studies, revealing both convergent and distinct pathways. Furthermore, it details an optimized whole-mount in situ hybridization (WISH) protocol, incorporating a tail fin notching technique that significantly reduces background staining—a critical methodological advancement for enhancing data clarity and reliability in regeneration research.
Comparative Analysis of Regeneration Mechanisms
Regeneration in zebrafish and the tokay gecko (Gekko gecko) involves distinct cellular strategies and genetic programs, providing complementary insights.
Cellular Precursors and Blastema Formation
The cellular origin of regenerated tissues differs significantly between these models.
- Tokay Gecko: Evidence suggests tail regeneration relies on the activation of resident stem cells, such as satellite cells for muscle regeneration, rather than a blastema with a distal growth zone similar to an embryonic bud. Single-cell and transcriptomic analyses indicate stromal cells are the major precursor population [42].
- Zebrafish: Caudal fin regeneration is characterized by dedifferentiation and the formation of a blastema, a mass of progenitor cells possessing a distinct growth zone that re-expresses embryonic patterning genes [42].
Transcriptomic Signatures and Patterning Genes
Transcriptome sequencing across seven stages of gecko tail regeneration reveals a dynamic and stage-specific molecular profile.
- HOXC Genes: A key finding in the gecko is the temporally collinear activation of posterior HOXC genes during regeneration. This sequential gene activation represents a re-deployment of a fundamental developmental mechanism, albeit within a different cellular context [42].
- Developmental Toolkit: The expression of developmental patterning genes during gecko tail regeneration is markedly different from that observed during embryonic tail development. This contrasts with zebrafish and axolotl, where regeneration more closely mirrors embryonic gene expression patterns [42].
Table 1: Core Differences in Regeneration Mechanisms Between Gecko and Zebrafish
| Aspect | Tokay Gecko | Zebrafish |
|---|---|---|
| Major Precursor Cells | Resident stem cells (e.g., satellite cells), Stromal cells [42] | Dedifferentiated cells forming a blastema [42] |
| Blastema Growth Zone | No apical growth zone; proliferating cells distributed along axis [42] | Distinct apical growth zone present [42] |
| Patterning Gene Expression | Differs from embryogenesis; temporally collinear HOXC activation [42] | Re-capitulates embryonic development [42] |
| Key Musculoskeletal Outcome | Continuous cartilage tube, segmented muscle without classical segmentation genes [42] | Regenerated fin rays and lepidotrichia [42] |
Quantitative Data from Cross-Model Studies
Analysis of transcriptomic and regulatory data provides a quantitative foundation for comparing regenerative processes.
Transcriptomic Dynamics in Gecko Tail Regeneration
The most substantial transcriptional change occurs at the onset of regeneration (0-4 days post-autotomy, dpa), with a second major shift during blastema formation (8-16 dpa) [42].
Table 2: Key Transcriptomic and Functional Data from Gecko and Zebrafish Studies
| Model / Data Source | Quantitative Finding | Technique | Biological Implication |
|---|---|---|---|
| Tokay Gecko [42] | 2,565 genes differentially expressed at 0-4 dpa; 1,241 unique to this comparison. | mRNA-seq | Massive transcriptional reprogramming initiates regeneration. |
| Tokay Gecko [42] | Immune-related GO terms enriched at 4 dpa; Developmental process terms (e.g., WNT, BMP) enriched at 16 dpa. | Gene Ontology (GO) Analysis | Regeneration phase involves an early immune response followed by developmental signaling. |
| Zebrafish [43] | 653 genomic regions showed increased chromatin accessibility at 4 dpa linked to downregulated genes. | ATAC-seq / RNA-seq | Identifies candidate "tissue regeneration silencer elements" (TRSEs) that may repress genes during regeneration. |
Signaling Pathways and Genetic Networks
The following diagram synthesizes the core signaling and genetic interactions involved in tail regeneration across models, based on the findings from the gecko and zebrafish studies.
Detailed Experimental Protocols
This section provides a standardized methodology for key techniques referenced in the cross-model studies, with a focus on improving signal-to-noise ratio.
Optimized Whole-MountIn SituHybridization (WISH) for Regenerating Tails
This protocol is optimized for regenerating zebrafish tadpole tails [2] and is readily adaptable to gecko tissue with minimal adjustments, such as extended proteinase K treatment for thicker sections.
5.1.1 Primary Fixation and Bleaching
- Fixation: Fix regenerating tail samples immediately after amputation in MEMPFA (4% PFA, 2mM EGTA, 1mM MgSO₄, 100mM MOPS, pH 7.4) for 2 hours at room temperature or overnight at 4°C. MEMPFA stored at 4°C can be used for up to 2 weeks [2].
- Dehydration: Gradually dehydrate the samples through a series of methanol/PBS solutions (25%, 50%, 75%), finally storing in 100% methanol at -20°C.
- Photo-bleaching: To eliminate melanophore and melanosome interference, photo-bleach the samples immediately after fixation and dehydration. Place the samples in a solution of 3% H₂O₂ in methanol under strong light until pigment is removed. This pre-hybridization step is critical for achieving high-contrast images [2].
5.1.2 Pre-Hybridization and Tail Fin Notching
- Rehydration: Gradually rehydrate the bleached samples through a descending methanol/PBS series (75%, 50%, 25%) into PBS.
- Proteinase K Treatment: Treat samples with Proteinase K (e.g., 10 µg/mL) to increase tissue permeability. The incubation time must be empirically determined based on tissue size and stage.
- Critical Step - Tail Fin Notching: To minimize background staining in loose fin tissues, use a fine scalpel or razor to make small, fringe-like incisions along the edges of the caudal fin, taking care to maintain a safe distance from the primary regeneration zone. This notching dramatically improves reagent penetration and washing efficiency, preventing trapping of the chromogenic substrate that causes non-specific staining [2].
5.1.3 Hybridization and Detection
- Pre-hybridize samples in a suitable hybridization buffer for several hours at the probe hybridization temperature.
- Hybridize with a digoxigenin-labeled antisense RNA probe complementary to the target mRNA (e.g., mmp9) overnight.
- Wash stringently to remove unbound probe.
- Incubate with an alkaline phosphatase-conjugated anti-digoxigenin antibody.
- Detect the signal by incubating with the chromogenic substrate BM Purple. The fin notching allows for extended staining (if required for low-abundance targets) without background accumulation [2].
Protocol for Transcriptomic Analysis of Regenerating Tissues
This generalized protocol outlines the process for generating bulk transcriptome data, as used in the gecko study [42].
5.2.1 Sample Collection and RNA Extraction
- Collect tissue from multiple defined stages of regeneration (e.g., 0, 4, 8, 16, 20, 28 dpa) with biological replicates (N ≥ 3).
- Homogenize tissue and extract total RNA using a column-based kit with DNase I treatment to remove genomic DNA.
- Assess RNA integrity and concentration using an instrument such as a Bioanalyzer; only use samples with high RNA Integrity Numbers (RIN > 8.0).
5.2.2 Library Preparation and Sequencing
- Prepare mRNA-seq libraries from purified poly-A RNA.
- Use a platform such as Illumina for high-throughput sequencing to a sufficient depth (e.g., 30 million paired-end reads per sample).
5.2.3 Bioinformatic Analysis
- Quality Control: Use FastQC to assess read quality. Trim adapters and low-quality bases with Trimmomatic.
- Alignment and Quantification: Map cleaned reads to the respective reference genome (e.g., Gekko gecko or Danio rerio) using a splice-aware aligner like HISAT2 or STAR. Quantify read counts per gene.
- Differential Expression: Perform differential expression analysis between consecutive stages of regeneration using software packages such as DESeq2 or edgeR. Genes with an adjusted p-value (FDR) < 0.05 and a |log2 fold change| > 1 are considered significant.
- Functional Enrichment: Conduct Gene Ontology (GO) and KEGG pathway enrichment analysis on the lists of differentially expressed genes using tools like clusterProfiler.
The Scientist's Toolkit: Essential Research Reagents & Materials
The following table catalogs key reagents and materials essential for conducting the experiments described in this application note.
Table 3: Research Reagent Solutions for Tail Regeneration Studies
| Reagent/Material | Function/Application | Specific Example/Note |
|---|---|---|
| MEMPFA Fixative | Tissue fixation for WISH and histology. Preserves morphology and mRNA integrity [2]. | 4% PFA, 2mM EGTA, 1mM MgSO₄, 100mM MOPS, pH 7.4 [2]. |
| Proteinase K | Enzymatic digestion to increase tissue permeability for probe penetration in WISH [2]. | Concentration and time must be optimized for tissue type and stage. |
| BM Purple | Chromogenic substrate for alkaline phosphatase; produces a purple precipitate for RNA visualization in WISH [2]. | Long incubation times possible with notched fins without background. |
| Digoxigenin (DIG)-labeled RNA Probe | Antisense RNA probe for specific detection of target mRNA in WISH [2]. | e.g., Probe for mmp9 to identify reparative myeloid cells [2]. |
| Anti-DIG-AP Antibody | Conjugated antibody that binds to the DIG-labeled probe, enabling colorimetric detection [2]. | Used in conjunction with BM Purple. |
| Hydrogen Peroxide (H₂O₂) | Key component of the bleaching solution for removing melanin pigment [2]. | Used at 3% in methanol for photo-bleaching. |
| Poly-A Selection Beads | Isolation of mRNA from total RNA for RNA-seq library preparation [42]. | Essential for transcriptomic studies. |
| DNase I | Degradation of genomic DNA during RNA extraction to prevent contamination [42]. | Critical for obtaining high-quality RNA-seq data. |
| Next-Generation Sequencing Kits | Preparation of cDNA libraries for high-throughput sequencing on platforms such as Illumina [42]. | Enables whole-transcriptome analysis. |
Conclusion
The tail fin notching technique represents a significant methodological advance for Whole-mount In Situ Hybridization, effectively solving the persistent problem of background staining in delicate, regenerating tissues. By enabling the clear visualization of key genetic regulators like mmp9, this optimized protocol provides deeper insights into the cellular dynamics of epimorphic regeneration. The successful application and validation of this method underscore its importance for basic research in developmental biology and for pre-clinical drug discovery platforms that rely on accurate phenotypic screening in animal models like Xenopus. Future directions should focus on adapting this technique to other challenging tissue models and integrating it with emerging spatial transcriptomics technologies to further bridge the gap between gene sequence data and tissue morphology.
References
- 1. Spatio-temporal reconstruction of gene expression patterns in ... [https://pmc.ncbi.nlm.nih.gov/articles/PMC11883288/]
- 2. An improved method for whole-mount in situ hybridization ... [https://pmc.ncbi.nlm.nih.gov/articles/PMC11663889/]
- 3. Fluorescent whole-mount RNA in situ hybridization (F- ... [https://www.sciencedirect.com/science/article/abs/pii/S1046202315301377]
- 4. An improved method for whole-mount in situ hybridization ... [https://www.frontiersin.org/journals/cell-and-developmental-biology/articles/10.3389/fcell.2024.1487644/full]
- 5. Skin Pigmentation Impacts on Established and Emerging ... [https://www.fda.gov/science-research/fda-stem-outreach-education-and-engagement/skin-pigmentation-impacts-established-and-emerging-optical-diagnostic-devices-survey-mechanisms-and]
- 6. The art of fin regeneration in zebrafish - PMC - PubMed Central [https://pmc.ncbi.nlm.nih.gov/articles/PMC4895310/]
- 7. Caudal fin regeneration in zebrafish [https://bionomous.ch/caudal-fin-regeneration-zebrafish/]
- 8. High species homology potentiates quantitative inflammation ... [https://pmc.ncbi.nlm.nih.gov/articles/PMC10770569/]
- 9. Tokay gecko tail regeneration involves temporally collinear ... [https://pmc.ncbi.nlm.nih.gov/articles/PMC11715542/]
- 10. Characterization of regeneration initiating cells during ... [https://genomebiology.biomedcentral.com/articles/10.1186/s13059-024-03396-3]
- 11. How do I reduce high background in my FISH assay? [https://www.ogt.com/us/resources/fish-resources-and-support/fish-resources/optimize-your-fish-assay-simple-fixes-for-reducing-high-background-signal/]
- 12. Hyaluronic acid synthesis is required for zebrafish tail fin ... [https://journals.plos.org/plosone/article?id=10.1371/journal.pone.0171898]
- 13. Quantifying Cell Proliferation Through ... [https://pmc.ncbi.nlm.nih.gov/articles/PMC10751246/]
- 14. Quantitative assessment of the regenerative and ... [https://www.nature.com/articles/srep39191]
- 15. Optimisation of a Standardised Automated Bleaching and ... [https://pubmed.ncbi.nlm.nih.gov/41168914/]
- 16. Simple Elimination of Background Fluorescence in ... [https://pubmed.ncbi.nlm.nih.gov/28892031/]
- 17. Overview of Tissue Clearing Methods and Applications [https://andor.oxinst.com/learning/view/article/overview-of-tissue-clearing-methods-and-applications]
- 18. Fabric Edge Pattern Notching Tool [https://www.sailrite.com/Fabric-Edge-Pattern-Notching-Tool?srsltid=AfmBOoroHLm1MK8cxRh4RdJZFgcgNcK5VeWxK69XTTZ4RNByhLhfJHgo]
- 19. Helobdella Protocols - Guide for substartes [https://sites.google.com/site/helobdellaprotocols/histology/guide-for-substartes]
- 20. Using Whole Mount in situ Hybridization to Link Molecular ... [https://pmc.ncbi.nlm.nih.gov/articles/PMC3197306/]
- 21. Mastering the Precision: Deciphering the Perfect Endpoint in ... [https://insitutech.wordpress.com/2016/08/08/the-art-of-knowing-when-to-stop-the-staining/]
- 22. Protocol 3: Whole mount in situ hybridization (WISH) [https://cuttingclass.stowers.org/en/node/121415]
- 23. Proteinase K: Introduction & Applications [https://www.sigmaaldrich.com/US/en/technical-documents/technical-article/genomics/dna-and-rna-purification/introduction-to-proteinase-k-and-its-applications]
- 24. Frequently Asked Questions About Proteinase K [https://agscientific.com/blog/proteinase-k-faqs.html]
- 25. IHC Troubleshooting Guide [https://www.thermofisher.com/us/en/home/life-science/protein-biology/protein-biology-learning-center/protein-biology-resource-library/pierce-protein-methods/ihc-troubleshooting-guide.html]
- 26. High background in immunohistochemistry [https://www.abcam.com/en-us/technical-resources/troubleshooting/high-background-in-immunohistochemistry]
- 27. Amplification and Background Reduction Techniques [https://fluorofinder.com/amplification-and-background-reduction-techniques/]
- 28. Distant insulin signaling regulates vertebrate pigmentation ... [https://pmc.ncbi.nlm.nih.gov/articles/PMC5991976/]
- 29. Damage-induced reactive oxygen species enable ... [https://www.nature.com/articles/s41467-018-06460-2]
- 30. PCR-Based Genotyping of Zebrafish Genetic Mutants [https://en.bio-protocol.org/en/bpdetail?id=5248&type=0]
- 31. A zebrafish tailfin injury assay protocol for quantifying ... [https://pmc.ncbi.nlm.nih.gov/articles/PMC8881708/]
- 32. Image Analysis Quality Control (Part 3/3): Staining QC [https://www.linkedin.com/pulse/image-analysis-quality-control-part-33-staining-qc-]
- 33. Reducers for Improved Fluorescent Background - Biotium Stains [https://biotium.com/blog/background-reducers-for-improved-fluorescent-stains/]
- 34. How to Troubleshoot Background : Primary Antibody Titration... Staining [https://www.celnovte.com/news/how-to-troubleshoot-background-staining-primary-antibody-titration-washing-tricks/]
- 35. The role and mechanisms of matrix metalloproteinase-9 in ... [https://pmc.ncbi.nlm.nih.gov/articles/PMC12611917/]
- 36. Matrix Metalloproteinase-9 (MMP-9) as a Therapeutic Target [https://www.mdpi.com/1999-4923/17/11/1425]
- 37. Matrix metalloproteinases are hallmark early biomarkers ... [https://insight.jci.org/articles/view/195104]
- 38. MMP-9 responsive hyaluronic acid hydrogel for stage- ... [https://www.sciencedirect.com/science/article/abs/pii/S1773224725011499]
- 39. Nutrient availability contributes to a graded refractory period ... [https://pmc.ncbi.nlm.nih.gov/articles/PMC8061425/]
- 40. Evolutionary divergence in tail regeneration between ... [https://cellandbioscience.biomedcentral.com/articles/10.1186/s13578-021-00582-9]
- 41. Possible role of XPhyH-like expressing immune cells in ... [https://www.sciencedirect.com/science/article/abs/pii/S0006291X13000417]
- 42. Tokay gecko tail regeneration involves temporally collinear ... [https://bmcbiol.biomedcentral.com/articles/10.1186/s12915-024-02111-9]
- 43. A screen for regeneration-associated silencer regulatory ... [https://pmc.ncbi.nlm.nih.gov/articles/PMC10939760/]