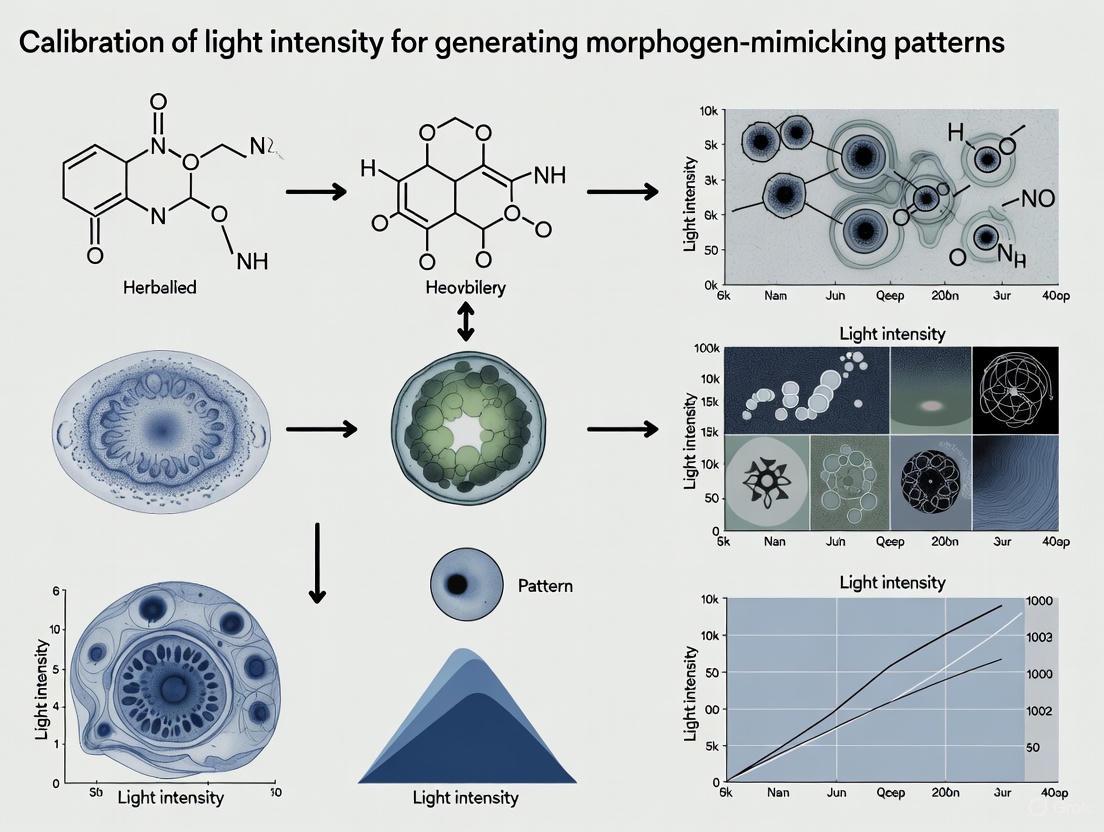
Precision Calibration of Light Intensity for Optogenetic Morphogen Patterning in Biomedical Research
This article provides a comprehensive guide for researchers and drug development professionals on calibrating light intensity to create precise, morphogen-mimicking patterns using optogenetic tools.
Precision Calibration of Light Intensity for Optogenetic Morphogen Patterning in Biomedical Research
Abstract
This article provides a comprehensive guide for researchers and drug development professionals on calibrating light intensity to create precise, morphogen-mimicking patterns using optogenetic tools. We explore the foundational principles of morphogen gradients and the critical need for accurate light delivery. The content details state-of-the-art methodological pipelines, from hardware setup to experimental protocols, for high-throughput spatial patterning. A dedicated troubleshooting section addresses common challenges like dark activity and optical fidelity, while a validation framework outlines strategies for quantifying pattern accuracy and biological efficacy. This synthesis aims to equip scientists with the knowledge to reliably engineer tissue patterns for advanced developmental biology studies and therapeutic applications.
Morphogen Gradients and Optogenetic Principles: The Foundation of Synthetic Patterning
Foundational Concepts FAQ
What is the French Flag Model? The French Flag Model is a conceptual framework in developmental biology that explains how cells in a developing embryo acquire distinct identities based on their position. Proposed by Lewis Wolpert in the 1960s, it uses the analogy of the French flag's blue, white, and red stripes to illustrate how a single gradient of a signaling molecule, called a morphogen, can pattern a field of cells into discrete domains. Cells respond to different concentration thresholds of the morphogen: high concentrations activate a "blue" genetic program, intermediate concentrations activate a "white" program, and low concentrations result in a default "red" state [1] [2].
How does a morphogen gradient form and provide positional information? A morphogen is produced from a localized source within a tissue. It then diffuses away from this source, creating a concentration gradient that decreases with distance. Cells are pre-programmed to interpret their positional value by reading the local morphogen concentration. This positional information is then translated by the cells' genetic machinery into specific fate decisions, ensuring spatial organization [1] [3]. The core principle is the separation of positional specification (a cell knowing its location) from interpretation (the cell activating the corresponding genetic program) [3].
What are the key challenges or criticisms of this model? While highly influential, the pure French Flag Model faces several theoretical challenges:
- Sink Requirement: Maintaining a stable gradient requires a mechanism to remove or degrade the morphogen.
- Temperature Sensitivity: Diffusion is temperature-dependent, yet development often proceeds normally across a range of temperatures.
- Scaling: Simple diffusion gradients do not easily scale with the size of an embryo.
- Noise: Fluctuations in gradient concentration, especially at low levels, could make accurate threshold reading by cells problematic [1].
Troubleshooting Guide: Light Intensity Calibration for Morphogen-Mimicking Patterns
This guide addresses common issues when using optogenetic or light-based systems to control morphogen production and create synthetic patterns in vitro.
Problem: Inconsistent or Faded Patterning Domains
- Potential Cause 1: Drift in light source intensity or incorrect calibration, leading to an inaccurate morphogen-mimicking signal.
- Solution:
- Verify Calibration: Regularly calibrate your light source using a NIST-traceable radiometric standard. The calibration is only valid for the entire optical setup (light source, filters, lenses) as a single system [4].
- Check for Stray Light: Stray light can "contaminate" your signal, leading to photometric inaccuracies and blurred patterning boundaries. Use appropriate filters to suppress stray light [5].
- Monitor Source Degradation: Calibration light sources can change their output over time (e.g., ~0.1% per hour at 350 nm). Keep a "gold standard" source to calibrate your working sources and establish a recalibration schedule based on hours of use [4].
Problem: "Requested Intensity Cannot Be Reached" Error
- Potential Cause: This error, reported in some UV light calibration systems, can indicate a hardware failure. In one case, the root cause was a degraded LCD component, which reduced the total light reaching the sample [6].
- Solution: Perform hardware diagnostics. If all other components (LEDs, driver board) are functional, inspect and potentially replace the light-modulating component (e.g., the LCD screen) [6].
Problem: Poor Reproducibility Between Experimental Runs
- Potential Cause: Variations in morphogen exposure duration and concentration.
- Solution: Standardize the dynamic parameters of your gradient. Recent research using optogenetically controlled Sonic Hedgehog (Shh) production shows that progenitor cell fate depends on both morphogen concentration and exposure duration. Ensure your experimental protocols tightly control both variables [7].
Experimental Protocols & Data
Table 1: Quantified Morphogen Gradient Parameters in Model Systems
| Morphogen / System | Characteristic Length (λ) | Key Processes | Reference |
|---|---|---|---|
| Bicoid (Drosophila embryo) | ~100 μm | Diffusion and degradation | [8] |
| Decapentaplegic (Dpp; Drosophila wing) | ~20 μm | Diffusion and degradation | [8] |
| Wingless (Drosophila wing) | ~6 μm | Diffusion and degradation | [8] |
| Sonic Hedgehog (Shh; in vitro optogenetic) | Extracellular half-life <1.5 hours | Continuous renewal during patterning | [7] |
Protocol: Establishing an Optogenetic Morphogen Gradient for Neural Patterning Based on systems for controlling Sonic hedgehog (Shh) production [7].
- Cell Preparation: Use a line of mouse neural progenitor cells engineered with a tunable, light-inducible gene expression system for Shh.
- System Calibration: Before patterning, calibrate the entire light delivery system (LED/laser, diffuser, filters) for irradiance (µW/cm²/nm) using a NIST-traceable standard. Critical: Do not alter the optical path after calibration [4].
- Gradient Generation: Expose the cell culture to a defined spatial pattern of light. The light intensity and profile will determine the local production rate of Shh, establishing a long-range, stable gradient.
- Patterning and Analysis: Maintain the gradient for the required duration. Fate acquisition depends on both concentration and exposure time [7]. Fix cells at determined time points and analyze the expression of downstream patterning markers (e.g., transcription factors like Nkx2.2, Olig2, Pax6) via immunostaining or in situ hybridization to map the resulting spatial domains.
The Scientist's Toolkit
Table 2: Essential Research Reagent Solutions
| Item | Function in Morphogen Research | Example/Specification |
|---|---|---|
| Optogenetic Gene Expression System | Enables precise, light-controlled production of a morphogen to establish a synthetic gradient. | A tunable light-inducible promoter system (e.g., for Shh) [7]. |
| NIST-Traceable Calibration Light Source | Provides a known irradiance standard to calibrate spectrometers and light delivery systems for quantitative experiments. | A lamp with certified output (e.g., in µW/cm²/nm) [4]. |
| Spectrometer with Cosine Corrector | Measures the absolute irradiance of a light source at the sample plane. Crucial for quantifying the "input" signal. | A system calibrated for spectral irradiance as a single unit [4]. |
| Holmium Oxide Filter/Solution | A wavelength calibration standard to verify the accuracy of a spectrometer's wavelength scale. | An aqueous holmium oxide solution or holmium oxide glass filter [5]. |
| Stray Light Filters | Used to test and quantify the level of stray light in a spectrophotometer, which can cause photometric errors. | Filters like OG550, RG850, which absorb specific wavelengths [4]. |
| Lineage-Specific Cell Markers | Antibodies or probes for key transcription factors to read out the final cell fates induced by the morphogen gradient. | Antibodies against Nkx2.2, Olig2, Pax6 for neural tube patterning [7]. |
Model Visualization
Troubleshooting Guides
Guide 1: Addressing Gradient Instability and Decay
Problem: Engineered morphogen gradients are unstable and decay too quickly, failing to sustain long-term patterning events.
Explanation: Gradient stability depends on the continuous renewal of the morphogen to counterbalance its degradation and diffusion. A short morphogen half-life relative to the timescale of downstream gene expression can lead to pattern fade.
Solution:
- Quantify Clearance Rates: Directly measure the extracellular half-life of your morphogen. For Sonic hedgehog (Shh), this was found to be below 1.5 hours, indicating gradients require constant renewal during patterning [7].
- Ensure Continuous Production: Configure your optogenetic induction system for sustained morphogen production rather than single pulses to maintain the gradient against degradation losses [7].
- Modify Biochemical Properties: Investigate how interacting proteins or sequence modifications can alter the morphogen's clearance rate to engineer a more stable gradient [7].
Guide 2: Correcting Low Contrast in Optogenetic Patterning
Problem: The boundary between "ON" and "OFF" cells in a light-patterned tissue is blurry, leading to imprecise fate decisions.
Explanation: This low contrast often stems from high background activity (dark activity) of the optogenetic tools and/or slow response kinetics, which blurs the intended spatial pattern.
Solution:
- Select High-Dynamic Range Reagents: Use optogenetic reagents engineered for minimal dark activity and high inducibility. For example, second-generation optoNodal2 reagents show negligible dark activity while maintaining strong light-driven signaling [9].
- Improve Receptor Sequestration: To reduce dark activity, modify constitutive receptors (e.g., Type II) to be cytosolic in the dark, lowering their chance for spurious activation [9].
- Choose Fast Photocycle Domains: Opt for protein pairs like Cry2/CIB1, which have association times of seconds and dissociation times of minutes, over slower alternatives (e.g., LOV domains) for sharper temporal control [9].
Guide 3: Achieving Reproducible Spatiotemporal Patterning
Problem: Inconsistent patterning outcomes occur between experiments due to unreliable light delivery and an inability to monitor and adjust patterns in real-time.
Explanation: Precise morphogen patterning requires not only light-sensitive cells but also a reliable hardware and software platform to deliver dynamic light patterns and provide feedback.
Solution:
- Implement a Feedback Loop: Use a "cybergenetics" system like μPatternScope, which measures cellular responses and dynamically adjusts the illumination profile to achieve a target pattern [10].
- Calibrate Projection System: Ensure a uniform light field and accurately map the input pattern image (DMD pixels) to the projected pattern on the sample plane to avoid optical distortions [10].
- Standardize Cell Response: Use clonally selected, genomically engineered cell lines to ensure a uniform optogenetic response across the entire cell population, which is critical for clean pattern formation [10].
Frequently Asked Questions (FAQs)
FAQ 1: How do I determine the initial light intensity and duration for my specific patterning goal?
The required light dose (intensity and duration) depends on the desired morphogen signaling level and target cell fate. Start with a power curve experiment.
- Method: Expose your optogenetic system to a range of light intensities (e.g., 0 to 20 μW/mm²) for a fixed duration and measure the output (e.g., pSmad2 for Nodal). This identifies the saturation intensity [9].
- Kinetics: Measure the system's response time. For optoNodal2, pSmad2 levels peak ~35 minutes after stimulation begins. Use such data to design impulse durations [9].
- Key Principle: Cell fate can depend on both morphogen concentration and exposure duration. Systematic testing is required to establish the dose-response relationship for your specific objective [7].
FAQ 2: My optogenetic system has high background activity (dark activity). How can I reduce it?
High dark activity is a common issue that reduces patterning contrast.
- Re-engineering Receptors: As demonstrated with optoNodal2, switching photo-associating domains (e.g., from LOV to Cry2/CIB1) and sequestering the Type II receptor to the cytosol can drastically reduce, or even eliminate, dark activity [9].
- mRNA Dosage Titration: If re-engineering is not an option, titrate down the mRNA dose used to express the optogenetic components. However, this may also reduce the maximum inducible signal [9].
FAQ 3: Can I use patterned light to rescue defects in genetic mutants?
Yes, optogenetic patterning can serve as a synthetic bypass for mutated components. This has been successfully demonstrated in zebrafish embryos lacking endogenous Nodal signaling (e.g., Mvg1 or MZoep mutants). By expressing optogenetic Nodal receptors and applying precise light patterns, researchers have rescued several characteristic developmental defects, proving that controlled synthetic signaling can restore complex tissue patterning [9].
Quantitative Data for Experimental Calibration
Table 1: Optogenetic System Performance Comparison
| Optogenetic System | Photo-associating Domain | Dark Activity | Time to Peak Signaling (after 20min impulse) | Saturating Light Intensity | Key Improvement |
|---|---|---|---|---|---|
| Original optoNodal | LOV | High (phenotypic defects) | >90 minutes | ~20 μW/mm² | First-generation, high potency |
| optoNodal2 | Cry2/CIB1 | Negligible (phenotypically normal) | ~35 minutes | ~20 μW/mm² | Improved dynamic range & kinetics [9] |
Table 2: Morphogen Gradient Kinetics
| Morphogen | Experimental System | Extracellular Half-Life | Key Pfinding for Patterning |
|---|---|---|---|
| Sonic hedgehog (Shh) | Mouse neural progenitors (in vitro) | Below 1.5 hours | Gradients are continually renewed; half-life is shorter than gene expression dynamics [7] |
Experimental Protocols
Protocol 1: Measuring Signaling Kinetics of an Optogenetic Morphogen System
Purpose: To characterize the activation and decay timeline of your optogenetic system, which is essential for designing temporal stimulation patterns.
Steps:
- Prepare Samples: Use embryos or cells expressing the optogenetic receptors. For a clean baseline, use mutants lacking the endogenous signaling pathway (e.g.,
Mvg1zebrafish) [9]. - Apply Stimulus: Deliver a single, saturating impulse of blue light (e.g., 20 μW/mm²) for a set duration (e.g., 20 minutes) [9].
- Fix and Sample: At multiple timepoints after the start of illumination (e.g., 10, 20, 35, 55, 85 minutes), collect and fix samples to capture the rise and fall of the signaling response [9].
- Quantify Activity: Stain for a direct downstream phosphorylation target (e.g., pSmad2 for Nodal signaling) and measure its intensity or nuclear localization over time. The time to peak and return-to-baseline provide critical kinetic parameters [9].
Protocol 2: Implementing Feedback-Controlled Patterning
Purpose: To dynamically maintain or achieve a target tissue pattern by using real-time imaging to adjust light stimulation.
Steps:
- Setup Framework: Integrate a μPatternScope-like system, which combines a DMD-based projector for patterned illumination with a microscope for live imaging [10].
- Segment and Track: Use the system's software to perform real-time single-cell segmentation and tracking on the acquired images [10].
- Define Target and Error: Programmatically define a desired target pattern (e.g., a specific 2D shape). The software calculates the difference (error) between the current cell culture state and the target state.
- Close the Loop: The software automatically computes and projects the light pattern needed to reduce the error, for instance, by inducing apoptosis in cells outside the target shape. This feedback loop runs continuously until the target pattern is achieved [10].
Pathway and Workflow Visualizations
The Scientist's Toolkit: Research Reagent Solutions
Table 3: Essential Materials for Optogenetic Patterning
| Item | Function/Description | Example/Reference |
|---|---|---|
| Cry2/CIB1-based Optogenetic Receptors | Engineered Type I and II receptors that dimerize under blue light to initiate signaling with high dynamic range and fast kinetics. | optoNodal2 system [9] |
| Genomically Engineered Cell Line | A clonally selected cell line with a stably integrated optogenetic circuit, ensuring uniform response across the cell population. | ApOpto cells (for light-induced apoptosis) [10] |
| DMD-based Projection System | A Digital Micromirror Device (DMD) system that projects user-defined, high-resolution light patterns onto the sample. | μPatternScope (μPS) [10] |
| Feedback Control Software | Software that analyzes live microscopy images and automatically adjusts the projected light pattern to achieve a target tissue pattern. | μPS software suite [10] |
| Saturating Blue Light Intensity | The light intensity required to fully activate the optogenetic system, determined empirically via a power curve. | ~20 μW/mm² for optoNodal2 [9] |
Core Principles of Optogenetic Control
What are the fundamental mechanisms by which optogenetic receptors convert light into patterned morphogen signals?
Optogenetic systems use light-sensitive proteins to achieve precise spatiotemporal control over signaling pathways. For morphogen research, this typically involves one of five core strategies [11]:
- Inducible Protein Associations: Light promotes dimerization of receptor components, initiating downstream signaling [11].
- Intramolecular Control: Light induces conformational changes that activate a single protein construct [11].
- Clustering-Based Activation: Light drives oligomerization of signaling proteins [11].
- Sequestration-Based Inhibition: Light triggers sequestration of proteins away from their site of action [11].
- Gene Expression Control: Light regulates transcription of morphogen-related genes [11] [7].
The following diagram illustrates the primary mechanisms used to control the Nodal signaling pathway, a key morphogen system in vertebrate development [12]:
Optogenetic Receptor Activation Pathway
How do improved optogenetic reagents like optoNodal2 overcome limitations of earlier systems?
First-generation optogenetic tools often suffered from slow kinetics and significant "dark activity" (background signaling without light). Next-generation systems like optoNodal2 address these limitations through refined molecular design [12]:
- Enhanced Dynamic Range: By fusing Nodal receptors to the Cry2/CIB1N heterodimerizing pair and sequestering the type II receptor to the cytosol, researchers achieved minimal dark activity with strong light-induced responses [12].
- Improved Kinetics: The Cry2/CIB1N system offers faster response times compared to earlier LOV domain-based systems [12].
- Reduced Dark Activity: Optimized protein interactions essentially eliminate background signaling in the absence of light [12].
Research Reagent Solutions
Table 1: Key Optogenetic Tools for Morphogen Signaling Research
| Reagent / Tool | Type / Mechanism | Key Characteristics | Primary Research Applications |
|---|---|---|---|
| OptoNodal2 System [12] | Cry2/CIB1N heterodimerization | Minimal dark activity, improved kinetics, high dynamic range | Mesendodermal patterning, vertebrate embryonic development |
| CRY2-CIB System [11] [13] | Blue-light heterodimerization | Rapid association, endogenous flavin chromophore | General signaling control, growth cone guidance, neuronal development |
| LOV Domain Systems [11] | Blue-light conformational change | Various implementations (relief of autoinhibition, heterodimerization) | Actin dynamics, cell migration, intracellular signaling |
| PhyB-PIF System [11] | Red/far-red heterodimerization | Reversible with different wavelengths, requires PCB chromophore | Protein localization, multicellular organisms |
| Channelrhodopsins (ChR2) [14] [15] | Light-gated ion channel | Direct membrane depolarization, millisecond kinetics | Neuronal excitation, vision restoration |
| Dronpa System [11] | Photoswitchable fluorescent protein | Reversible monomer-dimer transition | Protein function inhibition, allosteric control |
Experimental Protocols & Workflows
What is a standard workflow for creating optogenetic morphogen patterns in zebrafish embryos?
The following diagram outlines the experimental pipeline for generating synthetic Nodal signaling patterns using the optoNodal2 system [12]:
Optogenetic Patterning Experimental Workflow
Detailed Protocol: Optogenetic Patterning of Nodal Signaling in Zebrafish [12]
Molecular Construct Preparation:
- Express optoNodal2 constructs (Cry2-fused type I receptor and membrane-anchored CIB1N-fused type II receptor) via in vitro transcription to generate mRNA.
- Confirm construct specificity and lack of dark activity in cell-based assays before proceeding to embryos.
Embryo Preparation and Microinjection:
- Collect zebrafish embryos at the one-cell stage.
- Microinject 1-2 nL of optoNodal2 mRNA into the yolk or cell body.
- Incubate embryos in the dark at 28.5°C until the appropriate developmental stage (typically shield stage for gastrulation studies).
Optical Setup Configuration:
- Use an ultra-widefield microscope system equipped with a digital micromirror device (DMD) for spatial light patterning.
- Configure blue light illumination (wavelength ~450-488 nm) at appropriate intensity (typically 0.1-5 mW/mm², requires calibration).
- Set up environmental control to maintain embryo viability during extended time-lapse experiments.
Light Patterning and Live Imaging:
- Mount embryos in agarose and position on the microscope stage.
- Design desired illumination patterns using the DMD control software (stripes, gradients, or custom shapes).
- Apply light patterns with precise timing controlled by the experimental design.
- Simultaneously image downstream responses (e.g., pSmad2 translocation) using fluorescent reporters.
Validation and Analysis:
- Fix embryos at specific timepoints and perform whole-mount in situ hybridization for target genes (e.g., sox32, gsc).
- Quantify nuclear localization of pSmad2 as a direct readout of Nodal signaling activity.
- Track cell internalization movements during gastrulation in response to patterned signaling.
Troubleshooting Guides & FAQs
System Design & Selection
How do I select the appropriate optogenetic system for my morphogen signaling application?
Consider these key parameters when selecting an optogenetic system:
Table 2: Optogenetic System Selection Guide
| Parameter | Considerations | Recommended Systems |
|---|---|---|
| Temporal Resolution | Fast kinetics (ms-s) vs. slow kinetics (min) | LOV domains, Dronpa (faster); Cry2/CIB1 (moderate); PhyB/PIF (reversible) [11] |
| Spatial Resolution | Subcellular vs. tissue-scale patterning | Systems with minimal scattering (red-shifted) [16] |
| Dynamic Range | Signal-to-noise ratio, dark activity | Optimized systems like optoNodal2 [12] |
| Wavelength Compatibility | Multi-channel experiments, tissue penetration | Red-shifted systems (PhyB/PIF) for deeper penetration [16] |
| Chromophore Requirements | Endogenous availability (flavin) vs. exogenous supply (PCB) | CRY2, LOV (endogenous); PhyB (exogenous PCB) [11] |
What are the advantages of red-light optogenetics for in vivo applications?
Red light (630-710 nm) offers significant advantages for in vivo work [16]:
- Enhanced Tissue Penetration: Red light scatters less and is absorbed less by hemoglobin, enabling deeper tissue activation.
- Reduced Phototoxicity: Longer wavelengths cause less cellular damage than blue light during prolonged illumination.
- Spectral Multiplexing: Compatibility with blue-light tools for multi-channel experiments.
Despite these advantages, most established morphogen patterning systems currently use blue-light responsive systems like Cry2/CIB1 [12].
Implementation & Optimization
How do I calibrate light intensity for creating physiological morphogen-mimicking patterns?
Proper light calibration is essential for creating biologically relevant signaling patterns:
Establish a Dose-Response Curve:
- Expose expressing cells or embryos to a range of light intensities (e.g., 0.01-5 mW/mm²).
- Measure downstream output (e.g., pSmad2 nuclear localization, target gene expression).
- Identify the minimum intensity that produces maximal response and the dynamic range.
Match Endogenous Signaling Levels:
- Compare optogenetically-induced responses with endogenous signaling in wild-type embryos.
- For Nodal signaling, benchmark against known pSmad2 gradients in the embryonic margin [12].
Account for System Non-Linearities:
- Consider potential bleaching, desensitization, or adaptation effects at high intensities.
- Test for rebound effects after light offset, which can complicate interpretation [17].
What are common sources of off-target effects in optogenetic morphogen experiments?
- Dark Activity: Background signaling without illumination [12]. Solution: Use improved reagents like optoNodal2 with minimized dark activity.
- Cellular Toxicity: High expression of optogenetic proteins or prolonged illumination [18]. Solution: Titrate expression levels and use minimal effective light doses.
- Network-Level Effects: Activation of compensatory pathways or community effects [12]. Solution: Include appropriate controls in signaling mutants and monitor multiple pathway readouts.
- Rebound Effects: Excess activity following light offset due to post-inhibitory rebound [17]. Solution: Characterize post-stimulation dynamics and consider ramp-down protocols.
Technical Challenges
How can I address poor dynamic range or high background in my optogenetic morphogen system?
- Optimize Expression Ratios: For heterodimerizing systems, balance expression levels of both components.
- Implement Sequestration Strategies: As with optoNodal2, sequestering components to the cytosol can dramatically reduce background [12].
- Screen Receptor Variants: Test different receptor fusion configurations and linkers.
- Consider Alternative Systems: If Cry2-based systems show limited performance, evaluate LOV domain or PhyB-based alternatives.
What illumination hardware is suitable for creating complex morphogen patterns?
- Digital Micromirror Devices (DMDs): Provide flexible, high-resolution patterning for up to 36 embryos in parallel [12].
- Laser Scanning Systems: Offer high spatial resolution but typically lower throughput.
- LED Arrays: Simple to implement but limited in pattern complexity.
- Projection Systems: Balance flexibility and cost for intermediate complexity applications.
The following diagram compares troubleshooting approaches for common optogenetic patterning problems:
Troubleshooting Common Optogenetic Issues
Your Technical Support Center for Light Calibration in Morphogen Research
This guide provides targeted troubleshooting and methodologies for researchers calibrating light-based systems to create precise, morphogen-mimicking patterns. The following FAQs address common technical challenges in quantifying dynamic range, binding kinetics, and patterning fidelity.
Frequently Asked Questions (FAQs)
Dynamic Range & Light Calibration
Q: What is dynamic range in the context of calibrating light for biological patterning? A: Dynamic range is the ratio between the largest and smallest measurable light intensity that your imaging system can accurately capture. In your research, it defines the spectrum of light intensities you can use to create distinct biological effects—from very faint to very bright patterns. A system with insufficient dynamic range will lose detail in either the shadows (dimmer morphogens) or highlights (brighter morphogens) of your pattern [19] [20] [21].
Q: My patterned illumination appears "flat" and lacks contrast. What could be wrong? A: This is often a result of limited system dynamic range or incorrect exposure. To troubleshoot [22]:
- Check for overexposure: Ensure your camera sensor is not saturated. The brightest point in your pattern should not exceed 98% of the sensor's maximum capacity [22].
- Minimize stray light: "Flare" light from bright areas of your setup can scatter and "fog" darker areas, reducing effective contrast. Use optical baffles and high-quality lenses with anti-reflective coatings [22].
- Verify your calibration chart: Use a transmissive dynamic range chart (not a reflective one) for accurate measurements, as reflective charts lack sufficient tonal range [22].
Binding Kinetics & Assay Design
Q: How do I measure the binding kinetics of a light-activated morphogen to its target? A: You need to perform a real-time binding assay to measure the association and dissociation rate constants ((k1) and (k2)). The general methodology is as follows [23]:
- Initiate Binding: Mix your target (e.g., a receptor) with the ligand (your morphogen-mimic).
- Monitor Complex Formation: Use a compatible detection method (e.g., surface plasmon resonance, FRET) to measure the amount of target-ligand complex formed at multiple time points.
- Initiate Dissociation: After binding reaches equilibrium, prevent further association (e.g., by diluting the mixture or adding a high concentration of unlabeled competitor) and continue to monitor the decrease in complex over time.
- Curve Fitting: The resulting association and dissociation time courses are fit to exponential equations to derive the rate constants.
Q: My kinetic data is noisy, leading to poor curve fits. How can I improve signal quality? A:
- Subtract nonspecific binding: For each time point, measure signal from a control well without the target and subtract it from your experimental values. This controls for drift and binding to other assay components [23].
- Optimize ligand concentration: Use ligand concentrations both above and below the expected equilibrium constant ((K_d)). The amount bound at equilibrium should ideally be less than 20% of the total ligand concentration to ensure accurate kinetics [23].
- Ensure reagent stability: Confirm that your target and ligand are stable over the entire duration of the assay.
Patterning Precision & Calibration
Q: What is the best calibration pattern to ensure geometric accuracy in my illumination system? A: The choice depends on your need for robustness and precision. Below is a comparison of common patterns [24]:
| Pattern Type | Key Benefits | Best For | Important Considerations |
|---|---|---|---|
| Checkerboard | Simple detection; high-accuracy corner localization. | Basic system calibration with full pattern visibility. | The entire pattern must be visible in the image. Prone to failure with partial views or uneven lighting [24]. |
| ChArUco | Unique, coded markers; robust to occlusions and uneven lighting. | Scenarios where the pattern might be partially visible or lighting is not ideal. Allows data collection from image edges [24]. | |
| Circle Grid | Accurate detection using all perimeter pixels; resilient to image noise. | High-accuracy applications with symmetric lenses. | Asymmetric circle grids are required for stereo calibration to avoid 180-degree ambiguity [24]. |
| Checkerboard Marker | Absolute orientation reference from center circles. | Situations where you have a partial view but can see the center of the pattern [24]. |
Q: My calibrated system still produces distorted patterns. What should I check? A:
- Confirm pattern size: Your calibration target should fill at least half of the camera's field of view when viewed frontally. A target that is too small will not adequately constrain the camera model [24] [25].
- Lock your focus and aperture: Any change in focus distance or aperture after calibration can alter the effective focal length and introduce errors. Set these parameters before calibration and keep them fixed [24].
- Use a rigid target: Ensure your calibration pattern is printed on a flat, rigid material (e.g., aluminum composite) to prevent physical distortions that will skew your calibration [25].
Experimental Protocols & Methodologies
Protocol 1: Measuring Camera Dynamic Range Using a Transmissive Chart
Objective: To determine the usable dynamic range of your imaging system, which is critical for quantifying the intensity range of your morphogen patterns.
Materials:
- Imaging system (camera, lens) to be tested.
- Uniform, stable light source (e.g., light box).
- Transmissive dynamic range chart (e.g., with known optical densities).
- Analysis software (e.g., Imatest, ImageJ with appropriate plugins).
- Setup: Place the transmissive chart against the light source in a completely darkened room to minimize stray light.
- Position Camera: Frame the chart so it occupies the central portion of the camera's field of view.
- Set Exposure: Manually set the exposure so that the brightest patch on the chart is just below saturation (e.g., digital number of 250 on an 8-bit scale). Do not use auto-exposure [22].
- Capture Image: Take a picture of the chart.
- Analyze:
- In the analysis software, define a region of interest (ROI) for each patch on the chart.
- Plot the mean digital value (signal) for each patch against its known log exposure or optical density.
- The dynamic range is the range from the brightest patch (just before saturation) down to the darkest patch where the signal-to-noise ratio (SNR) is still acceptable (often defined as SNR ≥ 1) [22].
Protocol 2: Determining Ligand Binding Kinetics by a Direct Assay
Objective: To measure the association ((k1)) and dissociation ((k2)) rate constants for a ligand-target interaction.
Materials:
- Purified target protein.
- Labeled ligand (e.g., fluorescent, biotinylated).
- Real-time detection instrument (e.g., SPR reader, plate reader with injectors).
- Suitable buffer.
Method [23]:
- Association Phase:
- Immobilize the target on the sensor surface or in a well.
- Introduce a known concentration of ligand and start continuous monitoring.
- Measure the signal (proportional to complex formation) at multiple time points until the signal plateaus (equilibrium).
- Repeat with at least five different ligand concentrations.
- Dissociation Phase:
- After reaching equilibrium in the association phase, replace the ligand solution with buffer.
- Continue monitoring the signal as the complex dissociates.
- Data Analysis:
- For each ligand concentration, fit the association time-course data to an exponential equation to obtain an "observed rate" ((k{obs})).
- Plot (k{obs}) vs. ligand concentration. The slope of the linear fit is the association rate constant, (k1).
- Fit the dissociation time-course data to an exponential decay equation to obtain the dissociation rate constant, (k2).
The following diagram illustrates this workflow and the resulting data:
Essential Research Reagent Solutions
The following table lists key materials and their functions for setting up these critical experiments.
| Item | Function / Application | Key Specifications |
|---|---|---|
| Transmissive DR Chart | Measures the dynamic range of an imaging system. | High optical density range (e.g., ≥ 3.0); known patch densities [22]. |
| ChArUco Calibration Board | Geometric camera calibration for lens distortion correction. | Rigid, flat material (e.g., aluminum composite); unique, coded markers [24] [25]. |
| Uniform Light Source | Provides stable, even illumination for calibration and assays. | High stability; adjustable intensity; uniform output (e.g., iQ-LED lightbox) [20]. |
| Labeled Ligand | Tracking binding events in kinetic assays. | High purity; label (fluorophore, biotin) does not impair biological activity [23]. |
| Real-Time Detection Instrument | Monitors binding or reaction progress continuously. | Fast read capability; onboard injectors (e.g., BMG LABTECH plate reader) [26]. |
Visualizing the Full Calibration Workflow
A robust calibration pipeline for morphogen-mimicking patterns integrates all the concepts above. The following diagram maps the logical sequence from system setup to quantitative pattern validation:
From Theory to Bench: A Pipeline for High-Throughput Optogenetic Patterning
Frequently Asked Questions (FAQs)
Q1: What are the primary advantages of the second-generation optoNodal2 reagents over first-generation optoNodal tools? The optoNodal2 system offers two major advantages: significantly reduced dark activity and improved response kinetics. It eliminates the problematic background signaling present in first-generation tools, allowing experiments to be conducted without confounding basal activity. Furthermore, its rapid dissociation kinetics (returning to baseline ~50 minutes after light cessation) enable the creation of sharper, more dynamic signaling patterns compared to the slower LOV-based systems [9].
Q2: My optogenetic reagent shows high background activity (dark activity). What could be the cause and how can I mitigate this? High dark activity is often caused by spontaneous, light-independent dimerization of the optogenetic receptors [9]. To mitigate this, you can:
- Use Cytosolic Sequestration: A highly effective strategy, used in optoNodal2, is to remove the membrane-localization motif from the constitutively active receptor (e.g., Type II receptor), sequestering it in the cytosol in the dark to reduce spurious interactions [9].
- Switch Dimerization Domains: Consider using alternative light-sensitive heterodimerizing pairs like Cry2/CIB1, which may exhibit lower affinity in the dark compared to some LOV domains [9].
- Titrate Expression Levels: Lower the concentration of the injected or transfected mRNA/DNA, as high expression levels can exacerbate dark activity [9].
Q3: I am not achieving sufficient dynamic range in my light-activated signaling. What parameters should I optimize? To improve dynamic range (the difference between minimal dark activity and maximal light-induced signaling), focus on:
- Reagent Design: Ensure you are using reagents engineered for high dynamic range, like the optoNodal2 constructs [9].
- Light Intensity: Perform a power series experiment to determine the saturating light intensity for your setup, typically saturating near 20 μW/mm² for optoNodal2 [9].
- Expression Verification: Confirm that your receptors are expressing properly and localizing to the correct cellular compartments.
Q4: What are the recommended positive and negative controls for validating my optogenetic reagents in vivo? A robust validation strategy should include:
- Positive Control for Function: Inject reagents into embryos lacking endogenous Nodal signaling (e.g., Mvg1 or MZoep mutants). Exposure to saturating blue light should robustly induce downstream markers like pSmad2 and target genes (gsc, sox32), confirming the system's functionality [9].
- Negative Control for Specificity: Raise injected embryos in complete darkness. In a well-designed reagent like optoNodal2, these embryos should show minimal pSmad2 signaling and develop phenotypically normal at 24 hpf, demonstrating low dark activity [9].
Troubleshooting Guides
Problem 1: Low or No Light-Induced Signaling Response
| Possible Cause | Verification Method | Solution |
|---|---|---|
| Insufficient light intensity/dose | Measure power at the sample plane with a photometer. | Perform a light power series to find the saturation point (e.g., up to 20 μW/mm² for optoNodal2) [9]. |
| Poor reagent expression | Perform immunofluorescence or Western blot for receptor tags. | Optimize mRNA injection dose or transfection parameters; check plasmid sequence and integrity. |
| Incorrect genetic background | Genotype mutant embryos. | Use embryos with intact downstream signaling components (e.g., Smad2). For positive controls, use Nodal-deficient mutants (Mvg1, MZoep) [9]. |
| Hardware failure | Visually inspect LED status; verify pattern generation software. | Confirm LED/digital micromirror device (DMD) is functional; check that the correct light pattern is being generated. |
Problem 2: High Background Activity in the Dark
| Possible Cause | Verification Method | Solution |
|---|---|---|
| High reagent expression level | Titrate mRNA dose and observe phenotypic severity in dark-raised embryos. | Reduce the amount of injected mRNA; for optoNodal2, doses up to 30 pg showed low dark activity [9]. |
| Suboptimal receptor design | Compare dark activity of different optogenetic pairs (e.g., LOV vs. Cry2/CIB1). | Use reagents with cytosolic sequestration of components and low-affinity dimerization domains like Cry2/CIB1 [9]. |
| Endogenous pathway activity | Compare signaling in wild-type vs. pathway mutant embryos. | Conduct experiments in a loss-of-function mutant background to isolate the optogenetic signal from endogenous activity. |
Problem 3: Unintended Biological Phenotypes in Experimental Embryos
| Possible Cause | Verification Method | Solution |
|---|---|---|
| Toxicity from overexpression | Inject varying doses of mRNA and assess embryo survival and gross morphology. | Determine the maximum tolerated dose of your reagent that does not cause toxicity. |
| Off-target effects | Use a transcriptional reporter for the pathway of interest; profile gene expression. | Include critical controls: uninjected embryos and embryos expressing inert fluorescent proteins. |
| Patterning defects from inaccurate stimulation | Calibrate light patterns using a standardized sample; co-express a soluble fluorescent protein. | Precisely calibrate light intensity and spatial patterns; use a reference fluorescent dye to map the actual light pattern delivered [9]. |
Research Reagent Solutions
The following table details key materials used in the development and validation of improved optogenetic reagents like optoNodal2.
| Item | Function/Description | Example(s) |
|---|---|---|
| Optogenetic Actuators | Genetically-encoded proteins that control cellular processes with light [27]. | Microbial opsins (Channelrhodopsins, Halorhodopsins), Light-gated receptors (optoNodal2) [27] [9]. |
| Optogenetic Receptors | Engineered signaling components fused to photosensitive domains. | optoNodal2: Cry2-fused Type I receptor & cytosolic CIB1N-fused Type II receptor [9]. |
| Model Organism | In vivo system for testing reagent function and developmental impact. | Zebrafish embryos (Danio rerio) [9]. |
| Mutant Backgrounds | Genetically modified organisms to isolate optogenetic signal from endogenous activity. | Mvg1 and MZoep zebrafish mutants (lack endogenous Nodal signaling) [9]. |
| Validation Biosensors | Reporters for quantifying pathway activation upon light stimulation. | Anti-pSmad2 antibody (immunostaining), In situ hybridization for target genes (gsc, sox32) [9]. |
| Light Delivery System | Hardware for precise spatial and temporal light patterning. | Ultra-widefield patterned illumination microscope, LED plates [9]. |
Experimental Protocols for Validation
Protocol 1: Measuring Dynamic Range and Dose Response
Purpose: To quantify the background (dark) activity and maximum inducibility of your optogenetic reagent.
- Sample Preparation: Inject varying doses (e.g., 10-30 pg) of mRNA encoding the optogenetic receptors into 1-cell stage zebrafish embryos (use Nodal signaling mutants for clean background).
- Light Stimulation: At the desired developmental stage, expose groups of embryos to a range of blue light intensities (e.g., 0 to 50 μW/mm²) for a fixed duration (e.g., 1 hour).
- Fixation and Staining: Fix embryos and perform immunostaining for phosphorylated Smad2 (pSmad2).
- Quantification: Measure nuclear pSmad2 intensity across groups. Plot signal intensity versus light power to determine the dynamic range and saturation point [9].
Protocol 2: Assessing Response Kinetics
Purpose: To characterize the onset and decay kinetics of the light-induced signal.
- Sample Preparation: Inject a standard dose of mRNA into embryos.
- Light Impulse: Deliver a short, saturating pulse of light (e.g., 20 minutes at 20 μW/mm²).
- Time-Point Collection: Fix embryos at multiple time points after the start of the light pulse (e.g., 0, 20, 40, 60, 90 minutes).
- Analysis: Process and stain for pSmad2. Plot the average signaling intensity over time to determine the time to peak response and the time to return to baseline [9].
Experimental Workflow and Signaling Pathway
OptoNodal2 Signaling Pathway
This diagram illustrates the core design and mechanism of the improved optoNodal2 receptors.
Experimental Workflow for Validation
This flowchart outlines the key steps for validating improved optogenetic reagents from initial testing to application.
Frequently Asked Questions (FAQs)
Q1: What are the primary components and approximate cost of a basic DMD-based projection system like μPatternScope? A basic system requires a Digital Micromirror Device (DMD), an optical engine, a high-power LED, a controller board, and intermediary optics. The entire hardware setup for a system like μPatternScope can be assembled for approximately USD 7,000-8,000 [10].
Q2: My projected pattern appears distorted on the sample plane. How can I correct this? Pattern distortion is often a calibration issue. The μPS framework includes a dedicated calibration code routine to compute the precise mapping between the input pattern image (in DMD pixels) and the actual projected pattern as imaged under the microscope. Running this calibration ensures spatially accurate pattern projection [10].
Q3: How can I achieve uniform light intensity across the entire projection field? The μPS hardware is designed using a "telecentric" optical engine which homogenizes incident light from the LED before it reaches the DMD. This design, combined with specific intermediary optics, ensures uniform full field-of-view pattern projection with limited optical distortions [10].
Q4: What software is used to control the μPatternScope, and how flexible is it? The μPS software suite is built on a modular architecture using MATLAB, which is widely available in academic institutions. It provides functions for automating experiments, controlling microscope peripherals, and sending arbitrary pattern images to the DMD. Its open and modular design allows for extensive customization and further software enhancements [10].
Q5: For multi-layer patterning experiments, how is alignment between layers achieved? High-precision alignment in DMD-based systems can be achieved by integrating image sensors. One downward-facing sensor captures alignment marks on the substrate, while an upward-facing sensor determines the relative position between the DMD projection and these marks. Digital image processing then calculates the correct coordinates for patterning subsequent layers, minimizing overlay errors [28].
Troubleshooting Guides
Issue 1: Low Pattern Resolution or Fidelity
| Possible Cause | Diagnostic Steps | Solution |
|---|---|---|
| Incorrect optical focus | Verify the pattern is in focus at the sample plane by imaging a test pattern. | Adjust the position of the projection lenses in the optical path [10]. |
| Sub-optimal objective lens | Check the Numerical Aperture (NA) and magnification of the microscope objective. | Use a high-NA objective lens suitable for the desired resolution [10]. |
| DMD pixel binning | Ensure the software is set to use the native 1080p resolution of the DMD. | Configure the DMD controller to utilize the full resolution of over 2 million micromirrors [10]. |
Issue 2: Insufficient Light Intensity for Cell Stimulation
| Possible Cause | Diagnostic Steps | Solution |
|---|---|---|
| LED power degradation | Measure the optical power density at the sample plane with a photometer. | Replace the LED source or use a higher-power LED. A liquid light guide (LLG)-based assembly allows for easy source exchange [10]. |
| Inefficient optical path | Check for obstructions or misalignments in the light path from the LED to the sample. | Realign optical components and ensure the DMD mirrors are correctly directing light in the "ON" state [10]. |
| Incorrect duty cycle | Verify the Pulse Width Modulation (PWM) settings for the DMD micromirrors. | Increase the PWM duty cycle for the oscillating micromirrors to allow more light through [10]. |
Issue 3: Unresponsive or Inconsistent Cellular Response to Optogenetic Stimulation
| Possible Cause | Diagnostic Steps | Solution |
|---|---|---|
| Dark activity of optogenetic tools | Assess signaling activity in non-illuminated control cells (e.g., via pSmad2 immunostaining for optoNodal). | Use improved optogenetic reagents with reduced dark activity, such as the Cry2/CIB1N-based optoNodal2 system [9]. |
| Mosaicism in cell population | Check for uniform transgene expression across the cell culture. | Use stable genomic integration methods (e.g., Sleeping Beauty transposase) instead of transient transfection to ensure uniform response across the tissue [29]. |
| Sub-optimal stimulation kinetics | Measure the time-course of the optogenetic response after a light impulse. | Select optogenetic tools with faster on/off kinetics suitable for your temporal patterning needs [9]. |
Essential Research Reagent Solutions
The following reagents and materials are critical for implementing DMD-based optogenetic patterning in morphogen research.
| Item | Function / Application | Key Characteristics |
|---|---|---|
| Engineered Optogenetic Cells (e.g., ApOpto) | Enables light-sensitive induction of specific cellular processes (e.g., apoptosis). | Genetically stable, uniform response across population; e.g., ApOpto cells allow blue-light-induced apoptosis for 2D shape patterning [10]. |
| OptoNodal2 Reagents | Allows precise, light-controlled activation of Nodal signaling pathways to mimic morphogen gradients. | Built with Cry2/CIB1N pairs; eliminates dark activity and offers improved response kinetics for high-fidelity patterning [9]. |
| Sleeping Beauty Transposase System | Facilitates stable genomic integration of optogenetic circuits. | Ensures long-term, uniform expression of optogenetic tools, which is crucial for 2D and 3D tissue models [29]. |
| Multi-Color Light Engines | Provides different wavelengths of light for multi-chromatic optogenetic systems. | Enables orthogonal control of multiple cellular pathways; can be attached via liquid light guide (LLG) [10]. |
Experimental Protocols
Protocol 1: System Calibration for Spatial Fidelity
This protocol ensures the projected light pattern matches the intended digital design on the sample plane [10].
- Generate Calibration Pattern: Create a digital image of a known pattern (e.g., a grid or array of dots) using the μPS software module.
- Project and Capture: Project the pattern onto the sample plane and capture an image of it using the microscope's camera.
- Compute Transformation: Run the calibration code routine to compute the mapping function between the input DMD pixels and the captured image pixels.
- Apply Correction: Use this transformation to pre-warp all subsequent input patterns, ensuring geometric accuracy during experiments.
Protocol 2: Calibrating Light Intensity for Morphogen-Mimicking Patterns
Accurate control of light intensity is critical for mimicking subtle morphogen gradients [9].
- Measure Baseline: Use a photometer to measure the optical power density (e.g., in µW/mm²) at the sample plane for a fully illuminated field.
- Establish Dose-Response: Expose engineered cells (e.g., optoNodal2) to a range of light intensities (e.g., 0-20 µW/mm²) for a fixed duration.
- Quantify Response: Measure the downstream biological response (e.g., via pSmad2 immunostaining or SEAP reporter assay) for each intensity level.
- Create Look-up Table: Build a table that correlates the desired signaling activity level to the required DMD PWM duty cycle and LED power, enabling predictive patterning.
Light Intensity Calibration Workflow
System Setup and Signaling Pathway Diagrams
DMD Projection System Setup
OptoNodal2 Signaling Pathway
Frequently Asked Questions (FAQs)
1. What is the core purpose of calibration in optogenetic morphogen research? Calibration is essential to convert arbitrary, user-defined digital light patterns into precise, biologically meaningful signaling activity. It ensures that the intensity, duration, and spatial distribution of light delivered to the sample reliably produce a specific level of pathway activation (e.g., Smad2 phosphorylation in the Nodal pathway), allowing for the quantitative study of morphogen function [9].
2. My optogenetic system has high background activity ("dark activity") even without illumination. How can I troubleshoot this? High dark activity is a common issue with some first-generation optogenetic reagents. You can address this by:
- Upgrading Reagents: Switch to next-generation reagents, such as the improved "optoNodal2" system, which uses Cry2/CIB1N heterodimerizing pairs and cytosolic sequestration of the Type II receptor to drastically reduce spurious signaling in the dark [9].
- Optimizing Expression Levels: Titrate the mRNA or protein concentration of your optogenetic constructs to the lowest level that still provides a robust light-induced response [9].
3. How do I calibrate my light source to ensure accurate and reproducible measurements? Light source calibration is critical for quantitative experiments.
- Use a NIST-Traceable Standard: Calibrate your spectrometer or measurement device against a standard with known output. Be aware that calibration light sources themselves can degrade over time (e.g., 0.1% per hour at 350 nm) [4].
- Calibrate the Entire System: An absolute irradiance calibration must include the entire optical path (spectrometer, fiber optics, and front-end optics like a cosine corrector). Disconnecting and reattaching any component can invalidate the calibration [4].
- Maintain Calibration: Implement a regular recalibration schedule based on the operational hours of your light source to account for output drift [4].
4. The kinetic response of my optogenetic pathway seems slower than expected. What could be the cause? Response kinetics are determined by both the optogenetic tool and the inherent biology of the signaling pathway.
- Tool Selection: The photo-associating domain used in your construct dictates kinetics. Tools based on Cry2/CIB1N typically have faster dissociation kinetics (on the order of minutes) compared to some LOV-domain-based tools, which can dissociate more slowly and lead to sustained signaling after light cessation [9].
- Biological Delay: Account for the time required for downstream signaling events, such as transcription, translation, and protein maturation, when using transcriptional reporters. Fast optogenetic perturbations can help isolate the immediate signaling kinetics from these slower downstream processes [30].
5. How can I report my data to allow for direct comparison with other studies and platforms? Standardized data reporting is key for reproducibility and collaboration.
- Use Standard Units: Convert arbitrary fluorescence and light scatter intensities into standardized units. For fluorescence, use Molecules of Equivalent Soluble Fluorophore (MESF). For scatter, calibrate to particle size (e.g., nanometers) [31].
- Detailed Methodology: Adhere to community standards (like MIFlowCyt for flow cytometry) and provide comprehensive details on instrument configurations, laser powers, and acquisition settings [31].
Troubleshooting Guides
Table 1: Common Experimental Issues and Solutions
| Problem | Potential Cause | Solution |
|---|---|---|
| Low Signal-to-Noise Ratio | Insufficient light intensity or reagent expression. | Perform a light power series; optimize mRNA injection dose or cell line expression [9]. |
| Spatial Patterning Not Sharp | Light scattering in tissue or incorrect digital mask. | Use a calibration slide to verify pattern fidelity; consider using longer wavelength light or clearing agents [9]. |
| High Cell-to-Cell Variability | Inconsistent delivery of optogenetic constructs. | Use stable transgenic lines instead of transient transfection/injection where possible [30]. |
| Irreproducible Results Between Runs | Drift in light source output or uncalibrated system. | Regularly calibrate light source with a spectrometer; use internal controls in every experiment [4]. |
| Unexpected Gene Expression Patterns | Indirect or delayed feedback mechanisms. | Use fast, acute optogenetic perturbations and live imaging to distinguish direct from indirect effects [30]. |
Table 2: Calibration Standards and Their Applications
| Calibration Standard | Application | Key Metric | Considerations |
|---|---|---|---|
| NIST-Traceable Polystyrene Beads | Light scatter calibration for particle size [31]. | Diameter (nm) | Use a bead mixture covering the expected size range of your biological particles. |
| MESF Beads | Fluorescence intensity calibration [31]. | Molecules of Equivalent Soluble Fluorophore | Choose beads conjugated with the same fluorophore used in your experiment (e.g., PE, GFP). |
| Atomic Emission Lamps (Hg, Ar) | Wavelength calibration for spectrometers [4]. | Wavelength (nm) | Provides known spectral lines for precise calibration across the detector's range. |
| NIST-Traceable Irradiance Lamp | Absolute irradiance calibration [4]. | µW/cm²/nm | The gold standard for quantifying the absolute intensity of your light source. |
The Scientist's Toolkit: Key Research Reagent Solutions
Table 3: Essential Materials for Optogenetic Morphogen Research
| Item | Function | Example in Context |
|---|---|---|
| Optogenetic Receptors | Engineered receptors that dimerize in light to activate signaling. | OptoNodal2 (Cry2/CIB1N-fused receptors): Used to activate Nodal signaling with blue light in zebrafish [9]. |
| Light-Patterning Instrument | Microscope or widefield system to project defined light patterns. | Custom ultra-widefield microscopy: Allows parallel light patterning in up to 36 live zebrafish embryos [9]. |
| Live Biosensors | Reporter constructs for real-time imaging of signaling activity. | MS2-MCP system tagging mRNA: Allows live imaging of transcriptional activity in response to optogenetic Bicoid in fly embryos [30]. |
| Calibrated Beads | Particles of known size and fluorescence for system calibration. | Polystyrene & silica NIST-traceable beads: Used to convert side-scatter signal to particle diameter (nm) in flow cytometry [31]. |
| Signaling Mutants | Genetically modified organisms lacking endogenous pathway activity. | Mvg1 or MZoep mutant zebrafish: Provide a clean background to assess the function of optogenetic Nodal reagents without confounding endogenous signaling [9]. |
Experimental Protocols
Protocol 1: Calibrating an Optogenetic Signaling Dose-Response Curve
This protocol outlines how to establish a relationship between light intensity and pathway activation.
Key Materials:
- Embryos or cells expressing your optogenetic construct.
- Calibrated blue light source (e.g., LED plate or patterned illuminator).
- Equipment for fixing and immunostaining.
- Antibody against the immediate downstream phospho-target (e.g., anti-pSmad2 for Nodal pathway).
Methodology:
- Prepare Samples: Generate samples with the optogenetic system (e.g., inject zebrafish embryos with optoNodal2 mRNA [9]).
- Apply Light Stimulus: Expose groups of samples to a range of light intensities (e.g., from 0 to 20 μW/mm²) for a fixed duration (e.g., 1 hour).
- Fix and Stain: At the end of stimulation, immediately fix the samples and perform immunostaining for the activated pathway readout (pSmad2).
- Quantify and Plot: Measure the fluorescence intensity of the phospho-signal in the relevant region of each sample. Plot the signal intensity against the applied light power to generate a dose-response curve. This curve is your primary calibration for subsequent experiments [9].
Protocol 2: System Suitability Test Using Scatter and Fluorescence Calibration
This protocol ensures your flow cytometry system is properly calibrated for detecting and analyzing submicron particles like extracellular vesicles or viruses, which is analogous to analyzing small biological structures in optogenetic models.
Key Materials:
- NIST-traceable polystyrene beads of various sizes (e.g., 81 nm to 600 nm).
- MESF beads for the relevant fluorescence channel (e.g., PE MESF beads).
- Calibration software (e.g., FCMPASS [31]).
Methodology:
- Acquire Beads: Run the NIST-traceable size beads and the MESF beads on your flow cytometer using the same settings for your biological samples.
- Light Scatter Calibration: Input the median scatter intensity of each bead size into the calibration software. The software will use Mie theory to generate a model that converts scatter intensity to particle diameter [31].
- Fluorescence Calibration: Input the median fluorescence intensity of the MESF bead populations. The software will generate a linear model to convert fluorescence intensity to MESF units [31].
- Validate with Biological Sample: Run your stained biological sample (e.g., a fluorescent virus). Apply the calibration models to report its size in nanometers and fluorescence in MESF, ensuring data is standardized and comparable across platforms [31].
Experimental Workflow and Signaling Pathway Diagrams
Optogenetic Calibration Workflow
Nodal Signaling Pathway
The concept of "parallel patterning" refers to the coordinated establishment of spatial organization in two distinct experimental contexts: in vitro within multi-well plates used for High-Content Screening (HCS) and in vivo within developing embryos. In HCS, automated microscopy combines with multi-parametric imaging to quantify complex cellular events, generating rich datasets on hundreds of cellular features simultaneously [32]. This approach allows researchers to study intricate biological processes like protein translocation, neurite outgrowth, and cell differentiation in a high-throughput format [33]. Meanwhile, embryonic patterning represents the fundamental biological process where spatial information is established during development, primarily through signaling gradients and regulatory networks [34].
The strategic parallel between these systems enables powerful research applications. By calibrating light-induced patterns in multi-well systems to mimic endogenous morphogen gradients in embryos, researchers can create physiologically relevant assays for drug discovery and basic biological research. High-content screening bridges the gap between high information content and high throughput in biological experiments, making it particularly valuable for investigating complex patterning events [32]. This technical framework supports applications from lead compound identification to toxicity prediction and target validation throughout the drug discovery pipeline [33].
Frequently Asked Questions (FAQs)
Q1: What are the most critical factors for maintaining consistency in patterning assays across large-scale screens?
Consistency in large-scale patterning assays depends heavily on three factors: (1) cellular model reproducibility, (2) environmental control, and (3) assay plate selection. Variables that might be negligible in traditional assays become significant sources of variance in HCS. Differentiation assays are acutely sensitive to changes in proliferation rates, and factors like mechanical forces or thermal fluctuation can dramatically affect cellular stress responses [33]. For plate selection, HCS requires plates with excellent optical quality and suitable environments for cellular growth to achieve maximal scan performance. Clear flat-bottom black plates are recommended for fluorescence-based reading technologies [32].
Q2: How can I determine if my observed patterning defects are due to biological mechanisms or technical artifacts?
Systematic troubleshooting should include both positive and negative controls, assessment of multi-parametric data, and evaluation of temporal patterns. For HCS assays specifically, off-target effects such as cytotoxicity or compound autofluorescence are often detectable in the rich multiparametric data, allowing researchers to distinguish true biological effects from technical artifacts [33]. Additionally, consistency across replicates and dose-response relationships can help distinguish true biological effects from random technical errors.
Q3: What optimization strategies can improve signal-to-background in live-cell patterning assays?
Optimization strategies include using confocal imaging to reduce background noise, employing cell surface markers for co-localization, implementing multiplexed readouts, and carefully selecting fluorescent probes. Confocal imaging enables generation of high-resolution images by sampling from thin cellular sections and rejecting out-of-focus light, thus improving signal-to-noise ratio compared to conventional epi-fluorescence microscopy [32]. Additionally, because HCS provides more than just the endpoint, it can often identify the source of background issues that might be missed with single-endpoint assays [33].
Q4: How do I validate that my in vitro patterning results have relevance to in vivo embryonic processes?
Validation requires multiple complementary approaches, including pathway component analysis, phenotypic comparison, and functional genetic validation. Researchers should compare the signaling pathways active in their in vitro system to those known to operate in vivo. For example, in insect embryos, Toll signaling acts ventrally to specify mesoderm and neurogenic ectoderm, while BMP signaling acts dorsally to specify extraembryonic tissues and dorsal ectoderm [34]. Demonstrating that the same pathway components operate similarly in both systems strengthens the biological relevance.
Troubleshooting Guides
Common Patterning Issues and Solutions
Table 1: Troubleshooting Common Patterning Problems
| Problem | Potential Causes | Solutions | Prevention Tips |
|---|---|---|---|
| High well-to-well variability | Inconsistent cell seeding density; edge effects in microplates; temperature gradients | Automate cell seeding; use plate maps that randomize treatments; implement plate balancing controls; use specialized microplates to minimize evaporation | Validate seeding consistency; use environmental monitors in incubators; pre-warm media and reagents |
| Poor pattern resolution | Suboptimal morphogen concentration; incorrect light exposure parameters; inadequate contrast agents | Perform gradient optimization with multiple concentrations; conduct light calibration tests; validate probes with known controls | Establish dose-response curves for all patterning molecules; regularly calibrate imaging and light patterning equipment |
| Weak or inconsistent signaling gradients | Unstable morphogen-mimetics; improper diffusion time; degradation of components | Stabilize morphogens with carrier proteins; optimize incubation time; include protease inhibitors in assays; use more stable analogs | Use fresh reagent preparations; establish stability profiles for critical components; implement quality control checks |
| Inability to detect expected phenotypic changes | Insufficient assay sensitivity; wrong timepoint for readout; inadequate detection method | Increase sample size; perform time-course experiments; employ more sensitive detection reagents; add amplification steps | Conduct pilot studies to define optimal measurement windows; validate assays with positive controls known to induce the phenotype |
Data Quality and Analysis Issues
Table 2: Addressing Data Quality Challenges
| Data Issue | Root Cause | Corrective Actions | Quality Metrics |
|---|---|---|---|
| Low Z'-factor or poor assay window | High background signal; low dynamic range; excessive variability | Optimize staining protocols; reduce autofluorescence; increase signal strength through amplification; review cell health | Z' > 0.5; Signal-to-background > 3:1; Coefficient of variation < 20% |
| Inconsistent image analysis results | Poor segmentation parameters; suboptimal feature selection; cell clustering | Manually review and adjust segmentation settings; validate features against manual counts; adjust cell detection parameters | >90% accuracy in cell detection; <5% false positive/false negative rates; high correlation with manual counts |
| Failure to detect expected subpopulations | Insensitive gating strategies; overlapping populations; rare cell types | Use dimensionality reduction techniques (t-SNE, UMAP); implement unsupervised clustering; increase cell numbers for rare events | Clear population separation in visualization; statistical significance in subpopulation differences |
Experimental Protocols
Workflow for Parallel Patterning Assay Development
The following diagram illustrates the integrated experimental workflow for developing parallel patterning assays that combine multi-well plate screening with embryo validation:
Calibrating Light Intensity for Morphogen-Mimicking Patterns
Purpose: To establish reproducible light-induced patterning that accurately mimics endogenous morphogen gradients observed in embryonic systems.
Materials:
- High-content screening system with precise light control capabilities
- Photosensitive compound or optogenetic construct
- Validated cell line expressing relevant receptors
- Appropriate multi-well plates (black-walled, clear bottom)
- Calibration dyes for light intensity mapping
Procedure:
- Light Source Characterization:
- Map light intensity across entire well area using calibrated photodetector
- Document spatial heterogeneity and identify uniform illumination regions
- Establish intensity-illumination time relationship to determine total energy delivery
Dose-Response Establishment:
- Set up 8-point dilution series of reference morphogen in assay plates
- Treat cells for predetermined time based on pathway kinetics
- Fix and stain for primary readout (e.g., phosphorylated pathway components)
- Image and quantify response to establish reference gradient
Light Pattern Optimization:
- Program multiple light intensity patterns covering expected dynamic range
- Apply patterns to photosensitive system with constant exposure time
- Fix and process cells in parallel with reference morphogen treatments
- Quantify response and map to reference gradient
Validation:
- Compare pathway activation between light-induced and morphogen-induced patterning
- Assess spatial precision using line-scan analysis across pattern boundaries
- Verify biological response through downstream gene expression or phenotypic changes
Troubleshooting Notes:
- If pattern boundaries are diffuse, check focusing stability and reduce scattering
- If response is weaker than expected, verify photosensitive compound activity and cell viability
- If well-to-well variability is high, ensure consistent cell density and medium volume
Embryonic Patterning Conservation Analysis
Purpose: To determine the evolutionary conservation of patterning mechanisms between model systems and validate in vitro findings.
Materials:
- Embryos of relevant model organisms (Drosophila, Gryllus, etc.)
- Injection apparatus for embryos
- Morpholinos, RNAi constructs, or chemical inhibitors
- Whole-mount in situ hybridization reagents
- Confocal or stereomicroscope with imaging capabilities
Procedure:
- Pathway Component Identification:
- Search transcriptome databases for orthologs of known patterning genes
- Verify expression patterns through in situ hybridization or immunohistochemistry
- Confirm phylogenetic relationships through sequence alignment
Functional Testing:
- Design loss-of-function approaches (RNAi, morpholinos, CRISPR)
- Microinject embryos at appropriate developmental stages
- Incubate embryos to patterning stages under controlled conditions
- Score phenotypic consequences using standardized staging systems
Comparative Analysis:
- Document conserved and divergent phenotypic outcomes
- Analyze pathway interactions through double knockdown experiments
- Compare expression domains of downstream target genes
Interpretation Guidelines:
- Conserved phenotypes suggest fundamental patterning mechanisms
- Divergent phenotypes may reflect evolutionary adaptations or system-specific rewiring
- Partial conservation indicates core pathway function with modified regulation
Signaling Pathways in Parallel Patterning
The following diagram illustrates the core signaling pathways involved in dorsoventral patterning across insect embryos, demonstrating both conserved and divergent elements that inform parallel patterning approaches:
The Scientist's Toolkit: Research Reagent Solutions
Table 3: Essential Research Reagents for Parallel Patterning Studies
| Reagent Category | Specific Examples | Primary Function | Application Notes |
|---|---|---|---|
| Cell Lineage Markers | HCS NuclearMask stains, Hoechst 33342, DAPI, HCS CellMask stains | Nuclear and cellular segmentation; cell counting and viability assessment | Essential for automated image analysis; choose based on compatibility with other fluorophores and fixation methods [35] |
| Viability & Cytotoxicity Probes | HCS LIVE/DEAD Green Kit, CellROX oxidative stress reagents, Click-iT TUNEL assay | Assessment of cell health; discrimination of specific death mechanisms; oxidative stress measurement | Critical for distinguishing specific patterning effects from general toxicity; multiplex with pathway-specific markers [35] |
| Metabolic & Functional Reporters | FluxOR potassium channel assay, ThiolTracker Violet, HCS Mitochondrial Health Kit | Ion flux detection; glutathione and thiol group quantification; mitochondrial function assessment | Provides mechanistic insights beyond morphological changes; enables multiparametric profiling [35] |
| Proliferation & Synthesis Markers | Click-iT EdU HCS assays, Click-iT nascent RNA and protein synthesis kits | S-phase detection; DNA, RNA, and protein synthesis measurement | Enables cell cycle staging and direct measurement of biosynthetic activity in response to patterning cues [35] |
| Pathway-Specific Reporters | Organelle Lights reagents, BacMam gene delivery, phospho-specific antibodies | Subcellular localization tracking; organelle-specific labeling; signaling activation detection | Allows direct monitoring of pathway activation in response to engineered patterns; compatible with live-cell imaging [32] [35] |
| Differentiation & Specialization Markers | LipidTOX dyes, neurite outgrowth markers, cell type-specific antibodies | Adipocyte staining; neuronal process quantification; lineage specification assessment | Crucial for evaluating functional outcomes of patterning protocols; enables quantification of complex morphological changes [32] [35] |
Optogenetics is a genetic technique that enables the control of cellular activity using light. By introducing light-sensitive proteins (opsins) into specific cells, researchers can activate or inhibit biological pathways with high precision in both time and space [36] [37]. This approach has revolutionized developmental biology by allowing precise manipulation of morphogen signaling patterns that guide embryonic development [12]. In the context of directing cell fate and tissue morphogenesis, optogenetics provides an unprecedented tool to create designer signaling patterns in live embryos, mimicking natural morphogen gradients that instruct cells to adopt specific fates based on their position [12].
The core principle involves fusing light-sensitive protein domains to signaling pathway components. When illuminated with specific wavelengths, these domains undergo conformational changes that activate downstream signaling cascades [12] [37]. For example, in the Nodal signaling pathway—a key morphogen in vertebrate embryonic patterning—optogenetic tools have been developed by fusing Nodal receptors to the light-sensitive heterodimerizing pair Cry2/CIB1N [12]. This innovative approach allows researchers to bypass natural ligand distribution and directly control pattern formation with light patterns, opening new possibilities for systematically exploring how signaling patterns guide embryonic development [12].
Frequently Asked Questions (FAQs)
Q1: What are the primary advantages of using optogenetics over traditional methods for studying morphogen gradients? Optogenetics offers several key advantages: (1) Millisecond precision in controlling signaling activity, allowing researchers to manipulate dynamics with unprecedented temporal resolution [36] [38]; (2) Spatial precision at subcellular resolution, enabling creation of custom signaling patterns that cannot be achieved with genetic knockouts or pharmacological interventions [12]; (3) Reversible control without permanent genetic alterations, as light activation is typically transient [37]; (4) Minimal pleiotropic effects compared to traditional genetic manipulations since only targeted pathways are activated by light [12].
Q2: How do I select the appropriate opsin for controlling specific signaling pathways? Opsin selection depends on your research goals and the pathway you wish to control [38]. For pathway activation, channelrhodopsins like ChR2 (responsive to ~470nm blue light) are commonly used [36]. Newer optogenetic reagents like optoNodal2 use Cry2/CIB1N pairs with improved dynamic range and kinetics for controlling developmental signaling pathways [12]. Consider these factors: (1) Excitation wavelength - blue-light sensitive opsins offer faster kinetics while red-shifted opsins like JAWS (~620nm) enable deeper tissue penetration [36]; (2) Dynamic range - the ratio between light-activated and dark activity should be maximized [12]; (3) Kinetic properties - some opsins have faster on/off rates suitable for precise temporal control [37].
Q3: What equipment is essential for implementing optogenetic control of morphogen patterns? Essential equipment includes: (1) Light source with appropriate wavelength and intensity control [36]; (2) Spatial light modulation system for creating precise light patterns (e.g., digital mirror devices or liquid crystal spatial light modulators) [37]; (3) Targeting system for opsin expression (viral vectors or transgenic models) [36] [38]; (4) Imaging system for monitoring responses in real-time [12]. For sophisticated patterning across multiple samples, custom ultra-widefield microscopy platforms can enable parallel light patterning in up to 36 embryos simultaneously [12].
Q4: How can I troubleshoot poor pattern resolution in my optogenetic experiments? Poor pattern resolution can result from several factors: (1) Light scattering in tissue - consider using red-shifted opsins for deeper penetration [36]; (2) Insufficient spatial confinement of light patterns - optimize your optical system and consider two-photon excitation for improved spatial precision [37]; (3) Background activity of optogenetic reagents - use improved reagents with lower dark activity, such as optoNodal2 which eliminates dark activity [12]; (4) Insufficient expression of optogenetic constructs - optimize viral titers or use transgenic lines with stronger expression [38].
Troubleshooting Common Experimental Issues
Low Signal-to-Noise Ratio in Patterned Activation
Table: Troubleshooting Low Signal-to-Noise Ratio
| Issue | Potential Cause | Solution |
|---|---|---|
| High background signaling | Dark activity of optogenetic reagent | Use improved reagents like optoNodal2 with sequestered type II receptor to cytosolic region [12] |
| Weak activation | Insufficient light intensity or improper wavelength | Calibrate light power at sample site; ensure match with opsin absorption peak [38] |
| Non-specific activation | Light scattering beyond target area | Use spatial light modulators with beam shaping; employ two-photon activation for confined volumes [37] |
| Variable expression | Inconsistent viral transduction | Standardize viral preparation and injection protocols; use transgenic lines for uniform expression [38] |
Inconsistent Biological Responses Across Samples
Table: Addressing Response Variability
| Observation | Diagnostic Approach | Corrective Action |
|---|---|---|
| Variable target gene expression | Monitor signaling dynamics with live reporters | Include internal controls for expression efficiency; standardize developmental staging [12] |
| Incomplete pattern formation | Quantify pattern fidelity across multiple samples | Optimize illumination uniformity; pre-calibrate light patterns using reference samples [12] |
| Off-target developmental effects | Control for phototoxicity and heating | Include light-only controls; modulate pulse duration and frequency to minimize energy deposition [37] |
| Temporal delays in response | Characterize activation kinetics | Select opsins with appropriate kinetics; pre-activate pathway before critical developmental windows [12] |
Experimental Protocols for Key Applications
Protocol: Patterning Nodal Signaling in Zebrafish Embryos
This protocol describes using optoNodal2 to create custom Nodal signaling patterns in live zebrafish embryos, enabling precise control over mesendodermal patterning [12].
Materials Required:
- OptoNodal2 constructs (type I and II receptors fused to Cry2/CIB1N)
- Zebrafish embryos at appropriate developmental stage
- Widefield patterned illumination system capable of parallel processing
- Standard molecular biology reagents for mRNA synthesis
- Microinjection setup for embryo manipulation
Procedure:
- Prepare optogenetic constructs: Obtain plasmids encoding improved optoNodal2 reagents with type II receptor sequestered to cytosol to enhance dynamic range [12].
- Synthesize mRNA: Transcribe capped mRNA from linearized DNA templates using appropriate RNA synthesis kits.
- Microinject embryos: Inject 1-2 nL of mRNA mixture into 1-cell stage zebrafish embryos. Include fluorescent markers to identify successfully injected embryos.
- Calibrate light patterns: Prior to experiments, calibrate illumination system using power meter and reference samples. Design light patterns using spatial light modulator software.
- Apply patterned illumination: At desired developmental stage, expose embryos to custom light patterns. For Nodal patterning, this typically occurs during gastrulation stages.
- Monitor responses: Use live imaging to track downstream responses such as pSmad2 nuclear localization or target gene expression.
- Validate patterns: Fix subsets of embryos at different timepoints for immunohistochemistry or in situ hybridization to quantify pattern fidelity.
Technical Notes:
- The improved optoNodal2 system eliminates dark activity and improves response kinetics without sacrificing dynamic range [12].
- For parallel processing, custom ultra-widefield microscopy can pattern up to 36 embryos simultaneously [12].
- Optimal results are obtained when illumination patterns are synchronized with natural developmental windows for Nodal signaling.
Protocol: Calibrating Light Intensity for Morphogen-Mimicking Patterns
Accurate light intensity calibration is essential for creating biologically relevant morphogen patterns that properly direct cell fate decisions [38].
Materials Required:
- Spectrometer or power meter
- Neutral density filters
- Reference samples with uniform opsin expression
- Live signaling reporters (e.g., GFP under pathway-specific response elements)
Procedure:
- Characterize opsin sensitivity: Determine the activation threshold and saturation intensity for your specific opsin. This varies significantly between different optogenetic tools.
- Map intensity distribution: Using a calibrated power meter, measure light intensity across the entire field of view to identify and correct for illumination non-uniformities.
- Establish dose-response relationship: Expose reference samples to systematically varied light intensities and quantify downstream responses (e.g., nuclear translocation of transcription factors, target gene expression).
- Create intensity gradients: Program spatial light modulators to generate controlled intensity gradients that mimic natural morphogen distributions.
- Validate biological responses: Apply calibrated gradients to experimental samples and assess cell fate decisions using molecular markers.
- Iteratively refine patterns: Based on initial results, adjust intensity profiles to achieve desired patterning outcomes.
Technical Notes:
- Gradually increase light power while measuring at the target site to maintain precision and avoid unintended activation [38].
- For inhibitory opsins, excessive light intensity can sometimes cause paradoxical activation, so careful titration is essential [38].
- Consider light attenuation in tissue when calculating required intensities; red-shifted opsins typically penetrate deeper [36].
Research Reagent Solutions
Table: Essential Research Reagents for Optogenetic Control of Morphogenesis
| Reagent Category | Specific Examples | Key Features & Applications |
|---|---|---|
| Activating Opsins | Channelrhodopsin-2 (ChR2), Chrimson, ReaChR | ChR2: Fast activation with blue light (~470nm); Chrimson/ReaChR: Red-shifted activation for deeper penetration [36] |
| Inhibitory Opsins | Halorhodopsin (NpHR), Archaerhodopsin (Arch), JAWS | JAWS: Red-light inhibited for deeper tissue penetration; effective for silencing specific neuron populations [36] |
| Optogenetic Signaling Tools | optoNodal2, optoRTKs | optoNodal2: Improved dynamic range for Nodal signaling patterning; eliminates dark activity [12] |
| Expression Systems | AAV vectors, Lentivirus, Transgenic models | AAV: Specific cell-type targeting; Transgenic models: Stable expression across generations [36] [38] |
| Light Delivery Components | Optical cannulas, Fiber optics, Spatial light modulators | Spatial light modulators: Enable complex pattern generation; Optical cannulas: Essential for freely-behaving experiments [36] [37] |
Signaling Pathways and Experimental Workflows
Quantitative Data Reference Tables
Opsin Properties and Performance Characteristics
Table: Comparison of Optogenetic Tools for Morphogen Control
| Opsin/ Tool | Excitation Wavelength | Function | Dynamic Range | Kinetics | Primary Applications |
|---|---|---|---|---|---|
| ChR2 | 470nm | Activation | Moderate | Fast | General neuronal activation; pathway control [36] |
| Chrimson | 590nm | Activation | High | Medium | Deep tissue penetration; combinatorial experiments [36] |
| JAWS | 620nm | Inhibition | High | Medium | Deep tissue inhibition; behavioral studies [36] |
| optoNodal2 | 450-490nm | Nodal signaling activation | High (improved) | Improved kinetics | Mesendodermal patterning in zebrafish [12] |
| GtACR2 | 470nm | Inhibition | Moderate | Fast | Neuronal silencing; pathway inhibition [36] |
Light Intensity and Contrast Requirements
Table: Technical Specifications for Optogenetic Illumination
| Parameter | Minimum Requirement | Optimal Range | Measurement Method | Biological Consideration |
|---|---|---|---|---|
| Light intensity | Varies by opsin | Titrated to biological response | Power meter at sample site | Sufficient for activation without phototoxicity [38] |
| Spatial resolution | Cellular scale (~10μm) | Subcellular (<5μm) | Point spread function measurement | Matches natural morphogen gradient scales [12] |
| Temporal resolution | Seconds to minutes | Milliseconds to seconds | Fast shutter/detector systems | Matches natural signaling dynamics [37] |
| Pattern contrast | 3:1 intensity ratio | >10:1 intensity ratio | Calibration with reference samples | Determines sharpness of fate boundaries [12] |
| Wavelength specificity | ±20nm | ±10nm | Bandpass filters | Minimizes cross-talk with imaging channels [36] |
Solving Patterning Challenges: From Dark Activity to Optical Fidelity
Minimizing Dark Activity through Receptor Engineering and Cytosolic Sequestration
A fundamental challenge in optogenetic research is dark activity—the unintended, background signaling of optogenetic receptors in the absence of light stimulation. This phenomenon is particularly problematic in morphogen-mimicking pattern research, where precise spatial and temporal control of signaling is essential for reproducing developmental gradients. Dark activity can obscure delicate patterning experiments, reduce dynamic range, and lead to misinterpretation of results. Fortunately, recent advances in receptor engineering and subcellular localization strategies have provided powerful solutions to this persistent problem.
Table 1: Common Problems and Consequences of Dark Activity in Morphogen Research
| Problem | Impact on Experiments | Effect on Morphogen Patterning |
|---|---|---|
| Background signaling in dark conditions | Reduced signal-to-noise ratio | Ectopic pattern formation |
| Limited dynamic range | Diminished response to actual light stimulus | Blurred boundaries between pattern domains |
| Spurious pathway activation | Difficulty interpreting experimental results | Inaccurate positional information |
| Inability to control timing precisely | Compromised kinetic studies | Disrupted temporal patterning dynamics |
Frequently Asked Questions (FAQs)
Q1: What exactly is "dark activity" in optogenetic systems?
Dark activity refers to the background signaling that occurs in optogenetic receptors even in the absence of light stimulation. This unwanted activity manifests as pathway activation when the system should be completely off, reducing the dynamic range and precision of optogenetic tools. For morphogen patterning research, this is particularly problematic as it can lead to ectopic pattern formation and blurred domain boundaries.
Q2: Why is minimizing dark activity particularly important for morphogen-mimicking patterns?
Morphogen gradients function through precise concentration-dependent signaling, where slight variations in signal intensity can specify completely different cell fates. Dark activity introduces background noise that disrupts this precise interpretation of positional information, compromising the integrity of patterning experiments and making it difficult to establish clear thresholds for fate specification [8].
Q3: What are the main engineering strategies to reduce dark activity?
The two most effective strategies are: (1) replacing photosensory domains with improved variants that exhibit lower basal interaction, and (2) implementing cytosolic sequestration of receptors in their inactive state. These approaches can be combined for synergistic reduction of dark activity while maintaining robust light-induced responses.
Q4: How can I quantify the improvement in dark activity reduction in my system?
The most straightforward method is to compare signaling output between dark and light conditions for both original and engineered systems. Calculate the fold induction (light/dark activity ratio) and absolute background levels in the dark. Immunostaining for pathway activation markers (e.g., pSmad2 for Nodal signaling) in non-illuminated conditions provides direct visualization of residual dark activity [9].
Troubleshooting Guides
Problem: High Background Signaling in Dark Conditions
Symptoms: Detectable pathway activity in non-illuminated samples, reduced fold induction upon light stimulation, ectopic pattern formation outside illuminated regions.
Table 2: Troubleshooting Steps for High Background Signaling
| Step | Action | Expected Outcome |
|---|---|---|
| 1 | Verify receptor expression levels | Ensure optimal expression (neither too high nor too low) |
| 2 | Test different photosensory domains | Replace LOV domains with Cry2/CIB1 pairs where applicable |
| 3 | Implement cytosolic sequestration | Remove membrane localization motifs from type II receptors |
| 4 | Optimize illumination parameters | Adjust light intensity and duration to minimize leakage |
| 5 | Consider alternative optogenetic systems | Evaluate PhoBIT2 or similar next-generation tools |
Solution Approach: Implement the optoNodal2 strategy, which replaces LOV domains with Cry2/CIB1 pairs and removes the myristoylation motif from the type II receptor to enable cytosolic sequestration. This approach dramatically reduced dark activity across a wide range of receptor expression levels while maintaining robust light-induced signaling [9].
Experimental Validation:
- Transfect cells with engineered receptor system
- Maintain parallel samples in complete darkness for 24 hours
- Fix and stain for pathway-specific phosphorylation markers (e.g., pSmad2 for Nodal pathways)
- Quantify nuclear localization of transcription factors compared to negative controls
- Compare with light-stimulated samples to calculate fold induction
Problem: Slow Response Kinetics After Dark Activity Reduction
Symptoms: Delayed signaling onset after illumination initiation, prolonged signaling after illumination cessation, inability to mimic natural morphogen dynamics.
Solution Approach: The Cry2/CIB1 system offers improved kinetics compared to LOV domains. In direct comparisons, optoNodal2 receptors reached maximal pSmad2 levels approximately 35 minutes after stimulation and returned to baseline about 50 minutes later, while LOV-based systems continued to accumulate signaling for at least 90 minutes post-illumination [9].
Protocol for Kinetic Characterization:
- Transfer receptor-expressing cells to darkness for 12 hours to establish baseline
- Apply 20-minute impulse of saturating blue light (20 μW/mm²)
- Fix samples at multiple timepoints (0, 15, 30, 45, 60, 90, 120 minutes) post-stimulation
- Process for phospho-specific immunostaining
- Quantify signal intensity and calculate activation/decay half-lives
Problem: Inconsistent Patterning Results Across Biological Replicates
Symptoms: Variable boundary positions in morphogen patterning experiments, inconsistent threshold responses, non-reproducible pattern elements between experiments.
Solution Approach: Ensure consistent receptor expression levels and implement standardized dark adaptation protocols before patterning experiments. The engineered optoNodal2 system showed consistent performance across a wide range of mRNA dosages (up to 30 pg per receptor) when maintained in proper dark conditions [9].
Standardization Protocol:
- Establish clonal cell lines with stable receptor expression
- Implement mandatory 12-hour dark adaptation before all patterning experiments
- Use standardized light calibration protocols with power measurements
- Include internal patterning controls in each experiment
- Utilize automated patterning systems like μPatternScope for reproducibility [10]
Research Reagent Solutions
Table 3: Essential Research Reagents for Minimizing Dark Activity
| Reagent/Tool | Function | Application Examples |
|---|---|---|
| Cry2/CIB1 photodimerizer system | Blue light-induced heterodimerization with minimal dark activity | optoNodal2 receptors, PhoBIT2 systems [9] [39] |
| Cytosolic sequestration constructs | Receptor mislocalization in dark state | Membrane motif removal from type II receptors [9] |
| PhoBIT systems (ssrA-sspB based) | Alternative optogenetic platform with low basal activity | GPCR signaling, CRISPRi control, immune signaling [39] |
| μPatternScope or similar DMD systems | High-resolution spatial light patterning | 2D tissue patterning, precise morphogen gradient simulation [10] |
| pSmad2/3 antibodies | Quantitative readout of pathway activity | Validation of dark activity reduction in TGF-β/Nodal pathways [9] |
| Nuclear-cytoplasmic segmentation tools | Automated quantification of signaling activity | SMAD translocation assays in hESCs [40] |
Experimental Protocols
Protocol 1: Cytosolic Sequestration Engineering for Receptor Systems
Purpose: To reduce dark activity by mislocalizing receptors away from their signaling compartments in the dark state.
Materials:
- Wild-type receptor sequence (e.g., type II receptor Acvr2b)
- Molecular cloning reagents
- Fluorescent protein tags (e.g., mCherry, GFP)
- Cell culture components
Procedure:
- Identify and remove membrane localization motifs (e.g., myristoylation sequences) from receptor sequence
- Fuse modified receptor to photosensory domain (Cry2 for light-receiving subunit, CIB1 for partner subunit)
- Clone into appropriate expression vector with fluorescent tag
- Validate cytosolic localization in dark conditions via fluorescence microscopy
- Test light-induced membrane recruitment and signaling activation
Validation: Compare signaling in dark conditions between wild-type and engineered receptors. Successful engineering should show >80% reduction in dark activity while maintaining ≥90% of light-induced signaling capacity [9].
Protocol 2: Quantitative Dark Activity Assessment
Purpose: To systematically measure and compare dark activity across different receptor engineering approaches.
Materials:
- Receptor-expressing cell lines
- Pathway-specific phosphorylation antibodies
- Immunofluorescence staining reagents
- Confocal microscope or high-content imaging system
- Image analysis software (e.g., ImageJ, CellProfiler)
Procedure:
- Plate cells in multi-well plates and transfer to light-tight incubation for 24 hours
- For control samples, apply appropriate light stimulation paradigm
- Fix cells directly in dark conditions using safe lights or minimal exposure
- Process for immunostaining with pathway-specific markers (e.g., pSmad2 for Nodal pathway)
- Image and quantify nuclear translocation or phosphorylation levels
- Calculate fold induction (light/dark) and absolute background levels
Analysis:
- Successful dark activity reduction should yield fold induction >10:1
- Background activity in dark should be indistinguishable from negative controls
- Maximum signaling should approach endogenous pathway activation levels
Visualizing Key Concepts
Figure 1: Engineering Approach to Minimize Dark Activity. Traditional optogenetic systems (top) often exhibit high dark activity leading to patterning defects. Engineered systems with cytosolic sequestration strategies (bottom) minimize dark activity for precise morphogen patterning.
Figure 2: Mechanism of Cytosolic Sequestration for Reduced Dark Activity. In the dark state (top), type II receptors remain cytosolic, preventing spurious activation. Upon illumination (bottom), light-induced dimerization recruits type II receptors to membrane-bound type I receptors, initiating precise signaling.
Optimizing Dynamic Range and Response Kinetics for Sharper Patterns
Frequently Asked Questions (FAQs)
Q1: What do "dynamic range" and "response kinetics" mean in the context of creating morphogen-mimicking patterns?
- Dynamic Range refers to the ratio between the highest and lowest levels of a signal a system can produce or detect. In optogenetics, a high dynamic range means the system has negligible background activity in the dark and can reach strong, biologically relevant signaling levels when activated by light [9].
- Response Kinetics describe the speed at which a system reacts to a stimulus. Fast ON kinetics allow for rapid initiation of signaling upon illumination, while fast OFF kinetics ensure the signal rapidly decays once the light is removed, enabling precise temporal control [9].
Q2: My optogenetic system has high background activity (poor dark state). What could be the cause and how can I fix it?
High dark activity is often caused by spontaneous, light-independent interactions between the optogenetic components. Solutions include:
- Switch Photodimerizers: Replace slow-cycling photodimerizers (e.g., LOV domains) with systems exhibiting lower dark affinity, such as Cry2/CIB1 [9].
- Re-Engineer Component Localization: Sequestering a key receptor (e.g., the constitutively active Type II receptor) to the cytosol in the dark can drastically reduce its chance of spurious interaction, effectively improving the dynamic range [9].
Q3: The signaling pattern in my tissue is not scaling correctly with the size of the embryo or organoid. What mechanisms should I investigate?
Morphogen scaling ensures patterns remain proportional despite size variations. Key mechanisms to investigate or incorporate include:
- Expander-Repression Mechanisms: A diffusible "expander" molecule (e.g., Pentagone for Dpp) can inhibit morphogen degradation or enhance its diffusion, while the morphogen represses the expander. This feedback loop allows the gradient to scale with tissue size [41].
- Shuttling Mechanisms: Interactions between a morphogen and a binding protein/inhibitor (e.g., Bmp and Chordin) can create complexes with enhanced diffusion, facilitating a flux of signal that scales with the tissue field [41].
Q4: The response of my optogenetic system is too slow for the rapid patterning events I wish to study. How can I improve the kinetics?
Slow response kinetics, particularly slow OFF rates, limit temporal resolution. To improve them:
- Use Faster-Cycling Photodimerizers: Opt for protein pairs like Cry2/CIB1, which have dissociation kinetics on the order of minutes, compared to the slower LOV domains [9].
- Validate with Impulse Responses: Characterize your system by applying a short pulse of light and measuring the time for signaling to peak and return to baseline. This will quantitatively reveal the ON and OFF kinetics [9].
Troubleshooting Guides
Problem: Poor Dynamic Range in Optogenetic Reagents
Symptoms: High background signaling in the dark, inability to achieve high enough signaling levels upon illumination, or both.
| Investigation Step | Action to Perform | Expected Outcome & Interpretation |
|---|---|---|
| Check Dark Activity | Measure signaling activity (e.g., via pSmad2 immunostaining) in non-illuminated samples. | High signal: Significant dark activity. Proceed to Step 2. Low signal: Good dark state. Investigate low inducibility. |
| Test Inducibility | Expose samples to a range of light intensities (e.g., 0-20 μW/mm²) and measure maximum signaling output. | Saturates at low power: Good inducibility. Never reaches needed levels: Poor inducibility; may require component re-engineering [9]. |
| Verify Component Design | Review the constructs used. Are they fused to photodimerizers with known dark activity? Is a key receptor membrane-bound in the dark? | Using Cry2/CIB1 and cytosolic sequestration of the Type II receptor are documented strategies to improve dynamic range [9]. |
Problem: Incorrect Pattern Scaling with Tissue Size
Symptoms: Pattern boundaries are too close or too far from the signal source in tissues of different sizes, breaking proportionality.
| Investigation Step | Action to Perform | Expected Outcome & Interpretation |
|---|---|---|
| Characterize Scaling | Quantify the position of a specific gene expression boundary in tissues of different sizes. | Boundary position is constant: Scaling is absent. Boundary position scales with size: Scaling is functional [41]. |
| Test for Expander Molecules | Knock down or knockout candidate expander molecules (e.g., Pentagone, Smoc) and examine patterning in different-sized tissues. | Patterning fails to scale: The molecule is involved in scaling. Patterning still scales: Other mechanisms are at play [41]. |
| Analyze Feedback Loops | Examine whether the morphogen represses the expression of the expander molecule. | Loss of repression disrupts scaling: Feedback is crucial for the scaling mechanism [41]. |
Problem: Slow Response Kinetics in Optogenetic Patterning
Symptoms: Signaling lags significantly behind light activation, or continues long after light cessation, blurring temporal patterns.
| Investigation Step | Action to Perform | Expected Outcome & Interpretation |
|---|---|---|
| Measure Impulse Response | Apply a short, saturating light pulse (e.g., 20 minutes) and track signaling activity over time until it returns to baseline. | Slow rise/fall: Kinetics are limited by the optogenetic tool itself. Fast rise/fall: Kinetics may be limited by downstream cellular processes [9]. |
| Compare Photodimerizers | If possible, compare the impulse response of your system with one using faster-cycling domains like Cry2/CIB1 versus slower ones like LOV. | Faster OFF rate with Cry2/CIB1: Confirms the photodimerizer is the bottleneck [9]. |
| Check for Signal Amplification | Investigate if the pathway has inherent positive feedback loops that could delay signal termination. | Inhibition of feedback accelerates OFF kinetics: Intrinsic pathway dynamics contribute to slow kinetics. |
Experimental Protocols
Protocol 1: Calibrating Light Intensity for a Desired Signaling Output
This protocol describes how to establish a dose-response curve for an optogenetic system, linking light intensity to signaling activity.
Key Research Reagent Solutions
| Reagent/Material | Function in the Experiment |
|---|---|
| OptoNodal2 Reagents (Cry2/CIB1-fused receptors) | Light-inducible receptors with high dynamic range and improved kinetics [9]. |
| pSmad2 Antibody | Primary antibody to detect and quantify active Nodal signaling via immunostaining. |
MZoep or Mvg1 Mutant Zebrafish Embryos |
Host embryos lacking endogenous Nodal signaling, providing a clean background [9]. |
| Programmable LED Array | Light source capable of delivering uniform illumination at defined power levels (e.g., 0-30 μW/mm²) [9]. |
| Confocal Microscope & Image Analysis Software | For quantifying nuclear pSmad2 intensity across the tissue. |
Step-by-Step Methodology:
- Sample Preparation: Inject mRNA encoding the optogenetic receptors (e.g., optoNodal2) into 1-cell stage mutant (
MZoeporMvg1) zebrafish embryos. - Light Stimulation: At the desired developmental stage, divide embryos into groups. Expose each group to a different, constant light intensity (e.g., 0, 5, 10, 15, 20, 25 μW/mm²) for a fixed duration (e.g., 1 hour).
- Fixation and Staining: Fix the embryos immediately after the stimulation period and perform immunostaining using an antibody against pSmad2.
- Image Acquisition: Capture high-resolution images of the stained embryos using consistent microscope settings across all samples.
- Quantitative Analysis: Use image analysis software (e.g., Fiji/ImageJ) to measure the mean nuclear pSmad2 intensity in a defined region of interest for each embryo.
- Data Fitting: Plot the average pSmad2 intensity against the light intensity for each group. Fit a sigmoidal (logistic) curve to the data. This curve is your calibration standard, allowing you to select a light intensity that will produce a specific, desired signaling level in future experiments [9].
Protocol 2: Quantifying Response Kinetics with an Impulse Stimulus
This protocol measures the ON and OFF kinetics of an optogenetic system by applying a brief light pulse.
Step-by-Step Methodology:
- Sample Preparation: Prepare embryos as in Protocol 1, Step 1.
- Impulse Stimulation: At the target stage, expose the embryos to a short, saturating pulse of light (e.g., 20 μW/mm² for 20 minutes).
- Time-Point Collection: Fix subsets of embryos at precise timepoints: before the pulse, at the end of the pulse, and at multiple intervals after the pulse ends (e.g., every 15-20 minutes until signaling returns to baseline).
- Staining and Imaging: Fix and immunostain all samples for pSmad2, then image them under identical conditions.
- Kinetic Analysis: Quantify the pSmad2 intensity as before. Plot the intensity over time.
- The ON rate can be inferred from the slope of the signal increase during and immediately after the pulse.
- The OFF rate is determined by the exponential decay constant after the pulse ends. The system's OFF kinetics are defined by the time it takes for the signal to return to half its maximum value (half-life) after the pulse [9].
Data Presentation Tables
Table 1: Performance Comparison of Optogenetic Reagents for Morphogen Patterning
This table compares key performance metrics between an earlier and an improved optogenetic receptor system, highlighting critical parameters for optimization.
| Performance Metric | LOV Domain-based OptoNodal (1st Gen) | Cry2/CIB1-based OptoNodal2 (Improved) | Experimental Measurement Context |
|---|---|---|---|
| Dark Activity (Background) | High (severe phenotypes in dark) | Negligible (phenotypically normal in dark) | Embryos raised in dark until 24 hpf; pSmad2 staining [9]. |
| Maximum Inducibility | High (robust target gene expression) | Equivalent High | Light intensity series; pSmad2 and gsc/sox32 expression [9]. |
| Saturating Light Power | ~20 μW/mm² | ~20 μW/mm² | Light intensity series; pSmad2 staining [9]. |
| OFF Kinetics (Half-Life) | Slow (>90 minutes to peak after pulse) | Fast (~35 minutes to peak, ~50 min return) | 20-min impulse of 20 μW/mm²; pSmad2 time course [9]. |
Signaling Pathways and Workflows
Diagram Title: Experimental Workflow for Optogenetic Patterning
Diagram Title: OptoNodal2 Signaling Mechanism
Correcting Optical Distortions and Ensuring Uniform Field Illumination
Why are optical distortion correction and uniform illumination critical for morphogen-mimicking pattern research?
In research that uses light to mimic morphogen patterns, the precision of the final biological outcome is entirely dependent on the quality of the projected light. Optical distortion causes spatial warping, meaning a signal intended for one cellular location may fall on another, corrupting the positional information. Non-uniform illumination introduces intensity errors, causing cells exposed to an intended "low" signal level to receive a "high" signal level simply because they are at the edge of the field. These artifacts make experimental results unreliable and unreproducible.
Optical Distortion is a warping of shapes in an image compared to a simple pinhole camera model, where straight lines in a scene become curved in the image [42]. For morphogen research, this means a designed pattern of light intended to be a perfect gradient or sharp boundary will be geometrically incorrect when it reaches the sample.
Uniform Field Illumination refers to the consistency of light intensity across the entire field of view [43]. Inconsistent illumination creates hotspots and dark zones, which can be misinterpreted as biological signal gradients or can obscure genuine patterns [44]. In high-throughput microscopy, illumination can vary by 10-30% across a single image, even after standard hardware corrections, adding unacceptable noise to quantitative measurements [45].
Troubleshooting Guides
Troubleshooting Optical Distortion
This section helps identify and correct geometric distortions in your optical setup.
Problem: My projected light patterns do not align correctly with the expected biological output (e.g., fuzzy or mispositioned gene expression boundaries).
| Observation | Likely Cause | Next Step to Confirm |
|---|---|---|
| Curved lines appear straight in the projected pattern. | Radial lens distortion. | Image a checkerboard or dot pattern chart and look for bending of straight lines, especially near the image edges [42]. |
| Pattern appears stretched or compressed in one area. | Complex field-dependent distortion. | Use a calibration target with a known, regular grid and measure positional errors across the entire field. |
| Distortion is inconsistent across different wavelengths. | Chromatic aberration. | Test pattern alignment using different filter sets; the distortion may change with color. |
Solutions:
- Software Correction: The most common method is computational distortion correction by re-sampling the image. This involves defining a transformation that maps the distorted pixel locations from your camera back to their correct, undistorted positions [42]. This process often uses polynomial coefficients that describe the inverse transformation ((ru = f^{-1}(rd))), which can be measured using test charts [42].
- Lens Selection: For new systems, invest in lenses designed for metrology or machine vision that have minimal inherent distortion.
Troubleshooting Non-Uniform Illumination
This section helps diagnose and fix uneven lighting in your system.
Problem: I observe intensity gradients or hotspots in my uniform control samples, leading to inconsistent morphogen-mimicking signals.
| Observation | Likely Cause | Next Step to Confirm |
|---|---|---|
| Gradual fall-off in intensity from center to edges. | Vignetting. | Image a uniformly fluorescent control sample. A smooth, darkening towards the corners is typical of vignetting. |
| One region is consistently brighter/darker. | Imperfections in optics, dirty lenses, or uneven LED arrays. | Image the uniform sample and note if the pattern of non-uniformity is consistent across different plates or sessions. |
| "Speckled" or high-frequency noise in the background. | Dust or debris on optical surfaces. | Carefully inspect and clean all optical elements, including the light source, filters, and camera sensor. |
Solutions:
- Prospective Flat-Field Correction: This requires capturing a "white reference" image of a uniformly fluorescent sample (e.g., a solution of free fluorescent dye) [45]. All subsequent experimental images are then divided by this reference image to correct for systematic intensity variations. Caution: This method is sensitive to changes in optical conditions and the chemical environment of the fluorophore [45].
- Retrospective Illumination Correction: A more robust, data-driven method calculates an Illumination Correction Function (ICF) directly from your experimental images [45]. The ICF is generated by averaging all images in an experimental batch and applying a smoothing filter. Each image is then corrected by dividing it by this ICF, effectively normalizing the illumination post-acquisition [45].
Frequently Asked Questions (FAQs)
How do I quantitatively measure the uniformity of my illumination system?
Measure uniformity by imaging a uniformly fluorescent control sample and calculating the ratio between the minimum and average illumination levels (U0) or the minimum and maximum levels (U1) [43]. Higher ratios indicate better uniformity. For a precise map, use the retrospective method to generate an ICF, which visually and quantitatively represents the intensity variation across your field of view [45].
My distortion correction works in the center of the image but not at the edges. Why?
This is a classic sign of an inaccurate distortion model. The polynomial function used to model the distortion may be of too low an order to capture the complex warping at the extreme edges of the lens. Try measuring the distortion again with a high-density calibration chart that provides many data points at the periphery, and use a higher-order polynomial for the fit [42].
Can I use the same white reference image for different fluorescence channels?
It is not recommended. The optical path, including the excitation light source, filters, and camera sensitivity, can differ significantly between wavelengths. Using a single reference image for all channels can introduce new artifacts. For prospective correction, you should collect a dedicated white reference image for each channel [45].
How many images do I need to create a reliable retrospective Illumination Correction Function (ICF)?
The reliability of the ICF increases with the number of images used, as it averages out random noise and single-image artifacts. The method has been validated using all images from a particular channel on a single multi-well plate (often 96 or more images) [45]. Using a larger batch of images from a consistent experimental setup will yield a more robust and accurate ICF.
Experimental Protocols
Protocol 1: Measuring and Correcting Radial Distortion
This protocol allows you to characterize and correct for the geometric distortion of your lens.
- Acquire Calibration Image: Capture a high-resolution image of a calibration target with a known regular pattern, such as a checkerboard or dot pattern, ensuring the target fills the entire field of view [42].
- Define Coordinate System: Establish spatial coordinates for each pixel in the image, relative to the optical center [42].
- Convert to Polar Coordinates: Transform the Cartesian (X, Y) coordinates into polar form (Theta, Rho). The radial distance (Rho) is the key parameter, as distortion is often modeled as being purely radial [42].
- Measure Distortion: Using software analysis, measure the displacement of points in your captured image from their expected positions in the ideal grid. This yields a set of distorted radii ((rd)) and their corresponding undistorted radii ((ru)).
- Fit a Polynomial Model: The relationship between (rd) and (ru) is described by an inverse transformation polynomial: (ru = f^{-1}(rd)) [42]. The coefficients for this polynomial are the output of the measurement.
- Apply Correction via Re-sampling: To correct a new image, create a new, empty "undistorted" image grid. For each pixel in this new grid, use the polynomial model to calculate where it would be located in the original distorted image. Sample the color/intensity from that location in the distorted image and place it in the new grid [42].
The workflow for this correction process is illustrated below.
Protocol 2: Retrospective Illumination Uniformity Correction
This data-driven protocol corrects for uneven illumination using only the images from your experiment.
- Group Images: Collect all images from a single experimental batch (e.g., all images for a specific fluorescence channel from one multi-well plate) [45].
- Calculate Average Image: Compute the pixel-wise average of all images in the batch. This average image represents the systematic illumination pattern.
- Smooth the Average Image: Apply a median filter (e.g., with a window size of 500 pixels) to this average image to create a smooth Illumination Correction Function (ICF). This step removes high-frequency biological structures, leaving only the low-frequency illumination gradient [45].
- Correct Individual Images: For each image in the batch, perform a pixel-wise division: Corrected Image = Original Image / ICF.
- Quality Control: Visually inspect the ICFs for each plate to identify any sudden changes or unusual patterns that may indicate a hardware fault or outlier image [45].
The following diagram outlines the retrospective correction workflow.
The Scientist's Toolkit
Research Reagent Solutions for Optogenetic Patterning
The following table details key reagents and materials from advanced optogenetic research, which relies on extreme precision in light patterning and is therefore highly relevant to your work on morphogen gradients.
| Item | Function in Research | Example from Literature |
|---|---|---|
| OptoNodal2 Reagents | Improved optogenetic receptors that activate Nodal signaling in response to blue light. They offer reduced dark activity and faster kinetics, crucial for creating precise temporal patterns [12]. | Fuse Nodal receptors (Type I/II) to Cry2/CIB1N heterodimerizing pairs. The Type II receptor is sequestered to the cytosol to minimize dark activity [12]. |
| Ultra-Widefield Patterning Microscope | An optical instrument capable of projecting defined patterns of light with high spatial and temporal resolution onto multiple live samples in parallel, enabling high-throughput patterning experiments [12]. | Custom microscopes adapted for parallel light patterning in up to 36 live zebrafish embryos simultaneously, allowing systematic exploration of signaling patterns [12]. |
| Synthetic Morphogen System (SYMPLE3D) | A 3D cell culture platform that uses engineered gene circuits to study how cells respond to diffusible morphogen signals, allowing for the dissection of minimal components needed for tissue patterning [46]. | Engineered fibroblast cells (L929) that secrete GFP (organizer) and receiver cells that respond to GFP via a synNotch receptor to induce target genes (e.g., mCherry or E-cadherin) [46]. |
| Illumination Correction Function (ICF) | A software-based, post-processing solution for correcting intensity nonuniformity in fluorescence images, essential for quantitative intensity measurements [45]. | Implemented in open-source software like CellProfiler. The ICF is generated by averaging and smoothing all images from a plate, then used to correct each image via division [45]. |
Quantitative Data Reference
Standards and Tolerances for Illumination Uniformity
The table below summarizes key quantitative metrics related to illumination quality from various technical fields.
| Metric | Typical Value / Tolerance | Context & Importance |
|---|---|---|
| Uniformity Ratio (U0) | ≥ 0.6 | Target for office environments; higher ratios indicate more consistent illumination essential for quantitative imaging [43]. |
| Post-White-Referencing Variation | 10% - 30% | The residual intensity variation across a single image after applying standard microscope flat-field correction, highlighting the need for more robust methods [45]. |
| Post-Retrospective Correction Improvement | Increases Z'-factor & classification accuracy | Applying a retrospective ICF improves the statistical quality of high-throughput screens, leading to more reliable hit detection [45]. |
| Radial Distortion Model | (ru = f^{-1}(rd)) or (ru = \frac{rd}{P(r_d)/100 + 1}) | The polynomial or rational polynomial models used to correct for radial lens distortion, where (rd) is distorted radius and (ru) is undistorted radius [42]. |
Addressing Molecular Noise and Its Impact on Positional Error
Frequently Asked Questions (FAQs)
1. What is positional error in the context of morphogen gradients? Positional error is defined as the standard deviation of readout positions over different gradient realizations. It quantifies the inaccuracy in a cell's ability to determine its position based on morphogen concentration, and is calculated as σₓ = stddev[xθ], where xθ is the threshold position for a given morphogen concentration Cθ [47].
2. How does molecular noise affect my light-calibrated morphogen-mimicking system? Molecular noise introduces random fluctuations in morphogen concentration, which directly translates to positional error. The fundamental relationship is given by σₓ ≈ |∂C/∂x|⁻¹ σC, where σC is the standard deviation of local morphogen concentration and ∂C/∂x is the gradient slope [47]. This means steeper gradients and reduced concentration variability minimize positional error.
3. Can my experimental setup distinguish between accuracy and precision issues? Yes. In precision positioning terminology, accuracy refers to predictable errors (inaccuracy) while precision refers to random errors (imprecision). Resolution represents the smallest measurable change, but fine resolution alone doesn't guarantee accuracy or precision. Your troubleshooting should separately address systematic calibration errors (affecting accuracy) and stochastic noise (affecting precision) [48].
4. What are the main sources of molecular noise I should control for? The primary sources include: (1) Intrinsic fluctuations from low molecular copy numbers [49], (2) Embryo-to-embryo variability in morphogen source strength [49], (3) Stochastic production, transport, and decay kinetics [47], and (4) Environmental perturbations affecting gradient interpretation [50].
Troubleshooting Guides
Problem: High Positional Error in Gradient Interpretation
Symptoms: Irregular pattern boundaries, inconsistent cell fate assignments between experiments, high variance in threshold positions.
Diagnosis and Solutions:
Verify Gradient Linearity
- Check if your light-activated system produces linear morphogen decay. Non-linear decay (n > 1) creates power-law gradients that reduce error near the source but significantly increase positional error further away due to shallower tails [47].
- Compare your observed concentration profile to theoretical exponential (C(x) = C₀e^(-x/λ)) and power-law (C(x) = C₀(1 + x/mλₘ)^(-m)) models to identify your actual decay dynamics.
Quantify Local Noise-to-Signal Ratio
- Calculate the coefficient of variation (CVq = σq/μq) for each kinetic parameter in your system. Physiological noise levels typically range around 20% for morphogen production, decay, and transport parameters [47].
- Measure position-dependent variance σ_g²(x) across multiple embryos (N ≥ 8 recommended for statistical power) [49].
Implement Error Correction Mechanisms
- Consider biological noise-correction strategies like those found in zebrafish embryos, where cells with abnormal Wnt/β-catenin activity are eliminated via cadherin-mediated cell competition [51].
- Explore stochastic tuning approaches where noise is not suppressed but utilized as a driving force for pattern refinement [50].
Table 1: Quantitative Comparison of Morphogen Decay Dynamics and Their Impact on Positional Error
| Parameter | Linear Decay (n=1) | Non-linear Decay (n>1) | Experimental Implications |
|---|---|---|---|
| Profile Shape | Exponential C(x) = C₀e^(-x/λ) | Power-law C(x) = C₀(1 + x/mλₘ)^(-m) | Power-law provides better near-source precision but worse far-from-source precision |
| Positional Error Near Source | Moderate | Slightly reduced | Reduction too small for physiological noise levels |
| Positional Error Far From Source | Moderate | Significantly increased | Critical for patterning large tissue domains |
| Sensitivity to Source Variability | High | Reduced at high influx | Non-linear decay provides some robustness to production fluctuations |
Problem: Unreliable Light-Activated Morphogen Patterning
Symptoms: Inconsistent pattern reproduction, failure to maintain stable gradients, high embryo-to-embryo variability.
Diagnosis and Solutions:
Calibrate Light Intensity Using Evidential Deep Learning
- Implement uncertainty quantification using evidential deep learning (EDL) to distinguish reliable from unreliable predictions.
- This approach provides well-calibrated confidence estimates, preventing overconfident interpretations of noisy gradient data [52].
Optimize Multi-Molecule Encoding
- Utilize multiple information carriers (e.g., both IP3 and Ca2+ molecules) to create encoding redundancy.
- Multi-molecule systems can reduce bit error rate by approximately 18% compared to single-carrier approaches [53].
Control for Intercellular Variability
- Model cell-to-cell parameter variations using log-normal distributions for production rates (pᵢ), degradation rates (dᵢ), and diffusivities (Dᵢ) [47].
- Implement the CELLEC (Cell Signaling Error Control) protocol that combines adaptive retransmission with error control coding for reliable molecular communication [53].
Table 2: Research Reagent Solutions for Noise Mitigation
| Reagent/Tool | Function | Application Context |
|---|---|---|
| OTM:d2EGFP Reporter | Visualizes Wnt/β-catenin signaling with high spatial resolution | Live imaging of morphogen gradient dynamics in zebrafish [51] |
| OTM:ELuc-CP Reporter | Provides high temporal resolution for quantitative gradient analysis | Precise kinetic measurements of morphogen signaling [51] |
| EviDTI Framework | Uncertainty quantification for predictive models | Calibrating confidence in pattern predictions [52] |
| CELLEC Protocol | Adaptive error control for cell signaling channels | Improving reliability in synthetic biological networks [53] |
| Cadherin-Based Sensors | Detect unfit cells with abnormal signaling activity | Implementing quality control via cell competition [51] |
Experimental Protocols
Protocol 1: Quantifying Positional Information from Gene Expression Data
This protocol adapts the framework from Dubuis et al. for measuring positional information directly from experimental data [49].
Materials:
- Quantitative gene expression profiles G(μ)(x) from multiple embryos (μ = 1,...,N)
- Image analysis software for fluorescence quantification
- Statistical computing environment (R, Python, or MATLAB)
Procedure:
- Data Acquisition: Acquire expression patterns for multiple gap genes (e.g., in Drosophila embryos). Sample at least 8 embryos for statistical power.
- Normalization: Transform measurements G(x) to profiles g(x) with rescaled units, normalizing the mean profile ḡ(x) to 1 at maximum and 0 at minimum along the x-axis.
- Calculate Statistics: Extract position-dependent mean profile ḡ(x) and variance σ_g²(x) across all embryos.
- Compute Mutual Information: Use information-theoretic measures to calculate positional information I as mutual information between expression levels and embryo position.
- Estimate Positional Error: Relate positional error to positional information through mathematical derivatives of the mutual information.
Expected Outcomes: This approach can determine how many distinct gene expression levels are generated by the system and how many cell fates it can support, typically achieving nearly single-cell resolution from just four gap genes in Drosophila [49].
Protocol 2: Simulating Noisy Morphogen Gradients with Cell-Based Variability
This protocol implements the stochastic simulation approach from Vetter & Iber to model gradient precision under physiological noise conditions [47].
Materials:
- Numerical simulation environment (COMSOL, custom PDE solver)
- Parameter distributions for morphogen kinetics
- One-dimensional cellular domain model
Procedure:
- Domain Setup: Create a 1D domain with source region (-Lₛ) and patterning region (Lₚ).
- Reaction-Diffusion Model: Implement the equation: 0 = D∂²C/∂x² - dCⁿ/C_ref^(n-1) + pH(-x) with zero-flux boundary conditions.
- Introduce Stochasticity: For each cell i, draw parameters pᵢ, dᵢ, and Dᵢ from log-normal distributions with measured physiological coefficients of variation (~20%).
- Generate Multiple Realizations: Solve for steady-state gradient profiles Cⱼ(x) for multiple realizations j.
- Calculate Positional Error: For each realization, determine threshold position x{θ,j} where concentration first subceeds Cθ, then compute σₓ = stddevⱼ{x_{θ,j}}.
Expected Outcomes: These simulations reveal that non-linear decay provides only minimal precision improvements near the source while substantially increasing error in distal regions, suggesting linear decay models are generally adequate for most physiological applications [47].
Signaling Pathways and Experimental Workflows
Diagram: Cell Competition Pathway for Noise Correction
Diagram: Stochastic Tuning-Driven Morphogenesis Workflow
Differentiable Programming for Inverse Design of Genetic Networks
Differentiable programming represents a paradigm shift in the inverse design of genetic networks for synthetic biology. This approach uses automatic differentiation (AD) algorithms to efficiently calculate the sensitivities of observables with respect to input parameters in complex biological simulations. Unlike traditional parameter sweep or evolutionary search methods that become inefficient in high-dimensional spaces, differentiable programming enables gradient-based optimization of biological system parameters [54]. In the context of calibrating light intensity for morphogen-mimicking patterns, this methodology allows researchers to discover local interaction rules and genetic networks that yield emergent, systems-level characteristics. By framing inverse design tasks as optimization problems where the objective is to minimize the discrepancy between simulated and desired system states, researchers can efficiently navigate non-convex, high-dimensional parameter spaces to design genetic circuits with predetermined functions [54]. The entire simulation is written to be automatically differentiable, leveraging recent advances from deep learning communities, particularly through libraries like JAX for efficient numerical and automatic differentiation algorithms [54].
Technical FAQ & Troubleshooting Guide
Computational Framework Issues
Q: What are the primary causes of optimization failure in differentiable models of genetic networks?
A: Optimization failures typically stem from three sources: poorly chosen initial parameters, inadequate gradient flow through the computational graph, or insufficient handling of stochasticity. The REINFORCE algorithm [55] is employed to address intrinsic stochasticity in growth dynamics where the loss function may not be fully differentiable. In practice, rewards and penalties are assigned to each action taken (e.g., cell division) to provide weighting signals for trajectory probability gradients. This weighted gradient then adjusts gene network weights to increase favorable event probabilities in subsequent simulations [54].
Q: How can I validate that my differentiable model is correctly capturing biological phenomena?
A: Implement a multi-stage validation protocol:
- Pruning Analysis: Simplify learned networks by removing edges with weights below an experiment-dependent threshold to identify functional backbones while preserving optimized properties [54].
- Emergent Property Testing: Verify that systems optimized for specific final structures exhibit unpredicted but biologically relevant emergent capabilities, such as regenerative properties or gradient formation.
- Spatial Pattern Verification: For morphogenetic patterns, confirm that model-predicted chemical gradients correspond to experimentally observed ones using optogenetic validation techniques [12].
Experimental Implementation Challenges
Q: How can I improve dynamic range in optogenetic systems for morphogen patterning?
A: The development of optoNodal2 reagents demonstrates effective strategies for enhancing dynamic range. These improved reagents eliminate dark activity and improve response kinetics without sacrificing dynamic range by:
- Fusing Nodal receptors to the light-sensitive heterodimerizing pair Cry2/CIB1N
- Sequestering the type II receptor to the cytosol
- Implementing custom ultra-widefield microscopy platforms for parallel light patterning across multiple specimens [12]
Q: What approaches ensure stable optogenetic gene expression in 2D and 3D tissue cultures?
A: Genomic integration strategies using Sleeping Beauty 100X transposase provide stable expression without the mosaicism problems of transient transfection. This system accomplishes multiple genomic insertion events at random positions without viral particle production, increasing the likelihood of identifying well-performing clones with sufficient expression strength [29]. For 3D cultures specifically, combine this with:
- Multicistronic transcripts to ensure coordinated component expression
- Selection of red/far-red light switches (REDTET, REDE) using PhyB-PIF systems or blue light systems (BLUESINGLE, BLUEDUAL) using LOV domains for deeper tissue penetration [29]
Quantitative Data Reference
Performance Metrics for Optimization Algorithms
Table 1: Comparison of Inverse Design Method Characteristics [56]
| Method Category | Specific Algorithms | Key Advantages | Limitations | Suitable Applications |
|---|---|---|---|---|
| Trajectory-based | Hill-climbing, Direct Binary Search (DBS) | Simple, intuitive, easy to implement | Easily stuck in local optima, sensitive to initial guess | Discrete design spaces, digitized structures |
| Evolutionary Algorithms | Genetic Algorithm (GA), Differential Evolution | Powerful global search, mimics natural selection | Computationally intensive for large populations | Photonic crystal design, complex structural optimization |
| Swarm-based | Ant Colony Optimization, Particle Swarm Optimization | Effective for complex search spaces | Parameter tuning challenging | Nanophotonic device design |
| Adjoint Methods | Gradient-based optimization | Highly efficient for large parameter spaces | Requires differentiable model | Photonic power splitters, wavelength multiplexers |
| AI-based | Discriminative models, Generative models, Reinforcement Learning | Handles complex patterns, can predict novel designs | Large training data requirements, black-box nature | Metasurface design, complex device optimization |
Color Contrast Standards for Visualization Tools
Table 2: WCAG Enhanced Contrast Requirements for Experimental Readouts [57] [58]
| Text Type | Minimum Contrast Ratio | Example Applications | Testing Method |
|---|---|---|---|
| Standard text | 7.0:1 | Control software interfaces, data visualization labels | Check highest possible contrast between foreground and background colors |
| Large-scale text (18pt+ or 14pt+bold) | 4.5:1 | Microscope display readouts, presentation materials | Verify text is at least 18pt or 14pt and bold |
| Incidental text | Exempt | Disabled UI elements, decorative text | Confirm element is disabled via aria-disabled or hidden from assistive technologies |
| Logos/brand names | Exempt | Institutional branding on equipment | Ensure text is part of actual logo implementation |
Experimental Protocols
Protocol: Inverse Design of Elongation Patterns
This protocol details the process for designing genetic networks that drive elongated morphogenesis using differentiable programming [54].
Materials:
- 3D model of dividing cells with growth, stress exertion, and morphogen excretion capabilities
- Computational framework with automatic differentiation (JAX library recommended)
- Optimization algorithm (Adam optimizer with REINFORCE for stochastic elements)
Procedure:
- Initialize Model: Begin with a single cell model where each cell can divide, grow, exert stress, and excrete/sense morphogens.
- Define Objective Function: Set optimization to minimize the squared sum of z-coordinates of cells to enforce vertical elongation.
- Configure Input Parameters: Program the genetic network to process local chemical concentrations, estimated chemical gradients, cell size, and division propensities.
- Implement Training Loop:
- Run forward simulation from single cell to approximately 120 cells
- Calculate loss between current and target morphology
- Compute gradients using automatic differentiation through entire simulation
- Update genetic network parameters using gradient descent
- Validate Emergent Properties: Test for unpredicted capabilities like regeneration after simulated damage.
- Network Pruning: Remove edges with weights below threshold to simplify the functional backbone.
Troubleshooting:
- If elongation is asymmetric, check gradient calculation in spatial coordinates
- If growth stagnates, adjust reward weighting in REINFORCE algorithm
- For unstable optimization, reduce learning rate or implement gradient clipping
Protocol: Optogenetic Calibration for Morphogen Patterning
This protocol describes the process for calibrating light intensity to achieve specific morphogen-mimicking patterns using improved optoNodal2 reagents [12].
Materials:
- OptoNodal2 reagents (Nodal receptors fused to Cry2/CIB1N with sequestered type II receptor)
- Custom ultra-widefield microscopy platform with patterned illumination capability
- Zebrafish embryos (wild-type and Nodal signaling mutants)
- Light patterning system (digital micromirror devices or laser stimulation)
Procedure:
- System Setup:
- Configure illumination system for parallel patterning in up to 36 embryos
- Calibrate light intensity across entire field using radiometric measurements
- Establish dynamic range by measuring background vs. maximum activated signaling
Intensity Gradient Calibration:
- Apply spatially varying light patterns with known intensity profiles
- Quantify pSmad2 nuclear localization as proxy for Nodal signaling activity
- Map light intensity to signaling activity using dose-response curves
Temporal Patterning:
- Program illumination sequences with varying duration and frequency
- Monitor downstream gene expression dynamics in real-time
- Correlate light exposure history with cell fate decisions
Mutant Rescue Validation:
- Apply optimized light patterns to Nodal signaling mutants
- Assess rescue of characteristic developmental defects
- Quantify precision of endodermal precursor internalization
Troubleshooting:
- For limited dynamic range, verify receptor sequestration and consider additional cytosolic anchoring
- If spatial resolution degrades, check for light scattering in specimens and consider refractive index matching
- For heterogeneous responses across embryos, standardize developmental staging and positioning
Essential Diagrams
Genetic Network Optimization Workflow
Optogenetic Nodal Signaling Pathway
Research Reagent Solutions
Table 3: Essential Research Reagents for Differentiable Programming Experiments [54] [12] [29]
| Reagent/Tool | Function | Key Characteristics | Application Examples |
|---|---|---|---|
| JAX Library | Automatic differentiation | Efficient numerical computation, GPU acceleration, compatible with molecular dynamics | Gradient calculation through entire tissue growth simulations |
| OptoNodal2 Reagents | Optogenetic Nodal signaling control | Cry2/CIB1N fusions, sequestered type II receptor, minimal dark activity | Spatial patterning of mesendodermal precursors in zebrafish |
| REDTET/REDE Switches | Red/far-red light gene regulation | PhyB-PIF systems, TetR or E DNA-binding domains, reversibility | Deep tissue penetration in 3D cultures, multi-color experiments |
| BLUESINGLE/BLUEDUAL | Blue light gene regulation | LOV2-ePDZ heterodimerization, single or dual component architectures | High temporal resolution patterning, synthetic WNT3A signaling |
| Sleeping Beauty Transposase | Genomic integration | 100X hyperactive variant, random insertion, no size limitation | Creating stable optogenetic cell lines for 2D/3D cultures |
| Ultra-widefield Microscope | Parallel light patterning | Custom illumination, 36-embryo capacity, subcellular resolution | High-throughput optogenetic screening in live embryos |
| Digital Micromirror Device | Spatial light patterning | Sub-millisecond resolution, programmable patterns | Precise morphogen gradient generation in tissue cultures |
Quantifying Success: Strategies for Validating and Comparing Pattern Fidelity
This technical support guide provides a consolidated resource for researchers using pSmad2 immunostaining and downstream gene expression analysis to assess signaling activity, particularly in the context of calibrating light intensity for optogenetic morphogen-mimicking patterns. Proper interpretation of these readouts is fundamental for studies in developmental biology, cellular signaling, and therapeutic drug development.
Core Signaling Pathway: The TGF-β/Nodal signaling pathway initiates when ligands bind to cell surface receptor complexes, leading to the phosphorylation of the intracellular mediators Smad2 and Smad3. This phosphorylated Smad2 (pSmad2) forms a complex with Smad4, translocates to the nucleus, and regulates the transcription of target genes, thereby controlling diverse cellular processes [59] [60].
Frequently Asked Questions (FAQs)
Q1: What is the biological significance of pSmad2 as a signaling readout? pSmad2 is a direct, post-translational readout of pathway activation. Its levels and subcellular localization provide a snapshot of signaling activity. Nuclear pSmad2 indicates active transcription of target genes, which is crucial for processes like mesendoderm patterning in development and epithelial-mesenchymal transition in cancer [59] [60]. In cancer contexts, increased pSmad2 expression is associated with higher tumor grade and reduced survival [61].
Q2: How do I validate that my pSmad2 immunostaining results are accurate? A multi-step validation is recommended [62]:
- Specificity: Use positive and negative control cell lines (e.g., with/without pathway stimulation). Confirm staining loss with siRNA knockdown.
- Antibody Validation: Ensure the antibody is validated for IHC in your species and tissue type. Check for a single band on Western blot.
- Pattern Corroboration: Compare the pSmad2 staining pattern with the expression of well-established downstream target genes (e.g., Lefty1/2, Pitx2) via RNA in situ hybridization or other methods [63].
Q3: Why might I observe a discrepancy between pSmad2 staining and downstream gene expression? This is a common challenge with several potential causes:
- Temporal Delay: Gene expression is a slower process than protein phosphorylation. Allow sufficient time after pathway activation before measuring mRNA.
- Signal Integration: Target gene promoters integrate inputs from other signaling pathways (e.g., BMP, FGF, Wnt). High pSmad2 may be necessary but not sufficient for expression without these co-factors [63] [60].
- Feedback Inhibition: Active Nodal signaling induces expression of Lefty, a potent feedback inhibitor that can dampen the signal and subsequent gene expression [64] [60].
- Alternative Phosphorylation: Phosphorylation in the Smad2 linker region by kinases like ERK can influence protein stability and transcriptional output without involving the C-terminal (receptor-regulated) sites detected by common pSmad2 antibodies [65] [66].
Q4: In optogenetic experiments, how is pSmad2 immunostaining used to calibrate light intensity? In optoNodal systems, light pulses replace ligand binding to activate receptors. pSmad2 immunostaining serves as a direct, quantitative readout to correlate the applied light intensity/duration with the level of pathway activation. Researchers perform dose-response curves, measuring pSmad2 intensity in nuclei after illumination at different powers to establish a calibration curve that translates light into a defined signaling strength [9].
Troubleshooting Guides
Table 1: Troubleshooting pSmad2 Immunostaining
| Problem | Potential Cause | Suggested Solution |
|---|---|---|
| Weak or No Staining | Inefficient antigen retrieval | Optimize retrieval conditions (e.g., citrate buffer pH6, heat for 2 hours) [61] |
| Low pathway activity | Include a positive control (e.g., TGF-β1 stimulated cells); use a sensitive polymer-based detection system [62] | |
| High Background | Non-specific antibody binding | Use appropriate negative controls (omit primary antibody, isotype control); titrate antibody concentration [62] |
| Inconsistent Staining | Variable sample fixation | Standardize fixation protocol (e.g., 4% PFA, consistent fixation time); ensure uniform tissue processing [62] |
| Unexpected Subcellular Localization | Pathological context | In some cancers, TGF-βRII can show cytoplasmic predominant expression, potentially altering signal interpretation [61] |
Table 2: Troubleshooting Downstream Gene Expression
| Problem | Potential Cause | Suggested Solution |
|---|---|---|
| Target genes not induced despite pSmad2 | Insufficient signaling duration | Increase the time between pathway induction and analysis to allow for mRNA accumulation [60] |
| Absence of necessary co-factors | Investigate and potentially provide inputs from cooperating pathways (e.g., Wnt/β-catenin) [63] | |
| Ectopic gene expression | Failure of repression mechanisms | Check for de-repression of extra-embryonic genes, which can occur in Smad2/3 deficient models [63] |
| Expanded morphogen range | In systems like Nodal patterning, check for mutations in feedback inhibitors like Lefty [64] |
Key Experimental Protocols
Validating pSmad2 Antibody for Immunostaining
This protocol is adapted from standardized guidelines for antibody validation [62] and a specific study on pSmad2 in breast cancer [61].
- Step 1: Understand the Target. pSmad2 antibodies typically target phospho-serine residues 465/467. Be aware that linker phosphorylation (at S245/250/255) is regulated by different kinases (e.g., CDKs, ERK) and is detected by distinct antibodies [65].
- Step 2: Identify Control Cells and Tissues.
- Step 3: Perform Immunostaining.
- Deparaffinization and Antigen Retrieval: Use citrate buffer (pH 6) and heat for 2 hours in a pressure cooker [61].
- Staining: Incubate with primary antibody (e.g., anti-pSmad2 Ser465/467, Cell Signaling #9510 at 1:200) overnight at 4°C. Use a standard immunofluorescence protocol with a fluorescent secondary antibody or a tyramine-amplification method for low-abundance targets [62] [61].
- Step 4: Image and Quantify. Acquire images with a standardized microscope setup. Quantify mean fluorescence intensity in the nucleus using image analysis software (e.g., ImageJ, CellProfiler).
Correlating pSmad2 with Gene Expression in an Optogenetic Setup
This workflow allows you to calibrate light input with both proximal (pSmad2) and distal (gene expression) signaling outputs [9].
- Step 1: Pathway Activation. Illuminate embryos or cells expressing the optoNodal2 system with a range of calibrated light intensities (e.g., 0-20 μW/mm²) for a defined period [9].
- Step 2: Sample Fixation and Processing. Fix samples at multiple time points post-illumination to capture both the fast (pSmad2) and slow (gene expression) responses. Split samples for immunostaining and RNA extraction.
- Step 3: pSmad2 Quantification. Perform pSmad2 immunostaining as above. Plot nuclear pSmad2 intensity against light intensity to generate a calibration curve.
- Step 4: Gene Expression Analysis. Extract total RNA. Analyze expression of direct Nodal target genes (e.g., gsc, sox32, lefty1/2) via RT-qPCR or RNA-seq. This confirms the functional outcome of the pSmad2 signal [63] [9].
- Step 5: Data Integration. Correlate the pSmad2 levels with the magnitude of target gene induction for each light condition.
The Scientist's Toolkit: Research Reagent Solutions
Table 3: Essential Reagents for pSmad2 and Nodal Signaling Research
| Reagent | Function/Application | Example & Notes |
|---|---|---|
| pSmad2 (Ser465/467) Antibody | Detects pathway activation via C-terminal phosphorylation. | Rabbit mAb (Clone 138D4, Cell Signaling); validated for IHC in multiple studies [65] [61]. |
| OptoNodal2 Receptors | High-dynamic-range optogenetic tool for spatial-temporal control of Nodal signaling. | Cry2/CIB1N-fused receptors; eliminates dark activity and improves kinetics vs. first-gen tools [9]. |
| TGF-β1 / Activin A | Recombinant ligands to chemically activate the pathway. | Used for positive control stimulation in cell culture experiments [65] [61]. |
| ALK4/5/7 Inhibitor (e.g., SB-505124) | Small molecule inhibitor to block pathway activity. | Essential negative control to confirm staining specificity [60]. |
| Oep / EGF-CFC Co-receptor | Critical co-receptor for Nodal ligands; regulates ligand spread and cell sensitivity. | Loss leads to near-uniform Nodal activity, highlighting its role in shaping the gradient [64]. |
| CDK1/2 Inhibitors (e.g., Ro-3306) | To study cell cycle-dependent linker phosphorylation of Smad2. | pSmad2L is expressed in a mitosis-dependent manner in NSCLC and benign T cells [65]. |
Quantifying Positional Error and Patterning Precision in Noisy Environments
Frequently Asked Questions (FAQs)
Q1: What is the fundamental difference between positional error and patterning precision in the context of morphogen gradients?
Positional error (σₓ) quantifies the variability in the location of a pattern boundary, defined as the standard deviation of readout positions where a threshold morphogen concentration is reached across multiple embryos or experiments [47] [67]. Patterning precision refers to the overall accuracy and reproducibility of the entire patterned tissue structure. While positional error focuses on specific boundary locations, precision encompasses the reliability of the entire spatial pattern. In essence, low positional error is a prerequisite for high patterning precision.
Q2: How does non-linear morphogen decay impact patterning precision compared to linear decay?
The impact depends on the distance from the morphogen source. While non-linear decay (e.g., power-law gradients) was historically thought to increase robustness by reducing sensitivity to variability in the morphogen production rate, recent quantitative analyses show this benefit is very small under physiological noise levels [47]. Furthermore, non-linear decay produces gradients with shallower tails farther from the source. In tissues where the morphogen cannot exit the tissue opposite the source (a flux barrier), this can lead to a significantly larger positional error in regions distal to the source compared to gradients established by linear (exponential) decay [47].
Q3: My gradient measurements are noisy. What are the best methods to accurately calculate positional error from this data?
Avoid the common pitfall of fitting a single exponential to the average of many gradients and then using the inverse of its slope to estimate error (FitEPM). The arithmetic mean of multiple exponential gradients is not itself a perfect exponential, and this method can severely overestimate the positional error, especially away from the source [67]. Instead, use the Direct Error Estimation Method (DEEM): for each individual embryo or gradient realization, determine the precise position xθ,i where the concentration threshold Cθ is crossed. The positional error is then the standard deviation of all these xθ,i values [67]. The Numerical Differentiation Error Propagation Method (NumEPM) applied to the mean gradient profile is also a reliable approximation [67].
Q4: Can a single morphogen gradient achieve the high patterning precision observed in developing tissues?
Yes, numerical simulations based on measured molecular noise levels indicate that a single morphogen gradient can be sufficiently precise to define progenitor domain boundaries, such as those in the mouse neural tube, without requiring the simultaneous readout of multiple opposing gradients [67]. The positional error of single gradients has likely been overestimated in some previous studies due to the methodological issue described above [67].
Troubleshooting Guides
Issue 1: High Positional Error in Pattern Boundaries
Problem: The boundaries between different cellular fates are inconsistently located across experimental replicates.
Possible Causes and Solutions:
- Cause: Excessive variability in morphogen production.
- Solution: For optogenetic systems, ensure uniform expression of optogenetic reagents across the cell population and calibrate the light source intensity carefully [9]. For biochemical induction, use precise mixing and delivery systems to minimize pulse-to-pulse variation.
- Cause: High intrinsic noise in morphogen transport or degradation.
- Solution: This is often inherent to the biological system. Mitigate its impact by ensuring your readout mechanism (e.g., downstream gene expression) has a sufficiently steep response to the morphogen signal. A steeper effective response curve reduces the translation of concentration noise into positional error [47].
- Cause: Incorrect quantification method that overestimates true error.
- Solution: Re-evaluate your error calculation using the Direct Error Estimation Method (DEEM) as described in FAQ #3 [67].
Issue 2: Uncontrolled or Imprecise Morphogen Patterning with Light
Problem: When using optogenetics to create synthetic morphogen patterns, the resulting patterns are blurry, lack dynamic range, or have high background activity.
Possible Causes and Solutions:
- Cause: Suboptimal optogenetic reagents with slow kinetics or high "dark activity".
- Solution: Utilize improved reagent systems like optoNodal2, which uses Cry2/CIB1N heterodimerizing pairs and cytosolic sequestration of receptors to minimize dark activity and improve response kinetics [9].
- Cause: Inadequate spatial or temporal control of the illumination pattern.
- Solution: Implement a high-resolution pattern projection system, such as a Digital Micromirror Device (DMD), integrated with your microscope. This allows for the projection of complex, dynamic light patterns with high spatial fidelity [10].
- Cause: Lack of feedback between the observed pattern and the inducing signal.
- Solution: Employ a "cybergenetics" or closed-loop control system. This approach uses real-time imaging of the patterning process to dynamically adjust the light illumination profile, correcting for drift or heterogeneity to achieve a target pattern [10].
Quantitative Data on Gradient Precision
The following table summarizes key metrics and estimates of patterning precision from recent research, which can serve as benchmarks for your own experiments.
Table 1: Quantitative Estimates of Positional Error and Key Parameters in Model Systems
| System / Parameter | Morphogen / Signal | Mean Gradient Decay Length (λ) | Reported Positional Error (σₓ) | Notes | Source |
|---|---|---|---|---|---|
| Mouse Neural Tube | Sonic Hedgehog (SHH) | ~20 µm | ~1-3 cell diameters (direct measurement) | Earlier higher estimates were likely due to methodological overestimation. | [47] [67] |
| Synthetic Gradient (Simulation) | Linear decay model | 20 µm | ~2-5 µm (dependent on threshold position) | Error depends on molecular noise levels (CV ~10-50% for production, decay, diffusion). | [47] |
| Synthetic Gradient (Simulation) | Non-linear decay (n=4) | Varies | Smaller than linear decay near source; larger than linear decay far from source with a flux barrier. | Highlights the context-dependent benefit of non-linear decay. | [47] |
| Zebrafish Embryo | OptoNodal2 (Optogenetic) | Tunable via light | Not explicitly quantified, but enables precise spatial control of endogenous gene expression and cell internalization. | Demonstrates the capability to rescue mutant phenotypes with synthetic patterns. | [9] |
Table 2: Comparison of Positional Error Calculation Methods for Exponential Gradients
| Method | Description | Advantages | Limitations | Source |
|---|---|---|---|---|
| Direct Error Estimation (DEEM) | Directly calculate std. dev. of threshold positions xθ,i from individual gradients. |
Most accurate, makes no assumptions about gradient shape. | Requires a dataset of multiple individual gradient profiles. | [67] |
| Numerical Differentiation (NumEPM) | Apply error propagation to the numerically differentiated mean gradient profile. | Reliable approximation of DEEM, uses aggregated data. | Less accurate than DEEM if gradient realizations are highly variable in shape. | [67] |
| Fit-Based (FitEPM) | Fit a single exponential to the mean gradient and use its derivative for error propagation. | Simple, commonly used. | Severely overestimates error away from the source because the mean of exponentials is not exponential. | [67] |
Experimental Protocols
Protocol: Quantifying Positional Error from Noisy Gradient Data
This protocol outlines the steps to accurately determine the positional error of a morphogen gradient boundary from a set of concentration profiles (e.g., from multiple embryos).
Key Reagents & Equipment:
- A dataset of intensity/concentration profiles along a spatial axis (e.g., from fluorescence microscopy) from multiple biological replicates (N > 10).
- Data analysis software (e.g., Python, MATLAB, R).
Procedure:
- Data Alignment: Align all individual gradient profiles to a common reference point (e.g., the source boundary).
- Threshold Determination: Define the concentration threshold
Cθthat corresponds to the pattern boundary of interest. This may be derived from a known gene expression boundary. - Individual Readout Position Identification: For each individual gradient profile
j, determine the precise spatial positionxθ,jwhere the profile crosses the thresholdCθ. Use interpolation for sub-pixel/resolution accuracy. - Statistical Calculation: Calculate the mean readout position:
μₓ = mean({xθ,j}). Calculate the positional error, which is the standard deviation of the readout positions:σₓ = std({xθ,j})[67].
Diagram: Workflow for Quantifying Positional Error
Protocol: Implementing an Optogenetic Morphogen Gradient
This protocol describes the key steps for creating a synthetic, light-controlled morphogen gradient to pattern cells.
Key Reagents & Equipment:
- Engineered Cells: Cells expressing optogenetic receptors (e.g., optoNodal2: Cry2/CIB1N-fused receptors with cytosolic Type II receptor) [9].
- Patterned Illumination System: A microscope-integrated system with a Digital Micromirror Device (DMD) for high-resolution light patterning (e.g., μPatternScope) [10].
- Real-Time Imaging Setup: Microscope capable of live imaging to monitor downstream responses (e.g., pSmad2 translocation, reporter gene expression).
Procedure:
- Cell Preparation and Culture: Plate the engineered cells in an appropriate 2D or 3D culture format. Ensure uniform expression of the optogenetic constructs.
- System Calibration:
- Light Intensity: Calibrate the light intensity at the sample plane to ensure it falls within the dynamic range of the optogenetic system (e.g., saturating near 20 μW/mm² for optoNodal2) [9].
- Pattern Fidelity: Map the relationship between the digital pattern sent to the DMD and the actual light pattern projected onto the sample. Correct for any optical distortions [10].
- Patterning Experiment: Project the desired light pattern (e.g., a gradient) onto the cells. Control the duration and intensity of illumination to mimic desired morphogen dynamics.
- Validation and Readout: Fix the cells at the endpoint or use live reporters to visualize the resulting biological pattern (e.g., via immunostaining for phosphorylated Smad2 or fluorescence from a target gene reporter) [9].
- Closed-Loop Control (Advanced): For maximum precision, implement a feedback loop where the projected light pattern is dynamically adjusted based on real-time analysis of the emerging biological pattern [10].
Diagram: Optogenetic Patterning Experimental Setup
The Scientist's Toolkit
Table 3: Essential Research Reagent Solutions for Morphogen-Mimicking Patterning
| Reagent / Tool | Function | Example / Key Feature |
|---|---|---|
| Optogenetic Receptors | To confer light sensitivity to a specific signaling pathway, enabling external control. | optoNodal2: Cry2/CIB1N pairs with cytosolic sequestration for reduced dark activity and fast kinetics [9]. |
| Patterned Illumination System | To project defined light patterns onto biological samples with high spatial and temporal resolution. | μPatternScope: A customizable DMD-based system that integrates with microscopes for high-throughput, flexible patterning [10]. |
| Live-Cell Biosensors | To monitor signaling activity or gene expression in real-time during patterning. | pSmad2 Immunostaining / GFP Reporters: Allow visualization of immediate-early signaling and downstream transcriptional responses [9]. |
| Kinetic Noise Models | To simulate and understand the impact of molecular noise on gradient formation and precision. | Cell-based stochastic simulations: Incorporate variability in production, diffusion, and decay parameters to predict positional error [47]. |
Core Concepts of Functional Rescue
What is functional rescue and why is it a critical proof-of-concept in my research?
Functional rescue is an experimental strategy where a specific genetic defect (e.g., a disease-causing mutation) is compensated for, restoring normal or near-normal function to the protein or cellular pathway. In the context of your research on calibrating light intensity for morphogen-mimicking patterns, demonstrating a successful rescue provides the strongest possible evidence that an observed phenotype is directly caused by the targeted mutation and that your optogenetic intervention is effective [68].
For instance, a classic rescue experiment involves expressing a wild-type or engineered version of the gene in the mutant background to see if it reverses the phenotypic defect [69]. In your work, the "rescue agent" could be a precisely controlled light pattern that triggers a synthetic signaling pathway, effectively bypassing the defective endogenous component.
How does protein stability relate to functional rescue with optogenetic tools?
A significant mechanism by which missense variants cause disease is by reducing protein stability and abundance, leading to loss of function [70]. Many proteins are marginally stable, meaning even small, destabilizing mutations can prevent them from folding correctly or reaching their proper cellular location.
Your optogenetic gene switches function as "pharmacological chaperones" [70]. By using light to control the production of a key morphogen (like WNT3A), you can ensure that the functional protein is present at the right time and place, overcoming the deficit caused by a destabilizing mutation in the endogenous gene. This approach has been successfully used to rescue the expression of nearly all destabilizing variants in some model systems [70].
Troubleshooting Functional Rescue Experiments
Table 1: Troubleshooting Rescue Failure
| Problem | Potential Cause | Solution |
|---|---|---|
| No Phenotype Rescue | Incorrect light pattern or insufficient light intensity. | Calibrate light source and verify photon flux at sample plane with a power meter or chemical actinometer [71] [72]. |
| The mutant protein is severely destabilized (a "severe" TS mutant). | Consider combining rescue strategies (e.g., a stabilizer drug with optogenetic stimulation) [73]. | |
| Off-target effects of the genetic manipulation are the true cause of the phenotype. | Use multiple, independent optogenetic constructs or siRNAs to confirm specificity [69]. | |
| Inconsistent Rescue Between Biological Replicates | Variable transfection/transduction efficiency leading to mosaic transgene expression. | Use genomically stable cell lines with the optogenetic system integrated via transposases or lentivirus to ensure uniform responsiveness [29]. |
| Fluctuations in lamp output or alignment in the illumination system. | Regularly monitor and calibrate your light source; LEDs offer more stable output over time [71]. | |
| High Background Activity (Leakiness) | The optogenetic gene switch has significant basal expression at the "OFF" state. | Select a gene switch with low basal activity for your target cell type [29] and titrate the intensity of the activating light to find the optimal dynamic range. |
| Rescue is Not Sustained | The rescued protein has rapid turnover or the stabilizing effect is reversible. | For reversible stabilizers like ATO, sustained rescue may require inhibiting cellular counter-mechanisms (e.g., glutathione biosynthesis) or continuous, patterned illumination [73]. |
Table 2: Research Reagent Solutions for Functional Rescue
| Reagent / Tool | Function in Rescue Experiments | Example & Notes |
|---|---|---|
| Optogenetic Gene Switches | Enables spatiotemporal control of gene expression for the rescue agent (e.g., a morphogen). | Blue (EL222, LOV2) and red/far-red (PhyB-PIF) systems offer orthogonal control; test for low basal expression and high dynamic range in your cell type [29]. |
| Genomic Engineering Tools | Creates stable, uniform cell lines, eliminating mosaicism and ensuring consistent response to light. | Sleeping Beauty transposase allows for efficient, random genomic integration of large constructs without viral vectors [29]. |
| Pharmacological Chaperones / Stabilizers | Small molecules that bind and stabilize specific mutant proteins, facilitating their proper folding and function. | Arsenic trioxide (ATO) can stabilize the DNA-binding domain of certain p53 mutants; Tolvaptan can rescue surface expression of destabilized GPCRs [73] [70]. |
| siRNA-Resistant Transgenes | Serves as a definitive control to confirm that phenotype reversal is due to the expression of the rescue transgene. | An engineered transgene with synonymous codon changes is resistant to siRNA targeting the endogenous mRNA, allowing specific rescue of the phenotype [69]. |
| Chemical Actinometer | Calibrates the photon flux of light sources used to activate optogenetic systems, ensuring reproducibility. | A robust, broadly absorbing fulgide derivative can be used to quantify photons across UV to NIR wavelengths [72]. |
Detailed Experimental Protocols
Application: Precisely measure the power density of your microscope's light source to ensure consistent and reproducible activation of optogenetic systems across experiments [71].
Materials:
- Power meter and low-power detector head (e.g., Newport model 70260)
- Antireflection-coated lens (e.g., Thorlabs AC254-040-A1)
- Lens tube, adjustable iris, and thread adapter for your microscope stand
- Caliper
Method:
- Assemble the Setup: Mount the lens into the lens tube. Connect the lens tube to the adjustable iris, and attach the thread adapter to the iris. Secure this assembly to the microscope's objective turret (with the objective removed).
- Set the Aperture: Measure the diameter of the back aperture of the objective you will use. Adjust the iris to this measured diameter to match the beam size the objective would receive.
- Focus on Detector: Place the power detector head on the microscope stage. Use the lens to focus the light onto the active area of the detector.
- Measure Power: For each filter set and configuration you plan to use, record the power reading (in Watts) from the meter.
- Calculate Power Density: Convert the power reading to power density (e.g., W/cm²) at the sample plane using the field of view of your objective.
- Field of View (FoV) in mm: FoV = Field Number (FN) / Magnification of the objective.
- Illuminated Area (A) in cm²: A = π × (FoV / 2)². (Note: Convert mm to cm).
- Power Density: Power Density = (Power Reading × Objective Transmission) / A [71].
Protocol 2: Validating Rescue with an siRNA-Resistant Transgene
Application: Provide conclusive evidence that the phenotypic rescue is specifically due to the expression of your optogenetic construct and not an off-target effect [69].
Materials:
- siRNA targeting your gene of interest.
- Engineered, siRNA-resistant transgene (e.g., a codon-optimized version synthesized via GeneArt).
- Appropriate controls (non-silencing siRNA, etc.).
Method:
- Design the Resistant Transgene: Create a transgene that encodes the wild-type protein sequence but has a sufficiently altered DNA sequence (e.g., through codon optimization) in the region targeted by the siRNA. This makes the transgene mRNA resistant to degradation by the siRNA.
- Co-transfection: Transfert cells with both the siRNA and the siRNA-resistant transgene. Include controls: cells with non-targeting siRNA, siRNA alone, and siRNA plus the transgene.
- Assess Rescue: Quantify the rescue of the expected phenotype (e.g., cell cycle arrest, morphological change) using your established assays (FACS, imaging, etc.).
- Confirm Specificity: Use PCR primers that uniquely distinguish the endogenous mRNA (knocked down) from the exogenous, resistant mRNA (expressed) to confirm the molecular specificity of the rescue [69].
Experimental Workflows and Signaling Pathways
Diagram 1: Functional Rescue Workflow
Diagram 2: p53 & V2R Rescue Pathways
FAQs: Resolving Key Experimental Challenges
Q1: My morphogen gradient pattern is imprecise, particularly in regions far from the source. Could the type of morphogen decay be a contributing factor? Yes. While it was historically suggested that non-linear decay (e.g., ( n > 1 )) increases robustness by reducing sensitivity to variations in the morphogen source, recent quantitative studies indicate this benefit is marginal at physiological noise levels. In fact, for regions far from the source, non-linear decay can lead to significantly larger positional errors (( \sigma_x )) because it produces shallower gradient tails. This is especially problematic in tissues with impermeable boundaries (zero-flux boundary conditions) that prevent morphogen leakage [47] [74]. You should experimentally determine the decay exponent ( n ) for your specific morphogen system and validate patterning precision at multiple positions.
Q2: What are the primary sources of noise that affect my gradient's precision, and how do they interact with the decay mechanism? The main sources are molecular noise in production (p), diffusion (D), and degradation (d) rates. These parameters typically exhibit a noise-to-signal ratio (coefficient of variation, ( CV_q )) of around 0.1-0.5 under physiological conditions [47] [74]. This kinetic variability causes fluctuations in gradient amplitude and shape between different embryos or tissue samples. Non-linear decay does not substantially improve precision against this full spectrum of kinetic noise. For troubleshooting, quantify the variance in your key kinetic parameters.
Q3: How can I accurately measure the positional error (( \sigmax )) of my gradient in a developing tissue? Positional error is defined as the standard deviation of readout positions (( x\theta )) for a specific concentration threshold (( C\theta )) across multiple gradient realizations: ( \sigmax = \text{stddev}[x_\theta] ) [47] [74]. Avoid methods that assume a perfect exponential shape (like FitEPM) beyond the gradient's reliable detection limit, as they can vastly overestimate errors [75]. Instead, use:
- Cell-based simulations that incorporate measured noise levels.
- Error propagation methods that do not rely solely on exponential fitting.
- Ensure your imaging setup (e.g., bit depth) has a sufficient dynamic range to detect the full gradient profile without artificial flattening [75].
Troubleshooting Guides
Problem: High Patterning Variability Near the Morphogen Source
Potential Cause: Excessive variability in the morphogen production rate or source strength.
Solutions:
- Verify Source Integrity: Check for consistent expression of morphogen genes in source cells using in situ hybridization or immunohistochemistry.
- Modulate Production Noise: If using an inducible system, ensure the inducer is uniformly applied. Consider whether your experimental model accurately reflects the native source structure.
- Re-evaluate Decay Model Assumptions: Note that while non-linear decay (( n > 1 )) can theoretically reduce errors near the source, the practical improvement is small under real-world, noisy conditions [47]. Do not rely on switching to a non-linear decay mechanism as a primary solution.
Problem: High Patterning Variability Far from the Morphogen Source
Potential Cause: Shallow gradient slope amplifying local concentration noise. This is a hallmark issue with gradients resulting from non-linear decay mechanisms [47] [74].
Solutions:
- Check Boundary Conditions: Determine if your tissue has a flux barrier (impermeable boundary). This condition exacerbates the shallowing effect of non-linear decay. Characterize the tissue morphology opposite the source.
- Measure Full Gradient Profile: Use high dynamic range imaging (e.g., >8-bit) to accurately capture the gradient shape in its low-concentration regions. 8-bit imaging is limited to a 256-fold intensity change, artificially flattening the detected gradient beyond ~5.5 decay lengths [75].
- Consider Alternative Patterning Mechanisms: For patterns far from the source, investigate if a linear decay model is more appropriate or if sequential patterning and tissue growth play a more critical role than the steady-state gradient [76].
Problem: Inconsistent Readout of Morphogen Concentration by Cells
Potential Cause: The readout mechanism (how a cell converts a spatial morphogen distribution into a single concentration value) may be sensitive to noise.
Solutions:
- Averaging vs. Point Readout: Evidence suggests that the readout mechanism (e.g., averaging over the cell surface vs. reading at a single point) has a minor impact on perceived precision [47]. Therefore, focus troubleshooting on the gradient itself.
- Validate Threshold Response: Use reporter genes to confirm that downstream signaling responds sharply to the intended threshold concentration ( C_\theta ). Ensure that the feedback loops in the interpretation system do not introduce additional noise.
Quantitative Data Comparison
Table 1: Characteristics of Linear vs. Non-linear Morphogen Decay
| Feature | Linear Decay (( n = 1 )) | Non-linear Decay (( n > 1 )) |
|---|---|---|
| Gradient Profile | Exponential: ( C(x) = C_0 e^{-x/\lambda} ) [47] | Shifted power-law: ( C(x) = C0 (1 + \frac{x}{m\lambdam})^{-m} ), ( m=\frac{2}{n-1} ) [47] |
| Positional Error (( \sigma_x )) near source | Moderately sensitive to production noise [47] [74] | Slightly less sensitive, but improvement is minimal with physiological noise [47] |
| Positional Error (( \sigma_x )) far from source | Lower in impermeable tissues [47] | Much higher due to shallow gradient tails [47] |
| Key Biological Example | Bicoid (Drosophila) [76] [8] | Hedgehog (Hh) signaling, FGF8 (mouse brain, ( n \approx 4 )) [47] [74] |
Table 2: Key Parameters for Simulating Noisy Morphogen Gradients (based on Hedgehog)
| Parameter (Symbol) | Mean Value (( \mu_q )) | Standard Deviation (( \sigma_q )) | Notes & Function |
|---|---|---|---|
| Diffusivity (D) | 0.033 µm²/s [47] | ~0.0033 - 0.0165 (( CV_D = 0.1-0.5 )) | Sets the speed of morphogen spread. |
| Degradation Rate (d) | ( \muD / \mu\lambda^2 ) [47] | Varies (( CV_d = 0.1-0.5 )) | Combined with D, determines gradient length (( \lambda )). |
| Gradient Length (( \lambda )) | 20 µm [47] | - | Characteristic decay length. |
| Production Rate (p) | ( \mud C{ref} ) [47] | Varies (( CV_p = 0.1-0.5 )) | Sets the amplitude ( C_0 ) at the source. |
Experimental Protocols
Protocol 1: Determining the Morphogen Decay Exponent ( n )
Objective: To fit the morphogen decay exponent ( n ) from concentration profile data.
Materials:
- Quantified concentration profile data ( C(x) ) (e.g., from immunofluorescence or live imaging).
- Computational software for non-linear regression (e.g., Python, R, MATLAB).
Method:
- Acquire Data: Obtain a spatially resolved concentration profile across your tissue of interest.
- Model Fitting: Fit the general reaction-diffusion steady-state solution to your data. The model incorporates production, diffusion, and decay: ( 0 = D \frac{\partial^2 C}{\partial x^2} - d C^n / C_{ref}^{n-1} + p H(-x) ) [47].
- Parameter Estimation: Use non-linear least-squares algorithms to estimate the parameters ( D ), ( d ), ( p ), and the exponent ( n ). The value of ( n ) that minimizes the residual error indicates the nature of the decay.
- Validation: Compare the goodness-of-fit for models with fixed ( n=1 ) (linear) and free ( n ) (non-linear).
Protocol 2: Estimating Positional Error (( \sigma_x )) from Experimental Data
Objective: To compute the standard deviation of boundary positions determined by a morphogen threshold.
Materials:
- Multiple replicates of concentration profiles (( C_j(x) )) from different embryos/samples.
- A known or estimated concentration threshold ( C_\theta ) for a specific cell fate decision.
Method:
- Define Threshold: Identify the threshold concentration ( C_\theta ) for your readout (e.g., gene expression boundary).
- Locate Boundaries: For each gradient replicate ( j ), determine the position ( x{\theta, j} ) where the concentration profile crosses ( C\theta ). This is the readout position for that sample.
- Calculate Error: Compute the standard deviation of all determined positions ( x{\theta, j} ): ( \sigmax = \text{stddev}(x_{\theta, j}) ) [47]. This is the positional error. Avoid methods that infer this from a single profile fit.
Essential Diagrams
Morphogen Decay Dynamics
Gradient Precision Workflow
The Scientist's Toolkit: Research Reagent Solutions
Table 3: Essential Reagents and Methods for Morphogen Gradient Research
| Item | Function / Application | Example Use Case |
|---|---|---|
| Fluorescent Protein Fusions | Visualizing gradient profiles in live tissue. | Creating a GFP-Hedgehog fusion to track Shh gradient dynamics in the mouse neural tube [8] [75]. |
| Cell-Based Stochastic Simulations | Quantifying expected patterning precision under molecular noise. | Predicting the positional error of a Bicoid gradient using measured noise levels in production and diffusion [47] [74]. |
| High Bit-Depth Imaging (>8-bit) | Accurately capturing the full dynamic range of the gradient, especially low concentrations far from the source. | Avoiding artificial flattening of gradient tails, which is critical for assessing long-range patterning capacity [75]. |
| Morphogen Receptor Agonists/Antagonists | Perturbing specific steps in morphogen signaling to test models. | Using Cyclopamine (Smoothened antagonist) to disrupt Shh signal interpretation and map threshold responses [8]. |
A silent revolution is underway in developmental biology and genetics. Traditional methods like microinjection and genetic knockouts, long the workhorses of the field, are now being complemented and even surpassed by sophisticated new techniques. For researchers calibrating light intensity for morphogen-mimicking patterns, understanding this methodological shift is crucial. This technical support center provides a foundational guide, helping you benchmark these novel approaches against traditional standards, troubleshoot your experiments, and navigate the practical challenges of integrating new technologies into your research.
Key Experiment: Prime Editing in Mouse Embryos
Experimental Protocol
This protocol details the use of a prime editing system with transient mismatch repair inhibition (PE4) for highly efficient editing in two-cell mouse embryos, a method that demonstrates significant advantages over traditional approaches [77].
- Component Preparation:
- Editor mRNA: Produce PE2 (nCas9-RT) mRNA via in vitro transcription.
- pegRNA: Synthesize prime editing guide RNAs (pegRNAs) specifying the desired edit and target locus.
- Inhibitor mRNA: Prepare mRNA encoding a dominant-negative mouse mismatch repair protein (mMLH1dn).
- Embryo Collection & Staging: Collect mouse zygotes and culture them to the two-cell stage. Microinjection at this specific developmental stage is critical for high efficiency.
- Microinjection: Perform cytoplasmic microinjection of the two-cell embryo with a mixture containing:
- PE2 mRNA
- pegRNA
- mMLH1dn mRNA
- Embryo Culture: Post-injection, culture the embryos to the blastocyst stage.
- Outcome Analysis: Harvest embryos and analyze editing outcomes at the target site through amplicon sequencing. Categorize sequencing reads as:
- Unmodified (WT)
- Precise Edit (containing only the programmed edit)
- Errors (any unintended sequence change near the edit site)
Benchmarking Data & Analysis
The table below summarizes the performance of the PE4 system in two-cell mouse embryos compared to other methods, highlighting its superior balance of high precision and low byproducts [77].
Table 1: Benchmarking Prime Editing Systems in Mouse Embryos
| Editing System | Key Component | Average Precise Edit Frequency | Average On-Target Error Frequency | Key Characteristics |
|---|---|---|---|---|
| PE2 (Zygote) | nCas9-RT + pegRNA | ~8.5% | ~2% | Low efficiency, minimal byproducts [77] |
| PE3 (Zygote) | PE2 + sgRNA | ~25% | ~52% | Higher efficiency, but very high byproduct formation [77] |
| PE4 (Two-Cell) | PE2 + mMLH1dn | 58% (across 13 edits) | 0.5% (across 13 edits) | Optimal profile: High efficiency with minimal errors [77] |
| Traditional HDR | Cas9 nuclease + donor DNA | Not Specified | Frequently high | Frequent unwanted on-target mutations [77] |
Technical Note: Error rates should be adjusted by subtracting the average error rate found in unedited control embryos (typically 2-6%) to account for technical artifacts from PCR and sequencing [77].
Diagram 1: Prime Editing Workflow
The Scientist's Toolkit: Research Reagent Solutions
Table 2: Essential Reagents for Advanced Genome and Morphogen Engineering
| Reagent / Tool | Function / Description | Key Application |
|---|---|---|
| PE2 System | Engineered Cas9 nickase-reverse transcriptase fusion protein. | The core effector for prime editing, writes edited sequence from pegRNA template [77]. |
| pegRNA | Guide RNA that specifies both the target site and the desired edit. | Directs PE2 to the correct genomic locus and provides the template for the new genetic sequence [77]. |
| MLH1dn | Dominant-negative mismatch repair protein. | Transiently inhibits MMR to significantly boost prime editing efficiency and precision [77]. |
| OptoNodal2 System | Optogenetic Nodal receptors (Cry2/CIB1N) with cytosolic Type II receptor. | Generates high-fidelity, light-controlled Nodal signaling patterns in zebrafish embryos [9]. |
| iGWOS Platform | Integrated Genome-Wide Off-target cleavage Search platform. | A one-stop, ensemble learning-based platform for optimal prediction of CRISPR off-target sites [78]. |
Frequently Asked Questions (FAQs)
Q1: Our lab is new to prime editing. Why might we choose the PE4 system in two-cell embryos over traditional CRISPR-Cas9 knockouts?
A: The primary advantage is the reduction of unwanted on-target byproducts. Traditional CRISPR-Cas9 knockouts rely on double-strand breaks and endogenous repair, which often leads to a complex mixture of indels and other unintended mutations at the target site. In contrast, the PE4 system achieves high-efficiency precise editing (averaging 58% in benchmark studies) with a very low frequency of on-target errors (averaging 0.5%), enabling more reliable same-generation phenotyping without the need to establish stable lines [77].
Q2: When benchmarking a new optogenetic morphogen system like OptoNodal2, what are the key performance metrics to compare against traditional ligand microinjection?
A: Focus on these critical metrics:
- Dynamic Range: The system should have negligible activity in the dark and induce signaling levels that approach peak endogenous responses upon illumination. The OptoNodal2 system was specifically redesigned to eliminate problematic dark activity present in earlier versions [9].
- Response Kinetics: Measure how quickly the system activates and deactivates. Fast dissociation kinetics (e.g., OptoNodal2's return to baseline ~50 minutes post-stimulus) are essential for creating dynamic patterns that mimic natural morphogen pulses [9].
- Spatial Precision: The system must respond accurately to defined light patterns, allowing you to create arbitrary signaling domains that are not feasible with the diffuse point sources from ligand microinjection [9].
Q3: We've observed low editing efficiency in our initial prime editing experiments. What is the most critical step to optimize?
A: The developmental timing of delivery is a critical factor. Benchmark experiments have demonstrated that microinjection at the two-cell stage, as opposed to the zygote stage, can significantly increase the frequency of precise edit installation for many targets while maintaining low error rates. Furthermore, ensure you are co-injecting the mismatch repair inhibitor (mMLH1dn), as this is essential for achieving high efficiency with the PE4 system [77].
Q4: Off-target effects are a major concern with any genetic perturbation. How can we rigorously benchmark this for a new CRISPR method?
A: A comprehensive benchmark involves both in silico and experimental approaches.
- In Silico Prediction: Use an integrated platform like iGWOS, which combines multiple prediction algorithms to improve the genome-wide search for potential off-target cleavage sites [78].
- Experimental Detection: Rely on high-sensitivity, genome-wide techniques like CIRCLE-seq or GUIDE-seq to empirically detect off-target cleavage sites without prior sequence bias. It is important to note that these techniques vary in sensitivity and should be chosen based on your experimental context (e.g., in vitro vs. cell-based) [78].
Logical Pathway of Nodal Signal Decoding
The following diagram illustrates the core signaling pathway exploited by optogenetic morphogen tools, providing a logical framework for understanding how engineered stimuli are translated into gene expression [9].
Diagram 2: Optogenetic Signaling Pathway
Conclusion
The precise calibration of light intensity is the cornerstone of reliable optogenetic morphogen patterning. This synthesis demonstrates that success hinges on an integrated approach, combining optimized reagents with high-fidelity optical systems and rigorous validation. Foundational studies confirm that non-linear decay offers only marginal precision benefits, placing greater emphasis on controlling kinetic parameters and noise. Methodological advances now enable high-throughput creation of synthetic patterns, while troubleshooting focuses on eliminating dark activity and improving optical fidelity. Looking forward, the convergence of optogenetics with differentiable programming and automated feedback control, termed 'cybergenetics,' paves the way for programming complex tissue architectures. This holds profound implications for regenerative medicine, drug screening in engineered tissues, and fundamentally deciphering the rules of embryogenesis.
References
- 1. French flag model [https://en.wikipedia.org/wiki/French_flag_model]
- 2. The French Flag Model | Embryo Project Encyclopedia [https://embryo.asu.edu/pages/french-flag-model]
- 3. French flag model [https://grokipedia.com/page/French_flag_model]
- 4. Calibration FAQs [https://www.oceanoptics.com/faq/calibration-faqs/]
- 5. Errors in Spectrophotometry and Calibration Procedures to ... [https://pmc.ncbi.nlm.nih.gov/articles/PMC5293527/]
- 6. UV light calibration error: Requested intensity cannot be re... [https://forum.prusa3d.com/forum/original-prusa-sl1-hardware-firmware-and-software-help/uv-light-calibration-error-requested-intensity-cannot-be-reached-by-max-allowed-pwm/]
- 7. Investigating morphogen and patterning dynamics with ... [https://pubmed.ncbi.nlm.nih.gov/40848721/]
- 8. Theoretical and experimental approaches to understand ... [https://pmc.ncbi.nlm.nih.gov/articles/PMC2290935/]
- 9. Optogenetic control of Nodal signaling patterns [https://pmc.ncbi.nlm.nih.gov/articles/PMC11030342/]
- 10. Image-guided optogenetic spatiotemporal tissue patterning ... [https://www.nature.com/articles/s41467-024-54351-6]
- 11. Illuminating cell signalling with optogenetic tools - PMC [https://pmc.ncbi.nlm.nih.gov/articles/PMC4145075/]
- 12. Optogenetic control of Nodal signaling patterns - PMC [https://pmc.ncbi.nlm.nih.gov/articles/PMC12070070/]
- 13. Optogenetic control of receptor-mediated growth cone ... [https://pubmed.ncbi.nlm.nih.gov/39705378/]
- 14. Evolution of Light-Sensitive Proteins in Optogenetic ... [https://www.mdpi.com/2227-9059/13/2/429]
- 15. Viral Vectors 101: Optogenetic Tools [https://blog.addgene.org/viral-vectors-101-optogenetic-tools]
- 16. Red Light Optogenetics in Neuroscience [https://www.frontiersin.org/journals/cellular-neuroscience/articles/10.3389/fncel.2021.778900/full]
- 17. Characterizing optogenetically mediated rebound effects in ... [https://pmc.ncbi.nlm.nih.gov/articles/PMC12369306/]
- 18. Principles of designing interpretable optogenetic behavior ... [https://pmc.ncbi.nlm.nih.gov/articles/PMC4371169/]
- 19. Dynamic range [https://en.wikipedia.org/wiki/Dynamic_range]
- 20. Dynamic Range | OECF | ISO 14524 | Image Quality Factors [https://image-engineering.de/library/image-quality/factors/1293-dynamic-range]
- 21. How is Dynamic Range Measured? [https://neiloseman.com/how-is-dynamic-range-measured/]
- 22. Dynamic Range [https://www.imatest.com/imaging/dynamic-range/]
- 23. Analyzing Kinetic Binding Data - Assay Guidance Manual - NCBI [https://www.ncbi.nlm.nih.gov/books/NBK569501/]
- 24. Calibration Patterns Explained [https://calib.io/blogs/knowledge-base/calibration-patterns-explained?srsltid=AfmBOooEOumnzLEGc2_Z3IJMIAZNUe0VpxHm7MrQy5zMeZxnrtU7HWWP]
- 25. Calibration Patterns Explained | Don't BUY Before Reading!! [https://www.foamcoreprint.com/calibration-patterns-explained?srsltid=AfmBOooaYR7wq4XXjw0DxMBqux-_1umNH2qxXfZSzJPhmIWsiNGWce78]
- 26. Enzyme kinetics on a plate reader | BMG LABTECH [https://www.bmglabtech.com/en/application-notes/enzyme-kinetic-measurements-performed-on-a-bmg-labtech-microplate-reader/]
- 27. Optogenetics Guide [https://www.addgene.org/guides/optogenetics/]
- 28. High-precision alignment system for DMD-based maskless ... [https://www.sciencedirect.com/science/article/abs/pii/S0141635925002363]
- 29. Genetically-stable engineered optogenetic gene switches ... [https://www.nature.com/articles/s41467-024-54350-7]
- 30. Optogenetic control of the Bicoid morphogen reveals fast and ... [https://pmc.ncbi.nlm.nih.gov/articles/PMC9019726/]
- 31. Fluorescence and Light Scatter Calibration Allow ... [https://pmc.ncbi.nlm.nih.gov/articles/PMC8482305/]
- 32. High-Content Screening - an overview [https://www.sciencedirect.com/topics/medicine-and-dentistry/high-content-screening]
- 33. Assay Development Guidelines for Image-Based High ... - NCBI [https://www.ncbi.nlm.nih.gov/books/NBK100913/]
- 34. Striking parallels between dorsoventral patterning in Drosophila and... [https://elifesciences.org/articles/68287]
- 35. High-Content Analysis (Quantitative Imaging) Information [https://www.thermofisher.com/us/en/home/life-science/cell-analysis/cell-analysis-learning-center/cell-imaging-information/high-content-analysis-information.html]
- 36. Optogenetic Stimulation: The Ultimate Guide - Mightex [https://www.mightexbio.com/optogenetic-stimulation/]
- 37. Optogenetics for light control of biological systems - PMC [https://pmc.ncbi.nlm.nih.gov/articles/PMC10627578/]
- 38. Blog: Optimising Optogenetics: 5 Proven Tips for Better… [https://www.scientifica.uk.com/neurowire/optimising-optogenetics-5-proven-tips-for-better-experimental-control]
- 39. Engineering of photo-inducible binary interaction tools for ... [https://www.nature.com/articles/s41467-025-61710-4]
- 40. Rapid changes in morphogen concentration control self ... [https://elifesciences.org/articles/40526]
- 41. Morphogens in the evolution of size, shape and patterning [https://pmc.ncbi.nlm.nih.gov/articles/PMC7616732/]
- 42. Closing the Loop: Distortion Correction [https://www.imatest.com/2017/04/distortion-correction/]
- 43. Understanding Light Uniformity: Creating Perfect Illumination [https://www.benweilight.com/info/understanding-light-uniformity-creating-perfe-103221253.html]
- 44. Lighting: Why Uniformity Matters in Machine Vision Systems [https://fjwoptical.com/blogs/blog/lighting-why-uniformity-matters-in-machine-vision-systems?srsltid=AfmBOoo1zBse5rKCm9BO2Ws_yxFG90g3JaaLoEgV6onufvrASz9pje6j]
- 45. Pipeline for illumination correction of images for high- ... [https://pmc.ncbi.nlm.nih.gov/articles/PMC4359755/]
- 46. Robust tissue pattern formation by coupling morphogen ... [https://pmc.ncbi.nlm.nih.gov/articles/PMC11549100/]
- 47. Patterning precision under non-linear morphogen decay ... [https://elifesciences.org/articles/84757]
- 48. Understanding Error Sources in Precision Positioning [https://www.edmundoptics.com/knowledge-center/application-notes/optomechanics/understanding-error-sources-in-precision-positioning/?srsltid=AfmBOorWkXFD3peo1yDhVbnKVCldLufNsm1VHX_ufhOHGYuPCBtTOs3S]
- 49. Positional Information, Positional Error, and Readout ... - PMC [https://pmc.ncbi.nlm.nih.gov/articles/PMC4286692/]
- 50. Noise-driven morphogenesis independent of transcriptional ... [https://pmc.ncbi.nlm.nih.gov/articles/PMC12340819/]
- 51. Cell competition corrects noisy Wnt morphogen gradients ... [https://www.nature.com/articles/s41467-019-12609-4]
- 52. Evidential deep learning-based drug-target interaction ... [https://www.nature.com/articles/s41467-025-62235-6]
- 53. Cell signaling error control for reliable molecular ... [https://www.frontiersin.org/journals/communications-and-networks/articles/10.3389/frcmn.2024.1332379/full]
- 54. Engineering morphogenesis of cell clusters with ... [https://arxiv.org/html/2407.06295v1]
- 55. Elements must meet minimum color contrast ratio thresholds [https://dequeuniversity.com/rules/axe/4.8/color-contrast]
- 56. Inverse design of nanophotonic devices enabled by ... [https://pmc.ncbi.nlm.nih.gov/articles/PMC11806510/]
- 57. Text has enhanced contrast | ACT Rule | WAI [https://www.w3.org/WAI/standards-guidelines/act/rules/09o5cg/]
- 58. Text has enhanced contrast - Rules - Siteimprove [https://alfa.siteimprove.com/rules/sia-r66]
- 59. TGF-β signaling in health, disease and therapeutics [https://www.nature.com/articles/s41392-024-01764-w]
- 60. Temporal dynamics in the formation and interpretation of ... [https://www.sciencedirect.com/science/article/abs/pii/S0070215319300870]
- 61. Increased pSmad2 expression and cytoplasmic predominant ... [https://pmc.ncbi.nlm.nih.gov/articles/PMC4310807/]
- 62. Antibody validation of immunohistochemistry for biomarker ... [https://pmc.ncbi.nlm.nih.gov/articles/PMC4240800/]
- 63. Combinatorial Smad2/3 Activities Downstream of Nodal ... [https://pmc.ncbi.nlm.nih.gov/articles/PMC6113931/]
- 64. The pattern of nodal morphogen signaling is shaped by co ... [https://pmc.ncbi.nlm.nih.gov/articles/PMC8266389/]
- 65. SMAD2 linker phosphorylation impacts overall survival ... [https://www.nature.com/articles/s41416-025-02970-1]
- 66. Modulation of Smad2-mediated Signaling by Extracellular ... [https://www.sciencedirect.com/science/article/pii/S0021925819719735]
- 67. Precision of morphogen gradients in neural tube ... [https://www.nature.com/articles/s41467-022-28834-3]
- 68. functional validation of genetic variants - PMC - PubMed Central [https://pmc.ncbi.nlm.nih.gov/articles/PMC5959958/]
- 69. Top 10 Ways to Validate Your RNAi Data [https://www.thermofisher.com/us/en/home/references/ambion-tech-support/rnai-sirna/general-articles/top-ten-ways-to-ensure-valid-rnai-data.html]
- 70. A small molecule stabilizer rescues the surface expression ... [https://www.nature.com/articles/s41594-025-01659-6]
- 71. Calibrating excitation light fluxes for quantitative ... [https://pmc.ncbi.nlm.nih.gov/articles/PMC3109976/]
- 72. Behind the Science: Calibrating Light Sources for ... [https://www.chemistryviews.org/details/ezine/11165511/Behind_the_Science_Calibrating_Light_Sources_for_Photochemistry/]
- 73. Synergistic rescue of temperature sensitive p53 mutants by ... [https://pmc.ncbi.nlm.nih.gov/articles/PMC11466696/]
- 74. Patterning precision under non-linear morphogen decay and ... [https://pmc.ncbi.nlm.nih.gov/articles/PMC10139688/]
- 75. Assessing the precision of morphogen gradients in neural ... [https://www.nature.com/articles/s41467-024-45149-7]
- 76. Patterning principles of morphogen gradients - PMC - NIH [https://pmc.ncbi.nlm.nih.gov/articles/PMC9579920/]
- 77. Efficient prime editing in two-cell mouse embryos using ... [https://www.nature.com/articles/s41587-023-02106-x]
- 78. Benchmarking and integrating genome-wide CRISPR off ... [https://pmc.ncbi.nlm.nih.gov/articles/PMC7672467/]