Preserving RNA Integrity in Embryonic Samples: A Comprehensive Guide for Researchers
This article provides a detailed guide for researchers and drug development professionals on preventing RNA degradation in embryonic samples.
Preserving RNA Integrity in Embryonic Samples: A Comprehensive Guide for Researchers
Abstract
This article provides a detailed guide for researchers and drug development professionals on preventing RNA degradation in embryonic samples. It covers the foundational biology of RNA decay pathways active during early development, practical methodologies for sample stabilization and isolation, advanced troubleshooting for common challenges, and rigorous validation techniques to confirm RNA integrity. By synthesizing current research and protocols, this resource aims to equip scientists with the knowledge to ensure high-quality RNA for accurate transcriptomic analysis, stem cell research, and therapeutic development.
Understanding RNA Degradation: Why Embryonic Samples Are Uniquely Vulnerable
The Critical Role of RNA Turnover in Embryonic Development and Cell Fate Decisions
RNA turnover, the precise control of RNA synthesis and degradation, is a fundamental post-transcriptional regulatory mechanism that shapes gene expression profiles. In the context of embryonic development and cell fate decisions, where rapid and precise changes in gene expression are required, the regulated destruction of RNA molecules is as critical as their production. This process ensures the timely clearance of maternal transcripts during early embryogenesis and maintains appropriate gene expression patterns that guide stem cell differentiation and lineage specification. Disruptions in RNA degradation pathways can lead to developmental arrest, congenital disorders, and diseases including cancer and neurodegeneration. This technical support center provides essential guidance for researchers investigating RNA turnover in sensitive embryonic samples, with a focus on preventing unwanted RNA degradation and accurately interpreting experimental results.
FAQs: Understanding RNA Degradation in Embryonic Systems
Q1: Why does RNA degradation occur so rapidly in embryonic extracts compared to other sample types? Embryonic cells, particularly during early development, undergo massive, programmed RNA degradation events as part of normal developmental processes. The maternal-to-zygotic transition (MZT) represents a prime example, where maternal RNAs are systematically cleared to enable zygotic genome activation. This process is driven by specialized mechanisms including the IRE1α RNase pathway, which directly binds and cleaves maternal mRNAs after fertilization [1]. Additionally, embryonic extracts are rich in RNAses and regulatory factors that actively degrade RNA as part of developmental programming, making these samples particularly vulnerable to rapid RNA degradation if not properly handled.
Q2: What are the key RNA degradation pathways active in embryonic development? Multiple specialized RNA degradation pathways operate during embryonic development:
- IRE1α-mediated decay: Critical for post-fertilization maternal mRNA degradation during maternal-to-zygotic transition [1]
- Nonsense-mediated RNA decay (NMD): Influences neural development, stem cell differentiation decisions, and axon guidance; mutations in NMD factors are associated with neurodevelopmental disorders [2]
- Deadenylation-dependent decay: Initiated by PAN2-PAN3 and CCR4-NOT complexes which shorten poly(A) tails [3]
- Exosome-mediated decay: Catalyzed by multi-subunit exosome complex with 3'-to-5' exonuclease activity [3]
- MicroRNA-mediated degradation: Regulates transcript stability through RNA interference pathways [4]
Q3: How can I distinguish programmed developmental RNA degradation from experimental degradation artifacts? Programmed developmental degradation exhibits specific characteristics: (1) it occurs in a timed manner corresponding to developmental stages; (2) it targets specific transcript classes (e.g., maternal mRNAs during MZT); (3) it depends on specific degradation pathways evidenced by pathway-specific factor requirement; and (4) it produces specific degradation intermediates. Experimental artifacts appear random, affect transcripts indiscriminately, and are not reproducible across biological replicates. Using proper controls including synthetic spike-in RNAs can help distinguish these processes.
Q4: What special considerations are needed when working with embryonic stem cells versus whole embryos? Embryonic stem cells (ESCs) maintain different RNA stability profiles compared to whole embryos. In ESCs, the correlation between translation and mRNA stability is maintained by different mechanisms, and microRNAs impact translational repression independently of transcript destabilization [4]. Whole embryos contain multiple cell types with distinct RNA degradation programs operating simultaneously, complicating bulk RNA measurements. Single-cell approaches are often necessary to resolve cell-type-specific degradation events in whole embryos.
Troubleshooting Guide: Preventing RNA Degradation
Table: Common RNA Degradation Problems and Solutions in Embryonic Research
| Problem | Potential Causes | Solutions | Validation Methods |
|---|---|---|---|
| Rapid degradation of maternal transcripts | Overactive degradation pathways; improper sample collection | Optimize timing of sample collection; use specific pathway inhibitors; rapid freezing | Northern blotting; RACE assays to detect degradation intermediates |
| Inconsistent RNA quality across embryonic stages | Developmental stage-specific degradation activity; variable handling | Standardize collection protocols across stages; use RNA stabilizers; minimize processing time | RNA Integrity Number (RIN) measurement; capillary electrophoresis |
| Failure to detect unstable non-coding RNAs | Extreme instability of certain RNA classes (e.g., eRNAs, PROMPTs) | Implement metabolic labeling (4sU); use transcription inhibitors in time-course experiments | PRO-seq/RNA-seq combined analysis; 4sU-seq [5] |
| Loss of RNA during purification from small embryonic samples | Insufficient starting material; inefficient recovery | Carrier RNA use; scale-down of purification protocols; specialized micro-purification kits | Spike-in controls; quantitative RT-PCR with standard curves |
| Discrepancy between transcription rates and steady-state RNA levels | Unaccounted RNA stability differences; assuming uniform half-lives | Combined PRO-seq and RNA-seq analysis to estimate half-lives [5] | Metabolic labeling with 4-thiouridine; actinomycin D chase experiments |
Experimental Protocols: Key Methodologies
Protocol 1: RNA Isolation from Embryonic Zebrafish Using TRIzol
This protocol is adapted from established methods for embryonic zebrafish [6] and represents a robust approach for challenging embryonic samples:
- Sample Preparation: Pool 50 zebrafish embryos in a 1.5 ml microfuge tube and remove excess water. For other model organisms, adjust embryo numbers based on size.
- Lysis and Homogenization: Under a fume hood, add 250 μl TRIzol reagent to embryos. Homogenize with a pellet pestle (approximately 20 strokes) until tissue is sufficiently disrupted. Add additional 750 μl TRIzol for 1 ml total volume.
- Phase Separation: Incubate homogenized samples for 5 minutes at room temperature. Add 0.2 ml chloroform, rock tube for 15 seconds, and incubate for 2-3 minutes at room temperature. Centrifuge at 12,000 × g for 15 minutes at 4°C.
- RNA Precipitation: Transfer the upper aqueous phase (approximately 60% of volume) to a new tube. Add 0.5 ml isopropanol and incubate at room temperature for 10 minutes. Centrifuge at 12,000 × g for 10 minutes at 4°C to pellet RNA.
- RNA Wash: Remove supernatant and wash pellet with 1 ml 75% ethanol. Mix by inversion and centrifuge at 7,500 × g for 5 minutes at 4°C.
- RNA Resuspension: Air-dry pellet for 10 minutes (inverted tube). Resuspend in RNase-free water with frequent vortexing during 10-minute incubation at 55°C.
Critical Step: For embryonic samples rich in yolk, additional purification using silica membrane columns (e.g., Qiagen RNEasy kits) is recommended after TRIzol extraction to remove contaminants that may interfere with downstream applications.
Protocol 2: Genome-Wide RNA Half-Life Determination Using PRO-seq and RNA-seq
This computational approach estimates relative RNA half-lives without metabolic labeling [5]:
- Experimental Design: Perform matched PRO-seq (Precision Run-On sequencing) and RNA-seq experiments on the same biological samples. Include at least two biological replicates per condition.
- Library Preparation:
- For PRO-seq: Map engaged RNA polymerases genome-wide following established protocols [5]
- For RNA-seq: Use rRNA-depleted total RNA or poly-A+ selection depending on target transcripts
- Data Processing:
- Quantify transcription rates from PRO-seq data by calculating reads per million in transcription units (excluding first 500 bp downstream of TSS and 500 bp upstream of TES)
- Quantify RNA concentrations from RNA-seq data as transcripts per million (TPM)
- Half-Life Calculation: For each transcription unit, estimate relative half-life using the formula: Half-life ∝ RNA-seq TPM / PRO-seq TPM, based on the steady-state equilibrium assumption where production rate equals degradation rate
This method enables genome-wide assessment of RNA stability for both coding and non-coding RNAs, including those without introns, and reveals stability differences across transcript classes.
Research Reagent Solutions
Table: Essential Reagents for Studying RNA Turnover in Embryonic Systems
| Reagent/Category | Specific Examples | Function/Application | Considerations for Embryonic Research |
|---|---|---|---|
| RNA Stabilization Reagents | TRIzol, RNAlater | Preserve RNA integrity during sample collection | TRIzol effectively inactivates RNases in yolk-rich embryonic samples |
| Metabolic Labeling Compounds | 4-thiouridine (4sU), 5-ethynyl uridine | Pulse-chase analysis of RNA kinetics | Concentration must be optimized for embryonic systems to avoid developmental toxicity |
| Degradation Pathway Inhibitors | IRE1α RNase inhibitors, NMD pathway modifiers | Specific inhibition of distinct degradation pathways | Assess developmental stage-specific effects as pathway importance varies |
| Commercial RNA Isolation Kits | Qiagen RNEasy, Zymo Research Quick-RNA | High-quality RNA purification | Miniaturized versions available for limited embryonic material |
| Reverse Transcription Systems | SuperScript First-Strand Synthesis System | cDNA generation from RNA templates | Use random hexamers and oligo(dT) for comprehensive coverage |
| Spike-in RNA Controls | External RNA Controls Consortium (ERCC) standards | Normalization for technical variability in degradation studies | Essential for distinguishing technical from biological degradation |
| RNase Inhibitors | Recombinant RNase inhibitors, RNaseOUT | Protection during experimental procedures | Critical for embryonic extracts with high intrinsic RNase activity |
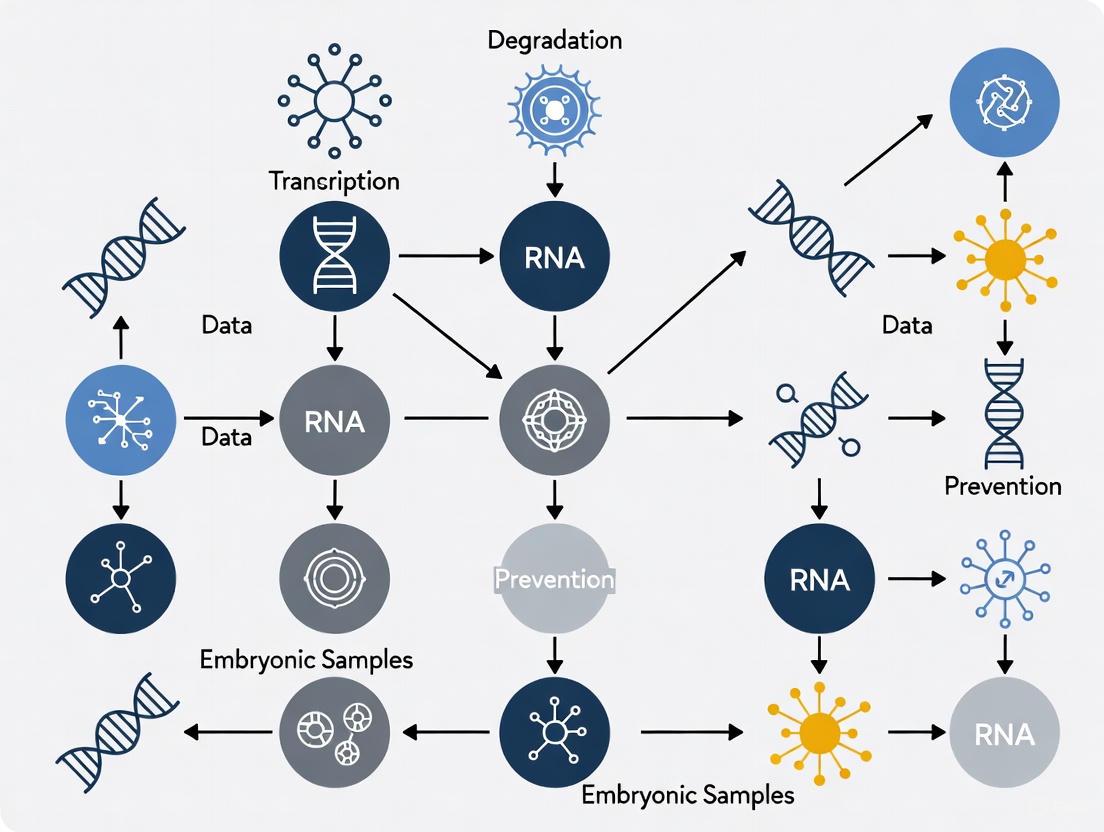
RNA Degradation Pathways in Embryonic Development
The following diagram illustrates the key RNA degradation pathways and their interrelationships in embryonic development:
This network of degradation pathways ensures precise control of transcript abundance during critical developmental transitions. Disruption of any major pathway typically leads to specific developmental defects, highlighting their non-redundant functions.
Advanced Techniques: Decoupling Translation and Degradation
To separate the effects of translational repression from RNA degradation, particularly in studies of microRNA function in embryonic stem cells, genetic approaches targeting key regulators like DDX6 can be employed [4]. DDX6 loss in ESCs upregulates translation of microRNA targets without concurrent changes in mRNA stability, effectively separating these two canonical microRNA functions. This approach reveals that translational repression alone can recapitulate many downstream consequences of microRNA loss, providing important insights for designing experiments to distinguish between these regulatory layers in embryonic systems.
FAQs: Understanding the Pathways
Q1: What are the primary RNA degradation pathways active in a mammalian cell? The primary pathways for cytoplasmic mRNA degradation are deadenylation-dependent decay and exonucleolytic decay. The process typically begins with the shortening of the poly(A) tail (deadenylation) by complexes like CCR4-NOT and PAN2-PAN3 [7] [8]. Once the tail is shortened, the mRNA body is degraded primarily from the 3'-end by the exosome complex (3'-to-5' decay) or from the 5'-end by XRN1 (5'-to-3' decay) following decapping by the DCP1/DCP2 complex [9] [10].
Q2: What is the exosome complex and what is its main function? The exosome complex is a highly conserved, multi-protein intracellular complex that acts as a major 3'-to-5' exoribonuclease [11] [12]. It is a key machine for degrading, processing, and surveilling a wide variety of RNA molecules, including messenger RNA (mRNA), ribosomal RNA (rRNA), and many small RNAs [11] [12]. Its function is crucial for maintaining RNA quality control and regulating gene expression levels [11].
Q3: Why is understanding RNA degradation critical when working with embryonic or pluripotent stem cell samples? In embryonic stem cells (ESCs) and during differentiation, RNA degradation is not just a cleanup process; it is an active regulator of cell fate [10] [13]. Selective clearance of specific transcripts (e.g., developmental or pluripotency-associated mRNAs) is essential for timely transitions in cellular state, such as during maternal-to-zygotic transition (MZT) and stem cell differentiation [10] [13]. Disruption of RNA decay pathways can lead to failed development and disease [13].
Q4: How do AU-rich elements (AREs) influence mRNA stability? AU-rich elements (AREs) are instability sequences found in the 3' untranslated regions (UTRs) of many short-lived mRNAs, such as those encoding cytokines and proto-oncogenes [9]. AREs serve as binding platforms for proteins that can recruit the degradation machinery, notably the exosome complex, leading to accelerated deadenylation and 3'-to-5' decay of the transcript [9].
Troubleshooting Guide: Common Experimental Issues and Solutions
| Problem | Potential Cause | Recommended Solution |
|---|---|---|
| Rapid loss of specific mRNA signals | Active degradation pathways targeting transcripts with instability elements (e.g., AREs). | Stabilize mRNA by inhibiting deadenylation (e.g., using novel peptide inhibitors targeting CCR4-NOT [14]) or use transcription inhibitors in time-course assays to measure half-life. |
| High background noise in RNA-seq from embryonic samples | Accumulation of aberrant transcripts (e.g., PROMPTs, eRNAs) due to impaired nuclear exosome function. | Ensure proper preservation of nuclear RNA decay pathways during sample prep; consider genetic or chemical inhibition of nuclear exosome co-factors (e.g., MTR4) to confirm target specificity [11] [13]. |
| Failure to clear maternal transcripts in early embryo models | Compromised deadenylation or decapping machinery. | Genetically validate key deadenylase components (e.g., CCR4, CAF1, PARN) and decapping activators in your model system [8] [10]. |
| Inconsistent results in RNA stability assays | Variable activity of 5'-to-3' vs. 3'-to-5' decay pathways between sample preparations. | Characterize the dominant pathway in your system using specific inhibitors. For instance, deplete XRN1 (5'-to-3') or EXOSC10 (3'-to-5') to determine the primary route of decay for your RNA of interest [9] [10]. |
Key Data on RNA Degradation Machinery
Table 1: Core Components of the Major RNA Degradation Pathways
| Pathway / Step | Key Complex/Enzyme | Direction | Function & Description |
|---|---|---|---|
| Deadenylation | CCR4-NOT, PAN2-PAN3 | 3' → 5' | Shortening of the poly(A) tail; the rate-limiting step for degradation and translational silencing [7] [8]. |
| Decapping | DCP1 / DCP2 | - | Removal of the 5' m7G cap, exposing the RNA to 5'-to-3' exonucleases [10]. |
| 5'→3' Decay | XRN1 (Cytoplasm), XRN2 (Nucleus) | 5' → 3' | Processive hydrolysis of the RNA body following decapping [10]. |
| 3'→5' Decay | Exosome Complex (with DIS3/EXOSC10) | 3' → 5' | Degradation of the RNA body after deadenylation; also processes rRNA/snoRNA and degrades aberrant transcripts [11] [12] [10]. |
| Nonsense-Mediated Decay (NMD) | UPF1, SMG1, SMG6 | Specialized | Quality control pathway that degrades mRNAs with premature termination codons [13]. |
Table 2: Regulatory Complexes for Nuclear RNA Surveillance
| Complex | Key Components | Primary Function |
|---|---|---|
| NEXT | ZCCHC8, RBM7, MTR4 | Targets short-lived non-coding RNAs (PROMPTs, eRNAs) for exosome degradation [13]. |
| PAXT | ZFC3H1, MTR4, PABPN1 | Targets polyadenylated nuclear RNAs for exosome-mediated decay [13]. |
Experimental Protocols
Protocol 1: Assessing mRNA Decay Pathways Using Exosome Depletion
- Objective: To determine the contribution of the exosome complex to the degradation of a specific mRNA.
- Methodology:
- Depletion: Use RNA interference (siRNA) or CRISPR-based knockout to deplete key exosome components, such as EXOSC10 (nuclear) or DIS3 (nuclear) or DIS3L1 (cytoplasmic), in your cell model (e.g., murine embryonic stem cells) [9] [13].
- Transcriptional Arrest: Treat control and depleted cells with a transcription inhibitor (e.g., Actinomycin D).
- Time-Course Sampling: Collect total RNA at multiple time points post-inhibition (e.g., 0, 1, 2, 4, 8 hours).
- Analysis: Quantify the half-life of your target mRNA (and known control transcripts) using RT-qPCR or RNA-seq. Stabilization of the transcript in exosome-depleted cells indicates it is a direct exosome substrate [9].
Protocol 2: In Vitro Deadenylation and Decay Assay
- Objective: To recapitulate and study deadenylation-dependent decay in a controlled system.
- Methodology:
- Extract Preparation: Prepare a cytoplasmic S100 extract from HeLa cells or relevant embryonic cell lines [9].
- RNA Substrate: Synthesize a radiolabeled or fluorescently-labeled RNA transcript containing a poly(A) tail. To study regulation, incorporate specific elements like an AU-rich element (ARE) in its 3' UTR [9].
- Reaction: Incubate the RNA substrate with the cytoplasmic extract under appropriate buffer conditions.
- Trapping Intermediates: To confirm the exonucleolytic pathway, use RNA substrates with phosphothioate modifications at the 3' end to trap decay intermediates [9].
- Analysis: Resolve the RNA products on a denaturing gel. Shortening of the poly(A) tail and the subsequent appearance of decay intermediates confirm deadenylation and 3'-to-5' exonucleolytic activity, which can be quantified [9].
Pathway Visualization
The Scientist's Toolkit: Research Reagent Solutions
Table 3: Essential Reagents for Studying RNA Degradation
| Reagent / Tool | Function / Application | Key Examples / Targets |
|---|---|---|
| siRNAs / shRNAs | Genetic depletion of specific decay factors to determine their role in transcript stability. | EXOSC10, DIS3, XRN1, UPF1, CNOT7 (CAF1) [9] [13]. |
| Chemical Transcription Inhibitors | To arrest new RNA synthesis and measure the half-life of existing transcripts. | Actinomycin D, DRB (5,6-Dichloro-1-β-D-ribofuranosylbenzimidazole). |
| Peptide Inhibitors | To block specific enzymatic steps, such as deadenylation, to stabilize mRNA. | CCR4-NOT interaction blockers [14]. |
| Stabilized RNA Substrates | In vitro probes to dissect specific decay pathways using cell extracts. | RNAs with AREs, phosphothioate-modified tails, or 5'-monophosphates [9]. |
| Antibodies for Immunoprecipitation | For isolating RNA-protein complexes (RIP) or depleting proteins from extracts. | Antibodies against PM-Scl75 (Exosome), PABPC1, HuR, UPF1 [9] [13]. |
Nonsense-Mediated Decay (NMD) as a Key Regulator of Pluripotency and Differentiation
Core Concepts: NMD in Stem Cell Biology
What is NMD's primary function in pluripotent stem cells? Nonsense-Mediated mRNA Decay (NMD) is a highly conserved RNA surveillance pathway that degrades specific subsets of RNA transcripts. In stem cell biology, it serves as a crucial post-transcriptional regulator that influences cell fate decisions by fine-tuning gene expression. Research demonstrates that NMD must be downregulated to permit efficient differentiation of embryonic stem cells, as NMD factors are expressed at higher levels in pluripotent cells compared to differentiated cells [15].
Why is understanding NMD important for embryonic sample research? Proper NMD function is essential for timed cell fate transitions. Disruption of NMD leads to delayed exit from naïve pluripotency and impaired differentiation capacity [16] [17]. For researchers studying embryonic development or differentiation protocols, uncontrolled NMD activity can compromise experimental results by preventing normal developmental progression and altering the expression of key pluripotency factors.
Troubleshooting Guide: Common NMD-Related Experimental Issues
Problem 1: Delayed Differentiation in Stem Cell Cultures
Symptoms: Persistent expression of naïve pluripotency markers (Rex1, Esrrb, Tbx3) beyond expected timeframes; reduced formation of definitive endoderm or other differentiated lineages.
Possible Causes and Solutions:
- Cause: Elevated NMD activity preventing timely shutdown of pluripotency network.
- Cause: Disruption in NMD-translation feedback loop.
- Solution: Monitor translation initiation factor Eif4a2 and its PTC-containing isoform; NMD deficiency leads to truncated eIF4A2PTC protein causing increased mTORC1 activity and translation rates [16].
Experimental Validation:
- Use Rex1-GFPd2 reporter lines to quantitatively monitor exit from naïve pluripotency [16].
- Perform commitment assays by applying 2i medium after 72h differentiation; only cells retaining naïve identity will form AP-positive colonies [16].
Problem 2: Inconsistent NMD Target Expression Across Cell Lines
Symptoms: Variable mRNA levels of known NMD targets between experiments; unexpected stability of transcripts containing uORFs or long 3'UTRs.
Possible Causes and Solutions:
- Cause: Differences in UPF1-LIN28A interaction across cell lines.
- Solution: Assess LIN28A expression and its interaction with UPF1; develop CPP-conjugated peptides to impair UPF1-LIN28A interaction and augment NMD efficiency [18].
- Cause: Variable activity between SMG6-endonucleolytic and SMG5/SMG7-exonucleolytic pathways.
- Solution: Simultaneously target multiple NMD effectors; note that SMG5 knockout produces strongest differentiation defects, followed by SMG6 and SMG7 [16].
Experimental Workflow for Systematic NMD Analysis:
- Construct eukaryotic expression vectors with PTC-containing mutations
- Transfert recombinant vectors into cells and culture for 24-48h
- Isolate RNA and perform qPCR to detect expression differences
- Validate NMD-specific degradation using control constructs [19]
Problem 3: Uncontrolled Spontaneous Differentiation in Pluripotent Cultures
Symptoms: Heterogeneous cell populations; gradual loss of pluripotency markers without directed differentiation induction.
Possible Causes and Solutions:
- Cause: Inadequate NMD-mediated clearance of pro-differentiation transcripts.
- Solution: Optimize NMD activity in maintenance cultures; ensure proper expression of NMD factors [17].
- Cause: Disrupted NMD-dependent degradation of signaling component transcripts.
- Solution: Monitor TGF-β and BMP signaling pathways, which NMD acts through to influence definitive endoderm versus mesoderm fate decisions [15].
NMD Factor Phenotypes in Differentiation
The table below summarizes the graded defects observed in NMD-deficient embryonic stem cells:
| NMD Factor Disruption | Differentiation Delay Severity | Key Molecular Consequences | Experimental Recommendations |
|---|---|---|---|
| SMG5 KO | Most severe | Strongest delay in Rex1 downregulation; impaired commitment | Monitor telomere length (may be longer than WT); use as most informative NMD disruption model |
| SMG6 KO | Intermediate | Delayed naïve network extinction; sustained Brachyury expression | Assess teratoma differentiation capacity; check for normal telomere length |
| SMG7 KO | Least severe | Mild differentiation delay; heterodimer-independent functions | Consider combinatorial knockouts with SMG5 to assess heterodimer independence |
Data compiled from Huth et al. 2022 [16]
Experimental Protocols & Methodologies
Protocol 1: Validating NMD Targets in Stem Cells
Principle: Identify bona fide NMD targets through combinatorial knockdown and rescue approaches.
Procedure:
- Perform shRNA-mediated knockdown of UPF1, SMG6, and SMG7 in stem cells
- Express RNAi-resistant versions of respective proteins for rescue controls
- Conduct RNA-seq transcriptome profiling across all conditions
- Apply meta-analysis to identify high-confidence NMD targets
- Validate targets using 4-thiouridine pulse-chase to measure mRNA stability [20]
Key Considerations:
- Include double knockdowns (SMG6/SMG7) with single rescues to assess pathway redundancy
- Focus on transcripts with introns in 3'UTR, uORFs, or long 3'UTRs as these are enriched NMD targets
- Analyze miRNA host genes and noncoding RNAs as additional NMD targets [20]
Protocol 2: Quantitative Exit from Naïve Pluripotency Assay
Principle: Objectively measure differentiation kinetics using reporter systems.
Procedure:
- Maintain Rex1-GFPd2 reporter ESCs in 2i/LIF medium for naïve pluripotency
- Withdraw 2i to initiate differentiation
- Monitor GFP intensity at 24h and 48h using flow cytometry
- Quantify expression of naïve (Esrrb, Tbx3, Tfcp2l1) and formative (Fgf5, Oct6) markers
- Assess functional commitment by re-applying 2i after 72h differentiation and scoring AP-positive colonies [16]
The Scientist's Toolkit: Essential Research Reagents
| Reagent/Cell Line | Function/Application | Key Features | Reference |
|---|---|---|---|
| Rex1-GFPd2 Reporter ESCs | Monitoring exit from naïve pluripotency | Destabilized GFP for dynamic expression tracking | [16] |
| NMD Factor KO Lines (Smg5, Smg6, Smg7) | Studying NMD mechanism in differentiation | Graded phenotypic strengths reveal pathway hierarchy | [16] |
| CPP-Conjugated Peptide | Disrupting UPF1-LIN28A interaction | Enhances NMD efficiency; promotes spontaneous differentiation | [18] |
| 4-Thiouridine (4sU) | Metabolic RNA labeling for stability assays | Enables nascent transcript capture and half-life determination | [4] |
| IAMC-00192 Compound | Inhibiting DDX6-4E-T interaction in P-bodies | Suppresses pathological transitions; extends mRNA half-life | [21] |
NMD Target Features and Predictive Value
The table below ranks features that predict NMD targeting based on experimental evidence:
| NMD Target Feature | Predictive Value | Experimental Validation | Considerations for Stem Cell Research |
|---|---|---|---|
| Intron in 3' UTR | Highest | Strong enrichment in RNA-seq of NMD factor KDs | Conserved across cell types; reliable predictor |
| Upstream ORFs (uORFs) | High | Ribosome profiling and sequencing approaches | Context-dependent; requires translation verification |
| Long 3' UTRs | Moderate | Comparative analysis of NMD-sensitive vs insensitive transcripts | Length threshold may vary; combine with other features |
| High GC Content in 3' UTR | Moderate | Bioinformatics analysis of NMD target sequences | May affect RNA secondary structure and UPF1 binding |
| Phylogenetically Less Conserved 3' UTRs | Moderate | Cross-species sequence comparison | Suggests evolutionary selection against NMD regulation |
Adapted from Colombo et al. 2017 [20]
NMD-Translation Feedback Loop in Cell Fate Transitions
Figure 1: NMD-Translation Feedback Loop. NMD deficiency triggers a cascade through Eif4a2PTC accumulation and increased translation, ultimately delaying differentiation [16] [17].
Frequently Asked Questions
Q: Can NMD be completely inhibited without affecting stem cell viability? A: Partial inhibition is preferable to complete ablation. Studies show that while NMD disruption delays differentiation, severe impairment can affect overall cell fitness. Use graded approaches - SMG7 disruption produces milder effects than SMG5 or SMG6 ablation [16].
Q: How does NMD interact with other RNA regulatory pathways in pluripotency? A: NMD interfaces with multiple pathways. It regulates miRNA targets through competition with DDX6-mediated translational repression [22] [4] and interacts with LIN28A, which directly binds UPF1 to reduce phosphorylation and inhibit NMD efficiency [18].
Q: What controls NMD activity during normal development? A: Multiple mechanisms: (1) Expression levels of NMD factors are higher in pluripotent cells [15]; (2) LIN28A-UPF1 interaction modulates NMD efficiency in stem cells [18]; (3) Signaling pathways like TGF-β and BMP are influenced by NMD, creating feedback loops [15].
Q: Are there chemical inhibitors available for manipulating NMD in research? A: While no direct NMD inhibitors are widely commercialized, recent research has identified IAMC-00192, which inhibits DDX6-4E-T interaction in P-bodies and affects mRNA decay [21]. Additionally, peptide-based approaches can disrupt specific interactions like UPF1-LIN28A [18].
Pro Tips for Experimental Success
Employ Multiple Assays: Combine transcriptional (RNA-seq), translational (ribosome profiling), and functional (differentiation) readouts to fully capture NMD effects.
Monitor Temporal Dynamics: NMD effects are often time-dependent. Capture early (24h) and late (48-72h) timepoints during differentiation.
Validate with Rescue Experiments: Always include rescue conditions with RNAi-resistant NMD factors to confirm phenotype specificity [20].
Consider Pathway Redundancy: The SMG6-endonucleolytic and SMG5/SMG7-exonucleolytic pathways show extensive but incomplete redundancy [16] [20].
Account for Cell Type Differences: NMD regulation differs between mouse and human ESCs, and between naïve vs. primed pluripotency states.
The Impact of Disrupted RNA Decay on Maternal-to-Zygotic Transition and Developmental Potential
Technical Support: Frequently Asked Questions (FAQs)
FAQ 1: What are the primary consequences of disrupted maternal RNA decay in early embryonic development?
Disruption of maternal RNA decay pathways is a major cause of early embryonic developmental arrest. Research on human embryos has directly linked defects in these pathways to arrested development:
- M-decay defects are highly associated with arrest at the zygote stage.
- Z-decay defects are frequently detected in embryos arrested at the 8-cell stage [23]. In mouse models, oocyte-specific deletion of key enzymes, such as the IRE1α RNase domain, results in female infertility characterized by embryonic arrest at the 1-cell or 2-cell stage and a failure to degrade maternal mRNAs [1]. This demonstrates that the precise clearance of maternal transcripts is fundamental for the embryo to progress beyond the initial stages of development.
FAQ 2: How does the timing of maternal-to-zygotic transition (MZT) differ between species, and why is this important for my research?
The timing of MZT, specifically Zygotic Genome Activation (ZGA), varies significantly across species. This is a critical consideration when choosing an appropriate model organism for your research, as summarized in the table below [24]:
Table 1: Timing of Zygotic Genome Activation (ZGA) in Different Species
| Species | ZGA Timing | Key Characteristics |
|---|---|---|
| Human | 4- to 8-cell stage [23] | Slow development; major ZGA at 8-cell stage. |
| Mouse | 2-cell stage [24] | Early ZGA; relatively unique among mammals. |
| Cow, Sheep, Rabbit | 8-cell stage [24] | Timing more similar to humans than mouse. |
| Drosophila | Nuclear cycles 8 (minor) and 14 (major) [25] | Rapid, synchronous divisions in a syncytium. |
| Zebrafish | ~4 hours post-fertilization [26] | Classified as a "fast-developing" embryo. |
FAQ 3: What are the best practices for preserving RNA integrity in embryonic samples?
Preserving RNA integrity begins the moment a sample is collected. Key recommendations include:
- Use RNase Inactivation Solutions: Immediately submerge small tissue pieces (max thickness 0.5 cm) or pelleted cells in 5-10 volumes of RNAlater solution. This stabilizes and protects RNA, allowing for storage at 4°C for a month or at -20°C/-80°C for long-term preservation [27].
- Avoid Freeze-Thaw Cycles: Store samples in single-use aliquots to prevent degradation from repeated freezing and thawing [28].
- Work in an RNase-Free Environment: Always wear gloves and use certified RNase-free tubes, tips, and solutions. Designate a clean, separate area for RNA work [28].
FAQ 4: How can I assess the quality and integrity of my isolated RNA?
There are two primary methods for checking RNA integrity:
- Denaturing Agarose Gel Electrophoresis: For intact total eukaryotic RNA, sharp, clear 28S and 18S ribosomal RNA bands should be visible. A key quality indicator is a 28S:18S band intensity ratio of approximately 2:1. Degraded RNA will appear as a smear or show an altered ratio [29].
- Automated Electrophoresis (e.g., Agilent 2100 Bioanalyzer): This microfluidics-based system uses only a small sample volume (e.g., 1 µl) to provide an RNA Integrity Number (RIN) and an electropherogram, which shows clear peaks for the 18S and 28S rRNAs. This method is more sensitive and provides quantitative data alongside quality assessment [29].
Troubleshooting Common Experimental Problems
Table 2: Troubleshooting Guide for RNA Extraction from Embryonic Samples
| Problem | Potential Cause | Solution |
|---|---|---|
| RNA Degradation | RNase contamination; improper sample storage; repeated freeze-thaw cycles [28]. | Use RNase-free reagents and consumables; store samples in RNAlater at recommended temperatures; aliquot samples to avoid repeated thawing [28] [27]. |
| Low RNA Yield | Incomplete homogenization; sample amount too large or too small; RNA not fully dissolved [28]. | Optimize homogenization conditions; adjust starting sample amount and TRIzol volume proportionally; extend dissolution time with mild heat (55-60°C for 2-3 minutes) [28]. |
| Genomic DNA (gDNA) Contamination | High sample input; incomplete DNase digestion or lack thereof [28]. | Reduce starting sample volume; include an on-column or in-solution DNase digestion step during extraction; use reverse transcription reagents with a gDNA removal module [28]. |
| Inhibitors in Downstream Applications | Contamination by protein, polysaccharides, salts, or organics (phenol) [28]. | Reduce starting sample volume; add extra purification/wash steps; ensure careful aspiration to avoid the organic phase when using phenol-chloroform extraction [28]. |
Key Experimental Protocols & Workflows
Protocol: Inhibiting Zygotic Genome Activation to Study Z-Decay
This protocol is used to investigate whether maternal mRNA clearance depends on transcription from the zygotic genome, a key step in delineating M-decay from Z-decay pathways [23] [30].
Detailed Methodology:
- Collection: Harvest mouse zygotes from the oviducts approximately 28 hours post-hCG injection [30].
- Treatment: Culture the zygotes in KSOM medium supplemented with the transcription inhibitor α-amanitin (25 ng/µl) [30].
- Control Group: Culture a separate group of zygotes in KSOM medium without α-amanitin.
- Incubation: Culture both groups for approximately 16 hours, or until control embryos have developed to the target stage (e.g., 2-cell in mouse, 8-cell in human) [23] [30].
- Sample Collection: Collect morphologically normal embryos from both groups.
- Analysis: Extract total RNA from the pooled embryos and analyze the stability of target maternal transcripts using quantitative RT-PCR (RT-qPCR) or RNA-seq. Compare the transcript levels between α-amanitin-treated and control embryos. Transcripts stabilized in the treated group are considered ZGA-dependent Z-decay targets [23].
The logical workflow for this experimental approach is outlined below:
Core Molecular Pathways in Maternal mRNA Clearance
The degradation of maternal mRNAs during MZT is a tightly regulated process governed by two sequential pathways. The following diagram summarizes the key components and their interactions in these pathways, as identified in mouse and human studies [23] [30].
The Scientist's Toolkit: Essential Research Reagents
Table 3: Key Reagents for Studying RNA Decay in Embryonic Development
| Reagent / Material | Function / Application | Key Details / Considerations |
|---|---|---|
| RNAlater | RNA Stabilization Solution | Preserves RNA integrity in tissues and cells immediately after collection; allows for temporary storage at 4°C [27]. |
| α-Amanitin | Transcription Inhibitor | Used to block ZGA in embryos (e.g., at 25 ng/µl in mouse zygotes) to study Z-decay pathways [30]. |
| DNase I (RNase-free) | DNA Removal | Critical for eliminating genomic DNA contamination during RNA extraction, preventing false positives in qPCR [28]. |
| Click-iT RNA Imaging Kits | Nascent RNA Detection | Utilize 5-ethynyl uridine (EU) incorporation to label and visualize newly transcribed zygotic RNA [30]. |
| TUT4/7 siRNAs | Gene Knockdown | Used to deplete terminal uridylyltransferases in embryos (e.g., via microinjection) to study their role in mRNA 3'-oligouridylation and Z-decay [30]. |
| Agilent 2100 Bioanalyzer | RNA Quality Control | Provides an automated, quantitative assessment of RNA integrity (RIN) using minimal sample volume [29]. |
Proven Protocols: From Sample Collection to Stable RNA Isolation
For researchers working with embryonic samples, the critical window immediately following sample collection is paramount. RNA integrity dictates the success of downstream applications, from gene expression microarrays to RNA sequencing. The single-stranded nature of RNA makes it inherently susceptible to degradation by ubiquitous and stable RNases, as well as by hydrolysis, particularly in the presence of divalent cations like Mg²⁺ [31]. This technical support center outlines best practices for preventing RNA degradation, focusing on the two primary stabilization methods: flash-freezing and chemical stabilization with reagents like RNAlater. The guidance is framed within a broader thesis on safeguarding the unique and often irreplaceable RNA profiles of embryonic tissues.
Frequently Asked Questions (FAQs)
1. My embryonic samples are degraded even after flash-freezing. What went wrong? The most common issue is slow freezing or improper thawing. Large tissue pieces freeze slowly, allowing endogenous RNases to remain active and degrade RNA. Ensure samples are dissected to less than 0.5 cm in any dimension before freezing [32]. Furthermore, never allow a frozen sample to thaw slowly. Process it directly from its frozen state into a lysis buffer, or if it must be thawed, do so on ice in the presence of an RNase-inactivating agent [31].
2. Can I use RNAlater for whole zebrafish embryos? Yes, but the protocol must ensure the solution penetrates the embryo. A common method involves pooling embryos (e.g., 50 embryos in a 1.5 ml tube), removing excess water, and immediately adding a chemical denaturant like TRIzol reagent for homogenization under a fume hood [33]. For storage in RNAlater, the embryo chorion may impede penetration, so it is often recommended to puncture it or use dechorionated embryos for optimal stabilization.
3. Does the choice of stabilization method bias my RNA-seq results? Yes, studies have shown it can. One study comparing RNAlater storage at room temperature to liquid nitrogen flash-freezing found that sample storage is a significant factor influencing observed differential gene expression. Genes with higher GC content showed elevated expression in flash-frozen samples, and genes more highly expressed in RNAlater were enriched for functional categories like RNA processing [34]. Therefore, it is critical to use the same stabilization method for all samples within a single study.
4. How long can I store my samples in RNAlater at room temperature? According to the manufacturer, RNAlater is effective for stabilizing RNA for 1 day at 37°C, 1 week at 25°C, 1 month at 4°C, or indefinitely at -20°C [32]. For long-term archival storage, especially for precious embryonic samples, storage at -20°C or -80°C is recommended.
5. My RNA yield is low after purification. How can I improve it? Low yield can stem from incomplete tissue homogenization or RNA loss during precipitation. For tough embryonic tissues, ensure you are using a sufficiently vigorous disruption method, such as a bead beater or grinding in liquid nitrogen. During RNA precipitation with isopropanol, ensure the sample sits at room temperature for the recommended time (e.g., 10 minutes) and that the pellet is washed with 75% ethanol without being disturbed [33]. Using a DNAse treatment step during cleanup can also remove genomic DNA contaminants that might skew quantification [33].
Comparison of Stabilization Methods
The table below summarizes the core characteristics of flash-freezing and RNAlater for embryonic sample preservation.
Table 1: Direct Comparison of Flash-Freezing and RNAlater
| Feature | Flash-Freezing in Liquid Nitrogen | RNAlater Stabilization Solution |
|---|---|---|
| Mechanism of Action | Instantly halts all cellular metabolism and RNase activity by freezing. | Rapidly permeates tissue, inactivating RNases by precipitating them into an aqueous sulfate salt solution [35]. |
| Best For | Labs with immediate access to liquid nitrogen; preserving samples for very long-term storage at -80°C; preventing any potential for physiological responses in the tissue post-collection [34]. | Fieldwork, multi-center studies, or any situation where immediate freezing is impractical; allows for room-temperature transport [36] [32]. |
| Handling & Logistics | Logistically challenging; requires constant supply of liquid nitrogen and specialized storage freezers; samples must be kept frozen continuously. | Simple and convenient; no initial freezing required; samples can be stored at a range of temperatures [32]. |
| Sample Size Limitation | Critical. Tissue pieces must be small (<0.5 cm) to ensure rapid freezing throughout the sample. | Critical. Tissue pieces must be small (<0.5 cm) to allow the solution to fully permeate the sample [32]. |
| Impact on Gene Expression | Considered the "gold standard," but one study showed it can favor detection of high-GC content genes compared to RNAlater [34]. | Can introduce a non-random bias in gene expression profiles, potentially enriching for certain functional gene categories compared to flash-freezing [34]. |
| Downstream Compatibility | Compatible with most RNA isolation methods, but frozen tissue must be homogenized while still frozen to avoid thaw-associated degradation. | Highly compatible with a wide range of RNA isolation procedures, including TRIzol and silica-membrane column-based kits like RNeasy [32]. |
Experimental Protocols
Protocol 1: Total RNA Extraction from Zebrafish Embryos using TRIzol
This protocol is adapted from a peer-reviewed method for isolating high-quality RNA from whole zebrafish embryos [33].
- Homogenization: Under a fume hood, place 50 pooled zebrafish embryos in a 1.5 ml tube. Remove all water and add 250 μl of TRIzol Reagent. Homogenize thoroughly with a pellet pestle (approx. 20 strokes).
- Incubation: Add another 750 μl of TRIzol to reach 1 ml total volume. Incubate the homogenized sample for 5 minutes at room temperature to dissociate nucleoprotein complexes.
- Phase Separation: Add 0.2 ml of chloroform. Rock the tube vigorously for 15 seconds. Incubate for 2-3 minutes at room temperature. Centrifuge at 12,000 × g for 15 minutes at 4°C.
- RNA Precipitation: Transfer the colorless upper aqueous phase (contains RNA) to a new tube. Avoid the interphase and lower red phenol-chloroform phase. Add 0.5 ml of isopropanol, mix, and incubate at room temperature for 10 minutes. Centrifuge at 12,000 × g for 10 minutes at 4°C to pellet the RNA.
- Wash: Remove the supernatant. Wash the pellet with 1 ml of 75% ethanol by inverting the tube. Centrifuge at 7,500 × g for 5 minutes at 4°C.
- Redissolution: Air-dry the pellet for 5-10 minutes (do not over-dry). Resuspend the RNA in 50-100 μl of RNase-free water by incubating at 55°C for 10 minutes, finger-vortexing frequently.
Protocol 2: RNA Cleanup and DNase Treatment (Qiagen RNeasy Mini Kit)
Following a TRIzol extraction, a column-based cleanup is recommended to remove impurities and genomic DNA [33].
- Adjust Binding Conditions: To the RNA sample (in up to 100 μl water), add 350 μl of Buffer RLT (supplemented with β-mercaptoethanol) and 250 μl of 100% ethanol. Mix well by pipetting.
- Bind RNA: Transfer the entire mixture (up to 700 μl) to an RNeasy spin column placed in a 2 ml collection tube. Centrifuge at ≥8,000 × g for 1 minute. Discard the flow-through.
- Wash: Add 700 μl of Buffer RW1 to the column. Centrifuge at ≥8,000 × g for 1 minute. Discard the flow-through.
- DNase Digestion (Critical Step): Prepare the DNase I incubation mix by adding 70 μl of Buffer RDD to 10 μl of DNase I stock per sample. Apply the 80 μl mix directly onto the column membrane. Incubate at room temperature for 30 minutes.
- Wash Again: Add 350 μl of Buffer RW1 to the column. Centrifuge at ≥8,000 × g for 1 minute. Discard the flow-through.
- Final Washes: Add 500 μl of Buffer RPE to the column. Centrifuge at ≥8,000 × g for 1 minute. Discard the flow-through. Add another 500 μl of Buffer RPE, centrifuge for 2 minutes, and discard the flow-through.
- Elute: Place the column in a new 1.5 ml collection tube. To elute, add 20-30 μl of RNase-free water directly to the membrane. Centrifuge at 10,000 × g for 1 minute.
The Scientist's Toolkit: Essential Reagents & Kits
Table 2: Key Reagents for RNA Stabilization and Isolation from Embryonic Samples
| Reagent / Kit | Primary Function | Key Considerations for Embryonic Samples |
|---|---|---|
| RNAlater | RNA stabilization solution for unfrozen tissues. | Ideal for stabilizing multiple embryos during long dissections. Ensure tissue piece <0.5 cm [36] [32]. |
| TRIzol / TRI Reagent | Monophasic chemical denaturant for cell lysis and RNA isolation. | Effective for tough embryonic structures. Contains phenol; use under a fume hood [33]. |
| RNeasy Mini Kit (Qiagen) | Silica-membrane column for RNA purification and cleanup. | Excellent for removing salts and impurities after TRIzol extraction. Includes optional DNase step [33]. |
| SuperScript First-Strand Synthesis System | Reverse transcription kit for cDNA synthesis from RNA templates. | Converts unstable RNA into stable cDNA for downstream applications like RT-PCR [33]. |
| RNase-free Water | Nuclease-free water for resuspending RNA. | Essential for preventing introduction of RNases at the final step. |
| β-Mercaptoethanol | Reducing agent added to lysis buffers. | Freshly added to Buffer RLT to inhibit RNases and help denature proteins [33]. |
Workflow & Quality Control
The pathway from sample collection to data analysis is critical. The diagram below outlines the key steps and where to implement rigorous quality control checks to ensure RNA integrity.
Essential Quality Control Steps:
- Spectrophotometry (NanoDrop): Check RNA quantity and purity. Acceptable values are A260/A280 ≈ 2.0 and A260/A230 > 2.0 [33].
- Integrity Analysis (Bioanalyzer/GeL): Assess RNA degradation. High-quality embryonic RNA should show sharp ribosomal RNA bands (28S and 18S in a 2:1 ratio) or a high RNA Integrity Number (RIN) [33]. Proceed only if QC passes.
FAQ: Core Principles and Tissue-Specific Selection
What is the fundamental mechanism of chaotropic salts versus phenol-based reagents?
Chaotropic salts, such as guanidine thiocyanate (GTC), work by denaturing proteins and inactiating RNases. They disrupt the hydrogen-bonding network and the hydrophobic interactions within proteins, leading to the unfolding of RNases and other cellular structures, thereby protecting the released RNA [37]. In contrast, phenol-based reagents like TRIzol combine the denaturing power of phenol with chaotropic salts. During homogenization, they dissolve cellular components, and a subsequent chloroform addition separates the solution into phases: the aqueous phase contains RNA, the interphase contains DNA, and the organic phase contains proteins [38] [37].
Which method is more suitable for embryonic tissues, which are often rich in lipids?
For embryonic tissues, a phenol-based method is often superior. The organic extraction step in phenol-chloroform protocols efficiently removes lipid contaminants, which can be abundant in embryonic and brain tissues. If using a chaotropic salt-based silica-column method, a pre-homogenization wash with a neutral buffer may be necessary to reduce lipid content before adding the lysis buffer [38].
How do I choose a method for fibrous or tough tissues like muscle or plant matter?
For tough tissues, the homogenization method is as critical as the lysis chemistry. A combination approach is best:
- Mechanical Disruption: Use a bead mill with sturdy beads (e.g., stainless steel) or a rotor-stator homogenizer for thorough initial breakdown [39].
- Lysis Chemistry: Following mechanical disruption, phenol-based reagents are highly effective as they can handle complex samples and efficiently separate RNA from polysaccharides and proteoglycans common in plants and tissues [38].
Can I use these methods for bacterial cells with robust cell walls?
Yes, but mechanical disruption is typically required. Bead beating with small (e.g., 0.1 mm) glass beads in the presence of a chaotropic salt-based lysis buffer is a very effective method for simultaneous disruption and lysis of bacterial cells [39]. For mycobacteria, recent studies indicate that 70% ethanol can be a simple and effective preservative and lysis aid, yielding high RNA quantity and integrity [40].
Is DNase treatment always necessary?
For most downstream applications like RNA-Seq, DNase treatment is essential. Contaminating genomic DNA can be co-purified with RNA, leading to inaccurate quantification and data biases in sensitive applications. It is recommended to perform an on-column or in-solution DNase digestion step, followed by a clean-up to remove the enzyme itself [41].
Table: Lysis Method Selection Guide for Different Tissues
| Tissue Type | Recommended Lysis Method | Key Considerations | Suggested Homogenization Technique |
|---|---|---|---|
| Embryonic / Lipid-rich | Phenol-chloroform (e.g., TRIzol) | Efficiently partitions lipids into organic phase. | Dounce homogenizer; rotor-stator. |
| Fibrous (Muscle, Heart) | Phenol-chloroform or GTC + Silica column | Requires vigorous disruption. Phenol handles toughness well. | Rotor-stator homogenizer; bead mill. |
| Plant & Fungal | Phenol-chloroform | Effective against polysaccharides and cell walls. | Cryogenic grinding with mortar/pestle; bead mill. |
| Bacterial / Yeast | GTC-based + Mechanical | Necessary to break tough cell walls. | Bead beater (with 0.1-0.5 mm beads). |
| Standard Cell Culture | GTC-based Silica column | Rapid, simple, and amenable to high-throughput. | Vortexing; syringe and needle. |
Troubleshooting Common RNA Lysis and Isolation Issues
Problem: Consistently Low RNA Yield
- Cause 1: Incomplete Homogenization/Lysis. The sample was not fully disrupted, trapping RNA within cells or organelles [39] [38].
- Solution: Visually inspect the lysate. If using a centrifugation step pre-chloroform, a white, mucus-like pellet is normal; a tan-colored precipitate indicates incomplete lysis [38]. Optimize homogenization by pre-cooling samples and using the recommended mechanical technique for your tissue type.
- Cause 2: RNA Pellet Over-drying or Improper Solubilization. A completely dried RNA pellet becomes difficult to redissolve [38].
- Solution: Air-dry the pellet only until it appears translucent, not chalky and cracked. Solubilize the pellet by pipetting repeatedly in DEPC-treated water or buffer, and briefly heating to 50-60°C [38].
- Cause 3: Excessive Wash Steps or Incorrect Buffer Ratios. Washing cells prior to lysis can lead to mRNA degradation and lower yields [38]. Using an insufficient volume of lysis buffer for the sample mass will also reduce efficiency [39].
- Solution: Lyse cells or tissues immediately without washing. Ensure the recommended buffer-to-sample ratio is followed (e.g., 1 mL TRIzol per 50-100 mg of tissue) [38].
Problem: RNA is Degraded (Low RIN/RNA Integrity Number)
- Cause 1: Inadequate RNase Inactivation. Endogenous RNases were not immediately inactivated upon cell disruption [38].
- Solution: Ensure tissues are frozen in liquid nitrogen immediately after collection or stored in a validated RNA stabilizer (e.g., RNAlater). Pre-cool homogenization equipment. Ensure lysis buffer is fresh and used in sufficient volume [38].
- Cause 2: Over-heating During Homogenization. Prolonged or continuous homogenization in a small volume can generate heat, degrading RNA [38].
- Solution: Perform homogenization in short, pulsed cycles and keep samples on ice between cycles. Use cryogenic grinding methods for tough samples [39].
Problem: Significant Genomic DNA (gDNA) Contamination
- Cause: Inefficient Separation or Lack of DNase Treatment. The phase separation was incomplete, or the interphase was disturbed, or no DNase step was used [38] [41].
- Solution:
- If using phenol-chloroform, ensure proper centrifugation conditions (4°C is best) and take care not to draw any interphase when collecting the aqueous phase [38].
- Include a DNase I digestion step. For column-based purifications, use an on-column DNase treatment. For phenol-based preps, treat the purified RNA with DNase I in solution, followed by a clean-up step to remove the enzyme [41].
- Solution:
Problem: Poor RNA Purity (Abnormal A260/A280 or A260/A230 Ratios)
- Cause 1: Phenol or Guanidine Contamination. Residual phenol in the sample absorbs at 270nm and 230nm, while guanidine absorbs around 240nm, skewing the ratios [38].
- Solution: Ensure phase separation is done at 4°C, as phenol is more soluble in the aqueous phase at room temperature. If contamination is suspected, re-precipitate the RNA with ethanol and wash thoroughly with 70% ethanol [38].
- Cause 2: Protein or Salt Contamination.
- Solution: For protein contamination (low A260/A280), perform an additional phenol-chloroform extraction. For salt contamination (low A260/A230), ensure the RNA pellet is washed adequately with 70% ethanol [38].
Table: Troubleshooting RNA Isolation Problems
| Problem | Possible Causes | Solutions |
|---|---|---|
| Low Yield | Incomplete homogenization; Over-dried pellet; Insufficient lysis buffer. | Optimize homogenization; Solubilize pellet at 55-60°C; Increase lysis buffer volume. |
| RNA Degradation | Slow sample processing; Over-heating; Ineffective RNase inhibitors. | Snap-freeze in LN₂; Use cold cycles during homogenization; Use fresh β-mercaptoethanol. |
| gDNA Contamination | No DNase treatment; Improper phase separation. | Use DNase I treatment; Carefully avoid interphase during aqueous phase collection. |
| Poor Purity (Low A260/280) | Protein contamination; Residual phenol. | Add extra phenol-chloroform clean-up; Reprecipitate RNA and wash pellet. |
| Polysaccharide Contamination | Common in plants, liver, aorta. | Use high-salt precipitation (0.8M Na Citrate, 1.2M NaCl) with isopropanol [38]. |
The Scientist's Toolkit: Essential Reagents and Materials
Table: Key Research Reagent Solutions for RNA Lysis and Isolation
| Reagent/Material | Function | Example Use Cases |
|---|---|---|
| Guanidine Thiocyanate (GTC) | Chaotropic salt; Denatures proteins and RNases; Primary component of many silica-column lysis buffers. | Standard cell culture; Bacterial lysis when combined with bead beating [40] [37]. |
| Phenol-Chloroform Reagents (e.g., TRIzol, RNAzol) | Organic denaturant; Separates RNA into aqueous phase in a tri-phasic separation. | Complex tissues (embryonic, plant, fibrous); When simultaneous DNA/protein isolation is desired [38] [37]. |
| β-Mercaptoethanol | Reducing agent; Breaks disulfide bonds in RNases, ensuring their complete denaturation. | Added to lysis buffers (e.g., RLT) for tough or RNase-rich tissues [40] [37]. |
| DNase I (RNase-free) | DNA-specific endonuclease; Digests contaminating genomic DNA. | Essential step for RNA-Seq, qRT-PCR; Used on-column or in-solution post-extraction [41]. |
| Protease Inhibitor Cocktails | Inhibits endogenous proteases; Protects proteins if also of interest, and prevents protease-mediated damage. | Critical for protein co-isolation; Added fresh to lysis buffers before use [42]. |
| RNase Inhibitors | Enzymes that bind and inhibit RNases; Protects RNA during handling post-extraction. | Added to RNA resuspension buffers or to cDNA synthesis reactions for sensitive applications. |
| Glycogen or Polyacrylamide | Carrier; Co-precipitates with nucleic acids to visualize pellets and improve yield of small RNA quantities. | Used during ethanol precipitation of low-abundance RNA samples [38]. |
| 70% Ethanol | Preservative and lysis aid; Kills mycobacteria and stabilizes RNA at -20°C; also used as a wash buffer. | Preservation of bacterial RNA; Standard wash step in silica-column protocols [40]. |
Experimental Workflow for Method Evaluation
The following workflow provides a visual guide for selecting and optimizing your RNA isolation strategy.
Detailed Protocol for Comparative Evaluation of Lysis Methods
This protocol allows researchers to empirically determine the optimal lysis method for their specific embryonic tissue.
Objective: To compare the yield, purity, and integrity of RNA isolated from the same embryonic tissue sample using a chaotropic salt (GTC)-based column method and a phenol-chloroform (TRIzol) method.
Materials:
- Embryonic tissue sample, freshly dissected or stabilized.
- Liquid nitrogen.
- GTC-based RNA purification kit (e.g., from QIAGEN or Thermo Fisher).
- Phenol-chloroform reagent (e.g., TRIzol).
- Chloroform.
- Isopropanol (100% and 70% in DEPC-water).
- DNase I (RNase-free).
- Homogenizer (e.g., rotor-stator or bead beater).
- Microcentrifuge.
- Spectrophotometer/Nanodrop and Bioanalyzer/Fragment Analyzer.
Method:
- Sample Preparation: Divide the embryonic tissue into two representative aliquots (e.g., 30 mg each). Process immediately or flash-freeze in liquid nitrogen.
- Homogenization:
- For GTC-Method: Homogenize one aliquot in the recommended volume of the kit's lysis buffer containing GTC and β-mercaptoethanol.
- For TRIzol-Method: Homogenize the other aliquot in 1 mL of TRIzol reagent.
- RNA Isolation:
- GTC-Column Protocol: Follow the manufacturer's instructions. This typically involves binding RNA to a silica membrane, washing with ethanol-based buffers, and eluting. Include the on-column DNase step.
- TRIzol Protocol:
- Incubate homogenate for 5 min at room temperature.
- Add 0.2 mL chloroform per 1 mL TRIzol. Shake vigorously, incubate for 3 min.
- Centrifuge at 12,000 x g for 15 min at 4°C.
- Transfer the colorless upper aqueous phase to a new tube.
- Precipitate RNA by adding 0.5 mL isopropanol. Incubate and centrifuge.
- Wash pellet with 70% ethanol, air-dry, and resuspend in DEPC-water.
- DNase Treatment (for TRIzol RNA): Treat the isolated RNA from the TRIzol method with DNase I, followed by a clean-up step to remove the enzyme [41].
- Quality Control and Analysis:
- Quantity and Purity: Measure RNA concentration and A260/A280 and A260/A230 ratios using a spectrophotometer.
- Integrity: Assess RNA Integrity Number (RIN) using a Bioanalyzer or Fragment Analyzer. A RIN >7.0 is generally acceptable for most downstream applications [40].
- gDNA Contamination: Perform a qPCR assay targeting a housekeeping gene (e.g., GAPDH) on the non-reverse transcribed RNA samples. A Cq value >5 cycles later than the reverse-transcribed sample indicates minimal gDNA contamination [41].
Expected Outcome: The researcher will obtain quantitative and qualitative data to decide which method provides the best balance of high-quality RNA yield, integrity, and purity for their specific embryonic tissue and downstream application.
Effective Homogenization Techniques for Embryonic Tissues High in Nucleases or Lipids
Within the context of a broader thesis on preventing RNA degradation in embryonic samples research, this guide addresses the unique challenges of homogenizing embryonic tissues. These samples are often characterized by high levels of endogenous nucleases, which can rapidly degrade RNA, and abundant lipids, which can co-purify and inhibit downstream applications [43]. Efficient and rapid homogenization is the most critical first step to inactivate these degradative elements and ensure the integrity of your analytes. The following sections provide targeted troubleshooting advice, detailed protocols, and essential resources to safeguard your precious embryonic samples.
Troubleshooting Common Homogenization Problems
Q1: I am consistently getting low RNA yield from my embryonic tissue. What is the most likely cause?
A: Low RNA yield is most frequently due to incomplete tissue disruption [39]. When cells are not fully broken open, a significant portion of the RNA remains trapped inside and is unavailable for purification. This problem is exacerbated in embryonic tissues, which may be small and difficult to physically handle.
- Solution: Ensure a thorough and rapid homogenization process.
- Cryogenic Grinding: For very small or fibrous embryonic samples, pulverize the tissue to a fine powder under liquid nitrogen using a pre-cooled mortar and pestle or a bead mill. This step is critical for tough tissues and those high in nucleases [39] [43].
- Optimize Homogenization Time: Use mechanical homogenization (e.g., rotor-stator) in short bursts of 15-20 seconds with 5-second rest intervals for a total of about 60 seconds to ensure complete disruption without generating excessive heat or foam [44].
Q2: My RNA is degraded, even though I work quickly. How can I better inhibit nucleases?
A: Embryonic tissues are often rich in potent RNases. Standard protocols may be insufficient.
- Solution: Implement immediate and potent nuclease inactivation.
- Rapid Preservation: Snap-freeze embryonic tissue in liquid nitrogen immediately upon dissection. Do not allow it to thaw during subsequent steps [43].
- Use RNAlater: When immediate freezing is impractical, preserve tissue in RNAlater, an aqueous reagent that permeates tissue and inactivates RNases, allowing samples to be stored for a period before homogenization [43] [44].
- Potent Lysis Buffers: Use a lysis buffer containing a denaturant like guanidinium thiocyanate and a reducing agent like beta-mercaptoethanol (β-ME), which is critical for denaturing RNases. A common ratio is 10 μL of β-ME per 1 mL of RLT buffer [43] [44].
Q3: My lysate is viscous or has white flocculent material after extraction. What is this and how do I fix it?
A: Viscosity is typically caused by high molecular weight genomic DNA, while white flocculent material often indicates contamination from lipids or proteins, common in lipid-rich tissues like brain or embryonic structures [43].
- Solution for Viscosity:
- Solution for Lipid/Protein Contamination:
- Additional Extraction: Add one-tenth volume of chloroform to the aqueous phase after initial phenol:chloroform extraction, mix well, and re-centrifuge. This can help remove residual lipids [43].
- Dilute and Re-extract: Remix the aqueous and organic phases, add more lysis solution to dilute the contaminants, and perform another phenol:chloroform extraction [43].
Q4: My homogenization results are inconsistent from sample to sample. How can I improve reproducibility?
A: Inconsistency often stems from manual processing techniques and a lack of standardized protocols [45].
- Solution:
- Automate the Process: Transition to a semi-automated homogenizer, like a bead mill or rotor-stator system with disposable probes. This standardizes the homogenization force and time for every sample and eliminates cross-contamination [45] [46].
- Standardize the Protocol: Keep sample weights consistent and ensure the volume of lysis buffer is proportional to the tissue mass [44].
Optimized Experimental Protocols
Protocol 1: Cryogenic Mortar and Pestle for Fibrous or Nuclease-Rich Embryonic Tissue
This method is ideal for tough embryonic tissues (e.g., heart muscle) or those extremely high in nucleases, as the rapid freezing inactivates enzymes and makes the tissue brittle for easy fracturing [43].
Materials:
- Liquid nitrogen
- Pre-cooled mortar and pestle
- Lysis buffer (e.g., RLT buffer with 1% β-ME)
- Cryovials
Method:
- Freeze: Immediately upon dissection, submerge the embryonic tissue in liquid nitrogen.
- Cool Equipment: Pre-cool the mortar and pestle by adding liquid nitrogen.
- Grind: Place the frozen tissue in the mortar and vigorously grind it to a fine powder. Keep the tissue submerged in liquid nitrogen throughout the grinding process to prevent thawing [39] [43].
- Transfer: Allow the liquid nitrogen to evaporate, but do not let the powder thaw. Quickly transfer the powdered tissue to a tube containing the appropriate volume of lysis buffer.
- Homogenize: Proceed with further homogenization using a vortex, bead mill, or rotor-stator homogenizer to create a uniform lysate [39].
Protocol 2: Mechanical Homogenization with Rotor-Stator for General Embryonic Tissues
This method offers a good balance of speed and efficiency for most embryonic soft tissues [44] [46].
Materials:
- Rotor-stator homogenizer (e.g., Omni Polytron)
- Disposable or sterilizable probes
- Round or flat-bottom tubes
- Lysis buffer (e.g., RLT buffer with 1% β-ME)
Method:
- Prepare Tissue: Mince the fresh or RNAlater-preserved tissue with razor blades in a weigh boat. No piece should be larger than half the diameter of the homogenizer probe [44].
- Transfer to Buffer: Transfer the minced tissue into a tube containing lysis buffer.
- Homogenize:
- Place the tip of the probe halfway into the tube, holding it against the side to minimize foaming.
- Homogenize at medium speed in short bursts of 15-20 seconds, with 5-second rest intervals, for a total of about 60 seconds [44].
- During rest intervals, decrease the speed and gently tap the probe on the side of the tube to minimize sample retention.
- Proceed: The homogenate is now ready for RNA extraction.
The following workflow diagram illustrates the decision path for selecting and applying the appropriate homogenization method for embryonic tissues.
The Scientist's Toolkit: Essential Research Reagent Solutions
The following table details key reagents and materials critical for successful homogenization of challenging embryonic tissues.
Table 1: Essential Reagents and Materials for Homogenization
| Item | Function & Application |
|---|---|
| RNAlater | An aqueous, non-toxic tissue storage reagent that rapidly permeates tissue to stabilize and protect RNA by inactivating RNases. Ideal for preserving samples during collection or when immediate processing is not possible [43]. |
| Guanidinium Thiocyanate-based Lysis Buffer | A powerful denaturant (e.g., in RLT buffer) that disrupts cells and inactivates nucleases and proteases, safeguarding RNA integrity during the homogenization process [43]. |
| Beta-Mercaptoethanol (β-ME) | A reducing agent added to lysis buffer (typically 1% v/v) to denature proteins and RNases by breaking disulfide bonds, providing enhanced protection for RNA [44]. |
| Polyvinylpyrrolidone (PVP) | Useful for plant embryonic tissues or those high in polyphenols and polysaccharides. PVP complexes with these contaminants, allowing them to be removed by centrifugation to prevent downstream inhibition [43]. |
| Acid-Washed Beads | For use in bead mills. Different sizes (e.g., 0.5 mm for yeast/soft tissue, 3–7 mm for tough tissue) provide efficient mechanical shearing. Acid-washing ensures they are nuclease-free [39]. |
| Disposable Homogenizing Probes | For rotor-stator homogenizers. They eliminate the risk of cross-contamination between samples, which is crucial for reproducibility and high-throughput work [46]. |
Frequently Asked Questions (FAQs)
Q: Can I combine different homogenization methods? A: Yes, and this is often recommended for optimal results. A common strategy is to first use cryogenic grinding with a mortar and pestle to pulverize tough tissue, followed by a brief round of mechanical homogenization with a rotor-stator in lysis buffer to create a perfectly uniform lysate [39] [47].
Q: How does homogenization time affect my results? A: Homogenization time is a critical balance. Insufficient time leads to incomplete lysis and low yield. Excessive time can generate heat, promote frothing, and physically shear RNA. Use the shortest time necessary to achieve a uniform lysate, typically in short bursts adding up to 60-90 seconds for most tissues [44].
Q: My downstream application is sensitive to contaminants. What is the best homogenization method? A: For applications like mass spectrometry or sequencing, consider methods that minimize heat and in-vitro enzymatic modifications. Picosecond-Infrared Laser (PIRL) Homogenization is an emerging technology that uses cold vaporization to transfer biomolecules directly into an aerosol, resulting in homogenates with a higher number of intact protein species and almost no insoluble particles, allowing for direct analysis [48]. Where advanced equipment is not available, a combination of gentle mechanical disruption in a nuclease-inhibiting buffer followed by careful cleanup steps is effective.
Q: How do I prevent overheating during mechanical homogenization? A: Overheating can degrade RNA and denature proteins. To prevent it:
- Use the burst protocol (15-20 seconds on, 5 seconds off) [44].
- Keep samples on ice between bursts.
- For sonication, consider using a cooling water bath [49].
This technical support center provides targeted troubleshooting and guidance for RNA isolation, with a specific focus on challenges relevant to embryonic samples research. A key goal in this field is to preserve the accurate representation of the transcriptome, as the fidelity, quality, and quantity of recovered RNA significantly impact all downstream analyses [50]. Given that embryonic development is directed by precise gene expression programs, where the selective degradation and translation of maternal mRNAs is critical for successful embryogenesis, preventing unintended RNA degradation during isolation is paramount [10] [51]. The following guides address specific issues across the most common isolation methods.
Troubleshooting Guides & FAQs
Column-Based RNA Isolation
Column-based methods, such as those using PureLink RNA kits, are popular for their ease of use and are ideal for processing multiple samples of standard types [50].
Problem: Genomic DNA contamination in the eluted RNA.
- Potential Cause: Incomplete digestion of DNA during the isolation process. This is particularly problematic for applications like qRT-PCR with non-intron-spanning primers [50].
- Solution: Perform an on-column DNase digestion step using a dedicated DNase Set. This is more efficient and leads to higher RNA recovery than post-isolation treatment [50].
Problem: Low RNA yield.
- Potential Causes & Solutions:
- Insufficient starting material: Know the expected RNA yield from your specific embryonic tissue and ensure you are processing an adequate amount [50].
- Column overloading: If the sample has high RNA content, overloading the column can trap RNA and reduce purity and yield [50].
- Incomplete elution: Using a larger elution volume will yield a more dilute sample but does not increase the total amount of RNA recovered. Ensure the elution buffer is applied directly to the membrane for efficient recovery [50].
- Potential Causes & Solutions:
Problem: Poor RNA quality (Low A260/A280 ratio).
TRIzol (Phenol-Guanidine Isothiocyanate) RNA Isolation
TRIzol reagent is a monophasic solution of phenol and guanidine isothiocyanate effective for simultaneous isolation of RNA, DNA, and protein. It is especially recommended for difficult samples, such as those high in nucleases or lipids [50] [53].
Problem: Low or no RNA yield after isopropanol precipitation.
- Potential Causes & Solutions:
- Very low RNA concentration: For small embryonic samples or low-input preparations, add a carrier like RNase-free glycogen (5-10 µg) to enhance precipitation [52].
- Invisible pellet: If an pellet is not visible after precipitation, do not decant the supernatant. Instead, carefully remove the supernatant by pipetting to avoid losing the pellet. Precipitating at 4°C or -20°C for 10–30 minutes can also help [54].
- Improper ethanol wash: If the ethanol concentration is too low, RNA may dissolve and be lost. Always use freshly prepared 75% ethanol made with DEPC-treated water [54].
- Potential Causes & Solutions:
Problem: Abnormal coloration (yellow, brown, pink) in the aqueous phase after chloroform addition.
- Potential Causes & Solutions:
- Lipid-rich tissues: Fat micelles can carry pigments. Centrifuge the initial homogenate before adding chloroform to remove the lipid layer at the top [54] [53].
- Blood contamination: Hemoglobin can cause yellowing or turbidity. Pre-wash tissue samples with PBS to reduce blood content [54].
- Over-dilution: A sample-to-TRIzol ratio exceeding 1:10 can cause premature phase separation. Add more TRIzol reagent to correct the ratio [54] [53].
- Potential Causes & Solutions:
Problem: Gel-like or discolored RNA pellet (brown, gray).
- Potential Cause: Contamination with polysaccharides, polyphenols (common in some tissues), or accidental aspiration of the interphase [54].
- Solution: For tissues known to be rich in proteoglycans/polysaccharides (e.g., certain embryonic structures), modify the protocol by adding a high-salt precipitation solution (0.8 M sodium citrate and 1.2 M NaCl) along with isopropanol. This keeps contaminants soluble while precipitating RNA [54] [53]. If the interphase was disturbed, re-extract the aqueous phase with chloroform to purify [54].
Problem: RNA degradation during or after extraction.
- Potential Cause: Incomplete inactivation of endogenous RNases, which is critical in RNA-rich embryonic samples.
- Solution: Ensure samples are homogenized immediately in the TRIzol reagent. For tissues, flash-freeze in liquid nitrogen or stabilize in a reagent like RNAlater. Once in TRIzol, RNases are effectively inhibited [50].
Automated Magnetic Bead-Based Protocols
These systems use paramagnetic particles coated with RNA-binding surfaces to capture RNA and are ideal for high-throughput, automated sample processing [50] [55].
Problem: Inconsistent yield between samples in a run.
- Potential Cause: Inefficient binding of RNA to magnetic beads due to suboptimal buffer conditions.
- Solution: Optimize the protocol parameters. A study on co-extracting DNA and RNA from sputum found that key factors include:
Problem: Carryover of contaminants inhibiting downstream applications.
- Potential Cause: Incomplete washing.
- Solution: Ensure the worktable and reagent positions are correctly configured so that the bead pellet is fully immersed and agitated during wash steps. Include a final step with 70-80% ethanol to remove salts effectively [55].
General RNA Isolation Best Practices for Embryonic Research
The following practices are crucial for all methods to preserve RNA integrity, especially for sensitive embryonic samples where transcript levels can be dynamic and low.
Sample Stabilization and Handling
- Inactivate RNases Immediately: Upon harvesting embryonic tissue, endogenous RNases must be inactivated immediately to prevent degradation. This can be achieved by: 1) immediate homogenization in a chaotropic lysis solution (e.g., guanidinium-based buffer or TRIzol), 2) flash-freezing in liquid nitrogen (ensure tissue pieces are small), or 3) placing samples in a stabilization solution like RNAlater [50].
- Maintain an RNase-free Environment: RNases are ubiquitous. Use RNase-free tips, tubes, and water. Frequently decontaminate surfaces, pipettors, and glassware with a dedicated RNase decontamination solution like RNaseZap. Change gloves often [50].
RNA Storage
- For short-term storage, RNA can be kept at –20°C.
- For long-term storage, especially for precious embryonic samples, store RNA at –80°C in single-use aliquots. This prevents degradation from multiple freeze-thaw cycles and minimizes the risk of accidental RNase contamination [50].
Quality Control and Quantification
Accurate assessment of RNA quality and quantity is essential before proceeding to costly downstream analyses like RNA-seq or qRT-PCR.
- UV Spectroscopy: Measures concentration and purity (A260/A280 ratio). An A260/A280 ratio of 1.8-2.0 indicates high-purity RNA. Instruments like the Thermo Scientific NanoDrop allow measurement with only 1-2 µL of sample [50].
- Fluorometry (e.g., Qubit Fluorometer): Provides a highly accurate RNA quantity measurement using RNA-specific fluorescent dyes, even in low-concentration samples [50].
- Capillary Electrophoresis (e.g., Bioanalyzer): Provides an RNA Integrity Number (RIN) that indicates the overall "intactness" of the RNA. While some techniques like qRT-PCR can tolerate lower RIN values, a minimum RIN of 7 is often recommended for transcriptome-wide analyses [50].
Diagrams of Workflows and Pathways
RNA Isolation Method Workflow
Maternal mRNA Degradation Pathway in Embryogenesis
Expected RNA Yields from Different Tissues Using TRIzol
This table provides a rough guide for estimating yield from 1 mg of tissue or 1 million cells, which can aid in experimental planning [52].
| Tissue or Cell Type | Approximate RNA Yield |
|---|---|
| Liver and Spleen | 6-10 μg |
| Kidney | 3-4 μg |
| Epithelial Cells | 8-15 μg |
| Fibroblasts | 5-7 μg |
| Placenta | 1-4 μg |
| Muscle and Brain Tissue | 1-1.5 μg |
Comparison of RNA Isolation Methods
This table compares the key features of different RNA isolation methods to help select the most appropriate one for your experimental needs [50] [55].
| Feature | Column-Based | TRIzol / Phenol-Chloroform | Magnetic Bead-Based |
|---|---|---|---|
| Principle | Binding to silica membrane in column | Phase separation with organic solvents | Binding to magnetic beads coated with silica |
| Best For | Most sample types; mid-to-low throughput | Difficult samples (high in nucleases, lipids, polysaccharides) | High-throughput and automated processing |
| Throughput | Medium | Low | High |
| Ease of Use | Easy, multiple samples | Requires careful handling of toxic phenol | Easy, especially when automated |
| Hands-on Time | Moderate | High | Low |
| Cost | Moderate | Low (reagent cost) | Varies |
| Safety | High (non-toxic buffers) | Low (toxic chemicals involved) | High |
| RNA Quality | High | High | High |
| Co-extraction of DNA/Protein | No | Yes, sequentially | Possible with optimized protocols [56] |
The Scientist's Toolkit: Essential Research Reagents
| Item | Function |
|---|---|
| Chaotropic Salts (e.g., Guanidine Isothiocyanate - GTC) | A key component of lysis buffers (e.g., in TRIzol and RLT buffer) that denatures proteins and inhibits RNases, protecting RNA during cell disruption [50] [57]. |
| RNase Decontamination Solution (e.g., RNaseZap) | Used to decontaminate surfaces, pipettors, and glassware to introduce an RNase-free environment and prevent accidental sample degradation [50]. |
| RNase-free Glycogen | Acts as a carrier to precipitate nucleic acids, improving the yield and visibility of the pellet from samples with very low RNA content, such as small embryonic biopsies [54] [52]. |
| DNase Set (e.g., PureLink DNase) | Allows for on-column digestion of contaminating genomic DNA during RNA purification, which is more efficient than post-purification treatment and crucial for sensitive applications like qRT-PCR [50]. |
| RNA Stabilization Solution (e.g., RNAlater) | An aqueous, non-toxic reagent that rapidly permeates tissues to stabilize and protect cellular RNA immediately after sample harvesting, preventing degradation before homogenization [50]. |
| Deadenylation Complexes (CCR4-NOT, PAN2-PAN3) | Enzymatic complexes that initiate controlled mRNA decay by shortening the poly(A) tail, a critical first step in the pathway that degrades maternal mRNAs during the maternal-to-zygotic transition [10]. |
| Dithiothreitol (DTT) | A reducing agent that helps break down disulfide bonds in mucoproteins, making it particularly useful for the extraction of nucleic acids from complex samples like sputum [56]. |
The Essential Role of DNase Treatment in On-Column Digestion for Genomic DNA Removal
In embryonic samples research, preserving RNA integrity is paramount. A critical challenge in this process is the removal of contaminating genomic DNA (gDNA), which can co-purify with RNA and lead to false-positive results in sensitive downstream applications like RT-PCR. This guide details the essential role of on-column DNase digestion, a robust method for eliminating gDNA contamination while protecting the valuable RNA sample, thereby ensuring the accuracy of your data in embryonic research.
FAQs: Understanding Genomic DNA Contamination
Why is genomic DNA removal so critical for embryonic RNA samples?
Genomic DNA contamination can serve as a template during the PCR phase of RT-PCR, generating false-positive signals that compromise data integrity [58]. This is especially crucial in embryonic research, where the accurate assessment of gene expression during early development—such as during the maternal-to-zygotic transition—is fundamental [1]. A "minus-RT" control, where reverse transcriptase is omitted, is the best practice for detecting this contamination [58].
Does the RNA isolation method affect genomic DNA contamination?
Yes, DNA contamination is a common issue irrespective of the isolation method. Studies have shown that DNA contamination is present in RNA isolated by various techniques, including single-reagent extraction (e.g., TRIzol), glass fiber filter-binding (e.g., RNeasy), and guanidinium thiocyanate/acid phenol-chloroform extraction [58]. Therefore, DNase treatment is consistently recommended for RT-PCR applications.
What are the advantages of on-column DNase digestion?
On-column digestion integrates the DNase treatment directly into the silica-membrane-based RNA purification workflow. This method is efficient and minimizes hands-on time. It confines the digestion reaction to the filter, reducing the risk of sample loss or cross-contamination that can occur with solution-phase treatments. It also avoids the need for post-digestion heat inactivation, which can damage RNA in the presence of divalent cations [58].
Troubleshooting Guide
This section addresses common problems encountered during on-column DNase digestion.
| Problem | Possible Cause | Solution |
|---|---|---|
| High Background in RT-PCR (-RT control) | Incomplete DNase digestion or recontamination. | - Ensure the DNase I is RNase-free and qualified for activity [59].- Verify that the digestion buffer is prepared correctly and the reaction is incubated for the recommended time.- Include a "minus-RT" control for every sample to monitor for contamination [58]. |
| Poor RNA Yield After DNase Treatment | RNA degradation during the procedure. | - Use certified RNase-free reagents and tubes.- Ensure the DNase I is certified to be free of RNase contamination [58].- Do not extend the digestion time unnecessarily. |
| Inefficient DNA Digestion | Suboptimal reaction conditions or enzyme inhibition. | - Qualify each new lot of DNase I to ensure it can reduce a DNA spike by at least 90% [59].- Ensure the sample does not contain inhibitors like SDS, which can halt DNase activity [59]. |
| Slow Filter Flow-Through | Excess DNase I or precipitation on the column. | - Use the recommended amount of DNase I. Excess enzyme in the presence of Mg²⁺ can slow filtration [59].- Ensure the digestion buffer does not contain precipitates before use. |
Optimized Protocols
Protocol 1: Standard On-Column DNase Digestion
This protocol can be integrated into many commercial silica-membrane RNA purification kits.
- Binding: Bind RNA to the silica membrane column as per your kit's instructions.
- DNase I Mixture Preparation: Prepare a digestion mix on ice. For one reaction, combine:
- 10 µL of DNase I (e.g., 1 U/µL, RNase-free)
- 70 µL of DNase Digestion Buffer (e.g., containing 2.5 mM MgCl₂ and 0.1 mM CaCl₂) [58].
- Digestion: Apply the entire 80 µL mixture directly onto the center of the membrane. Incubate the column at room temperature (15–25°C) for 15–30 minutes.
- Washing: Proceed with the standard wash steps as described in your RNA purification kit's protocol. The subsequent ethanol-containing washes will effectively inactivate and remove the DNase I.
- Elution: Elute the DNA-free RNA with RNase-free water or the kit's elution buffer.
Protocol 2: DNase I Qualification (in-solution)
It is good practice to qualify a new lot of DNase I before use to ensure optimal performance [59].
- Preparation: Prepare a stock solution of DNase I at 2500 U/mL in a storage buffer (e.g., 20 mM Tris-HCl, 1 mM dithioerythritol, 50 mM NaCl, 0.1 mg/mL BSA, 50% glycerol) and store at -20°C [59].
- Setup: Set up duplicate reactions with 0.5 mL of Zero Calibrator buffer, testing three levels of DNase I (e.g., 25 U, 50 U, and 100 U). Include controls with and without a 50 pg spike of double-stranded DNA.
- Digestion: Add 25 µL of 100 mM MgCl₂ to each tube to achieve a final concentration of ~5 mM for maximal DNase activity [59]. Incubate at 37°C for 3 hours.
- Inactivation: Heat samples at 105°C for 15 minutes to denature proteins, then cool on ice [59].
- Analysis: Analyze the DNA content in the samples. The lowest level of DNase I that reduces the DNA spike by at least 90% is the optimum concentration for use [59].
Workflow and Signaling Context
The following diagram illustrates the optimal workflow for RNA preparation using on-column DNase digestion, highlighting its role in protecting downstream embryonic research applications.
In embryonic development, precise regulation of RNA stability is critical. Research has shown that specific ribonucleases (RNases), such as IRE1α, are activated during the maternal-to-zygotic transition to degrade maternal mRNAs [1]. The following diagram places the technical process of DNase treatment within this broader biological context, showing how inaccuracies from gDNA contamination can obstruct the study of these essential pathways.
The Scientist's Toolkit: Key Research Reagent Solutions
| Item | Function in Experiment |
|---|---|
| RNase-free DNase I | An endonuclease that degrades double-stranded DNA to produce oligonucleotides. It must be free of RNase activity to prevent degradation of the RNA sample [58] [59]. |
| DNase Digestion Buffer | Typically contains divalent cations like Mg²⁺ and Ca²⁺, which are essential for optimal DNase I enzyme activity [58] [59]. |
| Silica-Membrane Spin Columns | The solid support for binding RNA during purification. The on-column digestion is performed directly on this membrane [58]. |
| Wash Buffers | Usually contain ethanol or other chaotropic salts. They wash away impurities and are critical for inactivating and removing DNase I after digestion is complete [58]. |
| EDTA Solution | A chelating agent used in solution-based DNase treatments to inactivate DNase I by chelating its required Mg²⁺ ions after digestion, preventing it from degrading newly synthesized DNA in downstream PCR [59]. |
| DNase Removal Reagent | A proprietary, solid-phase reagent that rapidly binds and removes DNase and divalent cations after digestion, offering a fast alternative to heat inactivation or organic extraction [58]. |
Troubleshooting RNA Degradation: Common Pitfalls and Proactive Solutions
Frequently Asked Questions (FAQs)
Q1: Why is creating an RNase-free environment so critical in embryonic stem cell research? In embryonic stem cell research, the precise gene expression program dictates cell fate decisions, such as self-renewal and differentiation. RNA degradation machinery is not just a background process; it is actively involved in clearing specific transcripts to enable these developmental transitions [10]. For instance, research shows that RNA degradation eliminates developmental transcripts during murine embryonic stem cell differentiation [60]. Degraded RNA from your samples would distort gene expression data, leading to inaccurate conclusions about the state of your cells.
Q2: What are the most common sources of RNase contamination in the lab? RNases are ubiquitous and hardy enzymes. The primary sources include [61]:
- Human Skin: RNases are present on skin surfaces and can be easily transferred to tubes, pipette tips, and bench tops.
- Dust: Airborne dust particles can harbor microorganisms that release RNases.
- Reagents & Consumables: If not certified RNase-free, buffers, water, and plasticware can be a contamination source.
- The Sample Itself: Biological samples like tissues and cells contain endogenous RNases that can be released during homogenization.
Q3: How can I verify if my RNA sample has been degraded? You can assess RNA integrity in two main ways [61]:
- Spectrophotometry: Determine the purity using the A260/A280 ratio. A ratio between 1.7 and 2.1 generally indicates good quality RNA.
- Gel Electrophoresis or Automated Systems: Run the RNA on a denaturing agarose gel. Intact total RNA will show sharp ribosomal RNA bands (e.g., 28S and 18S), with the 28S band approximately twice as intense as the 18S. Automated systems like Agilent's Bioanalyzer provide an RNA Integrity Number (RIN) for a more precise assessment.
Q4: My RNA yields are consistently low. What am I doing wrong? Low yields can result from several issues [62]:
- Incomplete Homogenization: The sample was not fully disrupted.
- Incomplete Dissolution of RNA Pellet: The final RNA pellet was not properly redissolved.
- Improper Sample Storage: Samples were stored at -20°C instead of -70°C for long-term storage, or were subjected to multiple freeze-thaw cycles.
- Sample Processing Delays: RNA was not stabilized or processed immediately after collection, leading to degradation by endogenous RNases.
Troubleshooting Guides
Problem: Suspected RNase Contamination in Reagents or Surfaces
Step 1: Decontaminate Your Workspace Thoroughly clean all surfaces with an RNase-inactivating reagent. Wipe benches with a commercial RNase decontamination solution, 100% ethanol, or a 1% sodium hypochlorite solution [63] [64].
Step 2: Treat Reusable Equipment
- Glassware: Bake at 180°C for at least 4 hours [63].
- Plasticware: Soak in 0.1 M NaOH / 1 mM EDTA for 2 hours at 37°C, then rinse thoroughly with DEPC-treated water [61] [63].
- Electrophoresis Tanks: Clean by wiping with a 1% SDS solution, rinse with water and absolute ethanol, then soak in 3% H₂O₂ for 10 minutes. Rinse with DEPC-treated water before use [63].
Step 3: Use Certified Reagents Ensure all water and buffers are certified RNase-free. For in-house preparation, treat non-Tris solutions with 0.1% DEPC overnight and then autoclave to hydrolyze the unreacted DEPC. Note: Tris buffers cannot be treated with DEPC; instead, dedicate a bottle for RNA work and use DEPC-treated water to prepare Tris solutions [63].
Problem: RNA Degradation During Sample Collection and Handling
Step 1: Stabilize Samples Immediately RNA degradation begins the moment a sample is collected. For tissues and cells, immediately stabilize the RNA by flash-freezing in liquid nitrogen or immersing the sample in a commercial RNA stabilization reagent (e.g., RNAlater) [62] [31].
Step 2: Work Quickly and on Ice Process samples as rapidly as possible. Once you begin working with the sample, keep it on ice at all times to slow down enzymatic activity and minimize degradation [31].
Step 3: Use RNase Inhibitors During RNA isolation and purification, add a protector RNase inhibitor to your lysis buffer and reaction mixtures. This is crucial for samples rich in endogenous RNases, such as pancreas or spleen [63].
Step 4: Store RNA Correctly For long-term storage, keep purified RNA as aliquots in ethanol or isopropanol at -70°C to -80°C. Avoid repeated freeze-thaw cycles by creating single-use aliquots [63] [31].
Experimental Protocols: Key Methodologies
Protocol 1: Decontamination Efficacy Testing (Solution Test)
This protocol, adapted from standardized guidelines, allows you to verify the effectiveness of decontamination reagents against amplifiable nucleic acids [64].
- Objective: To determine the efficacy of a decontamination reagent in degrading a target DNA or RNA in solution.
- Materials:
- Decontamination reagent (e.g., 1% sodium hypochlorite)
- Target nucleic acid (e.g., a defined PCR amplicon or in vitro transcribed RNA)
- Phosphate-buffered saline (PBS) or RNase-free water
- Lysis buffer (e.g., from MagAttract Virus Mini M48 Kit)
- Internal control nucleic acid (T7-DNA or MS2-RNA)
- Procedure:
- Pipette 10 µL of the decontamination reagent into a well (in triplicate).
- Add 10 µL of the target nucleic acid to the well, mix thoroughly, and spin down.
- Incubate at room temperature for 2 or 10 minutes.
- Stop the reaction by adding 180 µL of PBS and 200 µL of lysis buffer. Add 10 µL of internal control.
- Incubate for 15 minutes at room temperature.
- Extract the nucleic acid using a standard kit (e.g., MagAttract Virus Mini M48 Kit).
- Perform real-time (RT-)PCR to quantify the remaining amplifiable nucleic acid. Compare the quantification cycle (Cq) values to a no-reagent control to determine the reduction in amplifiable material [64].
Protocol 2: RNase Digestion for DNA Purification
This protocol is used when you want to remove unwanted RNA from a DNA sample or plasmid prep.
- Objective: To quantitatively degrade RNA in a sample using DNase-free RNase.
- Materials: DNase-free RNase [65].
- Procedure:
- Calculate Required RNase: One µL of a typical RNase制剂 (1.5 mU/µL) is sufficient to degrade 15 µg of RNA in 30 minutes at 37°C [65].
- Set Up Reaction: Add the calculated volume of RNase to your sample in a PCR-grade water or buffer. RNase is active in pure water and in the presence of Tris or NaCl [65].
- Incubate: Incubate at +15 °C to +25 °C or +37 °C for 30 minutes [65].
- Proceed with DNA Purification: After RNA is degraded, proceed with your standard DNA cleanup protocol.
Data Presentation
Table 1: Efficacy of Common Decontamination Reagents
This table summarizes the performance of various decontamination reagents against amplifiable nucleic acids, based on a standardized study [64].
| Reagent | Reactive Component | Efficacy (Solution Test) | Efficacy (Surface Test) | Key Considerations |
|---|---|---|---|---|
| 1% Sodium Hypochlorite | Sodium hypochlorite | Highly efficient | Highly efficient | Fast-acting; common and effective reference standard [64]. |
| DNA Away | Sodium hydroxide | Dose- and time-dependent | Dose- and time-dependent | Requires appropriate concentration and contact time [64]. |
| DNA-ExitusPlus IF | Non-enzymatic | No reduction observed | No reduction observed | Did not show efficacy under tested conditions [64]. |
| DNA Remover | Phosphoric acid | No reduction observed | No reduction observed | Did not show efficacy under tested conditions [64]. |
Table 2: RNase Digestion Guidelines for Different Sample Types
Guidelines for using DNase-free RNase to remove RNA from samples containing different numbers of cells [65].
| Sample Size | Recommended RNase Volume | Incubation Conditions |
|---|---|---|
| 10⁶ cells | 0.5 µL | +15 °C to +25 °C or +37 °C |
| 10⁷ cells | 1.5 µL | +37 °C for 30 min |
| 10⁸ cells | 16 µL | +37 °C for 30 min |
Workflow and Pathway Diagrams
RNase-Free RNA Handling Workflow
RNA Degradation Pathways in Cell Fate
The Scientist's Toolkit: Essential Research Reagent Solutions
| Item | Function/Benefit |
|---|---|
| Protector RNase Inhibitor | Protects RNA during isolation and downstream applications by inhibiting a wide spectrum of RNases (A, B, C). It remains active at elevated temperatures useful for reverse transcription [63]. |
| DEPC-treated Water | Water treated with Diethyl Pyrocarbonate (DEPC) to inactivate RNases. It is essential for preparing RNase-free solutions. Note: Must be autoclaved after treatment to break down unreacted DEPC [61] [63]. |
| RNA Stabilization Reagents (e.g., RNAlater, RNAprotect) | These reagents rapidly penetrate tissues and cells to stabilize and protect RNA at the point of collection, preventing degradation during sample storage and transport [62] [31]. |
| High-Salt Precipitation Solution | A solution of 0.8 M sodium citrate and 1.2 M NaCl used during RNA precipitation to efficiently precipitate RNA while keeping contaminating proteoglycans and polysaccharides in solution [62]. |
| Sodium Hypochlorite (1%) | A highly effective and common laboratory reagent for decontaminating surfaces and equipment from amplifiable nucleic acids, thereby preventing PCR carryover contamination [64]. |
FAQ: Understanding RNase Contamination
What are the primary sources of RNase contamination in a research lab? RNases are ubiquitous enzymes found throughout laboratory environments. The most common sources include:
- Skin and Hands: RNases are present on human skin and can be transferred to samples and equipment via direct contact or through shed skin cells [66] [67].
- Dust and Airborne Particles: Dust particles can carry bacterial and fungal spores, which are natural producers of RNases [66] [68].
- Reagents and Water: Water and laboratory-prepared buffers can be frequent sources of RNase contamination [66]. In fact, one study found that seven out of nine buffer and water stock solutions from an academic lab showed varying degrees of RNase contamination [68].
- Lab Surfaces and Consumables: Benches, pipettors, glassware, tubes, and tips can all be contaminated with RNases from environmental exposure [66].
Why are RNases so difficult to eliminate? RNases are exceptionally stable and robust enzymes due to their structure, which includes several cysteine residues that form numerous intramolecular disulfide bonds. This makes them refractory to many common decontamination methods, often requiring strong chemical treatments for elimination [66].
Does autoclaving eliminate RNases? No, autoclaving alone is not sufficient to inactivate all RNases [68] [67]. While autoclaving is useful for sterilization, dedicated methods such as DEPC treatment of solutions or baking glassware at high temperatures are required to inactivate RNases effectively.
What is the role of human skin as an RNase source? The human body uses RNases as a defense mechanism against microorganisms, secreting them in fluids such as tears, saliva, and perspiration. These RNases are also present on the skin's surface and can be shed onto lab surfaces via flaked skin or hair, making proper lab attire and gloving critical when handling RNA [66].
Troubleshooting Common RNase Contamination Problems
When working with RNA, degradation is a common issue. The table below outlines frequent problems, their likely causes, and proven solutions.
| Problem | Cause | Solution |
|---|---|---|
| Degraded RNA | RNase contamination during RNA cleanup [69]. | Work on a clean bench, wear gloves, use RNase-free tips and tubes [69]. Store purified RNA at -70°C if not used immediately [69]. |
| Low RNA Yield | Residual RNase activity degrading RNA during isolation [70]. | Inactivate intracellular RNases immediately upon cell lysis [70]. Ensure samples are fully homogenized and not washed prior to adding lysis reagent [70]. |
| Poor Downstream Performance | Carryover of salts, ethanol, or contaminants from the cleanup process that can inhibit enzymatic reactions [69]. | Ensure wash steps are performed correctly. Take care that the column does not contact the flow-through. Re-centrifuge if unsure to remove traces of ethanol and salt [69]. |
| Persistent Contamination | Reagents or water stocks contaminated with RNases [66] [68]. | Treat water and lab-prepared solutions with DEPC [66] [67]. Test water sources and bench-prepared reagents monthly for RNase activity [66]. Use a ribonuclease inhibitor in reactions [68]. |
The Scientist's Toolkit: Key Reagents for RNase Control
Effective management of RNases requires a set of dedicated reagents and materials. The following table lists essential items for maintaining an RNase-free environment.
| Item | Function |
|---|---|
| RNasin Ribonuclease Inhibitors | Specialized proteins that protect RNA from degradation by noncovalently binding to and inhibiting RNases from the RNase A family and human placental RNases. Essential for reactions like RT-PCR and in vitro transcription [68]. |
| DEPC-treated Water | Water treated with Diethyl Pyrocarbonate (DEPC), which inactivates RNases. It is a cornerstone for preparing RNase-free solutions. After treatment, the solution must be autoclaved to degrade residual DEPC [66] [67]. |
| RNase Decontamination Sprays/Towelettes | Ready-to-use reagents for the routine cleaning of lab surfaces such as benchtops, pipettors, and tube racks to remove RNase contamination [66]. |
| RNase-free Plasticware | Sterile, disposable plastic consumables (tubes, tips) that are certified RNase-free and do not require pre-treatment [66] [67]. |
| RNA Stabilization Reagents | Solutions used to preserve the integrity of RNA in cells or tissues immediately after collection, preventing degradation by endogenous RNases before the isolation process begins [66] [70]. |
Experimental Workflow for RNase Control
The following diagram illustrates a systematic workflow for preventing RNase contamination, from establishing a dedicated workspace to sample storage.
RNase Contamination Control Workflow
Practical Protocols for Maintaining an RNase-Free Environment
Establishing an RNA-Only Work Zone
- Designation: Assign a specific area in the lab for handling RNA samples only. This space should have dedicated pipettes, labware, and reagents labeled "RNA Only" to prevent cross-contamination from common lab areas [68] [67].
- Practice: Always wear gloves and use sterile techniques when handling RNA or associated reagents. The most common sources of RNase contamination are hands and microorganisms on dust particles or glassware [68].
Treatment of Labware and Reagents
- Disposable Plasticware: Use sterile, disposable plasticware, as these are typically RNase-free and do not require pre-treatment [68] [67].
- Glassware and Non-Disposables: For glassware, bake at 250°C for several hours (overnight is common) to inactivate RNases. For chloroform-resistant plasticware, rinsing with 0.1N NaOH/1mM EDTA followed by DEPC-treated water is effective [66] [67].
- Aqueous Solutions: Treat solutions by adding DEPC to a concentration of 0.05% and incubating overnight. This must be followed by autoclaving for at least 30 minutes to remove any trace of the DEPC from the solution. Note: Certain reagents like Tris cannot be DEPC-treated, as DEPC reacts with amines [66] [68].
Sample Storage for RNA Integrity
Proper storage is critical, as trace amounts of RNase can compromise RNA even in frozen samples [66].
- Short-term storage (up to one year): Resuspend RNA in RNase-free water (with 0.1 mM EDTA) or TE buffer and store at –80°C. The chelating agent (EDTA) prevents RNA strand scission by sequestering divalent cations like Mg²⁺ [66] [67].
- Long-term storage: Store the RNA as a salt/alcohol precipitate at –20°C. The combination of low temperature, presence of alcohol, and lower pH provides a stable environment that inhibits all enzymatic activity [66].
For researchers working with precious embryonic samples, preserving RNA integrity from collection to analysis is paramount. Proper storage conditions are a critical line of defense against degradation, ensuring the reliability of gene expression data.
RNA Storage FAQs for Embryonic Research
What is the single biggest threat to my stored RNA? The primary threat is Ribonucleases (RNases), enzymes that break down RNA. They are ubiquitous, stable, and do not require cofactors to function. Effective RNA storage relies on inactivating or rendering these enzymes dormant [31] [71].
What is the best way to store RNA for the long term? For long-term archival storage of valuable embryonic samples, -70°C to -80°C is the gold standard. At these temperatures, all enzymatic and chemical processes are effectively halted, preserving RNA integrity for years [31] [72] [71]. Aliquot the RNA to avoid repeated freeze-thaw cycles.
Can I store RNA in a regular -20°C freezer? Yes, for routine work and storage up to several months, a -20°C freezer is perfectly adequate and practical. Stability at -20°C is comparable to -80°C over this shorter timeframe [71].
How long can RNA remain stable at 4°C or on ice? Purified RNA can be stored at 4°C for up to two weeks without significant degradation. This is ideal when you are actively using a sample for a series of experiments over a short period [71].
Is it true that RNA is too unstable to sit on the benchtop? Pure, nuclease-free RNA is more stable than often assumed. It can be kept at room temperature for up to two days during benchtop work for downstream applications, provided the tubes are kept closed to limit environmental exposure [71].
What is the best solution to store my RNA in? While nuclease-free water is common, storing RNA in a weak buffer like TE buffer (10 mM Tris, 1 mM EDTA) is recommended. The EDTA chelates divalent cations (like Mg2+) that some RNases require for activity, adding an extra layer of protection [31] [72] [71].
Troubleshooting Guide: Common RNA Storage Issues
| Problem | Possible Cause | Solution |
|---|---|---|
| Low RNA Yield after Storage | Incomplete elution; degradation from RNase contamination. | Ensure adequate sample homogenization; use RNase-free reagents and tubes [72]. |
| RNA Degradation | Improper handling/storage; exposure to RNases; repeated freeze-thaw cycles. | Flash-freeze embryonic samples in liquid nitrogen; use RNase inhibitors; aliquot RNA [31] [72]. |
| Protein or DNA Contamination | Carryover from improper purification. | Use optional DNase I treatment; include extra wash steps during extraction [72]. |
| Inconsistent Gene Expression Results | RNA degradation; gDNA contamination; poor RNA integrity. | Always check RNA quality (e.g., RIN) before use; ensure complete DNA removal [73]. |
Experimental Protocol: Handling Cryopreserved Embryonic Tissues
The following optimized protocol is adapted from recent research on cryopreserved tissues and is crucial for maintaining RNA integrity in precious embryonic samples [74].
Objective
To preserve high-quality RNA (RIN ≥ 8) from embryonic tissues during thawing and processing after cryopreservation without initial preservatives.
Materials
- Liquid nitrogen (LN2)
- Pre-chilled mortar and pestle
- RNAlater or similar RNA stabilization solution
- RNase-free microcentrifuge tubes, scissors, and tweezers
- Hipure Total RNA Mini Kit (or equivalent)
Workflow for Handling Frozen Embryonic Tissue
Procedure
Cryogenic Smashing:
- Rapidly transfer the frozen embryonic tissue to a mortar pre-cooled with liquid nitrogen.
- Gently smash the tissue using a pestle until it breaks into a fine powder. Critical: Keep the tissue submerged in LN throughout this process to prevent thawing.
Aliquot Weighing:
- Weigh the smashed tissue powder into optimal aliquot sizes. For most commercial RNA extraction kits, this is ≤ 30 mg [74].
Stabilized Thawing:
- Before processing, add 750 µL of RNAlater stabilization solution to a sterile, RNase-free microcentrifuge tube.
- Transfer the frozen tissue aliquot into the RNAlater.
- For these small aliquots (≤ 100 mg), thaw the sample on ice for 45 minutes. (For larger tissue pieces, thawing at -20°C overnight is recommended [74]).
RNA Extraction:
- After thawing, carefully remove the RNAlater.
- Immediately proceed with RNA extraction using your chosen kit (e.g., Hipure Total RNA Mini Kit), following the manufacturer's instructions.
Key Experimental Findings
- Preservatives are Critical: Adding RNAlater during the thawing process significantly improves RNA integrity compared to thawing without preservatives [74].
- Thawing Temperature Matters: For small tissue aliquots (≤ 100 mg), thawing on ice is superior to thawing at room temperature [74].
- Minimize Freeze-Thaw Cycles: Tissues subjected to multiple (3-5) freeze-thaw cycles show notably higher variability and reduced RNA Integrity Numbers (RIN), especially in larger aliquots [74].
The table below summarizes the key parameters for storing your purified RNA under various conditions.
| Storage Temperature | Maximum Duration | Key Considerations & Best Practices |
|---|---|---|
| Room Temperature | Up to 2 days | Safe for immediate benchtop work (e.g., setting up qPCR). Keep tubes closed [71]. |
| 4°C (Fridge) | Up to 2 weeks | Ideal for short-term experimental use. Store in a buffered solution like TE buffer [72] [71]. |
| -20°C (Freezer) | Several months | Suitable for routine, medium-term storage. Aliquot to avoid freeze-thaw damage [31] [71]. |
| -70°C to -80°C (ULT Freezer) | Years (long-term) | Gold standard for precious/archival embryonic samples. Aliquot in single-use tubes [31] [72]. |
The Scientist's Toolkit: Essential Reagents for RNA Stabilization
| Item | Function in RNA Preservation |
|---|---|
| RNAlater / RNAprotect | Stabilization solution that permeates tissues/cells to inactivate RNases immediately upon collection, preserving the in vivo RNA profile [31] [74]. |
| TRIzol / QIAzol | Monophasic solutions of phenol and guanidine isothiocyanate. Effectively denature proteins and inhibit RNases during cell lysis and homogenization [31] [72]. |
| β-Mercaptoethanol or DTT | Reducing agents added to lysis buffers to disrupt disulfide bonds in RNases, ensuring their complete denaturation [31] [73]. |
| DNase I (RNase-free) | Enzyme used to digest and remove genomic DNA contamination during RNA purification, preventing false positives in qPCR [72] [73]. |
| TE Buffer (pH 7.5) | Optimal storage buffer (10 mM Tris, 1 mM EDTA). The EDTA chelates divalent cations, providing an additional layer of protection against metal-catalyzed RNA hydrolysis [31] [72] [71]. |
Proper RNA handling and storage are not just technical details—they are the foundation of reliable and reproducible genetic research. By implementing these guidelines, researchers can ensure that their valuable embryonic samples yield high-quality data, from discovery to drug development.
Within the critical field of embryonic development research, the integrity of RNA is paramount. Studies on organisms like C. elegans have revealed that the precise degradation of ribosomal RNA within lysosomes is essential for maintaining nucleotide homeostasis during embryogenesis [75]. However, obtaining high-quality RNA from embryonic and other challenging samples is a significant hurdle. Tissues high in endogenous nucleases, lipids, or secondary metabolites can rapidly degrade RNA or co-purify with contaminants, compromising downstream applications. This guide provides targeted troubleshooting advice to overcome these obstacles, ensuring the reliability of your gene expression data.
Core Challenges and Strategic Solutions
The first step in successful RNA isolation is understanding the specific obstacles presented by your sample type. The table below summarizes the primary challenges and the recommended strategic approaches to overcome them.
Table 1: Common Challenges and Strategic Solutions for Difficult RNA Samples
| Sample Type | Primary Challenges | Recommended Strategy |
|---|---|---|
| Tissues High in Nucleases (e.g., Pancreas, Spleen, Embryonic tissue) | Rapid RNA degradation by endogenous RNases immediately upon sample collection [50] [31]. | Immediate homogenization in a chaotropic lysis buffer (e.g., guanidinium isothiocyanate) or flash-freezing in liquid nitrogen [50]. Use of a more rigorous, phenol-based RNA isolation method like TRIzol Reagent is often required [50]. |
| Tissues High in Fat (e.g., Brain, Adipose, Breast tissue) | Co-purification of lipids, leading to poor RNA yield and quality, and inhibition of downstream reactions [50]. | Use of phenol-based RNA isolation methods (e.g., TRIzol Reagent) which efficiently separate RNA from lipids and other organic cellular components [50]. |
| Tissues High in Metabolites (e.g., Plant tissues, Liver) | Binding of secondary metabolites (e.g., polyphenols, polysaccharides) to RNA, inhibiting enzymes in RT-PCR and other applications [31]. | Employ specialized lysis and purification protocols designed for the specific sample type, often involving additional wash steps or specific kit chemistries [31]. |
Experimental Protocols for Challenging Samples
Protocol 1: Phenol-Chloroform Extraction for Nuclease- or Lipid-Rich Tissues
This method is considered the gold standard for difficult samples due to its rapid and effective denaturation of RNases and ability to separate RNA from other cellular components [76] [50].
- Homogenization: Rapidly homogenize the fresh or stabilized tissue in a phenol-containing solution, such as TRIzol. The chaotropic salts in the solution inactivate RNases immediately upon cell lysis [50].
- Phase Separation: Add chloroform and centrifuge the mixture. The solution will separate into three distinct phases:
- RNA Recovery: Carefully transfer the aqueous upper phase to a new tube.
- RNA Precipitation: Precipitate the RNA by adding isopropanol. Centrifuge to pellet the RNA.
- Wash and Resuspend: Wash the RNA pellet with 70% ethanol to remove residual salts. Briefly air-dry the pellet and resuspend the RNA in RNase-free water or a specialized storage solution [50] [31].
Protocol 2: Stabilization and Column-Based Purification
For many samples, combining immediate stabilization with a column-based purification offers a good balance of convenience and quality.
- Sample Stabilization: Immediately upon dissection, immerse thin (≤0.5 cm) tissue pieces in a stabilization solution like RNAlater. This solution permeates the tissue and stabilizes cellular RNA, allowing storage for days or weeks at 4°C or -20°C without degradation [76] [31].
- Lysis and Homogenization: Remove the tissue from the stabilizer and homogenize it in a lysis buffer containing a chaotropic salt (e.g., guanidine hydrochloride) to fully inactivate RNases.
- DNA Digestion (On-Column): For applications sensitive to DNA contamination (e.g., qRT-PCR with non-intron-spanning primers), perform an on-column DNase digestion. This is more efficient and yields higher RNA recovery than post-purification treatment [50].
- Binding and Washing: Load the lysate onto a silica-membrane column. RNA binds to the membrane in the presence of high-salt buffers, while contaminants are washed away [76] [55].
- Elution: Elute the pure, high-quality RNA in a small volume of RNase-free water or elution buffer [50].
Essential Workflow for RNA Integrity Preservation
The following diagram illustrates the critical steps for handling difficult samples to prevent RNA degradation, from collection to storage.
Frequently Asked Questions (FAQs)
Q1: My RNA yields from embryonic tissue samples are consistently low. What could be the cause? Low yields are often due to insufficient starting material or incomplete tissue homogenization. Embryonic tissues can be very small; ensure you are using an adequate amount. Dense or fibrous tissues may require more vigorous mechanical disruption (e.g., using a bead beater) in the presence of lysis buffer to completely break open cells and release RNA [31].
Q2: After purification, my RNA samples show poor A260/A280 ratios. What does this indicate? An A260/A280 ratio below 1.8 typically indicates protein contamination, while a ratio above 2.0 may suggest residual guanidine salts or other contaminants from the isolation procedure [50]. For problematic samples, performing an additional purification step or using a phenol-based extraction method can improve purity. Always use UV spectroscopy for initial assessment but confirm RNA integrity with more advanced methods like capillary electrophoresis [50].
Q3: How can I prevent RNA degradation during multi-sample processing? The key is to stabilize samples as they are collected. Do not collect all samples first and then begin processing. Instead, place each sample directly into RNAlater solution or flash-freeze it in liquid nitrogen immediately after dissection [76] [31]. This halts RNase activity and allows you to process samples at a later time without sacrificing RNA integrity.
Q4: My downstream RT-PCR is inconsistent. Could this be due to DNA contamination? Yes, residual genomic DNA is a common culprit. It is highly recommended to include an on-column DNase digestion step during RNA purification. This is more efficient and yields higher RNA recovery than post-purification treatment. Always include a no-reverse-transcriptase (-RT) control in your RT-PCR experiments to confirm that your signal is coming from RNA and not contaminating DNA [50].
Troubleshooting Common RNA Isolation Problems
The following flowchart provides a logical pathway for diagnosing and resolving the most frequent issues encountered when working with difficult samples.
The Scientist's Toolkit: Essential Research Reagents
Successful RNA isolation from challenging samples relies on using the right reagents and tools. The following table details key materials and their functions.
Table 2: Essential Reagents and Kits for RNA Isolation from Difficult Samples
| Reagent / Kit | Function / Application |
|---|---|
| RNAlater RNA Stabilization Solution | Preserves RNA integrity in freshly collected tissues by inactivating RNases, allowing for temporary storage at 4°C or -20°C before processing [76] [50]. |
| TRIzol Reagent | A mono-phasic solution of phenol and guanidine isothiocyanate. Ideal for simultaneous isolation of RNA, DNA, and proteins from difficult samples (nuclease-rich, fatty) [50]. |
| PureLink RNA Mini Kit | A column-based method for isolating high-quality total RNA. Efficient for many sample types and allows for convenient on-column DNase digestion [50]. |
| PureLink DNase Set | For on-column digestion of DNA during RNA purification, removing genomic DNA contamination that can interfere with sensitive downstream applications like qRT-PCR [50]. |
| RNaseZap RNase Decontamination Solution | Used to decontaminate work surfaces, pipettors, and other equipment to eliminate RNases from the laboratory environment [50]. |
| Chaotropic Lysis Buffer (e.g., containing guanidine salts) | The key component of most lysis buffers; denatures RNases and other proteins immediately upon cell disruption, protecting RNA from degradation [50] [31]. |
Interpreting Spectrophotometer and Fluorometer Data for Accurate Quality Assessment
FAQs on Instrument Principles and Data Interpretation
Q1: Why are my RNA concentration measurements from a spectrophotometer and a fluorometer significantly different?
This common discrepancy usually arises from the fundamental differences in how these instruments operate. A spectrophotometer measures the absorbance of all molecules in the sample that absorb light at 260 nm. This includes not only your target RNA but also contaminants like degraded RNA fragments, free nucleotides, DNA, or guanidine salts [77] [78] [79]. Therefore, the concentration value can be falsely inflated. In contrast, a fluorometer uses dyes that fluoresce only when specifically bound to intact RNA [80] [81] [82]. It is not affected by the presence of common contaminants or free nucleotides, providing a more accurate concentration of the actual, usable RNA [77] [78]. If your sample is degraded, the spectrophotometer may show a high concentration (due to the hyperchromic effect of fragments), while the fluorometer will show a low concentration, correctly reflecting the lack of intact RNA [79].
Q2: My RNA has an A260/A280 ratio of 1.7, below the ideal 2.0. Is it unusable?
Not necessarily. While an A260/A280 ratio below 1.8 can indicate protein contamination [83], the ratio is highly sensitive to the pH and ionic strength of the solution your RNA is dissolved in [84] [83]. RNA dissolved in pure water (which is slightly acidic) will often yield a lower A260/A280 ratio, not because of contamination, but due to the pH-dependence of the 280 nm absorbance [83]. For a more accurate purity assessment, dissolve your RNA in a neutral buffer like TE and re-measure. Furthermore, a purity ratio is only one part of the quality control picture. You must also check RNA integrity using gel electrophoresis or a bioanalyzer [83] [78]. RNA with a slightly suboptimal A260/A280 ratio but confirmed integrity may still be suitable for many downstream applications.
Q3: My Qubit fluorometer displays an "Out of Range" error. What should I do?
This error indicates that the sample's fluorescence signal does not fall within the range defined by the calibration standards. To troubleshoot:
- For a high concentration error: Your sample is too concentrated. Dilute the sample using the same buffer it was originally prepared in and re-measure [77].
- For a low concentration error: Your sample concentration is below the detection limit of the assay. You can try using a larger sample volume (up to 20 µL) in the assay tube, or switch to a more sensitive High-Sensitivity (HS) assay kit if you were using a Broad-Range (BR) kit [77].
- Check calibration and reagents: Ensure the working solution was prepared fresh (1:200 dilution of dye in buffer) and that the assay kit has not expired. Also, confirm that the buffer and dye are stored at and used at room temperature, as the assay is temperature-sensitive [77].
Troubleshooting Guides for Common Experimental Scenarios
Troubleshooting Guide 1: Inconsistent Yields from Precious Embryonic Samples
| Symptom | Possible Cause | Solution |
|---|---|---|
| Low fluorometer reading but acceptable spectrophotometer reading | RNA degradation during isolation or storage [84]. | Immediately homogenize embryonic samples in a denaturing guanidine-based lysis buffer to inactivate RNases. Store isolated RNA at -70°C to -80°C, not -20°C [84]. |
| Low yields from both instruments | Incomplete homogenization or inefficient precipitation [84]. | Ensure embryonic tissues are thoroughly and rapidly homogenized. For micro-dissected samples, use a carrier like glycogen during precipitation to improve RNA recovery [84]. |
| Gel shows smearing and no clear ribosomal bands | Degradation during sample collection. Embryonic samples are exceptionally RNase-rich. | Prevention is critical. Freeze embryonic tissue in liquid nitrogen or stabilize it in RNAlater immediately after dissection. Do not wash cells or tissues before adding lysis reagent [84]. |
Troubleshooting Guide 2: Discrepant Purity and Integrity Readings
| Symptom | Possible Cause | Solution |
|---|---|---|
| Good A260/A280 ratio (~2.0) but gel shows severe smearing | Spectrophotometer's inability to detect degradation. The ratio only indicates the relative absence of protein, not integrity [79]. | Always pair spectrophotometer purity ratios with an integrity check. Run an agarose gel to visualize the sharpness of the 28S and 18S ribosomal RNA bands [83] [79]. |
| Low A260/A230 ratio | Contamination with guanidine salts or phenol from the isolation process [83]. | Ethanol-precipitate the RNA and wash the pellet thoroughly with 70% ethanol to remove these contaminants [84]. |
| Unexpected high-molecular-weight band on gel | Genomic DNA contamination [83] [78]. | Include an on-column or solution-based DNase I digestion step during your RNA isolation protocol [84]. |
Quantitative Data Comparison Tables
Table 1: Comparison of Spectrophotometry and Fluorometry for RNA Quantification
| Criteria | UV-Vis Spectrophotometry | Fluorometry |
|---|---|---|
| Principle | Measures absorbance of light at 260 nm [80] [85] | Measures fluorescence from dyes that bind specifically to RNA [80] [81] |
| Concentration Calculation | Directly from absorbance using Beer-Lambert law [80] | From a standard curve of known concentrations [80] |
| Specificity | Low; cannot distinguish between RNA, DNA, free nucleotides, or degraded RNA [80] [86] | High; specific to the target molecule (e.g., RNA) based on the dye used [80] [82] |
| Sensitivity | Limited (typically 2-50 ng/µL) [86] | High (can detect down to 5-50 pg/µL) [81] [86] |
| Purity Information | Yes; provides A260/A280 and A260/A230 ratios [80] [83] | No; does not measure common contaminants [80] |
| Sample Volume | As little as 1 µL [80] | 1-20 µL, depending on the assay [80] [77] |
| Best For | Initial, rapid assessment of concentration and purity for clean samples [86] | Accurate, specific quantification of low-concentration or contaminated samples [80] [86] |
Table 2: Detection Ranges of Representative Instruments
| Instrument | Technology | Example RNA Detection Range |
|---|---|---|
| NanoDrop Spectrophotometer [80] | UV-Vis Spectrophotometry | 1.0 ng/µL - 27,500 ng/µL |
| EzDrop Spectrophotometer [86] | UV-Vis Spectrophotometry | 2 ng/µL - 20,000 ng/µL (dsDNA) |
| Qubit 4 Fluorometer [80] | Fluorometry | 0.005 ng/µL - 4000 ng/µL (Qubit RNA HS and BR Assays) |
| EzCube Fluorometer [86] | Fluorometry | 0.25 ng/µL - 100 ng/µL |
| DeNovix QFX Fluorometer [81] | Fluorometry | 250 pg/µL (0.25 ng/µL) - 1500 ng/µL |
Essential Experimental Protocols for Embryonic RNA QC
Protocol 1: The Dual-Method RNA Quality Control Workflow
This integrated protocol is essential for reliable data generation from embryonic samples.
Reagents and Equipment:
- Isolated RNA sample
- Nuclease-free water or TE buffer
- UV-Vis spectrophotometer (e.g., NanoDrop, EzDrop)
- Fluorometer (e.g., Qubit, EzCube) with appropriate RNA assay kit
- Agarose gel electrophoresis system or Bioanalyzer
Procedure:
- Spectrophotometric Analysis:
- Blank the spectrophotometer with the same solution used to suspend the RNA (e.g., TE buffer or water) [83].
- Apply 1-2 µL of the RNA sample to the instrument.
- Record the concentration (ng/µL), A260/A280 ratio, and A260/A230 ratio.
- Interpretation: An A260/A280 ratio of ~2.0 and an A260/A230 ratio >1.5 are good initial indicators of purity [83].
Fluorometric Analysis:
- Prepare the working solution by diluting the RNA-specific fluorescent dye in the provided assay buffer [77].
- Prepare standards and samples in assay tubes as per the kit instructions.
- Calibrate the fluorometer using the standards.
- Measure your RNA samples and record the concentration.
- Interpretation: This value is a more accurate measure of the concentration of intact RNA in your sample [78].
Integrity Analysis via Agarose Gel Electrophoresis:
- Prepare a standard (non-denaturing) 1% agarose gel with a nucleic acid stain [83].
- Mix a small aliquot of RNA (e.g., 100-200 ng) with loading dye and load onto the gel.
- Run the gel until the dye front has migrated sufficiently.
- Image the gel and examine the ribosomal RNA bands.
- Interpretation for embryonic samples (eukaryotic): Intact RNA will show two sharp, clear bands for the 28S and 18S rRNAs. The 28S band should be approximately twice as intense as the 18S band. Smearing or a faint 28S band indicates degradation [83] [78].
Protocol 2: Rapid Integrity Check for Low-Quality Embryonic Samples
For samples where degradation is suspected, this quick gel check can save time.
- Skip the detailed quantification and proceed directly to gel electrophoresis.
- Load a representative volume of the RNA sample directly onto the gel.
- A result showing no ribosomal bands and only a smear of low-molecular-weight RNA confirms severe degradation, indicating that the sample should be excluded or the isolation protocol revised [79].
Workflow and Decision Pathways
RNA Quality Control Workflow
This diagram outlines the essential, multi-step workflow for comprehensive RNA quality assessment, emphasizing that no single method is sufficient.
Research Reagent Solutions
Table 3: Essential Reagents for RNA Quantification and Quality Control
| Item | Function | Example Use Case |
|---|---|---|
| UV-Vis Spectrophotometer | Provides rapid measurement of nucleic acid concentration and calculates purity ratios (A260/A280, A260/A230) [80] [83]. | Initial, quick check of RNA yield and potential contamination after extraction. |
| Fluorometer with RNA-Specific Assay Kits | Enables highly specific and sensitive quantification of RNA by binding fluorescent dyes to the target molecule, ignoring contaminants and degraded fragments [80] [82]. | Accurate determination of intact RNA concentration prior to sensitive/expensive downstream steps like RNA-seq library prep [78]. |
| Fluorescent Dyes (e.g., Quant-iT RiboGreen) | Binds specifically to RNA and emits fluorescence upon excitation, allowing for quantitation [80] [81]. | Used with a fluorometer to generate the standard curve and measure unknown samples. |
| Agarose Gel Electrophoresis System | Visually assesses RNA integrity by separating molecules by size, allowing observation of distinct ribosomal bands or smearing from degradation [83] [79]. | Critical verification step to confirm that RNA with good purity ratios is also intact. |
| Bioanalyzer (e.g., Agilent 2100) | Provides a digital, automated assessment of RNA integrity and assigns an RNA Integrity Number (RIN) via microfluidics technology [83] [78]. | Gold-standard integrity analysis for the most demanding applications, like single-cell RNA-seq from embryonic samples. |
| DNase I (RNase-free) | Enzyme that degrades contaminating double-stranded and single-stranded DNA [84]. | Treatment of RNA samples to remove genomic DNA contamination that can interfere with downstream applications like RT-PCR. |
| Glycogen or Other Carriers | Improves the visibility and recovery of microscopic RNA pellets during ethanol or isopropanol precipitation [84]. | Essential for precipitating low-concentration RNA from limited embryonic samples. |
Validating RNA Integrity: From Quality Metrics to Functional Assays
Core Quality Metrics and Their Significance
In molecular biology research, particularly when working with sensitive samples like embryonic RNA, assessing RNA quality is a critical first step to ensure the reliability of downstream applications such as gene expression microarray, qPCR, and transcriptome sequencing [87] [88] [89]. Three fundamental metrics form the cornerstone of RNA quality control: A260/A280 Ratio, RNA Integrity Number (RIN), and Bioanalyzer Profiles.
The table below summarizes these essential quality metrics.
| Metric | What It Measures | Ideal Value/Range | Primary Method/Tool |
|---|---|---|---|
| A260/A280 Ratio | Purity of RNA from protein contamination (e.g., RNases) [87]. | ~2.0 for pure RNA [87]. | Spectrophotometry (e.g., NanoDrop) [87]. |
| RNA Integrity Number (RIN) | Integrity/degree of RNA degradation [88] [90]. | 1 (degraded) to 10 (intact); ≥8 is generally suitable for most downstream applications [88]. | Capillary Gel Electrophoresis (e.g., Agilent Bioanalyzer) [88] [89]. |
| Bioanalyzer Profile | Complete size distribution and integrity of RNA population, visualizes ribosomal peaks and degradation products [88] [90]. | Sharp 18S and 28S rRNA peaks (28S:18S ratio ~2 for mammals); low baseline signal, minimal fast-migrating degradation products [88]. | Microfluidics-based Capillary Electrophoresis (Agilent Bioanalyzer) [89] [90]. |
The relationship between sample quality, its Bioanalyzer profile, and the resulting RIN value is crucial for interpretation. The following diagram illustrates this workflow and the critical decision points.
Application in Embryonic Research: The Critical Role of RNA Integrity
Research on maternal-to-zygotic transition (MZT) highlights why RNA integrity is paramount. During MZT, oocytes and early embryos undergo massive, programmed degradation of maternal mRNAs, which is essential for successful embryonic development [1] [91]. Compromised RNA quality or dysregulated degradation pathways can directly lead to experimental failure, as intact maternal transcripts are a prerequisite for studying this process.
- Functional Evidence: Studies on mouse and human embryos show that failure to properly degrade maternal mRNAs prevents appropriate zygotic genome activation (ZGA) and arrests embryonic development [1] [91]. For example, oocyte-specific deletion of the IRE1α RNase domain in mice causes female infertility due to embryonic arrest and failure to degrade maternal mRNAs [1]. Another study found that inhibiting sperm-borne miR-34c in mouse zygotes disrupted maternal mRNA clearance and significantly reduced embryonic developmental potential [92].
- Implications for Quality Control: This evidence underscores that accurately profiling gene expression during early development requires starting with high-integrity RNA. Degraded samples cannot distinguish between regulated, biologically meaningful mRNA decay and random, post-collection degradation, leading to flawed data interpretation.
Troubleshooting Common RNA Quality Issues
This section addresses specific problems researchers might encounter during RNA quality assessment.
Low A260/A280 Ratio
- Problem: A260/A280 ratio is significantly below the ideal value of ~2.0 [87].
- Possible Causes & Solutions:
- Protein Contamination: The most common cause. Re-purify the RNA using a method that includes a protein removal step, such as phenol-chloroform extraction. Ensure complete removal of the organic phase [87].
- Sample Dilution Error: The pH of the solution can affect the ratio. Ensure the RNA is eluted or diluted in RNase-free water or TE buffer (pH 7.5) for consistent measurements [87].
- Contaminated Equipment or Reagents: Use RNase-free tubes, tips, and solutions. Regularly clean spectrophotometer pedestals.
Low RIN Value
- Problem: RIN value is low (e.g., below 7 or 8), indicating RNA degradation [88].
- Possible Causes & Solutions:
- RNase Contamination: RNases are ubiquitous and resilient. Always wear gloves, use RNase-decontamination reagents on surfaces and equipment, and use certified RNase-free plasticware [88].
- Improper Sample Handling or Storage: Process tissues or cells immediately after collection. If not possible, snap-freeze in liquid nitrogen and store at -80°C. Avoid repeated freeze-thaw cycles of isolated RNA [88].
- Apoptosis/Necrosis in Starting Material: Degradation can begin before RNA extraction. Ensure biological samples (e.g., embryos, tissues) are healthy and collected ethically and rapidly to minimize stress responses.
Discrepancy Between Good A260/A280 and Low RIN
- Problem: RNA sample has a good A260/A280 ratio (~2.0) but a low RIN value.
- Interpretation & Solution:
- Interpretation: The RNA is pure (free of protein contamination) but fragmented. This is a common scenario where spectrophotometry fails to reveal integrity problems [87] [88].
- Solution: The A260/A280 ratio should never be the sole quality metric. Always combine it with an integrity assessment like RIN for critical applications. Investigate the source of degradation as outlined in the previous point.
Frequently Asked Questions (FAQs)
Q1: My RNA sample is degraded. Can I still use it for my experiment? It depends on the downstream application. For sensitive quantitative methods like RNA-Seq or qPCR, degraded RNA will yield biased and unreliable results, and it is strongly recommended to repeat the extraction. For some applications like PCR of short amplicons, it might be partially usable, but the results will require careful validation.
Q2: Are there limitations to the RIN algorithm I should be aware of? Yes. The RIN algorithm is primarily trained on mammalian ribosomal RNA profiles. It may be less accurate for plant samples or samples with mixed eukaryotic-prokaryotic RNA, as it cannot differentiate between their different ribosomal RNA species [88]. Furthermore, RIN reflects the integrity of ribosomal RNAs, which can have different stability compared to some mRNAs of interest [88].
Q3: What is the best method for quantifying RNA for sensitive downstream applications? For highly sensitive applications (e.g., single-cell RNA-Seq, working with low-concentration embryonic samples), fluorometry (e.g., Qubit with RNA-specific dyes) is preferred over spectrophotometry. It is more specific for RNA, is less susceptible to contaminants, and offers higher sensitivity for low-concentration samples [87].
Q4: How does RNA quality impact gene expression studies in early embryos? In early embryonic development, the regulated decay of maternal mRNAs is a key biological process [1] [91]. Using degraded RNA for transcriptomic analysis makes it impossible to distinguish between this programmed degradation and technical degradation, directly compromising data quality and biological interpretation [88]. High-quality RNA (high RIN) is essential for accurately mapping the dynamics of the maternal-to-zygotic transition.
The Scientist's Toolkit: Essential Research Reagent Solutions
The table below lists key reagents and kits used in the experiments cited within this guide, providing insight into the tools driving current research.
| Research Reagent / Kit | Function / Application | Example Use in Cited Research |
|---|---|---|
| Agilent 2100 Bioanalyzer | Automated capillary electrophoresis for RNA integrity and quantitation, providing the RIN value [89] [90]. | Used to assess RNA quality and quantity prior to RNA-seq in the miR-34c study [92]. |
| miRCURY LNA miRNA Power Inhibitor | High-affinity knockdown of specific microRNAs in cells [92]. | Used to inhibit sperm-borne miR-34c in mouse zygotes to study its function in maternal mRNA decay [92]. |
| REPLI-g WTA Single Cell Kit | Whole transcriptome amplification from single cells or minute amounts of RNA [92]. | Used to amplify mRNA from pools of 5 mouse embryos for subsequent RNA-seq analysis [92]. |
| TruSeq RNA Sample Preparation Kit | Library preparation for next-generation RNA sequencing [92]. | Used for constructing RNA-seq libraries from amplified embryonic cDNA [92]. |
| EmbryoMax Advanced KSOM Medium | A specialized culture medium optimized for the preimplantation development of mouse embryos [92]. | Used for the in vitro culture of mouse zygotes after microinjection through to blastocyst stages [92]. |
In studies of embryonic development, the accurate assessment of nucleic acid purity and integrity is not merely a procedural step but a foundational requirement for valid research. The maternal-to-zygotic transition represents a particularly vulnerable period where precise degradation of maternal mRNAs is essential for successful embryonic development [1]. Recent research has revealed that the RNase activity of IRE1α is critical for this process, directly cleaving maternal transcripts after fertilization—a function independent of the canonical IRE1α-XBP1 signaling pathway [1]. This sophisticated regulatory mechanism underscores why preserving the true state of RNA molecules during analysis is paramount for researchers studying embryonic stem cells, early development, and developmental disorders.
The choice of analytical method can significantly impact experimental outcomes. This technical support center provides comprehensive guidance on two primary electrophoretic methods—capillary electrophoresis and traditional gel electrophoresis—to help researchers select and optimize the most appropriate technique for their specific research context, with a particular focus on preventing RNA degradation in embryonic samples.
Technical Comparison: Capillary Electrophoresis vs. Traditional Gel Electrophoresis
The following table summarizes the key technical characteristics of both methods, highlighting their respective advantages and limitations for analyzing sensitive embryonic samples:
| Parameter | Capillary Electrophoresis | Traditional Gel Electrophoresis |
|---|---|---|
| Sample Requirement | Minimal (typically 1-5 µL) | Larger volume (typically 10-30 µL) |
| Detection Method | Laser-induced fluorescence | Ethidium bromide or other stains |
| Resolution | High (can distinguish 1-2 bp differences) | Moderate (5-10 bp differences) |
| Analysis Time | Rapid (minutes per sample) | Slower (hours including gel preparation) |
| Quantitation Capability | Excellent (digital output) | Semi-quantitative (visual comparison) |
| Automation Potential | High (autosampler capable) | Low (manual processing) |
| RNA Integrity Assessment | Provides RNA Integrity Number (RIN) | Qualitative assessment via ribosomal bands |
| Cost Considerations | Higher instrument cost, lower consumable cost per run | Lower initial cost, higher recurring consumable costs |
| Sensitivity to Degradation | High sensitivity for partial degradation | Limited sensitivity for partial degradation |
Frequently Asked Questions (FAQs)
Q1: Which method provides more reliable results for assessing RNA quality in embryonic stem cell samples?
Capillary electrophoresis generally provides more reliable and quantitative results for RNA quality assessment in sensitive samples like embryonic stem cells. The method generates an RNA Integrity Number (RIN) that offers a standardized, numerical assessment of RNA quality. A RIN value >8 is generally considered optimal for downstream expression analyses such as qRT-PCR or RNA-Seq [93]. Traditional gel electrophoresis provides only a qualitative assessment based on the intensity and sharpness of ribosomal RNA bands, which may miss subtle degradation that could impact gene expression studies in embryonic development research.
Q2: What are the primary causes of RNA degradation during electrophoresis analysis, and how can they be prevented?
RNA degradation during analysis primarily results from RNase contamination, improper sample handling, or ineffective preservation methods. For embryonic samples, where RNA integrity is particularly crucial, prevention strategies include:
- Using RNase-free reagents and consumables throughout the process
- Adding denaturants to gel loading buffers when working with RNA [94]
- Employing RNA stabilization solutions like RNAlater for sample preservation before analysis, which rapidly penetrates tissues and inactivates nucleases [95]
- Working rapidly and keeping samples on ice whenever possible
- Using dedicated RNA work areas and frequently changing gloves to prevent RNase contamination [93]
Q3: Why do my capillary electrophoresis results show broad or smeared peaks instead of sharp fragments?
Broad or smeared peaks in capillary electrophoresis can result from several issues:
- Degraded polymer or buffer: Check expiration dates and replace if necessary [96]
- Sample degradation: Ensure proper RNA preservation and handling techniques [96]
- High salt concentration in samples: Desalt samples before analysis or dilute in nuclease-free water [96]
- Capillary array degradation: Replace the array if it has exceeded its usage lifespan [96]
- System leaks: Check for leaks at the capillary/capillary array entering the pump or polymer block [96]
Q4: What are the common issues causing faint bands in gel electrophoresis, and how can I resolve them?
Faint bands in gel electrophoresis typically indicate:
- Insufficient sample loading: Load a minimum of 0.1–0.2 μg of nucleic acid per millimeter of gel well width [94]
- Sample degradation: Use molecular biology grade reagents and nuclease-free labware [94]
- Gel over-running: Monitor run time and migration of loading dyes to prevent losing smaller fragments [94]
- Low sensitivity of stain: Use fresh stain with appropriate penetration time, especially for thicker gels [94]
- Incorrect electrode connection: Ensure the gel wells are on the cathode side (negative electrode) [94]
Q5: How does the choice of electrophoresis method impact the detection of microRNA regulation in embryonic stem cells?
The choice of electrophoresis method is crucial for studying microRNA regulation, as miRNAs are short (approximately 22 nucleotides) and remarkably susceptible to degradation compared to other RNA species [93]. Capillary electrophoresis provides superior resolution for small RNA fragments and more accurate quantification of miRNA expression changes. Research has shown that in embryonic stem cells, miRNAs impact gene expression through both translational repression and transcript destabilization, effects that can be decoupled in certain genetic backgrounds [4]. Accurate assessment of miRNA integrity and concentration through optimized electrophoretic methods is therefore essential for valid interpretation of regulatory mechanisms in embryonic development.
Troubleshooting Guides
Troubleshooting Capillary Electrophoresis
| Problem | Possible Causes | Solutions |
|---|---|---|
| Low signal intensity | - Low template, primer, or cycle number in PCR- Degraded fluorescently labeled primer- Blocked capillary | - Optimize PCR conditions- Re-synthesize primer- Run size standard-only sample to confirm, replace capillary if needed [96] |
| Off-scale or flat peaks | - Sample concentration too high- Excessive injection time | - Dilute PCR product (try 1:4 or 1:5 dilution)- Decrease injection time in instrument run module [96] |
| Broad peaks | - Expired or degraded polymer/buffer- High salt concentration in sample- Capillary array degradation | - Replace polymer, buffer, and/or array- Desalt samples before analysis- Check for system leaks [96] |
| No peaks for sample or size standard | - Blocked capillary- Air bubble in capillary or sample well- Degraded HiDi Formamide- Incorrect autosampler calibration | - Centrifuge plate before running- Replace HiDi Formamide- Perform autosampler calibration [96] |
| Sizing inaccuracies | - Changed electrophoresis conditions- Different fluorescent label- Alternative size standard | - Maintain consistent run conditions- Use same dye label across comparisons- Use consistent size standard [96] |
Troubleshooting Traditional Gel Electrophoresis
| Problem | Possible Causes | Solutions |
|---|---|---|
| Smeared bands | - Sample overloading- Sample degradation- High salt concentration- Incorrect gel type | - Load 0.1–0.2 μg nucleic acid per mm well width- Use nuclease-free reagents and practices- Dilute or purify sample to reduce salt- Use denaturing gels for RNA [94] |
| Faint bands | - Insufficient sample- Gel over-run- Incorrect staining technique- Reversed electrodes | - Increase sample concentration- Monitor run time carefully- Extend staining time, especially for thick gels- Verify correct electrode connection [94] |
| Poor band separation | - Incorrect gel percentage- Sample overloading- Suboptimal voltage or run time | - Use higher percentage gels for smaller fragments- Reduce sample amount- Adjust voltage and run time for fragment size [94] |
| Unexpected band patterns | - Different DNA conformations- Protein contamination- Incompatible loading buffer | - Recognize supercoiled, linear, and nicked circular forms- Purify sample to remove proteins- Use denaturing buffer for RNA, non-denaturing for dsDNA [97] |
| Wavy bands | - Undissolved agarose crystals | - Heat agarose solution until completely clear before casting [98] |
Experimental Protocols
Protocol 1: Assessing RNA Integrity in Embryonic Samples Using Capillary Electrophoresis
This protocol is optimized for sensitive embryonic samples where RNA integrity is crucial for accurate gene expression analysis.
Materials Needed:
- RNA 6000 Nano Kit or equivalent
- Capillary electrophoresis system (e.g., Agilent 2100 Bioanalyzer)
- RNase-free tubes and tips
- RNAlater or similar RNA stabilization solution [95]
Procedure:
- Sample Preservation: Preserve embryonic tissue samples immediately after collection in 5-10 volumes of RNAlater to stabilize RNA and inhibit nucleases [95].
- RNA Isolation: Extract RNA using a phenol-guanidine-based method, maintaining RNase-free conditions throughout.
- Sample Preparation:
- Denature RNA samples at 70°C for 2 minutes, then immediately place on ice.
- Prepare the gel matrix according to manufacturer instructions.
- Load 1 μL of RNA marker into appropriate wells.
- Pipette 5 μL of gel matrix into the well designated for the gel.
- Add 1 μL of denatured RNA sample to the sample well.
- Instrument Operation:
- Place the prepared chip in the capillary electrophoresis instrument.
- Run the RNA assay according to manufacturer specifications.
- Data Analysis:
- Review the electrophoretogram for peak shape and distribution.
- Record the RNA Integrity Number (RIN); values >8.0 indicate high-quality RNA suitable for embryonic gene expression studies [93].
- Examine the ratio of ribosomal bands (28S:18S); optimal samples show a ratio of approximately 2:1.
Protocol 2: Evaluating Nucleic Acid Purity and Integrity Using Denaturing Gel Electrophoresis
This protocol is designed specifically for RNA analysis from embryonic samples, using denaturing conditions to maintain RNA structure and prevent degradation.
Materials Needed:
- Agarose (molecular biology grade)
- MOPS buffer
- Formaldehyde (for denaturing gels)
- RNA stain (e.g., ethidium bromide or SYBR Safe)
- RNA loading dye containing denaturant
Procedure:
- Gel Preparation:
- Prepare a 1.2% agarose solution in MOPS buffer.
- Add formaldehyde to a final concentration of 2.2 M for denaturing conditions [94].
- Cast the gel in a fume hood and allow it to solidify completely.
- Sample Preparation:
- Mix RNA samples with denaturing loading buffer.
- Heat denature at 70°C for 10 minutes, then immediately place on ice [97].
- Electrophoresis:
- Pre-run the gel for 5 minutes at 5 V/cm.
- Load samples carefully to avoid well damage.
- Run at constant voltage (3-5 V/cm) until the dye front has migrated appropriately.
- Visualization:
- Stain the gel with appropriate RNA stain.
- Destain if necessary to reduce background.
- Visualize under UV light, ensuring the camera is properly focused [94].
Signaling Pathways in RNA Regulation During Embryonic Development
The following diagram illustrates the key molecular pathways involved in RNA regulation during early embryonic development, highlighting points where analysis methods must preserve RNA integrity to accurately capture biological reality:
Pathway Description: This diagram illustrates the critical role of IRE1α RNase activity in maternal mRNA degradation during early embryonic development. Following fertilization, the ERK1/2 pathway activation triggers IRE1α translation. IRE1α then directly cleaves maternal mRNAs through its RNase activity, independent of the canonical IRE1α-XBP1 signaling pathway (shown with dashed arrow). This targeted mRNA degradation is essential for subsequent zygotic genome activation (ZGA) [1]. Accurate assessment of these molecular events requires electrophoretic methods that preserve the true state of RNA molecules without introducing degradation artifacts.
The Scientist's Toolkit: Essential Research Reagents
The following table catalogues essential reagents mentioned in the troubleshooting guides and protocols, with specific emphasis on their applications in embryonic research:
| Reagent | Function | Application Notes |
|---|---|---|
| RNAlater | RNA stabilization solution | Rapidly penetrates tissues to inactivate nucleases; allows refrigerated storage for weeks before RNA isolation [95] |
| HiDi Formamide | Denaturant for CE samples | Provides sample stability during heat denaturation and electrophoresis; superior to water which causes variable injection quality [96] |
| Internal Size Standards | Fragment sizing reference | Essential for creating standard curves in capillary electrophoresis; examples include LIZ 600 and ROX 500 dyes [96] |
| Fluorescent Dyes | Nucleic acid detection | Dye sets (E5, D, F, G5) with different signal intensities (6-FAM brightest, PET weakest); require optimization for multiplexing [96] |
| RNAsecure | RNase inactivation solution | Used to treat buffers and solutions; activated by heating to 60°C for 10 minutes [93] |
| Denaturing Loading Buffers | Sample preparation for RNA gels | Contain denaturants (e.g., formaldehyde) to prevent RNA secondary structure formation during electrophoresis [94] |
| ULTRAhyb Buffer | Northern blot hybridization | Ultrasensitive hybridization buffer for detection of low-abundance mRNA species [97] |
Selecting between capillary electrophoresis and traditional gel electrophoresis for assessing nucleic acid purity and integrity requires careful consideration of research goals, sample limitations, and downstream applications. For embryonic research where RNA integrity is particularly crucial—both for understanding fundamental developmental processes like maternal mRNA degradation and for ensuring accurate experimental results—capillary electrophoresis generally provides superior resolution, quantification, and sensitivity. However, traditional gel electrophoresis remains a valuable, accessible tool for initial quality assessment and educational applications.
Regardless of the method chosen, strict attention to RNA preservation techniques before and during analysis is essential. Proper sample handling, use of stabilization solutions like RNAlater, and adherence to troubleshooting guidelines will ensure that researchers obtain reliable data that accurately reflects the biological reality of their embryonic samples, ultimately supporting robust conclusions about gene expression and regulatory mechanisms in early development.
Frequently Asked Questions (FAQs) & Troubleshooting Guides
FAQ: Method Selection and Fundamentals
Q1: What are the primary methods for measuring mRNA decay kinetics, and how do I choose? Two primary methodological approaches are used to measure mRNA half-life: Transcriptional Inhibition and Metabolic Labeling. The choice depends on your experimental needs regarding invasiveness, throughput, and the specific biological question.
The table below compares the core methodologies:
| Method | Principle | Key Reagents | Advantages | Limitations & Troubleshooting |
|---|---|---|---|---|
| Transcriptional Inhibition [99] [100] | Blocks new RNA synthesis with chemicals; tracks remaining mRNA over time. | Actinomycin D, DRB | - Works with endogenous transcripts.- Protocol is relatively simple and does not require special equipment [99]. | - Cytotoxicity: Can induce cellular stress and secondary effects. Use lowest effective dose (e.g., 10 µg/ml Actinomycin D) [99].- Indirect measurement: Assumes changes in level solely reflect decay. |
| Metabolic Labeling (e.g., 4tU, 4sU, SLAM-seq) [101] [102] | Incorporates nucleotide analogs into nascent RNA; allows pulse-chase labeling and isolation of newly synthesized transcripts. | 4-thiouridine (4sU), 4-thiouracil (4tU), MTSEA-biotin | - Non-invasive: Minimal perturbation to cell physiology [101].- Can measure synthesis and decay rates simultaneously. | - Labeling efficiency: Requires optimization of analog concentration and uptake.- Chemical coupling: Inefficient biotinylation can lead to incomplete capture; use high-efficiency crosslinkers like MTSEA-biotin [101]. |
Q2: Why is mRNA stability important in embryonic and developmental research? In embryonic development, controlled mRNA degradation is a fundamental post-transcriptional mechanism that fine-tunes gene expression. This is crucial during the Maternal-to-Zygotic Transition (MZT), where maternal mRNAs are massively degraded to allow for zygotic genome activation [1] [103]. Furthermore, regulated mRNA stability continues to dictate cell fate decisions, as demonstrated in the developing cortex, where the stability of mRNAs encoding transcription factors and cell-cycle regulators directly controls neurogenesis [102]. Disruption of RNA decay machinery (e.g., the CCR4-NOT complex) can lead to severe developmental defects, including microcephaly [102].
Troubleshooting Common Experimental Issues
Q3: My mRNA half-life measurements are inconsistent. What could be wrong? Inconsistency often stems from technical variation or suboptimal experimental conditions.
- Check Your Inhibition Efficiency: When using transcriptional inhibitors like Actinomycin D, confirm that transcription is fully blocked. Run a pilot assay and check the rapid decay of a known unstable transcript.
- Control for Technical Variation in RNA-seq: For metabolic labeling with RNA-seq, ensure high-quality libraries.
- Library Preparation Bias: This is a major source of technical variation. Randomize samples during preparation and use multiplexing to mitigate batch and lane effects [104].
- RNA Quality: Use high-quality RNA (e.g., high RIN) for poly(A) selection. For degraded or low-input samples (common in embryonic research), consider ribosomal depletion instead [105].
- Sequencing Depth: Insufficient depth lacks power to quantify low-abundance transcripts. While 5 million mapped reads may suffice for medium-high expression, deeper sequencing (20-100 million reads) is needed for precise quantification of low-expression genes [105].
- Account for Model Fitting: For metabolic labeling data, a standard exponential decay model may not suffice. Incorporate an "efficiency parameter" into your decay model to account for inefficiencies in labeling, biotinylation, and capture, which significantly improves half-life estimates [101].
Q4: I am working with low-input embryonic samples. What specific considerations should I have? Working with oocytes or early embryos presents unique challenges.
- Amplification Bias: Low-input RNA often requires amplification, which can introduce bias. Use protocols with Unique Molecular Identifiers (UMIs) to correct for PCR duplicates and improve quantification accuracy [103].
- Stranded Libraries: Always use strand-specific RNA-seq protocols. This is critical for accurately quantifying antisense transcripts or genes with overlapping regions, which are common in complex transcriptomes [105].
- Spike-in Controls: Use external RNA spike-ins. These are added in known quantities before library prep and are essential for normalizing data across samples with vastly different total RNA content, a common scenario in embryonic development where total RNA amounts fluctuate dramatically [103].
Experimental Protocols & Data Analysis
Detailed Protocol: mRNA Stability Assay Using Actinomycin D
This protocol is adapted for embryonic stem cells, which are highly relevant to embryonic research [99].
1. Cell Culture and Treatment:
- Seed cells (e.g., ( 3 \times 10^5 ) mouse iPSCs per well in a 6-well plate) and allow them to adhere [99].
- Critical Step: Include wells for all time points (e.g., 0, 1, 2, 4, 6, 8 hours) in a single experiment to minimize inter-experiment variation.
- Prepare a 1 mg/ml stock of Actinomycin D in DMSO and store in aliquots at -20°C.
- To initiate the assay, add Actinomycin D to the culture media for a final concentration of 10 µg/ml. Add it dropwise for uniform distribution [99].
- For the ( t = 0 ) control, collect cells immediately before adding the drug.
2. Sample Collection and RNA Extraction:
- At each time point, collect cells rapidly by trypsinization or scraping.
- Pellet cells and resuspend in 1 ml of TRI Reagent. Freeze samples at -80°C if not processing immediately.
- Extract total RNA using a standard phenol-chloroform (TRI Reagent) protocol, including a DNase digestion step to remove genomic DNA contamination [99].
3. Quantification of mRNA Decay:
- Synthesize cDNA using reverse transcriptase with a mixture of random hexamers and oligo-dT primers.
- Perform quantitative PCR (qPCR) with primers for your genes of interest and stable reference genes (e.g., Gapdh, Actb).
- Data Analysis: Calculate the relative expression at each time point compared to ( t = 0 ). Fit the data to an exponential decay curve (( mRNAt = mRNA0 \cdot e^{-kt} )) using software like GraphPad Prism. The half-life is calculated as ( t_{1/2} = \ln(2)/k ) [99].
RNA-seq Normalization and Analysis for Decay Kinetics
When using RNA-seq (especially with metabolic labeling like SLAM-seq), proper bioinformatics analysis is crucial.
Key Steps in the Analysis Pipeline [105] [104]:
Quality Control (QC):
- Raw Reads: Use FastQC to check per-base sequence quality, GC content, and adapter contamination. Trim low-quality bases and adapters with tools like Trimmomatic [105].
- Alignment: Map reads to the reference genome/transcriptome using a splice-aware aligner (e.g., STAR, TopHat2). Use Qualimap or RSeQC to assess the alignment, including the distribution of reads across genomic features [105].
Quantification and Normalization:
- Quantify reads per gene or transcript. For metabolic labeling data, you will be quantifying labeled (new) and unlabeled (pre-existing) transcript fractions.
- Normalization is critical. Common methods include TPM (Transcripts Per Million) or FPKM/RPKM, which account for sequencing depth and gene length. For differential analysis between conditions, use methods designed for count data (e.g., DESeq2, edgeR) that model biological variance using a negative binomial distribution [104].
Half-life Calculation:
- After quantifying labeled mRNA over multiple time points, fit the data to a decay model. As highlighted in the troubleshooting section, using a model that incorporates a parameter for experimental efficiency greatly increases accuracy [101].
The Scientist's Toolkit: Essential Reagents & Materials
The table below lists key reagents for conducting mRNA decay experiments.
| Reagent / Material | Function / Application | Example & Specification |
|---|---|---|
| Actinomycin D [99] [100] | Transcriptional inhibitor; intercalates into DNA to block RNA polymerase. | Cell culture grade (e.g., Sigma-Aldrich, A9415). Prepare stock at 1 mg/mL in DMSO. |
| 4-thiouridine (4sU) / 4-thiouracil (4tU) [101] [102] | Nucleoside analog for metabolic labeling of nascent RNA. | Use appropriate concentration for your cell type (e.g., 100-500 µM for 4sU in mammalian cells [102]). |
| MTSEA-biotin [101] | High-efficiency biotinylation reagent for capturing thio-labeled RNA. | Superior to HPDP-biotin; critical for efficient pulldown in metabolic labeling protocols [101]. |
| STRT-N / SLAM-seq Kit [102] [103] | Specialized RNA-seq protocol for 5'-end capture (STRT) or metabolic labeling analysis (SLAM-seq). | Allows for accurate quantification of transcription start sites and intact transcripts. |
| External RNA Spike-ins [103] | Normalization controls added to the sample before library prep. | Essential for normalizing samples with differing total RNA content (e.g., ERCC RNA Spike-In Mix). |
| RNase Inhibitor [106] | Protects RNA samples from degradation during processing. | Critical for all steps after cell lysis (e.g., ScriptGuard RNase Inhibitor). |
Experimental Workflow and Pathway Diagrams
Diagram 1: Experimental Workflow for Measuring mRNA Decay. This diagram outlines the parallel paths for the two primary methods, from experimental design to data analysis.
Diagram 2: Key mRNA Decay Pathways and Regulators. This diagram shows the core degradation machinery and highlights key trans-acting factors (like IRE1α and CNOT3) and cis-acting features (like codon usage and m6A) that determine mRNA half-life, particularly in an embryonic context.
Technical Troubleshooting Guides
Troubleshooting RNA Degradation in Embryonic Samples
Problem: Rapid RNA degradation in early embryo samples compromising smFISH results.
- Potential Cause: High endogenous RNase activity in embryonic cells, particularly during maternal-to-zygotic transition.
- Solution: Implement RNA stabilization techniques immediately upon sample collection. Flash-freeze samples in liquid nitrogen or preserve in RNA stabilization buffers like RNAlater. Include RNase inhibitors (e.g., RNasin, SUPERase-In) in all solutions during sample preparation [107].
- Preventive Measures: Maintain samples at -80°C until fixation. Use pre-chilled equipment and RNase-free tubes. For embryonic samples specifically, note that IRE1α RNase-mediated decay is a natural process during maternal-to-zygotic transition [1].
Problem: High background noise in smFISH imaging.
- Potential Cause: Incomplete cell permeabilization, non-specific probe binding, or inadequate washing.
- Solution: Optimize permeabilization conditions by titrating Triton X-100 concentration (typically 0.1-0.5%) and incubation time. Increase formamide concentration in hybridization buffer (10-20%) to enhance stringency. Implement additional post-hybridization washes with SSC buffer [108].
- Verification: Include negative control probes (e.g., sense strand or scrambled sequences) to distinguish specific from non-specific signal.
Problem: Weak or absent smFISH signal.
- Potential Cause: Poor probe penetration, inefficient hybridization, or target RNA abundance below detection limit.
- Solution: Validate probe set efficiency using positive control genes with known expression patterns. Increase probe concentration (typically 50-250 nM) and extend hybridization time (2-12 hours). For low-abundance targets, increase the number of oligonucleotide probes tiling the target RNA [108].
- Alternative Approach: For very low abundance targets, consider CRISPR LiveFISH which provides enhanced signal through repetitive sequence targeting [109].
Troubleshooting Experimental Systems for mRNA Decay Studies
Problem: Inconsistent results when using transcriptional inhibition to study mRNA decay.
- Potential Cause: Incomplete transcription inhibition or secondary effects on cellular physiology.
- Solution: Use smFISH to quantify mRNA decay without transcriptional inhibitors by counting absolute numbers of cytoplasmic mRNAs and nascent transcripts at transcription sites [110]. This approach avoids artifacts from drugs like thiolutin, which can inhibit transcription only 90-95% efficiently and may affect mRNA decay processes directly [110].
- Alternative Method: For dynamic studies, implement metabolic labeling with 4-thiouridine (4sU) in genetically engineered yeast strains expressing nucleoside transporters [110].
Problem: Cell-to-cell variability obscuring mRNA decay kinetics.
- Potential Cause: Natural heterogeneity in gene expression within cell populations.
- Solution: Leverage single-cell resolution of smFISH to quantify mRNA turnover in individual cells rather than population averages. Analyze at least 50-100 cells per condition to account for biological variability [111] [112].
- Advanced Approach: Use multiplexed smFISH to simultaneously monitor multiple mRNA species in the same cell, enabling correlation analysis between different transcripts [111].
Frequently Asked Questions (FAQs)
Q: How does smFISH compare to single-cell RNA sequencing for studying mRNA decay? A: smFISH provides more accurate absolute quantification of RNA levels with single-molecule resolution, direct visualization of transcript subcellular localization, and does not require RNA extraction which can introduce degradation artifacts. However, it is limited to studying 1-4 genes simultaneously compared to the genome-wide scope of scRNA-seq [111] [108].
Q: Can I study real-time mRNA dynamics with smFISH? A: Traditional smFISH requires cell fixation, preventing true live imaging. However, CRISPR LiveFISH enables real-time monitoring of chromosomal activities and RNA transcription in live cells by using fluorescently labeled crRNAs targeted to repetitive sequences [109].
Q: What are the key considerations for designing smFISH probes? A: Probes should be 20-mer DNA oligonucleotides tiling the entire target RNA, with 3'-end modifications for fluorophore attachment. Ideally, design 48 or more probes per mRNA to ensure sufficient signal-to-noise ratio. Avoid regions with secondary structure or sequence homology to other genes [111] [108].
Q: How can I prevent RNA degradation during sample preparation for embryonic studies? A: Implement rapid fixation with 4% formaldehyde, use RNase-free conditions throughout processing, include RNase inhibitors in all solutions, and minimize sample processing time. For embryonic samples specifically, note that IRE1α-mediated decay is a regulated process during early development [1] [107].
Q: What controls should I include in smFISH experiments? A: Essential controls include: (1) No-probe control to assess autofluorescence, (2) Negative control probes (scrambled sequences) to evaluate non-specific binding, (3) Positive control probes for a constitutively expressed gene, and (4) RNase treatment before hybridization to confirm RNA-dependent signal [108].
Quantitative Data Tables
Table 1: Comparison of mRNA Half-Life Measurement Techniques
| Method | Principle | Perturbation Required | Temporal Resolution | Single-Cell Capability | Key Limitations |
|---|---|---|---|---|---|
| smFISH [110] | Direct counting of single mRNA molecules | None | High (minutes) | Yes | Limited multiplexing; fixed cells only |
| Transcriptional Inhibition [110] | Chemical inhibition of RNA synthesis | Drugs (thiolutin, 1,10-phenantroline) | Medium (30+ minutes) | No | Incomplete inhibition; secondary effects |
| Temperature-Sensitive RNAP II [110] | Thermal inactivation of RNA polymerase II | Temperature shift | Medium (30+ minutes) | No | Heat shock effects; strain-dependent |
| Metabolic Labeling (4sU) [110] | Incorporation of modified nucleosides | Genetic modification for nucleoside transporter | High (minutes) | No (population) | Requires genetic engineering |
| CRISPR LiveFISH [109] | Live imaging with fluorescent CRISPR/Cas | None for endogenous targets | High (real-time) | Yes | Requires repetitive target sequences |
Table 2: Essential Research Reagent Solutions for RNA Dynamics Studies
| Reagent Category | Specific Examples | Function | Application Notes |
|---|---|---|---|
| Fixation Agents | 4% Paraformaldehyde [108] | Preserve cellular architecture and RNA localization | Fix for 30 minutes at room temperature for optimal results |
| Permeabilization Reagents | Triton X-100 (0.1-0.5%) [108] | Enable probe access to cellular RNA | Titrate concentration to balance signal and morphology |
| Hybridization Components | Formamide (10%), Dextran sulfate [108] | Enhance hybridization stringency and efficiency | Higher formamide increases stringency but may reduce signal |
| RNase Inhibitors | RNasin, SUPERase-In, VRC [107] [108] | Prevent RNA degradation during processing | Essential for embryonic samples with high RNase activity |
| smFISH Probes | 48× 20-mer oligonucleotides [111] | Target-specific RNA detection | Design multiple probes tiling entire transcript |
| Stabilization Buffers | RNAlater, RNA stabilization buffers [107] | Preserve RNA integrity before fixation | Critical for clinical or precious embryonic samples |
Experimental Protocol Summaries
Detailed smFISH Protocol for mRNA Detection and Quantification
Sample Preparation:
- Fixation: Harvest cells and fix immediately with 4% formaldehyde in PBS for 30 minutes at room temperature [108].
- Permeabilization: Treat cells with 0.1% Triton X-100 in PBS for 10 minutes at room temperature [108].
- Hybridization: Apply smFISH probes (50-250 nM) in hybridization buffer (10% formamide, 10% dextran sulfate, 2× SSC) and incubate overnight at 37°C [108].
- Washing: Perform post-hybridization washes with 10% formamide in 2× SSC to remove non-specifically bound probes [108].
- Mounting: Mount samples with anti-fade mounting medium containing DAPI for nuclear staining [108].
Image Acquisition and Analysis:
- Acquire z-stack images using epifluorescence or confocal microscopy with 100× objective [111] [108].
- Use spot detection algorithms (e.g., FISH-quant) to identify individual mRNA molecules as diffraction-limited spots [108].
- Differentiate between cytoplasmic mature mRNAs and nuclear nascent transcripts by their localization and intensity profile [112].
mRNA Decay Measurement Without Transcriptional Inhibition
Principles:
- Quantify both cytoplasmic mRNAs and nascent transcripts at the transcription site in single cells [110].
- Assume steady-state conditions where mRNA synthesis equals degradation.
- Calculate decay rates using mathematical modeling of the relationship between mature and nascent RNA counts [110].
Procedure:
- Perform smFISH for your target gene as described above.
- Quantify absolute numbers of cytoplasmic mRNAs and nascent transcripts in at least 50 individual cells.
- Calculate mRNA half-life using mathematical modeling that relates transcription site intensity to cytoplasmic mRNA abundance [110].
- Compare distributions across cell population to account for heterogeneity.
Experimental Workflow and Pathway Diagrams
Diagram 1: smFISH Experimental Workflow for mRNA Decay Studies. This workflow outlines the complete procedure from sample collection to data analysis, highlighting critical steps for maintaining RNA integrity and specific considerations for embryonic samples, including IRE1α-mediated decay pathways [1] [108].
Diagram 2: IRE1α-Mediated mRNA Decay Pathway in Early Embryos. This pathway illustrates the mechanism of maternal mRNA degradation during maternal-to-zygotic transition, highlighting the critical role of IRE1α RNase activity independent of the canonical IRE1α-XBP1 signaling pathway [1]. Understanding this pathway is essential for designing appropriate embryonic RNA detection experiments.
Core Concepts and FAQs
Q1: Why is preventing RNA degradation particularly critical when working with embryonic samples? In embryonic research, the precise and timely degradation of maternal mRNAs is a biologically programmed event essential for development. The IRE1α protein, for example, has been identified as critical for degrading maternal transcripts after fertilization. Artificially degraded RNA from poor handling can confound results, making it impossible to distinguish between biologically significant degradation and technical artifacts, ultimately compromising data on key processes like zygotic genome activation [1].
Q2: What are the most common signs that my RNA sample has degraded during my cell-based assay workflow? The most common signs include:
- Poor Yield: Lower than expected RNA concentration after extraction [113].
- Abnormal Electrophoresis: A degraded RNA sample will not show sharp, clear bands for the 28S and 18S ribosomal RNAs on an agarose gel. Instead, it will appear as a smear, with a loss of the characteristic 2:1 ratio (28S:18S) band intensity [114].
- Low RIN: An RNA Integrity Number (RIN) below 8.0 (or below 6.0 for more degradation-tolerant methods) as measured by a Bioanalyzer [35] [114].
- Downstream Failures: Inconsistent results in downstream applications like qRT-PCR, such as high Ct values, failed reactions, or irregular melting curves [115].
Q3: I am using a cell-based assay to measure insulin receptor phosphorylation. My negative controls show high background signal. What could be the cause? High background in such assays can often be traced to:
- Inadequate Washing: Residual salts or ethanol from wash buffers can carry over, leading to non-specific signals. Ensure complete removal of wash buffers by centrifuging for the recommended time after the final wash [113].
- Antibody Specificity: The primary or secondary antibody may be binding non-specifically. Titrate antibodies to find the optimal concentration and include appropriate blocking steps.
- Cell Line Issues: The cells overexpressing the insulin receptor may be overly confluent or stressed, leading to basal receptor activation. Ensure consistent cell passage and health [116].
Q4: For my embryonic tissue samples, what is the most reliable preservation method to ensure high-quality RNA for functional assays? For sensitive tissues like embryonic samples, the most reliable method is immediate stabilization. Flash-freezing in liquid nitrogen is highly effective for solid tissues, as it instantly halts all enzymatic activity [35] [31]. Alternatively, immersion in a commercial stabilization reagent like RNAlater is excellent for preserving RNA integrity, especially when immediate freezing is not feasible. This solution permeates the tissue, inactivating RNases [35] [117]. A study comparing methods found TRIzol to be a highly efficient stabilizer for certain cell types, but flash-freezing remains the gold standard for many tissues [114].
Troubleshooting RNA Degradation in Functional Assays
Troubleshooting Guide
| Problem | Possible Cause | Recommended Solution |
|---|---|---|
| Low RNA Yield | Incomplete cell or tissue lysis [113]. | Increase homogenization time; ensure complete tissue disruption; pre-treat with Proteinase K if recommended [113]. |
| RNA degradation during storage [31]. | Store samples at -80°C; use DNA/RNA Protection Reagent; avoid freeze-thaw cycles [113] [31]. | |
| RNA Degradation | RNase contamination during handling [31]. | Use RNase-free consumables; wear gloves; clean surfaces with RNase deactivating reagents [31]. |
| Improper sample stabilization post-collection [35]. | Preserve samples immediately upon collection using flash-freezing or RNA stabilization reagents (e.g., RNAlater) [35] [31]. | |
| DNA Contamination | Genomic DNA not removed during extraction [113]. | Perform an on-column or in-solution DNase I digestion step during the RNA purification process [113]. |
| Poor A260/280 Ratio | Residual protein or guanidine salt contamination [113]. | Ensure complete removal of debris before column binding; perform all wash steps thoroughly [113]. |
| Failed Downstream Assay | RNA is degraded despite good spectrophotometry readings [115]. | Always check RNA quality by electrophoresis (RIN) before use; repeat extraction if degraded [115] [114]. |
| Salt or ethanol carryover inhibits enzymatic reactions [113]. | Ensure no wash buffer residue is in the eluate; add an extra centrifugation wash step if needed [113]. |
Decision Diagram for RNA Degradation Issues
This workflow helps diagnose and address common RNA degradation problems.
Key Experimental Protocols
Protocol: Cell-Based Assay for Insulin Receptor Phosphorylation
This protocol, adapted from regulatory science, is used to confirm the biological activity of insulin products by measuring receptor auto-phosphorylation, a key signaling event [116].
1. Cell Preparation and Seeding:
- Use a cell line engineered to overexpress the human insulin receptor.
- Seed cells in an appropriate growth medium in a multi-well plate and culture until they reach 80-90% confluence.
2. Serum Starvation:
- Replace the growth medium with a serum-free medium for a defined period (e.g., several hours to overnight) to synchronize cells and reduce basal signaling activity.
3. Insulin Stimulation:
- Prepare serial dilutions of the insulin reference standard and the test sample.
- Aspirate the serum-free medium and add the insulin solutions to the cells. Incubate for a specified time (e.g., 10-30 minutes) at 37°C to allow receptor activation.
4. Cell Fixation and Permeabilization:
- Quickly aspirate the insulin solution and fix the cells with a suitable fixative (e.g., 4% formaldehyde).
- Permeabilize the cells with a buffer containing a non-ionic detergent (e.g., 0.1% Triton X-100) to allow antibody access to intracellular proteins.
5. Immunodetection:
- Block non-specific binding sites with a protein solution (e.g., BSA).
- Incubate with a primary antibody specific for phosphorylated tyrosine residues.
- Incubate with a fluorescently-labeled secondary antibody.
- Include a fluorescent DNA stain (e.g., Hoechst) to normalize for cell number across wells.
6. Quantification and Analysis:
- Read the fluorescent signal using a plate reader.
- Normalize the phospho-tyrosine signal to the DNA signal for each well.
- Plot the dose-response curve of the test sample against the reference standard to determine relative biological activity [116].
Workflow for Validating Functional Activity in Embryonic Research
This general workflow integrates RNA preservation with functional validation, crucial for studies on embryonic development.
Research Reagent Solutions
This table details key reagents essential for successful RNA preservation and functional assay execution.
| Reagent / Kit | Function / Application |
|---|---|
| RNAlater Stabilization Solution | An aqueous, non-toxic solution that rapidly permeates tissues to stabilize and protect cellular RNA by inactivating RNases. Ideal for preserving embryonic samples when immediate freezing is not possible [35] [117]. |
| TRIzol Reagent | A mono-phasic solution of phenol and guanidine isothiocyanate designed to simultaneously solubilize biological material and denature proteins. It effectively inhibits RNases during homogenization, making it suitable for RNA, DNA, and protein purification from the same sample [35] [114]. |
| Monarch Total RNA Miniprep Kit | A column-based system for the purification of high-quality total RNA from a wide range of sample types, including cells and tissues. Includes a DNase I step to remove genomic DNA contamination [113]. |
| DNA/RNA Protection Reagent | A reagent used to co-precipitate and protect both DNA and RNA in samples during storage at -80°C, preventing degradation and preserving nucleic acid integrity [113]. |
| PAXgene Blood RNA Tubes | Specialized blood collection tubes containing reagents that stabilize RNA intracellularly for up to several days at room temperature, designed specifically for whole blood samples [35]. |
| Phospho-specific Antibodies | Antibodies that specifically recognize phosphorylated tyrosine residues or specific phosphorylated proteins (e.g., insulin receptor). They are critical for detecting activation in cell-based signaling assays like the insulin receptor phosphorylation assay [116]. |
Conclusion
Preventing RNA degradation in embryonic samples is not merely a technical prerequisite but a fundamental requirement for obtaining biologically meaningful data. A successful strategy integrates a deep understanding of the active decay pathways in pluripotent cells with rigorous, hands-on methodologies from the moment of sample collection. As research advances, the crosstalk between RNA degradation, epitranscriptomic modifications, and cell fate decisions is becoming increasingly clear. Future directions will likely involve the development of even more specific stabilization reagents and the integration of novel inducible decay systems to dynamically study RNA metabolism. Mastering these techniques is paramount for driving discoveries in developmental biology, regenerative medicine, and the creation of novel RNA-based therapeutics.
References
- 1. IRE1α RNase activity is critical for early embryo development by... [https://pubmed.ncbi.nlm.nih.gov/40530690/]
- 2. Nonsense-mediated RNA decay in the... | Nature Reviews Neuroscience [https://www.nature.com/articles/s41583-018-0079-z?error=cookies_not_supported&code=7c982c0f-7a5e-4287-939b-1298952e74b7]
- 3. Control of RNA degradation in cell decision - PMC fate [https://pmc.ncbi.nlm.nih.gov/articles/PMC10070868/]
- 4. Decoupling the impact of microRNAs on translational repression versus... [https://elifesciences.org/articles/38014]
- 5. Characterizing RNA stability genome-wide through combined analysis of PRO-seq and RNA-seq data | BMC Biology | Full Text [https://bmcbiol.biomedcentral.com/articles/10.1186/s12915-021-00949-x]
- 6. Isolation from RNA Zebrafish and cDNA Synthesis for... Embryonic [https://www.jove.com/t/1470/rna-isolation-from-embryonic-zebrafish-cdna-synthesis-for-gene]
- 7. Mechanisms of deadenylation -dependent decay [https://pubmed.ncbi.nlm.nih.gov/21957004/]
- 8. and Its Regulation in Eukaryotic Cells | SpringerLink Deadenylation [https://link.springer.com/protocol/10.1007/978-1-62703-971-0_23]
- 9. The mammalian exosome mediates the efficient degradation of mRNAs that contain AU-rich elements - PMC [https://www.ncbi.nlm.nih.gov/pmc/articles/PMC125812/]
- 10. Frontiers | Control of RNA degradation in cell fate decision [https://www.frontiersin.org/journals/cell-and-developmental-biology/articles/10.3389/fcell.2023.1164546/full]
- 11. The regulation and functions of the nuclear RNA exosome complex [https://pubmed.ncbi.nlm.nih.gov/26726035/]
- 12. - Wikipedia Exosome complex [https://en.wikipedia.org/wiki/Exosome_complex]
- 13. RNA Degradation in Pluripotent Stem Cells: Mechanisms, Crosstalk, and Fate Regulation - PMC [https://pmc.ncbi.nlm.nih.gov/articles/PMC12563098/]
- 14. Töte nicht die Boten- RNA ! [https://www.mpi-dortmund.mpg.de/news/dont-kill-the-messenger-rna]
- 15. - Nonsense RNA Mediated Influences Human Embryonic Decay ... Stem [https://pubmed.ncbi.nlm.nih.gov/27304915/]
- 16. is required for timely cell fate transitions by fine-tuning gene... NMD [https://pmc.ncbi.nlm.nih.gov/articles/PMC8973849/]
- 17. fate determination: making sense out of Cell nonsense [https://www.maxperutzlabs.ac.at/news/latest-news/l/cell-fate-determination-making-sense-out-of-nonsense-100265]
- 18. Role of UPF1-LIN28A interaction during early differentiation of... [https://www.nature.com/articles/s41467-023-44600-5?error=cookies_not_supported&code=f18b8f14-060e-48ce-b4d3-d028b667e445]
- 19. Nonsense-Mediated mRNA Decay (NMD) Analysis - CD Genomics [https://rna.cd-genomics.com/nonsense-mediated-mrna-decay-nmd-analysis.html]
- 20. Transcriptome-wide identification of NMD-targeted human mRNAs reveals extensive redundancy between SMG6- and SMG7-mediated degradation pathways - PMC [https://www.ncbi.nlm.nih.gov/pmc/articles/PMC5238794/]
- 21. A novel mRNA decay inhibitor abolishes pathophysiological cellular transition | Cell Death Discovery [https://www.nature.com/articles/s41420-022-01076-4]
- 22. Decoupling the impact of microRNAs on translational repression versus... [https://pubmed.ncbi.nlm.nih.gov/30044225/]
- 23. Dynamics and clinical relevance of maternal ... | Nature Communications [https://www.nature.com/articles/s41467-020-18680-6?error=cookies_not_supported]
- 24. MZT in Human Embryos and Other Animal Species | Encyclopedia MDPI [https://encyclopedia.pub/entry/27287]
- 25. Regulatory principles governing the maternal-to-zygotic transition: insights from Drosophila melanogaster - PMC [https://www.ncbi.nlm.nih.gov/pmc/articles/PMC6303782/]
- 26. Mechanisms regulating zygotic genome activation - PMC [https://pmc.ncbi.nlm.nih.gov/articles/PMC6558659/]
- 27. RNAlater FAQs | Thermo Fisher Scientific - US [https://www.thermofisher.com/us/en/home/references/ambion-tech-support/rna-isolation/tech-notes/rnalater-faqs.html]
- 28. Troubleshooting Guide: RNA Extraction for Sequencing - CD Genomics [https://rna.cd-genomics.com/resource/troubleshooting-rna-extraction.html]
- 29. Methods to Check RNA Integrity | Thermo Fisher Scientific - US [https://www.thermofisher.com/us/en/home/references/ambion-tech-support/rna-isolation/tech-notes/is-your-rna-intact.html]
- 30. Characterization of zygotic genome activation-dependent maternal mRNA clearance in mouse - PMC [https://pmc.ncbi.nlm.nih.gov/articles/PMC6954448/]
- 31. Best practices for RNA storage and sample handling | QIAGEN [https://www.qiagen.com/us/knowledge-and-support/knowledge-hub/bench-guide/rna/introduction/general-remarks-on-rna-handling-storage-and-stabilization]
- 32. Invitrogen RNAlater Stabilization Solution 100 mL | Fisher Scientific [https://www.fishersci.com/shop/products/ambion-rna-i-later-i-stabilization-solution-7/AM7020]
- 33. Isolation from RNA Zebrafish and cDNA Synthesis for... Embryonic [https://pmc.ncbi.nlm.nih.gov/articles/PMC3152201/]
- 34. Nonrandom RNAseq gene expression associated with RNAlater and flash freezing storage methods - PubMed [https://pubmed.ncbi.nlm.nih.gov/30447171/]
- 35. Preservation Methods to Improve RNA Quality and Quantity RNA [https://alitheagenomics.com/blog/rna-preservation-methods-to-improve-rna-quality-and-quantity]
- 36. RNAlater® Solution Around the World | Stabilizing Expression Profiles [https://www.thermofisher.com/kg/en/home/references/ambion-tech-support/rna-buffers-chemicals/tech-notes/rnalater-solution-around-the-world-stabilizing-expression-profiles.html]
- 37. Genomic DNA Purification and Assessment [https://www.sigmaaldrich.cn/CN/en/technical-documents/technical-article/genomics/dna-and-rna-purification/sample-purification-and-quality-assessment]
- 38. Collection, Protection... | Thermo Fisher Scientific - KR RNA Sample [https://www.thermofisher.com/kr/ko/home/technical-resources/technical-reference-library/nucleic-acid-purification-analysis-support-center/rna-sample-collection-protection-isolation-support/rna-sample-collection-protection-isolation-support-troubleshooting.html]
- 39. Cell lysis techniques and homogenization for RNA extraction | QIAGEN [https://www.qiagen.com/us/knowledge-and-support/knowledge-hub/bench-guide/rna/rna-purification/cell-lysis-and-homogenization-for-rna-extraction]
- 40. 70% ethanol preserves mycobacterial RNA from cultures more efficiently than GTC-TCEP | Scientific Reports [https://www.nature.com/articles/s41598-025-93699-7]
- 41. DNase Treatment in RNA Extraction: Essential or Optional? [https://www.lexogen.com/blog/rna-lexicon-dnase-to-treat-or-not-to-treat/]
- 42. Why is my lysis buffer not working? 9 Lysis Buffer Issues – GoldBio [https://www.goldbio.com/blogs/articles/why-is-my-lysis-buffer-not-working-how-to-resolve-9-lysis-buffer-issues-that-might-be-holding-you-back]
- 43. Isolation of Total RNA from Difficult Tissues [https://www.thermofisher.com/us/en/home/references/ambion-tech-support/rna-isolation/tech-notes/isolation-of-total-rna-from-difficult-tissues.html]
- 44. Disruption and Homogenization of Tissue for the Extraction of RNA [https://www.niehs.nih.gov/research/resources/protocols/extraction/disruption]
- 45. Key Considerations for Cell Lysis & Tissue Homogenization [https://www.preomics.com/blog/key-considerations-for-achieving-efficient-reproducible-cell-lysis-and-tissue-homogenization]
- 46. What is a Tissue Homogenizer? We Take A Closer Look for 2025. [https://blog.omni-inc.com/blog/what-is-a-tissue-homogenizer]
- 47. Video: Tissue Homogenization and Cell Lysis [https://www.jove.com/science-education/v/13830/tissue-homogenization-and-cell-lysis]
- 48. Homogenization of tissues via picosecond-infrared laser (PIRL) ablation: Giving a closer view on the in-vivo composition of protein species as compared to mechanical homogenization - PMC [https://pmc.ncbi.nlm.nih.gov/articles/PMC4767054/]
- 49. Troubleshooting Common Issues with Ultrasonic Homogenisers: A Comprehensive Guide-tube revolver rotator-ultrasonic homogenizer-DLAB Scientific [https://www.dlabsci-online.com/news_detail/1866312141549473792.html]
- 50. Top Ten Ways to Improve Your RNA Isolation [https://www.thermofisher.com/us/en/home/references/ambion-tech-support/rna-isolation/general-articles/ten-ways-to-improve-your-rna-isolation.html]
- 51. Degradation and translation of maternal mRNA for embryogenesis - PubMed [https://pubmed.ncbi.nlm.nih.gov/38262796/]
- 52. - TRIzol / BOC Sciences RNA Extraction Protocol RNA [https://rna.bocsci.com/support/trizol-rna-extraction-protocol.html]
- 53. ™ Reagent 100 mL | Contact Us | Invitrogen™ | thermofisher.com TRIzol [https://www.thermofisher.com/order/catalog/product/15596026]
- 54. Common Issues and Troubleshooting in RNA Using Extraction TRIzol [https://www.yeasenbio.com/blogs/molecular-biology/common-issues-and-troubleshooting-in-rna-extraction-using-trizol]
- 55. : Methods, challenges, and applications | QIAGEN RNA isolation [https://www.qiagen.com/us/knowledge-and-support/knowledge-hub/bench-guide/rna/rna-purification/rna-isolation-sample-source-considerations]
- 56. Integrated DNA and RNA extraction using magnetic beads from viral pathogens causing acute respiratory infections | Scientific Reports [https://www.nature.com/articles/srep45199]
- 57. DIY RNA Spin Column Buffers – Purification of RNA with humble DNA... [https://pipettejockey.com/2020/03/30/diy-rna-spin-column-buffers-purification-of-rna-with-humble-dna-silica-spin-columns/]
- 58. & DNase Reagents | Thermo Fisher Scientific - RU Treatment Removal [https://www.thermofisher.com/ru/ru/home/references/ambion-tech-support/rna-isolation/tech-notes/a-new-method-to-remove-dna.html]
- 59. DNAse I qualification and sample treatment | Molecular Devices [https://www.moleculardevices.com/en/assets/app-note/reagents/dna-dnase-i-qualification-and-sample-treatment]
- 60. RNA degradation eliminates developmental transcripts during murine embryonic stem cell differentiation via CAPRIN1-XRN2 - ScienceDirect [https://www.sciencedirect.com/science/article/pii/S1534580722008140]
- 61. Working with RNA: Hints and Tips | Bioline | Meridian Bioscience [https://www.bioline.com/rna-hints-and-tips]
- 62. RNA Sample Collection, Protection, and... | Thermo Fisher Scientific - UK [https://www.thermofisher.com/uk/en/home/technical-resources/technical-reference-library/nucleic-acid-purification-analysis-support-center/rna-sample-collection-protection-isolation-support/rna-sample-collection-protection-isolation-support-troubleshooting.html]
- 63. Precautions for Handling of RNA [https://lifescience.roche.com/global/en/article-listing/article/precautions-for-handling-of-rna.html]
- 64. Efficacy Assessment of Nucleic Acid Decontamination Reagents Used in Molecular Diagnostic Laboratories - PMC [https://pmc.ncbi.nlm.nih.gov/articles/PMC4943653/]
- 65. , DNase- RNase free Protocol [https://www.sigmaaldrich.com/US/en/technical-documents/protocol/genomics/dna-and-rna-purification/rnase-dnase-free]
- 66. The Basics: RNase Control | Thermo Fisher Scientific - US [https://www.thermofisher.com/us/en/home/references/ambion-tech-support/nuclease-enzymes/general-articles/the-basics-rnase-control.html]
- 67. Bench Tips [https://www.clementiabiotech.com/bench-tips/rnase-control-in-labs]
- 68. Focus on RNase protection Nordic Biolabs - Leverantör av... [https://www.nordicbiolabs.se/kunskapsbank/focus-on-rnase-protection?trk=article-ssr-frontend-pulse_little-text-block]
- 69. Troubleshooting Guide for RNA Cleanup | NEB [https://www.neb.com/en-us/tools-and-resources/troubleshooting-guides/troubleshooting-guide-for-rna-cleanup]
- 70. RNA Sample Collection, Protection, and Isolation Support—Troubleshooting | Thermo Fisher Scientific - US [https://www.thermofisher.com/us/en/home/technical-resources/technical-reference-library/nucleic-acid-purification-analysis-support-center/rna-sample-collection-protection-isolation-support/rna-sample-collection-protection-isolation-support-troubleshooting.html]
- 71. How Stable Is Extracted Rna At Various Temperatures? [https://kindle-tech.com/faqs/how-stable-is-extracted-rna-at-various-temperatures]
- 72. Comprehensive guide to RNA purification | Abcam [https://www.abcam.com/en-us/knowledge-center/dna-and-rna/rna-purification]
- 73. RNA Integrity and Quality – Standardize RNA Quality Control | PPT [https://www.slideshare.net/slideshow/rna-integrity-and-quality-standardize-rna-quality-control/56750101]
- 74. Optimizing RNA quality in cryopreserved tissues without preservatives... [https://bmcbiotechnol.biomedcentral.com/articles/10.1186/s12896-025-01059-0]
- 75. Autophagy-dependent ribosomal RNA is essential for... degradation [https://elifesciences.org/articles/36588]
- 76. The Basics: RNA | Thermo Fisher Scientific - US Isolation [https://www.thermofisher.com/us/en/home/references/ambion-tech-support/rna-isolation/general-articles/the-basics-rna-isolation.html]
- 77. Nucleic Acid Quantification Support—Troubleshooting | Thermo Fisher Scientific - US [https://www.thermofisher.com/us/en/home/technical-resources/technical-reference-library/nucleic-acid-purification-analysis-support-center/nucleic-acid-quantification-support/nucleic-acid-quantification-support-troubleshooting.html]
- 78. Vazyme-Science in Lab | How to Work with Precious RNA [https://www.vazymeglobal.com/News/MediaReleases/1726522978366717953.html]
- 79. Why Relying Solely on Spectrophotometers Can Ruin Your RNA ... [https://www.tinzyme.com/new/why-relying-solely-on-spectrophotometers-can-ruin-your-rna-extraction/]
- 80. DNA and RNA Quantification | Thermo Fisher Scientific - US [https://www.thermofisher.com/us/en/home/life-science/dna-rna-purification-analysis/nucleic-acid-quantitation.html]
- 81. DNA & RNA Quantification via Fluorometric Analysis [https://www.denovix.com/dna-rna-quantification-fluorometric-analysis/]
- 82. Qubit Fluorometric Quantification | Thermo Fisher Scientific - US [https://www.thermofisher.com/us/en/home/industrial/spectroscopy-elemental-isotope-analysis/molecular-spectroscopy/fluorometers/qubit.html]
- 83. quality control: 3 Key Considerations RNA [https://bitesizebio.com/13527/how-to-quality-control-check-your-rna-samples/]
- 84. Sample Collection, Protection, and... | Thermo Fisher Scientific - JP RNA [https://www.thermofisher.com/jp/ja/home/technical-resources/technical-reference-library/nucleic-acid-purification-analysis-support-center/rna-sample-collection-protection-isolation-support/rna-sample-collection-protection-isolation-support-troubleshooting.html]
- 85. The Best Techniques for RNA Quantification [https://www.denovix.com/the-best-techniques-for-rna-quantification/]
- 86. vs. Spectrophotometers : Choosing the Right Tool for... Fluorometers [https://www.blue-raybio.com/en/blog/Spectrophotometers-vs-Fluorometers-Choosing-the-Right-Tool-for-DNARNA-Quantification]
- 87. quantification and quality assessment techniques | QIAGEN RNA [https://www.qiagen.com/us/knowledge-and-support/knowledge-hub/bench-guide/rna/rna-analysis/quantification-and-analysis-of-rna]
- 88. - Wikipedia RNA integrity number [https://en.wikipedia.org/wiki/RNA_integrity_number]
- 89. RNA Electrophoresis, RNA Integrity, Bioanalyzer RIN | Agilent [https://www.agilent.com/en/product/automated-electrophoresis/bioanalyzer-systems/bioanalyzer-rna-kits-reagents/bioanalyzer-rna-analysis-228256]
- 90. The RIN : an RNA for assigning integrity values to... number integrity [https://bmcmolbiol.biomedcentral.com/articles/10.1186/1471-2199-7-3]
- 91. Dynamics and clinical relevance of maternal mRNA clearance during the oocyte-to-embryo transition in humans | Nature Communications [https://www.nature.com/articles/s41467-020-18680-6]
- 92. Sperm-borne microRNA-34c regulates maternal mRNA degradation and preimplantation embryonic development in mice | Reproductive Biology and Endocrinology | Full Text [https://rbej.biomedcentral.com/articles/10.1186/s12958-023-01089-3]
- 93. Stabilizing the Code—Methods to Preserve RNA Prove Their Worth - PMC [https://pmc.ncbi.nlm.nih.gov/articles/PMC2999993/]
- 94. Nucleic Acid Gel Electrophoresis Troubleshooting | Thermo Fisher Scientific - US [https://www.thermofisher.com/us/en/home/life-science/cloning/cloning-learning-center/invitrogen-school-of-molecular-biology/na-electrophoresis-education/na-electrophoresis-troubleshooting.html]
- 95. Preserve RNA in the Tissue Before RNA Isolation | Thermo Fisher Scientific - US [https://www.thermofisher.com/us/en/home/references/ambion-tech-support/rna-isolation/tech-notes/preserve-rna-in-the-tissue-before-rna-isolation.html]
- 96. Fragment Analysis Support—Troubleshooting | Thermo Fisher Scientific - US [https://www.thermofisher.com/us/en/home/technical-resources/technical-reference-library/capillary-electrophoresis-applications-support-center/fragment-analysis-support/fragment-analysis-support-troubleshooting.html]
- 97. Nucleic Acid Gel Electrophoresis and Blotting Support—Troubleshooting | Thermo Fisher Scientific - US [https://www.thermofisher.com/us/en/home/technical-resources/technical-reference-library/nucleic-acid-purification-analysis-support-center/nucleic-acid-electrophoresis-blotting-support/nucleic-acid-electrophoresis-blotting-support-troubleshooting.html]
- 98. Gel electrophoresis troubleshooting – miniPCR bio [https://www.minipcr.com/gel-electrophoresis-troubleshooting/]
- 99. mRNA Stability Assay Using transcription inhibition by Actinomycin D in Mouse Pluripotent Stem Cells - PMC [https://pmc.ncbi.nlm.nih.gov/articles/PMC8342049/]
- 100. Stability Assay Using Transcription mRNA by Actinomycin... Inhibition [https://bio-protocol.org/en/bpdetail?id=3072&type=0]
- 101. Non-invasive measurement of mRNA reveals translation... decay [https://pmc.ncbi.nlm.nih.gov/articles/PMC6152797/]
- 102. mRNA stability fine-tunes gene expression in the developing cortex to control neurogenesis - PMC [https://pmc.ncbi.nlm.nih.gov/articles/PMC11838918/]
- 103. sequencing of mRNA 5’-ends reveals regulators of bovine... RNA [https://bmcgenomics.biomedcentral.com/articles/10.1186/s12864-025-12110-x]
- 104. RNA-seq Data: Challenges in and Recommendations for Experimental Design and Analysis - PMC [https://pmc.ncbi.nlm.nih.gov/articles/PMC4230301/]
- 105. A survey of best practices for RNA-seq data analysis | Genome Biology | Full Text [https://genomebiology.biomedcentral.com/articles/10.1186/s13059-016-0881-8]
- 106. In Situ Stability Test for mRNA Vaccines Based on Deep-UV Resonance Raman Spectroscopy - PMC [https://pmc.ncbi.nlm.nih.gov/articles/PMC10845005/]
- 107. The Battle Against RNA : Strategies and Solutions Degradation [https://www.numberanalytics.com/blog/battle-against-rna-degradation-strategies-solutions]
- 108. - Single Fluorescence in situ Hybridization (smFISH) for RNA... molecule [https://pmc.ncbi.nlm.nih.gov/articles/PMC8342053/]
- 109. CRISPR fluorescent in situ hybridization in live cells [https://www.idtdna.com/page/support-and-education/decoded-plus/crispr-fluorescent-in-situ-hybridization-in-live-cells-a-new-approach-to-detecting-chromosomal-activities/]
- 110. Measuring mRNA Decay in Budding Yeast Using Single ... Molecule [https://pmc.ncbi.nlm.nih.gov/articles/PMC10773531/]
- 111. Multiplex RNA single of molecule mRNAs in single... FISH inducible [https://www.nature.com/articles/s41597-019-0106-6?error=cookies_not_supported]
- 112. Promoter-Autonomous Functioning in a Controlled Environment using Single Molecule FISH - PMC [https://www.ncbi.nlm.nih.gov/pmc/articles/PMC4446897/]
- 113. Troubleshooting Guide for Total RNA Extraction & Purification | NEB [https://www.neb.com/en-us/tools-and-resources/troubleshooting-guides/troubleshooting-guide-for-total-rna-extraction-and-purification]
- 114. Optimizing preservation protocols to extract high-quality RNA from different tissues of echinoderms for next-generation sequencing - PubMed [https://pubmed.ncbi.nlm.nih.gov/23683108/]
- 115. RNA Preparation Troubleshooting [https://www.sigmaaldrich.com/US/en/technical-documents/technical-article/genomics/dna-and-rna-purification/troubleshooting-rna-preparation]
- 116. Establishment and validation of an in - vitro to... | FDA cell based assay [https://www.fda.gov/drugs/regulatory-science-action/establishment-and-validation-in-vitro-cell-based-assay-assess-biological-activity-insulin-products]
- 117. US8178296B2 - Methods and reagents for preserving RNA in cell and tissue samples - Google Patents [https://patents.google.com/patent/US8178296B2/en]