Troubleshooting High Background in In Situ Hybridization: A Comprehensive Guide for Clear Signals
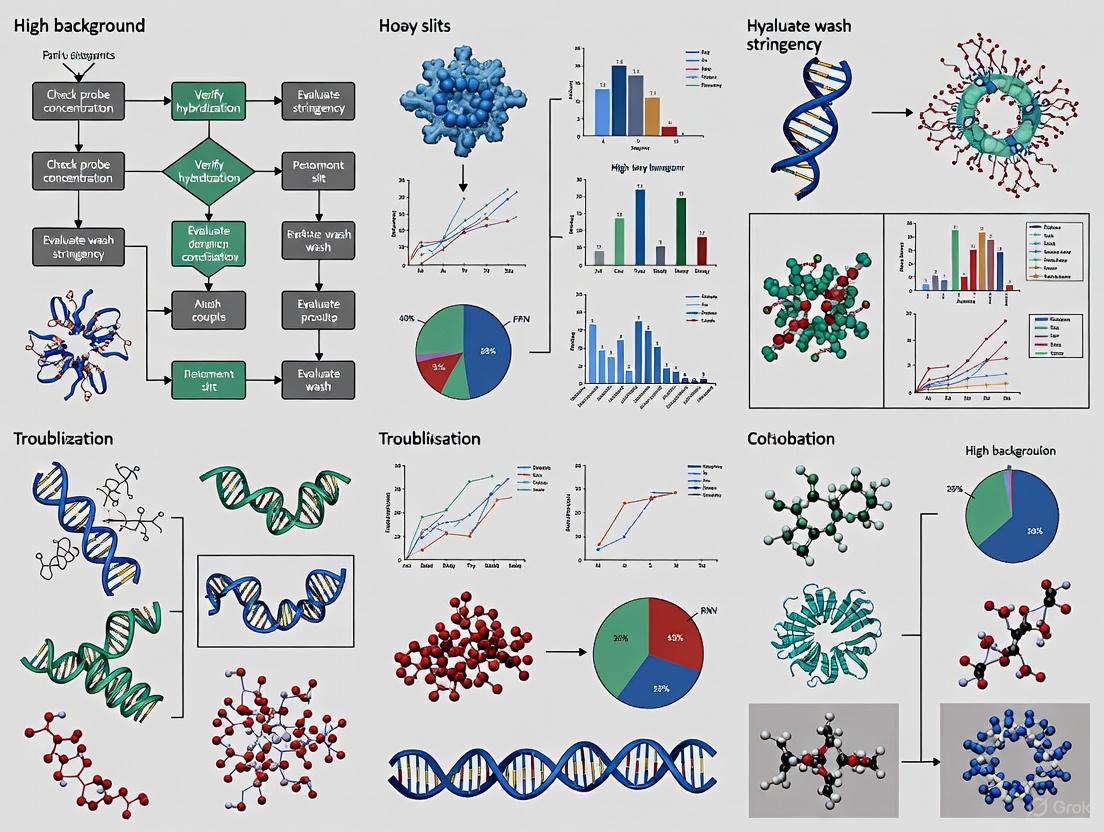
This article provides a systematic guide for researchers and drug development professionals to diagnose and resolve high background fluorescence and nonspecific staining in in situ hybridization (ISH) assays.
Troubleshooting High Background in In Situ Hybridization: A Comprehensive Guide for Clear Signals
Abstract
This article provides a systematic guide for researchers and drug development professionals to diagnose and resolve high background fluorescence and nonspecific staining in in situ hybridization (ISH) assays. Covering foundational principles to advanced validation techniques, it details common error sources from sample preparation to detection, offers step-by-step optimization protocols for both CISH and FISH, and explores the integration of automated platforms and AI-powered analysis to enhance assay robustness and reproducibility in biomedical research.
Understanding ISH Background: Defining the Problem and Its Common Sources
High Background? Differentiating Signal from Noise in CISH and FISH
What is High Background?
In both Chromogenic and Fluorescence In Situ Hybridization (CISH and FISH), "high background" refers to unwanted, non-specific signal that obscures the true, target-specific hybridization signal. This noise complicates analysis and can lead to erroneous interpretation of experimental results [1].
In CISH, this typically manifests as a diffuse, general staining across the tissue section, making it difficult to distinguish the specific precipitate formed by enzymes like Horseradish Peroxidase (HRP) or Alkaline Phosphatase (AP) [2]. In FISH, high background appears as a haze or speckling of fluorescence across the sample, including on non-target cells or mineral particles, which can mask the true fluorescent signals from your probe [1] [3].
Troubleshooting Guide: Common Causes and Solutions
The table below summarizes the frequent causes of high background in CISH and FISH experiments and the recommended corrective actions.
| Problem Area | Common Causes of High Background | Recommended Solutions |
|---|---|---|
| Sample Preparation | Under-fixation or over-fixation; incorrect section thickness; delayed fixation [2] [1] [4]. | Use freshly prepared fixatives; adhere to recommended fixation times; aim for 3-4μm thick FFPE sections [1] [5] [4]. |
| Pre-treatment | Insufficient or over-digestion with protease (e.g., pepsin, Proteinase K) [2] [6]. | Titrate enzyme concentration and time. A typical start is 1-5 μg/mL Proteinase K for 10 min at room temperature [6]. |
| Probe Hybridization | Denaturation temperature/time incorrect; probe concentration too high; probe drying on slide [2] [1] [4]. | Ensure denaturation at 95±5°C for 5-10 min; prevent reagent evaporation during incubation [2] [1]. |
| Washing Stringency | Inadequate stringent wash; use of incorrect wash buffers or temperature [2] [1]. | For CISH, use 1X SSC at 75-80°C. Optimize wash stringency by adjusting pH, temperature, and salt concentration [2] [1] [6]. |
| Detection | Endogenous biotin activity; enzyme-substrate mismatch; reaction development too long [2] [6]. | Block endogenous biotin; ensure conjugate matches substrate (e.g., HRP with DAB); stop chromogenic reaction once signal appears [2] [6]. |
Specialized Protocol: EDTA-FISH for Mineral-Rich Samples
Environmental samples like sediments are prone to high background due to non-specific probe adsorption to mineral particles. The EDTA-FISH protocol effectively counters this [3].
- Background: Standard FISH buffers use 0.9 M NaCl, which does not prevent probe adsorption to mineral grains.
- Solution: Replace 0.9 M NaCl in the hybridization buffer with 250 mM EDTA (pH 8.0). The EDTA chelates divalent cations that facilitate probe binding to mineral surfaces, drastically reducing background without compromising specific cell-bound signals [3].
- Key Consideration: This buffer change slightly alters hybridization stringency, so the optimal formamide concentration must be re-established probe-by-probe [3].
Experimental Protocols for Key Optimizations
Protocol 1: Optimizing Proteinase K Digestion for Tissue Permeabilization
Proteinase K digestion is a critical pre-treatment step. Insufficient digestion masks targets, while over-digestion damages morphology and increases background [6].
- Prepare a titration series: Test a range of Proteinase K concentrations (e.g., 1, 2, 5, 10 µg/mL) on consecutive tissue sections while keeping time and temperature constant (e.g., 10 minutes at room temperature) [6].
- Run the ISH assay: Perform the entire ISH protocol with your probe of choice on the titrated sections.
- Evaluate results: The optimal concentration produces the highest specific hybridization signal with the least disruption of tissue or cellular morphology [6].
Protocol 2: Performing a Stringent Wash for CISH
An improper stringent wash is a primary cause of high DAB background in CISH [2].
- After hybridization, rinse slides briefly at room temperature with SSC buffer.
- Immerse slides in pre-warmed SSC buffer for 5 minutes. The critical parameter is maintaining a temperature between 75-80°C.
- If processing multiple slides, increase the temperature by approximately 1°C per slide, but do not exceed 80°C. Temperatures higher than this can eliminate the specific CISH signal [2].
- After the wash, rinse the slides with the appropriate buffer (e.g., TBST). Avoid using water or PBS without detergent, as this can increase background [2].
Frequently Asked Questions (FAQs)
Q: My probe contains repetitive sequences (like Alu elements), which is causing high background. What can I do? A: You can block probe binding to these repetitive sequences by adding unlabeled COT-1 DNA to the hybridization mixture [2].
Q: Why should I avoid a dark hematoxylin counterstain in CISH? A: A dark counterstain can mask the positive signal, especially with brown DAB or dark blue NBT/BCIP precipitates. Use a light counterstain (e.g., 5 seconds to 1 minute in Mayer's hematoxylin) for better contrast [2].
Q: For FFPE tissue FISH, what is the key to optimizing denaturation conditions? A: Follow the probe manufacturer's protocol precisely. Using a temperature that is too low prevents probe binding, while a temperature that is too high increases non-specific binding. The duration is also critical; prolonged denaturation can unmask non-specific binding sites [1].
Q: I am using biotin-labeled probes and getting high background. What are my options? A: Endogenous biotin is a common cause. You can either:
- Block endogenous biotin by adding excess avidin or streptavidin prior to probe hybridization.
- Switch labels and use digoxigenin-labeled probes, as digoxigenin is not endogenously produced in mammalian tissues, offering higher specificity [6].
Signaling Pathways & Workflows
The following diagram illustrates the parallel pathways that lead to either specific signal or non-specific background noise in a typical CISH/FISH assay, highlighting key control points.
The Scientist's Toolkit: Key Research Reagent Solutions
This table lists essential reagents and materials for troubleshooting and optimizing your CISH and FISH assays.
| Reagent/Material | Function & Importance in Troubleshooting |
|---|---|
| Charged Slides | Provides superior section adhesion, preventing section lifting which can cause uneven staining and high background [4]. |
| Pepsin or Proteinase K | Enzymes for antigen retrieval. Concentration and time must be titrated for each tissue type; crucial for balancing signal and background [2] [6]. |
| Formamide | Component of hybridization buffer. Allows hybridization to occur at lower temperatures, helping to preserve tissue morphology [6] [5]. |
| SSC Buffer (Saline-Sodium Citrate) | Standard buffer for stringent washes. Using it at the correct temperature (75-80°C) is vital for removing non-specifically bound probe [2]. |
| COT-1 DNA | Unlabeled DNA used to block repetitive sequences (e.g., Alu, LINE) in the genome, reducing non-specific probe binding and background [2]. |
| EDTA (for EDTA-FISH) | A chelating agent that, when used at high concentration (e.g., 250 mM) in place of NaCl in the hybridization buffer, reduces probe adsorption to mineral particles in environmental samples [3]. |
| Tween 20 | A detergent added to wash buffers (e.g., PBST). Its omission can lead to elevated background staining [2]. |
| Histomount Mounting Medium | A specific mounting medium recommended for chromogenic sections to preserve the signal and clarity when applying coverslips [2]. |
What are the primary probe-related causes of high background?
Probe-related issues are a frequent source of high background staining in ISH experiments. The table below summarizes the key culprits and their solutions.
Table 1: Probe-Related Causes and Solutions for High Background
| Culprit | Underlying Cause | Recommended Solution |
|---|---|---|
| Repetitive Sequences | Probes containing Alu or LINE elements cause non-specific binding [2] | Add COT-1 DNA during hybridization to block repetitive sequences [2] |
| Probe Concentration | Too concentrated probe increases non-specific hybridization [7] | Titrate probe to find optimal concentration; avoid excessive amounts [7] |
| Probe Specificity | Poorly designed probes with low specificity for target [4] | Carefully select probes with high sensitivity and specificity for your target [4] |
| Probe Labeling Issues | Improperly labeled or degraded probes [7] | Use fresh, properly validated probes with appropriate labeling techniques [7] |
How do sample preparation errors contribute to background issues?
Improper sample preparation can significantly increase background staining by creating conditions favorable for non-specific probe binding.
Table 2: Sample Preparation-Related Causes and Solutions
| Culprit | Underlying Cause | Recommended Solution |
|---|---|---|
| Inadequate Permeabilization | Insufficient access to target nucleic acids [7] | Optimize proteinase K concentration (3-10 min at 37°C for most tissues); avoid over-digestion [2] |
| Improper Fixation | Over-fixation causes excessive protein cross-linking [2] | Standardize fixation conditions (type, pH, temperature, time) across all samples [4] |
| Section Drying | Tissue drying during processing causes non-specific binding [2] | Ensure sections remain hydrated throughout the entire protocol [2] |
| Incomplete Dewaxing | Residual paraffin prevents proper reagent penetration [4] | Ensure complete paraffin removal during dewaxing steps [4] |
Which hybridization and washing conditions most commonly cause high background?
Suboptimal hybridization and washing conditions represent the most frequent technical causes of high background in ISH experiments.
Critical Hybridization Factors:
- Stringency Washes: Insufficient stringent washing is a major cause of high background [2]. Use SSC buffer at 75-80°C for 5 minutes, increasing temperature by 1°C per additional slide (maximum 80°C) [2].
- Evaporation Control: Drying of probe or reagents during hybridization causes heavy, non-specific staining at edges [4]. Use proper humidified chambers and ensure adequate hydration throughout incubation [2].
- Temperature Consistency: Hybridization should be conducted at precisely 37°C [2]. Temperature fluctuations dramatically impact specificity.
What detection system problems lead to excessive background?
The detection phase introduces multiple potential sources of background, particularly when using enzymatic detection methods.
Table 3: Detection System Causes and Solutions for High Background
| Culprit | Underlying Cause | Recommended Solution |
|---|---|---|
| Over-Development | Excessive chromogen incubation produces nonspecific precipitation [2] | Monitor development microscopically; stop reaction immediately when background appears [2] |
| Endogenous Enzyme Activity | Unblocked peroxidase or phosphatase activity [7] | Include enzymatic blocking steps during prehybridization [7] |
| Conjugate Mismatch | Mismatched probe label and detection system [2] | Ensure conjugates match probes (biotin with anti-biotin) and enzymes match substrates (HRP with DAB) [2] |
| Antibody Concentration | Too high antibody concentration in detection system [8] | Titrate detection antibodies to optimal concentration [8] |
The Scientist's Toolkit: Essential Research Reagent Solutions
Table 4: Key Research Reagents for Background Reduction
| Reagent/Category | Primary Function | Specific Application Notes |
|---|---|---|
| COT-1 DNA | Blocks repetitive sequences in probes [2] | Essential when probes contain Alu or LINE elements [2] |
| Proteinase K | Digests proteins surrounding target nucleic acids [7] | Optimal concentration critical; 3-10 min at 37°C for most tissues [2] |
| SSC Buffer | Provides proper stringency in post-hybridization washes [2] | Use at 75-80°C for 5 minutes for effective background reduction [2] |
| PBST with Tween-20 | Washes with detergent minimize hydrophobic interactions [2] | Critical: Using PBS without Tween-20 or distilled water increases background [2] |
| Enzyme Blocking Reagents | Quenches endogenous enzyme activity [7] | Essential when using enzymatic detection systems [7] |
| Formamide | Increases stringency in hybridization buffer [7] | Reduces non-specific hybridization; concentration must be optimized [7] |
FAQs on Sample Preparation for In Situ Hybridization
1. How does fixation time affect my ISH results? Both under-fixation and over-fixation can severely compromise your ISH results. Under-fixation fails to preserve cellular structure and nucleic acids adequately, leading to degradation and high background staining. Over-fixation, particularly with formalin, causes excessive cross-linking of proteins and nucleic acids, which can mask your target sequences and reduce probe accessibility, also resulting in poor signal and elevated background [9]. Adhere strictly to recommended fixation times.
2. What is the most common cause of high background staining? Insufficient washing during the post-hybridization steps is a frequent culprit for high background [2]. However, other factors include too high a probe concentration, inadequate digestion during pre-treatment, insufficient blocking, or letting tissue sections dry out during the procedure [8] [10]. A systematic approach to troubleshooting is needed to identify the specific cause.
3. Why is my staining weak or absent even though my probe is valid? Weak or absent staining can result from several preparation issues. These include RNA degradation due to delayed fixation or RNase contamination [4], over-digestion with proteases like proteinase K which damages tissue morphology [10], or insufficient antigen retrieval which leaves target sequences masked [11] [12]. Ensure proper tissue handling and optimize pre-treatment steps.
4. How can I reduce background in fluorescent ISH (FISH) assays? To reduce background in FISH, ensure the use of freshly prepared fixative and wash buffers [9]. Optimize the stringency of your post-hybridization washes by carefully controlling temperature and salt concentration [10] [2]. Also, for FFPE tissues, use thin sections (3-4μm) to avoid issues with probe penetration, and consider using a hypotonic solution during the fixation of blood smears [9].
Troubleshooting Guide: High Background in ISH
The following table outlines common problems related to sample preparation that lead to high background, along with their specific solutions.
| Problem | Primary Cause | Recommended Solution |
|---|---|---|
| High Background Staining | Over-fixation or under-fixation [9] | Standardize fixation conditions; for formalin, use 10% NBF and adhere closely to recommended fixation times [4] [9]. |
| Insufficient proteinase K digestion [10] | Perform a titration experiment to determine the optimal concentration and time for your specific tissue type and fixation [10]. | |
| Tissue sections drying out [8] | Use a humidified chamber during all incubation steps and never allow slides to dry out [8] [2]. | |
| Inadequate post-hybridization washes [2] | Use standardized, stringent washes (e.g., with SSC buffer at 75–80°C) to remove unbound probe [10] [2]. | |
| Uneven or Patchy Staining | Incomplete removal of paraffin [4] | Follow a rigorous deparaffinization protocol with fresh xylene and ethanol series [10]. |
| Inconsistent reagent coverage [8] | Ensure reagents fully cover the tissue section and use a humidified chamber to prevent evaporation [8] [4]. | |
| Poor section adhesion [4] | Use charged slides and avoid protein-based adhesives that can block the slide surface [4]. |
Experimental Protocols for Optimal Sample Preparation
Protocol 1: Standard Fixation and Pre-treatment for FFPE Tissues
This methodology is critical for preserving nucleic acid integrity and ensuring optimal probe access [10] [9].
- Fixation: Immerse tissue promptly in a sufficient volume of 10% Neutral Buffered Formalin (NBF). Fixation time should be standardized and consistent; 24 hours is a common starting point, but optimal duration may vary by tissue type [9] [12].
- Processing & Embedding: Process fixed tissues through a graded series of ethanol for dehydration, followed by xylene (as a clearing agent), and finally infiltrate and embed in paraffin wax [12].
- Sectioning: Cut thin sections (3–5 μm) using a microtome and mount on charged slides to ensure adhesion. Dry slides thoroughly [4] [9].
- Deparaffinization and Rehydration:
- Xylene: 2 x 3 min
- Xylene:1:1 with 100% ethanol: 3 min
- 100% ethanol: 2 x 3 min
- 95% ethanol: 3 min
- 70% ethanol: 3 min
- 50% ethanol: 3 min [10]
- Permeabilization/Antigen Retrieval: Digest with 20 μg/mL proteinase K in pre-warmed 50 mM Tris buffer for 10–20 minutes at 37°C. Note: Concentration and time must be optimized for each tissue and fixation condition via titration [10].
Protocol 2: Proteinase K Titration Experiment
This experiment is essential for optimizing the permeabilization step, which is a common source of both high background and weak signal [10].
- Objective: To determine the optimal proteinase K concentration that maximizes signal while preserving tissue morphology.
- Method:
- Prepare a series of proteinase K solutions in 50 mM Tris buffer (e.g., 0, 5, 10, 20, 40 μg/mL).
- Apply each concentration to consecutive tissue sections and incubate at 37°C for a fixed time (e.g., 15 minutes).
- Stop the reaction by rinsing slides 5x in distilled water.
- Proceed with the remainder of your ISH protocol uniformly for all slides.
- Evaluation: Examine slides under a microscope. The optimal condition will show strong specific staining with minimal background and well-preserved tissue structure. Insufficient digestion yields weak signal; over-digestion results in poor morphology and high background [10].
Research Reagent Solutions
The following table details key reagents used in ISH sample preparation and their critical functions.
| Reagent | Function in Sample Preparation |
|---|---|
| 10% Neutral Buffered Formalin (NBF) | Cross-linking fixative that preserves tissue architecture and nucleic acids by forming methylene bridges between proteins [12]. |
| Proteinase K | Proteolytic enzyme that digests proteins surrounding the target nucleic acids, thereby unmasking the targets and allowing probe access [10]. |
| Formamide | A denaturing agent used in hybridization buffers. It lowers the effective melting temperature of the probe, allowing for specific hybridization at manageable temperatures [10] [13]. |
| Saline-Sodium Citrate (SSC) Buffer | A salt buffer used in hybridization and stringent washes. The salt concentration (stringency) and temperature of SSC washes are critical for removing non-specifically bound probe to reduce background [10] [2]. |
| Digoxigenin (DIG)-labeled Probes | Hapten-labeled nucleic acid probes. After hybridization, they are detected with an anti-DIG antibody conjugated to an enzyme (e.g., alkaline phosphatase) for colorimetric or fluorescent detection [10]. |
Workflow: Impact of Sample Preparation on ISH Results
This diagram illustrates the cause-and-effect relationship between sample preparation steps and experimental outcomes.
Proactive Practices for Robust ISH
To ensure consistent success with your ISH experiments, integrate these core principles into your standard workflow:
- Standardize and Control: Use consistent fixation conditions (type, pH, time, temperature) across all samples. Always include known positive and negative control tissues in every run to validate your protocol and results [4] [2].
- Prevent RNase Contamination: Use RNase-free reagents, gloves, and sterile techniques during all procedures involving RNA detection. Degraded RNA is a primary cause of signal failure [10] [4].
- Optimize Systematically: Critical steps like protease digestion and hybridization stringency require empirical optimization for each new tissue type, fixation protocol, and probe. Use titration experiments rather than relying on generic protocols [10] [9].
Frequently Asked Questions (FAQs)
Q: What are the primary causes of high background signal in my ISH experiment?
High background, or non-specific signal, can stem from various probe-related and procedural issues. Key causes include:
- Probe Design: Probes containing repetitive sequences (like Alu or LINE elements) can bind non-specifically, elevating background. This can be mitigated by adding blocking DNA like COT-1 during hybridization [2].
- Insufficient Washes: Inadequate stringency during post-hybridization washes is a common cause of high background. Washes must be performed at the correct temperature and pH to remove weakly bound, non-specific probes [2] [14] [5].
- Sample Over-fixation: Over-fixation with formalin can create excessive cross-linking, which masks target sequences and leads to non-specific probe binding and higher background [14].
- Probe or Reagent Drying: Allowing the probe or other reagents to dry onto the slide, particularly at the edges, causes heavy, non-specific staining [4].
- Incorrect Wash Buffers: Using distilled water or PBS without detergent (e.g., Tween 20) for washing steps can result in elevated background. The correct buffers, such as PBST, are essential [2].
Q: How can I improve the specificity and labeling efficiency of my probes?
Improving specificity and efficiency involves optimizing probe design, labeling methods, and using appropriate tags.
- Evaluate Labeling Efficiency: For precise quantification of how well your binders (e.g., antibodies, nanobodies) label the target, use a reference tag strategy. A molecular construct with a reference tag fused to your target protein allows you to correlate signals and calculate absolute labeling efficiency at the single-molecule level [15].
- Choose Conjugation Methods Carefully: The method used to conjugate dyes or other labels to your primary antibodies significantly impacts efficiency. For instance, enzymatic site-specific conjugation (e.g., transglutaminase vs. GlyCLICK) can lead to stark differences in labeling efficiency for the same antibody [15].
- Combine Tags and Binders: To boost overall labeling efficiency, consider concatenating multiple tags (e.g., GFP and ALFA-tag) on your target and using a combination of binders specific to each tag [15].
- Select the Right Probe Type: DNA probes are generally easy to prepare and work with, while single-stranded RNA probes can form more stable hybrids and achieve high label incorporation, which can enhance specificity [5].
Q: My negative controls are showing a signal. What does this indicate and how can I fix it?
Signal in negative controls points to non-specific binding or background staining.
- Confirm Probe Specificity: Ensure your negative control uses a verified non-specific probe. Signal with this probe indicates a fundamental issue with probe specificity or assay conditions [4].
- Optimize Hybridization Stringency: The hybridization temperature and buffer composition are critical. Temperature that is too low prevents specific binding, while temperature that is too high can promote non-specific binding. Typically, a range between 55°C and 62°C is used, and formamide in the buffer helps maintain morphology at lower temperatures [5].
- Check for Probe Contamination: Always use high-quality, purified DNA free of contaminants to synthesize probes. Change solutions frequently and use dedicated equipment to avoid cross-contamination [5].
- Verify Enzyme Activity: If using enzymatic detection, confirm that the enzyme conjugate is active by mixing a drop of conjugate with a drop of substrate. A color change should occur within minutes [2].
Q: What are the best practices for handling and storing probes to maintain their performance?
Proper handling and storage are crucial for preserving probe integrity and performance.
- Prevent Degradation: Protect probes from light exposure, especially fluorescently labeled ones, to prevent photobleaching [14].
- Ensure Purity: After probe synthesis, purify the probe to remove unincorporated nucleotides. Verify the yield, dye incorporation, and fragment length (e.g., a smear of 100-250 bp for DNA probes) to ensure quality [5].
- Use Fresh Buffers: Always use freshly prepared wash and fixation solutions. Degraded or contaminated buffers can fail to remove non-specifically bound probes and introduce background fluorescence [14].
- Store Appropriately: For some fixatives like Carnoy's solution, store at -20°C and discard after use to maintain effectiveness [14].
Quantitative Data on Labeling Efficiency
The table below summarizes absolute labeling efficiencies for various nanobodies and conjugation strategies, as determined by a single-protein level quantification method [15].
Table 1: Quantified Labeling Efficiencies of Common Binders
| Target Tag | Binder (Clone) | Labeling Efficiency | Notes |
|---|---|---|---|
| GFP | Nanobody (1H1) | ~50% | — |
| GFP | Nanobody (1H1 + 1B2) | 62% ± 5% | Combination of two clones targeting different epitopes |
| GFP + ALFA-tag | Nanobody (1H1+1B2) + ALFA-tag Nanobody | 76% ± 8% | Combined tags and binders on a single construct |
| mEOS2 | Nanobody (1E8) | <10% | — |
| CD80 | Antibody (Transglutaminase conjugation) | Varies | Efficiency is antibody-dependent |
| CD80 | Antibody (GlyCLICK conjugation) | ~7x lower | Stark difference for this specific antibody |
Detailed Experimental Protocols
Protocol 1: Quantifying Absolute Labeling Efficiency at the Single-Protein Level
This protocol enables precise measurement of binder labeling efficiency in a cellular context, crucial for quantitative interpretation of super-resolution data [15].
- Molecular Construct Design: Design a construct where your protein of interest (POI) is fused to a reference tag (e.g., ALFA-tag) at one terminus (N- or C-). The tag for which you want to test labeling efficiency (the target tag) is fused to the other terminus.
- Cell Transfection: Transiently transfect your cells with the constructed plasmid.
- Labeling: Label the sample with binders for both the reference tag and the target tag. These binders are conjugated to DNA strands for subsequent Exchange-PAINT imaging.
- Sequential Imaging: Perform a two-target Exchange-PAINT super-resolution experiment to independently resolve the locations of the reference and target binders with single-molecule sensitivity.
- Data Analysis:
- Cluster Identification: Apply a cluster algorithm to identify individual molecules from clouds of localizations.
- Cross Nearest Neighbor Distance (NND): Calculate the cross NND from each reference signal to its nearest target binder.
- Simulation and Fitting: Simulate reference and target molecules at the same experimental density for a range of possible labeling efficiencies. Find the most likely labeling efficiency by performing a least-squares minimization fit between the experimental and simulated NND histograms. Labeling efficiency is calculated as NRef+Target / (NRef + N_Ref+Target).
Protocol 2: Reducing High Background in FISH Assays
A step-by-step guide to troubleshoot and minimize background fluorescence [2] [4] [14].
Sample Preparation and Fixation:
- Use thin tissue sections (3-4 μm for FFPE) to ensure proper probe penetration [14] [5].
- Fix tissues promptly with freshly prepared formalin or paraformaldehyde. Avoid over-fixation (do not exceed 24 hours) or under-fixation, as both can increase background [14].
- For blood smears, use a hypotonic solution (e.g., potassium chloride) during fixation to reduce background [14].
Pretreatment and Permeabilization:
- Perform heat-induced epitope retrieval by heating sections in pretreatment buffer at 98°C for 15-30 minutes, depending on tissue type [2] [14].
- Digest with pepsin at 37°C for 3-10 minutes. Optimize this time for your specific tissue, as over-digestion can damage the sample and under-digestion can decrease signal [2].
- Ensure slides do not dry out at any point during pretreatment [2].
Denaturation and Hybridization:
Stringent Washes:
- After hybridization, rinse slides briefly at room temperature with SSC buffer.
- Perform a stringent wash by immersing slides in SSC buffer at 75°C for 5 minutes. Increase the temperature by 1°C per slide if washing more than 2 slides, but do not exceed 80°C [2].
- Rinse with TBST or PBST afterward. Do not use water or plain PBS, as this can cause background [2].
Detection and Counterstaining:
- Incubate with the enzyme conjugate (e.g., HRP) at 37°C for 30 minutes, then rinse with PBS.
- Develop the signal with a chromogenic substrate (e.g., DAB). Monitor the reaction under a microscope at 2-minute intervals and stop the reaction by rinsing with distilled water as soon as background begins to appear [2].
- Apply a light counterstain (e.g., Mayer's hematoxylin for 5-60 seconds) to avoid masking the specific signal [2].
Signaling Pathways and Workflows
Workflow for Quantifying Labeling Efficiency
Probe Design and Specificity Considerations
The Scientist's Toolkit: Key Research Reagent Solutions
Table 2: Essential Reagents for ISH Troubleshooting
| Reagent | Function | Key Consideration |
|---|---|---|
| COT-1 DNA | Blocks binding to repetitive sequences (e.g., Alu, LINE) to reduce background [2]. | Must be added during the hybridization step. |
| Charged Slides | Provides strong adhesion for tissue sections, preventing lift-off and uneven staining [4]. | Avoid protein-based adhesives on charged slides. |
| Formamide | Component of hybridization buffer; allows for lower hybridization temperatures, preserving tissue morphology [5]. | Typical concentration in buffer is 50%. |
| PNGase F & Transglutaminase | Enzymes for site-specific, Fc-targeted conjugation of DNA to primary antibodies [15]. | Labeling efficiency is highly dependent on the antibody and conjugation strategy. |
| Pepsin / Trypsin | Proteases for tissue digestion; unmask target nucleic acids by breaking cross-links from fixation [2] [5]. | Digestion time (3-10 min at 37°C) must be optimized for each tissue type. |
| Stringent Wash Buffer (SSC) | Removes non-specifically bound probes after hybridization. Critical for reducing background [2]. | Temperature must be tightly controlled (75-80°C). |
| Tween 20 (in PBST) | Detergent added to wash buffers; prevents non-specific hydrophobic interactions that cause background [2]. | Concentration of 0.025% is typical. |
| Histomount Mounting Medium | A non-aqueous, permanent mounting medium that preserves the stained section for imaging [2]. | Apply to wet sections, avoiding bubbles. |
What are the primary causes of high background in my in situ hybridization experiment?
High background staining in ISH experiments is frequently caused by two main categories of endogenous biomolecules: those that cause autofluorescence and those that interact with detection systems. The table below summarizes their sources and impacts.
Table 1: Primary Endogenous Causes of High Background in ISH
| Cause | Source | Impact on ISH |
|---|---|---|
| Autofluorescence | Flavoproteins, reduced pyridine nucleotides (NADH, NADPH), lipofuscin, and tryptophan in central nervous system (CNS) tissues and other sample types [16]. | Emits broad-spectrum light that masks specific fluorescent signals, leading to a low signal-to-noise ratio and unreliable imaging [17] [16]. |
| Endogenous Biotin | Naturally occurring in various tissues (e.g., liver, kidney, brain); a essential coenzyme for carboxylases [6]. | Binds to avidin- or streptavidin-based detection systems, causing non-specific chromogenic or fluorescent staining that is not related to probe hybridization [6]. |
How can I minimize or correct for cellular autofluorescence?
Autofluorescence, characterized by broad excitation and emission spectra, is a significant challenge, especially in metabolically active tissues like the brain [16]. The following strategies can help manage it.
A. Technical and Image Processing Corrections
- Time-Gated Microscopy with Lanthanide Probes: This advanced method uses luminescent lanthanide chelates (e.g., europium complexes), which have long luminescence lifetimes (up to milliseconds). A time-gated camera acquires images after the short-lived autofluorescence (nanosecond range) has completely decayed, resulting in a background-free image [16].
- Digital Image Subtraction: A method using the ratio of autofluorescence between multiple color images to perform pixel-by-pixel subtraction in digital images. This can enhance specific signals, making previously indistinguishable signals clearly visible [17].
B. Optimized Sample Handling and Reagents
- Use of Alternative Labels: Employing digoxigenin-labeled probes instead of biotin can circumvent issues related to endogenous biotin. Digoxigenin is a plant-derived molecule not found in mammalian tissues, ensuring detection is highly specific to the probe [6].
- Pre-hybridization with Random Oligonucleotides: For techniques like in situ Hybridization Chain Reaction (HCR), adding random oligonucleotides during pre-hybridization and hybridization steps can reduce non-specific background signals by blocking non-specific binding sites, improving the signal-to-noise ratio by 3 to 90 times [18].
- Optimized Fixation and Permeabilization: Avoid over-fixation, which can increase autofluorescence. Similarly, over-digestion with permeabilization agents like proteinase K can damage tissue morphology and increase background. Perform a titration to find the optimal concentration [2] [6].
Table 2: Methods for Correcting Autofluorescence in ISH
| Method | Principle | Best For |
|---|---|---|
| Time-Gated Microscopy | Exploits the long lifetime of lanthanide luminescence to exclude short-lived autofluorescence [16]. | High-precision, background-free imaging of low-abundance targets in highly autofluorescent tissues (e.g., brain and spinal cord). |
| Digital Image Subtraction | Computationally removes autofluorescence based on its spectral characteristics in digital images [17]. | Improving signal visibility in samples with uniform, predictable autofluorescence. |
| Probe Design & Blocking | Uses non-biotin labels and blocking agents to prevent non-specific signal at its source [18] [6]. | All ISH applications, particularly those using signal amplification or working with tissues rich in endogenous biotin. |
Diagram 1: A workflow for troubleshooting and correcting autofluorescence in ISH experiments.
How do I prevent non-specific staining from endogenous biotin?
Endogenous biotin is a common pitfall in ISH and IHC. The key is to block its activity before the detection step.
- Blocking with Avidin/Streptavidin and Biotin: Perform sequential blocking by first applying an avidin or streptavidin solution to bind all available endogenous biotin, followed by a biotin solution to block the remaining binding sites on the avidin/streptavidin. This ensures the detection reagents added later have nothing to bind to except the probe-associated biotin [6].
- Switch to Digoxigenin-Labeled Probes: The most effective strategy is to avoid biotin altogether. Using digoxigenin (DIG)-labeled probes with anti-digoxigenin antibodies for detection completely eliminates the problem of endogenous biotin, as the antibodies are highly specific to the digoxigenin hapten [6].
Diagram 2: Two primary strategies to overcome non-specific staining from endogenous biotin.
What are the best general practices to minimize all types of background?
A robust ISH protocol with careful attention to detail is the first line of defense against high background.
- Optimized Hybridization and Washes: Ensure hybridization temperature and wash stringency are correct. High background can occur if the stringent wash step is inadequate. For example, using a 1X SSC buffer at 75-80°C is often recommended [2]. Parameters like temperature, salt, and detergent concentration should be adjusted to remove non-specific interactions [10] [7].
- Prevent Sample Drying: Ensure that tissue sections do not dry out at any point during the ISH protocol, as drying causes massive non-specific probe binding and high background staining [2] [4]. Use a humidified chamber during all incubation steps.
- Use the Correct Wash Buffers: Always use wash buffers containing detergent (e.g., PBST - PBS with 0.025% Tween 20). Washing with PBS without Tween 20 or distilled water can lead to elevated background [2].
- Validate Reagent Activity and Specificity: Confirm that your enzyme conjugates (e.g., HRP, AP) are active by testing them with their substrate [2]. Also, check probe specificity to ensure it is not binding to repetitive sequences (e.g., Alu elements), which can be blocked with COT-1 DNA during hybridization [2].
- Control Counterstaining: A dark hematoxylin counterstain can mask a positive signal, particularly with DAB or NBT/BCIP chromogens. Use a light counterstain (e.g., 5 seconds to 1 minute) to ensure the ISH signal remains visible [2].
The Scientist's Toolkit: Key Research Reagent Solutions
Table 3: Essential Reagents for Troubleshooting Background in ISH
| Reagent / Material | Function | Considerations for Background Reduction |
|---|---|---|
| Digoxigenin (DIG)-Labeled Probes | A non-radioactive label for nucleic acid probes, detected with anti-DIG antibodies [10] [6]. | Avoids endogenous biotin issues; highly specific for low-background detection [6]. |
| Lanthanide Chelates (e.g., Europium) | Luminescent labels for probes used with time-gated microscopy [16]. | Enables background-free imaging by bypassing short-lived autofluorescence [16]. |
| Proteinase K | Enzyme for digesting proteins and permeabilizing the sample for probe access [10] [6]. | Concentration must be optimized; over-digestion damages tissue, under-digestion reduces signal [2] [6]. |
| COT-1 DNA | Unlabeled DNA rich in repetitive sequences [2]. | Added during hybridization to block non-specific binding of probes to repetitive genomic sequences, reducing background [2]. |
| Avidin/Biotin Blocking Solutions | Sequential solutions of avidin (or streptavidin) and free biotin [6]. | Essential for blocking endogenous biotin when using biotinylated probes. |
| Random Oligonucleotides | Short, non-specific DNA sequences [18]. | Used in HCR and other ISH methods to block non-specific binding sites during pre-hybridization, drastically reducing background [18]. |
| Charged Slides (e.g., Superfrost Plus) | Microscope slides with a charged surface to enhance tissue adhesion [19]. | Prevents tissue loss during stringent washes and avoids pooling of reagents under lifting sections, which causes uneven staining [4]. |
Best Practices in ISH: A Methodological Framework for Clean Results
Optimal Sample Fixation and Preparation Protocols for DNA and RNA Preservation
FAQs on Fixation and Preservation
1. What is the most critical factor for successful DNA/RNA preservation in tissue samples? Optimal and consistent fixation is paramount. Both under-fixation and over-fixation can compromise nucleic acid integrity and accessibility, leading to high background or weak signals in subsequent experiments like ISH. Use a known, standardized fixative (e.g., 10% Neutral Buffered Formalin) and adhere strictly to recommended fixation times and temperatures to ensure proper tissue preservation without excessive cross-linking [14] [4].
2. How can I prevent RNA degradation during sample collection? RNA is highly susceptible to degradation by ubiquitous RNases. To prevent this:
- Stabilize Immediately: Flash-freeze samples in liquid nitrogen or immerse them in RNA stabilization reagents (e.g., RNAlater) immediately after collection [20] [21].
- Work Quickly: Minimize the time between sample collection and stabilization or fixation [4] [20].
- Use an RNase-free environment: Designate a clean workspace, use RNase-free consumables, and wear gloves to prevent introduction of external RNases [20] [21].
3. My ISH experiments show high background staining. What are the most common causes? High background in ISH is frequently caused by:
- Insufficient Stringency Washes: Inadequate washing fails to remove non-specifically bound probes [2] [14] [22].
- Probe-Related Issues: Probes with repetitive sequences can cause background; this can be blocked by adding COT-1 DNA during hybridization [2] [22].
- Over-digestion during Pretreatment: Excessive protease or pepsin treatment can damage tissue and increase non-specific binding [2] [22].
- Sample Drying: Allowing slides to dry at any point during the hybridization or detection process can cause heavy, non-specific background staining [2] [4].
4. Are some tissues more challenging for nucleic acid preservation and isolation? Yes, tissues high in endogenous nucleases (e.g., pancreas) or lipid content (e.g., brain, adipose tissue) are particularly challenging. For these tissues, more rigorous isolation methods, such as phenol-based extraction (e.g., TRIzol), are recommended over standard column-based kits to ensure high-quality yields [21].
Troubleshooting Guide: High Background in In Situ Hybridization
High background signal can obscure results and lead to erroneous conclusions. The following table outlines common causes and their specific solutions.
| Problem Area | Specific Cause | Recommended Solution |
|---|---|---|
| Sample Preparation & Fixation | Under-fixation [14] | Use freshly prepared fixative and adhere strictly to recommended fixation times [14]. |
| Over-fixation [14] | Avoid excessive cross-linking by standardizing fixation conditions; may require extended retrieval for FFPE [14] [23]. | |
| Pretreatment | Insufficient pre-treatment [14] | Ensure adequate heat-induced epitope retrieval and enzymatic digestion to unmask target sequences [2] [14]. |
| Over-digestion [2] [22] | Optimize protease/pepsin digestion time and temperature (e.g., 3-10 min at 37°C for many tissues) [2]. | |
| Hybridization & Probes | Probes with repetitive sequences [2] | Add blocking DNA (e.g., COT-1 DNA) to the hybridization mix to prevent non-specific binding [2]. |
| Incorrect denaturation [14] | Ensure denaturation is performed at 95 ± 5°C for 5-10 minutes; avoid temperatures that are too high or times that are too long [2] [14]. | |
| Washing | Low stringency wash [2] [14] | Perform stringent washes with appropriate buffer (e.g., SSC) at the correct temperature (75-80°C) and duration [2] [14]. |
| Incorrect wash buffer [2] | Always use buffers containing detergent (e.g., PBST) as specified; washing with water or PBS alone can cause high background [2]. | |
| Detection & Staining | Reaction over-development [2] | Monitor the development of the chromogenic signal under a microscope and stop the reaction by rinsing in water as soon as background appears [2]. |
| Excessive counterstaining [2] | Use a light counterstain (e.g., Mayer’s hematoxylin for 5-60 seconds) to avoid masking the specific signal [2]. |
Experimental Protocols for Optimal Preservation
Protocol 1: Standardized Fixation for Formalin-Fixed Paraffin-Embedded (FFPE) Tissues
This protocol is critical for preserving morphology and nucleic acids for techniques like ISH and FISH.
Key Materials:
- Fresh 10% Neutral Buffered Formalin (NBF) [23]
- Positively Charged Microscope Slides (e.g., Superfrost Plus) [4] [23]
- Tissue Processing and Embedding System
Methodology:
- Immersion Fixation: Immediately upon dissection, immerse tissue in a sufficient volume of 10% NBF (typically 10:1 fixative-to-tissue ratio) [2] [23].
- Fixation Time: Fix at room temperature for 24-48 hours. Prolonged fixation can lead to excessive cross-linking, while short fixation risks under-preservation [14] [4].
- Processing: After fixation, dehydrate the tissue through a graded series of alcohols, clear with xylene, and infiltrate with paraffin using a standard histological processor.
- Embedding and Sectioning: Embed tissue in paraffin blocks and section at a thickness of 3-4 μm [14]. Float sections on a warm water bath and mount on positively charged slides.
- Slide Storage: Dry slides thoroughly, preferably overnight, at 37°C or on a slide warmer. Store at room temperature or 4°C until use.
Protocol 2: RNA Preservation from Challenging Tissues for Downstream Analysis
This protocol is optimized for tissues high in RNases or lipids.
Key Materials:
- TRIzol Reagent [24] [21] or a dedicated kit like the PureLink RNA Mini Kit [21]
- Liquid Nitrogen
- RNaseZap Decontamination Solution [21]
- RNase-free tubes and tips
Methodology:
- Stabilization:
- Option A (Flash-freezing): For solid tissues, rapidly dissect into small pieces (<0.5 cm) and immediately submerge in liquid nitrogen. Store at -80°C until processing [20] [21].
- Option B (Stabilization Solution): For easier handling, place small tissue pieces directly into 5-10 volumes of RNAlater, store overnight at 4°C, then remove and store at -80°C [24] [21].
- Homogenization: Under a designated RNase-free fume hood, homogenize the frozen or stabilized tissue in TRIzol reagent using a thoroughly cleaned rotor-stator homogenizer. Ensure all equipment is treated with RNaseZap [21].
- RNA Isolation: Follow the manufacturer's instructions for the TRIzol or column-based isolation method. This typically involves phase separation with chloroform, RNA precipitation with isopropanol, and washing with ethanol [24] [21].
- DNase Treatment: To remove genomic DNA contamination, perform an on-column DNase digestion step if using a kit [21].
- RNA Storage: Elute or resuspend the purified RNA in RNase-free water or TE buffer. Aliquot to avoid freeze-thaw cycles and store at -80°C for long-term preservation [20] [21].
Signaling Pathways and Workflows
The following diagram illustrates the critical decision points and procedures in the sample preparation workflow, highlighting how choices impact downstream outcomes like background signal.
Diagram: Impact of Sample Preparation on ISH/FISH Outcomes
The Scientist's Toolkit: Key Research Reagent Solutions
The following table details essential materials and reagents referenced in the protocols and troubleshooting guides.
| Reagent / Material | Function / Purpose | Key Considerations |
|---|---|---|
| 10% Neutral Buffered Formalin (NBF) | Standard fixative for FFPE tissues; preserves morphology and nucleic acids. | Always use freshly prepared; standardize fixation time to avoid under/over-fixation [14] [23]. |
| RNAlater Stabilization Solution | Stabilizes and protects cellular RNA in unfrozen tissues prior to homogenization. | Tissue must be dissected into small pieces (<0.5 cm) for rapid penetration [24] [21]. |
| TRIzol Reagent | Monophasic solution of phenol and guanidine isothiocyanate for effective lysis and isolation of total RNA. | Ideal for challenging tissues (high in fat, RNases); requires careful handling [24] [21]. |
| Positively Charged Slides (e.g., Superfrost Plus) | Provides superior adhesion for tissue sections, preventing tissue loss during processing. | Critical for multi-step ISH protocols to avoid losing samples [4] [23]. |
| COT-1 DNA | Used to block non-specific hybridization of repetitive sequences (e.g., Alu, LINE) in probes. | Reduces high background staining in ISH/FISH [2]. |
| Protease / Pepsin | Enzyme for digesting proteins surrounding target nucleic acids, improving probe accessibility. | Concentration and time must be optimized; over-digestion damages tissue [2] [22]. |
| Stringent Wash Buffer (e.g., SSC with Tween 20) | Removes unbound and weakly bound probes after hybridization to reduce background. | Temperature (75-80°C), salt concentration, and duration are critical for stringency [2] [14]. |
FAQ: DNA vs. RNA Probes - Core Differences and Selection Criteria
What are the fundamental differences between DNA and RNA probes?
DNA and RNA probes, while both used to detect nucleic acid sequences, have distinct biochemical properties and are synthesized differently. DNA probes are typically labeled fragments of DNA, either single or double-stranded, that are complementary to a specific target sequence. RNA probes are stretches of single-stranded RNA used for the same purpose, but they are almost exclusively generated through a method called in vitro transcription [25].
The table below summarizes their key characteristics:
| Feature | DNA Probes | RNA Probes |
|---|---|---|
| Composition | Deoxyribonucleic Acid | Ribonucleic Acid |
| Common Synthesis Methods | Nick Translation, PCR, Random Priming [25] | In vitro Transcription [25] |
| Thermal Stability | High | Generally lower; more susceptible to degradation [25] |
| Hybridization Efficiency | Good | Superior; RNA-DNA hybrids are more stable than DNA-DNA hybrids [26] |
| Typical Use Cases | Detecting DNA targets (e.g., gene loci on chromosomes), FISH [2] | Detecting RNA targets, sensitive applications requiring strong signal [25] [26] |
How do I choose between a DNA probe and an RNA probe for my experiment?
Your choice should be guided by your experimental goal, the target molecule, and the required sensitivity.
- For Detecting DNA Targets (e.g., gene loci, chromosomal rearrangements): DNA probes are often the preferred and more robust choice [2].
- For Detecting RNA Targets (e.g., mRNA localization, gene expression): RNA probes are generally superior due to their higher hybridization efficiency, which can lead to a stronger signal [2]. They are particularly useful for sensitive detection of low-abundance transcripts.
- For Enrichment in Next-Generation Sequencing (NGS): Recent studies show a performance trade-off. RNA probes demonstrate superior enrichment efficiency, yielding higher mapping rates and sequencing depth. However, DNA probes are more effective at reducing artifacts caused by nuclear mitochondrial DNA segments (NUMTs), leading to fewer false positives in mutation detection [26].
Troubleshooting Guide: Resolving High Background in ISH
High background fluorescence or staining is a common challenge that can obscure results and lead to erroneous conclusions. The following FAQs address its primary causes and solutions.
Why is my background staining so high, and how can I reduce it?
High background can stem from multiple aspects of your ISH procedure. The diagram below outlines the primary troubleshooting workflow and the key parameters to check.
Probe-Related Causes and Fixes
- Cause: Probes with Repetitive Sequences. If your probe contains a lot of repetitive sequences like Alu or LINE elements, it can bind non-specifically across the genome, elevating background staining [2].
- Fix: Add unlabeled blocking DNA, such as COT-1 DNA, during the hybridization step to competitively inhibit probe binding to these repetitive regions [2].
- Cause: Suboptimal Probe Concentration or Denaturation.
- Fix: Precisely follow the manufacturer's protocol for probe volume. Verify and optimize the denaturation temperature and time for your specific sample type (e.g., FFPE tissue requires careful optimization) [14].
Washing and Stringency Causes and Fixes
- Cause: Inadequate Stringent Washes. The stringent wash is critical for removing probes that are weakly or non-specifically bound to imperfectly matched sequences [2] [22].
- Fix: Ensure the stringent wash is performed at the correct temperature (commonly 75–80°C for CISH) and with the proper salt concentration (e.g., SSC buffer) [2]. Increase the stringency incrementally if background persists, but avoid conditions so harsh that they remove your specific signal.
- Cause: Poor Quality Wash Buffers. Degraded or contaminated buffers can fail to remove unbound probes effectively [14].
- Fix: Always use freshly prepared wash buffers [14].
Sample Preparation and Detection Causes and Fixes
- Cause: Improper Fixation. Both under-fixation and over-fixation can lead to high background. Under-fixation fails to preserve cellular structure, leading to non-specific probe binding. Over-fixation causes excessive cross-linking, which can trap probes and mask targets, also increasing background [14].
- Fix: Adhere strictly to recommended fixation times and use freshly prepared fixative solutions [14].
- Cause: Dark Counterstaining. A very dark counterstain, such as over-staining with hematoxylin, can mask the specific signal and make background particulate matter more prominent [2].
- Fix: Use a light counterstain (e.g., 5 seconds to 1 minute in Mayer's hematoxylin) to enhance contrast without obscuring your result [2].
- Cause: Worn Microscope Filters. Damaged or degraded optical filters on your fluorescence microscope can produce a mottled appearance and weaken the specific signal, making background noise more apparent [14].
- Fix: Inspect filters for damage and replace them according to the manufacturer's guidelines, typically every 2-4 years [14].
My positive control works, but my experimental sample has a weak or absent signal. What should I do?
A weak or absent signal despite a working control points to issues with the target accessibility or the probe hybridization in your specific sample.
- Cause: Inadequate Digestion / Permeabilization. Proteins surrounding the target nucleic acid can prevent the probe from reaching its target [22].
- Fix: Optimize the enzyme (e.g., pepsin, proteinase K) digestion time and temperature for your tissue type. Between 3-10 minutes at 37°C is a common starting point, but this must be optimized, as over-digestion can damage morphology and under-digestion will block probe access [2] [27].
- Cause: Target Degradation. If the time between obtaining the tissue and fixing it is too long, the RNA or DNA target can degrade, leading to a false negative [2].
- Fix: Minimize the time from sample collection to fixation. Ensure the tissue specimen is an appropriate size for the volume of fixative to ensure rapid and complete penetration [2].
- Cause: Suboptimal Hybridization Conditions. The hybridization temperature, time, or buffer may not be correct for your probe-sample combination [22].
- Fix: Verify that the hybridization temperature is optimized for your probe's sequence and sample type. Ensure the hybridization is performed in a humidified chamber to prevent the slide from drying out, which can cause high, non-specific background [2].
Detailed Experimental Protocol: RNA-ISH with High-Sensitivity Probes
The following protocol provides a generalized workflow for detecting RNA targets using advanced RNA probes, such as those utilizing signal amplification technologies [25].
Principle: Labeled RNA probes are hybridized to specific RNA targets in fixed cells or tissues. The probes are designed with non-hybridizing, enzyme-labeled regions (e.g., biotin or digoxigenin). After hybridization, chromogenic development is used to visualize the precise spatial localization of the target RNA [25].
Solutions and Reagents
| Stage | Essential Reagents |
|---|---|
| Sample Preparation | Coating solution, fresh fixative (e.g., formaldehyde, paraformaldehyde), wash buffers [22] [14]. |
| Pretreatment | Protease (e.g., pepsin, proteinase K), hydrochloric acid, blocking buffer (e.g., to block endogenous alkaline phosphatase or biotin) [2] [22]. |
| Hybridization | Target-specific RNA probes (e.g., AMPIVIEW), hybridization buffer, coverslips [25] [22]. |
| Post-Hybridization Washes | Saline-sodium citrate (SSC) buffer, PBST (PBS with Tween 20) [2]. |
| Detection | Enzyme conjugate (e.g., HRP- or AP- conjugated anti-biotin or anti-digoxigenin), chromogenic substrate (e.g., DAB for HRP, NBT/BCIP for AP), Mayer's Hematoxylin for counterstaining, aqueous mounting medium [2]. |
Step-by-Step Procedure
Sample Preparation and Fixation:
- Prepare tissue sections (3-4μm thick for FFPE) or cells on positively charged slides to ensure adhesion [14].
- Fix samples promptly with an appropriate fixative. For many RNA targets, fixation with 4% paraformaldehyde for 15-30 minutes is effective. Critical: Avoid over-fixation, as it can mask the target sequence [14].
Pretreatment and Permeabilization:
- Deparaffinize and rehydrate FFPE sections if needed.
- Perform heat-induced epitope retrieval (HIER) by heating in an appropriate buffer (e.g., citrate-based) at 98°C for 15 minutes [2].
- Treat with protease (e.g., pepsin at 37°C for 3-10 minutes) to digest proteins surrounding the RNA and increase probe accessibility. Tip: Optimize this time for your specific tissue; over-digestion degrades morphology, under-digestion reduces signal [2].
- Apply a blocking agent to inhibit non-specific binding from endogenous enzymes or proteins [22].
Hybridization:
- Prepare the probe by diluting it in the appropriate hybridization buffer. For some probes, denaturation at 85°C for 5 minutes is required before use [2].
- Apply the diluted probe to the sample and cover with a coverslip. Ensure no air bubbles are trapped.
- Incubate the slides in a humidified hybridization chamber at 37°C for the recommended time, typically 16 hours (overnight) [2].
Post-Hybridization Washes and Stringency Control:
- Remove coverslips by soaking slides in a wash buffer (e.g., PBST).
- Perform a stringent wash to remove weakly bound probes. A common method is to immerse slides in SSC buffer (e.g., 1X SSC) at 75-80°C for 5 minutes [2].
- Rinse slides with TBST or PBST. Critical: Do not use water or PBS without detergent at this stage, as it can increase background [2].
Signal Detection and Chromogenic Development:
- Incubate slides with the enzyme conjugate (e.g., HRP-anti-biotin) at 37°C for 30 minutes. Rinse thoroughly with PBS.
- Apply the chromogenic substrate (e.g., DAB for HRP) and monitor the development of the colored precipitate under a microscope. Stop the reaction by rinsing with distilled water the moment background staining begins to appear [2].
- Apply a light counterstain (e.g., Mayer's hematoxylin for 5-60 seconds) to visualize tissue architecture [2].
- Mount the slides with an aqueous mounting medium and proceed to imaging.
The Scientist's Toolkit: Essential Research Reagent Solutions
| Reagent / Kit | Primary Function | Key Application |
|---|---|---|
| Nick Translation DNA Labeling Kit [25] | Enzymatic incorporation of labeled nucleotides (Fluorophore, Biotin, Digoxigenin) into DNA probes. | Generating labeled DNA probes for use in FISH, CISH, and Southern blotting. |
| Custom RNA Probes (e.g., AMPIVIEW) [25] | Provide high-sensitivity, target-specific probes with built-in signal amplification technology. | Sensitive detection of RNA or DNA targets in cells and tissue while preserving morphology. |
| Cytocell LPS 100 Tissue Pretreatment Kit [14] | Standardized heat and enzyme treatment for FFPE tissue sections. | Optimizing sample pretreatment to maximize target accessibility and minimize background in FISH. |
| CO-T-1 DNA [2] | Unlabeled DNA that blocks repetitive genomic sequences. | Reducing non-specific background staining caused by probe binding to repetitive elements. |
| Mayer's Hematoxylin [2] | A light, nuclear counterstain. | Providing contrast by staining cell nuclei without masking the specific chromogenic signal. |
| DAB (3,3'-Diaminobenzidine) [2] | Chromogenic substrate for Horseradish Peroxidase (HRP). | Producing an insoluble brown precipitate at the site of probe hybridization. |
FAQs: Troubleshooting High Background in ISH
Why is my ISH background staining too high, and how can I reduce it?
High background is a common challenge that can obscure your specific signal. The causes and solutions are multifaceted:
- Inadequate Stringent Washing: Insufficient washing after hybridization is a primary cause. For optimal results, perform a post-hybridization wash with SSC buffer (e.g., 1X SSC) at a temperature between 75–80°C for 5 minutes [2].
- Probe-Related Issues: Probes containing repetitive sequences (like Alu or LINE elements) can bind non-specifically. This can be mitigated by adding blocking agents such as COT-1 DNA to your hybridization mixture [2].
- Incorrect Wash Buffer: Using PBS or distilled water without detergent during washing steps can elevate background. Always use the recommended buffers containing a mild detergent like Tween 20 (e.g., PBST) to minimize non-specific interactions [8] [2].
- Over-development with Chromogen: Allowing the chromogen reaction (e.g., DAB) to proceed for too long leads to diffuse background stain. Monitor the reaction under a microscope and stop it by rinsing with distilled water as soon as specific signal appears and before background develops [8] [2].
What causes weak or absent ISH staining?
A weak or absent signal can result from problems at various stages of your protocol:
- Suboptimal Enzyme Pretreatment (Digestion): Enzyme digestion is critical for unmasking targets. Both over-digestion and under-digestion with enzymes like pepsin can weaken or eliminate the signal. The optimal digestion time (e.g., 3–10 minutes at 37°C for pepsin) must be determined for your specific tissue and fixation conditions [2].
- Ineffective Heat-Induced Epitope Retrieval (HIER): HIER is often necessary to expose nucleic acid targets. Using the wrong buffer or insufficient heating can cause failure. Ensure the retrieval buffer reaches and maintains the correct temperature (e.g., 98°C) for the full duration [2] [28].
- Poor Fixation or Tissue Handling: A long delay between tissue collection and fixation, or using an inadequate volume of fixative, degrades the target and leads to poor results. Ensure immediate and standardized fixation protocols are followed [4].
- Inactive Reagents: Always confirm that your enzyme conjugates (e.g., HRP) are active by testing them with their substrate in a small tube. A color change should occur within a few minutes [2].
Quantitative Data for Pre-treatment Optimization
Table 1: Heat-Induced Epitope Retrieval (HIER) Buffer Comparison
| Buffer Composition | Typical pH Range | Common Applications & Notes |
|---|---|---|
| Sodium Citrate [29] [28] | 6.0 | A very popular, general-purpose buffer. Suitable for a wide range of antigens. |
| Tris-EDTA [29] [28] | 9.0 | Often provides excellent antigen recovery, particularly for more challenging targets. |
| EDTA [29] [28] | 8.0 | Known for strong retrieval efficacy, but may cause more tissue damage compared to citrate. |
Table 2: Enzyme Digestion Conditions for Antigen Retrieval
| Enzyme | Typical Concentration | Incubation Conditions | Key Considerations |
|---|---|---|---|
| Pepsin [2] | Not Specified | 3-10 minutes at 37°C | Conditions are tissue-dependent. Over-digestion eliminates signal; under-digestion decreases signal. |
| General Proteases | Varies | Varies by specific enzyme | Can risk tissue damage or non-specific staining; concentration and time require empirical optimization [28]. |
Experimental Protocols for Key Pre-treatment Methods
Protocol 1: Heat-Induced Epitope Retrieval (HIER) Using a Pressure Cooker
This method is efficient and widely used for consistent results [28].
Materials:
- Domestic stainless steel pressure cooker and hot plate
- Antigen retrieval buffer (e.g., Citrate pH 6.0, Tris-EDTA pH 9.0)
- Metal slide rack
Method:
- Add antigen retrieval buffer to the pressure cooker and begin heating on a full-power hot plate.
- While the buffer is heating, deparaffinize and rehydrate your tissue sections using standard histological methods.
- Once the buffer is boiling, transfer the slides from tap water into the pressure cooker.
- Secure the lid as per the manufacturer's instructions. Once full pressure is reached, start the timer and process the slides for 3 minutes [28].
- After 3 minutes, turn off the hotplate. Place the pressure cooker in a sink, activate the pressure release valve, and run cold water over the cooker to depressurize and cool it.
- Open the lid and run cold water into the cooker for 10 minutes to cool the slides completely.
- Proceed with your ISH or IHC staining protocol.
Protocol 2: Enzymatic Antigen Retrieval
Enzymatic methods can be effective but require careful optimization to avoid tissue damage [2] [28].
Materials:
- Enzyme solution (e.g., Pepsin)
- Humidified incubation chamber at 37°C
Method:
- Following deparaffinization and rehydration, rinse the slides with the recommended buffer.
- Pipette the pre-warmed enzyme solution onto the tissue section, ensuring complete coverage.
- Incubate the slides in a humidified chamber at 37°C. The incubation time must be optimized for your system. A starting range of 3-10 minutes is recommended for pepsin [2].
- After incubation, thoroughly rinse the slides with distilled water or an appropriate buffer to stop the enzymatic reaction.
- Continue with the subsequent steps of your staining protocol.
Pre-treatment Optimization Workflow
The following diagram outlines the logical decision-making process for troubleshooting and optimizing pre-treatment methods to reduce high background and improve signal in ISH.
The Scientist's Toolkit: Essential Research Reagent Solutions
Table 3: Key Reagents for Pre-treatment and Troubleshooting
| Reagent | Function | Application Notes |
|---|---|---|
| Citrate Buffer (pH 6.0) [29] [28] | A common buffer for HIER to break formaldehyde cross-links and unmask epitopes. | A versatile, first-choice buffer for many targets. |
| Tris-EDTA Buffer (pH 9.0) [29] [28] | An alternative alkaline pH retrieval buffer for more challenging targets. | Often effective when citrate fails. |
| Pepsin [2] | A protease enzyme for enzymatic retrieval, digesting proteins masking the target. | Requires careful optimization of time and concentration to avoid tissue damage. |
| SSC Buffer [2] | Saline-sodium citrate buffer used for post-hybridization stringent washes. | Critical for removing non-specifically bound probe; temperature-sensitive. |
| COT-1 DNA [2] | Used to block hybridization to repetitive DNA sequences in the genome. | Reduces non-specific background when using probes containing repetitive elements. |
| Tween 20 [8] [2] | A mild detergent added to wash buffers (e.g., PBST). | Reduces hydrophobic interactions and non-specific binding, lowering background. |
| HRP Conjugate & DAB [8] [2] | Enzyme conjugate and chromogen system for colorimetric detection. | Monitor development microscopically to prevent over-development and high background. |
Research Reagent Solutions
The following table details key reagents essential for controlling hybridization precision and managing background noise.
| Reagent Type | Specific Examples | Function in Controlling Precision & Background |
|---|---|---|
| Blocking Agents | Casein, BSA, Denatured Salmon Sperm DNA [30] | Reduces non-specific attachment of the probe to the membrane or tissue, lowering background signal. |
| Helix-Destabilizing Reagents | Formamide [31] | Lowers the effective melting temperature (Tm), allowing for stringent hybridization at lower temperatures that preserve tissue morphology. |
| Stringent Wash Buffers | Saline Sodium Citrate (SSC) [2] [30] | The salt concentration regulates stringency; low salt concentrations increase stringency to wash away imperfectly matched hybrids. |
| Proteases | Pepsin [2] | Digests proteins surrounding the target nucleic acid, increasing probe accessibility and signal strength. |
| Detergents | Tween 20, SDS [2] [30] | Added to wash buffers (e.g., PBST) to reduce electrostatic interactions and lower background staining. |
FAQs: Troubleshooting High Background
1. What are the primary factors that cause high background in my hybridization experiment?
High background is most frequently caused by insufficient stringency during the washing steps or non-specific probe interactions [2] [22] [27]. This can be broken down into several specific causes:
- Inadequate Stringent Washes: The temperature of your stringent wash may be too low, or the salt concentration may be too high, preventing the removal of partially matched probes [2].
- Probe Design: Probes that contain repetitive sequences (like Alu or LINE elements) can bind non-specifically throughout the genome, elevating background [2].
- Sub-optimal Wash Buffers: Using the wrong wash solution, such as distilled water or PBS without a detergent like Tween 20, can lead to elevated background [2].
- Over-digestion during Pretreatment: Excessive protease treatment can degrade tissue morphology and increase non-specific probe binding, contributing to background [22].
2. How do I precisely control stringency to eliminate background without losing my specific signal?
Stringency is controlled by both temperature and salt concentration during hybridization and post-hybridization washes. The relationship is inverse for these two parameters [30]:
- High Stringency: High Temperature and Low Salt concentration. This favors the formation of only perfectly matched hybrids.
- Low Stringency: Low Temperature and High Salt concentration. This allows imperfectly matched hybrids to form.
For a typical stringent wash using SSC buffer, a temperature of 75-80°C is recommended [2]. If you are washing multiple slides, increase the temperature by approximately 1°C per slide, but do not exceed 80°C [2].
3. My specific signal is weak, but the background is high. What steps should I take?
This combination of problems suggests that while your probe is binding, it is doing so non-specifically. Your troubleshooting should focus on improving the specificity of binding.
- Verify Probe and Conjugate Match: Ensure that biotin-labeled probes are used with an anti-biotin conjugate and digoxigenin-labeled probes with an anti-digoxigenin conjugate [2].
- Check Enzyme Substrate Compatibility: Confirm that HRP is used with DAB or AEC, and alkaline phosphatase is used with NBT/BCIP or Fast Red [2].
- Optimize Pretreatment: Both over-digestion and under-digestion with protease can decrease or eliminate the specific signal [2]. A typical range is 3-10 minutes at 37°C, but this must be optimized for your specific tissue type [2].
- Add Blockers for Repetitive Sequences: If your probe contains repetitive sequences, add unlabeled COT-1 DNA to the hybridization mixture to block non-specific binding sites [2].
4. How does the chemical composition of the hybridization buffer influence precision?
The hybridization buffer is not merely a solvent; its components are critical for controlling the kinetics and specificity of the reaction.
- Formamide: This reagent destabilizes DNA duplexes, effectively lowering the melting temperature. This allows you to perform hybridization at a lower temperature (e.g., 37°C), which preserves tissue morphology, while still maintaining high specificity [31].
- Dextran Sulfate: This anionic polymer acts to exclude volume, which locally concentrates the probe and enhances the rate of hybridization [31].
- Monovalent Cations: Provided by salts like NaCl in SSC buffer, cations shield the natural negative repulsion between the phosphate backbones of the probe and target. High salt concentration produces low stringency conditions, while low salt concentration increases stringency [31].
Quantitative Data for Experimental Control
The tables below summarize key quantitative parameters for critical steps in the hybridization workflow.
Table 1: Temperature and Time Parameters for Key Steps [2] [22]
| Experimental Step | Temperature Range | Time Range | Additional Notes |
|---|---|---|---|
| Heat-Induced Epitope Retrieval | 98°C | 15 minutes | Time starts when buffer reaches target temperature. |
| Protease Digestion (Pepsin) | 37°C | 3 - 10 minutes | Must be optimized for specific tissue type to avoid over- or under-digestion. |
| Denaturation | 95 ± 5°C | 5 - 10 minutes | Slides should be cover-slipped and performed in a moist environment. |
| Hybridization | 37°C | 16 hours (overnight) | Optimum for specificity; conducted in a humidified chamber. |
| Stringent Wash | 75 - 80°C | 5 minutes | Using SSC buffer; critical for reducing background. |
| Enzyme Conjugate Incubation | 37°C | 30 minutes | Follow with multiple rinses in PBS buffer. |
Table 2: Parameters for Managing Signal Detection [2]
| Parameter | Recommended Specification | Impact on Precision |
|---|---|---|
| Substrate Incubation (DAB) | 5 - 15 minutes at 37°C | Monitor under microscope at 2-minute intervals; stop reaction (rinse in water) the moment background appears. |
| Counterstaining (Hematoxylin) | 5 seconds - 1 minute | A dark counterstain can mask a positive signal; Mayer’s hematoxylin is recommended. |
Detailed Experimental Protocol: Stringent Wash for Background Reduction
This protocol is critical for removing partially matched probes that cause high background.
Methodology:
- Post-Hybridization Rinse: After hybridization, briefly rinse the slides at room temperature with SSC buffer to remove the bulk of the hybridization solution [2].
- High-Temperature Stringent Wash: Immerse the slides in a fresh container of pre-warmed SSC buffer. Place the container in a water bath or oven set to 75°C for 5 minutes [2].
- Adjust for Multiple Slides: If washing more than two slides simultaneously, increase the temperature by 1°C per slide to compensate for heat dispersion, but do not exceed 80°C [2].
- Final Rinse: After the stringent wash, rinse the slides with a buffer like TBST or PBST. Avoid using water or plain PBS at this stage, as this can contribute to background [2].
Workflow and Relationship Diagrams
Diagram 1: Troubleshooting high background in hybridization experiments.
Diagram 2: Relationship between stringency parameters and experimental outcomes.
Frequently Asked Questions
What is the most common mistake when setting up a detection system? The most frequent error is a mismatch between the probe label, the conjugate, and the enzyme substrate. For example, using a biotin-labeled probe requires an anti-biotin conjugate, and an HRP-conjugated antibody must be used with DAB or AEC, not with an AP substrate like NBT/BCIP [2].
My negative control shows high background. What does this indicate? High background in a negative control (where the primary antibody or probe is omitted) strongly suggests that the secondary antibody or the detection system itself is binding non-specifically. This can be due to endogenous enzymes, endogenous biotin, or cross-reactivity with tissue components [32] [33] [34].
How can I reduce high background that appears evenly across my tissue section? Start by optimizing your washing steps, particularly the stringency wash. Ensure you are using the correct buffer (e.g., SSC) at the proper temperature (typically 75-80°C) [2]. Also, titrate your primary antibody and probe, as concentrations that are too high are a common cause of uniform background [32] [34].
The background is only high at the edges of the section. What is the cause? This pattern typically indicates that the tissue section dried out at some point during the procedure, which concentrates reagents and leads to edge artifacts. Always ensure slides remain hydrated in a humidified chamber [35] [4].
My chromogen signal is weak, but the background is low. What should I check? Verify the activity of your enzyme conjugate by testing it with its substrate alone; a color change should occur within minutes [2]. Also, check that your detection method is sensitive enough for your target abundance and consider using signal amplification methods like tyramide signal amplification (TSA) for low-abundance targets [2] [36].
Matching Conjugates, Enzymes, and Substrates
A properly matched detection system is fundamental to a successful experiment. The table below outlines the correct combinations to generate a specific signal while minimizing background.
| Probe Label | Conjugate (Binder) | Enzyme | Compatible Substrates | Precipitate Color |
|---|---|---|---|---|
| Biotin | Anti-Biotin, Streptavidin [2] | Horseradish Peroxidase (HRP) | DAB, AEC [2] | Brown/Black, Red [37] |
| Biotin | Anti-Biotin, Streptavidin [2] | Alkaline Phosphatase (AP) | NBT/BCIP, Fast Red [2] | Dark Blue/Purple, Red [37] |
| Digoxigenin | Anti-Digoxigenin [2] | Horseradish Peroxidase (HRP) | DAB, AEC [2] | Brown/Black, Red [37] |
| Digoxigenin | Anti-Digoxigenin [2] | Alkaline Phosphatase (AP) | NBT/BCIP, Fast Red [2] | Dark Blue/Purple, Red [37] |
| Fluorescein | Anti-Fluorescein [22] | Horseradish Peroxidase (HRP) | DAB, AEC [2] | Brown/Black, Red [37] |
| Fluorescein | Anti-Fluorescein [22] | Alkaline Phosphatase (AP) | NBT/BCIP, Fast Red [2] | Dark Blue/Purple, Red [37] |
Substrate Properties and Selection
Choosing the right chromogenic substrate involves balancing sensitivity, signal color, and solubility. The following table compares common options to guide your selection.
| Substrate | Compatible Enzyme | Precipitate Color | Solubility | Key Characteristics |
|---|---|---|---|---|
| DAB | HRP [2] | Brown to Black | Insoluble in organic solvents [37] | Intense, permanent color; contrasts well with blue hematoxylin counterstain [37]. |
| AEC | HRP [2] | Red | Soluble in organic solvents [37] | Requires aqueous mounting medium; alcohol-soluble [2] [37]. |
| NBT/BCIP | AP [2] | Dark Blue to Purple | Insoluble in organic solvents [37] | Highly sensitive; stable precipitate; compatible with permanent mounting [37]. |
| Fast Red | AP [2] | Red | Soluble in organic solvents [37] | Yields an alcohol-soluble red precipitate; can be light-sensitive [2] [37]. |
Troubleshooting High Background
High background staining can arise from numerous sources. The following workflow provides a systematic approach to identifying and resolving the most common causes.
The Scientist's Toolkit: Essential Reagents for Clean Detection
Having the right reagents on hand is crucial for both preventing and troubleshooting background issues.
| Reagent Type | Example Products | Function |
|---|---|---|
| Endogenous Enzyme Block | 3% H₂O₂, Levamisole, BLOXALL [35] [32] [33] | Quenches activity of endogenous peroxidases or alkaline phosphatases to prevent false-positive signals. |
| Endogenous Biotin Block | Avidin/Biotin Blocking Kit [35] [33] [34] | Blocks endogenous biotin present in tissues like liver and kidney when using biotin-based detection. |
| Blocking Serum | Normal Serum from secondary antibody species [35] [32] | Reduces non-specific binding of secondary antibodies to tissue components. |
| Species-on-Species Block | M.O.M. (Mouse on Mouse) Blocking Reagent [32] | Essential for blocking endogenous Ig when using a mouse primary antibody on mouse tissue. |
| Stringent Wash Buffer | Saline-Sodium Citrate (SSC) Buffer [2] | Used at controlled temperatures to remove weakly bound, non-specific probes after hybridization. |
| Adsorbed Secondary Antibodies | Rat-adsorbed anti-mouse IgG [32] | Prevents cross-reactivity when working with closely related species (e.g., mouse and rat). |
| Mounting Medium | Histomount, Aqueous Mounting Medium [2] [37] | Preserves the stain; choice is critical based on chromogen solubility (e.g., aqueous for AEC, organic for DAB). |
Systematic Troubleshooting and Optimization of ISH Protocols
Troubleshooting High Background in In Situ Hybridization
High background signal is a common challenge in in situ hybridization (ISH) that can obscure your results and lead to inaccurate interpretations. This guide provides a systematic, step-by-step approach to diagnose and resolve the sources of high background in your ISH experiments.
The flowchart below outlines the logical pathway for diagnosing the source of high background in your ISH experiment. Follow the path based on your observations to identify potential causes and solutions.
Frequently Asked Questions
Q1: My positive control shows a clean signal, but my experimental sample has high background. What should I check? This indicates a sample-specific issue. Focus on sample preparation and pre-treatment:
- Fixation Check: Ensure your tissue was fixed promptly after collection and for the correct duration. Both under-fixation and over-fixation can cause high background [2] [14].
- Digestion Optimization: For FFPE tissues, enzyme digestion (e.g., with pepsin) is critical. Over-digestion can damage the tissue and increase background, while under-digestion can also lead to high background by failing to unmask the target adequately [2]. Optimize the digestion time (e.g., 3-10 minutes at 37°C is a common starting point) [2].
- Section Thickness: For FFPE tissue, sections that are too thick (e.g., >4µm) can trap probe and reagents, leading to high background. Aim for sections of 3-4µm [14].
Q2: I have followed the protocol closely, but I still get a high, uniform background across the entire slide, including where there is no tissue. What is the most likely cause? A uniform background often points to a protocol-wide issue with washing or reagents.
- Insufficient Stringency Washes: The post-hybridization stringent wash is designed to remove loosely bound or non-specifically bound probe. Ensure you are using the correct SSC buffer at a temperature between 75-80°C for 5 minutes [2]. Do not exceed 80°C, as this can eliminate your specific signal [2].
- Contaminated or Incorrect Buffers: Always use freshly prepared wash buffers. Using PBS without Tween 20 or distilled water during steps specified for PBST (PBS with Tween) can lead to elevated background [2]. Check that all buffers are not contaminated [38].
Q3: The no-probe control (where the probe is omitted) is clean, but my experimental slide shows high background. What does this mean? A clean no-probe control is excellent news; it indicates that your detection system (secondary antibodies, conjugates, and substrates) is not the primary source of the background. The problem lies with the probe itself or its interaction with the tissue.
- Probe Concentration is Too High: A high probe concentration can saturate non-specific binding sites. Titrate your probe to find the optimal concentration that gives a strong specific signal with minimal background [14].
- Probe Contains Repetitive Sequences: If your probe contains a lot of repetitive sequences like Alu or LINE elements, this can elevate background staining. This can be blocked by adding COT-1 DNA during the hybridization step [2].
- Denaturation Conditions: For FFPE samples, denaturation temperature and time are critical. Too high a temperature or too long a time can increase non-specific binding sites, leading to high background [14].
Q4: The background staining is a specific color (e.g., brown with DAB). How can I troubleshoot this? Color-specific background points to an issue in the detection and visualization steps.
- Endogenous Enzyme Activity: If using HRP-based detection, endogenous peroxidases can react with the substrate (e.g., DAB) to produce a brown background. Quench this activity by incubating sections in 3% H₂O₂ in methanol or water before the detection steps [38] [34]. For alkaline phosphatase (AP) systems, use levamisole to inhibit endogenous phosphatases [38].
- Over-development: The enzyme-substrate reaction (e.g., DAB incubation) must be monitored closely. The reaction should be stopped by rinsing in distilled water the moment background staining appears under the microscope. Typically, a clear signal appears within 5-15 minutes at 37°C [2].
- Conjugate Activity: Check that your enzyme conjugate (HRP or AP) is active by mixing a drop of conjugate with a drop of substrate in a small tube. A definite color change should occur within a few minutes [2].
The Scientist's Toolkit: Key Research Reagent Solutions
The following table details essential reagents used to prevent and resolve high background in ISH, along with their specific functions.
| Reagent/Solution | Function/Brief Explanation |
|---|---|
| COT-1 DNA | Blocks hybridization of repetitive sequences (e.g., Alu, LINE) in nucleic acid probes to reduce non-specific background [2]. |
| Stringent Wash Buffer (SSC) | Removes loosely bound, non-specific probe after hybridization; temperature (75-80°C) and salt concentration are critical for effectiveness [2]. |
| Normal Serum (from secondary host) | Used in blocking to reduce non-specific binding of secondary antibodies to tissue components [34]. |
| Enzyme Inhibitors (H₂O₂, Levamisole) | Quenches endogenous peroxidase (H₂O₂) or alkaline phosphatase (levamisole) activity to prevent false-positive chromogenic signals [38] [34]. |
| PBS/Tween 20 (PBST) | Standard wash buffer; the detergent (Tween 20) helps reduce hydrophobic interactions and lower background. Using PBS without Tween can lead to elevated background [2]. |
| Protease (e.g., Pepsin) | Digests proteins that cross-link and mask target epitopes in FFPE tissues (antigen retrieval). Conditions must be optimized to avoid over- or under-digestion [2]. |
Essential Control Experiments for Valid Interpretation
Running the correct controls is non-negotiable for accurately diagnosing high background and validating your results. The table below summarizes the key controls to include in every ISH experiment.
| Control Experiment | Purpose & Methodology | Interpretation of Result |
|---|---|---|
| Positive Control | A specimen known to express the target. Processed identically to experimental samples. | Validates that the entire protocol (probe, detection, reagents) is working. If background is high here, the problem is protocol-wide [39]. |
| No-Probe Control | The primary probe is omitted from the hybridization step; all other steps are identical. | Controls for non-specific signal from the detection system. Background indicates issues with secondary antibodies, enzymes, or substrates [39]. |
| Negative Control (Isotype) | The primary probe is replaced with a non-specific immunoglobulin or serum at the same concentration. | The proper control for non-specific binding of the primary probe. Background indicates probe-specific issues (e.g., concentration, specificity) [39]. |
| Enzyme Activity Test | A drop of enzyme conjugate is mixed with a drop of substrate in a tube. | Verifies the conjugate and substrate are active. A quick color change confirms functionality [2]. |
Frequently Asked Questions (FAQs)
FAQ 1: What are the primary causes of high background in my ISH experiment, and how is pre-treatment involved?
High background staining is frequently caused by non-specific binding of the probe. Inadequate pre-treatment can leave cellular debris that autofluoresces or provides non-specific binding sites [14]. Conversely, over-digestion during pre-treatment can damage tissue morphology and increase background by exposing non-target sequences [14]. The key is optimizing pre-treatment to sufficiently permeabilize the tissue without degrading its structure.
FAQ 2: How do I know if my tissue is under-digested or over-digested with protease?
Under-digestion results in diminished or absent hybridization signal due to insufficient probe access to target nucleic acids, though cell nuclei may still counterstain normally [2]. Over-digestion leads to poor tissue morphology, weakened or eliminated signal, and can prevent effective nuclear counterstaining; the tissue may appear degraded, torn, or weakly defined [2] [6] [22]. Always run positive and negative control probes to qualify your sample and assess assay performance [40].
FAQ 3: My background is high despite following the protocol. What is the first parameter I should adjust?
The stringency of your post-hybridization washes is a critical first check [2] [14]. High background often occurs if the stringent wash step is inadequate. Ensure you are using the correct SSC buffer concentration (e.g., 1X SSC) and that the temperature is precisely maintained between 75-80°C for 5 minutes [2]. Also, verify that all wash buffers are fresh and prepared correctly [40] [14].
Troubleshooting Guides
Guide 1: Optimizing Proteinase K Digestion
Proteinase K digestion is a critical step for successful ISH. Insufficient digestion will result in a diminished hybridization signal, while over-digestion destroys tissue morphology, making localization of the hybridization signal impossible [6].
Table 1: Proteinase K Optimization Parameters and Troubleshooting
| Parameter | Recommended Starting Point | Troubleshooting Adjustments | Effect of Insufficient Treatment | Effect of Excessive Treatment |
|---|---|---|---|---|
| Concentration | 1–5 µg/mL [6] [41] | Titrate in increments of 1 µg/mL [6]. | Weak or no signal [22]. | Poor tissue morphology, tissue loss [6] [22]. |
| Time | 10 minutes at room temperature [6] [41] | Adjust in 5-minute increments [6]. | Weak or no signal [22]. | Poor tissue morphology, tissue loss [6] [22]. |
| Temperature | 20-40°C [40] [6] | Proteinase K is active from ~20-65°C [42]. | Reduced digestion efficiency. | Enzyme inactivation begins above 65°C [42]. |
Optimization Protocol:
- Prepare Slides: Use tissue sections of known positive control material [41].
- Apply Titration: Treat slides with a range of Proteinase K concentrations (e.g., 1, 2, 3, 4, and 5 µg/mL) for a fixed time (e.g., 10 minutes) at a consistent temperature [6].
- Hybridize: Process all slides through the full ISH protocol using a reliable positive control probe [40].
- Evaluate: Under a microscope, identify the condition that produces the highest specific hybridization signal with the least disruption of tissue or cellular morphology [6]. This is your optimized concentration.
Guide 2: Optimizing Pepsin Digestion
Pepsin is another common enzyme used for tissue permeabilization. The principles of optimization are similar to those for Proteinase K, focusing on time and concentration.
Table 2: Pepsin Digestion Guidelines and Troubleshooting
| Parameter | Recommended Starting Point | Troubleshooting Adjustments | Key Considerations |
|---|---|---|---|
| Concentration | Manufacturer's recommendation | Titrate concentration. | Activity is highly dependent on buffer pH and ionic strength. |
| Time | 3-10 minutes at 37°C [2] | Adjust in 2-3 minute increments. | Prevent evaporation during incubation to maintain consistent conditions [2]. |
| Application | Primarily for CISH assays [2] | Ensure the enzyme matches your detection method. | Over-digestion weakens or eliminates signal; under-digestion decreases signal [2]. |
Guide 3: Systematic Troubleshooting for High Background
Systematic Troubleshooting for High Background
The Scientist's Toolkit: Essential Research Reagents
Table 3: Key Reagents for Optimizing ISH Pre-treatment
| Reagent / Material | Function / Purpose | Key Considerations for Use |
|---|---|---|
| Proteinase K | Broad-spectrum serine protease; digests proteins surrounding target nucleic acids to increase accessibility [6] [42]. | Aliquot stock solution (e.g., 20 mg/mL) and store at -20°C; stable for ~1 year. Activity is optimal between pH 7.5-12.0 and can be inactivated by heating to 95°C for 10 min [42]. |
| Pepsin | Protease used for tissue permeabilization, particularly in some CISH kits [2]. | Incubate at 37°C for 3-10 minutes; prevent evaporation during digestion [2]. |
| Charged Slides (e.g., Superfrost Plus) | Provides strong adhesion for tissue sections throughout the multi-step ISH procedure [40]. | Using unsuitable slides is a common cause of tissue detachment. Avoid protein-based adhesives on charged slides [40] [4]. |
| Control Probes (PPIB, dapB) | Essential for assessing assay performance and sample RNA quality. PPIB is a positive control; dapB (bacterial gene) is a negative control [40]. | Always run with your experimental samples. A successful assay shows PPIB score ≥2 and dapB score <1 [40]. |
| Stringent Wash Buffer (SSC) | Removes unbound or weakly bound (non-specific) probes after hybridization. Critical for reducing background [2] [10]. | Use the correct concentration (e.g., 0.1-2x SSC) and maintain temperature at 75-80°C for 5 minutes [2] [10]. |
| Blocking Agent (e.g., BSA, serum) | Reduces non-specific binding of the detection antibody or system to the tissue [10]. | Apply after protease digestion and washing steps, typically for 1-2 hours at room temperature [10]. |
FAQs and Troubleshooting Guides
How do denaturation temperature and time affect background signal?
Improper denaturation conditions are a primary cause of high background fluorescence in FISH assays.
- Denaturation Temperature: The denaturation temperature is a critical parameter that must be carefully optimized. Using a temperature that is too low can prevent the effective unwinding of the double-stranded DNA, resulting in reduced probe binding and weak specific signals. Conversely, a denaturation temperature that is too high may unmask non-specific binding sites, allowing probes to bind off-target and significantly increasing background signal [14].
- Denaturation Time: The duration of denaturation follows a similar principle. Excessively short denaturation times may not allow for complete separation of the DNA strands or the FISH probe itself, leading to weak specific signals. Excessively long denaturation times can promote non-specific binding by over-exposing sequences that the probe is not designed to hybridize with, thereby elevating background [14].
For standard protocols, a denaturation step of 5-10 minutes at 95 ± 5°C is often recommended for chromogenic ISH (CISH) [2].
What is the optimal probe volume and concentration to prevent background?
Using an optimal probe volume is essential for achieving a strong specific signal while minimizing background.
- Excessive Probe Volume: Using too much probe can saturate the sample. When all specific target sites are occupied, the excess probe is more likely to bind non-specifically to off-target sites, creating a high background that can obscure your true signal [14].
- Insufficient Probe Volume: Using too little probe can result in weak or negative signals, as not all target sequences are hybridized, making the results difficult to detect and interpret [14].
Probe concentration should also be verified for good activity, and the test should be repeated using different concentrations and volumes to establish the optimal conditions [22].
How can hybridization temperature and post-hybridization washes be optimized for specificity?
The specificity of the entire hybridization process is governed by stringency, which is controlled by temperature and salt concentrations during hybridization and washing.
- Hybridization Temperature: This temperature should be optimized for each probe and sample type, typically ranging from 37°C to 65°C [6] [43]. The goal is to perform hybridization a few degrees below the melting temperature (T~m~) of the probe-target hybrid [43]. Using formamide in the hybridization buffer allows the reaction to be performed at lower temperatures while maintaining specificity, which helps preserve tissue morphology [6] [10].
- Stringency Washes: After hybridization, stringent post-hybridization washes are critical for removing imperfectly matched or loosely bound probes. For CISH, a stringent wash using SSC buffer at 75-80°C for 5 minutes is recommended [2]. The stringency of these washes can be controlled by adjusting the temperature, salt concentration, and detergent content of the wash buffers [6] [22] [10]. Higher temperatures and lower salt concentrations increase stringency.
Experimental Optimization Protocols
Protocol 1: Systematic Optimization of Denaturation Conditions
This protocol helps methodically determine the ideal denaturation parameters for your specific assay.
- Prepare multiple identical slides from the same sample block to ensure consistency.
- Establish a denaturation temperature gradient. Using a calibrated hot plate or water bath, denature one set of slides at different temperatures (e.g., 80°C, 85°C, 90°C, 95°C) for a fixed time (e.g., 5 minutes) [2] [14].
- Establish a denaturation time gradient. At the temperature that yielded the best results from step 2, denature another set of slides for different durations (e.g., 2, 5, 10, 15 minutes) [14].
- Complete the ISH protocol using identical hybridization and washing conditions for all slides.
- Evaluate slides microscopically. The optimal condition is the one that provides the strongest specific signal with the lowest non-specific background. Check the temperature of the hot plate with a validated thermometer, as surface temperatures can vary [2].
Protocol 2: Empirical Determination of Optimal Probe Concentration and Volume
This protocol outlines a probe titration experiment to find the ideal probe amount.
- Prepare a dilution series of your probe in the appropriate hybridization buffer. A common starting point is to test a range from 50-200% of the manufacturer's recommended concentration [22].
- Apply each probe dilution to identical sample sections on different slides. Ensure the probe volume is sufficient to cover the entire sample without drying out, typically 50-100 μL [22] [10].
- Perform hybridization and subsequent washes under identical, standard conditions for all slides.
- Analyze the results. The correct probe concentration will yield a strong, clear specific signal with minimal to no background staining. A high background indicates the concentration/volume is too high, while a weak specific signal indicates it is too low [22] [14].
Table 1: Troubleshooting Guide for High Background Related to Key Parameters
| Parameter | Problem | Effect on Background | Solution |
|---|---|---|---|
| Denaturation Temperature | Too High | Increases background [14] | Optimize temperature gradient (e.g., 80-95°C) [2] [14] |
| Too Low | Increases background (weak signal) [14] | Optimize temperature gradient [2] [14] | |
| Denaturation Time | Too Long | Increases background [14] | Optimize time gradient (e.g., 2-15 min) [14] |
| Too Short | Increases background (weak signal) [14] | Optimize time gradient [14] | |
| Probe Volume/Concentration | Too High | Significantly increases background [14] | Perform probe titration [22] |
| Too Low | May increase perceived background (weak signal) [14] | Perform probe titration [22] | |
| Hybridization Temperature | Too Low | Reduces specificity, increases background [6] | Optimize based on probe T~m~, use 37-65°C [6] [43] |
| Stringency Wash | Insufficient | Fails to remove non-specifically bound probe, high background [2] | Use SSC at 75-80°C; adjust salt conc. & temp. [2] [6] |
Table 2: Key Research Reagent Solutions for Optimization
| Reagent | Function in Optimization | Key Considerations |
|---|---|---|
| Formamide | Hybridization Buffer Component | Lowers effective T~m~, allowing hybridization at lower temps to preserve morphology [6] [10]. |
| Saline Sodium Citrate (SSC) | Stringency Wash Buffer | The concentration (e.g., 0.1x to 2x SSC) and temperature (25-75°C) directly control wash stringency [2] [10]. |
| Proteinase K / Pepsin | Pre-hybridization Treatment | Digests proteins surrounding nucleic acids to improve probe access. Over-digestion degrades tissue; under-digestion reduces signal [2] [22] [10]. |
| Tween-20 / Detergent | Wash Buffer Additive | Reduces non-specific binding in wash buffers. Washing with PBS or water without detergent can lead to high background [2] [43]. |
Workflow and Relationship Diagrams
In the context of troubleshooting high background in in situ hybridization (ISH), the implementation of correct washing protocols is a critical, yet often overlooked, determinant of success. Stringent washing is a primary defense against non-specific binding, which manifests as high background staining, compromising the clarity and interpretability of your results. This guide details the precise methodologies and troubleshooting steps necessary to master this crucial phase of the ISH protocol.
Standard Operating Procedure: Stringent Wash Protocol
The following table outlines the key parameters for a standard post-hybridization stringent wash designed to remove imperfectly matched or unbound probes.
Table 1: Standard Stringent Wash Protocol Parameters
| Parameter | Specification | Purpose & Notes |
|---|---|---|
| Wash Buffer | 0.1X - 1X SSC (Saline Sodium Citrate) [2] | The standard buffer for removing unbound probe. Using the wrong wash solution (e.g., PBS without detergent, distilled water) can lead to elevated background [2]. |
| Detergent Additive | 0.025% - 0.1% Tween 20 [44] | Added to the wash buffer (e.g., creating PBST) to reduce surface tension and help dislodge non-specifically bound reagents. |
| Temperature | 75 - 80 °C [2] | Critical for denaturing and washing away imperfectly matched probe-target hybrids. |
| Duration | 5 - 15 minutes [2] | Must be sufficient to allow for diffusion and removal of unbound probe. |
| Stringency Control | Increase temperature by 1°C per slide when processing ≥2 slides, but do not exceed 80°C [2]. | Ensures consistent stringency across multiple slides. Temperatures >80°C can damage the sample or eliminate the specific signal [2]. |
| Agitation | Constant, gentle agitation [44] | Ensures even washing and prevents stagnant buffer layers. |
The following workflow maps the key decision points and steps in the stringent washing process and its role in the larger ISH experiment.
Troubleshooting FAQs: High Background Issues
1. Despite doing a stringent wash, my slides still have high background. What are other potential causes?
High background is multifactorial. If your wash is optimized, investigate these other common culprits:
- Suboptimal Pretreatment: Inadequate or excessive digestion with protease can significantly increase background. Under-digested tissues trap probe non-specifically, while over-digested tissues lose morphological integrity [45].
- Probe Issues: Probes containing a high number of repetitive sequences (e.g., Alu, LINE elements) can bind non-specifically across the genome. This must be blocked by adding unlabeled COT-1 DNA to the hybridization mix [2].
- Inadequate Blocking: Failure to properly block endogenous enzymes (like alkaline phosphatase) or non-specific binding sites before hybridization can lead to universal background staining [22].
- Over-developed Signal: Allowing the colorimetric detection reaction (e.g., with DAB or NBT/BCIP) to run too long will cause background precipitate to form across the entire tissue. Monitor the reaction under a microscope and stop it by rinsing with distilled water as soon as background begins to appear [2].
2. I am getting weak specific signals after my wash. Did I overwash my slides?
Yes, this is a possibility. Excessive washing stringency, particularly using temperatures significantly above 80°C, can denature and wash away the specific probe-target hybrid, leading to a weak or absent signal [2]. To troubleshoot, systematically lower the wash temperature in your next experiment (e.g., try 72°C instead of 78°C) while keeping other factors constant. Other causes of weak signal include poor probe labeling, over-fixation, or insufficient hybridization time [22].
3. Can I use PBS or distilled water for my post-hybridization washes instead of SSC?
No. Using PBS without Tween 20 or distilled water for the stringent wash steps is a common mistake that can lead to elevated background [2]. The chemical composition and ionic strength of SSC buffer are specifically designed for nucleic acid hybridization and washing. Substituting it with the wrong buffer disrupts the hydrogen bonding and ionic interactions necessary for removing unbound probe effectively.
Research Reagent Solutions
The following table catalogues the essential reagents required for effective stringent washing and their critical functions.
Table 2: Essential Reagents for Stringent Washes
| Reagent | Function | Key Considerations |
|---|---|---|
| SSC Buffer(Saline Sodium Citrate) | Provides the correct ionic strength and pH for controlling stringency during the wash. | Use a high-purity, molecular biology grade to prepare 20X stock solutions. Dilute to 0.1X - 1X for stringent washes [2]. |
| Tween 20 | A non-ionic detergent that reduces non-specific binding by minimizing hydrophobic interactions. | Typical working concentration is 0.025% - 0.1% (v/v) in the wash buffer (e.g., in PBST) [2] [44]. |
| Proteinase K | A protease used in pre-treatment to digest proteins surrounding the target nucleic acid, increasing accessibility. | Concentration and time must be optimized. Over-digestion increases background and damages tissue; under-digestion decreases signal [45] [22]. |
| COT-1 DNA | Unlabeled genomic DNA used to block repetitive sequences in the probe, preventing non-specific hybridization. | Essential when your probe contains repetitive elements. It is added directly to the hybridization mixture [2]. |
| Blocking Buffer | A solution (often containing serum, BSA, or proprietary mixtures) used to occupy non-specific binding sites on the tissue. | Applied after protease treatment and before hybridization to reduce background caused by non-probe binding [22]. |
Troubleshooting Guides
High Background Staining in CISH/FISH
Q: Despite a successful experiment, my slides show high, nonspecific background staining that obscures the specific signal. What are the primary causes and solutions?
A: High background is a common issue often stemming from the final stages of the protocol, including detection, counterstaining, and washing. The table below summarizes the key culprits and their fixes.
| Problem Area | Specific Cause | Recommended Solution |
|---|---|---|
| Stringent Washes | Insufficient stringency (temperature, time, or salt concentration) fails to remove non-specifically bound probes [2] [14]. | Ensure stringent wash buffer (e.g., SSC) is used at 75-80°C for 5 minutes [2]. Increase temperature by 1°C per slide for >2 slides, but do not exceed 80°C [2]. |
| Enzyme Reaction | Letting the chromogenic substrate reaction (e.g., DAB) run for too long [2]. | Monitor the staining reaction under a microscope at 2-minute intervals. Stop the reaction by rinsing in distilled water the moment background appears [2]. |
| Counterstaining | Using a dark hematoxylin counterstain that masks the specific signal [2]. | Use a light counterstain (e.g., Mayer’s hematoxylin for 5 seconds to 1 minute) [2]. |
| Probe Design | Probes containing repetitive sequences (e.g., Alu, LINE) can bind nonspecifically [2]. | Block repetitive sequences by adding COT-1 DNA during hybridization [2]. |
| Wash Buffers | Using incorrect wash solutions (e.g., PBS without Tween 20) can cause high background [2]. | Always use the specified wash buffers with detergents like Tween 20 (e.g., PBST) [2]. |
| Reagent Drying | Probe or reagents drying on the slide during long incubations [4]. | Ensure proper humidification in the hybridization chamber to prevent slides from drying out at any time [2] [4]. |
High Background Troubleshooting Flow
Microscope Maintenance for Optimal Signal Detection
Q: My positive control shows a clear signal, but I struggle to see or focus on the signal in my test samples. Could the microscope be at fault?
A: Yes, poor microscope maintenance directly impacts image quality, contrast, and your ability to distinguish a weak specific signal from background. Regular cleaning is essential.
| Problem | Consequence for ISH | Maintenance Solution |
|---|---|---|
| Dirty or damaged optical filters [14] | Reduced fluorescence signal strength, clouded results, and difficulty visualizing FISH signals [46] [14]. | Check filters for a mottled appearance. Close the microscope shutter when not in use. Replace filters per manufacturer guidelines (typically every 2-4 years) [14]. |
| Dust and oil on objectives and eyepieces [46] | Reduced image contrast, blurred images, and ghosting, which can mask a faint positive signal [46]. | Daily: Remove dust with an air blower [46]. After use: Wipe oil immersion objectives immediately with soft lens paper and a suitable solvent (e.g., isopropanol) [46]. |
| Contaminated slides | Spots and debris in the field of view can be mistaken for specific staining [46]. | Store slides in 70% ethanol and wipe dry before use. Use clean cover glasses [46]. |
Microscope Issues and Maintenance Flow
Frequently Asked Questions (FAQs)
Q: How can I prevent my tissue sections from drying out during the long hybridization step, which I know causes background? A: Perform the hybridization step in a securely closed humidified chamber. Use a dedicated hybridization chamber or a sealed container with a small amount of pre-warmed water or buffer to maintain a humid environment. Ensure the slides are cover-slipped after the probe is applied [2].
Q: I am using AEC as my chromogen and notice the signal fades. What is happening? A: AEC produces a red, alcohol-soluble precipitate. If you use alcohol-based solvents after staining, it will dissolve the signal. The chromogen DAB is solvent-insoluble and is recommended if you plan to use any organic solvents during mounting or subsequent steps [2].
Q: My negative control shows no staining, but my positive tissue has a weak signal with high background. What should I optimize first? A: Focus on the proteinase K digestion step. Under-digestion decreases or eliminates the specific signal, while over-digestion destroys tissue morphology and can also increase background. Perform a titration experiment to optimize the concentration (e.g., 20 µg/mL) and incubation time (10-20 minutes at 37°C) for your specific tissue and fixation conditions [10].
Q: What is the safest way to clean my microscope's objectives? A:
- Do not use paper towels, facial tissues, or clothing, as they can scratch optics [47].
- Use a rubber air blower to remove loose dust [46].
- Gently wipe the lens with soft lens paper or a lint-free microfiber cloth.
- If needed, apply a few drops of lens cleaning fluid (e.g., isopropanol) to the lens paper, not directly to the lens, and wipe gently in a circular motion [46] [47].
The Scientist's Toolkit: Research Reagent Solutions
| Reagent | Function in Preventing Background |
|---|---|
| SSC Buffer (Saline Sodium Citrate) | Used in stringent washes; the salt concentration and temperature determine stringency. Low salt and high temperature (e.g., 0.1-2x SSC at 75-80°C) remove weakly bound probes [2] [10]. |
| Proteinase K | An enzyme that digests proteins, making nucleic acid targets more accessible. Titration is critical; too little causes low signal, too much causes high background and poor morphology [10]. |
| Formamide | A denaturing agent included in hybridization buffers. It allows the hybridization to be performed at a lower temperature (e.g., 37-45°C), preserving tissue structure while promoting specific probe binding [10]. |
| COT-1 DNA | Used as a blocking agent to suppress hybridization of probe sequences to repetitive DNA elements (e.g., Alu, LINE), thereby reducing nonspecific background [2]. |
| Tween 20 | A detergent added to wash buffers (e.g., PBST, TBST). It reduces surface tension and helps wash away nonspecifically bound reagents, lowering background [2] [10]. |
| Blocking Serum (BSA, Milk) | Applied before the antibody incubation step. It blocks nonspecific protein-binding sites on the tissue to prevent the detection antibody from sticking where it shouldn't [10]. |
Validation, Technology Comparison, and Future Directions in ISH
Establishing Rigorous Internal Controls and Validation Standards
Troubleshooting High Background in In Situ Hybridization
What are the primary causes of high background signal in my ISH experiments?
High background signal, or noise, in ISH experiments can stem from multiple sources throughout the protocol. The most common causes include insufficient post-hybridization washing, leading to incomplete removal of unbound or loosely bound probes [2] [14]; over-digestion or under-digestion of the sample during pre-treatment steps, which can damage tissue or leave cellular debris that causes autofluorescence [14]; probe hybridization to non-target sequences or fragmented nucleic acids, especially in tissues undergoing cell death [48]; drying of reagents on the section during incubation, which causes heavy, non-specific staining, particularly at the edges [4]; and endogenous enzymes or binding sites that interact with the detection system, such as endogenous biotin [6].
How can I systematically troubleshoot high background fluorescence in FISH assays?
A systematic approach to troubleshooting high background in FISH involves verifying critical steps and reagents. The table below outlines key areas to investigate and the appropriate corrective actions.
| Troubleshooting Area | Common Issues | Corrective Actions |
|---|---|---|
| Sample Preparation [14] | Under-fixation or over-fixation; incorrect tissue thickness (FFPE). | Use freshly prepared fixatives; adhere to fixation times; section FFPE tissues at 3-4μm. |
| Pre-treatment [2] [14] | Insufficient or excessive enzyme (e.g., pepsin, proteinase K) digestion. | Titrate enzyme concentration and time; use validated pre-treatment kits. |
| Probe & Denaturation [14] | Incorrect probe volume; denaturation temperature too high/low; denaturation time too long/short. | Use protocol-specified probe volume; optimize denaturation temperature and time. |
| Hybridization [2] [6] | Low hybridization specificity; probe concentration too high; evaporation. | Optimize temperature and formamide concentration; use a humidified chamber. |
| Post-Hybridization Washes [2] [14] | Insufficient stringency; degraded or contaminated wash buffers. | Use stringent washes (e.g., 1X SSC at 75-80°C); use fresh, high-quality buffers. |
| Detection [6] | Endogenous biotin or enzymes causing non-specific signal. | Block endogenous biotin (for biotinylated probes); use digoxigenin-labeled probes as an alternative. |
| Microscope Optics [14] | Worn or damaged optical filters. | Inspect filters for damage; replace every 2-4 years per manufacturer guidelines. |
What specific optimization can be made to the washing steps to reduce background?
The stringency of the post-hybridization washes is critical for reducing background. Stringency is controlled by temperature, salt concentration, and detergent presence [2] [10]. For DNA probes, formaldehyde should be avoided in the wash buffers [6] [10]. A typical stringent wash for CISH involves using 1X SSC buffer at a temperature between 75-80°C [2]. It is recommended to increase the temperature by 1°C per slide when washing more than two slides, but not to exceed 80°C [2]. Always use buffers containing a detergent like Tween 20 (e.g., PBST or MABT) to prevent high background, as washing with PBS or water alone can cause unwanted background staining [2] [10].
Can tissue quality itself contribute to background, and how can this be controlled?
Yes, tissue quality and handling are fundamental to achieving clean results. Inconsistent fixation conditions (under-fixation or over-fixation) are a major source of variable background and poor morphology [4] [14]. Delayed fixation can lead to RNA degradation and loss of signal, which can complicate interpretation [2]. Furthermore, tissues undergoing programmed cell death (PCD) or necrosis can contain extensively fragmented nucleic acids, to which probes can bind non-specifically, generating false-positive signals [48]. To control for this, always use appropriate positive and negative control tissues included in the same experimental run [4].
Experimental Protocols for Validation
Protocol: Validating Probe Specificity and Hybridization Conditions
This protocol is designed to optimize key variables that influence signal specificity and background.
Probe Validation:
- Always perform a parallel hybridization using a sense probe or a non-specific probe as a negative control to distinguish specific signal from non-specific background [48] [10].
- Verify that the probe label matches the detection conjugate (e.g., biotin-labeled probes with anti-biotin conjugate, digoxigenin-labeled with anti-digoxigenin conjugate) [2].
Proteinase K Titration:
- The optimal concentration of Proteinase K for antigen retrieval is highly dependent on tissue type, fixation duration, and tissue size [6] [10].
- Prepare a series of Proteinase K concentrations (e.g., 1, 5, 10, 20 µg/mL) in a pre-warmed buffer (e.g., 50 mM Tris, pH 7.5).
- Apply to serial tissue sections and digest for a fixed time (e.g., 10 minutes) at room temperature or 37°C [10].
- Proceed with the standard ISH protocol. The optimal concentration is the one that yields the strongest specific hybridization signal with the least disruption to tissue morphology [6].
Stringency Wash Optimization:
- After hybridization, test a range of wash temperatures and salt concentrations.
- For example, perform the stringent wash with 0.1-2x SSC at temperatures ranging from 25°C to 75°C [10].
- Higher temperatures and lower salt concentrations increase stringency, removing more weakly bound probes but potentially risking the specific signal for some probes [2] [6].
Protocol: Conjugate and Detection System Validation
This protocol ensures the detection reagents are active and specific.
Conjugate Activity Check:
- To confirm the enzyme conjugate (e.g., HRP or AP) is active, mix one drop of conjugate with one drop of its corresponding substrate in a small tube.
- A definite color change should be observed within a few minutes. A positive reaction confirms both the conjugate and substrate are functional [2].
Microscopic Monitoring of Signal Development:
- During the chromogenic substrate incubation, monitor the development of the signal under the microscope at 2-minute intervals.
- The moment background staining begins to appear, stop the reaction by rinsing the slides in distilled water. This prevents over-development which is a common cause of high background [2].
Blocking for Non-Specific Interactions:
- When using biotinylated probes, be aware of endogenous biotin. Block it by applying an avidin/biotin blocking step prior to probe hybridization [6].
- Use a blocking buffer (e.g., containing BSA, milk, or serum) for 1-2 hours before applying the enzyme conjugate to reduce non-specific antibody binding [10].
The Scientist's Toolkit: Key Research Reagent Solutions
The following table details essential materials and their functions for establishing robust ISH controls and validation.
| Reagent / Material | Function in Control & Validation |
|---|---|
| Sense Strand Probe [48] [10] | Negative control probe; identical to the target mRNA sequence. Should not hybridize, used to identify non-specific binding and background. |
| Charged Slides [4] | Provides a surface that ensures optimal tissue section adhesion, preventing lift-off which causes uneven staining and high background. |
| Proteinase K [6] [10] | Enzyme for antigen retrieval; digests proteins surrounding nucleic acids. Concentration must be titrated for each tissue type to balance signal and morphology. |
| Formamide [10] | Component of hybridization buffer; lowers the melting temperature of hybrids, allowing for specific hybridization at lower, less damaging temperatures. |
| SSC Buffer (Saline-Sodium Citrate) [2] [10] | The ionic strength and temperature of this wash buffer control stringency, critical for removing non-specifically bound probe. |
| Blocking Reagent (BSB, Milk, Serum) [10] | Blocks charged sites on the tissue to prevent non-specific binding of the detection antibody, thereby reducing background. |
| Histomount / Aqueous Mountant [2] | A mounting medium compatible with the chromogen used (e.g., avoid organic solvents with AEC). Applied to wet sections to preserve signal and morphology. |
Frequently Asked Questions (FAQs)
What are the consequences of using technical replicates instead of biological replicates in validation experiments?
Using technical replicates (e.g., multiple measurements from the same sample) in place of biological replicates (measurements from different, independent samples) is a form of pseudoreplication [49]. It inflates the degrees of freedom in statistical tests and deflates the standard error, leading to a high risk of false-positive conclusions. Technical replicates only measure variation in the measurement tool or procedure, not the true biological variation between samples. For validation, biological replicates are essential to ensure findings are generalizable and not an artifact of a single sample [49].
How do I choose between DNA and RNA probes for my assay?
The choice depends on the application and desired hybrid stability.
- RNA (ribo)Probes: Form highly stable RNA-RNA hybrids with target mRNA, offering high sensitivity and specificity. They are ideal for detecting RNA targets. However, RNA is labile and requires careful handling to avoid RNase degradation [6] [7].
- DNA Probes: Are easier to prepare and more stable than RNA probes. However, DNA-RNA hybrids are less stable than RNA-RNA hybrids, and DNA-DNA hybrids are the least stable. Formaldehyde should not be used in post-hybridization washes with DNA probes [6] [10].
Why is it critical to include both positive and negative tissue controls in every run?
Controls are non-negotiable for correct interpretation.
- A positive tissue control with known expression of the target validates that the entire ISH protocol—from pre-treatment to detection—worked correctly. A lack of signal in the test sample when the positive control works indicates a problem with the test sample itself (e.g., poor RNA quality) [2] [4].
- A negative control tissue (without the target) or a negative control probe (sense strand) identifies the level of non-specific background and false-positive signal. Any staining in this control invalidates the specific signal seen in test samples and necessitates protocol troubleshooting [4] [48].
Accurately distinguishing specific in situ hybridization (ISH) signals from background is a critical step in ensuring the validity of your experimental data. High background fluorescence or chromogenic precipitation can obscure true signals, leading to inaccurate interpretation. This guide provides a systematic approach for calculating statistically valid cut-off values, enabling researchers to confidently differentiate authentic signal patterns from non-specific background, a common challenge in troubleshooting ISH experiments [2] [14].
FAQs on Cut-Off Values and Background Troubleshooting
What is a cut-off value, and why is it essential for my ISH analysis? A cut-off value is a pre-defined threshold used to statistically distinguish a positive, specific signal from non-specific background staining. Establishing a validated cut-off is crucial for objective and reproducible data analysis, especially in assays like chromogenic or fluorescence ISH (CISH/FISH) where background can compromise results [2] [14]. It minimizes investigator bias and is fundamental for experiments aimed at gene quantification, viral detection, or confirming the presence of therapeutic oligonucleotides [43].
My negative controls show high background. Can I still calculate a valid cut-off? High background in negative controls must be addressed before establishing a final cut-off, as it indicates underlying technical issues. A valid cut-off relies on well-performing controls. First, troubleshoot the background using the guide below. Common fixes include optimizing the stringency of post-hybridization washes, checking the activity of detection reagents, and ensuring your sample was not under-fixed or over-digested with protease [2] [14] [6]. Once background is minimized, you can proceed with cut-off calculation.
How many samples or fields of view do I need to measure for a robust cut-off? For a statistically significant cut-off, analyze as many negative control samples and fields of view as feasible. A larger sample size (e.g., n > 15-20 measurements from multiple independent negative control samples) will provide a more reliable estimate of background variation and a more robust mean background value, strengthening your final cut-off calculation.
Troubleshooting High Background: A Quantitative Guide
High background is a primary obstacle to clear signal interpretation. The table below summarizes common patterns of high background, their causes, and specific solutions to implement before calculating your cut-off value.
| Background Pattern | Primary Cause | Troubleshooting Solution | Impact on Cut-Off |
|---|---|---|---|
| Uniformly High Background Across Entire Sample [2] [14] | Inadequate post-hybridization washes; Contaminated or old wash buffers. | Increase stringency of washes (e.g., adjust pH, temperature); Always use fresh wash buffers [14]. | Inflates background mean, raising cut-off and reducing assay sensitivity. |
| Speckled or Punctate Background [2] | Probe binding to repetitive sequences; Incomplete enzymatic digestion of proteins. | Add repetitive sequence blockers (e.g., COT-1 DNA) to hybridization mix; Optimize Proteinase K concentration (1-5 µg/mL is a good start) [2] [6]. | Increases background variance, making a single cut-off value less reliable. |
| High Background on Positive Control, But Not Negative [2] | Enzyme-substrate reaction developing for too long. | Monitor staining reaction microscopically and stop (by rinsing in water) the moment background appears [2]. | May not affect cut-off derived from negatives, but compromises positive control validity. |
| Background in Negative Control, But Not Unstained Sample [6] | Non-specific binding of detection antibodies (for digoxigenin) or streptavidin (for biotin). | For biotin systems, block endogenous biotin; Use high-affinity, specific anti-digoxigenin antibodies [6]. | Directly inflates the negative control values used for cut-off calculation. |
Experimental Protocol: Establishing a Statistical Cut-Off Value
This protocol outlines a step-by-step methodology for calculating a statistically validated cut-off value for ISH signal detection, incorporating best practices for minimizing background.
1. Experimental Design and Sample Preparation
- Include Essential Controls:
- Negative Control: A sample known not to express the target nucleic acid. This is critical for measuring background.
- Positive Control: A sample known to express the target, to ensure the entire assay is working.
- No-Probe Control: A sample processed without any probe, to identify background from the detection system itself [2].
- Standardize Tissue Preparation: Use 10% Neutral Buffered Formalin (NBF) with a 10:1 fixative-to-tissue ratio and fixation for ~24 hours at room temperature. Under-fixation or over-fixation can degrade signal and increase background [43] [14]. For FFPE tissues, section thickness of 3-4 µm is recommended [14].
- Optimize Pretreatment: Perform a titration of Proteinase K (e.g., 1-5 µg/mL for 10 minutes at room temperature) to find the concentration that provides the strongest specific signal with the best tissue morphology [6].
2. Image Acquisition and Signal Measurement
- Acquire Images: Using a fluorescence or brightfield microscope, capture multiple, randomly selected fields of view from your negative control samples. Ensure imaging settings (e.g., exposure time, gain, illumination) are identical for all samples and are not saturated.
- Measure Signal Intensity: Using image analysis software (e.g., ImageJ, QuPath), measure the signal intensity in the relevant cellular compartment (e.g., nucleus for DNA, cytoplasm for mRNA).
- For CISH/DAB, measure the optical density.
- For FISH, measure the mean fluorescence intensity.
- Record Background Values: Collect all intensity measurements from the negative control samples. These values represent your background distribution.
3. Statistical Calculation of the Cut-Off Value The most common method for establishing a cut-off is based on the mean and standard deviation of the background signal.
- Calculate the mean (µ) and standard deviation (σ) of all signal measurements from your negative control samples.
- The cut-off value is typically set as: Cut-Off = µ + 3σ.
- This means any signal intensity above this threshold has a very high probability (99.7% for a normal distribution) of being a true positive signal and not part of the background noise.
Example Calculation: If analysis of your negative control FISH samples yields a mean background fluorescence intensity (µ) of 150 units and a standard deviation (σ) of 20 units, your cut-off would be: Cut-Off = 150 + (3 * 20) = 210 units. Any cell or region with a signal intensity above 210 units would be considered positive.
4. Validation and Application
- Validate with Controls: Apply the calculated cut-off to your positive and no-probe controls. The positive control should have a significant proportion of signals above the cut-off, while the no-probe control should have virtually none.
- Apply to Experimental Samples: Use the validated cut-off to score your experimental samples. Report the percentage of positive cells or the number of signals per cell relative to this defined threshold.
Experimental Workflow for Cut-Off Validation
The Scientist's Toolkit: Essential Research Reagent Solutions
The following reagents are critical for performing a robust ISH assay and obtaining reliable data for statistical cut-off validation.
| Reagent / Solution | Function & Importance | Troubleshooting Tip |
|---|---|---|
| Proteinase K | Digests proteins masking target nucleic acids; concentration must be titrated for optimal signal-to-noise [6]. | Over-digestion destroys morphology; under-digestion reduces signal. Test 1-5 µg/mL for 10 min [6]. |
| Formamide | Added to hybridization buffer to lower melting temperature, preserving tissue morphology during hybridization [43] [6]. | Allows for specific hybridization at lower, gentler temperatures (37-65°C). |
| Stringent Wash Buffer (e.g., SSC) | Removes unbound and non-specifically bound probes after hybridization; critical for reducing background [2] [14]. | Use fresh buffer at 75-80°C for 5 min. Temperature is critical for stringency [2]. |
| COT-1 DNA | Blocks repetitive sequences (e.g., Alu, LINE) in the genome to prevent non-specific probe binding and high background [2]. | Essential when probes contain repetitive sequences. Add during hybridization. |
| RNase Inhibitors | Protects RNA targets from degradation by endogenous RNases, especially critical for RNA-FISH on frozen sections [43]. | Less critical for FFPE tissues where fixation inactivates RNases [43]. |
| Blocking Reagent | Prevents non-specific binding of detection antibodies or streptavidin to tissue. | For biotin systems, block endogenous biotin to prevent false positives [6]. |
Logical Troubleshooting for High Background
Frequently Asked Questions (FAQs)
Q1: What are the fundamental technological differences between RNAscope, MERFISH, and Xenium?
A1: These platforms employ distinct molecular mechanisms for in situ RNA detection:
- RNAscope utilizes a proprietary in situ hybridization (ISH) method with a double-Z probe design for signal amplification and background suppression. It does not require an RNase-free environment and typically detects a limited number of target genes (often <10-12 per run) with high sensitivity at subcellular resolution. Its workflow can be manual or automated and is completed within a single day [50] [23] [51].
- MERFISH (Multiplexed Error-Robust FISH) is an imaging-based spatial transcriptomics method that uses a two-step labeling process. It employs encoding probes binding to cellular RNA and fluorescent readout probes that hybridize to these encoding probes in multiple rounds. It leverages combinatorial barcoding and error-correction schemes to profile hundreds to thousands of genes simultaneously. It is known for high detection efficiency but requires specialized instrumentation like the Merscope [52] [51] [53].
- Xenium is an imaging-based platform based on in situ sequencing (ISS). It uses padlock probes that hybridize to the target RNA, are circularized by ligation, and then amplified via rolling circle amplification. The barcodes are read out through successive rounds of hybridization with fluorescent probes. It can detect up to 5,000 genes with high sensitivity and subcellular resolution, and the analysis is performed on a fully integrated instrument [51] [53].
Q2: My samples are FFPE tissues. Which platform is most suitable?
A2: All three platforms are compatible with FFPE tissues, but with different considerations [51] [53] [54].
- RNAscope is highly robust on FFPE samples and is widely considered a gold standard for validating gene expression in clinical archives. Its protocol is explicitly optimized for tissues fixed in 10% NBF for 16-32 hours [50] [23].
- MERFISH (Merscope) and Xenium also support FFPE samples. However, for all platforms, the fixation history of the tissue (e.g., over- or under-fixing) can impact RNA accessibility and may require optimization of pretreatment conditions like protease digestion and antigen retrieval times [50] [53] [54].
For the best results with FFPE samples, it is critical to qualify your sample RNA integrity using positive and negative control probes before running your target experiment [50] [23].
Q3: I am observing high background signals. What are the primary causes and solutions?
A3: High background is a common challenge in ISH-based methods. The causes and remedies can vary by platform.
General Causes:
- Over-fixed or under-fixed tissue: This can reduce RNA accessibility or increase non-specific probe binding.
- Incomplete protease digestion: Under-digestion prevents probe access, while over-digestion can damage tissue and RNA.
- Non-specific probe binding: This is a significant source of background, particularly in complex tissues [18] [55].
- Tissue autofluorescence: This can interfere with signal detection, especially in fluorescence-based methods like MERFISH and Xenium [55].
Troubleshooting Steps:
- Run Controls: Always include positive control probes (e.g., PPIB, UBC) and negative control probes (e.g., bacterial dapB). A successful experiment should show a score of ≥2 for PPIB and <1 for dapB [50] [23].
- Optimize Pretreatment: For over-fixed tissues, increase protease treatment time incrementally (e.g., in 10-minute increments on the BOND RX system) or adjust antigen retrieval conditions [50] [23].
- Use Blocking Strategies: Recent research shows that adding random oligonucleotides during the pre-hybridization and hybridization steps can reduce background signals in HCR by 3 to 90 times by competing for non-specific binding sites [18].
- Screen Probes: For MERFISH, prescreening readout probes against your sample of interest can identify and mitigate readout-specific non-specific binding [52].
Table: Troubleshooting High Background Noise
| Cause | Symptoms | Corrective Action |
|---|---|---|
| Inadequate Protease Digestion | Weak or no signal from positive control; high background | Titrate protease concentration and time; use control slides to optimize [50] |
| Non-specific Probe Binding | Punctate dots in negative control (dapB) | Include random DNA blockers [18]; ensure stringent wash conditions [52] |
| Tissue Autofluorescence | Diffuse, non-punctate background across all channels | Use tissue clearing methods [55]; employ far-red emitting dyes [55] |
| Over-amplification | Large, irregular signal clusters | Follow protocol precisely; do not alter amplification step times [50] |
Q4: How do I decide between a targeted approach (like RNAscope) and a more multiplexed approach (like MERFISH or Xenium)?
A4: The choice depends on your experimental goals and resources.
Choose RNAscope if:
Choose MERFISH or Xenium if:
- Your research question requires profiling hundreds to thousands of genes simultaneously in their spatial context.
- You have access to the required commercial instruments (Merscope or Xenium Analyzer) and the budget for larger probe panels.
- You are conducting exploratory research to discover novel cell types or states within a tissue microenvironment [51] [53].
Table: Key Performance Metrics from a Comparative Study on Tumor Cryosections [53]
| Platform | Technology | Typical Gene Panel Size | Resolution (FWHM of Beads) | Key Differentiator |
|---|---|---|---|---|
| RNAscope | ISH with signal amplification | 1-12+ genes | ~350 nm (with SDCM) | High sensitivity; robust on FFPE; low-plex benchmark |
| MERFISH (Merscope) | smFISH with combinatorial barcoding | 100-500+ genes | 480 ± 85 nm | High detection efficiency; error-robust encoding |
| Xenium | In situ sequencing (padlock probes) | 300-5,000 genes | 474 ± 55 nm | Integrated instrument; high-plex capability |
Technical Troubleshooting Guides
Sample Preparation and Quality Control
Problem: Inconsistent staining or tissue detachment.
- Solution:
- Use Recommended Slides: Exclusively use Superfrost Plus slides. Other types may result in tissue detachment [50] [23].
- Use the Correct Barrier Pen: The ImmEdge Hydrophobic Barrier Pen is the only pen validated to maintain a barrier throughout the RNAscope procedure [50].
- Avoid Slide Drying: Do not let slides dry out at any time. Flick or tap slides to remove residual reagent, but immediately apply the next solution [50].
- Quality Control RNA: For any platform, always run control probes on a test section of your sample. Use housekeeping genes like PPIB (low-copy) or UBC (high-copy) to assess RNA quality. Successful staining should yield a PPIB score ≥2 and a UBC score ≥3, with a dapB (negative control) score of <1 [50] [23].
The following workflow outlines the critical steps for qualifying samples and troubleshooting background issues:
Platform-Specific Instrument and Protocol Optimization
Problem: High background or low signal on automated systems (BOND RX or DISCOVERY ULTRA).
- Solution for RNAscope on Leica BOND RX:
- Standard Pretreatment: 15 min Epitope Retrieval 2 (ER2) at 95°C + 15 min Protease at 40°C.
- For Over-fixed Tissues: Increase ER2 time in 5-minute increments and Protease time in 10-minute increments (e.g., 20 min ER2 + 25 min Protease) while keeping temperatures constant [50] [23].
- Reagents: Use only the specified detection kits (e.g., BOND Polymer Refine Detection) and do not alter the staining protocol [23].
Solution for RNAscope on Roche DISCOVERY ULTRA:
- Instrument Maintenance: Perform decontamination every three months to prevent microbial growth in fluidic lines. Purge and replace all bulk solutions with recommended buffers [50].
- Software Settings: Uncheck the "Slide Cleaning" option. Do not adjust recommended temperatures unless instructed by technical support [50].
Solution for MERFISH Optimization:
- Encoding Probe Hybridization: Modifications to the hybridization conditions (e.g., temperature, chemical denaturants like formamide) can enhance the rate of probe assembly and signal brightness [52].
- Reagent Aging: Be aware that reagents can decrease in performance over long-duration experiments (multiple days). Use fresh buffers and consider stabilization strategies [52].
- Readout Probe Specificity: Prescreen readout probes against your sample type to identify and mitigate tissue-specific non-specific binding [52].
The Scientist's Toolkit: Essential Research Reagent Solutions
Table: Key Reagents for Successful Spatial Transcriptomics Experiments
| Reagent / Material | Function | Platform Specificity |
|---|---|---|
| Superfrost Plus Slides | Provides superior tissue adhesion to prevent detachment during stringent assays | RNAscope (mandatory) [50]; generally recommended for all |
| ImmEdge Hydrophobic Barrier Pen | Creates a well around the tissue section to retain reagents and prevent drying | RNAscope (mandatory) [50] |
| Positive Control Probes (PPIB, POLR2A, UBC) | Assess sample RNA integrity and permeabilization efficiency | Universal best practice [50] [23] |
| Negative Control Probe (dapB) | Distinguish specific signal from non-specific background staining | Universal best practice [50] [23] |
| Random Oligonucleotides | Competes for non-specific binding sites, reducing background | Particularly effective in HCR and FISH methods [18] |
| Assay-Specific Mounting Media | Preserves signal and tissue morphology for imaging | Critical; using the wrong media can degrade results (e.g., EcoMount for Red assay) [50] [23] |
The following diagram summarizes the platform selection logic based on key experimental parameters:
Troubleshooting Guides
Troubleshooting High Background in ISH: A Methodical Approach
A high background signal is a common issue that can obscure results and lead to erroneous conclusions in In Situ Hybridization (ISH). The following guide addresses the most frequent causes and their automated solutions.
Q: My ISH assay has high, diffuse background fluorescence. What could be the cause and how can I fix it?
This is often related to sample preparation, pre-treatment, or washing steps.
Potential Cause 1: Suboptimal Sample Fixation.
- Root Cause: Under-fixation can lead to poor preservation of cellular structure, increasing non-specific probe binding. Over-fixation, particularly with formalin, can create excessive cross-linking that masks target sequences and also elevates background [14].
- Manual Troubleshooting: Adhere strictly to fixation times and use freshly prepared fixative solutions. For blood smears, the use of a hypotonic solution during fixation can help reduce background [14].
- Automated Advantage: Automated stainers standardize the fixation process, applying consistent volumes and incubation times for every sample, which eliminates variability introduced by manual handling [56].
Potential Cause 2: Inadequate Pre-treatment or Enzyme Digestion.
- Root Cause: Insufficient pre-treatment leaves cellular debris that causes autofluorescence or non-specific binding. Over-digestion can damage the sample and target sequence [14] [6].
- Manual Troubleshooting: Perform a titration experiment for critical steps like Proteinase K digestion to find the optimal concentration that maximizes signal while preserving morphology (a good starting point is 1-5 µg/mL for 10 minutes at room temperature) [6].
- Automated Advantage: Automated platforms precisely control the temperature, timing, and volume of pre-treatment reagents. This ensures every slide receives identical digestion conditions, making optimization reproducible [56].
Potential Cause 3: Insufficient Stringency Washes.
- Root Cause: Post-hybridization washes are critical for removing excess or loosely bound probes. If the stringency (controlled by temperature, pH, and salt concentration) is too low, non-specifically bound probes will not be removed [2] [14].
- Manual Troubleshooting: Optimize wash stringency by carefully adjusting the temperature and salt concentration. Use freshly prepared wash buffers [14]. For CISH, a stringent wash with SSC buffer at 75–80°C is recommended [2].
- Automated Advantage: Automated systems perform stringent washes at exact, pre-programmed temperatures and for defined durations, eliminating human error and ensuring the highest level of consistency in this critical step [56] [57].
Q: My background is high, and the specific signal is weak. Could the issue be with my probe or hybridization conditions?
Yes, probe handling and hybridization parameters are frequent culprits.
Potential Cause 1: Non-Optimal Denaturation Conditions.
- Root Cause: Denaturation that is too brief or at too low a temperature can prevent proper probe binding. Excessively long or hot denaturation can unmask non-specific binding sites and damage the sample [2] [14].
- Manual Troubleshooting: For manual protocols, denaturation at 95 ± 5°C for 5-10 minutes is a common guideline. Use a validated thermometer to confirm hot plate temperature [2].
- Automated Advantage: Automated stainers have integrated, calibrated heating elements that ensure the denaturation step occurs at the exact specified temperature and time for every single run [56].
Potential Cause 2: Endogenous Biotin or Enzymes.
- Root Cause: In tissues with high endogenous biotin, avidin- or streptavidin-based detection systems will bind non-specifically, creating a high background [6].
- Manual Troubleshooting: Block endogenous biotin by adding excess avidin or streptavidin prior to probe hybridization. Alternatively, use a digoxigenin-labeled probe system, as digoxigenin is not naturally found in animal tissues [6].
- Automated Advantage: Many automated staining systems include built-in, pre-programmed steps for blocking endogenous enzymes and biotin, ensuring this critical step is never missed [57].
Potential Cause 3: Probe Mismatch or Degradation.
- Root Cause: Using a biotin-labeled probe with an anti-digoxigenin conjugate (or vice versa) will fail. Degraded probes can also produce erratic results [2].
- Manual Troubleshooting: Always verify that your probe label matches the detection conjugate. Check the integrity of your probes and store them according to manufacturer specifications.
- Automated Advantage: Integrated automated systems often use pre-loaded, barcoded reagents where the instrument software can verify reagent-track lot compatibility, reducing the risk of human error [58].
Experimental Protocol: Optimizing ISH with an Automated Stainer
This protocol outlines a generalized workflow for performing an ISH assay on a fully automated staining platform, highlighting steps critical for minimizing background.
Objective: To consistently detect a specific nucleic acid target in formalin-fixed, paraffin-embedded (FFPE) tissue sections with high specificity and low background using an automated stainer.
Materials:
- Fully automated IHC/ISH stainer (e.g., Roche BenchMark ULTRA series, Celnovte CNT360) [56] [57]
- FFPE tissue sections (3-4μm thick recommended) [14]
- Appropriate ISH probe (DNA, RNA, or oligonucleotide)
- Stainer-specific reagent kit (including deparaffinization, pre-treatment, hybridization, wash, and detection reagents)
Method:
Slide Loading and Deparaffinization:
- Load slides onto the automated stainer.
- The instrument will automatically perform baking and deparaffinization using standardized conditions.
Heat-Induced Epitope Retrieval and Pre-treatment:
- The stainer will subject the slides to a pre-programmed heat-induced retrieval step (e.g., 15-30 minutes at 98–100°C) [2] [14].
- This is followed by an automated enzymatic digestion (e.g., pepsin or Proteinase K for 3-10 minutes at 37°C). The instrument's precision ensures no evaporation and consistent timing [2] [56].
Denaturation and Hybridization:
- Denaturation occurs on the instrument's hot plate at a precise temperature (e.g., 95±5°C for 5-10 minutes) [2].
- The probe is applied, and hybridization is carried out under cover-slipped conditions in a humidified chamber at 37°C for the set duration (often overnight). The automated system maintains a perfect humidified environment to prevent slide drying [2].
Stringent Washes:
- The stainer performs post-hybridization washes. The most critical is the stringent wash (e.g., with SSC buffer at 75–80°C for 5 minutes) to remove non-specifically bound probe [2].
Detection and Counterstaining:
- The detection system (e.g., enzyme conjugate and chromogenic substrate) is applied automatically.
- The reaction is monitored and stopped after a defined time or based on the development of control slides.
- A light counterstain (e.g., Mayer’s hematoxylin for 5-60 seconds) is applied to avoid masking the specific signal [2].
Frequently Asked Questions (FAQs)
Q: How does automation specifically improve reproducibility in ISH? A: Manual protocols are vulnerable to variability in reagent application, incubation times, and temperatures. Automated stainers eliminate this by performing every step according to a precise digital protocol. Each slide is processed identically, drastically reducing inter-assay and inter-operator variability and producing highly reproducible results [56] [57].
Q: Can automated stainers handle complex assays like multiplex ISH? A: Yes. Advanced automated stainers are specifically designed for complex assays. They can automate the sequential application and layering of multiple probes and detection systems, ensuring clear signals with minimal crossover. This is exceptionally difficult to achieve consistently by hand [56].
Q: What is the most critical step to automate for reducing background? A: While every step is important, the stringent wash is particularly critical. Slight variations in temperature or duration during this wash can lead to either high background (if too low) or loss of specific signal (if too high). Automation guarantees this step is performed with precision every time [2] [14].
Q: Besides consistency, what are other key benefits of automated staining platforms? A: Key benefits include:
- Increased Throughput: Processing 30-90 slides in a single run frees up technician time for higher-level analysis [58] [57].
- Enhanced Safety: Minimizes technician exposure to hazardous chemicals used in the staining process [57].
- Traceability: Digital logs and barcoding provide a full audit trail for reagents and protocols, which is essential for regulated environments [58].
Research Reagent Solutions
The table below details key reagents used in ISH and their function, with a focus on troubleshooting high background.
| Reagent | Function in ISH | Troubleshooting Role |
|---|---|---|
| Proteolytic Enzymes (e.g., Pepsin, Proteinase K) | Digests proteins that mask target nucleic acids, enabling probe access [2] [6]. | Concentration and time must be optimized. Under-digestion decreases signal; over-digestion damages morphology and can increase background [2] [6]. |
| Formamide | Added to hybridization buffer to lower the melting temperature (Tm) of DNA, allowing hybridization to occur at lower temperatures that preserve tissue morphology [6]. | A key component for controlling stringency during hybridization. |
| Saline-Sodium Citrate (SSC) Buffer | A salt buffer used in hybridization and post-hybridization washes. | The concentration and temperature of SSC in the stringent wash are primary determinants of stringency. Higher temperature/lower salt increases stringency, reducing background [2] [14]. |
| DIGX or Biotin Labels | Non-isotopic tags incorporated into probes. Detected by specific antibodies (anti-DIG) or streptavidin conjugated to reporter enzymes [6]. | Digoxigenin (DIG) is often preferred over biotin for tissues with high endogenous biotin to avoid non-specific background staining [6]. |
| Blocking Reagents (e.g., COT-1 DNA) | Used to block repetitive sequences (like Alu or LINE elements) in the genome [2]. | Adding COT-1 DNA during hybridization is essential when using probes containing repetitive sequences to prevent them from binding non-specifically and elevating background [2]. |
Workflow Diagrams
Diagram 1: Automated vs Manual ISH Workflow
Diagram 2: Automated ISH Error Reduction Pathways
Troubleshooting Guides
FAQ: Addressing High Background in In Situ Hybridization
What are the primary causes of high background signal in my ISH experiment?
High background, or non-specific signal, can arise from numerous sources throughout your ISH protocol. Key culprits include insufficient stringency washing, suboptimal sample fixation (both under-fixation and over-fixation), over-digestion or under-digestion during enzyme pretreatment, probe drying during incubation, and use of degraded or contaminated wash buffers [2] [14] [4]. The table below summarizes common causes and their solutions.
How can I optimize the stringency wash to reduce background?
The stringency wash is critical for removing non-specifically bound probes. For CISH/FISH assays, use SSC buffer at a temperature between 75-80°C for the wash step [2]. It is recommended to increase the temperature by 1°C per slide when washing more than two slides, but do not exceed 80°C [2]. Ensure the wash buffer is freshly prepared to prevent contamination or degradation that can lead to high background [14].
My sample preparation is meticulous. What else could be causing high background?
Even with careful sample preparation, background issues can persist. Check the following:
- Optical Filters: Worn or damaged filters on your fluorescence microscope can exhibit a mottled appearance and contribute to background noise. Protect them from the light source and replace them according to the manufacturer's guidelines, typically every 2-4 years [14].
- Probe Design: Probes containing many repetitive sequences (like Alu or LINE elements) can elevate background. This can be blocked by adding COT-1 DNA during the hybridization step [2].
- Reagent Evaporation: Ensure the probe solution does not dry out during long incubation times, as this is a common cause of heavy, non-specific staining, particularly at the edges of the section [4].
Troubleshooting Table: High Background in ISH
| Problem Area | Specific Issue | Recommended Solution |
|---|---|---|
| Sample Preparation | Under-fixation or over-fixation [14] | Use freshly prepared fixatives and adhere closely to recommended fixation times [14]. |
| Incorrect tissue section thickness [14] | For FFPE tissue, aim for sections 3-4μm thick for optimal probe penetration [14]. | |
| Pre-treatment | Over-digestion with pepsin or enzyme [2] | Optimize digestion time (e.g., 3-10 min at 37°C for most tissues). Over-digestion can weaken signal and prevent counterstaining [2]. |
| Under-digestion with pepsin or enzyme [2] | Increase digestion time within the recommended range. Under-digestion can decrease or eliminate the specific signal [2]. | |
| Hybridization & Detection | Probe drying during incubation [4] | Use a sealed, humidified chamber during hybridization to prevent evaporation [2] [4]. |
| Insufficient stringency washing [2] | Perform stringent wash with SSC buffer at 75-80°C for 5 minutes [2]. | |
| Incorrect wash buffer [2] | Use the correct wash solution (e.g., PBST). Washing with PBS without Tween 20 or distilled water can increase background [2]. | |
| Conjugate/Substrate mismatch [2] | Ensure HRP is used with DAB/AEC and Alkaline Phosphatase with NBT/BCIP/Fast Red [2]. | |
| Dark counterstaining [2] | Use a light hematoxylin counterstain (5 sec - 1 min) to avoid masking the specific signal [2]. |
AI-Powered Multiplexing Workflow for Background Reduction
Advanced AI-powered spatial biology workflows are now being used to systematically analyze the tumor microenvironment (TME), which requires high-plex, low-background imaging. The following section details a protocol from a recent study that leverages AI to analyze 43 distinct cell phenotypes, a process where minimizing background is paramount [59].
Experimental Protocol: AI-Powered Spatial Cellomics
This protocol is adapted from a study profiling 1168 Non-Small Cell Lung Cancer (NSCLC) patients [59].
1. Tissue Microarray (TMA) Construction
- For each patient, select four 1.5 mm tissue cores from representative tumor regions and assemble them into TMAs for high-throughput imaging [59].
2. Multiplex Immunofluorescence (mIF) Staining
- Use a 12-plex immunofluorescence panel to characterize the TME. The panel should include markers for:
- Immune-related proteins: CD3, CD4, CD8, CD20, CD56, CD68, CD163, FOXP3, Granzyme B (GrB).
- Immune-checkpoints: PD-1, PD-L1.
- Epithelial cells: Cytokeratin (CK).
- This panel allows for the distinction of 43 different cell types [59].
3. Consecutive H&E Staining
- Stain the same sections with Hematoxylin & Eosin (H&E) and re-scan to enable integrated analysis of tumor histomorphology [59].
4. AI-Based Image Analysis Pipeline
- Tissue Segmentation: Train a deep convolutional neural network with a UNet architecture to segment carcinoma, necrosis, tumor stroma, and healthy tissue. The final model in the cited study achieved a macro-averaged F1-score of 0.92 [59].
- Cell Detection: Use an optimized object detection model (e.g., StarDist) fine-tuned on pathologist-annotated cell nuclei to detect cell nuclei. The cited model achieved an F1-score of 0.91 [59].
- Cell Classification: Employ a multi-label classification task using multiple independent models (e.g., one per mIF channel using a ConvNext architecture) to classify cells based on the mIF markers. The cited models achieved an average F1-score of 0.91 across 53 million cells [59].
5. Niche Identification and Survival Analysis
- Derive niche composition by comparing local marker frequencies within a defined radius (e.g., 34 µm) to prototype distributions obtained via clustering [59].
- Use the identified cell niches to train a predictor of patient survival on one cohort and validate it on an independent cohort [59].
Quantitative Data from AI Spatial Biology Studies
The table below summarizes key quantitative metrics from recent landmark studies utilizing AI-powered spatial biology, demonstrating the scale and accuracy of these approaches.
| Study / Reference | Cohort Size | Multiplexing Panel | Cells Analyzed | AI Model Performance (F1-Score) | Clinical Improvement |
|---|---|---|---|---|---|
| NSCLC AI-Spatial Cellomics [59] | 1,168 patients | 12-plex (43 cell types) | 53 million | Tissue Segmentation: 0.92Cell Detection: 0.91Cell Classification: 0.91 | 14-47% improvement in risk stratification |
| Melanoma SECOMBIT Trial [60] | 42 biopsies | 28-plex | Not Specified | Identified immune cell interactions linked to PFS and OS | Predictive biomarkers for immunotherapy and targeted therapy |
Workflow Diagram
Research Reagent Solutions
The following table lists essential reagents and tools used in advanced AI-powered spatial biology studies.
| Item | Function in the Experiment |
|---|---|
| Charged Slides [4] | Provides a surface that ensures thin, flat tissue sections adhere thoroughly to prevent uneven staining and background. |
| CytoCell LPS 100 Tissue Pretreatment Kit [14] | A standardized kit for optimal pre-treatment of FFPE tissue sections, critical for reducing background by breaking cross-links without damaging targets. |
| 12-plex Immunofluorescence Panel [59] | A panel of antibodies (e.g., CD3, CD4, CD8, CD20, CD68, CK, etc.) enabling the simultaneous detection and AI-based classification of 43 cell phenotypes. |
| COMET Platform & 28-plex Panel [60] | A high-plex spatial imaging platform and panel used for deep profiling of the tumor microenvironment and predictive biomarker discovery. |
| COT-1 DNA [2] | Used to block probe binding to repetitive DNA sequences (e.g., Alu, LINE elements), thereby reducing non-specific background signal. |
| Freshly Prepared Wash Buffers [2] [14] | Essential for effective removal of unbound probes during stringent washing steps; degraded or contaminated buffers are a common source of high background. |
Conclusion
Achieving low-background, high-fidelity in situ hybridization requires a holistic approach that integrates meticulous sample preparation, precise protocol optimization, and rigorous validation. By understanding the fundamental causes of background, systematically troubleshooting each step from fixation to final wash, and leveraging emerging technologies like automated platforms and AI-driven analysis, researchers can significantly enhance the reliability and interpretability of their ISH data. These advancements not only improve current diagnostic and research applications but also pave the way for more complex, multiplexed spatial analyses that will deepen our understanding of cellular function and disease pathology in the era of spatial biology.
References
- 1. How do I reduce high background in my FISH assay? [https://www.ogt.com/resources/fish-resources-and-support/fish-resources/optimise-your-fish-assay-simple-fixes-for-reducing-high-background-signal/]
- 2. In Situ Hybridization Support—Troubleshooting | Thermo Fisher Scientific - US [https://www.thermofisher.com/us/en/home/technical-resources/technical-reference-library/gene-expression-analysis-genotyping-support-center/in-situ-hybridization-support/ish-support-troubleshooting.html]
- 3. EDTA-FISH: A Simple and Effective Approach to Reduce ... [https://pmc.ncbi.nlm.nih.gov/articles/PMC7511785/]
- 4. Steps to Better ISH Staining [https://www.leicabiosystems.com/us/knowledge-pathway/steps-to-better-ish/]
- 5. FISH Tips and Troubleshooting | Today's Clinical Lab [https://www.clinicallab.com/fish-tips-and-troubleshooting-22053]
- 6. 10 Tips for Optimizing In Situ Hybridization (ISH) [https://www.enzo.com/note/10-tips-for-optimizing-in-situ-hybridization-ish/]
- 7. In Situ Hybridization: Tips, Techniques, and Expert Insights [https://www.the-scientist.com/tips-and-tricks-for-in-situ-hybridization-71928]
- 8. Ultimate IHC Troubleshooting Guide: Fix Weak Staining & ... [https://www.atlasantibodies.com/knowledge-hub/blog/the-ultimate-ihc-troubleshooting-guide-from-weak-staining-to-high-background/]
- 9. How do I reduce high background in my FISH assay? [https://www.ogt.com/ca/resources/fish-resources-and-support/fish-resources/optimize-your-fish-assay-simple-fixes-for-reducing-high-background-signal/]
- 10. ISH: in situ hybridization protocol [https://www.abcam.com/en-us/technical-resources/protocols/in-situ-hybridization]
- 11. Treatment of tissue sections for in situ hybridization [https://pubmed.ncbi.nlm.nih.gov/16780190/]
- 12. THE COMBINED EFFECTS OF FORMALIN FIXATION AND ... [https://pmc.ncbi.nlm.nih.gov/articles/PMC2903968/]
- 13. A technical review and guide to RNA fluorescence in situ ... [https://pmc.ncbi.nlm.nih.gov/articles/PMC7085896/]
- 14. How do I reduce high background in my FISH assay? [https://www.ogt.com/us/resources/fish-resources-and-support/fish-resources/optimize-your-fish-assay-simple-fixes-for-reducing-high-background-signal/]
- 15. Quantification of absolute labeling efficiency at the single- ... [https://pmc.ncbi.nlm.nih.gov/articles/PMC11399078/]
- 16. Visualizing neuroinflammation with fluorescence and luminescent... [https://jneuroinflammation.biomedcentral.com/articles/10.1186/s12974-019-1451-2]
- 17. correction for fluorescence Autofluorescence in situ hybridization [https://pubmed.ncbi.nlm.nih.gov/7587724/]
- 18. Universal Improvement of In Situ Hybridization Chain ... [https://pubmed.ncbi.nlm.nih.gov/40653625/]
- 19. Troubleshooting | In Situ Hybridization, RNA-ISH [https://acdbio.com/ebook/troubleshooting]
- 20. Best practices for RNA storage and sample handling [https://www.qiagen.com/us/knowledge-and-support/knowledge-hub/bench-guide/rna/introduction/general-remarks-on-rna-handling-storage-and-stabilization]
- 21. Top Ten Ways to Improve Your RNA Isolation [https://www.thermofisher.com/us/en/home/references/ambion-tech-support/rna-isolation/general-articles/ten-ways-to-improve-your-rna-isolation.html]
- 22. In Situ Hybridization Protocol & Troubleshooting [https://www.creativebiolabs.net/in-situ-hybridization.htm]
- 23. RNAscope ISH Troubleshooting [https://www.bio-techne.com/resources/protocols-troubleshooting/rnascope-ish-troubleshooting]
- 24. Optimizing Preservation Protocols to Extract High-Quality ... [https://pubmed.ncbi.nlm.nih.gov/23683108/]
- 25. What are the Differences Between DNA and RNA Probes? [https://www.enzo.com/note/what-are-the-differences-between-dna-and-rna-probes/]
- 26. Comparative evaluation of DNA and RNA probes for ... [https://pmc.ncbi.nlm.nih.gov/articles/PMC12333292/]
- 27. FISH Tips and Troubleshooting [https://www.creative-bioarray.com/support/fish-tips-and-troubleshooting.htm]
- 28. IHC antigen retrieval protocol | Abcam [https://www.abcam.com/en-us/technical-resources/protocols/ihc-antigen-retrieval]
- 29. - Heat Antigen Induced for Immunohistochemical Reactions in... Retrieval [https://pmc.ncbi.nlm.nih.gov/articles/PMC7604828/]
- 30. Hybridisation - Bioinformatics [https://www.bioinformatics.nl/molbi/SimpleCloningLab/Hybridisation.htm]
- 31. Solution Hybridization - an overview [https://www.sciencedirect.com/topics/medicine-and-dentistry/solution-hybridization]
- 32. Background Staining In IHC And IF [https://vectorlabs.com/blog/my-staining-didnt-work-part-1-background-staining-in-ihc-and-if/?srsltid=AfmBOop0ga_TnBgIH4VPZ4NiZUR7bgW7pEDP46TNkG-CIiJWc6S2E886]
- 33. Immunohistochemistry (IHC) Troubleshooting Guide & the ... [https://www.cellsignal.com/learn-and-support/troubleshooting/ihc-troubleshooting-guide?srsltid=AfmBOopT982I5wFQlB2ohlskmQhpd2PqC1i0yI5jd6QEsCQfCJkmCxNz]
- 34. IHC Troubleshooting Guide [https://www.thermofisher.com/us/en/home/life-science/protein-biology/protein-biology-learning-center/protein-biology-resource-library/pierce-protein-methods/ihc-troubleshooting-guide.html]
- 35. High background in immunohistochemistry [https://www.abcam.com/en-us/technical-resources/troubleshooting/high-background-in-immunohistochemistry]
- 36. IHC Immunodetection (Staining) [https://www.thermofisher.com/us/en/home/life-science/protein-biology/protein-biology-learning-center/protein-biology-resource-library/pierce-protein-methods/ihc-immunodetection.html]
- 37. What are the Common Reporter Enzymes used in IHC [https://www.enzo.com/note/what-are-the-common-reporter-enzymes-used-in-ihc/]
- 38. IHC Troubleshooting Guide | Common Issues & Fixes [https://www.bosterbio.com/protocol-and-troubleshooting/ihc-troubleshooting?srsltid=AfmBOoq0Fe0fpjjIqdmf0jKGIHUD8FIeTPRGvNyWHpRo1caTsc7bFv7o]
- 39. Controls for Immunohistochemistry: The Histochemical ... [https://pmc.ncbi.nlm.nih.gov/articles/PMC4212362/]
- 40. RNAscope Troubleshooting Guide and FAQ [https://acdbio.com/technical-support/solutions/faq]
- 41. Ten Tips for In Situ Hybridization of Tissue Microarrays [https://www.thermofisher.com/us/en/home/references/ambion-tech-support/microrna-studies/general-articles/ten-tips-for-in-situ-hybridization-.html]
- 42. 20 Answers to Important Proteinase K Questions [https://www.goldbio.com/blogs/articles/20-answers-to-important-proteinase-k-questions-plus-free-printable-fact-sheet?srsltid=AfmBOoq1xwesm7ztY6eAVnpIE-DMKDFt38N-2-ZLWnPwfzC4vzTcd0DH]
- 43. Review of In Situ Hybridization Techniques for Drug Research ... [https://pmc.ncbi.nlm.nih.gov/articles/PMC10467011/]
- 44. Rinse Right: The Hidden Power of Washing in Western Blots [https://www.agrisera.com/en/blogg/technical-blog/2025/02/11/rinse-right-the-hidden-power-of-washing-in-western-blots.html]
- 45. High Background, In Situ Hybridization | ACD [https://acdbio.com/ebook/troubleshooting/high-background]
- 46. Microscope Cleaning & Maintenance: Expert Guide for ... [https://www.zeiss.com/microscopy/en/resources/insights-hub/foundational-knowledge/microscope-cleaning--maintenance.html]
- 47. Microscope Maintenance: How to Keep Your Optics in Top ... [https://moticmicroscopes.com/blogs/articles/microscope-maintenance-how-to-keep-your-optics-in-top-conditio?srsltid=AfmBOorwOGVIjsZRSznwfJ3Q8mz1i8LcikuS8t4TlFyjIT0Cszes_6sp]
- 48. Dealing with the problem of non-specific in situ mRNA ... [https://pmc.ncbi.nlm.nih.gov/articles/PMC2829549/]
- 49. Rigor and Reproducibility in Experimental Design [https://smcclatchy.github.io/exp-design/03-common-flaws/]
- 50. RNAscope Troubleshooting Guide and FAQ [https://acdbio.com/technical-support/solutions]
- 51. Advances in spatial transcriptomics and its application ... [https://www.nature.com/articles/s41413-025-00429-w]
- 52. Protocol optimization improves the performance of ... [https://www.nature.com/articles/s41598-025-17477-1]
- 53. Comparison of spatial transcriptomics technologies using ... [https://genomebiology.biomedcentral.com/articles/10.1186/s13059-025-03624-4]
- 54. Enhancing RNA Capture Efficiency in Spatial Transcriptomics [https://www.mdpi.com/1422-0067/26/22/11076]
- 55. High-content enhancement strategies for fluorescence in ... [https://www.sciencedirect.com/science/article/abs/pii/S0165993625002225]
- 56. Common IHC Stainer Issues: Understanding the Top Three ... [https://www.celnovte.com/solution/common-ihc-stainer-issues-understanding-the-top-three-challenges/]
- 57. Automated slide staining systems [https://diagnostics.roche.com/us/en/products/product-category/lab-type/pathology-lab/automated-slide-staining-systems.html]
- 58. Automated IHC and ISH Stainer Market Growth 2025–2033 [https://www.linkedin.com/pulse/automated-ihc-ish-stainer-market-growth-20252033-forecast-a8vjc]
- 59. AI-powered spatial cell phenomics enhances risk ... [https://www.nature.com/articles/s41467-025-65783-z]
- 60. AI-Powered Spatial Biology Workflow from ... [https://investors.bio-techne.com/news/detail/511/ai-powered-spatial-biology-workflow-from-bio-techne-and-nucleai-enables-predictive-biomarker-discovery-in-melanoma-patients]