Whole Mount Immunofluorescence for Embryo Analysis: Principles, Protocols, and 3D Imaging Applications
This article provides a comprehensive guide to whole-mount immunofluorescence (WM-IF), a powerful technique for visualizing protein expression within the three-dimensional context of intact embryos and tissue samples.
Whole Mount Immunofluorescence for Embryo Analysis: Principles, Protocols, and 3D Imaging Applications
Abstract
This article provides a comprehensive guide to whole-mount immunofluorescence (WM-IF), a powerful technique for visualizing protein expression within the three-dimensional context of intact embryos and tissue samples. Tailored for researchers, scientists, and drug development professionals, we cover the foundational principles of WM-IF, detailed methodological protocols for various model organisms, advanced troubleshooting and optimization strategies, and rigorous validation approaches. By preserving spatial relationships and tissue architecture, WM-IF enables unparalleled analysis of morphogenetic events, cell fate mapping, and drug responses in complex 3D systems, making it an indispensable tool for developmental biology and preclinical research.
The Power of 3D Vision: Core Principles of Whole-Mount Immunofluorescence
Whole-mount immunofluorescence (WMIF) represents a transformative methodological approach in biomedical research that enables the comprehensive three-dimensional visualization of biological specimens. Unlike traditional sectioning techniques that compromise structural integrity, WMIF preserves the complete spatial architecture of tissues, organs, and entire embryos during the staining and imaging process. This technical guide explores the core principles of WMIF, with a specific focus on its unparalleled capacity for 3D preservation within the context of embryo analysis research. By examining advanced protocols, computational analytic pipelines, and quantitative applications, this review establishes WMIF as an indispensable tool for researchers investigating complex developmental processes, tissue organization, and cellular interactions in their native spatial context.
Whole-mount immunofluorescence is an advanced immunohistochemical technique wherein entire biological specimens—ranging from early-stage embryos to isolated organs—are processed for immunofluorescence staining without physical sectioning. The methodology involves permeabilizing fixed tissues, allowing antibodies to penetrate throughout the specimen, and using fluorescently-labeled markers to visualize target antigens within their native three-dimensional environment [1] [2]. This approach stands in stark contrast to conventional immunohistochemical methods that require tissue sectioning, which inevitably destroys valuable three-dimensional structural information and spatial relationships between cells and tissues.
The fundamental principle underlying WMIF is the preservation of anatomical integrity throughout the staining and imaging process. This preservation enables researchers to conduct comprehensive analyses of biological structures within their authentic physiological context [2]. For embryo research specifically, WMIF provides an unparalleled window into developmental processes, allowing scientists to trace lineage relationships, map gene expression patterns in three dimensions, and understand how morphological changes unfold across entire embryonic structures without reconstruction artifacts from serial sections.
The Defining Advantage: Three-Dimensional Preservation
Core Principle: Maintaining Spatial Architecture
The paramount advantage of whole-mount immunofluorescence is its capacity to maintain the complete spatial architecture of biological specimens. Traditional two-dimensional imaging methods, while useful for many applications, fundamentally lack the capacity to capture intricate three-dimensional relationships that are crucial for understanding complex biological systems [3]. When tissues are sectioned for conventional immunohistochemistry, critical spatial information about cellular organization, tissue boundaries, and structural relationships is irrevocably lost or must be painstakingly reconstructed from serial sections with inherent alignment challenges.
WMIF overcomes these limitations by preserving specimens intact throughout the entire staining and imaging process. This holistic approach allows researchers to visualize how cells and tissues are organized in three-dimensional space, revealing anatomical and molecular relationships that are simply inaccessible through section-based methods [3]. For embryonic development research, where spatial positioning and tissue interactions drive morphogenetic events, this 3D preservation is not merely advantageous but essential for accurate interpretation of developmental processes.
Comparative Analysis: WMIF vs. Traditional Methods
Table 1: Comparative analysis of whole-mount immunofluorescence versus traditional sectioning methods
| Parameter | Whole-Mount Immunofluorescence | Traditional Sectioning Methods |
|---|---|---|
| Spatial Information | Preserves complete 3D architecture | Limited to 2D plane with reconstructed 3D |
| Tissue Integrity | Maintains intact specimen | Physical disruption through sectioning |
| Antibody Penetration | Requires optimization for deep tissue | Minimal penetration issues |
| Imaging Requirements | Specialized microscopy (confocal, two-photon) | Standard widefield microscopy often sufficient |
| Data Complexity | High (requires 3D reconstruction/analysis) | Lower (primarily 2D analysis) |
| Specimen Size Limits | Limited by light penetration | Virtually unlimited through serial sectioning |
| Application in Embryology | Ideal for studying spatial relationships in development | Limited for comprehensive 3D developmental analysis |
Technical Evidence of 3D Capabilities
The superior capabilities of WMIF for 3D analysis are demonstrated across multiple research applications. In cardiac conduction system research, WMIF has enabled the precise 3D localization of the sinoatrial node (SAN) and atrioventricular node (AVN) within the intact mouse heart, revealing their complex anatomical relationships with surrounding myocardium and neural elements without disruptive sectioning [2]. Similarly, in developmental studies, WMIF has facilitated the quantitative 3D analysis of progenitor cell populations within the developing cardiac crescent at embryonic day 8.25 in mice, providing unprecedented insights into early heart development with preserved spatial context [1].
The power of 3D reconstruction from WMIF data is particularly evident in liver tissue studies, where volumetric rendering reveals complex interactions between cellular and structural components that traditional two-dimensional imaging methods cannot capture [3]. Structures that appear obscured or incomprehensible in 2D slices become clear and analytically accessible when visualized in three dimensions, demonstrating the transformative potential of WMIF for tissue-level analysis.
Technical Foundations and Methodological Framework
Fundamental Workflow of Whole-Mount Immunofluorescence
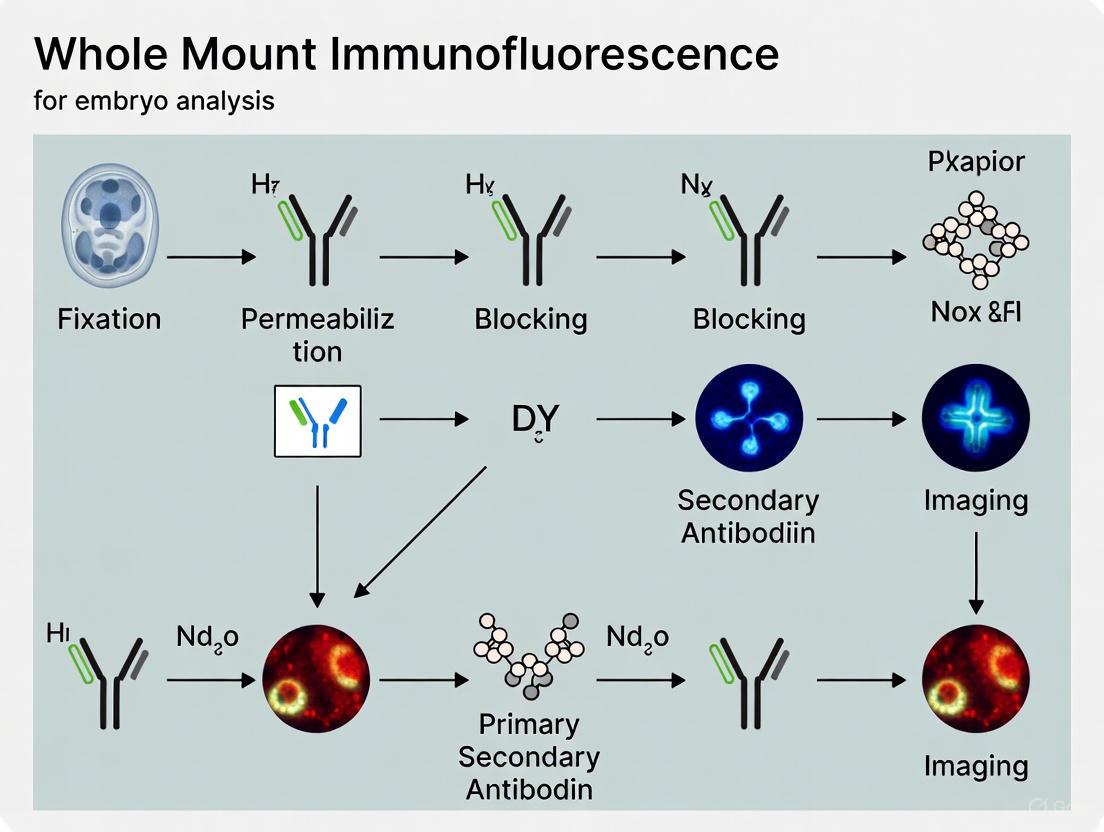
The successful implementation of WMIF requires careful execution of a multi-stage process designed to balance antigen preservation, antibody penetration, and structural integrity. The following workflow diagram illustrates the core procedural pathway:
Critical Protocol Specifications for Embryo Analysis
Table 2: Key methodological parameters for successful whole-mount immunofluorescence in embryo research
| Protocol Step | Technical Specifications | Purpose | Embryo-Specific Considerations |
|---|---|---|---|
| Fixation | 4% PFA, 1h RT or O/N at 4°C [1] | Preserve tissue architecture and antigenicity | Duration adjusted based on embryo size/stage |
| Permeabilization | 0.5-2% Triton X-100, 30min - 4h [1] [4] | Enable antibody penetration | Concentration and time critical for balance between access and preservation |
| Blocking | 1% BSA, 0.1-0.3% Triton in PBS, 4h RT or O/N 4°C [1] | Reduce non-specific binding | May include species-specific serum matching secondary antibodies |
| Primary Antibody | 1:50-1:1000 dilution, 1-7 days at 4°C [1] [5] | Target antigen recognition | Extended incubation often needed for deep penetration |
| Washing | 0.1% Triton in PBS, 3x1h to O/N [1] | Remove unbound antibodies | Multiple extended washes crucial for background reduction |
| Secondary Antibody | 1:100-1:500 dilution, 1-3 days at 4°C [1] | Fluorescent detection | Light-protected during incubation and storage |
| Mounting | 80% glycerol or ProLong Gold [6] [4] | Refractive index matching | Critical for optimal light penetration in imaging |
| Nuclear Counterstain | DAPI (10min, RT) [1] | Structural reference | Enables cellular identification and segmentation |
Research Reagent Solutions for WMIF
The successful implementation of WMIF depends on carefully selected reagents and materials optimized for 3D tissue preservation and analysis. The following table details essential solutions and their specific functions in the WMIF workflow:
Table 3: Essential research reagents for whole-mount immunofluorescence
| Reagent Category | Specific Examples | Function | Technical Notes |
|---|---|---|---|
| Fixatives | 4% Paraformaldehyde (PFA) [1] | Preserve tissue architecture and antigen epitopes | Concentration and duration vary with tissue size |
| Permeabilization Agents | Triton X-100 (0.5-2%), Saponin (0.5%) [1] | Disrupt membranes for antibody penetration | Balance between penetration and structural preservation |
| Blocking Solutions | BSA (1%), serum (1-10%), saponin (0.5%) [1] | Reduce non-specific antibody binding | Serum should match host species of secondary antibody |
| Mounting Media | 80% glycerol, ProLong Gold [6] [4] | Refractive index matching for imaging | Includes anti-fade agents to reduce photobleaching |
| Clearing Agents | Glycerol (80%), optiprep [6] | Enhance tissue transparency | Critical for light penetration in thick specimens |
| Nuclear Stains | DAPI, Hoechst [6] [1] | Label all nuclei for structural reference | Enables cell counting and segmentation |
| Washing Buffers | PBS with 0.1% Triton X-100 [1] | Remove unbound reagents | Multiple extended washes reduce background |
Advanced Methodologies in Whole-Mount Immunofluorescence
Computational Analysis and 3D Reconstruction
The rich three-dimensional data generated through WMIF requires sophisticated computational approaches for extraction of meaningful biological insights. Advanced pipelines have been developed to process, segment, and quantify 3D image data, such as the Tapenade Python package which provides tools for accurate 3D nuclei segmentation and reliable quantification of gene expression patterns in intact specimens [6]. These computational methods enable researchers to move beyond qualitative assessment to precise quantitative analysis of spatial relationships, cellular densities, and morphological patterns within the preserved 3D architecture of whole-mounted specimens.
A significant challenge in WMIF analysis is the management and processing of large volumetric datasets, which can require substantial computational resources and specialized data management strategies [3]. The application of lazy loading bioimage visualization techniques helps address these challenges by enabling efficient access to large multidimensional images without loading entire datasets into memory, thereby facilitating the analysis of complex specimens such as multilayered organoids and late-stage embryos [6].
Multiphoton Microscopy for Deep Tissue Imaging
While conventional confocal microscopy is widely used for WMIF imaging, multiphoton microscopy provides a powerful alternative for large, densely-packed specimens such as gastruloids and later-stage embryos [6]. This technique utilizes longer excitation wavelengths that penetrate more deeply into tissues with reduced scattering and minimal photodamage compared to single-photon approaches. The superiority of multiphoton microscopy for challenging specimens is demonstrated by its application in imaging gastruloids ranging from 100-500μm in diameter, where it enables visualization at cellular resolution throughout the entire volume of these optically dense structures [6].
The integration of multiphoton imaging with spectral unmixing and dual-view registration further enhances the capabilities of WMIF, allowing researchers to achieve comprehensive visualization of complex specimens through computational fusion of multiple imaging angles [6]. These technical advances have been particularly valuable in organoid research, where they enable the correlation of cellular behaviors with tissue-scale organization in developing gastruloid models.
Clearing Techniques for Enhanced Penetration and Imaging
A critical technical consideration in WMIF is the optimization of tissue clearing to enhance antibody penetration and light transmission through thick specimens. Comparative studies of refractive index matching mounting mediums have identified 80% glycerol as an effective clearing agent that provides superior performance, resulting in a 3-fold reduction in intensity decay at 100μm depth and an 8-fold reduction at 200μm depth compared to phosphate-buffered saline mounting [6]. This enhanced penetration directly translates to improved imaging quality and more reliable cellular detection throughout the specimen volume.
The importance of effective clearing is quantifiably demonstrated by segmentation analysis in cleared specimens, which shows reliable detection of cell nuclei at depths up to 200μm, whereas continuous decline in cell density is observed in non-optimized preparations [6]. For embryo research, where structures may span several hundred micrometers, such optimization is essential for comprehensive analysis throughout the entire specimen.
Quantitative Applications in Embryo Research
Cardiac Crescent Progenitor Population Analysis
WMIF has enabled groundbreaking quantitative analysis of progenitor cell populations during early organogenesis stages. In cardiac crescent stage mouse embryos (E8.25), WMIF combined with confocal microscopy and 3D image processing has allowed researchers to precisely measure the spatial distribution and organization of specific progenitor populations, including the First and Second Heart Fields (FHF and SHF) [1]. This approach facilitates the creation of three-dimensional spatial reconstructions of the developing cardiac crescent, providing quantitative data on the localization and organization of these critical progenitor populations during a pivotal phase of heart development.
The quantitative power of this approach is enhanced through the use of reference antibodies that enable successive masking of anatomical structures and subsequent quantitative measurements of specific domains within the crescent [1]. This methodology provides both cellular and tissue-level information, bridging scales from individual cell identification to tissue-wide patterning analysis—a capability uniquely enabled by the 3D preservation inherent to WMIF.
Validation of Quantitative Potential
The quantitative potential of immunofluorescence methodologies has been rigorously validated through comparison with mass spectrometry, establishing that properly optimized immunofluorescence can achieve quantitative results comparable to this criterion standard for protein measurement [5]. In critical validation studies, when primary antibodies were used at optimal signal-to-noise concentrations determined through quantitative titration, strong linear correlation (R²=0.88) was observed between immunofluorescence measurements and absolute protein concentrations determined by mass spectrometry [5].
This demonstration of quantitative reliability is particularly significant for embryo research applications, where WMIF is increasingly used not merely for descriptive localization but for precise measurement of protein expression dynamics during development. The establishment of robust quantitative frameworks further enhances the value of 3D spatial information provided by WMIF, creating a powerful toolkit for systems-level analysis of developmental processes.
Emerging Techniques and Future Directions
Immunofluorescence Tomography
A recent innovation that extends the capabilities of traditional WMIF is immunofluorescence tomography, which combines physical sectioning with computational 3D reconstruction to achieve high-resolution visualization of large tissue volumes [7]. This method involves serial sectioning of methacrylate-embedded tissues followed by immunofluorescence staining of individual sections and computational alignment into coherent 3D volumes [7]. While this approach sacrifices some aspects of purely non-destructive imaging, it provides exceptional axial resolution and enables 3D reconstruction of tissues spanning millimeters in depth—substantially exceeding the limits of conventional optical microscopy.
A significant advantage of immunofluorescence tomography is the capacity for multiple rounds of staining and elution, allowing visualization of numerous markers on the same tissue series beyond the conventional limits of simultaneous multiplexing [7]. This capability is particularly valuable for embryonic analysis, where comprehensive characterization of multiple cell types and structures within the same specimen provides crucial information about developing tissues and organs.
Ex Vivo Systems for Implantation Research
WMIF methodologies are being integrated with novel ex vivo culture systems to create powerful platforms for investigating dynamic developmental processes. Recent advances have established ex vivo uterine systems that recapitulate embryo implantation with high efficiency (exceeding 90%), followed by embryogenesis and trophoblast invasion [8]. When combined with WMIF, these systems enable detailed 3D analysis of implantation interfaces and maternal-embryonic signaling events that were previously inaccessible for direct observation.
The integration of WMIF with these innovative culture approaches highlights the growing importance of 3D spatial analysis in developmental biology and provides a framework for investigating human development while addressing ethical constraints on in vivo research [8]. As these systems become more sophisticated, WMIF will play an increasingly central role in extracting quantitative spatial information from these complex biological models.
Whole-mount immunofluorescence represents a cornerstone methodology for developmental biology research, with its capacity for three-dimensional preservation standing as its defining advantage. By maintaining the spatial integrity of biological specimens throughout the staining and imaging process, WMIF provides unique insights into the architectural relationships that underlie developmental processes, tissue organization, and cellular interactions. The technical frameworks and applications outlined in this review demonstrate the transformative potential of WMIF for embryo research, particularly as quantitative approaches and computational analysis methods continue to advance.
As imaging technologies, computational power, and specimen preparation methods evolve, the applications of WMIF will undoubtedly expand, further solidifying its role as an essential tool for understanding development in three dimensions. For researchers investigating embryogenesis, organogenesis, and complex tissue systems, WMIF provides an indispensable approach for bridging the gap between molecular expression and morphological structure within the authentic context of intact biological systems.
The Critical Importance of Spatial Architecture in Developmental Biology
The emergence of complex organisms from a single fertilized egg is one of the most remarkable processes in biology, orchestrated not just by genetic blueprints but by their precise spatial execution within the developing embryo. The critical importance of spatial architecture in developmental biology lies in its fundamental role in establishing the three-dimensional organization necessary for proper tissue formation, organogenesis, and ultimately, viable organismal development. This spatial context enables the precise cellular communication and positional information that guide developmental processes. Within this framework, whole-mount immunofluorescence has emerged as an indispensable technique that preserves this critical three-dimensional information, allowing researchers to visualize protein localization and expression patterns within the intact architecture of early embryos [9]. Unlike traditional methods that require tissue sectioning, whole-mount techniques maintain the spatial context of the entire specimen, providing a comprehensive systems-level view of development as it unfolds across multiple scales—from subcellular structures to tissue-level organization.
The integration of spatial context with molecular analysis has revealed that developmental processes are orchestrated within specialized cellular microenvironments or niches. These niches—communities of spatially colocalized cells with coordinated functions—are shaped by interactions between neighboring cells and provide the architectural foundation for tissue formation [10]. Recent advances in spatial omics technologies have further enhanced our ability to characterize these niches at unprecedented resolution, capturing how spatial organization shapes health and disease from embryonic stages onward [11]. This review explores how the analytical power of whole-mount immunofluorescence and related spatial techniques is illuminating the fundamental principles of developmental biology through the lens of spatial architecture.
Principles of Whole-Mount Immunofluorescence for Spatial Analysis
Whole-mount immunofluorescence staining enables the visualization of protein expression within the context of an embryo's complete three-dimensional structure, preserving spatial relationships that are critical for understanding developmental processes. The technique involves applying specific antibodies conjugated to fluorescent tags to label target antigens in intact embryos, followed by confocal microscopy to capture high-resolution images throughout the specimen volume. This approach maintains the spatial integrity of the embryo, allowing researchers to analyze expression patterns without the spatial disruption inherent in traditional sectioning methods [9].
The methodological workflow for whole-mount immunofluorescence of early mouse embryos (up to E8.0) involves several critical stages that ensure preservation of both structural integrity and antigenicity. Specimens are first fixed to maintain native tissue architecture, followed by permeabilization to allow antibody penetration. After blocking non-specific binding sites, embryos are incubated with primary antibodies specific to the target proteins, then with fluorescently-labeled secondary antibodies. Critical to success is the careful optimization of antibody concentrations, incubation times, and washing steps to achieve specific labeling while minimizing background fluorescence. The stained embryos are ultimately cleared and mounted for confocal microscopy imaging, which generates optical sections that can be reconstructed into three-dimensional representations of protein distribution patterns [9].
A significant advantage of whole-mount techniques is their compatibility with multiple labeling, allowing simultaneous visualization of several proteins alongside nuclear stains. This multiplexing capability enables researchers to map the spatial relationships between different cell types, extracellular matrix components, and signaling molecules within the same specimen. When combined with increasingly sophisticated computational tools for three-dimensional image analysis and quantification, whole-mount immunofluorescence provides an unparalleled window into the spatial organization of developing systems, from preimplantation stages through early organogenesis [9].
Experimental Protocols for Spatial Analysis in Development
Whole-Mount RNA Fluorescent In Situ Hybridization with Autofluorescence Reduction
The integration of transcript localization with protein expression data provides a more comprehensive understanding of spatial regulation in development. An optimized protocol for whole-mount RNA fluorescent in situ hybridization (FISH) addresses the challenge of tissue autofluorescence that can compromise signal detection in embryo specimens. This approach combines specific nucleic acid probes with advanced oxidation-mediated techniques to reduce autofluorescence, significantly enhancing the signal-to-noise ratio for precise spatial localization of gene expression [12].
The experimental workflow begins with embryo fixation using paraformaldehyde to preserve RNA integrity and tissue architecture. Specimens are then treated with proteinase K to increase probe accessibility, followed by hybridization with gene-specific fluorescent probes. A critical innovation in this protocol is the incorporation of an oxidation step using reagents such as hydrogen peroxide or sodium borohydride to reduce endogenous autofluorescence without diminishing specific hybridization signals. After stringent washes to remove non-specifically bound probes, embryos are counterstained with DAPI to visualize nuclear architecture and mounted for imaging using fluorescence confocal microscopy [12].
This technique enables researchers to map the spatial expression patterns of multiple mRNA species simultaneously within the context of the whole embryo, maintaining the three-dimensional relationships between expression domains. The autofluorescence reduction component is particularly valuable for later stage embryos where endogenous fluorophores accumulate, and when combined with whole-mount immunofluorescence, provides a powerful multi-omics approach to spatial analysis in developmental biology.
Fluorescence Confocal Microscopy for Three-Dimensional Imaging
The implementation of fluorescence confocal microscopy represents a cornerstone technology for spatial analysis in developmental biology, enabling high-resolution imaging of intact specimens without physical sectioning. This optical imaging method provides virtual sections of untreated tissue that correspond remarkably well to traditional histology while preserving three-dimensional architecture [13].
The standardized protocol for fluorescence confocal imaging of embryonic tissues involves several key steps. Fresh specimens are stained with fluorochromes such as acridine orange (0.6 mM concentration, 20-second immersion), which binds nucleic acids and enhances nuclear contrast. The stained tissue is positioned between silicon-sealed glass slides to maintain hydration and spatial orientation during imaging. Using a confocal microscope equipped with a 488-nm diode laser and a ×30 water immersion objective with high numerical aperture (0.9), sequences of high-resolution images (0.75 mm × 0.75 mm) are automatically acquired. These individual tiles are computationally assembled into comprehensive mosaics up to 12 × 12 mm, mimicking the low-power view of conventional microscopy but with the advantage of optical sectioning at <2 μm horizontal and <5 μm vertical resolution [13].
This approach generates detailed three-dimensional datasets that can be digitally "sectioned" in any plane while maintaining the overall spatial context of the embryo. The ability to image at multiple depths (up to 250 μm depending on tissue characteristics) enables reconstruction of complex structures throughout their volume, providing unprecedented access to the spatial organization of developing tissues without compromising specimen integrity for subsequent analyses.
Key Research Reagent Solutions for Spatial Developmental Biology
The experimental approaches for spatial analysis in developmental biology rely on specialized reagents and tools optimized for preserving three-dimensional architecture while enabling specific molecular detection. The following table summarizes essential research solutions for whole-mount techniques:
Table 1: Essential Research Reagents for Spatial Developmental Biology
| Reagent/Tool | Function | Application Notes |
|---|---|---|
| Primary Antibodies | Specific detection of target proteins | Must be validated for whole-mount applications; penetration crucial [9] |
| Fluorochrome-Conjugated Secondaries | Signal amplification and detection | Multiple species compatibility enables multiplexing [9] |
| Acridine Orange | Nuclear staining | 0.6 mM concentration, 20-second immersion optimal for contrast [13] |
| Proteinase K | Tissue permeabilization | Concentration and timing critical for balance between access and preservation [12] |
| Paraformaldehyde | Tissue fixation | Preserves 3D architecture while maintaining antigenicity [12] [9] |
| VivaScope 2500 | Confocal microscopy | ×30/0.9 NA water immersion lens; 488-nm laser; <2 μm resolution [13] |
| Gene-Specific FISH Probes | mRNA localization | Designed against target sequences; multiple fluorophores enable multiplexing [12] |
| Oxidation Reagents | Autofluorescence reduction | Hydrogen peroxide or sodium borohydride enhance signal-to-noise ratio [12] |
Beyond these core reagents, several specialized tools enhance the capabilities of spatial analysis. The VivaScope 2500 confocal microscope system, with its inverted microscope configuration and automated mosaic acquisition, enables comprehensive imaging of large specimens up to 1.2 cm × 1.2 cm while maintaining cellular resolution [13]. For computational analysis, tools like NicheCompass employ graph deep-learning to model cellular communication and identify spatially organized niches based on signaling events, providing quantitative characterization of developmental microenvironments [10]. The integration of these reagents and analytical tools creates a powerful pipeline for deciphering the spatial complexity of embryonic development.
Quantitative Data in Spatial Developmental Biology
The application of spatial techniques in developmental biology generates rich quantitative datasets that reveal organizational principles across scales. The following table summarizes key quantitative parameters from essential methodologies:
Table 2: Quantitative Parameters of Spatial Analysis Techniques
| Method | Spatial Resolution | Tissue Penetration | Multiplexing Capacity | Processing Time |
|---|---|---|---|---|
| Whole-Mount Immunofluorescence | <2 μm (horizontal) <5 μm (axial) [13] | Up to 250 μm [13] | 4-8 targets simultaneously [9] | 2-3 days (including staining) [9] |
| Whole-Mount RNA FISH | <2 μm (horizontal) <5 μm (axial) [12] | Up to 250 μm [12] | 10+ transcripts simultaneously [12] | 3-4 days (including hybridization) [12] |
| Sequential FISH (seqFISH) | Subcellular [10] | Tissue-dependent | 100+ transcripts through sequential rounds [10] | 5-7 days (multiple hybridization cycles) [10] |
| NicheCompass Analysis | Single-cell [10] | Full specimen (reconstructed) | Unlimited molecular features [10] | Hours to days (computational) [10] |
These quantitative metrics highlight the complementary strengths of different spatial analysis approaches. While whole-mount immunofluorescence and RNA FISH provide high-resolution data within the context of intact embryos, computational methods like NicheCompass offer powerful integration across datasets and scales. The application of NicheCompass to mouse organogenesis data, for example, has successfully identified a hierarchy of functional niches—including distinct central nervous system regions (midbrain, forebrain, floor plate, hindbrain, and spinal cord) and gut niches—organized through specific signaling pathways such as Spint1 in the ventral gut and Fgf3 in the hindbrain [10].
The temporal dimension of spatial analysis also yields important quantitative insights into developmental dynamics. Time-course studies tracking niche formation during mouse embryonic development have revealed how signaling gradients establish spatial boundaries between emerging tissue compartments, with critical transitions occurring within precise developmental windows. These temporal-spatial relationships are fundamental to understanding how complex structures emerge through coordinated cell behaviors, differentiation programs, and morphogenetic movements within the evolving architectural framework of the embryo.
Signaling Pathways and Cellular Niches in Spatial Development
Architecture of Developmental Signaling Networks
The spatial organization of developing tissues emerges from precisely regulated signaling pathways that operate across multiple scales. Whole-mount analytical techniques have been instrumental in mapping these pathways within their native architectural context. In mouse embryonic development, key pathways include the Fgf signaling network that patterns the hindbrain and midbrain regions, the Shh pathway that demarcates the floor plate niche, and the Wnt planar cell polarity pathway mediated by Cthrc1-Fzd3 interactions in the dorsal gut niche [10].
These pathways exhibit distinctive spatial activation patterns that correspond to functional niches. For instance, the Fgf17 combined interaction program shows enriched activity in the midbrain niche, driven by ligand-encoding Fgf17 and receptor-encoding Fgfr2 genes that are essential for vertebrate midbrain patterning [10]. Similarly, the Dkk1 ligand-receptor program displays distinctive activity in the forebrain niche, where it promotes forebrain neuron precursor formation [10]. The visualization of these pathways within intact embryos reveals how morphogen gradients establish positional information that guides cellular differentiation and tissue patterning in three dimensions.
The integration of multiple signaling pathways within the same architectural framework creates a complex regulatory network that coordinates development across tissues. The spatial proximity of niches utilizing different signaling systems enables cross-regulation and integration of patterning information, establishing the complex blueprints for organ formation. Whole-mount techniques provide the comprehensive perspective needed to understand how these multiple systems interact within the same embryonic context, revealing the emergent properties of developmental systems that cannot be understood by studying individual pathways in isolation.
Computational Framework for Niche Identification and Characterization
The identification and characterization of cellular niches within developing tissues requires sophisticated computational approaches that can integrate spatial information with molecular data. NicheCompass represents a leading graph deep-learning method that models cellular communication to learn interpretable cell embeddings encoding signaling events, enabling the identification of niches and their underlying processes [10].
The algorithm processes cell-level or spot-level resolution spatial omics data by constructing a spatial neighborhood graph where nodes represent cells or spots and edges indicate spatial proximity. Each node contains an omics feature vector (gene expression in unimodal data or paired gene expression and chromatin accessibility in multimodal data). A graph neural network encoder then generates cell embeddings by jointly encoding features of nodes and their neighbors, effectively capturing cellular microenvironments [10]. This approach explicitly models how intercellular interactions shape niche identity and function, moving beyond simple spatial clustering to identify functionally coherent communities based on communication pathways.
The application of this computational framework to mouse organogenesis data has demonstrated its power to elucidate tissue architecture, revealing a hierarchy of highly resolved functional niches with niche-specific gene programs that remain consistent across embryos [10]. By quantifying signaling pathway usage within microenvironments, NicheCompass and related approaches provide a quantitative foundation for understanding how spatial architecture emerges from molecular interactions during development, offering insights into both normal embryogenesis and the spatial disruptions that characterize developmental disorders.
Visualization of Spatial Analysis Workflows
The integration of experimental and computational methods for spatial analysis involves sophisticated workflows that maintain architectural context throughout the analytical pipeline. The following diagram illustrates the core process for whole-mount spatial analysis:
Whole-Mount Spatial Analysis Workflow
This workflow begins with tissue preservation through fixation that maintains native architecture, followed by multiplexed staining to label molecular targets of interest. The critical imaging phase employs confocal microscopy to capture three-dimensional data without physical sectioning, generating comprehensive datasets that are then reconstructed and analyzed computationally to identify spatially organized niches and signaling patterns. Throughout this process, the architectural context of the embryo remains intact, enabling true spatial analysis rather than reconstruction from disaggregated data.
The application of computational methods to spatial data involves additional specialized workflows for niche identification and characterization. The following diagram illustrates the core computational process for signaling-based niche analysis:
Signaling-Based Niche Identification
This computational framework begins with construction of a neighborhood graph from spatial omics data, where nodes represent cells and edges represent spatial proximity. A graph neural network encoder then processes this graph to generate cell embeddings that capture microenvironmental context. These embeddings are analyzed to identify spatial gene programs representing signaling events and coordinated cellular activities. Finally, these programs enable quantitative niche characterization based on communication pathways, revealing the functional organization of tissues through their underlying signaling architecture [10].
Future Directions and Clinical Applications
The continued advancement of spatial analysis technologies promises to further transform our understanding of developmental biology and its clinical applications. Emerging approaches in spatial multi-omics enable simultaneous assessment of multiple molecular modalities—including gene expression, chromatin accessibility, and protein localization—within the same architectural context [10]. These integrated profiles provide increasingly comprehensive views of the regulatory networks guiding development, from epigenetic landscapes to functional protein distributions.
The application of artificial intelligence to spatial analysis represents another frontier, with deep learning approaches enabling automated identification of patterns and relationships within complex spatial datasets [11]. These methods facilitate the integration of spatial data across scales, from subcellular details to tissue-level organization, and can identify subtle architectural features that may elude conventional analysis. As these technologies mature, they offer the potential to construct predictive models of developmental processes that can guide both basic research and clinical applications in regenerative medicine and developmental disorder therapeutics.
The clinical translation of spatial analysis approaches builds on their demonstrated utility in pathological assessment, where fluorescence confocal microscopy has shown diagnostic capability comparable to conventional histology for various tissue types [13]. As these methods become more accessible and standardized, they offer potential for improving diagnosis of developmental disorders through more comprehensive assessment of tissue architecture. Furthermore, the insights gained from spatial analysis of normal development provide essential reference frameworks for understanding architectural disruptions in disease states, creating opportunities for earlier detection and more targeted interventions for conditions with developmental origins.
This technical guide details the core immunofluorescence (IF) staining workflow, framed within the context of whole-mount techniques essential for embryo analysis research. Whole-mount IF preserves the intricate 3-dimensional architecture of embryos, allowing for the comprehensive visualization of protein localization and cellular relationships within the intact specimen [14] [15].
Immunofluorescence (IF) is a powerful immunochemical technique that allows for the detection and localization of a wide variety of antigens in cells and tissues using fluorophore-tagged antibodies [16]. The whole-mount approach applies this technique to entire 3D structures, such as embryos or organoids, without sectioning, thereby maintaining spatial context and complex morphology [14] [15]. This is particularly valuable in developmental biology for studying protein expression patterns and signaling pathways throughout the entire embryo. The mandatory usage of extracellular matrix (ECM) gels or the inherent thickness of embryos poses distinct challenges, including limited antibody penetration and increased background, which this protocol is designed to overcome [14].
Core Staining Workflow
The following diagram illustrates the complete immunofluorescence staining workflow, from sample preparation through to imaging.
Sample Fixation
Objective: To preserve cellular architecture and immobilize antigens while maintaining antigenicity [16].
- Reagent Selection: The ideal fixative depends on the target antigen and sample type. Cross-linking reagents (e.g., formaldehyde) preserve structure well but may mask some epitopes, while organic solvents (e.g., methanol) precipitate cellular components and can permeabilize the membrane simultaneously [16] [17].
- Detailed Protocol for Formaldehyde Fixation:
- Prepare Fixative: Dilute 4% Paraformaldehyde (PFA) to 2% in sterile Phosphate-Buffered Saline (PBS). Warm to 37°C to prevent ECM gel disintegration in 3D cultures [14].
- Fix Samples: Aspirate culture medium and gently wash samples with pre-warmed PBS. Treat with 2% PFA for 15 minutes at room temperature [14].
- Safety: PFA is toxic. Use under a fume hood while wearing gloves and safety glasses [14].
- Quenching: After fixation, wash samples with pre-warmed PBS-Glycine solution to clear any fixative residue and reduce background autofluorescence [14].
Permeabilization and Blocking
Objective: To allow antibody access to intracellular targets and minimize non-specific background staining.
- Permeabilization Protocol: Incubate fixed samples with a permeabilization buffer containing detergents like 0.5% Triton X-100 or Tween-20 for several hours at room temperature or overnight at 4°C [14] [15]. Methanol-fixed samples may not require a separate permeabilization step [17].
- Blocking Protocol: Incubate samples for 30 minutes to 1 hour at room temperature in a blocking solution. A common and effective buffer is 0.3% Bovine Serum Albumin (BSA) in Tris-buffered saline [5]. Alternatively, use 5-10% normal serum from the host species of the secondary antibody [15] [17]. Blocking for excessively long periods should be avoided, as it can reduce specific antibody binding [17].
Antibody Staining
Objective: To specifically label the target antigen with a fluorescent signal.
Immunofluorescence can be performed via direct or indirect methods. The indirect method, detailed here, is more widely used due to its superior sensitivity and signal amplification [16] [18].
- Primary Antibody Incubation:
- Washing: Wash the sample 3 times for 10-15 minutes each with IF-Wash buffer (e.g., PBS with 0.05% Tween-20) to remove unbound primary antibody [14] [15].
- Secondary Antibody Incubation:
- Antibody Selection: Use a fluorophore-conjugated secondary antibody raised against the host species of the primary antibody.
- Incubation: Dilute the secondary antibody in blocking buffer (typically 1:500) [14] and incubate for 1-2 hours at room temperature in the dark [17]. From this step onward, protect samples from light to prevent fluorophore photobleaching.
Counterstaining, Mounting, and Imaging
Objective: To provide spatial context, preserve the sample, and acquire high-quality images.
- Counterstaining: Incubate samples with DAPI (5 µg/mL in PBS) for 15-20 minutes at room temperature to label cell nuclei [15].
- Mounting for Whole-Mount Samples: For thick samples like embryos, a clearing solution can significantly improve transparency and imaging depth. A fructose-glycerol solution (2.5M fructose in 80% glycerol) is an effective mounting and clearing medium that preserves fluorescence [14].
- Imaging: Acquire images using a confocal microscope, which provides optical sectioning capability essential for 3D samples [14] [19]. For live imaging or very thick embryos, multi-photon microscopy may be preferable due to its superior penetration depth and reduced phototoxicity [19].
The Scientist's Toolkit: Essential Reagents and Materials
The table below summarizes key reagents and their functions in the whole-mount IF workflow.
Table 1: Essential Research Reagents for Whole-Mount Immunofluorescence
| Reagent/Material | Function | Example Formulations/Notes |
|---|---|---|
| Paraformaldehyde (PFA) | Cross-linking fixative that preserves cellular morphology. | Typically used at 2-4% in PBS. Requires careful, safe handling [14] [17]. |
| Triton X-100 / Tween-20 | Detergent for permeabilizing cell membranes to allow antibody entry. | Used at 0.1-0.5% in buffer. Tween-20 is less harsh than Triton X-100 [14] [17]. |
| Bovine Serum Albumin (BSA) / Normal Serum | Blocking agent to reduce non-specific antibody binding. | BSA at 0.3-5% or 5-10% serum from the secondary antibody host [14] [5]. |
| Primary Antibody | Binds specifically to the target antigen of interest. | Must be validated for IF. Monoclonal antibodies offer high specificity; polyclonal can offer higher signal [16] [18]. |
| Fluorophore-Conjugated Secondary Antibody | Binds to the primary antibody, providing a detectable signal. | Enables signal amplification. Choose fluorophores compatible with your microscope's lasers and filters [16] [17]. |
| DAPI | Nuclear counterstain. | Labels DNA, allowing visualization of all nuclei. Used at ~5 µg/mL [15]. |
| Mounting/Clearing Medium | Preserves sample, reduces scattering, and enables high-resolution imaging. | Fructose-glycerol solution is effective for clearing whole-mount samples [14]. |
| IF-Wash Buffer | Washes away unbound antibodies and reduces background. | Typically PBS with 0.05-0.1% Tween-20 and sometimes 0.1% BSA [14]. |
Quantitative Antibody Titration and Validation
A critical step for quantitative and reproducible IF is the validation and titration of the primary antibody. Using an antibody at its optimal concentration maximizes the signal-to-noise ratio, which is crucial for reliable data.
Table 2: Key Considerations for Antibody Validation and Titration
| Aspect | Description | Impact on Experiment |
|---|---|---|
| Titration | Testing a range of antibody concentrations (e.g., 1:50 to 1:5000) on a control sample to find the optimal dilution. | Identifies the concentration that provides the strongest specific signal with the lowest background [5]. |
| Signal-to-Noise Ratio | The ratio of the fluorescence intensity in positive areas (signal) to the intensity in negative areas (noise/background). | The objectively optimal titer has the highest dynamic range and signal-to-noise ratio [5]. |
| Validation with MS | Correlation of IF signal intensities with absolute protein concentrations measured by Mass Spectrometry. | Proof that standardized QIF can achieve quantitative results comparable to the mass spectrometry criterion standard [5]. |
| Controls | Includes positive, negative, secondary-only, and isotype controls. | Essential for verifying antibody specificity and interpreting results correctly [18]. |
Imaging Modalities for Whole-Mount Embryo Analysis
Choosing the correct microscopy technique is paramount for successfully imaging thick, 3D specimens like embryos. The table below compares common modalities.
Table 3: Comparison of Fluorescence Microscopy Techniques for Embryo Imaging
| Technique | XY Resolution | Z-Resolution / Sectioning | Imaging Depth | Best Suited For |
|---|---|---|---|---|
| Wide-Field Fluorescence | Diffraction limited (~200 nm) | Weak | Worst (thin samples) | Quick overview of staining; not ideal for thick embryos due to out-of-focus light [19]. |
| Laser-Scanning Confocal | Diffraction limited | Good | Better (up to ~100 µm) | Standard for 3D reconstruction of fixed embryos. Provides optical sections [19]. |
| Multi-Photon Microscopy | Diffraction limited | Good | Best (hundreds of µm) | Live, thick embryo imaging. Deeper penetration and less phototoxicity than confocal [19]. |
| Structured Light (SLM) | Can be super-resolution | Varies (can be super-resolution) | Better | Optical sectioning on a wide-field microscope; can provide improved resolution [19]. |
Whole mount immunofluorescence (WMIF) represents a powerful methodological approach for analyzing embryonic development in three-dimensional space. Unlike traditional methods that require tissue sectioning, WMIF preserves the intact spatial architecture of the entire embryo or organoid, enabling comprehensive analysis of morphological context, cell-cell interactions, and long-range signaling gradients. When applied to embryonic research, this technique provides unparalleled access to the complex processes of morphogenesis, patterning, and cell fate specification within their native three-dimensional context [6].
The fundamental principle of WMIF involves permeabilizing intact embryonic specimens, allowing antibodies to penetrate throughout the tissue and bind to specific antigens of interest. Subsequent detection with fluorophore-conjugated secondary antibodies generates signals that can be visualized using advanced microscopy platforms. For embryonic applications, this technique must be optimized to overcome significant challenges including tissue opacity, light scattering in dense cell aggregates, and antibody penetration barriers in thick specimens [6]. Recent advances in tissue clearing, deep imaging modalities, and computational analysis have positioned WMIF as an indispensable tool for modern developmental biology, particularly for mapping neural circuits, analyzing organogenesis, and tracing cell lineages.
Technical Foundations and Methodological Framework
Experimental Pipeline for Embryonic WMIF
The successful application of WMIF to embryonic analysis requires an integrated experimental and computational pipeline that addresses the unique challenges of thick, light-scattering specimens [6].
Sample Preparation and Clearing: Optimal sample preparation is critical for WMIF of embryos. For gastruloids ranging from 100-500µm in diameter, mounting in 80% glycerol as a refractive index matching medium demonstrated a 3-fold reduction in intensity decay at 100µm depth and an 8-fold reduction at 200µm depth compared to PBS mounting. This clearing significantly improves information content, with Fourier ring correlation quality estimate (FRC-QE) showing 1.5- and 3-fold improvements at these depths respectively [6].
Advanced Imaging Modalities: For large, densely packed embryonic structures, multiphoton microscopy provides superior performance due to its ability to penetrate deep into thick tissues with minimal photodamage. This technique utilizes longer excitation wavelengths that reduce scattering in opaque tissues. Compared to confocal or light-sheet microscopy, multiphoton imaging avoids strong intensity gradients, image blurring, and reduced axial information caused by light scattering and aberrations [6]. Dual-view imaging with iterative imaging from opposing sides further enhances signal reconstruction throughout the entire specimen volume [6].
Multiplexing Approaches: Comprehensive phenotypic characterization requires multiplexed biomarker panels. One approach utilizes iterative cycles of optimized 10-plex immunostaining with 10-color epifluorescence imaging to accumulate highly enriched image datasets from individual whole-brain slices, which can be adapted for embryonic applications [20]. Computational alignment of images across staining rounds enables reconstruction of multiplex mosaics containing 10-100 biomarkers, sufficient to characterize all major cell classes and their functional states [20].
Computational Processing and Analysis
The complex datasets generated by embryonic WMIF require sophisticated computational tools for extraction of biologically meaningful information.
Spectral Unmixing and Signal Correction: Specific fluorescent signals of interest must be isolated from diverse non-specific sources including autofluorescence, photobleaching, sensor noise, non-uniform illumination, spectral mixing, and cross-labeling [20]. A semi-supervised sparse linear spectral unmixing algorithm can effectively correct for spectral bleed-through and cross-labeling, while alternating sequential filters (ASF) identify and subtract non-specific intra-channel signals based on the spatial scales of cellular objects [20].
3D Reconstruction and Segmentation: Reliable detection of cell nuclei in embryonic tissues presents challenges due to staining variability. Deep neural networks can be trained to achieve reliable cell detection by co-analyzing images containing complementary nuclear markers such as DAPI and pan-histone labels [20]. Transfer learning approaches help generate sufficient training samples for detecting cell nuclei in large datasets, which can then be classified by cell type based on unique biomarker combinations [20].
The Tapenade Python package represents one such computational solution, providing user-friendly tools for processing and exploring multiscale data, including correction of optical artifacts, accurate 3D nuclei segmentation, and reliable quantification of gene expression [6].
Table 1: Quantitative Performance of WMIF Pipeline Components
| Pipeline Component | Performance Metric | Value/Improvement | Experimental Context |
|---|---|---|---|
| Tissue Clearing (80% Glycerol) | Intensity decay reduction at 100µm | 3-fold reduction | Gastruloids vs. PBS mounting [6] |
| Tissue Clearing (80% Glycerol) | Intensity decay reduction at 200µm | 8-fold reduction | Gastruloids vs. PBS mounting [6] |
| Tissue Clearing (80% Glycerol) | Information content (FRC-QE) | 1.5-3 fold improvement | At 100-200µm depth [6] |
| Cell Detection | Reliable detection depth | Up to 200µm | In glycerol-cleared samples [6] |
| Two-photon Imaging | Penetration capability | Superior in dense tissues | Compared to confocal/light-sheet [6] |
Advanced Applications in Embryonic Research
Cell Lineage Tracing
Cell lineage tracing remains essential for understanding cell fate, tissue formation, and human development. Modern lineage tracing approaches combine genetic strategies with advanced imaging to establish hierarchical relationships between cells during embryogenesis [21].
Genetic Reporter Systems: Site-specific recombinase (SSR) systems, particularly Cre-loxP, represent the gold standard for lineage tracing studies. These systems can knock-in/knock-out alleles and influence gene expression with precise cell and temporal specificity. In embryonic applications, Cre recombinase excises a STOP codon between loxP sites, activating a fluorescent reporter gene whose expression is driven by cell-type-specific promoters [21].
Multicolour Approaches: The introduction of multicolour reporter cassettes like "Brainbow" enables simultaneous expression of up to four different fluorescent proteins through stochastic Cre-loxP-mediated excision and/or inversion [21]. The R26R-Confetti reporter adaptation allows clonal analysis at single-cell resolution across diverse tissues and has been applied in live-imaging studies to trace cell origin and proliferation in real time [21].
Dual Recombinase Systems: Combining Cre-loxP with analogous systems such as Dre-rox creates dual recombinase systems that offer enhanced experimental design strategies. These have been applied to determine the origin of regenerative cells in remodelled bone and to investigate cellular origins of alveolar epithelial stem cells post-injury [21].
Recent applications in endodermal organogenesis demonstrate how genetic lineage tracing codes using inducible Cre recombinase and loxP systems with fluorescent protein insertions across multiple mouse models can specifically identify individual endodermal subpopulations via distinct marker-gene combinations [22]. Integration of scRNA-seq data with detailed imaging enables tracing of progenitor cell origins and developmental trajectories across critical endodermal subregions during early embryogenesis, revealing widespread cell fate convergence and divergence within endodermal organ progenitors [22].
Mapping Neural Circuits
Comprehensive mapping of neural circuits in embryonic systems requires simultaneous profiling of multiple biological processes in their native anatomical context [20].
Multiplex Biomarker Panels: Optimized multiplex immunohistochemical staining panels combined with multispectral epifluorescence microscopy enable phenotyping of all major brain cell classes resident to the whole brain. This approach efficiently overcomes fluorescence signal limitations to achieve highly enriched source imagery for reliable automated scoring at scale [20].
Whole-Brain Imaging and Analysis: A complete toolkit for whole-brain tissue mapping uses large-scale highly multiplexed immunohistochemistry to characterize all major brain cell types at scales ranging from subcellular compartments to whole-brain regions. This approach can accelerate system-level studies of normal and pathological brain development by enabling comprehensive profiling of cellular distributions in their anatomical context [20].
Deep Learning-Based Phenotyping: Reliable cell detection in complex neural tissues represents a fundamental challenge. Deep neural networks can be trained to achieve reliable cell detection by co-analyzing complementary nuclear markers, with subsequent classification of major brain cell types based on unique biomarker combinations [20].
Analyzing Organogenesis
Organogenesis involves rapid and complex cell fate changes as embryonic tissues transition from germ layers to functional organs. WMIF enables detailed analysis of this process in intact embryonic specimens [22].
Endodermal Organogenesis Mapping: Research has mapped the regional patterning of mouse endoderm by embryonic day (E) 8.5, revealing segregation into four distinct regions (foregut, anterior intestinal portal lip, midgut, and hindgut), each with specialized subregions [22]. This arrangement sets the foundation for endodermal organ development, with subsequent major changes including oropharyngeal membrane disruption, pharyngeal pouch formation, gut tube closure, and organ bud formation occurring between E8.5 and E9.5 [22].
Spatiotemporal Fate Mapping: Integration of lineage tracing with spatial imaging provides a powerful approach for studying cellular fate decisions and developmental trajectories during organogenesis. Techniques that combine lineage barcode sequencing with spatial resolution are particularly promising for tracking differentiation in complex systems [22].
Gastruloid Models: Gastruloids—mouse embryonic stem cells that self-organize into 3D embryonic organoids—provide a valuable model system for studying organogenesis. Within a few days, gastruloids undergo significant morphological changes, developing structures that closely resemble organs both genetically and morphologically, including neural tube-, gut-, and cardiac-like structures [6]. WMIF enables quantitative analysis of 3D spatial patterns of gene expression and nuclear morphology in these systems, revealing how local cell deformations and gene co-expression relate to tissue-scale organization [6].
Table 2: Key Lineage Tracing Technologies and Applications
| Technology | Mechanism | Applications in Embryonic Research | References |
|---|---|---|---|
| Cre-loxP System | Site-specific recombination activating fluorescent reporter | Clonal analysis studies with cell-type-specific promoter control | [21] |
| Brainbow/Confetti | Stochastic recombination generating multicolour reporters | Single-cell resolution clonal analysis in diverse tissues | [21] |
| Dual Recombinase (Cre/Dre) | Independent recombination systems with orthogonal specificity | Simultaneous tracing of multiple cell populations | [21] |
| MADM-CloneSeq | Genetic tracing with sequencing readout | Integration of lineage information with transcriptomic data | [21] |
| Endodermal Genetic Codes | Inducible CreER-loxP with fluorescent proteins across multiple models | Tracing origins and trajectories of progenitor cells in endodermal subregions | [22] |
The Scientist's Toolkit: Research Reagent Solutions
Table 3: Essential Research Reagents for Embryonic WMIF
| Reagent Category | Specific Examples | Function in WMIF | Application Notes |
|---|---|---|---|
| Mounting Media | 80% glycerol, ProLong Gold Antifade, optiprep | Refractive index matching for tissue clearing | 80% glycerol shows superior clearing performance for gastruloids [6] |
| Nuclear Stains | Hoechst, DAPI, pan-histone markers | Nuclear counterstaining for cellular identification | Pan-histone markers complement DAPI for reliable detection in variable staining [20] |
| Primary Antibodies | Cell type-specific markers (e.g., HNF4A, PDX1, GCG) | Target protein detection and cellular phenotyping | Validated panels required for comprehensive cell classification [20] [22] |
| Secondary Antibodies | Spectrally compatible fluorophore conjugates | Signal amplification and multiplex detection | Must minimize spectral crosstalk; require optimized filter sets [20] |
| Tissue Clearing Agents | Glycerol-based solutions | Reduce light scattering for deep imaging | Critical for specimens >100µm; significantly improves penetration [6] |
| Genetic Reporters | Cre/loxP-dependent fluorescent proteins (tdTomato, GFP) | Lineage tracing and fate mapping | Enable inducible, cell-type-specific lineage analysis [21] [22] |
Workflow and Signaling Pathways
Experimental Workflow Diagram
Computational Analysis Pipeline
Best Practices and Technical Considerations
Image Acquisition and Processing Guidelines
Effective image presentation is critical for publications that rely on reader interpretation of fluorescence images to support scientific conclusions [23]. Several key considerations ensure both data integrity and accessibility:
Contrast Optimization: Modern scientific cameras acquire images with dynamic ranges significantly larger than human eyes can detect or computer monitors can display. Contrast stretching sets the brightest pixel as white and the darkest as black, redistributing intermediate gray values without altering the underlying spatial information. All publication images should be contrast-stretched to the upper/lower limits of the image's dynamic range [23].
Color Selection for Accessibility: Approximately 8% of males and 0.5% of females have some form of color blindness, most commonly difficulty perceiving differences between red and green. The simple solution is to avoid red/green color combinations entirely. Preferred alternatives include green/magenta, yellow/blue, and red/cyan combinations. For three-color images, magenta/yellow/cyan provides excellent differentiation [24].
Channel Separation: Always show grayscale images for individual channels alongside merged images, as the human eye detects changes in grayscale better than in color. This practice eliminates ambiguity regarding signal location and strength while ensuring accessibility for all readers [24] [23].
Nonlinear Transformations: Power-law transformations (γ transformations) can increase contrast for specific gray levels without clipping low/high pixel intensities. However, these transformations must be disclosed as they change relationships between gray values within an image. Identical scaling should always be applied to images from the same field of view or time lapse to avoid artificial differences in perceived brightness [23].
Validation and Quality Control
Rigorous validation is essential for reliable WMIF data interpretation in embryonic research:
Assay Quality Control: Image quality fundamentally depends on original assay quality. Weak signal intensity in areas of high autofluorescence is incredibly difficult to correct during image processing. Comprehensive troubleshooting of immunostaining protocols is essential before image acquisition [25].
Experimental Replication: The inherent variability in organoid development necessitates detailed characterization of sufficient numbers of specimens to properly characterize developmental diversity. Coarse-grained methods have been developed to classify phenotypes by analyzing maximum projections from 3D immunofluorescence staining using high-throughput imaging [6].
Multimodal Corroboration: Flagship lineage tracing studies are increasingly rigorous and multimodal, validating hypotheses through multiple distinct methods. It is not unusual for such studies to incorporate advanced microscopy, state-of-the-art sequencing technology, and multiple biological models to ensure robust conclusions [21].
Whole mount immunofluorescence has emerged as an indispensable methodology for embryonic research, particularly in mapping neural circuits, analyzing organogenesis, and tracing cell lineages. The integrated experimental and computational pipelines described herein enable comprehensive 3D analysis of embryonic systems at multiple scales, from subcellular compartments to entire organ systems. As these technologies continue to evolve, particularly through advances in tissue clearing, multiplex imaging, and deep learning-based analysis, WMIF will undoubtedly yield increasingly profound insights into the fundamental processes of embryonic development. By adhering to best practices in both experimental execution and data presentation, researchers can ensure their findings are not only scientifically robust but also accessible to the broadest possible audience.
The study of embryonic development is a cornerstone of developmental biology, regenerative medicine, and toxicology research. The principle of whole-mount immunofluorescence has revolutionized this field by enabling the three-dimensional profiling of protein expression patterns within intact embryonic specimens, preserving critical spatial and biological context that is lost in sectioned samples [26]. This technique provides an unparalleled view of the complex processes governing embryogenesis, from early cell fate decisions to tissue morphogenesis.
The fidelity of such analyses is profoundly dependent on the appropriate selection of embryo stages, which are characterized by specific temporal (age) and morphological (size) parameters. These factors are not merely practical considerations for handling and staining; they are intrinsically linked to the fundamental biology being studied. Key developmental events such as gastrulation, neurulation, and organogenesis occur within precise and often narrow temporal windows. Utilizing embryos of an incorrect stage can lead to failed experiments, inaccurate data, and invalid conclusions. Furthermore, the physical size of the embryo directly impacts the efficiency of reagent penetration during whole-mount protocols, making size a critical determinant for experimental success [12] [26].
This guide provides a detailed technical framework for selecting suitable embryo stages in major model organisms, presenting key quantitative data and methodologies to inform robust experimental design in fundamental and applied biomedical research.
Embryo Stage Specifications by Model Organism
The following section details the specific age and size characteristics of embryos from the most prominently used model organisms in developmental studies. Adherence to these parameters is essential for investigating stage-specific biological questions.
Table 1: Age and Size Specifications for Model Organism Embryos
| Model Organism | Key Developmental Stage | Approximate Post-fertilization Age | Approximate Size | Primary Research Applications |
|---|---|---|---|---|
| Human Embryo Model | Blastocyst Model | 5-7 days [27] | 100-200 µm [28] | Early lineage specification, implantation studies [27]. |
| Post-implantation Model (e.g., PASE) | 8-10 days [27] | ~500 µm [28] | Amnion formation, lumenogenesis, onset of gastrulation [27]. | |
| Gastrulation Model (e.g., Gastruloid) | 14+ days [27] | Up to 1 mm [28] | Germ layer formation, axial organization, ethical alternative to natural embryos [27]. | |
| Mouse | Pre-implantation Blastocyst | 3.5 days | 80-100 µm | Naive pluripotency, inner cell mass vs. trophectoderm fate [29]. |
| Post-implantation Epiblast | 5.5-6.5 days | ~250 µm | Primed pluripotency, onset of gastrulation [29]. | |
| Drosophila melanogaster | Early Embryo (before cellularization) | 0-3 hours | ~500 µm (length) [30] | Axis patterning, gap gene network analysis, morphogen gradient studies [31] [30]. |
Stage-Limited Biological Processes
The connection between embryo stage and biological process is critical. The following table aligns specific developmental events with the stages optimal for their study using whole-mount techniques.
Table 2: Key Developmental Processes and Their Corresponding Embryo Stages
| Developmental Process | Relevant Model Organism | Optimal Embryo Stage for Analysis |
|---|---|---|
| Blastocyst Formation | Human (model) / Mouse | Integrated stem cell-based blastoid (in vitro) / E3.5 [27] [29]. |
| Implantation & Amnion Formation | Human (model) | Post-implantation amniotic sac embryoid (PASE) [27]. |
| Gastrulation & Germ Layer Specification | Human (model) / Mouse | Gastruloid / E6.5-E7.5 [27]. |
| Body Axis Patterning | Drosophila | Early embryo (0-3 hours); gap gene network activity [31] [30]. |
| Neurulation | Human (model) / Mouse | Neuronal gastruloid / E8.5-E9.5 [27]. |
Experimental Protocols for Whole-Mount Analysis
This section provides a generalized workflow and a specific protocol for whole-mount immunofluorescence, adaptable to embryos of various model organisms.
General Workflow for Whole-Mount Immunofluorescence
The diagram below outlines the core sequential steps for processing embryos for whole-mount immunofluorescence analysis.
Detailed Protocol for Mouse Embryo Analysis
The following protocol is optimized for three-dimensional imaging of mouse embryonic tissues, such as the mammary primordium [26], and can be adapted for integrated human embryo models with adjustments to incubation times.
Protocol Optimized for:
- Subject: Mid-gestation mouse embryos (e.g., E12.5-E15.5) or similarly sized embryo models.
- Focus: Preservation of 3D architecture for high-resolution confocal microscopy.
Methodology:
- Fixation: Dissect embryos or tissues in cold PBS and fix with 4% Paraformaldehyde (PFA) in PBS for 2-4 hours at 4°C. The fixation time must be calibrated to the specimen's size to ensure complete penetration without over-fixing.
- Permeabilization and Blocking: Wash fixed specimens with PBS and permeabilize with 0.5% Triton X-100 in PBS for 1-2 hours. To reduce non-specific antibody binding, incubate specimens in a blocking solution (e.g., 5% normal serum from the secondary antibody host, 0.1% Triton X-100 in PBS) for 4-6 hours at room temperature or overnight at 4°C.
- Antibody Incubation: Incubate with the primary antibody diluted in blocking solution for 24-48 hours at 4°C under gentle agitation. This extended incubation is crucial for antibody penetration into whole-mount specimens. Wash thoroughly with 0.1% Triton X-100 in PBS over 8-12 hours, with multiple solution changes. Subsequently, incubate with fluorophore-conjugated secondary antibodies diluted in blocking solution for 24 hours at 4°C, protected from light.
- Counterstaining and Mounting: Following secondary antibody washes, counterstain nuclei with DAPI (e.g., 1 µg/mL for 1 hour). Wash the specimens and mount them in an aqueous anti-fade mounting medium on a depression slide or using spacers to prevent crushing, ensuring the specimen is immobilized for imaging [26].
The Scientist's Toolkit: Essential Research Reagents
Successful whole-mount analysis requires a suite of carefully selected reagents. The table below details essential materials and their specific functions in the context of embryonic research.
Table 3: Essential Research Reagents for Embryo Model and Whole-Mount Analysis
| Reagent / Material | Function | Application Example |
|---|---|---|
| Pluripotent Stem Cells (PSCs) | Self-renewing, programmable cells capable of differentiating into all embryonic lineages; the foundational "building blocks" for generating embryo models [28] [29]. | Derived from human blastocysts (hESCs) or via somatic cell reprogramming (hiPSCs) to form integrated embryo models [27] [29]. |
| Trophoblast Stem Cells (TSCs) | Contribute extra-embryonic trophoblast lineage, essential for modeling implantation and placental development in integrated embryo models [29]. | Co-cultured with PSCs to create more sophisticated embryo models that mimic the natural crosstalk between embryonic and extra-embryonic tissues [29]. |
| Extracellular Matrix (ECM) Components | Provide a physical scaffold and biochemical signals that guide cell adhesion, migration, and self-organization. | Used in micropatterned colony assays to study gastrulation and in 3D cultures to support the structure of post-implantation embryo models like the PASE [27]. |
| Morphogens (e.g., BMP4) | Signaling molecules that direct cell fate decisions by forming concentration gradients. | Used to induce self-organization and germ layer patterning in 2D micropatterned colonies and 3D gastruloids [27]. |
| Paraformaldehyde (PFA) | A cross-linking fixative that preserves cellular architecture and antigenicity by immobilizing proteins. | Standard fixative for whole-mount immunofluorescence, critical for maintaining the 3D structure of embryos and embryo models [26]. |
| Permeabilization Agent (e.g., Triton X-100) | A detergent that dissolves lipid membranes, allowing antibodies to access intracellular targets. | Essential step in whole-mount protocols to enable antibody penetration throughout the entire specimen [26]. |
Signaling Pathways in Embryonic Patterning
Embryonic development is orchestrated by evolutionarily conserved signaling pathways. The following diagram illustrates the core logic of a key patterning network, the Drosophila gap gene system, which is a classic model for understanding how positional information is established in the early embryo.
This network demonstrates a fundamental principle: maternal morphogen gradients provide initial positional cues that activate or repress specific gap genes in broad, overlapping domains [31]. The gap genes then engage in a web of mutual repression, sharpening their own expression boundaries. This cross-repressive interaction is critical for transforming a smooth morphogen gradient into a sharply defined, segmental body plan [31]. This system has been shown to be optimized by evolution to transmit high-fidelity positional information to downstream genes, a concept supported by mathematical modeling [31].
From Theory to Bench: A Step-by-Step WM-IF Protocol for Embryos and Organoids
In whole mount immunofluorescence for embryo analysis, fixation is the foundational step that preserves structural integrity and antigenicity, enabling researchers to capture a high-fidelity, three-dimensional snapshot of developmental processes. The choice between crosslinking fixatives like paraformaldehyde (PFA) and precipitating fixatives like methanol represents a critical decision point that directly impacts experimental outcomes. While PFA works by creating protein crosslinks that stabilize and harden the sample, methanol displaces water around cellular macromolecules, resulting in their denaturation and precipitation in situ [32]. For embryo research specifically, this decision carries additional weight as the three-dimensional architecture must be preserved throughout the relatively large tissue sample, and techniques like antigen retrieval are generally not feasible due to the heat sensitivity of embryos [33]. This technical guide provides a comprehensive comparison of PFA and methanol fixation methodologies, specifically contextualized for whole mount embryo imaging applications in developmental biology, to empower researchers in making informed decisions that optimize preservation, penetration, and staining quality.
Mechanisms of Action: How Fixatives Work
Paraformaldehyde: Crosslinking for Structural Preservation
Paraformaldehyde (PFA) functions as a crosslinking fixative that reacts with and creates covalent bonds between protein molecules. The monomeric formaldehyde (methylene hydrate, H₂C=O) reacts via its aldehyde group with nearby proteins to form (-CH₂) methylene bridge adducts [34]. These modified proteins form a matrix within which cellular components are trapped, thereby stabilizing the native structure and creating a "life-like" snapshot of the cell [32]. This extensive crosslinking network provides excellent preservation of cellular ultrastructure and superior maintenance of tissue architecture, which is particularly valuable for three-dimensional imaging in whole mount embryo studies [33]. However, this same crosslinking action can mask epitopes by altering the three-dimensional conformation of proteins, potentially reducing antibody accessibility [32] [33].
Methanol: Precipitation for Epitope Exposure
Methanol operates through a fundamentally different mechanism as a dehydrating and precipitating fixative. It displaces water around cellular macromolecules, interfering with hydrogen bonds and hydrophobic interactions [35]. This process releases internal hydrophobic groups of amino acids, resulting in changes to the tertiary structure of proteins and their solubility, ultimately causing protein denaturation and precipitation in situ [32]. While this action may damage some cellular structures, it often exposes epitopes that would otherwise remain buried within the protein's native conformation, making this approach particularly advantageous for certain antibodies [32]. The denaturation process can improve antibody binding for specific molecular targets, especially those associated with cytoskeletal components and organelles [32].
Table 1: Fundamental Mechanisms of PFA and Methanol Fixation
| Characteristic | Paraformaldehyde (PFA) | Methanol |
|---|---|---|
| Primary Mechanism | Crosslinking via aldehyde groups forming methylene bridges | Dehydration and protein precipitation |
| Structural Preservation | Excellent; maintains native architecture | Moderate; can cause cellular shrinkage and damage |
| Epitope Accessibility | May mask some epitopes through crosslinking | Can expose buried epitopes through denaturation |
| Cellular Integrity | Well-preserved morphology and membrane structure | Can disrupt membranes and internal structures |
| Best Applications | Soluble proteins, structural studies, subcellular localization | Cytoskeletal proteins, certain phosphorylated epitopes |
Comparative Analysis: Performance Metrics and Applications
Structural Preservation and Morphology
The preservation of embryonic morphology is paramount in whole mount studies where three-dimensional context is critical. PFA fixation demonstrates superior performance in maintaining cellular integrity and tissue architecture. Research confirms that PFA-fixed cells exhibit well-preserved morphology with forward and right angle light scatter properties sufficiently maintained to permit gating on these parameters [36]. In contrast, methanol fixation often results in visible cellular damage, including potential shrinkage and disruption of delicate structures [35]. This distinction is particularly relevant for embryo imaging where the preservation of complex three-dimensional relationships between tissues and organs is essential for accurate interpretation. The crosslinking nature of PFA provides stabilization of membrane receptors and cytoskeletal elements that methanol cannot achieve through its precipitating action alone [34].
Antigen Compatibility and Epitope Preservation
The compatibility of specific antigens with different fixatives varies significantly and must be empirically determined for each target. Studies directly comparing fixation methods demonstrate that some antibodies, such as those targeting Keratin 8/18, perform best with methanol fixation, while others like AIF (Apoptosis-Inducing Factor) show superior results with formaldehyde fixation [32]. This variation stems from whether the antibody recognizes a linear sequence (often preserved after methanol denaturation) or a conformational epitope (better maintained with PFA crosslinking). For whole mount embryo studies, where optimization can be time-consuming due to penetration times, consulting existing literature on antibody performance with different fixatives provides a valuable starting point [33].
Penetration Efficiency in Whole Mount Specimens
For whole mount immunofluorescence of embryos, penetration efficiency becomes a critical factor as fixatives must reach the deepest tissue layers. PFA's relatively small molecule size allows better penetration through tissues compared to larger crosslinking agents like glutaraldehyde [34]. However, for whole mount specimens, extended incubation times are necessary regardless of fixative choice—typically 30 minutes to several hours or overnight at 4°C for PFA [33]. Methanol, being a smaller molecule, penetrates rapidly but can cause hardening of the outer layers that might impede further penetration into deeper tissues. The recommended approach for whole mount specimens is to use low concentrations of PFA (1-4%) for extended periods to balance adequate penetration with preservation of antigenicity [33] [34].
Table 2: Functional Comparison for Whole Mount Embryo Applications
| Parameter | Paraformaldehyde | Methanol |
|---|---|---|
| Penetration Rate | Moderate (requires extended incubation) | Fast |
| Suitable Incubation | 15 min - 24 hours (4°C for long periods) | 30 minutes at room temperature or -20°C |
| 3D Structure Preservation | Excellent | Moderate to poor |
| Compatibility with Multiplexing | High (with optimization) | Variable |
| Membrane Protein Integrity | Excellent (especially with GA combination) | Poor to moderate |
| Background Signal | Low with proper washing | Variable |
Advanced Applications and Synergistic Approaches
Sequential Fixation Protocols
Research demonstrates that sequential fixation methods can harness the benefits of both PFA and methanol. A sequential paraformaldehyde and methanol fixation procedure has been validated for simultaneous flow cytometric analysis of DNA, cell surface proteins, and intracellular proteins [36]. Cells fixed with this sequential approach exhibited significantly greater intracellular antitubulin immunofluorescence than cells fixed with either fixative alone (p < 0.002) or with methanol followed by paraformaldehyde (p < 0.006) [36]. This synergistic effect suggests that initial stabilization with PFA followed by methanol permeabilization and precipitation can optimize detection of diverse cellular components. For whole mount embryo applications, such sequential approaches could potentially enhance antibody penetration while maintaining structural integrity, though protocol optimization would be necessary to prevent over-fixation.
Special Considerations for Membrane Proteins
Faithful preservation of membrane protein organization presents particular challenges that warrant special consideration. Studies highlight the inadequacy of PFA fixation alone for complete immobilization of membrane-associated molecules, which can lead to artefactual clustering during immunolabeling [34]. Fluorescence recovery after photobleaching (FRAP) experiments confirm that artefactual receptor clusters are indeed introduced by residual mobility after PFA fixation [34]. Research demonstrates that concentrations as low as 1% PFA in combination with 0.2% glutaraldehyde are sufficient to fully immobilize membrane receptors, while PFA alone is adequate when using permeabilized cells [34]. This distinction is crucial for studies of receptor clustering in embryonic development where spatial organization carries functional significance.
Fixation for Super-Resolution Microscopy
Advanced imaging techniques like super-resolution microscopy place additional demands on fixation quality. As these methods push beyond the diffraction limit, they reveal details of cellular architecture that are particularly vulnerable to fixation artefacts. Studies emphasize that sample preparation protocols must be meticulously optimized to preserve authentic receptor organization for super-resolution fluorescence microscopy [34]. The growing application of these techniques in developmental biology necessitates careful attention to fixation parameters including concentration, duration, temperature, and pH to balance structural preservation with epitope integrity at nanoscale resolution.
Experimental Protocols for Embryo Research
Standardized PFA Fixation Protocol for Whole Mount Embryos
For consistent results in whole mount embryo immunofluorescence, the following PFA fixation protocol is recommended:
Sample Preparation: Dissect embryos in cold phosphate-buffered saline (PBS) and remove surrounding membranes and tissues that may impede fixative penetration [33].
Fixation Solution Preparation: Prepare 4% PFA in PBS. For better membrane protein preservation, consider adding 0.1-0.2% glutaraldehyde [34]. CRITICAL: Paraformaldehyde is toxic; wear proper protective equipment and use only in a fume hood [37].
Fixation Process: Immerse embryos in sufficient volume of fixative to cover completely (typically 10-20x sample volume). Fix at 4°C for 4-6 hours with gentle agitation [33]. The optimal fixation time depends on embryo size and stage—smaller embryos require shorter times.
Post-Fixation Processing: Remove fixative and rinse tissues with 1× PBS three times for 15 minutes each at 4°C [37]. For larger embryos, a sucrose infiltration step (incubate with 30% sucrose until sinks) may improve cutting quality for thicker specimens [37].
Storage: Fixed samples can be stored in PBS with 0.01% sodium azide at 4°C for several weeks or at -20°C in cryoprotectant for long-term preservation.
Methanol Fixation Protocol for Whole Mount Embryos
For antigens known to be methanol-sensitive, the following protocol is recommended:
Sample Preparation: Dissect embryos in cold PBS as described for PFA fixation.
Fixation: Place embryos in 100% methanol at room temperature or -20°C for 30 minutes [35]. Pre-cooling methanol to -20°C may improve morphological preservation for some specimens.
Rehydration: Gradually rehydrate embryos through a methanol series (75%, 50%, 25% methanol in PBS) for 15 minutes each step.
Post-Fixation Processing: Rinse thoroughly with PBS before proceeding to immunostaining. Note that methanol fixation automatically permeabilizes cells, so additional permeabilization steps are generally unnecessary.
Combined PFA-Methanol Fixation Protocol
For challenging targets that benefit from both preservation and epitope exposure:
Initial Fixation: Fix embryos with 2-4% PFA for 30-60 minutes at room temperature [36] [14].
Rinsing: Rinse briefly with PBS to remove excess PFA.
Secondary Fixation: Treat with 100% methanol for 10-15 minutes at -20°C [36].
Rehydration: Gradually rehydrate through methanol series as described above before immunostaining.
Diagram 1: Fixation Method Decision Pathway for Whole Mount Embryo Analysis
The Scientist's Toolkit: Essential Research Reagents
Table 3: Key Research Reagent Solutions for Whole Mount Immunofluorescence
| Reagent/Category | Function/Purpose | Example Applications |
|---|---|---|
| Paraformaldehyde (4%) | Crosslinking fixative for structural preservation | General whole mount staining, membrane protein studies [33] [34] |
| Methanol (100%) | Precipitating fixative for epitope exposure | Keratin detection, methanol-sensitive antigens [32] |
| Glutaraldehyde | Enhanced crosslinking for membrane proteins | Preventing artefactual clustering in super-resolution microscopy [34] |
| Triton X-100 | Detergent for permeabilization after PFA fixation | Creating membrane pores for antibody access [32] |
| PBS-Glycine Buffer | Quenching autofluorescence from aldehydes | Reducing background in PFA-fixed samples [14] |
| Fructose-Glycerol Solution | Clearing agent for improved imaging depth | Enhanced transparency in 3D embryo imaging [14] |
| Sucrose (30%) | Cryoprotectant for frozen specimen preparation | Preventing ice crystal formation in tissue preservation [37] |
| Normal Goat Serum | Blocking agent for reducing non-specific binding | Improving signal-to-noise ratio in immunostaining [37] |
The choice between paraformaldehyde and methanol fixation in whole mount embryo immunofluorescence is fundamentally context-dependent, requiring careful consideration of research objectives, target antigens, and desired structural preservation. PFA emerges as the preferred choice for most whole mount applications due to its superior preservation of three-dimensional architecture and compatibility with a broad range of detection methods. Methanol offers specific advantages for challenging antigens that require denaturation for epitope exposure, particularly cytoskeletal and some nuclear targets. The emerging approach of sequential fixation protocols provides a promising middle ground, potentially harnessing the benefits of both methods. Ultimately, researchers must balance the competing demands of morphological preservation, antigen accessibility, and technical feasibility when designing fixation strategies for whole mount embryo studies, recognizing that empirical optimization remains an essential component of successful experimental design.
In whole mount immunofluorescence (WMIF), the ultimate goal is to achieve clear, specific labeling of target antigens throughout an intact, three-dimensional biological specimen, such as an embryo. Unlike thin sections, whole embryos present unique challenges for antibody penetration and specific binding due to their dense cellular networks and the presence of lipid-rich barriers. The eggshell of a Drosophila embryo, for instance, contains a waxy layer that is largely impermeable to aqueous solutions and small molecules, posing a significant delivery challenge [38] [39]. Consequently, permeabilization and blocking are not merely optional steps in WMIF; they are foundational to experimental success. Effective permeabilization ensures that antibodies can reach their intracellular targets by disrupting these lipid barriers, while rigorous blocking minimizes non-specific antibody binding, which is a major source of background noise [40] [41]. Within the context of embryo analysis, these steps must be carefully optimized to balance adequate tissue penetration with the preservation of structural integrity and antigenicity, enabling researchers and drug development professionals to obtain reliable, high-resolution three-dimensional data.
Core Principles: Overcoming Barriers in Embryos
The Permeabilization Imperative
Permeabilization is the process of introducing pores in cellular and tissue membranes to allow antibodies and other reagents to access intracellular targets. In whole mount specimens like embryos, this step is crucial for overcoming two primary barriers: the cellular plasma membrane and, in many cases, specialized external structures. For example, the Drosophila embryo is protected by a five-layered eggshell, the innermost of which is a waxy layer that acts as a formidable waterproofing barrier, excluding even small solutes [38] [39]. Without effective permeabilization, antibodies simply cannot penetrate to the embryo proper. The principle is to selectively disrupt these lipid membranes using detergents or solvents without destroying the native architecture of the tissue or the antigenicity of the target proteins. The choice of agent and protocol must be tailored to the specimen, as over-permeabilization can lead to loss of cellular structure, while under-permeabilization results in weak or absent staining.
The Function of Blocking
Once a specimen is permeabilized and the pathways for antibody entry are established, the next critical step is to ensure that antibody binding is specific to the target antigen. Blocking is the process of pre-incubating the specimen with a solution of irrelevant proteins or sera to occupy charged surfaces and non-specific antibody-binding sites [40] [41] [42]. In whole mount preparations, the large surface area of exposed internal structures makes this step particularly vital. Non-specific binding can occur on hydrophobic domains, Fc receptors on certain cell types, and other sticky sites within the tissue. A well-blocked sample significantly reduces background fluorescence, thereby enhancing the signal-to-noise ratio and the reliability of the final confocal image [43].
Reagent Selection and Optimization
Choosing a Permeabilization Agent
The selection of a permeabilization agent depends on the nature of the specimen and the localization of the target antigen. The table below summarizes common agents and their applications, which is critical for planning embryo experiments.
Table 1: Common Permeabilization Agents and Their Applications
| Agent Type | Specific Agents | Suggested Concentration | Mechanism of Action | Ideal For | Considerations |
|---|---|---|---|---|---|
| Harsh Detergents | Triton X-100, NP-40 | 0.1 – 0.2% [41] | Solubilizes lipid membranes | General intracellular antigens; thick tissues | Can disrupt membrane-associated antigens [41] |
| Mild Detergents | Tween 20, Saponin | 0.2 – 0.5% [41] | Extracts cholesterol, creating pores | Preserving membrane ultrastructure; membrane proteins | Saponin requires presence in all subsequent buffers [44] |
| Organic Solvents | Methanol, Acetone | 95-100% [41] | Precipitates lipids and proteins | Simultaneous fixation and permeabilization | Can destroy some epitopes; not always suitable for IF [41] |
| Specialized Solvents | D-limonene (EPS) | 90% with surfactants [38] [39] | Dissolves waxy layers | Drosophila embryos; impermeable barriers | Water-miscible; less toxic than heptane/octane [38] |
For challenging specimens like Drosophila embryos, a novel Embryo Permeabilization Solvent (EPS) composed of 90% D-limonene and plant-derived surfactants has been developed as a less toxic and highly effective alternative to traditional, toxic solvents like heptane [38] [39]. This water-miscible solvent efficiently removes the waxy layer of the dechorionated eggshell, permitting the uptake of small molecules while maintaining a high degree of embryo viability [38].
Selecting a Blocking Agent
The choice of blocking agent is equally important and should be compatible with the host species of the secondary antibody.
Table 2: Common Blocking Agents for Immunofluorescence
| Blocking Agent | Mechanism | When to Use | Key Advantage | Consideration |
|---|---|---|---|---|
| Normal Serum | 2-10% serum from secondary antibody host species (e.g., goat, donkey) [41] [42] | Standard blocking for indirect IF | Contains a mix of proteins that block a wide range of non-specific sites | Must not be from the host species of the primary antibody [41] |
| Bovine Serum Albumin (BSA) | 1-5% solution in PBS [41] [42] | Compatible with a wide range of antibodies; good general purpose blocker | Inert, inexpensive, and readily available | May be less efficient than serum for some high-background tissues [41] |
| Combination Blocks | e.g., 5% donkey serum + 0.15% Triton X-100 in PBS [43] | Whole mount immunofluorescence | Simultaneously blocks and maintains permeabilization during long incubations | Ideal for complex, thick samples like embryos and pancreas [43] |
A standard and effective blocking buffer for whole mount immunofluorescence is 5% normal serum (from the secondary antibody host) with 0.1-0.15% Triton X-100 in PBS, which performs blocking and permeabilization simultaneously throughout long incubation steps [43].
Experimental Protocols for Embryo Analysis
Protocol 1: Permeabilization of Drosophila Embryos
This protocol is adapted from methods developed to introduce small molecules into Drosophila embryos for pharmacological studies [38] [39].
Materials Required:
- Embryo Permeabilization Solvent (EPS: 90% D-limonene, 5% cocamide DEA, 5% ethoxylated alcohol) [38].
- Dilution buffer (e.g., Milli-Q water or Modified Basic Incubation Medium).
- Phosphate Buffered Saline (PBS).
- PBS with 0.05% Tween-20 (PBStw).
- Nitex mesh baskets.
Step-by-Step Method:
- Dechorionation: Collect embryos and dechorionate them by immersion in 50% bleach for two minutes. Wash thoroughly with tap water [38].
- EPS Treatment: Immerse dechorionated embryos in a 1:5 to 1:40 dilution of EPS in buffer. The exposure time can range from 30 seconds to 4 minutes and must be optimized for the specific embryo stage and desired viability [38].
- Washing: Immediately following EPS treatment, wash the embryos four times in PBS, followed by two washes in PBStw to remove all traces of the solvent [38].
- Viability Check: Uptake of dyes like Rhodamine B can be used to identify successfully permeabilized embryos. Optimal permeabilization maintains embryo viability for subsequent development [38] [39].
Protocol 2: Combined Permeabilization and Blocking for Whole Mount Tissues
This protocol, derived from a method for staining adult mouse pancreas, is highly applicable to other thick tissues and embryos, as it emphasizes deep penetration [43].
Materials Required:
- Fixative (e.g., 4% Paraformaldehyde in PBS).
- Permeabilization agent (e.g., PBS-X: 0.15% Triton X-100 in PBS).
- Blocking agent (e.g., 5% donkey serum).
- Combined Blocking/Permeabilization Buffer: 5% donkey serum + 0.15% Triton X-100 in 1x PBS [43].
Step-by-Step Method:
- Fixation and Preparation: Fix the intact embryo or tissue in 4% PFA at 4°C overnight. For larger specimens, cut into small pieces (<5 mm) to facilitate reagent penetration [43].
- Dehydration/Rehydration (Optional): For some specimens, a series of dehydration with methanol and rehydration can aid in permeabilization and reduce background [43].
- Combined Blocking and Permeabilization: Incubate the sample in the combined blocking/permeabilization buffer (5% serum + 0.15% Triton X-100) overnight at 4°C on a nutator or rocker. This single, prolonged step ensures that the specimen is both fully permeabilized and blocked throughout its volume [43].
- Antibody Incubation: Proceed directly to incubation with the primary antibody diluted in a buffer containing a mild detergent (e.g., PBS-X) to maintain permeability [43].
The Scientist's Toolkit: Essential Research Reagents
Table 3: Key Reagent Solutions for Whole Mount Immunofluorescence
| Reagent | Function | Example Usage in Protocols |
|---|---|---|
| Triton X-100 | Non-ionic detergent for permeabilizing lipid membranes | Used at 0.1-0.2% for general permeabilization; at 0.15% in blocking buffers for whole mounts [41] [43] |
| Saponin | Mild detergent that selectively extracts cholesterol | Used at 0.2-0.5% for gentle permeabilization, especially for membrane-bound antigens [44] [41] |
| Embryo Permeabilization Solvent (EPS) | Water-miscible solvent to dissolve waxy barriers | 90% D-limonene base used to permeabilize Drosophila eggshells for small molecule delivery [38] [39] |
| Normal Serum (Goat, Donkey) | Protein-rich solution for blocking non-specific binding | Used at 2-10% in PBS to prevent off-target antibody binding [41] [43] |
| Bovine Serum Albumin (BSA) | Purified protein used as a blocking agent | Used at 1-5% in PBS as an alternative to serum for blocking [41] [42] |
| Phosphate Buffered Saline (PBS) | Isotonic buffer for washing and reagent dilution | Standard buffer for all washing steps and as a base for other solutions [40] [41] |
Workflow Visualization and Troubleshooting
The following diagram illustrates the critical decision points and parallel pathways for the permeabilization and blocking processes in a whole mount immunofluorescence experiment.
Troubleshooting Common Issues
- High Background Staining: This is most frequently due to insufficient blocking. Ensure the blocking serum is from the same species as the secondary antibody and that the concentration and duration of blocking are adequate for the specimen's thickness. Including an "omitting the primary antibody" control can help diagnose this issue [45].
- Weak or No Specific Signal: This can result from under-permeabilization, where antibodies fail to penetrate the specimen. Consider increasing the concentration of the detergent, extending the permeabilization time, or switching to a stronger agent. Over-fixation can also mask epitopes, which might require optimization of fixation time or the use of antigen retrieval methods [40] [42].
- Poor Viability or Morphology (Embryos): Over-permeabilization can damage cellular structures. For embryo work, carefully titrate the concentration and exposure time of the permeabilization agent (e.g., EPS) [38]. Using a viability dye like Rhodamine B can help identify the optimal window for permeability and survival [38] [39].
In the field of developmental biology, whole mount immunofluorescence has become an indispensable technique for visualizing protein expression and spatial relationships within the intricate three-dimensional context of intact embryos. Unlike traditional section-based methods that disrupt tissue architecture, whole mount staining preserves the complete structural integrity of specimens, providing unparalleled insights into developmental processes, neural circuit mapping, and organogenesis [33]. However, the transition from thin sections to thick samples introduces significant challenges in antibody penetration, requiring meticulous optimization of incubation parameters to achieve specific, reproducible staining throughout the entire tissue volume.
This technical guide provides evidence-based strategies for optimizing antibody concentrations and incubation durations specifically for thick samples, with particular emphasis on embryo analysis research. The protocols and principles outlined herein empower researchers to overcome the penetration barriers inherent to three-dimensional tissues while maintaining signal clarity and morphological preservation.
Principles of Whole Mount Immunofluorescence for Embryo Analysis
Whole mount immunofluorescence operates on the fundamental principle of antibody-antigen binding within intact tissues, but differs critically from conventional immunohistochemistry in its requirement for deep reagent penetration. The technique involves sequential stages of fixation to preserve tissue architecture and antigenicity, permeabilization to allow antibody access to internal epitopes, targeted antibody binding for specific protein detection, and high-resolution imaging to visualize the three-dimensional distribution of targets [33].
The primary challenge in whole mount staining stems from the physical barriers that limit reagent penetration into thick specimens. As embryo size increases, the time required for antibodies and other reagents to reach the tissue core increases exponentially. Inadequate incubation durations result in weak or absent central staining, while excessive incubation can elevate background signal and promote non-specific binding [33]. Furthermore, the cross-linking fixatives necessary for structural preservation may mask epitopes, a problem exacerbated in thick samples where antigen retrieval techniques are generally not feasible due to tissue sensitivity [33].
For embryonic research, specimen age and size present critical considerations. The technique works optimally with younger, smaller embryos where penetration barriers are less pronounced. Chicken embryos are typically processed up to 6 days, while mouse embryos are suitable up to approximately 12 days of development. For older, larger embryos, dissection into segments or removal of surrounding tissues may be necessary to facilitate effective staining [33].
Experimental Design and Optimization Strategies
Fixation and Permeabilization Considerations
Effective fixation represents the foundational step in whole mount immunofluorescence, balancing structural preservation with epitope accessibility. For most embryonic applications, 4% paraformaldehyde (PFA) serves as the primary fixative, either at room temperature for 30 minutes or overnight at 4°C for better penetration into thicker samples [33] [46]. When PFA causes epitope masking due to excessive cross-linking, methanol fixation provides a valuable alternative, though it may not preserve morphology as effectively [33].
Following fixation, permeabilization becomes essential for enabling antibody access to intracellular targets. Triton X-100 at concentrations of 0.1-0.5% effectively dissolves membrane lipids without excessive protein denaturation [46] [47]. The specific permeabilization agent and concentration must be empirically determined for each embryo type and developmental stage, as insufficient treatment limits antibody penetration while excessive treatment compromises cellular integrity.
Table 1: Fixation and Permeabilization Conditions for Different Embryonic Samples
| Sample Type | Recommended Fixative | Fixation Duration | Permeabilization Agent | Permeabilization Duration |
|---|---|---|---|---|
| Zebrafish Embryos | 4% PFA [33] | 30 min - Overnight [33] | 0.1% Triton X-100 [46] | Varies with size and age |
| Mouse Embryos | 4% PFA [33] | 30 min - Overnight [33] | 0.1-0.5% Triton X-100 [47] | Varies with size and age |
| Organoids | 4% PFA [48] | 30-60 min [48] | 0.5% Triton X-100 [48] | Overnight at 4°C [48] |
| Anterior Eye Cup | 4% Formaldehyde [46] | 50 min [46] | 0.1% Triton X-100 [46] | Incorporated in blocking |
Antibody Incubation Optimization
Antibody concentration and incubation duration represent the most critical variables requiring optimization for thick samples. The fundamental principle guiding this optimization is that thicker specimens demand longer incubation times to achieve sufficient reagent penetration. Whereas standard immunostaining of sections might require 1-2 hours for antibody binding, whole mount embryos typically need overnight to multi-day incubations [33].
For primary antibodies, researchers should begin with the manufacturer's recommended concentration for IHC on cryosections, then systematically adjust based on initial results. Common starting points range from 1:100 to 1:500 dilution, with incubation times extending from 12 hours to 3 days depending on embryo size and density [33] [47]. Agitation during incubation enhances reagent penetration and should be maintained throughout the process, typically at 800 rpm on an orbital shaker [47].
Secondary antibody concentrations generally fall between 1:400 to 1:1000, with incubation durations mirroring those of primary antibodies [47]. Fluorophore selection should consider tissue autofluorescence and imaging depth, with longer wavelengths (e.g., Alexa Fluor 555, 647) providing better penetration for deeper structures.
Table 2: Optimized Antibody Incubation Parameters for Thick Samples
| Sample Type | Primary Antibody Dilution | Primary Antibody Incubation | Secondary Antibody Dilution | Secondary Antibody Incubation |
|---|---|---|---|---|
| Spheroids | 1:100 [47] | 20 hours at 37°C [47] | 1:400 [47] | 6 hours at 37°C [47] |
| Organoids | Manufacturer's recommendation [48] | Overnight at 4°C [48] | Manufacturer's recommendation [48] | Overnight at 4°C [48] |
| Anterior Eye Cup | Not specified | Overnight at 4°C [46] | Not specified | Not specified |
| General Embryos | 1:100-1:500 (starting point) [33] | 12-72 hours [33] | 1:400-1:1000 [33] | 12-72 hours [33] |
Blocking and Washing Strategies
Comprehensive blocking proves essential for reducing non-specific background in whole mount immunofluorescence. Blocking buffers typically combine serum proteins (e.g., 5-10% normal serum from the secondary antibody host species) with detergent (e.g., 0.1-0.5% Triton X-100) in a physiological buffer [46] [47]. For particularly challenging specimens with high endogenous immunoreactivity, additional blocking agents such as bovine serum albumin (1-3%) or commercial blocking formulations may be incorporated [46].
Washing efficiency significantly impacts signal-to-noise ratio in thick samples. Standard protocols recommend 3-5 washes lasting 10 minutes to several hours each, with agitation to ensure complete reagent exchange throughout the tissue [33] [47] [48]. For delicate embryos, pipette tips should be modified by cutting the ends to create wider barrels that prevent shear damage during fluid transfers [48].
Workflow for Whole-Mount Immunofluorescence in Embryonic Samples
Stage-Specific Protocols for Embryonic Samples
Protocol for Murine Anterior Eye Cup Staining
This protocol, adapted from Gu et al., details specialized processing for mouse anterior eye cup specimens at different postnatal ages, enabling high-resolution visualization of vascular and cellular structures [46].
Materials and Reagents:
- Fixative: 4% formaldehyde in PBS, pH 7.4
- Blocking buffer: 3% BSA, 5% donkey serum, 0.1% Triton X-100 in PBS
- Primary antibodies: CD31 (endothelial cells), Endomucin (blood vessels), LYVE1 (lymphatic vessels)
- Secondary antibodies: Species-appropriate Alexa Fluor conjugates (488, 594, 647)
Methodological Details:
- Tissue Harvest and Fixation: Harvest eyeballs from euthanized mice and create a small incision at the temporal sclera for orientation. Fix with 1.5 mL 4% formaldehyde with gentle shaking for 50 minutes at room temperature [46].
- Blocking and Permeabilization: Incubate tissue in blocking buffer for 2 hours at room temperature with agitation.
- Antibody Incubation: Incubate with primary antibodies diluted in blocking buffer overnight at 4°C with gentle agitation. Follow with three 15-minute washes in PBST (0.1% Triton X-100 in PBS), then incubate with secondary antibodies overnight at 4°C [46].
- Mounting and Imaging: Mount tissues in Fluoromount-G medium and image using high-resolution confocal microscopy with appropriate filter sets [46].
Protocol for Spheroid Whole-Mount Immunofluorescence
While developed for cancer spheroids, this protocol provides valuable insights for embryonic researchers working with compact three-dimensional structures, particularly regarding penetration optimization [47].
Materials and Reagents:
- Fixative: 4% formaldehyde in PBS, pH 7.2-7.4
- Blocking buffer: 0.1% BSA, 0.2% Triton X-100, 0.05% Tween-20, 10% normal goat serum in PBS
- Primary antibodies: E-cadherin, N-cadherin, Ki-67
- Secondary antibodies: Goat anti-mouse and anti-rabbit Alexa Fluor conjugates (488, 555)
- Nuclear stain: Hoechst 33342 (100 μg/mL)
Methodological Details:
- Fixation: Transfer spheroids to 1.5 mL microcentrifuge tubes and fix with cold 4% formaldehyde for 30 minutes at room temperature. Wash five times with 500 μL PBS for 5 minutes each at 800 rpm agitation [47].
- Blocking: Incubate spheroids in 500 μL blocking buffer for 90 minutes at room temperature with 800 rpm agitation [47].
- Antibody Incubation: Incubate with primary antibodies (1:100 dilution in 1% BSA/PBS) for 20 hours at 37°C with 800 rpm agitation. Wash three times with 500 μL PBS for 10 minutes each. Incubate with secondary antibodies (1:400 dilution in 1% BSA/PBS) for 6 hours at 37°C in darkness [47].
- Nuclear Staining and Imaging: Incubate with Hoechst 33342 solution for 16 hours at 37°C, wash three times with PBS, and image using confocal microscopy with optical clearing if necessary [47].
The Scientist's Toolkit: Essential Research Reagents
Table 3: Key Reagents for Whole-Mount Immunofluorescence in Embryo Research
| Reagent Category | Specific Examples | Function | Optimization Notes |
|---|---|---|---|
| Fixatives | 4% Paraformaldehyde (PFA) [33], Methanol [33] | Preserve tissue architecture and antigenicity | PFA may mask epitopes; methanol alternative for sensitive targets |
| Permeabilization Agents | Triton X-100 [46] [47], Tween-20 [47] | Enable antibody penetration through membranes | Concentration critical (0.1-0.5%); balance between access and damage |
| Blocking Agents | Normal Serum [46] [47], BSA [46] | Reduce non-specific antibody binding | Use serum from secondary antibody host species |
| Primary Antibodies | CD31 [46], E-cadherin [47] | Bind specific target proteins | Validate on cryosections first; 1:100-1:500 typical starting dilution |
| Secondary Antibodies | Alexa Fluor conjugates [46] [47] | Signal amplification and detection | Choose fluorophores with good tissue penetration (e.g., 555, 647) |
| Nuclear Stains | Hoechst 33342 [47], DAPI [48] | Identify cellular organization | Incubation times vary (15 min - 16 hr) based on tissue permeability |
Advanced Applications in Embryo Analysis Research
Whole mount immunofluorescence provides unprecedented insights into developmental biology by preserving spatial relationships often lost in sectioning approaches. The technique enables comprehensive mapping of gene expression patterns during organ formation, visualization of neural circuit development, and assessment of transgenic model validation [33]. When combined with advanced imaging modalities like confocal microscopy and light-sheet fluorescence microscopy, researchers can reconstruct detailed three-dimensional models of embryonic structures at cellular resolution.
For drug development applications, whole mount staining facilitates evaluation of pharmacological interventions on embryonic development, particularly for compounds targeting vascularization, neurogenesis, or organogenesis. The preserved tissue architecture enables assessment of treatment effects on spatial patterning and cellular organization that would be impossible to detect using traditional molecular techniques alone [33].
Optimizing antibody concentrations and incubation durations for thick samples represents both a challenge and necessity in embryonic research. The protocols and parameters outlined in this guide provide a systematic framework for achieving specific, reproducible staining throughout three-dimensional specimens while preserving structural integrity. As imaging technologies continue to advance, the synergy between optimized whole mount immunofluorescence and high-resolution microscopy will undoubtedly yield new insights into the complex processes governing embryonic development, ultimately enhancing both basic scientific understanding and therapeutic development for congenital disorders.
Whole mount immunofluorescence (WM-IF) represents a cornerstone technique in developmental biology research, enabling the comprehensive three-dimensional visualization of protein localization and gene expression patterns within intact embryos. Unlike traditional sectioning methods that disrupt spatial relationships, WM-IF preserves the intricate architecture of embryonic tissues, providing invaluable insights into developmental processes. This technical guide details specialized sample preparation methodologies for three fundamental model organisms: mouse, zebrafish, and chick embryos. Within the broader thesis of whole mount immunofluorescence principles for embryo analysis, mastering these organism-specific protocols is essential for researchers investigating the dynamic processes of embryogenesis, organ formation, and morphogenetic events in their native three-dimensional context.
The principle of WM-IF for embryo analysis hinges on successful antigen preservation, adequate tissue permeabilization, and specific antibody penetration throughout thick tissue samples, followed by high-resolution imaging. Each model organism presents unique advantages and challenges for WM-IF. Mouse embryos offer direct relevance to mammalian development but require precise developmental staging. Zebrafish embryos provide optical clarity but need specialized permeabilization. Chick embryos are accessible for manipulation but have specific size limitations for effective staining. This guide addresses these nuances through standardized, detailed protocols to ensure reproducible and high-quality results across these key model systems.
Comparative Analysis of Model Organisms
The selection of an appropriate model organism is dictated by the research question, considering factors such as developmental timing, genetic tractability, and physiological relevance. The table below provides a comparative overview of the three models in the context of WM-IF.
Table 1: Key Characteristics of Mouse, Zebrafish, and Chick Embryos for WM-IF
| Parameter | Mouse Embryo | Zebrafish Embryo | Chick Embryo |
|---|---|---|---|
| Maximum Recommended Age for WM-IF | Up to 12 days [33] | Varies by structure; whole spinal cords in adults [49] | Up to 6 days [33] |
| Key Pre-Staining Steps | Dissection from decidua, removal of extra-embryonic tissues [50] | Dechorionation (for early embryos), dissection for older tissues [49] [33] | Windowing of egg, dissection of embryo |
| Fixation of Choice | 4% Paraformaldehyde (PFA) [50] | 4% PFA [49] [33] | 4% PFA [33] |
| Primary Permeabilization Challenge | Tissue density and size | Yolk sac and pigment (if not mutant) | Tissue size and density |
| Specialized Considerations | Precise dissection and positioning for imaging is critical [50] | Enzymatic (pronase) or manual dechorionation often required [33] | May require dissection into segments for older stages [33] |
| Imaging Advantage | Direct relevance to mammalian organogenesis | Natural transparency in early stages; suitable for light-sheet microscopy [49] | Large size, easy to access and manipulate ex ovo |
Essential Reagents and Equipment: The Scientist's Toolkit
Successful execution of WM-IF relies on a foundation of specific, high-quality reagents and equipment. The following table catalogs the essential components required for the protocols described in this guide.
Table 2: Essential Research Reagent Solutions for Whole Mount Immunofluorescence
| Reagent/Equipment | Function | Examples & Notes |
|---|---|---|
| Fixatives | Preserves tissue architecture and antigenicity by cross-linking or precipitating proteins. | 4% Paraformaldehyde (PFA) is most common [33]. Methanol can be an alternative for PFA-sensitive epitopes [33]. |
| Permeabilization Agents | Disrupts lipid membranes to allow antibody penetration into the tissue and cells. | Detergents like Triton X-100 [50] or Tween. |
| Blocking Buffer | Reduces non-specific antibody binding to minimize background signal. | Typically contains serum (e.g., goat, donkey) and a protein source (e.g., BSA) in a permeabilization buffer. |
| Primary Antibodies | Specifically bind to the target antigen of interest. | Must be validated for immunofluorescence in fixed tissue; monoclonal antibodies reduce variability [51]. |
| Secondary Antibodies | Fluorophore-conjugated antibodies that bind to the primary antibody for detection. | Must be raised against the host species of the primary antibody. Multiple fluorophores allow multiplexing [51]. |
| Mounting Medium | Preserves the sample and provides a refractive index suitable for microscopy. | Anti-fade media (e.g., with DABCO) are essential for fluorescence preservation [50]. |
| Coverslips & Slides | Supports the sample for high-resolution microscopy. | |
| Confocal Microscope | Essential for acquiring high-resolution, optical Z-sections through thick samples. | Light-sheet microscopy is ideal for very large samples [49]. |
Detailed Experimental Protocols
Mouse Embryo WM-IF Protocol
The following workflow outlines the key steps for processing mouse embryos for WM-IF, optimized for developmental stages up to E12.5 [33].
Step-by-Step Methodology:
Dissection and Harvesting: On the desired embryonic day (e.g., E8.25), disinfect the pregnant mouse abdomen with 70% ethanol. Make an abdominal incision to expose and remove the uterine horn. Transfer the uterus to a dish containing phosphate-buffered saline (PBS). Carefully dissect individual deciduae and use fine forceps to remove the uterine tissue. Slice the tip of the decidua to reveal the embryo and gently push it out. Remove extra-embryonic tissues without damaging the embryo's morphology and transfer to a tube containing fresh PBS on ice [50].
Fixation: Aspirate the PBS and add 4% Paraformaldehyde (PFA) in PBS. Fix for 1 hour at room temperature. Note that fixation time may need optimization and can be extended for larger embryos [50] [33].
Washing: Remove the fixative and wash the embryos three times with fresh PBS to remove all traces of PFA.
Permeabilization and Blocking: Incubate the embryos in blocking buffer for 4 hours at room temperature. The blocking buffer should contain a permeabilization agent (e.g., 0.1% or 1% Triton X-100) and a blocking serum (e.g., 5-10% from the species of the secondary antibody) to prevent non-specific antibody binding [50] [51].
Primary Antibody Incubation: Replace the blocking buffer with the primary antibody diluted in blocking buffer. Incubate overnight at 4°C. Due to tissue thickness, incubation times longer than those used for cells or sections are typically necessary [50] [33].
Washing: Aspirate the primary antibody and wash the embryos three times for one hour per wash with PBS containing 0.1% Triton X-100 to ensure complete removal of unbound antibody [50].
Secondary Antibody Incubation: Add the fluorophore-conjugated secondary antibody, diluted in blocking buffer, to the embryos. Incubate for 3 hours at room temperature, protected from light.
Washing and Counterstaining: Perform final washes with PBS. Counterstain nuclei with DAPI (e.g., 10 minutes in PBS), followed by two five-minute washes in PBS [50].
Mounting: Suspend the embryo in an anti-fade mounting medium. To position the embryo correctly for imaging, place a drop of medium on a slide, transfer the embryo, and use forceps to orient it (e.g., with the anterior side facing away from the slide). Lower a coverslip onto the sample, using stacks of double-stick tape as supports to prevent crushing. Correct positioning is critical for obtaining high-quality, quantifiable data [50].
Zebrafish Embryo WM-IF Protocol
Zebrafish protocols require specific steps to handle the chorion and, for some tissues like the adult spinal cord, specialized dissection and clearing.
Step-by-Step Methodology:
Dechorionation: The chorion is a physical barrier that must be removed. This can be done manually using fine forceps under a dissecting microscope or enzymatically by incubating embryos in pronase (1-2 mg/mL for 5-10 minutes at room temperature), followed by thorough rinsing in embryo medium or PBS [33].
Fixation: Fix dechorionated embryos in 4% PFA. The duration must be optimized based on the embryo's size and stage.
Permeabilization: Zebrafish embryos, particularly older ones, can be challenging to permeabilize. Use higher concentrations of detergent (e.g., 1-2% Triton X-100) and/or extend the permeabilization time. For some applications, proteinase K treatment may be used, but this requires post-fixation afterward to restore tissue integrity.
Antibody Incubation and Washing: The principles are similar to the mouse protocol, but incubation and washing times are often substantially longer for zebrafish embryos—sometimes extending over several days—to ensure deep penetration of reagents [33].
Specialized Protocol for Adult Zebrafish Spinal Cords: For larger tissues like the adult spinal cord, a detailed dissection and clearing protocol is available [49]. This involves:
- Dissection: Step-by-step dissection of the entire spinal cord.
- Whole-Mount Staining: Optimized immunofluorescence staining for the whole tissue.
- Clearing: Using Scale solutions to render the tissue transparent for improved light penetration during imaging [49].
- Imaging: Light-sheet microscopy is ideally suited for acquiring 3D data from these large, cleared samples [49].
Chick Embryo WM-IF Protocol
Chick embryos are a classic model for developmental studies. The WM-IF protocol is similar to that of mouse and zebrafish, with attention paid to the recommended developmental window.
Step-by-Step Methodology:
Harvesting: Carefully open the eggshell and cut a window to access the embryo. Using fine tools, dissect the embryo from the yolk and extra-embryonic membranes in a dish containing PBS. Gently wash away any adherent yolk.
Fixation: Fix the intact chick embryo in 4% PFA. For embryos older than 6 days, consider dissecting the region of interest (e.g., a specific organ) rather than processing the whole embryo, as the size hinders reagent penetration [33].
Permeabilization, Blocking, and Staining: Follow the same core principles as the mouse embryo protocol. Ensure adequate incubation times for antibodies and washes, adjusting for the size of the chick embryo.
Mounting and Imaging: Mount the embryo in an anti-fade medium. For larger embryos, it may be necessary to physically support the coverslip to avoid crushing the sample. Confocal microscopy is used to acquire Z-stacks through the tissue.
Advanced Applications and Integration with Other Techniques
Whole mount immunofluorescence serves as a powerful starting point for integrated analytical pipelines. A key application is quantitative analysis, where fluorescence intensity is measured to assess protein abundance or signaling activity. For instance, protocols exist for quantifying TGF-β signaling in human blastocysts by measuring the immunofluorescence intensity of phosphorylated SMAD proteins, utilizing Fiji and CellProfiler for nuclear segmentation and tracking [52]. This demonstrates how WM-IF data can be translated into quantitative metrics.
Furthermore, WM-IF samples are highly amenable to advanced imaging and processing. As mentioned in the zebrafish protocol, tissue clearing techniques like ScaleS solution transform opaque tissues into transparent samples, enabling deep-tissue imaging with light-sheet microscopy [49]. The resulting 3D volumetric data can be processed using automated image analysis software to generate surfaces and quantify parameters like the volume of specific cell populations, providing unprecedented quantitative information about tissue-level dynamics [50].
Troubleshooting Common Challenges
Even with optimized protocols, researchers may encounter challenges. The table below outlines common issues and their solutions.
Table 3: Troubleshooting Guide for Whole Mount Immunofluorescence
| Problem | Potential Cause | Solution |
|---|---|---|
| Weak or No Signal | Epitope masked by PFA cross-linking. | Try methanol fixation as an alternative to PFA [33]. |
| Antibody cannot penetrate deep into the tissue. | Increase permeabilization agent concentration/time; extend primary/secondary antibody incubation times [33]. | |
| High Background | Inadequate blocking or washing. | Optimize blocking buffer (e.g., change serum, add BSA); increase wash frequency and duration [33]. |
| Non-specific antibody binding. | Titrate the primary antibody to find the optimal dilution; include detergent in all wash buffers. | |
| Uneven Staining | Incomplete permeabilization. | Ensure the tissue is fully submerged and agitated during steps; consider using a milder detergent. |
| Trapped air bubbles in the tissue. | Degas solutions or use a vacuum chamber briefly during initial fixation/permeabilization steps. | |
| Poor Image Quality | Tissue too thick/opaque for light penetration. | For large embryos, dissect into segments [33] or apply tissue clearing protocols [49]. |
| Sample not positioned correctly. | Take extreme care during mounting, using supports to correctly orient the embryo without distortion [50]. |
Confocal microscopy represents a pivotal advancement in optical microscopy, enabling high-resolution imaging deep within both living and fixed cells and tissues. The core principle of this technology is the use of spatially filtered illumination and detection to eliminate out-of-focus light, thereby producing sharply defined optical sections from which three-dimensional (3D) renderings can be created [53]. In a standard widefield fluorescence microscope, the entire specimen is illuminated, and light emitted from fluorophores both in and out of the focal plane is detected, resulting in a blurred image with reduced contrast, especially in thicker samples [54]. The confocal microscope addresses this fundamental limitation by incorporating pinhole apertures placed in conjugate focal planes (confocal) for both illumination and detection. This configuration ensures that only light from the focal plane passes through the detection pinhole to reach the detector, while light from above and below the focal plane is largely blocked [54] [53].
This optical sectioning capability is the foundation for 3D reconstruction. By systematically scanning the laser point across the sample in the x, y, and z dimensions, a series of in-focus images, known as a z-stack, can be collected [54]. These sequential optical slices can then be digitally processed to reconstruct a 3D representation of the specimen, allowing researchers to analyze its internal structure and spatial relationships in unprecedented detail. The lateral resolution of a confocal microscope can reach ~0.2 µm, while the axial resolution is typically ~0.6 µm, though these values are influenced by the numerical aperture (NA) of the objective lens, the wavelength of light (λ), and the refractive index (η) of the mounting medium [54].
Core Methodology: Whole-Mount Immunofluorescence for Embryo Analysis
Whole-mount immunofluorescence (IF) is a powerful technique for visualizing the 3D distribution of proteins and cellular structures within intact tissues and embryos, preserving their anatomical integrity without the need for physical sectioning. When combined with confocal microscopy and 3D reconstruction, it provides an unparalleled tool for studying complex processes during morphogenesis [55] [2]. The following workflow and diagram outline the key stages of this integrated approach.
Figure 1: Experimental workflow for whole-mount immunofluorescence, confocal imaging, and 3D reconstruction.
Sample Preparation and Fixation
The process begins with careful sample preparation to preserve morphology and antigenicity. For embryos or tissues, this involves dissection followed by fixation. A common and effective fixative is 4% paraformaldehyde (PFA) in phosphate-buffered saline (PBS), incubated for 10-20 minutes at room temperature [56] [41]. PFA cross-links proteins, effectively preserving cellular structure. Alternative fixatives include chilled methanol, ethanol, or acetone, which simultaneously fix and permeabilize cells by precipitating proteins and dissolving lipids [41].
Permeabilization and Blocking
Following fixation and washing, samples permeabilized with a detergent are often necessary when using PFA to allow antibodies to access intracellular epitopes. A widely used agent is 0.1-0.2% Triton X-100 in PBS, incubated for 2-5 minutes [41]. Subsequently, a critical blocking step is performed to minimize non-specific antibody binding. Blocking is typically done with a 2-10% solution of a protein such as bovine serum albumin (BSA) or normal serum from the host species of the secondary antibody, for 1-2 hours at room temperature [56] [41].
Immunostaining
Samples are incubated with a primary antibody specific to the target protein, diluted in a buffer like PBS with 1% BSA and 0.1% Triton X-100. This incubation is often performed overnight at 4°C to ensure sufficient antibody penetration and binding [55] [2]. After thorough washing to remove unbound antibody, a fluorophore-conjugated secondary antibody, raised against the host species of the primary antibody, is applied for 1-2 hours protected from light [56]. This indirect method amplifies the signal and allows for flexibility. For multi-color imaging, this process can be repeated with antibodies from different species or using direct conjugates.
Mounting, Clearing, and Imaging
After final washes, the stained samples are mounted for microscopy. For deep imaging, a refractive index-matched mounting medium is crucial. For example, 80% glycerol has been shown to provide excellent clearing performance for dense organoids, significantly reducing signal attenuation at depths of up to 200 µm compared to aqueous mounting media like PBS [6]. The mounted sample is then ready for confocal microscopy to acquire a z-stack of the entire structure.
3D Spatial Reconstruction from Confocal Z-Stacks
The stack of 2D optical sections acquired via confocal microscopy forms the raw data for 3D reconstruction. This process involves several computational steps to create an accurate and quantitative 3D model. A pipeline such as the one named "Tapanade," used for gastruloid analysis, typically includes corrections for optical artifacts, accurate 3D segmentation of nuclei, and reliable quantification of gene expression patterns [6]. The reconstructed 3D model allows for the extraction of quantitative parameters at multiple scales, from subcellular details to tissue-level organization.
Table 1: Quantitative 3D Morphological Parameters in Developmental Biology
| Parameter Category | Specific Parameter | Application Example | Biological Significance |
|---|---|---|---|
| Overall Morphology | Blastocyst Volume, Surface Area, Diameter [57] | Blastocyst development | Larger values associated with higher pregnancy and live birth rates [57] |
| Tissue-Specific | Trophectoderm (TE) Cell Number, TE Density [57] | Blastocyst development | Larger values linked to increased likelihood of pregnancy and live birth [57] |
| Nuclear/Cellular | Nuclear Morphology, Gene Co-expression [6] | Gastruloid development | Reveals relationships between local cell deformations and tissue-scale organization [6] |
| Spatial Relationships | ICM Shape Factor, Spatial Distance between ICM and TE [57] | Blastocyst development | Shape closer to a sphere (smaller shape factor) correlates with better outcomes [57] |
Integrated Experimental and Computational Pipeline
For large, densely packed samples like gastruloids, which can exceed 200 µm in diameter, two-photon microscopy is often preferred over confocal microscopy. Two-photon microscopy uses longer-wavelength light for excitation, which penetrates deeper into thick tissues with less scattering and photodamage, making it ideal for imaging dense 3D cell aggregates [6]. An advanced pipeline may involve sequential opposite-view multi-channel imaging of cleared samples using a two-photon microscope. The subsequent computational workflow includes several sophisticated steps to yield quantitative, biologically meaningful data [6].
Figure 2: Integrated pipeline for deep imaging and 3D analysis of thick samples like organoids and embryos.
- Spectral Unmixing: Using techniques like linear unmixing, this step corrects for spectral bleed-through or cross-talk, which occurs when the emission spectra of multiple fluorophores overlap. This ensures that the signal in each channel is specific and accurate [6] [58].
- Dual-View Registration and Fusion: In opposite-view imaging, the two datasets must be precisely aligned (registered) and combined to reconstruct a complete in-toto image of the sample, improving the resolution and signal-to-noise ratio throughout the volume [6].
- 3D Nuclei Segmentation: This is a critical step where individual cell nuclei are identified and delineated in 3D space. This allows for the counting of cells and analysis of nuclear morphology, position, and gene expression on a single-cell level within the tissue context [6].
- Signal Normalization: This corrects for intensity variations that can occur as a function of imaging depth due to light scattering and absorption, ensuring that fluorescence intensity measurements are quantitative and comparable throughout the sample [6].
These processing tools are increasingly available as open-source software packages (e.g., the Python package Tapenade) and plugins for platforms like napari, making quantitative 3D analysis accessible to a broader scientific community [6].
The Scientist's Toolkit: Essential Reagents and Materials
Table 2: Key Research Reagent Solutions for Whole-Mount Immunofluorescence
| Item | Function/Purpose | Examples / Notes |
|---|---|---|
| Fixative | Preserves cellular morphology and immobilizes antigens. | 4% Paraformaldehyde (PFA) [56]; Methanol or Acetone (fix and permeabilize) [41] |
| Permeabilization Agent | Solubilizes membranes for intracellular antibody access. | Triton X-100 (0.1-0.5%) [41]; Saponin (milder, for membrane antigens) [41] |
| Blocking Agent | Reduces non-specific antibody binding to minimize background. | Normal Serum (from secondary host); BSA (2-10%) [56] [41] |
| Primary Antibody | Binds specifically to the target protein of interest. | Anti-HCN4 (for cardiac nodal cells) [55]; Validate for whole-mount applications [58] |
| Fluorophore-Conjugated Secondary Antibody | Detects the primary antibody; provides signal amplification. | Alexa Fluor dyes; choose species reactivity and minimal cross-reactivity [56] |
| Mounting Medium | Preserves sample and matches refractive index for deep imaging. | Glycerol (e.g., 80%) [6]; Commercial antifade reagents (e.g., ProLong Gold) [6] |
| Refractive Index Matching Solution | Clears tissue to reduce light scattering for deeper imaging. | 80% Glycerol [6]; OptiPrep [6] |
The integration of confocal (or two-photon) microscopy with whole-mount immunofluorescence and sophisticated 3D image analysis has fundamentally transformed our ability to study embryonic development and complex tissue models. This pipeline provides a powerful, quantitative framework to investigate the intricate relationships between cellular fate, molecular expression, and 3D tissue architecture in systems ranging from human blastocysts to advanced organoid models. As these technologies continue to evolve, they will undoubtedly yield deeper insights into the fundamental principles of life's earliest stages and provide new tools for drug development and regenerative medicine.
Solving Common Challenges: A Troubleshooting Guide for Clear WM-IF Results
In whole mount immunofluorescence (WMIF) for embryo analysis, achieving a high signal-to-noise ratio is paramount for accurate data interpretation. High background fluorescence can obscure critical morphological details and lead to misleading conclusions. Two of the most common technical pitfalls causing this issue are insufficient blocking and over-fixation. This guide details the principles and protocols for identifying and correcting these problems within the context of embryonic research, ensuring clear and reliable three-dimensional imaging.
The Pitfall of Insufficient Blocking
Inadequate blocking occurs when non-specific antibody binding sites are not effectively saturated before antibody incubation. This results in antibodies attaching to non-target sites, creating a diffuse, high-background signal that can mask specific staining.
Optimized Blocking Buffer Composition
A well-formulated blocking buffer is crucial for reducing non-specific background. The table below compares a standard, potentially insufficient buffer with an optimized one for embryonic tissues.
Table 1: Composition and Efficacy of Blocking Buffers for Embryo WMIF
| Component | Standard Buffer (Potential for High Background) | Optimized Buffer (Low Background) | Function |
|---|---|---|---|
| Protein Source | 1-3% Serum | 5-10% Serum (from secondary antibody host species) | Saturates non-specific protein-binding sites [43] [59] |
| Detergent | 0.1% Triton X-100 | 0.1-0.5% Triton X-100 [43] [59] | Permeabilizes membranes for antibody penetration; concentration can be tuned [14] |
| Additional Agents | Not always included | 1% BSA, 0.1% Sodium Azide (toxic; handle with care) [14] | BSA adds extra blocking capacity; sodium azide prevents microbial growth [14] |
| Expected Background | High, diffuse staining | Signally reduced, clean background | - |
Detailed Protocol for Effective Blocking and Permeabilization
The following workflow, specifically adapted for embryo analysis, ensures sufficient blocking and permeabilization.
Diagram 1: Effective blocking and permeabilization workflow.
Step-by-Step Method:
- Post-fixation Wash: After fixation, wash the embryos with a permeabilization wash buffer such as PBS-X (0.15% Triton X-100 in PBS) to begin the permeabilization process [43].
- Buffer Preparation: Prepare a fresh blocking buffer. For example: 5% donkey serum + 0.15% Triton X-100 in PBS [43]. Using serum from the same species as the host of your secondary antibody is highly recommended to minimize cross-reactivity [59].
- Blocking Incubation: Replace the solution with a sufficient volume of blocking buffer to fully cover the embryos. Incubate overnight at 4°C on a gentle rocker. This extended incubation is critical for allowing the blocking agents to fully penetrate the dense three-dimensional structure of the embryo [43] [50].
The Pitfall of Over-fixation
Over-fixation, typically resulting from excessive concentration or duration of paraformaldehyde (PFA) exposure, can induce high background through two primary mechanisms: autofluorescence and masking of antigen epitopes.
Autofluorescence and Epitope Masking
PFA fixation works by creating cross-links between proteins. While necessary to preserve structure, over-crosslinking can:
- Cause Autofluorescence: Creates fluorescent cross-linked products that emit light across a broad spectrum, creating a greenish-yellow background [50].
- Mask Epitopes: Alters the conformation of the target antigen so that the primary antibody can no longer recognize and bind to it, leading to weak or false-negative signals.
Quantitative Fixation Guidelines for Embryos
The table below provides quantitative guidelines for balancing adequate fixation with minimized background in embryo studies.
Table 2: Fixation Parameters and Their Impact on Background in Embryo WMIF
| Parameter | Over-fixation Condition | Optimal Condition | Rationale |
|---|---|---|---|
| PFA Concentration | >4% | 2-4% [14] [43] [50] | Lower concentrations reduce cross-linking-induced autofluorescence. |
| Fixation Duration | >24 hours, or at high temp | 1-16 hours at 4°C [43] [50] | Shorter, colder fixation minimizes epitope damage. |
| Fixation Temperature | Room Temperature or 37°C | 4°C [43] | Cold temperature slows fixation rate, improving uniformity. |
| Primary Outcome | High autofluorescence, weak signal | Strong specific signal, low background | - |
Detailed Protocol for Controlled Fixation
Adhering to a precise fixation protocol is essential for preserving antigenicity and minimizing autofluorescence.
Diagram 2: Controlled fixation and quenching process.
Step-by-Step Method:
- Controlled Fixation: Immerse the freshly dissected embryo in ice-cold 4% PFA. Incubate at 4°C on a nutator for a defined period, typically overnight (16 hours). The cold temperature is key to controlled and uniform fixation [43].
- Thorough Washing: After fixation, wash the sample multiple times with ice-cold PBS to remove all traces of PFA [43].
- Quenching (Critical Step): Incubate the sample with a PBS-Glycine solution. Glycine acts as a quenching agent by binding to and neutralizing any remaining, unreacted PFA molecules in the tissue, thereby reducing the potential for ongoing cross-linking and background during storage or subsequent steps [14].
A Researcher's Toolkit for Low-Background WMIF
The following table lists essential reagents and their specific functions in mitigating high background in embryo WMIF protocols.
Table 3: Essential Reagent Solutions for Low-Background Embryo Staining
| Reagent | Function in Protocol | Role in Reducing Background |
|---|---|---|
| Glycine Buffer | Quenching agent used after fixation [14]. | Neutralizes excess PFA, reducing autofluorescence and non-specific cross-linking [14]. |
| Normal Serum (e.g., Donkey, Goat) | Protein source in blocking buffer [43] [59]. | Competes for and saturates non-specific antibody binding sites on proteins and tissues. |
| Triton X-100 / Tween-20 | Detergent in wash and blocking buffers [14] [43]. | Permeabilizes membranes for antibody penetration; helps wash away unbound antibodies in wash steps. |
| Bovine Serum Albumin (BSA) | Additional blocking agent in buffers [14]. | Provides a non-interacting protein matrix to further adsorb non-specifically binding antibodies. |
| Sodium Azide (NaN₃) | Antimicrobial agent in stock buffers [14]. | Prevents microbial growth in stored buffers and during long incubations, which can cause high background. |
High background staining from insufficient blocking and over-fixation is a formidable but surmountable challenge in whole mount immunofluorescence of embryos. By understanding the underlying principles—meticulously saturating non-specific sites and carefully controlling cross-linking fixation—researchers can achieve exceptional image clarity. Implementing the optimized protocols and reagent solutions detailed in this guide will empower robust and reproducible 3D imaging, enabling deeper insights into the complex processes of embryonic development.
In whole mount immunofluorescence (IF) for embryo analysis, the failure to generate a specific, robust signal represents a significant experimental bottleneck. For researchers studying embryonic development, two technical challenges frequently undermine data quality: epitope damage from suboptimal fixation and inadequate permeabilization of complex three-dimensional tissues. Within the context of whole mount embryo analysis, these challenges are exacerbated by the specimen's size, density, and the critical need to preserve native structure-function relationships. When antibodies fail to access and recognize their targets, the resulting low or absent signal can be misinterpreted as biological absence rather than technical artifact, potentially leading to flawed scientific conclusions. This guide synthesizes current methodological insights to provide researchers with evidence-based strategies for overcoming these pervasive challenges, with a specific focus on preserving embryonic structures for accurate analysis.
Quantitative Comparison of Epitope-Antibody Pair Performance
The choice of epitope-antibody pair significantly influences signal strength in immunofluorescence applications. A recent systematic comparison evaluated multiple tag/antibody combinations under standardized conditions in fixed and permeabilized cells, providing quantitative data to inform experimental design [60].
The study expressed chimeric proteins composed of an invariant transmembrane domain (IL2Ra) fused with specific epitope tags, enabling direct comparison of recognition efficiency by quantifying signals from anti-tag and anti-IL2Ra antibodies [60]. All antibodies were recombinant antibodies fused to the same mouse Fc domain, ensuring comparability [60]. The performance hierarchy established through this analysis is summarized in the table below.
Table 1: Quantitative Performance of Epitope-Antibody Pairs in Immunofluorescence
| Epitope Tag | Antibody Clone | Performance at High Concentration (5 μg·mL⁻¹) | Performance at Low Concentration (50 ng·mL⁻¹) | Fixation Compatibility |
|---|---|---|---|---|
| EPEA | AI215 | High (>50) | High (Efficient) | PFA & Methanol |
| HA | AF291 | High (>50) | High (Efficient) | PFA & Methanol |
| SPOT | AI196 | High (>50) | High (Efficient) | Better in Methanol |
| DYKDDDDK (FLAG) | TA001 | High (>50) | Fair (Less Efficient) | PFA & Methanol |
| DYKDDDDK (FLAG) | AX047 | High (>50) | Fair (Less Efficient) | PFA & Methanol |
| 6xHis | AD946 | High (>50) | Fair (Less Efficient) | PFA & Methanol |
| 6xHis | AV248 | High (>50) | Fair (Less Efficient) | PFA & Methanol |
| Myc | TA002 | High (>50) | Poor (No Specific Signal) | PFA & Methanol |
| DYKDDDDK (FLAG) | AI177 | Low (<25) | Not Tested | PFA & Methanol |
| 6xHis | AF371 | Low (<25) | Not Tested | PFA & Methanol |
| Myc | AI179 | Low (<25) | Not Tested | Significantly Weaker in Methanol |
Note: Performance values are normalized signals with anti-HA AF291 set at 100 [60].
Three distinct performance categories emerged from this analysis [60]:
- "Good" antibodies (e.g., anti-EPEA AI215, anti-HA AF291, anti-SPOT AI196) generated high signals even at low concentrations (50 ng·mL⁻¹).
- "Fair" antibodies (e.g., anti-FLAG TA001/AX047, anti-6xHis AD946/AV248) required high concentrations (5 μg·mL⁻¹) to generate strong signals.
- "Mediocre" antibodies (e.g., anti-FLAG AI177, anti-6xHis AF371, anti-Myc AI179) generated weak signals even at high concentrations.
Fixation method specifically impacted anti-Myc antibodies, which performed significantly worse in methanol-fixed cells [60]. This underscores how fixation-induced epitope damage can be tag-specific.
Experimental Protocols for Signal Optimization
Systematic Workflow for Troubleshooting Signal Problems
The following diagram outlines a structured approach to diagnosing and resolving low or no signal issues in whole mount immunofluorescence, emphasizing decisions related to permeabilization and epitope preservation.
Optimized Permeabilization Protocols for Embryonic Tissues
Effective permeabilization is critical for antibody access in whole mount embryo specimens. The following protocol provides a framework for systematic optimization.
Sequential Detergent Screening Approach
- Prepare embryo samples fixed with 4% paraformaldehyde (PFA).
- Test increasing concentrations of saponin (0.1%-0.5%), Triton X-100 (0.1%-0.3%), or Tween-20 (0.1%-0.5%).
- Incubate with permeabilization solution for 1-4 hours with gentle agitation.
- Include a positive control antibody known to work in whole mount preparations.
- Quantify signal intensity and background for each condition.
For particularly challenging dense embryonic tissues, consider combining detergents (e.g., 0.1% Triton X-100 followed by 0.1% saponin) or incorporating limited proteinase K treatment (0.1-1 μg/mL for 5-15 minutes) prior to detergent permeabilization.
Epitope Preservation and Retrieval Methods
Epitope damage from fixation can be mitigated through several approaches:
Fixation Optimization
- Compare fixation methods: Test PFA concentrations (2%-4%), duration (15 minutes to 2 hours), and inclusion of glutaraldehyde (0.1%-0.25%) for better structural preservation.
- Consider methanol fixation for specific epitopes, though this may damage some tags like Myc [60].
- Reduce fixation time for sensitive epitopes while maintaining structural integrity.
Epitope Retrieval Techniques
- Heat-induced epitope retrieval: Incubate samples in citrate buffer (pH 6.0) or Tris-EDTA buffer (pH 9.0) at 70-95°C for 20-45 minutes.
- Enzymatic retrieval: Test proteinase K (1-10 μg/mL), pepsin, or trypsin for specific epitopes.
- Reduction-based retrieval: Use 0.1% sodium borohydride to reduce cross-linking, particularly after aldehyde fixation.
The Scientist's Toolkit: Essential Research Reagents
Table 2: Key Reagents for Optimizing Whole Mount Immunofluorescence
| Reagent Category | Specific Examples | Function & Application Notes |
|---|---|---|
| Permeabilization Agents | Saponin (0.1-0.5%), Triton X-100 (0.1-0.3%), Tween-20 (0.1-0.5%), Digitonin | Create pores in membranes while preserving protein function; saponin is preferred for intracellular epitopes. |
| Fixatives | Paraformaldehyde (2-4%), Methanol, Ethanol | Preserve cellular structure; PFA is standard but may mask epitopes; methanol may denature sensitive tags like Myc [60]. |
| Epitope Tags | EPEA, HA, SPOT, FLAG, 6xHis, Myc | Recombinant tags with varying antibody performance characteristics; EPEA, HA and SPOT show superior performance in IF [60]. |
| High-Performance Antibodies | Anti-HA AF291, Anti-EPEA AI215, Anti-SPOT AI196 | Recombinant antibodies validated for high signal at low concentrations (50 ng·mL⁻¹); optimal for detecting low-abundance targets [60]. |
| Blocking Agents | BSA (1-5%), Normal serum (1-10%), Fish skin gelatin (0.1-1%) | Reduce nonspecific antibody binding; serum from secondary antibody host is often most effective. |
| Epitope Retrieval Reagents | Sodium citrate (pH 6.0), Tris-EDTA (pH 9.0), Proteinase K, Sodium borohydride | Reverse formaldehyde-induced cross-links to expose masked epitopes; optimal conditions are epitope-dependent. |
Advanced Applications in Embryo Analysis
The principles of epitope preservation and adequate permeabilization find particular relevance in cutting-edge embryo research. Recent advances in live imaging of late-stage preimplantation human embryos have revealed de novo mitotic errors occurring at previously unappreciated developmental stages [61]. These findings were enabled by gentle fixation and imaging techniques that preserve embryonic structures while allowing detailed observation of developmental processes.
For whole mount RNA fluorescent in situ hybridization on mouse embryos, optimized protocols include oxidation-mediated autofluorescence reduction steps that enhance signal-to-noise ratios without epitope damage [12]. Similarly, multiplex immunofluorescence techniques enable researchers to visualize multiple targets simultaneously, requiring careful balancing of permeabilization and epitope preservation across different antibody-antigen combinations [62].
Solving the challenges of low or no signal in whole mount immunofluorescence requires a systematic approach addressing both permeabilization efficiency and epitope preservation. The quantitative data presented here provides evidence-based guidance for selecting high-performance epitope-antibody pairs, while the detailed protocols offer actionable strategies for optimizing specimen preparation. As embryo analysis techniques continue to advance, with innovations such as AI-powered image analysis and non-invasive genetic testing becoming more prevalent [63] [64], the fundamental principles of adequate permeabilization and epitope preservation remain essential for generating reliable, interpretable data. By implementing these optimized protocols and reagent selections, researchers can significantly improve signal quality in whole mount immunofluorescence applications, thereby enhancing the rigor and reproducibility of developmental biology research.
Optimizing Antibody Penetration in Large or Dense Samples
In the context of whole-mount immunofluorescence principles for embryo analysis research, achieving effective antibody penetration represents a significant technical challenge. The three-dimensional complexity of large, dense samples like embryos and organoids creates substantial barriers that restrict antibody access to internal structures, potentially compromising staining quality and experimental outcomes. The mandatory usage of extracellular matrix (ECM) gels in 3D cultures further complicates this process by limiting antibody penetration and increasing background noise, while removal of these ECM gels risks disrupting delicate morphological integrity and causing sample loss [14]. This technical guide provides comprehensive, evidence-based strategies to overcome these limitations, ensuring robust and reproducible immunofluorescence results while preserving valuable sample architecture.
Fundamental Challenges in Antibody Penetration
The structural properties that make large samples like embryos and organoids biologically relevant also create substantial physical barriers to antibody delivery. Several interconnected factors contribute to poor reagent penetration:
Binding Site Barriers: At sub-saturating doses, antibodies progressively saturate their targets as they diffuse from blood vessels, creating a "binding site barrier" that prevents uniform distribution throughout the tissue [65]. This results in heterogeneous staining where peripherally located structures label effectively while interior regions remain unstained.
Macromolecular Crowding: The dense cellular packing in structures like gastruloids, which can reach diameters of 300-500 microns, creates a physically restrictive environment that hinders antibody diffusion [6]. This effect is particularly pronounced in multilayered organoid tissues where cell packing hinders both deep imaging and quantification of cell-scale processes.
Extracellular Matrix Limitations: ECM gels essential for supporting 3D culture architectures simultaneously create a meshwork that physically impedes antibody movement while increasing non-specific background signal [14]. This represents a fundamental trade-off between physiological relevance and experimental accessibility.
Sample Preparation and Clearing Strategies
Optimized Fixation Protocols
Proper fixation represents the critical first step in preserving sample integrity while maintaining antigen accessibility. For gel-embedded pancreatic organoids, researchers recommend fixation with pre-warmed 2% paraformaldehyde (PFA) at room temperature for 15 minutes [14]. Temperature control is essential throughout this process, as temperature directly affects ECM gel solidity. All buffers and solutions should be pre-warmed to 37°C, and chamber slides maintained on a pre-warmed working plate during manipulation to prevent gel disruption [14].
Advanced Tissue Clearing Techniques
Tissue clearing techniques enhance optical transparency and antibody accessibility by reducing light scattering in dense samples. Several clearing approaches have demonstrated efficacy for large samples:
Fructose-Glycerol Clearing: This solution, containing 2.5M fructose in a glycerol-water mixture, significantly improves sample transparency while preserving fluorescence signals. Preparation requires approximately 2 days to achieve a homogeneous solution without fructose crystals [14].
Glycerol-Based Clearing: For gastruloids, 80% glycerol mounting medium provides superior clearing performance compared to phosphate-buffered saline (PBS), resulting in a 3-fold reduction in intensity decay at 100 µm depth and an 8-fold reduction at 200 µm depth [6]. This method enables reliable cell detection at depths up to 200 microns, substantially improving imaging capability in thick samples.
Alternative Mounting Media: Comparative studies of refractive index matching mounting mediums including glycerol, ProLong Gold Antifade mounting medium, and optiprep have identified glycerol as the optimal choice for clearing performance, though specific applications may benefit from alternative formulations [6].
Table 1: Quantitative Comparison of Tissue Clearing Methods
| Clearing Method | Sample Type | Performance Improvement | Implementation Time | Storage Conditions |
|---|---|---|---|---|
| Fructose-Glycerol | Pancreatic Organoids | Preserves fluorescence signals | 2 days preparation | +4°C for up to 3 months |
| 80% Glycerol | Gastruloids | 3-fold/8-fold reduction in intensity decay at 100µm/200µm | Immediate use | Not specified |
| ProLong Gold | Gastruloids | Intermediate performance | Immediate use | Not specified |
| Optiprep | Gastruloids | Live-cell compatible | Immediate use | Not specified |
Buffer Composition and Permeabilization
Optimized Buffer Formulations
The composition of washing and incubation buffers significantly impacts antibody penetration and signal-to-noise ratios. An effective IF-Wash buffer stock solution (10X) can be prepared with the following components:
- 0.5 g NaN₃ (highly toxic - handle with appropriate PPE)
- 1 g BSA (Fraction V)
- 80 mL of 10X PBS
- 2 mL Triton X-100
- 0.5 mL Tween-20
The solution should be mixed until homogeneous, adjusted to pH 7.4, brought to a final volume of 100 mL with 10X PBS, and filtered through a 0.2 µm filter. This stock solution can be stored at +4°C for up to 2 weeks [14].
For blocking non-specific binding sites and preparing antibody dilutions, PBS-Glycine buffer (10X) can be prepared by adding 7.5 g glycine to 100 mL of 10X PBS, adjusting to pH 7.4, and filtering through a 0.2 µm filter [14].
Permeabilization Strategies
Effective permeabilization must balance adequate antibody access with preservation of cellular integrity and antigenicity. The combination of Triton X-100 and Tween-20 in the IF-Wash buffer provides both membrane permeabilization and reduction of non-specific hydrophobic interactions [14]. Permeabilization is often performed concurrently with blocking steps or during antibody incubations to optimize reagent access to internal epitopes [66].
Diagram 1: Workflow for optimized whole-mount immunostaining. Critical steps for enhancing antibody penetration are highlighted.
Antibody Formulation and Application
Co-Administration Strategies
Innovative dosing strategies can dramatically improve antibody distribution within dense tissues. A promising approach involves co-administration of unlabeled parent antibody with the labeled antibody conjugate. Clinical evidence demonstrates that this loading dose strategy improves microscopic antibody distribution without increasing uptake in healthy tissues [65].
In human clinical trials for head and neck squamous cell carcinomas, patients receiving a loading dose of 100 mg unlabeled panitumumab alongside the antibody-dye conjugate showed significantly improved tumor penetration compared to those receiving the conjugate alone [65]. This approach appears to mitigate the binding site barrier effect by pre-saturating readily accessible epitopes, allowing the labeled antibody to penetrate deeper into the tissue architecture.
Antibody Concentration and incubation
The principles of antibody incubation require careful optimization for each sample type:
Direct vs. Indirect Methods: The direct method (using labeled primary antibodies) offers advantages in speed and reduced non-specific background but may lack sensitivity. The indirect method (using unlabeled primary antibodies followed by labeled secondary antibodies) provides signal amplification through multiple secondary antibodies binding to each primary antibody but requires longer processing times and carries increased risk of background signal [66].
Incubation Parameters: Sufficient incubation time is critical for adequate penetration. While standard protocols may recommend 1-2 hours for thin sections, large dense samples often require extended incubation periods (overnight or longer) with gentle agitation to facilitate antibody diffusion without damaging sample integrity.
Advanced Imaging Techniques for Deep Tissue
Microscopy Modalities
Conventional widefield and confocal microscopy face significant limitations when imaging large, dense samples due to restricted penetration depth and resolution constraints. Advanced techniques better suited for these applications include:
Two-Photon Microscopy: This technique provides superior penetration in thick, densely packed tissues like gastruloids by utilizing longer excitation wavelengths that experience less scattering. Two-photon microscopy avoids drawbacks of confocal or light-sheet microscopy in large samples, such as strong intensity gradients, image blurring, and reduced axial resolution [6].
Light-Sheet Fluorescence Microscopy (LSFM): Optimized for parallel imaging of 3D tissues, LSFM is particularly valuable for live imaging applications where minimal photodamage is essential [67] [6].
Super-Resolution Techniques: Methods like STED, PALM, and STORM can improve resolution by 10-20-fold compared to conventional fluorescence microscopy, enabling visualization of fine subcellular structures previously obscured by diffraction limitations [67].
Table 2: Performance Characteristics of Advanced Imaging Modalities for Large Samples
| Microscopy Technique | Optimal Sample Size | Resolution | Penetration Depth | Key Applications |
|---|---|---|---|---|
| Widefield Fluorescence | Thin samples, adherent cells | ~200 nm (diffraction limited) | Limited by out-of-focus light | Initial screening, thin specimens |
| Confocal | <100 µm diameter | ~200 nm | Limited penetration in dense samples | Small organoids, surface structures |
| Two-Photon | 100-500 µm diameter | Sub-micron | Excellent in scattering samples | Gastruloids, embryos, thick tissues |
| Light-Sheet | <100 µm diameter (larger if hollow) | ~200 nm | Good for optically cleared samples | Live imaging, high-throughput |
| STED | Typically smaller regions | ~20 nm | Limited | Subcellular structure detail |
Computational Processing for Enhanced Analysis
Advanced computational approaches can extract meaningful data from challenging images of dense samples. The Tapenade pipeline represents one such approach, incorporating multiple processing steps:
- Spectral unmixing to remove signal cross-talk between fluorophores
- Dual-view registration and fusion to reconstruct complete 3D images from multiple angles
- Accurate 3D nuclei segmentation despite signal attenuation in deep tissue
- Signal normalization across depth and channels to correct for intensity variations [6]
These computational corrections are particularly valuable for quantitative comparisons of antibody penetration and target expression throughout large sample volumes.
Diagram 2: Relationship between penetration barriers and optimization solutions. Specific challenges map to targeted strategies for improving antibody access and visualization.
The Scientist's Toolkit: Essential Research Reagents
Table 3: Key Research Reagent Solutions for Optimized Whole-Mount Immunostaining
| Reagent/Category | Specific Examples | Function/Purpose | Implementation Notes |
|---|---|---|---|
| Clearing Agents | Fructose-glycerol solution, 80% Glycerol, ProLong Gold | Reduce light scattering, improve antibody penetration | Fructose-glycerol requires 2 days preparation; glycerol provides immediate use |
| Permeabilization Detergents | Triton X-100, Tween-20 | Disrupt membranes to enable antibody access | Typically used in combination (IF-Wash buffer) |
| Blocking Agents | BSA Fraction V, Normal goat serum (10%) | Reduce non-specific antibody binding | Serum should match host species of secondary antibody |
| Penetration Enhancers | Co-administered unlabeled antibody | Improve distribution of labeled antibodies | Loading dose of 100mg unlabeled antibody shown effective in clinical samples |
| Mounting Media | Fructose-glycerol, ProLong Gold, Optiprep | Preserve fluorescence, maintain sample clarity | Choice depends on imaging requirements and sample type |
| Fixation Agents | Paraformaldehyde (2-4%) | Preserve tissue architecture and antigenicity | Concentration and time must be optimized for each sample type |
Troubleshooting and Quality Assessment
Common Pitfalls and Solutions
Incomplete Penetration: Evidenced by strong peripheral staining with weak or absent central signal. Solution: Implement tissue clearing methods, extend antibody incubation times, consider antibody co-administration strategies, and optimize permeabilization protocols [14] [65] [6].
High Background Fluorescence: Often caused by inadequate blocking or non-optimized buffer formulations. Solution: Ensure fresh preparation of blocking buffers containing BSA and appropriate serum, optimize detergent concentrations, and include thorough wash steps between incubations [14] [66].
Sample Damage or Morphological Disruption: Frequently results from overly aggressive permeabilization or inadequate temperature control. Solution: Maintain samples at consistent temperature throughout processing, use gentle agitation rather than vigorous shaking, and titrate permeabilization agents to find the minimal effective concentration [14] [66].
Validation of Penetration Efficiency
Effective optimization requires quantitative assessment of antibody distribution throughout the sample volume. Several approaches enable this evaluation:
Microscopic Intensity Profiling: Measure fluorescence intensity as a function of distance from the sample surface or nearest blood vessel. Effective penetration shows a relatively uniform intensity profile, while poor penetration exhibits exponential decay from the surface [65].
Z-Stack Analysis: Collect serial images throughout the sample depth and quantify the number of detectable labeled structures or signal intensity at each focal plane [6].
Comparison of Internal vs. External Structures: For samples with known architecture, compare staining intensity between superficially and deeply located identical structures to quantify penetration efficiency.
Optimizing antibody penetration in large or dense samples requires a multifaceted approach addressing physical, chemical, and biological barriers. Through strategic implementation of tissue clearing, buffer optimization, antibody formulation adjustments, and advanced imaging techniques, researchers can overcome the fundamental challenges associated with these complex samples. The continued refinement of these methodologies will enhance our ability to extract meaningful quantitative data from embryo and organoid systems, advancing our understanding of developmental processes in their native three-dimensional context.
Managing Autofluorescence and Sample Bleaching During Imaging
Tissue autofluorescence (AF) poses a significant and complex challenge for high-sensitivity detection in fluorescence-based techniques like whole-mount immunofluorescence and RNA-FISH on embryos. This endogenous fluorescence, originating from molecules such as nicotinamide, flavins, collagen, elastin, and lipofuscin, can interfere with or even overwhelm the specific fluorescence signal of interest [68]. In formalin-fixed paraffin-embedded (FFPE) tissues, the fixation process itself can enhance AF through formaldehyde-induced reactions with amines to form fluorescent molecules [68]. For researchers focusing on embryo analysis, this background signal is particularly problematic due to the need for precise spatial and quantitative data in complex three-dimensional structures. While digital post-processing can sometimes ameliorate these issues, it is preferable to eliminate tissue autofluorescence at the source prior to fluorescent labelling to ensure data integrity [69]. This guide provides a comprehensive overview of evidence-based strategies for managing autofluorescence, with a specific focus on whole-mount embryo imaging, to improve the reliability and quantitative accuracy of your research findings.
Autofluorescence in biological samples arises from multiple endogenous sources. Key contributors include reduced pyridine nucleotides (NAD(P)H), flavoproteins, lipofuscin, elastin, and collagen [68]. The spectral profiles of these fluorophores often overlap with those of common synthetic fluorescent tags (e.g., FITC, TRITC, Cy5), creating significant background noise that compromises signal-to-noise ratio.
In the context of whole-mount embryo imaging, the challenge is magnified. The three-dimensional nature of embryos means that AF emanates from throughout the sample volume, not just a single optical plane. Furthermore, developmental tissues often contain high levels of extracellular matrix proteins like collagen, which are strongly autofluorescent. Blood cells and their breakdown products within embryonic blood vessels also contribute substantial autofluorescence that can persist after fixation [69].
Traditional chemical treatments for AF reduction, including sudan black, trypan blue, eriochrome black T, copper sulfate, and sodium borohydride, have limitations for whole-mount applications [68]. These chemicals may not penetrate entire embryos effectively, can quench the specific immunofluorescence signal, or might increase background in specific emission channels [68]. Therefore, photobleaching approaches have gained prominence for whole-mount preparations due to their effectiveness and relative simplicity.
Table 1: Common Sources of Autofluorescence in Embryonic Tissues
| Source | Excitation/Emission Maxima | Primary Tissue Localization | Impact on Whole-Mount Imaging |
|---|---|---|---|
| NAD(P)H | ~350 nm/~450 nm | Mitochondria (all metabolically active cells) | High in developing organs, can mimic blue-channel signals |
| Flavoproteins | ~450 nm/~550 nm | Mitochondria | Overlaps with FITC/GFP emission spectrum |
| Lipofuscin | Broad spectrum | Lysosomal deposits | Increases with sample age, creates punctate background |
| Collagen | ~270-370/~305-450 nm | Extracellular matrix | Particularly problematic in connective tissues and cartilage primordia |
| Elastin | ~350-420/~420-500 nm | Blood vessels, elastic cartilage | Affects cardiovascular system imaging |
Photobleaching-Based AF Reduction Strategies
Fundamental Principles of Photobleaching
Photobleaching-based AF reduction utilizes intense illumination to chemically alter or destroy fluorophores responsible for autofluorescence prior to antibody staining or hybridization [68]. This approach has shown robustness across various tissues, including those particularly relevant to embryonic research [68]. The mechanism involves generating reactive oxygen species through light exposure in the presence of oxygen, which oxidizes fluorescent molecules, rendering them non-fluorescent.
The efficacy of photobleaching depends on several key parameters. Different endogenous fluorophores have varying susceptibility to photobleaching, with some requiring longer exposure times or specific wavelengths for optimal reduction. Research has demonstrated that AF intensity decreases with increasing irradiation exposure time across most wavelengths, with the most significant reductions typically observed in the 450 nm and 520 nm excitation channels [68]. However, tissue processing steps like deparaffinization (DP) and antigen retrieval (AR) can significantly increase AF levels even in previously photobleached samples, necessitating additional treatment after these steps [68].
Oxidation-Mediated Autofluorescence Reduction (OMAR)
The OMAR (Oxidation-Mediated Autofluorescence Reduction) protocol represents a significant advancement for whole-mount samples, combining photochemical treatment with detergent-based tissue permeabilization [69]. This method consistently reduces and often eliminates tissue and blood vessel autofluorescence, significantly improving the signal-to-noise ratio for whole-mount RNA-FISH and immunofluorescence without the need for digital image post-processing [69].
The OMAR protocol requires a high-intensity cold white light source, such as high-power LED spotlights on flexible goosenecks or LED daylight panels (20000 lumen) [69]. During the procedure, successful oxidation manifests as an increasing number and size of bubbles in the solution and around the sample [69]. This protocol is particularly suitable for delicate embryonic tissues as it effectively suppresses autofluorescence while preserving structural integrity and antigenicity.
Table 2: Quantitative Efficacy of Photobleaching Across Emission Channels
| Emission Channel | Excitation (nm) | AF Reduction with 24h Bleaching (%) | Notes on Efficacy |
|---|---|---|---|
| Blue | 405 | Variable (sometimes increased) | May show intensity increase at 24h; use shorter durations or H₂O₂ assistance |
| Green | 450 | High | Most significant reduction observed |
| Yellow-Green | 520 | High | Consistent, strong reduction |
| Red | 640 | Moderate | Steady decrease with prolonged exposure |
Experimental Protocols for Effective AF Management
Chemical-Assisted LED Photobleaching for FFPE Tissues
This protocol systematically reduces AF in FFPE tissues using LED illumination with hydrogen peroxide assistance, significantly reducing required exposure times from overnight to just a few hours [68].
Materials Needed:
- Bleaching solution: 4.5% (wt/vol) H₂O₂ and 20 mM NaOH in 1× PBS [68]
- LED illumination system: Seven-band LED panel with 390, 430, 460, 630, 660, 850 nm, and 10,000 Kevin white/blue broad spectrum LEDs [68]
- Standard equipment: Petri dishes, slide containers, chemical fume hood
Step-by-Step Procedure:
- Prepare bleaching solution: Mix 25 mL of 1× PBS with 4.5 mL of 30% (wt/vol) H₂O₂ and 0.8 mL of 1 M NaOH [68].
- Submerge samples: Add bleaching solution to petri dishes containing tissue slides, ensuring complete immersion.
- Initial illumination: Expose slides to LED illumination for durations ranging from 1-3 hours, depending on tissue type and AF intensity.
- Post-bleaching processing: After illumination, process samples through standard deparaffinization and antigen retrieval protocols.
- Secondary illumination (if needed): For samples showing residual AF after DP/AR, perform additional LED exposure for 2-24 hours without bleaching solution to further suppress AF signals.
Critical Considerations:
- Tissue thickness should be optimized (typically 5μm for sections) for uniform bleaching [68].
- Always include non-bleached controls to quantify AF reduction efficacy.
- For FFPE tissues, bleaching before DP/AR shows more consistent results, though some AF may reappear after these processing steps [68].
OMAR Protocol for Whole-Mount Embryos
This specialized protocol is optimized for whole-mount embryonic tissues, particularly mouse embryonic limb buds, and is applicable to other tissues, organs, and vertebrate embryos [69].
Materials Needed:
- High-intensity light source: LED spotlights with flexible goosenecks or two LED daylight panels (20000 lumen) [69]
- OMAR solution: 4.5% H₂O₂ in 1× PBS
- Equipment: Glass vials, forceps, nutator, thermomixer
Step-by-Step Procedure:
- Embryo collection and fixation: Collect embryos at desired developmental stages and fix in 4% paraformaldehyde following standard protocols for your tissue.
- Photochemical treatment: Transfer embryos to glass vials containing OMAR solution, ensuring complete immersion.
- First illumination: Expose samples to high-intensity light for 2-4 hours with gentle agitation. Monitor for bubble formation as an indicator of successful oxidation [69].
- Solution refreshment: Replace with fresh OMAR solution.
- Second illumination: Repeat illumination for another 2-4 hours.
- Permeabilization: Following OMAR treatment, proceed with detergent-based permeabilization using Tween 20 or Triton X-100.
- RNA-FISH or immunofluorescence: Continue with standard whole-mount hybridization or staining protocols.
Validation and Optimization:
- Always perform test series with your specific tissues and LED light sources to establish optimal treatment duration.
- Successful treatment manifests as low or absent autofluorescence in all channels of interest when compared to untreated controls [69].
- The protocol preserves RNA integrity for FISH applications and antigenicity for immunofluorescence.
Researcher's Toolkit: Essential Reagents and Materials
Table 3: Key Research Reagent Solutions for AF Management
| Reagent/Equipment | Specification/Concentration | Primary Function | Application Notes |
|---|---|---|---|
| Hydrogen Peroxide | 4.5% (wt/vol) in PBS | Oxidizing agent for chemical-assisted bleaching | Critical for OMAR protocol; enhances bleaching efficacy [68] [69] |
| Sodium Hydroxide | 20 mM in PBS | pH adjustment for bleaching solution | Optimizes oxidative environment [68] |
| LED Illumination System | High-power multiwavelength (390-660 nm) or white light (20000 lumen) | Light source for photobleaching | Flexible gooseneck spotlights or LED panels provide uniform illumination [68] [69] |
| Tween 20 | 0.1-1% in buffer | Detergent for permeabilization | Enhances reagent penetration in whole-mount samples [69] |
| Triton X-100 | 0.1-0.5% in buffer | Alternative detergent for permeabilization | Stronger than Tween 20 for challenging tissues [69] |
| Sudan Black | 0.1-0.3% in 70% ethanol | Chemical quenching of AF | Traditional approach; may not penetrate whole-mounts effectively [68] |
| Sodium Borohydride | 0.1-1 mg/mL in PBS | Reduces aldehyde-induced fluorescence | Particularly effective for formaldehyde-fixed tissues [68] |
Advanced Techniques and Integration with Fluorescence Methods
Fluorescence Lifetime Imaging Microscopy (FLIM) for AF Discrimination
For particularly challenging samples where complete AF elimination is not achievable, Fluorescence Lifetime Imaging Microscopy (FLIM) provides a powerful alternative approach. FLIM distinguishes fluorophores based on their fluorescence decay characteristics rather than solely on emission spectra, enabling separation of specific signal from background autofluorescence even when their emission spectra overlap [68].
In practice, FLIM systems equipped with multiple laser sources (e.g., 405 nm, 450 nm, 520 nm, and 640 nm) and appropriate bandpass filters can isolate the IF signal from AF for precise quantification [68]. This approach is particularly valuable for validation of bleaching efficacy and for quantitative studies where precise signal measurement is critical.
Integration with Whole-Mount RNA-FISH and Immunofluorescence
Effective AF management should be seamlessly integrated with standard whole-mount procedures. For RNA-FISH applications, particularly the Hybridization Chain Reaction (HCR) v3.0 approach, OMAR treatment precedes standard probe hybridization and amplification steps [69]. Similarly, for immunofluorescence, AF reduction should occur after fixation but before antibody incubation.
The order of operations is critical:
- Sample collection and fixation
- AF reduction (OMAR or photobleaching)
- Permeabilization
- Primary antibody incubation (IF) or probe hybridization (FISH)
- Secondary antibody incubation (IF) or amplification (HCR FISH)
- Imaging
This workflow ensures that AF is minimized before specific labeling occurs, preventing masking of weak signals by background fluorescence.
Troubleshooting and Quality Control
Even with optimized protocols, researchers may encounter challenges in AF management. Here are common issues and evidence-based solutions:
Incomplete AF Reduction:
- Cause: Insufficient illumination time or intensity, expired H₂O₂, or inadequate solution penetration in whole mounts.
- Solution: Perform test series with your specific light source; increase illumination time in 30-minute increments; ensure fresh H₂O₂ preparation; extend permeabilization step.
Signal Loss with AF Reduction:
- Cause: Over-bleaching or oxidative damage to epitopes/RNA targets.
- Solution: Titrate bleaching time; consider alternative AF reduction methods for sensitive targets; include controls to monitor signal preservation.
Increased AF in Specific Channels:
- Cause: Prolonged exposure to high-power LED light, particularly at 405 nm, can sometimes increase AF [68].
- Solution: Limit exposure time in problematic channels; use chemical-assisted methods to reduce required illumination.
Quality Control Metrics:
- Always include non-bleached controls in every experiment to quantify AF reduction efficacy.
- Calculate signal-to-background ratios for quantitative comparisons.
- Use FLIM where available to validate specific versus non-specific signal [68].
For embryo research specifically, document developmental stage meticulously, as autofluorescence characteristics may change during development. Test your AF reduction protocol at multiple stages if studying processes spanning significant developmental timeframes.
Effective management of autofluorescence through photobleaching strategies is essential for high-quality whole-mount embryo imaging. The OMAR protocol and chemical-assisted LED photobleaching provide robust, reproducible methods for suppressing endogenous fluorescence while preserving molecular integrity for both immunofluorescence and RNA-FISH applications. By implementing these protocols and following the detailed guidelines presented in this technical guide, researchers can significantly improve signal-to-noise ratios, enhance quantitative accuracy, and unlock more reliable imaging data from their embryonic samples. As fluorescence techniques continue to advance in sensitivity, concomitant improvements in AF management will remain crucial for extracting maximum biological insight from complex developmental systems.
Practical Tips for Handling Fragile Embryos and Preventing Sample Loss
In whole mount immunofluorescence (WM-IF) for embryo analysis, sample loss is not merely an inconvenience; it represents a critical failure point that can invalidate extensive experimental efforts and compromise research conclusions. The structural fragility of embryos, particularly at late preimplantation stages with over 100 cells, demands specialized handling protocols that differ significantly from those used for cultured cell lines or dissected tissues [70]. Success in WM-IF hinges on preserving three-dimensional architecture while allowing sufficient antibody penetration and maintaining antigen integrity—a balancing act that requires meticulous technique from the moment of embryo collection through final imaging.
This guide synthesizes current methodologies from multiple model systems and human embryo research to provide evidence-based protocols for maximizing sample retention throughout the WM-IF pipeline. By implementing these standardized procedures, researchers can significantly reduce technical variability and sample attrition, thereby enhancing the reliability of their experimental data in developmental studies, toxicological assessments, and drug discovery applications.
Material Preservation: Collection, Fixation, and Stabilization Techniques
Embryo Harvesting and Initial Stabilization
The initial minutes following embryo collection are critical for preserving structural integrity. Mechanical stress during harvesting represents a primary cause of early sample loss, particularly for delicate blastocyst-stage embryos with fluid-filled blastocoel cavities.
Mechanical Protection Protocols:
- For zebrafish embryos, perform step-by-step dissection of spinal cords in oxygenated physiological buffer to maintain tissue viability [49]
- For Drosophila embryos, implement hand devitellinization methods that avoid methanol exposure, which can destroy cell membrane integrity and lead to structural collapse [71]
- Use micro-dissecting probes with fine tips (23-gauge needles) for precise manipulation of embryos, creating small openings in vitelline membranes at the anterior end to gently "push" fixed embryos out without shear stress [71]
Chemical Stabilization:
- Utilize formaldehyde-saturated heptane fixation on a nutator for 1 hour at room temperature for optimal preservation of membrane structures and epitopes [71]
- Immediately transfer embryos to PBS solution after heptane evaporation to prevent dehydration-induced damage [71]
- Add Triton X-100 (0.1%) to PBS solutions to facilitate subsequent permeabilization while maintaining sample integrity [71]
Table 1: Quantitative Comparison of Fixation Methods for Different Embryo Types
| Embryo Type | Optimal Fixation Method | Duration | Temperature | Structural Preservation Rating |
|---|---|---|---|---|
| Zebrafish (adult spinal cord) | Scale solution clearing | 1-2 hours | Room temperature | High [49] |
| Drosophila | Formaldehyde-saturated heptane | 1 hour | Room temperature | High [71] |
| Human blastocysts | mRNA electroporation + light-sheet compatible fixatives | 45-60 minutes | Room temperature | Moderate-High [70] |
| Mouse preimplantation | Methanol-free protocols | 30-45 minutes | 4°C | High [70] |
Optimized Fixation Strategies for Different Embryonic Stages
Different developmental stages present unique challenges for sample preservation, necessitating stage-specific fixation approaches.
Cleavage-Stage Embryos (1-8 cells):
- Implement mild fixation with 2-4% paraformaldehyde for 30-45 minutes to preserve delicate cell membranes
- Avoid methanol-based fixation which can disrupt cytoskeletal elements critical for early development studies
Blastocyst-Stage Embryos:
- Adapt fixation protocols to maintain integrity of both inner cell mass and trophectoderm structures
- For human blastocysts cryopreserved at 5 days post-fertilization (dpf), optimize thawing protocols before fixation to minimize osmotic shock [70]
- Consider sequential fixation approaches for specialized structures, beginning with weaker fixatives for internal cells followed by stronger fixation for outer layers
Staining Optimization: Enhancing Antibody Penetration While Minimizing Loss
Permeabilization Strategies for Whole Mount Embryos
Effective antibody penetration without structural damage represents a fundamental challenge in WM-IF. The following protocols balance these competing demands:
Standardized Permeabilization Workflow:
- Post-fixation permeabilization: Use Triton X-100 (0.1-0.5%) in PBS for 30 minutes to 2 hours depending on embryo size and stage [71]
- Proteinase K treatment: For deeply embedded epitopes, implement limited Proteinase K digestion (1-10 μg/mL for 5-15 minutes) followed by glycine quenching
- Detergent combinations: For challenging samples, combine Triton X-100 with saponin (0.1%) to target both plasma and intracellular membranes
- Temperature optimization: Perform permeabilization at room temperature with gentle agitation on a nutator to ensure even treatment [71]
Antibody Incubation and Washing Protocols
Consistent antibody performance and minimal background require standardized incubation conditions:
Primary Antibody Incubation:
- Dilute antibodies in 5% BSA/PBT (PBS with 0.1% Triton) to reduce non-specific binding [71]
- Incubate on a nutator at 4°C overnight for optimal penetration while preserving antigen integrity [71]
- For human embryos, validate antibody specificity using knockout controls when available due to potential cross-reactivity issues
Washing Procedures to Prevent Loss:
- Implement four washes with 1% BSA/PBT for 10 minutes each on a gently moving nutator [71]
- Use wide-bore pipette tips for transfer between solutions to prevent mechanical stress on fixed embryos
- Include additional rinses with PBT (3×10 minutes) after secondary antibody incubation [71]
Table 2: Staining Protocol Parameters for Different Embryo Sizes
| Embryo Size | Permeabilization Duration | Primary Antibody Incubation | Wash Cycles | Recommended Antibody Concentrations |
|---|---|---|---|---|
| Small (<100μm) | 30-45 minutes | 4-6 hours, room temperature | 3 × 5 minutes | Standard dilution |
| Medium (100-200μm) | 1-2 hours | Overnight, 4°C | 4 × 10 minutes | Standard dilution |
| Large (>200μm) | 2-4 hours | 24-48 hours, 4°C | 4-6 × 15 minutes | 2× more dilute than standard |
| Human blastocysts | 45-60 minutes | Overnight, 4°C | 4 × 10 minutes | Validate for human specificity [70] |
Mounting and Imaging: Securing Samples for Optimal Visualization
Clearing Techniques for Enhanced Optical Access
Modern clearing methods enable deep imaging within intact embryos while preserving structural relationships:
Hydrogel-Based Clearing (for plant tissues, adaptable to animal embryos):
- Embed samples in hydrogel according to established protocols to preserve morphological integrity [72]
- Include additional clearing steps with methanol and ClearSee treatments to substantially improve signal-to-noise ratio [72]
- Extend ClearSee treatment periods for thicker specimens (refer to Supplementary Table 2 for timing guidelines) [72]
Aqueous Clearing Methods:
- Scale solutions provide effective clearing for zebrafish spinal cords and are applicable to other model systems [49]
- For light-sheet imaging, optimize refractive index matching to minimize spherical aberration during long-term time-lapse acquisition [70]
Strategic Mounting for Stability During Imaging
Proper mounting is the final defense against sample loss, particularly during extended imaging sessions:
Stabilized Mounting Protocols:
- To increase efficiency of imaging batches of embryos at the correct orientation, implement standardized mounting procedures using specialized dishes (e.g., MatTek mounting dishes) [71]
- Use AquaMount or similar aqueous mounting media to preserve fluorescence signal intensity while maintaining sample hydration [71]
- For long-term light-sheet imaging (up to 46 hours), secure samples in low-melt agarose cylinders (1-2%) to prevent drift while allowing nutrient/waste exchange [70]
Orientation Control:
- Position embryos using glass-bottom dishes with micromanipulators to achieve optimal imaging angles
- For blastocysts, orient to simultaneously visualize both polar (overlying inner cells) and mural (surrounding blastocoel) regions when possible [70]
The Scientist's Toolkit: Essential Reagents and Materials
Table 3: Research Reagent Solutions for Embryo Handling and Analysis
| Reagent/Material | Function | Application Notes | Source |
|---|---|---|---|
| H2B-mCherry mRNA | Nuclear DNA labeling via electroporation | 700-800 ng/μl concentration, 41-75% efficiency in human/mouse embryos [70] | Custom synthesis |
| SPY650-DNA dye | Alternative nuclear staining | Stains trophectoderm only at blastocyst stage; cytoplasmic in inner cell mass [70] | Commercial vendors |
| Formaldehyde-saturated heptane | Fixation preserving membrane integrity | Superior to methanol for delicate structures; 1 hour incubation [71] | Laboratory preparation |
| ClearSee solution | Tissue clearing | Reduces autofluorescence, improves signal-to-noise ratio [72] | Commercial or lab-made |
| Renaissance 2200 | Cell wall staining (plants) and membrane marking | Allows assignment of transcripts to different cells [72] | Commercial vendors |
| Triton X-100 | Permeabilization | 0.1% in PBS for membrane permeabilization [71] | Standard supplier |
| BSA/PBT solution | Blocking and antibody dilution | 1-10% BSA in PBS with 0.1% Triton for reducing background [71] | Laboratory preparation |
| Low-melt agarose | Sample stabilization for imaging | 1-2% for securing embryos during long-term light-sheet acquisition [70] | Standard supplier |
Preventing sample loss when handling fragile embryos requires integrated approach that begins at collection and continues through final imaging. The protocols presented here, drawn from cutting-edge research in multiple model systems, provide a framework for standardizing whole mount immunofluorescence procedures to maximize data quality and reproducibility. As human embryo models become increasingly sophisticated [73], and methods like single-molecule RNA FISH become applicable to whole mount contexts [72], maintaining sample integrity becomes ever more critical for generating meaningful biological insights. By implementing these evidence-based practices, researchers can significantly reduce technical variability and push the boundaries of what can be learned from these precious samples.
Ensuring Accuracy: How to Validate and Compare WM-IF with Other Methods
Within the framework of whole mount immunofluorescence (WM-IF) for embryo analysis, the reliability of experimental data is paramount. The use of positive and negative control tissues forms the cornerstone of rigorous experimental validation, ensuring that observed fluorescence patterns accurately represent true biological expression rather than technical artifacts. This guide details the established methodologies and quantitative frameworks for implementing these essential controls, providing researchers with the tools to generate robust, reproducible, and interpretable data in complex three-dimensional samples.
The Critical Role of Controls in Whole Mount Immunofluorescence
In whole mount immunofluorescence, the intricate three-dimensional structure of embryos presents unique challenges for antigen preservation and antibody accessibility. The use of control tissues is not merely a supplementary step but a fundamental requirement for validating the entire staining workflow. Positive control tissues confirm that the immunofluorescence protocol—from fixation and permeabilization to antibody binding and detection—functions optimally for the target antigen. Conversely, negative control tissues are indispensable for identifying and accounting for non-specific antibody binding, endogenous background fluorescence, and other sources of false-positive signals [74] [75].
The integration of these controls is particularly crucial when adopting novel protocols or working with precious embryonic samples, where the cost of misinterpretation is high. For instance, a study validating an automated multiplex immunofluorescence method demonstrated that comparisons with traditional immunohistochemistry and single-plex IF, facilitated by proper controls, revealed highly significant positive correlations (Spearman’s rho = 0.927 to 0.750, p < 0.0001), thereby underscoring the reliability of the new technique [75].
Experimental Design and Selection of Control Tissues
Defining Positive and Negative Controls
A well-designed experiment incorporates both types of controls processed in parallel with the experimental samples.
Positive Controls: These are tissues or cell lines with well-documented, confirmed expression of the target antigen. For embryo research, this could be a specific embryonic stage or tissue known to express the protein of interest. For example, in a study investigating disialoganglioside GD2, tissue specimens from patients with histologically confirmed neuroblastoma and GD2-positive expression in bone marrow aspirate served as effective positive controls [74]. Alternatively, cultured cell lines with validated expression of the target, such as LS cells for GD2, can be used as standardized positive controls [74].
Negative Controls: These are tissues or samples that lack the target antigen. This can be achieved through several approaches:
- Biological Negative Controls: Tissues from the same organism that are known not to express the antigen. In the GD2 study, nephroblastoma or Hodgkin lymphoma samples, which do not overexpress GD2, were used as negative controls [74].
- Genetic Knockout Controls: Cell lines where the gene encoding the target protein has been knocked out. The LS KO-B4GALNT1 cell line, which exhibits a complete loss of GD2 synthesis due to CRISPR/Cas9 knockout of a key synthase gene, is a powerful example of this approach [74].
- Technical Negative Controls: These include samples where the primary antibody is omitted and replaced with a non-immune immunoglobulin from the same species (isotype control) or a buffer control. This helps identify staining resulting from non-specific binding of the secondary antibody or other reagents [74] [76].
Practical Workflow for Control Integration
The following diagram illustrates a logical workflow for incorporating controls into a WM-IF experiment to ensure conclusive results.
Detailed Protocols for Control Validation
Protocol: Validation of Antibody Specificity Using Control Cell Lines
This protocol, adapted from a GD2 immunofluorescence study, provides a robust method for confirming antibody specificity before applying it to precious whole mount embryo samples [74].
Aim: To validate the selective affinity of a primary antibody for its target antigen using genetically defined positive and negative control cell lines.
Materials:
- Positive Control Cell Line: Cells with confirmed expression of the target antigen (e.g., LS for GD2).
- Negative Control Cell Line: Isogenic cells where the target gene is knocked out (e.g., LS KO-B4GALNT1 for GD2).
- Primary Antibody: The antibody being validated (e.g., Purified Mouse anti-Human GD2).
- Isotype Control: A non-immune immunoglobulin from the same host species.
- Secondary Antibody: A fluorophore-conjugated antibody targeting the primary antibody's host species.
- Blocking Buffer: DPBS containing 2% Bovine Serum Albumin (BSA) and 1% Fetal Bovine Serum (FBS).
- Nuclear Counterstain: e.g., 4′,6-diamidino-2-phenylindole (DAPI).
- Mounting Medium: An aqueous mounting medium such as Fluoromount.
Method:
- Cell Culture and Seeding: Culture the positive and negative control cells to ~70% confluence. Treat with a cell dissociation agent (e.g., Accutase) for 5 minutes at 37°C. Seed the cells on glass coverslips in a multi-well plate at a density of 1 × 10^6 cells/well and culture for 24 hours.
- Fixation and Blocking: Wash the unfixed cells twice with DPBS for 5 minutes per wash. Incubate with the blocking buffer for 60 minutes at room temperature to reduce non-specific binding.
- Primary Antibody Incubation: Prepare the primary antibody and the isotype control in DPBS at the working concentration (e.g., 2.5 µg/mL). Incubate the cells with either the primary antibody, the isotype control, or only blocking buffer (secondary antibody control) for 90 minutes at room temperature.
- Secondary Antibody Incubation: After two 5-minute washes with the blocking buffer, incubate the cells with the fluorophore-conjugated secondary antibody (e.g., diluted in DPBS) for 60 minutes at room temperature, protected from light.
- Nuclear Staining and Mounting: Wash the cells three times for 10 minutes each. Counterstain the nuclei with DAPI for 15 minutes at room temperature. Mount the coverslips onto microscope slides using an aqueous mounting medium.
Validation Criterion: A valid result shows a strong, specific signal in the positive control cells incubated with the primary antibody, and an absence of signal in the negative control cells and in all isotype/secondary-only controls.
Protocol: Whole Mount Immunofluorescence with Integrated Controls
This protocol outlines the key steps for processing whole mount tissues, such as embryonic samples, with integrated positive and negative controls [76] [77].
Aim: To perform whole mount immunofluorescence on embryo samples while using control tissues to validate the staining outcome.
Materials:
- Experimental Tissues: Whole mount embryos or embryonic tissues.
- Control Tissues: Fresh or properly preserved positive and negative control tissues (e.g., human donor corneas for limbal stem cell (LSC) markers [77]).
- Fixative: Paraformaldehyde (PFA) is recommended for optimal morphology preservation [78].
- Permeabilization Agent: Triton X-100 or similar detergent.
- Primary and Secondary Antibodies: As validated in the previous protocol.
- Washing Buffers: Phosphate-buffered saline (PBS) or Dulbecco's PBS (DPBS).
Method:
- Tissue Preparation and Fixation: For whole mount embryo analysis, dissect and prepare tissues, ensuring they do not exceed 3 mm in thickness for adequate reagent penetration [74]. Fix tissues promptly. Prolonged storage before fixation can lead to epitope degradation and loss of marker expression, as observed in stored human donor corneas [77]. Fix with 4% PFA for optimal morphology preservation [78].
- Permeabilization and Blocking: Permeabilize the fixed tissues to allow antibody penetration. A simultaneous fixation and permeabilization procedure using PFA with 0.5% Triton X-100 (PFATX) has been shown to be optimal for preserving certain phospho-epitopes and actin stress fibers [78]. Subsequently, incubate tissues in a blocking buffer (e.g., with 2% BSA) for several hours or overnight to minimize non-specific binding.
- Antibody Staining: Incubate the tissues with the validated primary antibody. In parallel, process the positive control tissue with the same antibody, and the negative control tissue with an isotype control antibody. Incubation times may need to be extended (e.g., 2-4 hours or overnight) for antibodies to penetrate thicker whole mounts, though this must be balanced against potential tissue cytolysis in unfixed specimens [74].
- Washing and Visualization: Perform extensive washing steps to remove unbound antibody. Incubate with fluorophore-conjugated secondary antibodies, followed by further washing. The stained whole mount tissues can then be imaged using confocal laser scanning microscopy (CLSM) for three-dimensional visualization [76].
Quantitative Data Analysis and Validation Metrics
The validation of immunofluorescence data is greatly strengthened by quantitative analysis. The table below summarizes key quantitative metrics from published validation studies, providing benchmarks for researchers.
Table 1: Quantitative Metrics from Immunofluorescence Validation Studies
| Study Focus | Validation Method | Correlation Metric | Key Finding |
|---|---|---|---|
| Multiplex IF Profiling Melanoma [75] | Single-plex IF vs. Chromogenic IHC | Spearman's rho = 0.927 to 0.750 (p < 0.0001) | High correlation between IF and IHC for various markers (CD8, CD68, CD16, PD-L1, SOX10). |
| Multiplex IF Profiling Melanoma [75] | Single-plex IF vs. Multiplex IF | Spearman's rho > 0.9 (p < 0.0001) | High reproducibility between single-plex and multiplex staining for the same markers. |
| Quantitative IF for EGFR [79] | QIF vs. Mass Spectrometry (MS) | Linear Regression R² = 0.88 | When optimized, QIF can achieve quantitative results comparable to the MS criterion standard. |
| Whole Mount IF for Limbal Stem Cells [77] | WM-IF vs. Tissue Sections | N/A (Qualitative) | WM-IF emerged as a more effective method for visualizing marker expression patterns within intact tissues. |
Furthermore, the precision and reproducibility of a validated method can be demonstrated through repeat testing. For example, in the melanoma multiplex IF study, correlation analysis of three multiplex staining replicates showed a very high degree of reproducibility (Spearman’s rho > 0.940, p < 0.0001) [75]. The following workflow visualizes the path from image acquisition to quantitative, validated data.
The Scientist's Toolkit: Essential Research Reagent Solutions
The table below catalogs key reagents and materials critical for successfully implementing control strategies in whole mount immunofluorescence.
Table 2: Essential Reagents and Materials for Controlled WM-IF Experiments
| Item | Function / Purpose | Example from Literature |
|---|---|---|
| Validated Cell Lines | Serve as standardized positive and negative controls for antibody validation. | LS (GD2+) and LS KO-B4GALNT1 (GD2-) cells [74]. |
| Isotype Control Antibodies | Distinguish specific from non-specific antibody binding; crucial for negative controls. | Purified Mouse IgG2a, κ Isotype Control [74]. |
| Tyramide Signal Amplification (TSA) Kits | Amplify weak signals, enabling detection of low-abundance targets in multiplex assays. | Opal 7 colour Kit used in multiplex IF validation [75]. |
| Aqueous Mounting Medium with Counterstain | Preserves fluorescence and allows visualization of nuclei for spatial context. | ProLong mounting medium with DAPI [79]; Fluoromount [74]. |
| Tissue Microarray (TMA) | Enables high-throughput, parallel processing of multiple tissue samples under identical conditions. | TMA containing metastatic melanoma specimens used for validation [75]. |
| Automated Image Analysis Software | Provides objective, quantitative measurement of fluorescence, removing scorer subjectivity. | HALO, QuPath, AQUA method for generating continuous QIF scores [79] [75] [76]. |
The integration of positive and negative control tissues is a non-negotiable component of rigorous whole mount immunofluorescence. The techniques and frameworks detailed in this guide—from antibody validation with defined cell lines to quantitative correlation with established methods—provide a pathway to data integrity. By adhering to these practices, researchers can confidently decode the complex language of embryonic development, secure in the knowledge that their findings are built upon a validated and reliable experimental foundation.
Quantifying Fluorescence Intensity for Robust Data Analysis
Whole mount immunofluorescence (WM-IF) has emerged as a powerful technique for visualizing biological structures in their complete three-dimensional context, providing a significant advantage over traditional tissue sections for many research applications. This is particularly true in the field of embryonic development, where preserving spatial relationships is crucial for understanding complex morphogenetic processes [77] [80]. WM-IF enables researchers to examine tissue architecture, cell morphology, and molecular localization simultaneously within intact specimens, avoiding the potential artifacts introduced by sectioning.
The transition from qualitative observation to quantitative measurement represents a critical advancement in extracting robust, statistically valid data from fluorescence imaging. Where fluorescence microscopy was once primarily used for localization studies, technological advances in confocal microscopy, stable fluorophores, and image analysis software now enable precise quantitation of protein expression and distribution [81]. This quantitation is especially valuable when working with precious or limited samples, such as embryos, where traditional protein quantification methods like Western blotting may not be feasible [81]. For researchers studying embryonic development using whole mount techniques, quantifying fluorescence intensity provides a powerful approach to answer fundamental questions about gene expression patterns, protein localization, and morphological changes during development.
Core Principles of Fluorescence Intensity Measurement
Fundamental Concepts
Fluorescence intensity measures the number of photons emitted by an excited fluorophore and is directly correlated with the concentration of that fluorophore [82]. The process begins when a fluorophore absorbs high-energy light, elevating electrons to an unstable excited state. As these electrons return to their ground state, they release energy as emitted light (photons) of a longer wavelength than the excitation light—a phenomenon known as the Stokes shift [82]. This wavelength difference between excitation and emission peaks enables the specific detection of fluorophores against the excitation background.
The relationship between fluorophore concentration and emitted light intensity forms the foundation for quantitative fluorescence applications. In ideal conditions, this relationship is linear, allowing researchers to make direct comparisons between samples [82]. However, multiple factors can influence intensity measurements, including the fluorophore's quantum yield (efficiency of converting absorbed light to emitted light), extinction coefficient (ability to absorb light), and the stability of the fluorophore against photobleaching (permanent loss of fluorescence due to light-induced damage) [82] [16].
Technical Considerations for Accurate Detection
Fluorescence detection systems in microscopes typically involve three key components: a light source, wavelength selection devices, and a detector. Common light sources include xenon flash lamps (broad spectrum from UV to infrared), tungsten halogen lamps (limited to visible wavelengths), and LEDs (high intensity at specific bandwidths) [82]. Wavelength selection is typically achieved using either optical filters or monochromators. Filters are glass slides with specialized coatings that transmit only specific wavelength ranges, while monochromators can select different wavelengths as needed [82].
The detector, usually a photomultiplier tube (PMT), converts photon emissions into electrical signals that are displayed as relative fluorescence units (RFU) [82]. For quantitative measurements, several technical parameters require careful optimization:
- Filter selection: Excitation and emission filters should be centered near the respective maxima of the fluorophore, with a minimum separation of 30 nm to prevent excitation light from leaking through to the detector [82].
- Bandwidth: Narrow bandwidth filters (~10 nm) are recommended for bright fluorophores or samples with high autofluorescence, while broader filters can be used for dim signals in clean samples [82].
- Gain settings: The PMT gain (amplification factor) must be set to ensure signals are within the detector's linear range without saturation [83].
Table 1: Key Fluorophore Properties Influencing Quantitation
| Property | Description | Impact on Quantitation |
|---|---|---|
| Quantum Yield | Efficiency of converting absorbed photons to emitted photons | Higher yield provides brighter signal and better detection sensitivity |
| Extinction Coefficient | Measure of light absorption capability | Higher coefficient enables better signal-to-noise ratio |
| Stokes Shift | Difference between excitation and emission maxima | Larger shifts reduce background from scattered excitation light |
| Photostability | Resistance to photobleaching | Higher stability ensures consistent measurements over time |
| Excitation/Emission Spectra | Range of wavelengths for excitation and emission | Determines compatibility with microscope filters/lasers |
Experimental Workflow for Whole Mount Immunofluorescence
The process of obtaining quantitative fluorescence data from whole mount specimens requires careful attention to each step of sample preparation, staining, and imaging. The following diagram illustrates the complete workflow from sample preparation through image analysis:
Sample Preparation and Fixation
Proper specimen preparation is foundational for successful whole mount immunofluorescence. For embryonic tissues, optimal fixation conditions must be determined empirically to preserve morphology while maintaining antigenicity. Cross-linking fixatives like 4% paraformaldehyde (PFA) in phosphate-buffered saline (PBS) are commonly used for 15-60 minutes at room temperature, depending on specimen size [84] [80]. Following fixation, samples should be washed thoroughly with PBS to remove residual fixative, which can cause high background fluorescence [84].
For larger specimens, including some organoids and late-stage embryos, permeabilization with detergents like Triton X-100 (typically 0.1-0.3%) is essential to allow antibody penetration [17] [84]. The concentration and duration of permeabilization must be optimized—insufficient treatment limits antibody access, while excessive treatment can damage cellular structures, particularly membranes [17].
Antibody Incubation and Blocking
Blocking is a critical step for reducing non-specific antibody binding and minimizing background signal. Solutions containing 5% normal serum from the same species as the secondary antibody, often combined with 0.1% Triton X-100 and 1% bovine serum albumin (BSA), are typically applied for 30-60 minutes at room temperature [84] [17]. The serum proteins occupy non-specific binding sites, while BSA stabilizes the antibodies.
For primary antibody incubation, conditions must be carefully optimized for each antibody-antigen combination. Typical dilutions range from 1:100 to 1:1000 in antibody dilution buffer, with incubation times from 2 hours at room temperature to overnight at 4°C [84] [17]. Overnight incubation at 4°C often improves penetration and binding efficiency for thicker specimens. After incubation, extensive washing (typically 3×5 minutes in PBS with 0.1% Triton X-100) removes unbound primary antibody [17].
Secondary antibodies conjugated to fluorophores are then applied, with incubation for 1-2 hours at room temperature protected from light [84]. Selection of appropriate fluorophores considers the microscope's capabilities, the need for multiple labels, and the relative abundance of target antigens—brighter fluorophores should be reserved for less abundant targets [16].
Mounting and Imaging Considerations
For whole mount specimens, proper mounting is essential for optimal imaging. Refractive index matching mounting media such as 80% glycerol can significantly improve image quality by reducing light scattering, particularly for deeper imaging [6]. One study demonstrated that glycerol clearing provided a 3-fold reduction in intensity decay at 100 µm depth compared to PBS mounting [6]. For long-term storage, commercial mounting media with anti-fade compounds help preserve fluorescence signals [17].
Table 2: Essential Reagents for Whole Mount Immunofluorescence
| Reagent Category | Specific Examples | Function | Technical Considerations |
|---|---|---|---|
| Fixatives | 4% Paraformaldehyde, Methanol | Preserve tissue morphology and antigen structure | Cross-linking fixatives (PFA) better preserve structure; alcohol-based fixatives can be harsher |
| Permeabilization Agents | Triton X-100, Tween-20, Saponin | Enable antibody penetration through membranes | Concentration and duration must be optimized for each specimen type |
| Blocking Agents | Normal serum, BSA, Commercial blocking buffers | Reduce non-specific antibody binding | Serum should match secondary antibody species; protein-free blockers available |
| Detection Reagents | Fluorophore-conjugated secondary antibodies, Phalloidin, WGA | Enable visualization of targets | Bright, photostable fluorophores preferred for quantitation |
| Mounting Media | Glycerol-based media, Commercial anti-fade media | Preserve samples and optimize optical properties | High refractive index matching improves deep imaging |
Image Acquisition for Quantitative Analysis
Microscope Configuration and Settings
Consistent, standardized image acquisition parameters are fundamental for reliable intensity quantitation. Laser scanning confocal microscopy is particularly well-suited for quantitative whole mount imaging because it eliminates out-of-focus light, providing sharper images with better resolution [81]. For very thick or dense specimens, multiphoton microscopy offers superior penetration depth with reduced photodamage, making it ideal for large organoids and embryos [6].
Key microscope settings that must be kept consistent across all experimental groups include:
- Laser power: Should be set to the minimum necessary to detect signal, minimizing photobleaching
- Detector gain: Must be within the linear range of the PMT
- Digital offset: Adjusts black level without affecting gain
- Pinhole size: Typically set to 1 Airy unit for optimal section thickness and resolution
- Pixel dwell time: Affects signal-to-noise ratio and acquisition speed
- Image bit depth: Higher bit depth (12- or 16-bit) provides greater dynamic range [81]
All acquisition parameters should be meticulously documented and identical for control and experimental samples imaged within the same study [83]. Slight variations in these settings can significantly impact intensity measurements and compromise data comparability.
Minimizing Technical Variability
Several strategies help minimize technical variability in quantitative fluorescence imaging:
- Include controls: Negative controls (no primary antibody), positive controls (known expressing tissue), and internal controls should be included in each experiment [81]
- Acquire multiple fields: Image several regions per specimen to account for heterogeneity [83]
- Use the same equipment: Imaging should be performed on the same microscope system using identical settings
- Avoid signal saturation: Ensure no pixels are at maximum intensity (255 in 8-bit, 4095 in 12-bit images)
- Prevent photobleaching: Limit light exposure and use anti-fade mounting media [16]
For whole mount specimens, additional considerations include signal attenuation with depth due to light scattering and absorption. This can be partially corrected computationally during image analysis or through the use of refractive index-matched mounting media [6].
Quantitative Image Analysis Workflow
Image Preprocessing
Before quantitative analysis, images often require preprocessing to correct for technical artifacts. Background subtraction is particularly important for accurate intensity measurements. This is typically done by measuring the intensity in a region without specific staining (but with similar autofluorescence properties) and subtracting this value from the signal in the regions of interest (ROIs) [83]. Additionally, corrections for flat-field illumination (uneven illumination across the field of view) and depth-dependent signal attenuation may be necessary for whole mount specimens [6].
For valid quantitation, analysis must always be performed on raw, uncompressed images [83]. While brightness and contrast adjustments may be applied for visualization purposes, these manipulated images should never be used for measurements, and the original raw data must be preserved [83].
Defining Regions of Interest (ROIs)
The accurate definition of ROIs is critical for meaningful intensity measurements. ROIs can be defined manually by drawing around specific structures, or automatically using thresholding algorithms that select pixels above a certain intensity value [83]. For whole mount embryo analysis, ROIs might include specific embryonic regions, individual cells, or subcellular compartments, depending on the research question.
Automated ROI identification using intensity thresholds creates a binary mask that flags which pixels will be included in measurements [83]. The threshold should be carefully set to include all relevant structures while excluding background—most image analysis software provides visual feedback to verify the selected threshold before proceeding with quantitation.
Intensity Measurement and Data Extraction
Once ROIs are defined, mean fluorescence intensity (MFI) is the most common metric for quantitative analysis. MFI represents the average pixel intensity within the defined ROI and should be calculated for each object of interest [81]. For whole mount analyses, it's often valuable to measure multiple parameters:
- Nuclear intensity: Measure MFI within nuclear ROIs (identified by DAPI or Hoechst staining)
- Cytoplasmic intensity: Measure MFI in cytoplasmic regions
- Background intensity: Measure MFI in areas without specific staining
- Cell counting: Automatically or manually count cells within ROIs
- Percentage of positive cells: Calculate the proportion of cells exceeding a defined intensity threshold [81]
These measurements are typically performed using specialized image analysis software such as Fiji/ImageJ, which offers a wide range of plugins and tools for biological image analysis [81] [85]. The analysis workflow can be automated through scripting to ensure consistency when processing large datasets.
Analysis Workflow and Data Normalization Strategies
The process of analyzing fluorescence intensity data involves multiple steps from image processing through statistical analysis, as shown in the following workflow:
Data Normalization Approaches
To enable meaningful comparisons between samples, raw intensity measurements require appropriate normalization. Common approaches include:
- Background subtraction: Subtract the mean background intensity from the ROI intensity [83]
- Control normalization: Express intensities as fold-changes relative to control conditions
- Internal standards: Use invariant proteins or added fluorescent standards for normalization
- Cellular normalization: Normalize signal intensity to cellular number or area
For whole mount embryo analyses, additional normalization strategies might include normalizing to total protein content (if measurable) or to reference structures that should remain constant between specimens.
Statistical Considerations and Replicates
Robust quantitative analysis requires appropriate experimental replication and statistical analysis. Biological replicates (independent biological specimens) are essential for drawing meaningful conclusions about biological variability, while technical replicates (multiple measurements of the same specimen) help assess measurement precision [83]. For embryo research, a minimum of 3-5 independent biological replicates is typically recommended, with multiple technical replicates (imaging fields) per specimen [81].
Data presentation should clearly show both the group averages and the individual data points when possible. For time-series data, such as fluorescence intensity changes during embryonic development, plotting individual replicates alongside the average values helps visualize variability [85]. Statistical tests should be appropriate for the experimental design and sample distribution, with common choices including t-tests for two-group comparisons or ANOVA for multiple groups.
Applications in Embryonic Research and Advanced Techniques
Case Study: Whole Mount Analysis of Ocular Lens Development
Research on ocular lens development demonstrates the power of quantitative whole mount immunofluorescence. One study established methodology to quantify capsule thickness, epithelial cell area, nuclear area and shape, meridional row order, and fiber cell packing in whole mounted lenses [80]. This approach preserved the 3D tissue architecture while enabling detailed morphometric analysis that would be challenging with traditional sections.
The study found that WM-IF was "a more effective method when compared to tissue sections for visualizing the expression of limbal stem cell markers" [77]. Furthermore, the researchers emphasized the importance of fresh tissue controls, as storage duration significantly influenced marker expression, with prolonged storage leading to epithelial degeneration and loss of stem cell markers [77].
3D Analysis and Co-localization Studies
For embryonic research, extending analysis into three dimensions provides more biologically relevant data. Advanced imaging and analysis pipelines now enable complete 3D reconstruction of whole mount specimens, followed by automated segmentation and quantification of individual cells [6]. These approaches allow researchers to correlate gene expression patterns with spatial position and cellular morphology throughout the entire embryo or organoid.
Co-localization analysis represents another advanced application, where the spatial overlap of two different fluorophores is quantified to determine if their corresponding proteins interact or reside in the same subcellular compartment [83]. However, true co-localization requires specialized microscopy and careful controls due to the resolution limits of conventional light microscopy (~200 nm) [83]. Fluorescence resonance energy transfer (FRET) provides more definitive evidence of molecular proximity (<10 nm) but requires specialized fluorophore pairs and analysis methods [82].
Multiplexing and High-Content Analysis
The ability to simultaneously detect multiple targets (multiplexing) significantly enhances the information content from precious embryonic specimens. With careful fluorophore selection and spectral unmixing, researchers can visualize 4 or more targets in the same whole mount sample [6]. Computational approaches, including the Tapenade pipeline described for gastruloid analysis, enable signal normalization across channels and reconstruction of complex gene expression patterns in 3D [6].
For large-scale studies, high-content analysis platforms combine automated microscopy with computational analysis to quantify multiple parameters across many samples. These approaches are particularly valuable for phenotypic screening in developmental toxicology or drug discovery applications [6].
Quantifying fluorescence intensity in whole mount immunofluorescence provides powerful insights into embryonic development when performed with appropriate controls and rigorous methodology. Key best practices include:
- Validate antibodies specifically for immunofluorescence applications
- Optimize fixation and permeabilization to balance morphology preservation and antibody access
- Use consistent imaging parameters across all experimental groups
- Perform background subtraction and appropriate normalization
- Include proper controls in every experiment
- Maintain raw data without compression or manipulation
- Employ adequate replication for statistical power
As imaging technologies and analysis algorithms continue to advance, quantitative whole mount immunofluorescence will undoubtedly yield increasingly precise understanding of the complex molecular and cellular events driving embryonic development. By applying the principles and methods outlined in this guide, researchers can generate robust, quantitative data to advance knowledge in developmental biology and related fields.
WM-IF vs. Traditional Section IHC: A Direct Comparison of Strengths and Weaknesses
The analysis of protein expression and localization is a cornerstone of biological research, particularly in developmental biology and embryology. Two powerful techniques employed for this purpose are Whole-Mount Immunofluorescence (WM-IF) and Traditional Section Immunohistochemistry (IHC). While both leverage the specific binding of antibodies to target antigens, their methodologies, applications, and output data differ substantially. Traditional Section IHC is performed on thin tissue slices (sections) and typically uses chromogenic enzymes to produce a permanent, colored stain that is viewed with a standard brightfield microscope [86] [87]. In contrast, Whole-Mount Immunofluorescence involves staining an entire, intact tissue sample—such as a zebrafish or mouse embryo—using fluorescent dyes (fluorophores) and visualizing it in three dimensions with a fluorescence or confocal microscope [88] [33].
The choice between these techniques is crucial in embryo analysis research. A central thesis is that WM-IF is uniquely powerful for preserving three-dimensional tissue architecture and providing a comprehensive spatial context for developmental processes, from early organogenesis to the formation of complex neural circuits [33] [6]. This guide provides a direct, in-depth technical comparison to help researchers select the optimal method for their specific experimental goals.
Technical Comparison: A Side-by-Side Analysis
The fundamental differences between WM-IF and Traditional Section IHC can be broken down into key technical parameters, which directly influence their suitability for various research applications.
Table 1: Core Technical Comparison between WM-IF and Traditional Section IHC
| Parameter | Whole-Mount Immunofluorescence (WM-IF) | Traditional Section IHC |
|---|---|---|
| Detection Chemistry | Fluorophores (e.g., Alexa Fluor dyes) [86] [87] | Chromogenic enzymes (e.g., HRP with DAB) [86] [87] |
| Microscopy Equipment | Fluorescence or confocal microscope; advanced scanner often required [86] [6] | Standard brightfield microscope [86] [89] |
| Multiplexing Capability | High. Typically 2-8 markers; ultra-high-plex platforms can detect 10-60 markers on one sample [86] [89] | Low. Typically 1-2 markers per slide due to color overlap of chromogens [86] [87] |
| Spatial Information | Full 3D context preserved within intact sample [33] | 2D section information; 3D structure must be reconstructed from serial sections [33] |
| Signal Stability & Archiving | Moderate. Prone to photobleaching; digital archiving is recommended [86] [87] | High. Staining is permanent and slides can be archived for years [86] [87] |
| Tissue Morphology | Can be obscured by sample thickness; requires clearing for deep imaging [6] | Excellent. Provides crisp morphology ideal for pathologist review [86] [90] |
| Best For | Spatial biology, co-localization studies, analyzing complex tissues and embryos [86] [33] | Diagnostic workflows, regulatory archiving, pathologist review [86] [90] |
| Typical Turnaround Time | 5-7 days for standard IF [86] | 3-5 days [86] |
Table 2: Quantitative Performance Metrics
| Metric | Whole-Mount Immunofluorescence (WM-IF) | Traditional Section IHC |
|---|---|---|
| Sensitivity / Dynamic Range | High to Very High [86] | Moderate [86] |
| Maximum Markers/Slide | 2-8 (Traditional IF); 10-60 (Ultra-high-plex) [86] | 1-2 [86] |
| Sample Thickness | Up to 500 µm or more (with clearing) [6] | Typically 4-7 µm [86] [33] |
| Key Limitations | Photobleaching, autofluorescence, high cost/complexity, antibody penetration issues in thick samples [86] [87] | Limited multiplexing, moderate sensitivity, lack of 3D context from a single slide [86] [89] |
Experimental Protocols for Embryo Analysis
Detailed, optimized methodologies are critical for success in both techniques, especially when working with delicate embryonic samples.
Whole-Mount Immunofluorescence Protocol for Embryos
This protocol is adapted for zebrafish, mouse, or chick embryos and is based on established methodologies [88] [33] [17].
- Fixation: Immerse embryos in 4% Paraformaldehyde (PFA) in PBS. Fixation time is critical and depends on embryo size and age; it can range from 2 hours at room temperature to overnight at 4°C to ensure complete penetration and preservation of antigenicity. Alternative: For antigens sensitive to PFA's cross-linking, chilled 100% methanol can be used as a fixative and permeabilization agent [33] [17].
- Permeabilization: Incubate embryos in a detergent solution, such as 0.5% Triton X-100 or Tween-20 in PBS, for several hours to days. This step is essential to allow antibodies to penetrate the entire sample. For zebrafish embryos, a preceding dechorionation (manual or enzymatic removal of the egg membrane) is required [33].
- Blocking: Incubate embryos for 4 hours to overnight in a blocking solution, such as 2-5% Bovine Serum Albumin (BSA) or serum from the host species of the secondary antibody, combined with 0.1% detergent, to minimize non-specific antibody binding [33] [17].
- Primary Antibody Incubation: Incubate embryos with the primary antibody diluted in blocking solution for 24-48 hours at 4°C with gentle agitation. These extended times are necessary for antibody diffusion into the core of the sample [33].
- Washing: Wash the embryos extensively in PBT (PBS with 0.1% Tween-20) over 12-24 hours, with multiple solution changes, to remove unbound primary antibody.
- Secondary Antibody Incubation: Incubate with fluorophore-conjugated secondary antibodies, diluted in blocking solution, for 24-48 hours at 4°C in the dark. From this point forward, protect samples from light to prevent fluorophore photobleaching.
- Final Washing & Mounting: Perform a final series of washes in PBT over 12-24 hours. For 3D imaging, clear the samples using a mounting medium like 80% glycerol [6] or BABB (Benzyl alcohol benzyl benzoate) [91], and mount them on a microscope slide for imaging with a fluorescence or two-photon confocal microscope [33] [6].
Traditional Section IHC Protocol
This standard protocol is typically performed on formalin-fixed, paraffin-embedded (FFPE) tissue sections [87] [16].
- Sectioning & Deparaffinization: Cut FFPE tissue blocks into 4-5 µm thick sections and mount them on glass slides. Deparaffinize and rehydrate the sections by sequential washing in xylene and graded ethanol solutions [16].
- Antigen Retrieval: Perform Heat-Induced Epitope Retrieval (HIER) by heating slides in a high-pH (Tris-EDTA) or low-pH (citrate) buffer using a pressure cooker or water bath. This critical step reverses formaldehyde-induced cross-links and unmask epitopes for antibody binding [16]. Alternative: Protease-Induced Epitope Retrieval (PIER) uses enzymes like proteinase K [16].
- Blocking: Block endogenous peroxidase activity with 3% H₂O₂, then incubate with a protein block (e.g., BSA or normal serum) for 30-60 minutes to reduce background [16].
- Primary Antibody Incubation: Apply the primary antibody diluted in buffer and incubate for 1 hour at room temperature or overnight at 4°C [16].
- Washing: Wash slides in a buffer like PBS or TBS-Tween to remove excess primary antibody.
- Detection: Apply an enzyme-labeled polymer (e.g., HRP-conjugated) secondary antibody for 30 minutes. Visualize by adding a chromogen substrate such as 3,3'-Diaminobenzidine (DAB), which produces a brown precipitate [87] [16].
- Counterstaining & Mounting: Counterstain with hematoxylin to visualize nuclei. Dehydrate the sections through graded alcohols and xylene, and mount under a glass coverslip with a permanent mounting medium for long-term storage [87] [16].
Workflow Visualization
The following diagram illustrates the key procedural steps and decision points for both techniques, highlighting their parallel yet distinct pathways.
The Scientist's Toolkit: Essential Reagents and Materials
Successful implementation of WM-IF and IHC requires careful selection of reagents and materials. The following table outlines key solutions and their specific functions in the experimental pipeline.
Table 3: Essential Research Reagent Solutions
| Reagent / Material | Primary Function | Application Notes |
|---|---|---|
| Paraformaldehyde (PFA) | Cross-linking fixative that preserves tissue structure and antigenicity. | Standard for both WM-IF and IHC; concentration (typically 4%) and fixation time must be optimized [33] [17]. |
| Methanol | Organic solvent fixative that precipitates proteins and permeabilizes membranes. | Alternative to PFA for some WM-IF antigens; also used for vitelline membrane removal in Drosophila embryos [33] [91]. |
| Triton X-100 / Tween-20 | Detergents for permeabilizing lipid membranes. | Allows antibody penetration; concentration critical to balance access with preservation of membrane structures [33] [17]. |
| Bovine Serum Albumin (BSA) | Protein-based blocking agent. | Reduces non-specific background by saturating reactive sites; used in both WM-IF and IHC [16] [17]. |
| Fluorophore-Conjugated Antibodies | Secondary antibodies for target detection in IF. | Alexa Fluor dyes (e.g., 488, 555, 647) are preferred for brightness and photostability [87] [17]. |
| HRP-Conjugated Polymer & DAB | Enzyme-substrate system for chromogenic detection in IHC. | HRP catalyzes DAB to produce an insoluble brown precipitate; permanent and viewable by brightfield [87] [16]. |
| Mounting Media (Glycerol/BABB) | Medium for mounting coverslips and matching refractive index. | Aqueous glycerol (80%) is common for WM-IF; BABB provides superior clearing for deep imaging [6] [91]. |
| Mounting Media (Permanent) | Non-aqueous, synthetic resin for IHC slides. | Preserves chromogenic stain long-term; requires dehydrated samples [87] [16]. |
| DAPI | Fluorescent nuclear counterstain. | Binds to DNA, labeling all nuclei; essential for defining cellular architecture in WM-IF [87] [17]. |
| Hematoxylin | Chromogenic nuclear counterstain for IHC. | Provides blue-toned nuclear contrast to the brown DAB signal, crucial for morphological assessment [87]. |
The direct comparison between Whole-Mount Immunofluorescence and Traditional Section IHC reveals that neither technique is universally superior; rather, they are complementary tools that address different research questions. The selection criteria are clear: choose WM-IF when the research goal demands 3D spatial context, high-plex biomarker detection, and analysis of complex tissue architecture in intact embryos or organoids. Choose Traditional Section IHC when the priority is crisp 2D morphology, permanence for archiving, integration into diagnostic workflows, and accessibility with standard laboratory equipment [86] [89].
The future of spatial biology in embryo analysis is being shaped by emerging technologies that push the boundaries of both techniques. Ultra-high-plex WM-IF platforms, such as the Akoya PhenoCycler-Fusion, now enable the simultaneous detection of 60 or more markers on a single sample, unlocking unprecedented detail in the study of complex systems like the tumor microenvironment [86]. Furthermore, advanced computational pipelines for 3D image analysis, two-photon microscopy for deep-tissue imaging, and semi-automated robotics for sample processing are progressively overcoming traditional limitations of throughput and reproducibility in whole-mount approaches [6] [91]. By understanding the inherent strengths and weaknesses of each method, researchers can make an informed choice that optimally aligns with their specific experimental objectives, driving discovery in developmental biology and beyond.
Understanding the journey from a single fertilized egg to a complex, fully formed organism remains a fundamental pursuit in developmental biology. This process requires precise spatiotemporal regulation of cell fate determination, where cells adopt specific identities and functional specializations [92]. Two powerful, complementary disciplines have been developed to investigate this dynamic process: fate mapping, which provides a schematic showing which parts of an embryo develop into which tissues, and lineage tracing, which aims to identify all progeny arising from an individual cell, placing them within a lineage hierarchy [93]. While fate mapping offers crucial spatial information often lost in lineage reconstruction, lineage tracing reveals the direct genealogical connections between cells [93].
Whole-mount immunofluorescence (WM-IF) has become an indispensable tool in this investigative arsenal. It enables the visualization of protein expression and localization within the three-dimensional (3D) context of intact tissues, preserving spatial relationships that are critical for understanding developmental processes. However, to fully unravel the mechanisms of development, regeneration, and disease, WM-IF must be integrated with other methodologies. The combination of WM-IF with advanced fate mapping and genetic lineage tracing techniques creates a powerful synergistic workflow. This integration allows researchers to not only pinpoint the spatial location and molecular identity of cells (via WM-IF) but also to trace their developmental history and future potential (via fate mapping and lineage tracing) [72] [94]. This technical guide explores the principles, methods, and quantitative frameworks for effectively leveraging WM-IF with these complementary techniques, specifically within the context of embryo analysis research.
Core Principles: Fate Mapping and Lineage Tracing
Definitions and Historical Context
Cell fate determination is a fundamental process in multicellular development, characterized by cellular plasticity that allows cells to revert to prior states or adopt alternative differentiation pathways in response to specific stimuli [92]. Investigating this plasticity is key to understanding organ development, tissue homeostasis, and disease pathogenesis.
Lineage tracing is a powerful technique that enables the tracking of all descendants from a single progenitor cell, thereby elucidating its fate trajectory [92]. It involves labeling progenitor cells with heritable markers that are transmitted to progeny through cell division and differentiation. By monitoring these inherited markers, lineage tracing reconstructs developmental and pathological trajectories within a fate map—a spatial blueprint correlating cellular origins with functional outcomes [92]. The earliest lineage tracing methods, dating back to 1905, relied on direct observation and dye-based labeling of transparent embryos, such as those of ascidians and nematodes [92]. However, these approaches were limited by organismal opacity and progressive marker dilution.
The advent of molecular genetics revolutionized the field. The introduction of recombinase systems (e.g., Cre/loxP) marked the onset of the molecular labeling era, allowing for more precise and heritable genetic labeling of specific cell populations and their progeny [92]. Subsequently, technologies such as multicolor labeling systems (e.g., Brainbow) enabled the simultaneous tracking of multiple lineages by generating a diverse palette of colors to discriminate different cells upon activation of Cre recombinase [95].
The Single-Cell Revolution and Natural Barcodes
Recent breakthroughs in single-cell sequencing technologies have propelled lineage tracing into a new era of high-resolution analysis. Single-cell lineage tracing (SCLT) can now map cell lineage connectivity at single-cell resolution, making it the gold standard for exploring the heterogeneity of cellular differentiation [95]. SCLT technologies can be broadly categorized into those using engineered (exogenous) markers and those leveraging natural (endogenous) barcodes.
Engineered markers include:
- Integration barcodes: Utilizing retroviral vectors or transposons to introduce unique, heritable DNA sequences into cells [95].
- CRISPR barcodes: Employing CRISPR/Cas9 to generate cumulative insertions and deletions (InDels) that serve as genetic landmarks for reconstructing lineage hierarchies [95].
- Polylox barcodes: Using an artificial DNA recombination locus with the Cre-loxP system to generate diverse barcode combinations [95].
A significant advancement has been the development of base editors, which introduce informative sites at a faster mutation rate, allowing for the recording of more mitotic divisions and the construction of more detailed cell lineage trees [95].
In parallel, retrospective lineage tracing leverages naturally occurring somatic mutations—in the nuclear genome, mitochondrial DNA, or epigenome—that accumulate during development and aging [95]. This approach is particularly valuable for studying lineage relationships in humans, as it is non-invasive and does not require genetic manipulation.
Table 1: Comparison of Major Lineage Tracing Technologies
| Technology | Key Principle | Resolution | Key Advantages | Key Limitations |
|---|---|---|---|---|
| Dye Labeling | Direct staining of cell membranes | Low | Simple, non-invasive | Marker dilution with cell division |
| Cre/loxP Systems | Site-specific genetic recombination | Moderate to High | Heritable, permanent labeling | Potential non-specific expression |
| Brainbow/Confetti | Stochastic multicolor fluorescence | High | Visualizes multiple lineages simultaneously | Limited number of distinct colors |
| Viral Barcoding | Unique DNA barcode integration | Single-Cell | High-throughput, tracks thousands of clones | Limited to dividing cells; potential silencing |
| CRISPR Barcoding | Accumulation of CRISPR-induced InDels | Single-Cell | High-resolution lineage trees | Complex data analysis |
| Natural Barcodes | Endogenous somatic mutations | Single-Cell | Applicable to humans; non-invasive | Requires deep sequencing; low mutation rate |
Methodological Integration: WM-IF with Fate Mapping and Lineage Tracing
Whole-Mount Immunofluorescence (WM-IF) Workflow
A robust WM-IF protocol is the foundation for successful integration. The following method has been adapted from a simplified and robust immunofluorescence labeling technique for complex 3D cultures, which minimizes manipulation and maximizes data preservation [94].
Protocol: Simplified WM-IF for Embryonic Tissues
Sample Fixation and Permeabilization
- Fix embryos in 4% paraformaldehyde (PFA) for 2-4 hours at 4°C, depending on size.
- Wash 3x with phosphate-buffered saline (PBS).
- Permeabilize with 0.5% Triton X-100 in PBS for 4-12 hours at 4°C.
Blocking and Antibody Incubation
- Block non-specific sites with a solution containing 5% normal serum (from the secondary antibody host species) and 0.1% Tween-20 in PBS for 6-12 hours at 4°C.
- Incubate with primary antibody diluted in blocking solution for 24-48 hours at 4°C under gentle agitation.
- Wash 4-6x with PBS containing 0.1% Tween-20 over 12-24 hours.
- Incubate with fluorophore-conjugated secondary antibody for 24-48 hours at 4°C, protected from light.
Clearing and Mounting
- Clear samples using a high-efficiency mounting medium such as 80% glycerol [6] or commercial alternatives like ProLong Gold. For highly opaque tissues, extended clearing with agents like ClearSee may be necessary [72].
- Mount samples between two glass coverslips using spacers of a defined thickness (e.g., 250-500 µm) to prevent compression and facilitate dual-view imaging [6].
This protocol emphasizes sample integrity by minimizing mechanical manipulation and using extended, gentle incubation steps, which is crucial for preserving the 3D architecture and antigenicity of embryonic tissues [94].
Integrating smFISH for Simultaneous RNA and Protein Quantification
To correlate lineage information with transcriptional activity, WM-IF can be combined with single-molecule RNA fluorescence in situ hybridization (smFISH). This powerful combination allows for the absolute quantification of mRNA molecules alongside protein detection at cellular and subcellular resolution within intact tissues [72].
Workflow for Combined WM-IF and smFISH:
- Perform the standard WM-IF protocol as described above.
- After secondary antibody incubation and washing, post-fix the samples with 4% PFA for 1 hour.
- Perform smFISH hybridization using probes against the target mRNA (e.g., labeled with Quasar570 or Quasar670) according to established protocols, often incorporating additional clearing steps (e.g., methanol or ClearSee treatments) to reduce autofluorescence [72].
- Include a cell wall stain (e.g., Renaissance 2200 for plants) or a nuclear stain (e.g., Hoechst for animal tissues) to facilitate cell segmentation and assignment of molecular quantities to specific cells [72].
- Image using a confocal or two-photon microscope capable of distinguishing the multiple fluorophores.
This integrated approach enables the creation of quantitative spatial expression maps, revealing relationships between mRNA and protein levels across different cell types within the embryo.
Diagram 1: Integrated WM-IF and smFISH workflow.
Correlating with Genetic Lineage Tracing Data
For researchers working with transgenic animals or organoid models expressing lineage tracing systems (e.g., Cre-dependent fluorescent reporters, Brainbow, or CRISPR barcodes), WM-IF serves as the critical link between lineage history and cell state.
Experimental Pipeline:
- Induction of Lineage Markers: Activate the lineage tracing system in the model organism (e.g., via tamoxifen injection for CreER^T2^) at the desired developmental time point.
- Sample Collection: Harvest embryos or organoids at a later time point to allow for lineage expansion.
- WM-IF Processing: Process the samples for WM-IF as described in Section 3.1, using antibodies that target:
- The reporter protein itself (e.g., tdTomato, GFP) to enhance the signal, especially for deep imaging.
- Key transcription factors or cell surface markers that define cell states or fates within the lineage of interest.
- Advanced Imaging: Image the samples using a two-photon microscope for superior tissue penetration in large, dense samples (e.g., gastruloids >200 µm) [6]. Implement spectral unmixing to resolve signal crossover between multiple fluorescent proteins and immunofluorescence labels [6].
- Computational Analysis:
- 3D Nuclei Segmentation: Use tools like Tapenade or Cellpose to segment individual nuclei from 3D image stacks based on a nuclear stain [6] [72].
- Signal Assignment: Assign lineage tracing signals (colors or barcodes) and WM-IF intensity values to each segmented cell.
- Data Integration: Construct a quantitative data matrix that links each cell's lineage identity with its molecular phenotype and spatial position.
Table 2: Key Research Reagent Solutions for Integrated Lineage Studies
| Reagent / Tool | Function | Application Note |
|---|---|---|
| Cdh5-Dre; Prox1-RSR-CreER (Mouse Line) | Intersectional genetic labeling for precise fate mapping [92]. | Example from heart lymphatic vessel tracing. |
| Anti-TdTomato/RFP Antibody | Enhances weak native fluorescence of common lineage reporters (e.g., Rosa26-tdT) for deep imaging. | Critical for detecting diluted reporter signals. |
| Cre/loxP System | Core recombinase system for heritable genetic labeling [92]. | Basis for many lineage tracing strategies. |
| Dre/Rox, Flp/FRT Systems | Orthogonal recombinase systems for independent, simultaneous labeling of multiple lineages [92]. | Increases multiplexing capability. |
| Quasar570/670 smFISH Probes | Detect individual mRNA molecules in whole-mount tissues [72]. | Allows absolute transcript counting. |
| Renaissance 2200 / Hoechst | Cell wall and nuclear counterstains for cell segmentation [72] [6]. | Essential for assigning signals to individual cells. |
| 80% Glycerol / ClearSee | Mounting and clearing media that reduce light scattering and autofluorescence [6] [72]. | Significantly improves signal-to-noise ratio in deep tissue. |
Quantitative Data Analysis and Imaging Pipelines
The integration of WM-IF with lineage tracing generates complex, multi-dimensional datasets. A robust computational pipeline is essential for extracting meaningful biological insights.
An Integrated Pipeline for Multi-Layered Organoids and Embryos
A comprehensive pipeline for whole-mount deep imaging and analysis provides a framework that can be adapted for embryonic tissues [6]. This pipeline corrects for optical artifacts and quantifies gene expression and nuclear morphology across multiple spatial scales.
Key Computational Steps:
- Spectral Unmixing: Separate the overlapping emission spectra of multiple fluorophores to obtain pure channel signals [6].
- Dual-View Registration and Fusion: For samples imaged from opposite sides, computationally align and merge the two views to reconstruct a single, high-quality in toto image [6].
- 3D Nuclei Segmentation: Accurately segment individual cell nuclei from 3D image stacks. This is a critical step for single-cell analysis.
- Signal Normalization: Correct for intensity decay as a function of imaging depth and normalize signals across different samples and channels to enable quantitative comparisons [6].
- Single-Cell Data Extraction: For each segmented cell, extract features such as:
- Fluorescence intensity of WM-IF markers.
- Intensity or identity of the lineage label.
- Nuclear volume, shape, and position.
- Number of mRNA transcripts (if smFISH was performed).
Diagram 2: Computational analysis pipeline.
Presenting Quantitative Data
The analysis pipeline produces rich, quantitative data that should be summarized clearly. The following table exemplifies how to present quantitative comparisons of different imaging and clearing modalities, a crucial consideration for experimental design.
Table 3: Quantitative Comparison of Imaging and Clearing Modalities for Deep Tissue WM-IF
| Modality | Optimal Sample Size | Relative Intensity at 200µm Depth | Information Content (FRC-QE) at 200µm | Key Application |
|---|---|---|---|---|
| Confocal (PBS Mount) | <100 µm | Very Low | Very Low | Small, transparent samples. |
| Confocal (Glycerol Mount) | <100 µm | Low | Low | Small, cleared samples. |
| Two-Photon (PBS Mount) | 100-500 µm | Low | Low | Live imaging of mid-planes. |
| Two-Photon (Glycerol Mount) | 100-500 µm | High (8x vs. PBS) | High (3x vs. PBS) [6] | Gold standard for large, dense whole-mounts (e.g., gastruloids, embryos). |
| Light-Sheet | <100 µm (large if hollow) | Varies | High for permissive samples | High-speed, long-term live imaging of organoids with lumens [6]. |
Advanced Applications and Future Directions
The convergence of WM-IF with next-generation lineage tracing and fate mapping is opening new frontiers in developmental biology and disease modeling.
One significant application is in the study of hematopoietic stem cells (HSCs). Single-cell lineage tracing techniques have been pivotal in uncovering the functional and structural heterogeneity of HSCs, which has profound implications for understanding blood disorders, aging, and cancer treatment responses [95]. Combining these SCLT approaches with WM-IF of bone marrow niches can directly link HSC clonal dynamics with their spatial microenvironment.
Another frontier is the use of neighboring cell labeling technologies. While traditional lineage tracing captures cell-autonomous histories, it often misses the spatial and dynamic context provided by adjacent cells. New techniques are being developed to selectively mark cells adjacent to a target progenitor, providing tools to investigate how cellular crosstalk within native niches regulates cell fate decisions [92]. When overlaid with WM-IF data on signaling molecules, this offers a powerful system to deconstruct the molecular mechanisms of niche regulation.
Finally, the push towards synthesizing high-resolution fate maps is underway. By leveraging single-cell genomics and the spatial data from WM-IF, researchers can begin to construct detailed digital fate maps that not only show the lineage relationships and final positions of cells but also the underlying gene expression programs that drive their journey [93]. This integrated approach promises a more holistic and mechanistic understanding of development at unprecedented depth.
The pursuit of physiologically relevant in vitro models is a cornerstone of modern biomedical research, directly supporting the "3Rs" principle (Replacement, Reduction, and Refinement) to minimize animal use [6]. In oncology, this has driven the shift from traditional two-dimensional (2D) cell cultures to three-dimensional (3D) models that more accurately mimic the complex architecture and cellular heterogeneity of in vivo tumors [96] [97]. Similarly, in developmental biology, whole-mount immunofluorescence has been established as a gold standard for analyzing complex 3D structures like embryos, allowing for the comprehensive visualization of spatial organization and protein expression patterns without sectioning [4].
This case study operates at the intersection of these two advanced methodologies. We present a detailed framework for validating drug responses in 3D tumor spheroid co-cultures, explicitly framing the analytical workflow within the principles of whole-mount immunofluorescence. The core thesis is that the rigorous, quantitative imaging and analysis pipelines developed for embryonic research can be powerfully adapted to overcome the significant challenges of evaluating therapeutic efficacy in dense, multicellular tumor spheroids. By doing so, we bridge a critical technological gap, enhancing the biological relevance and predictive power of pre-clinical drug screening data [97] [6].
The Biological and Technical Rationale for 3D Spheroid Models
Limitations of 2D Cultures and Animal Models
Conventional 2D cell cultures, while simple and reproducible, fail to recapitulate the intricate in vivo tumor microenvironment (TME). They lack critical features such as cell-cell and cell-extracellular matrix (ECM) interactions, gradients of oxygen and nutrients, and the resultant cellular heterogeneity in proliferative, quiescent, and necrotic states [96] [97]. This oversimplification often leads to a poor correlation between in vitro drug efficacy and clinical outcomes, contributing to the high attrition rate of new cancer drugs in clinical trials [98].
While patient-derived xenografts (PDX) maintain more tumor complexity, they are hampered by high costs, long generation times, poor implantation rates, and ethical concerns regarding animal use [96] [98]. Three-dimensional tumor spheroids have thus emerged as a robust intermediate model, offering a physiologically relevant platform that can fill the gap between 2D cultures and in vivo animal models [97].
Advantages of 3D Tumor Spheroids
3D tumor spheroids are scaffold-free, self-assembled aggregates of tumor cells that accurately replicate key pathophysiological features of solid tumors [97]. Table 1 summarizes a comparison of different culture models.
Table 1: Comparison of Pre-clinical Cancer Model Features
| Feature | 2D Model | 3D Spheroid Model | PDX Animal Model |
|---|---|---|---|
| Physiological Relevance | Intermediate | High (mimics tumor architecture) | High |
| Cellular Heterogeneity | Low | High (proliferating, quiescent, necrotic zones) | High |
| Cost & Maintenance | Low | Intermediate | High |
| Ethical Issues | No | No | Yes |
| Throughput for Drug Screening | High | Effective | Less Effective |
| Reproducibility | High | Requires protocol optimization [97] | Low |
The key advantages of 3D spheroids include:
- Mimicking the TME: They secrete their own ECM and facilitate direct cell-cell contact, better simulating the in vivo TME [96].
- Drug Resistance Mechanisms: The 3D architecture and presence of hypoxic cores create gradients of drug penetration and activity, modeling a critical mechanism of therapeutic resistance observed in patients [96] [98].
- Gene Expression and Signaling: Spheroids demonstrate gene expression patterns and physiological responses that are more aligned with human tumors than 2D-cultured cells [96].
Experimental Workflow: From Spheroid Generation to Data Analysis
The following diagram outlines the integrated experimental and computational pipeline for validating drug response in 3D spheroid co-cultures, incorporating principles from whole-mount analysis.
Spheroid Fabrication and Co-culture Techniques
Generating reproducible, high-quality spheroids is the foundational step. Different methods offer various trade-offs between throughput, control, and spheroid size.
Table 2: Techniques for Generating 3D Tumor Spheroids
| Technique | Principle | Benefits | Drawbacks |
|---|---|---|---|
| Hanging Drop [96] | Cells aggregate by gravity in suspended droplets. | Simple, economical; reproducible shape/size. | Low-throughput; cumbersome handling. |
| Liquid Overay [97] | Cells aggregate on low-attachment surfaces. | Simple, suitable for high-throughput screening. | Potential heterogeneity in spheroid size and shape. |
| Pellet Culture [97] | Centrifugation forces cell aggregation. | Rapid, compact spheroid formation; controllable size. | Very low throughput (one spheroid per tube). |
| Rotary Cell Culture System (RCCS) [97] [98] | Cells remain suspended by rotation, minimizing shear stress. | High yield of large spheroids; uniform nutrients/oxygen. | Requires specialized equipment. |
| Magnetic Levitation [96] | Cells assembled using magnetic nanoparticles. | Good control over spheroid formation. | Requires external biomaterials (nanoparticles). |
For this study, the Rotary Cell Culture System (RCCS) is recommended for generating large spheroids (500-1100 µm in diameter) suitable for studying deep-tissue drug penetration effects [97]. Co-cultures are established by seeding cancer cells together with stromal cells (e.g., cancer-associated fibroblasts or immune cells) at a defined ratio within the RCCS vessel.
Critical Pre-Selection Based on Morphological Parameters
A key challenge in 3D culture is inherent variability. To ensure data reproducibility, a pre-selection of spheroids based on morphological homogeneity is crucial before initiating drug treatments [97]. This involves using open-source software tools like AnaSP to analyze brightfield images and quantify:
- Volume and Equivalent Diameter: Ensuring spheroids are of uniform size.
- Sphericity Index (SI): A measure of roundness, where 1.0 is a perfect sphere. Spheroids with an SI ≥ 0.90 are considered spherical and exhibit greater morphological stability over time compared to irregularly shaped aggregates [97].
Drug Treatment and Viability Assessment
Selected spheroids are treated with therapeutic candidates across a range of physiologically relevant concentrations. It is critical to use viability assays specifically validated for 3D models, as conventional 2D assays often fail to penetrate deeply or are confounded by the model's complexity [97]. The assay must be capable of providing meaningful data on the damage induced in large tumor spheroids.
Whole-Mount Immunofluorescence and Deep Imaging
The principles of whole-mount immunofluorescence, refined in embryology, are directly applicable to analyzing intact tumor spheroids [4] [6]. This process preserves the 3D architecture, allowing for the spatial analysis of drug effects.
Staining Protocol for Fixed Spheroids
The following protocol is adapted from established whole-mount embryo and organoid methodologies [4] [6].
- Fixation: Transfer spheroids to a microfuge tube and fix with 4% paraformaldehyde (PFA) for 30-60 minutes at room temperature (RT).
- Permeabilization: Remove PFA and permeabilize with 2% Triton X-100 in PBS for 30-60 minutes at RT.
- Blocking: Incubate spheroids in a blocking solution (e.g., 4% Bovine Serum Albumin (BSA) in PBS) for 2-4 hours at RT to reduce non-specific antibody binding.
- Primary Antibody Incubation: Incubate spheroids with primary antibodies (e.g., anti-Ki67 for proliferation, anti-Cleaved Caspase-3 for apoptosis, anti-HIF1α for hypoxia) diluted in blocking solution, overnight at 4°C.
- Washing: Wash thoroughly with PBS containing 1% BSA and 0.005% Triton X-100.
- Secondary Antibody and Counterstaining: Incubate with fluorophore-conjugated secondary antibodies and nuclear stain (e.g., DAPI) diluted in blocking solution, for 4-6 hours at RT or overnight at 4°C. Protect from light.
- Mounting and Clearing: Mount spheroids using spacers between coverslips in a refractive index-matched mounting medium (e.g., 80% glycerol), which significantly improves imaging depth and clarity by reducing light scattering [6].
Advanced 3D Imaging via Two-Photon Microscopy
For large, dense spheroids (diameters > 200 µm), confocal microscopy faces limitations due to light scattering and signal attenuation. Two-photon microscopy is the preferred method for deep-tissue imaging as it uses longer-wavelength light for superior penetration and causes minimal photodamage [6]. For maximum information, perform sequential opposite-view imaging of the mounted spheroid, followed by computational registration and fusion of the two image stacks to reconstruct a complete in toto image [6].
Computational Analysis and Data Quantification
The acquired 3D image datasets require sophisticated computational tools for quantitative analysis. The pipeline can be implemented using open-source packages like Tapenade [6].
Image Processing and Segmentation Workflow
The computational pipeline involves several key steps to extract robust, quantitative data from the raw 3D images, as visualized below.
Quantitative Data Extraction and Validation
Following segmentation, multiple parameters are quantified for each spheroid to build a comprehensive drug response profile. Table 3 outlines key metrics.
Table 3: Key Quantitative Metrics for Drug Response Validation
| Analysis Category | Specific Measurable Parameters | Biological Significance |
|---|---|---|
| Viability & Death | Ratio of Caspase-3+ cells; Nuclear morphology (condensation/fragmentation). | Quantifies direct cytotoxic effect and induction of apoptosis. |
| Proliferation | Ratio of Ki-67+ cells; Mitotic count. | Indicates anti-proliferative effect of the treatment. |
| Hypoxic Stress | Volume and intensity of HIF1α+ region. | Maps the hypoxic, quiescent core often associated with drug resistance. |
| Drug Penetration | Intensity gradient of a fluorescently-labeled drug. | Measures the ability of a drug to reach its intracellular target in the spheroid core. |
| Cellular Morphology | Nuclear volume, sphericity, and texture. | Reveals subtle treatment-induced changes in cell state. |
| Spatial Patterning | 3D spatial correlation of different cell fates (e.g., proliferation vs. hypoxia). | Identifies spatially restricted drug effects and microenvironmental influence. |
Statistical analysis comparing these metrics between treatment and control groups validates the drug response. This multi-parameter approach moves beyond simple viability, providing a systems-level view of therapeutic efficacy and resistance mechanisms.
The Scientist's Toolkit: Essential Reagent Solutions
Table 4: Key Research Reagents for Spheroid Validation
| Reagent / Material | Function | Example |
|---|---|---|
| Low-Attachment Plates | Prevents cell adhesion, forces 3D aggregation. | Commercially available ultra-low attachment (ULA) plates. |
| Extracellular Matrix (ECM) Hydrogels | Provides scaffold for scaffold-based 3D cultures; mimics in vivo ECM. | Matrigel, synthetic PEG hydrogels [96] [98]. |
| Primary Antibodies | Binds specific targets (antigens) for immunofluorescence detection. | Anti-STAT3, Anti-Ki67, Anti-Cleaved Caspase-3, Anti-HIF1α [4]. |
| Fluorophore-Conjugated Secondary Antibodies | Binds primary antibody; provides fluorescent signal for detection. | Donkey anti-Rabbit IgG (Alexa Fluor 488), Donkey anti-Mouse IgG (Alexa Fluor 546) [4]. |
| Nuclear Stain | Labels all nuclei; used for segmentation and morphological analysis. | DAPI (4′,6-diamidino-2-phenylindole) [4]. |
| Mounting Medium with Clearing | Reduces light scattering for deeper imaging; preserves fluorescence. | ProLong Gold Antifade reagent, 80% Glycerol [4] [6]. |
| Refractive Index Matching Solution | Clears tissue optically, crucial for deep imaging in whole mounts. | 80% Glycerol, OptiPrep [6]. |
This case study demonstrates a robust, quantitative pipeline for validating drug responses in 3D tumor spheroid co-cultures. By integrating the rigorous principles of whole-mount immunofluorescence and deep-tissue imaging from embryology, we overcome the significant analytical challenges posed by these complex models. The presented workflow—from careful spheroid generation and pre-selection to sophisticated 3D image analysis—ensures the generation of biologically relevant, reproducible, and high-quality data. This approach significantly enhances the predictive power of in vitro pre-clinical screening, facilitating the development of more effective anticancer therapies and advancing the goals of precision oncology.
Conclusion
Whole-mount immunofluorescence stands as a uniquely powerful technique that provides an unparalleled, holistic view of biological processes within their native 3D architecture. By mastering its principles, methodologies, and optimization strategies, researchers can move beyond flat images to generate quantitative, spatially resolved data on progenitor populations, cell fate, and tissue morphogenesis. The future of WM-IF is tightly linked to advancements in imaging technology, automated 3D image analysis, and deep-learning models, promising even deeper insights into embryonic development, disease modeling, and the mechanism of action of therapeutic compounds. Its application in sophisticated 3D culture systems like organoids and tumor spheroids will continue to bridge the gap between in vitro studies and in vivo physiology, accelerating discovery in biomedical and clinical research.
References
- 1. Quantitative Whole-mount Immunofluorescence Analysis of ... [https://pmc.ncbi.nlm.nih.gov/articles/PMC6475905/]
- 2. Whole-Mount Immunofluorescence Staining, Confocal ... [https://www.jove.com/t/62058/whole-mount-immunofluorescence-staining-confocal-imaging-3d]
- 3. Unlocking the Third Dimension Benefits of 3D ... [https://visikol.com/blog/2024/02/29/unlocking-the-third-dimension-benefits-of-3d-reconstruction-in-whole-mount-imaging/]
- 4. 4.5. Whole-Mount Embryo Immunofluorescence [https://bio-protocol.org/exchange/minidetail?id=8733580&type=30]
- 5. Proof of the quantitative potential of immunofluorescence ... [https://www.nature.com/articles/labinvest2016148]
- 6. A quantitative pipeline for whole-mount deep imaging and ... [https://elifesciences.org/reviewed-preprints/107154]
- 7. Immunofluorescence Tomography: High-resolution 3-D ... [https://www.nature.com/articles/s41598-018-38232-9]
- 8. An ex vivo uterine system captures implantation ... [https://www.nature.com/articles/s41467-025-60610-x]
- 9. Whole-Mount Immunofluorescence Staining of Early ... [https://pubmed.ncbi.nlm.nih.gov/32944908/]
- 10. Quantitative characterization of cell niches in spatially ... [https://www.nature.com/articles/s41588-025-02120-6]
- 11. Spatial architecture of development and disease [https://pubmed.ncbi.nlm.nih.gov/41028908/]
- 12. Optimized protocol for whole-mount RNA fluorescent in situ ... [https://www.sciencedirect.com/science/article/pii/S2666166723005701]
- 13. Fluorescence confocal microscopy for pathologists [https://www.nature.com/articles/modpathol2013158]
- 14. Protocol for whole-mount immunofluorescence staining of ... [https://pmc.ncbi.nlm.nih.gov/articles/PMC11227007/]
- 15. Protocol Guide: Immunofluorescent Staining of Whole ... [https://www.sigmaaldrich.com/US/en/technical-documents/protocol/cell-culture-and-cell-culture-analysis/3d-cell-culture/organoid-antibody-staining?srsltid=AfmBOor2AOPL6Yhg7u-7-OquO5ODPOxE5PqYqEEP_wzninhT5JD9crca]
- 16. An introduction to Performing Immunofluorescence Staining [https://pmc.ncbi.nlm.nih.gov/articles/PMC6918834/]
- 17. Immunofluorescence Staining | A Typical Workflow [https://ibidi.com/content/365-immunofluorescence-staining-a-typical-workflow]
- 18. Immunofluorescence staining: Visualizing cellular structures [https://www.abcam.com/en-us/knowledge-center/immunocytochemistry/immunofluorescence-staining]
- 19. Fluorescence Microscopy: A Concise Guide to Current ... [https://pmc.ncbi.nlm.nih.gov/articles/PMC3805368/]
- 20. Whole-brain tissue mapping toolkit using large-scale highly ... [https://pmc.ncbi.nlm.nih.gov/articles/PMC7946933/]
- 21. Next generation lineage tracing and its applications ... [https://www.nature.com/articles/s41540-025-00542-w]
- 22. Article Spatiotemporal and genetic cell lineage tracing of ... [https://www.sciencedirect.com/science/article/abs/pii/S0092867424014259]
- 23. improving the visibility of your fluorescence images - PMC [https://pmc.ncbi.nlm.nih.gov/articles/PMC3290635/]
- 24. How to make scientific figures accessible to readers with ... [https://www.ascb.org/diversity-equity-and-inclusion/how-to-make-scientific-figures-accessible-to-readers-with-color-blindness/]
- 25. A Beginner's Guide to a Publication Quality Image ... [https://www.nsh.org/blogs/ashley-stewart/2024/05/02/a-beginners-guide-to-a-publication-quality-image]
- 26. A whole-mount immunofluorescence protocol for three- ... [https://pubmed.ncbi.nlm.nih.gov/23649699/]
- 27. Stem cell-based human embryo models: current knowledge ... [https://stemcellres.biomedcentral.com/articles/10.1186/s13287-025-04581-2]
- 28. Lab-grown embryo models are getting more realistic. ... [https://www.cnn.com/2025/07/30/science/human-embryo-models-stem-cells-ethics]
- 29. The building blocks of embryo models: embryonic and ... [https://www.nature.com/articles/s41421-025-00780-6]
- 30. Diversity of Drosophila egg patterning: The missing tools to ... [https://pmc.ncbi.nlm.nih.gov/articles/PMC11968673/]
- 31. Many Roads Lead to... the embryo [https://www.sciencedaily.com/releases/2025/01/250122130239.htm]
- 32. Successful Immunofluorescence: Fixation & Permeabilization [https://blog.cellsignal.com/successful-immunofluorescence-fixation-and-permeabilization]
- 33. IHC staining protocol for whole mount samples [https://www.abcam.com/en-us/technical-resources/protocols/wholemount-staining-for-ihc]
- 34. Critical importance of appropriate fixation conditions for faithful ... [https://pmc.ncbi.nlm.nih.gov/articles/PMC5051640/]
- 35. The effect of chemical fixation with paraformaldehyde ... [https://pmc.ncbi.nlm.nih.gov/articles/PMC11837135/]
- 36. Sequential paraformaldehyde and methanol fixation for ... [https://pubmed.ncbi.nlm.nih.gov/1382010/]
- 37. Optimized immunofluorescence staining protocol for ... [https://pmc.ncbi.nlm.nih.gov/articles/PMC8233161/]
- 38. Permeabilization of Drosophila embryos for introduction of ... [https://pmc.ncbi.nlm.nih.gov/articles/PMC3269133/]
- 39. Permeabilization of Drosophila embryos for introduction ... [https://www.sciencedirect.com/science/article/abs/pii/S0965174810001621]
- 40. Specimen Preparation for Immunofluorescence Microscopy [https://lifesciences.danaher.com/us/en/blog/how-to-prepare-your-specimen-for-immunofluorescence-microscopy.html]
- 41. Immunocytochemistry protocol | Abcam [https://www.abcam.com/en-us/technical-resources/protocols/icc-protocol]
- 42. Immunohistochemistry (IHC): Experimental Protocols and ... [https://www.antibodysystem.com/archive/387.html]
- 43. Painting the Pancreas in Three Dimensions: Whole - Mount ... [https://pmc.ncbi.nlm.nih.gov/articles/PMC7521363/]
- 44. Optimization of protocols for pre-embedding immunogold ... [https://pmc.ncbi.nlm.nih.gov/articles/PMC8173732/]
- 45. 5 Controls for Immunofluorescence: An Easy Guide [https://bitesizebio.com/44370/controls-for-immunofluorescence-a-beginners-guide/]
- 46. Protocol for immunofluorescent staining, high-resolution ... [https://pmc.ncbi.nlm.nih.gov/articles/PMC12212140/]
- 47. Whole-mount immunofluorescence labelling and optical ... [https://www.protocols.io/view/whole-mount-immunofluorescence-labelling-and-optic-g66rbzhd7.html]
- 48. Protocol Guide: Immunofluorescent Staining of Whole ... [https://www.sigmaaldrich.com/US/en/technical-documents/protocol/cell-culture-and-cell-culture-analysis/3d-cell-culture/organoid-antibody-staining?srsltid=AfmBOor11x_rV2fH2O9e2mmk6D4afyEx-sGtJ8vmUZwNWrA1zv_Ns05J]
- 49. Protocol for whole-mount preparation, clearing, and ... [https://www.sciencedirect.com/science/article/pii/S2666166724006567]
- 50. Quantitative Whole-mount Immunofluorescence Analysis of ... [https://app.jove.com/v/56446/quantitative-whole-mount-immunofluorescence-analysis-cardiac]
- 51. Immunocytochemistry/Immunofluorescence Guide - ICC/IF ... [https://www.antibodies.com/applications/immunofluorescence]
- 52. Protocol for immunofluorescence detection and ... [https://www.sciencedirect.com/science/article/pii/S2666166725002552]
- 53. Concepts in Confocal Microscopy [https://evidentscientific.com/en/microscope-resource/knowledge-hub/techniques/confocal]
- 54. Confocal Microscopy: Principles and Modern Practices - PMC [https://pmc.ncbi.nlm.nih.gov/articles/PMC6961134/]
- 55. Whole-Mount Immunofluorescence Staining, Confocal ... [https://pubmed.ncbi.nlm.nih.gov/33427243/]
- 56. Immunofluorescence Protocol with Formaldehyde Fixation [https://www.cellsignal.com/learn-and-support/protocols/protocol-if?srsltid=AfmBOoqprxrrZJyxIpSS6x2Kaa26LnYYYrx0kE4XPL4Pze_t-V9I2zCK]
- 57. Timelapse-based 3D reconstruction of blastocysts reveals ... [https://www.nature.com/articles/s41746-025-02028-9]
- 58. Quantitative confocal microscopy: Beyond a pretty picture [https://www.sciencedirect.com/science/article/abs/pii/B9780124201385000070]
- 59. Protocol Guide: Immunofluorescent Staining of Whole ... [https://www.sigmaaldrich.com/US/en/technical-documents/protocol/cell-culture-and-cell-culture-analysis/3d-cell-culture/organoid-antibody-staining?srsltid=AfmBOoqTKujHan863rUlq1C55jDvQdfV8LuQJc414OkqkHjFP1A00Z6j]
- 60. A quantitative comparison of antibodies against epitope ... [https://pmc.ncbi.nlm.nih.gov/articles/PMC10699100/]
- 61. Widely-used technique for assessing IVF embryos may be ... [https://www.cam.ac.uk/research/news/widely-used-technique-for-assessing-ivf-embryos-may-be-flawed-study-suggests]
- 62. Antibodies 101: Multiplex Immunofluorescence [https://blog.addgene.org/antibodies-101-multiplex-immunofluorescence]
- 63. Fertility Treatments in 2025: The Biggest Innovations to ... [https://www.aspirefertility.com/blog/fertility-treatments-in-2025-the-biggest-innovations-to-watch]
- 64. Latest IVF Technology in 2025: What's New? [https://corionfertilityclinic.com/latest-ivf-technology-in-2025-whats-new/]
- 65. Co-administered antibody improves penetration of ... [https://www.nature.com/articles/s41467-020-19498-y]
- 66. Ten Approaches That Improve Immunostaining: A Review ... [https://www.mdpi.com/1422-0067/23/3/1426]
- 67. Overview of Advanced Fluorescence Microscopy Techniques [https://fluorofinder.com/overview-of-advanced-fluorescence-microscopy-techniques/]
- 68. Quantitative investigation of photobleaching-based autofluorescence suppression in formalin-fixed paraffin-embedded human tissue - PMC [https://pmc.ncbi.nlm.nih.gov/articles/PMC11828445/]
- 69. Optimized protocol for whole-mount RNA fluorescent in situ hybridization using oxidation-mediated autofluorescence reduction on mouse embryos - PMC [https://pmc.ncbi.nlm.nih.gov/articles/PMC10522992/]
- 70. Live imaging of late-stage preimplantation human embryos ... [https://www.nature.com/articles/s41587-025-02851-1]
- 71. Protocol for batch imaging and quantification of cellular ... [https://pmc.ncbi.nlm.nih.gov/articles/PMC8449127/]
- 72. Whole-mount smFISH allows combining RNA and protein ... [https://www.nature.com/articles/s41477-023-01442-9]
- 73. A comprehensive human embryo reference tool using ... [https://www.nature.com/articles/s41592-024-02493-2]
- 74. A Backwards Approach to GD2 Immunofluorescence in ... [https://pmc.ncbi.nlm.nih.gov/articles/PMC12468902/]
- 75. Validation of an Accurate Automated Multiplex ... [https://www.frontiersin.org/journals/molecular-biosciences/articles/10.3389/fmolb.2022.810858/full]
- 76. Skin Whole-Mount Immunofluorescent Staining Protocol, ... [https://pubmed.ncbi.nlm.nih.gov/37338194/]
- 77. Whole mount immunofluorescence analysis of fresh and ... [https://www.sciencedirect.com/science/article/pii/S1542012424000673]
- 78. Quantitative, Cell-based Immunofluorescence Assays [https://www.nist.gov/programs-projects/quantitative-cell-based-immunofluorescence-assays]
- 79. Proof of the Quantitative Potential of Immunofluorescence ... [https://pmc.ncbi.nlm.nih.gov/articles/PMC5334147/]
- 80. Whole Mount Imaging Methodology to Visualize and ... [https://pmc.ncbi.nlm.nih.gov/articles/PMC11623403/]
- 81. A simple method for quantitating confocal fluorescent images [https://pmc.ncbi.nlm.nih.gov/articles/PMC7856428/]
- 82. Fluorescence Intensity Measurements [https://www.bmglabtech.com/en/fluorescence-intensity/]
- 83. Analysis and Quantitation | Thermo Fisher Scientific - ES [https://www.thermofisher.com/us/en/home/life-science/cell-analysis/cell-analysis-learning-center/molecular-probes-school-of-fluorescence/imaging-basics/capturing-analyzing-your-samples/analysis-quantitation.html]
- 84. Immunofluorescence Protocol with Formaldehyde Fixation [https://www.cellsignal.com/learn-and-support/protocols/protocol-if?srsltid=AfmBOoqnWCDMlfcW2DfAFwcuarr1jz0DYpQsziY3Pw8X8zrgjOfvUbMV]
- 85. Analyzing fluorescence data - Image Analysis [https://forum.image.sc/t/analyzing-fluorescence-data/54089]
- 86. IHC vs IF: Key Differences, Use Cases & Which to Choose [https://www.ihisto.io/post/ihc-vs-if-comparison]
- 87. IHC or IF: Which is Best for My Study? [https://www.stagebio.com/blog/ihc-or-if-which-is-best-for-my-study]
- 88. Whole-Mount Immunohistochemical and ... [https://pubmed.ncbi.nlm.nih.gov/38285355/]
- 89. IHC or IF: Which Technique Suits Your Research Best? [https://home.histowiz.com/blog/ihc-vs-if/]
- 90. IHC vs IF: A Thorough Comparison for Research [https://www.histologix.com/insights-news/ihc-vs-if-a-thorough-comparison-for-research/]
- 91. An open-source semi-automated robotics pipeline for ... [https://www.nature.com/articles/s41598-021-89676-5]
- 92. Cell Fate Determination and Lineage Tracing - PubMed Central [https://pmc.ncbi.nlm.nih.gov/articles/PMC12591152/]
- 93. Next-Generation Lineage Tracing and Fate Mapping to ... [https://www.sciencedirect.com/science/article/pii/S1534580720308418]
- 94. A Simplified and Robust Immunofluorescence Labeling ... [https://pubmed.ncbi.nlm.nih.gov/40465186/]
- 95. Single-cell lineage tracing techniques in hematology [https://translational-medicine.biomedcentral.com/articles/10.1186/s12967-025-06318-4]
- 96. Three-Dimensional In Vitro Tumor Spheroid Models for ... [https://pmc.ncbi.nlm.nih.gov/articles/PMC10571930/]
- 97. 3D tumor spheroid models for in vitro therapeutic screening [https://www.nature.com/articles/srep19103]
- 98. 3D tumor cultures for drug resistance and screening ... [https://molecular-cancer.biomedcentral.com/articles/10.1186/s12943-025-02281-2]