Whole Mount Immunofluorescence vs. Cryosection IHC: A Comprehensive Guide for 3D Spatial Analysis and High-Resolution Applications
This article provides a comparative analysis of whole mount immunofluorescence and cryosection immunohistochemistry (IHC), two pivotal techniques for protein localization in biomedical research.
Whole Mount Immunofluorescence vs. Cryosection IHC: A Comprehensive Guide for 3D Spatial Analysis and High-Resolution Applications
Abstract
This article provides a comparative analysis of whole mount immunofluorescence and cryosection immunohistochemistry (IHC), two pivotal techniques for protein localization in biomedical research. Tailored for researchers and drug development professionals, it explores the foundational principles, methodological workflows, and specific applications of each technique, with a focus on their unique advantages for 3D architectural studies versus high-resolution cellular analysis. The content delivers practical troubleshooting guidance and optimization strategies to overcome common challenges like antibody penetration and background staining. By synthesizing validation criteria and comparative insights, this guide empowers scientists to select the appropriate method for their experimental goals in developmental biology, neurobiology, and immuno-oncology.
Understanding the Core Principles: How Whole Mount Immunofluorescence and Cryosection IHC Work
The precise visualization of proteins within their native tissue context is a cornerstone of modern biological research and diagnostic pathology. The development of techniques capable of achieving this has progressed from simple histological stains to sophisticated immunological methods, ultimately leading to the two powerful approaches central to this comparison: whole mount immunofluorescence (IF) and cryosection immunohistochemistry (IHC). These techniques share a common principle—the specific binding of an antibody to its target antigen—but diverge significantly in their sample preparation, detection methodology, and application [1] [2].
The foundational concept of using labeled antibodies to detect antigens in tissue sections was pioneered by Albert H. Coons and his colleagues in the 1940s, who created the first fluorescently conjugated antibody to detect pneumococcal bacteria [1] [2]. This breakthrough initiated the field of immunofluorescence. Subsequent decades saw the development of enzyme-conjugated antibodies in the 1960s, a key advancement that enabled chromogenic detection and paved the way for IHC as it is widely known today [2]. Further refinements, such as antigen retrieval methods and the use of secondary antibodies, were developed throughout the 1970s and 1980s, significantly enhancing the sensitivity and specificity of both IHC and IF [2]. Today, the choice between whole mount IF and cryosection IHC is guided by the specific research question, balancing the need for structural preservation, multiplexing capability, and workflow efficiency.
Core Principles and Technical Foundations
Immunohistochemistry (IHC)
IHC relies on the specific binding of antibodies to target antigens within tissue sections, with detection achieved through enzyme-conjugated antibodies that generate a colored, insoluble precipitate at the reaction site [3] [4] [2]. The most common chromogen is 3,3'-Diaminobenzidine (DAB), which produces a brown precipitate, but other colors are available [5] [6]. This signal is viewed using a standard brightfield microscope. IHC can be performed via direct or indirect methods. The direct method uses a primary antibody directly conjugated to an enzyme, while the more common indirect method uses an unlabeled primary antibody followed by an enzyme-conjugated secondary antibody, which provides signal amplification and greater sensitivity [1].
Immunofluorescence (IF)
IF similarly uses antibody-antigen interactions but employs fluorophore-conjugated antibodies for detection [4] [2]. When excited by light of a specific wavelength, these fluorophores emit light of a longer wavelength, which is captured using a fluorescence microscope. Like IHC, IF can be direct (a single fluorescently-labeled primary antibody) or, more frequently, indirect (a primary antibody followed by a fluorescently-labeled secondary antibody) [4]. The indirect method offers higher sensitivity and is the basis for most modern IF applications, including highly multiplexed protocols.
Whole Mount IF vs. Cryosection IHC: A Workflow Comparison
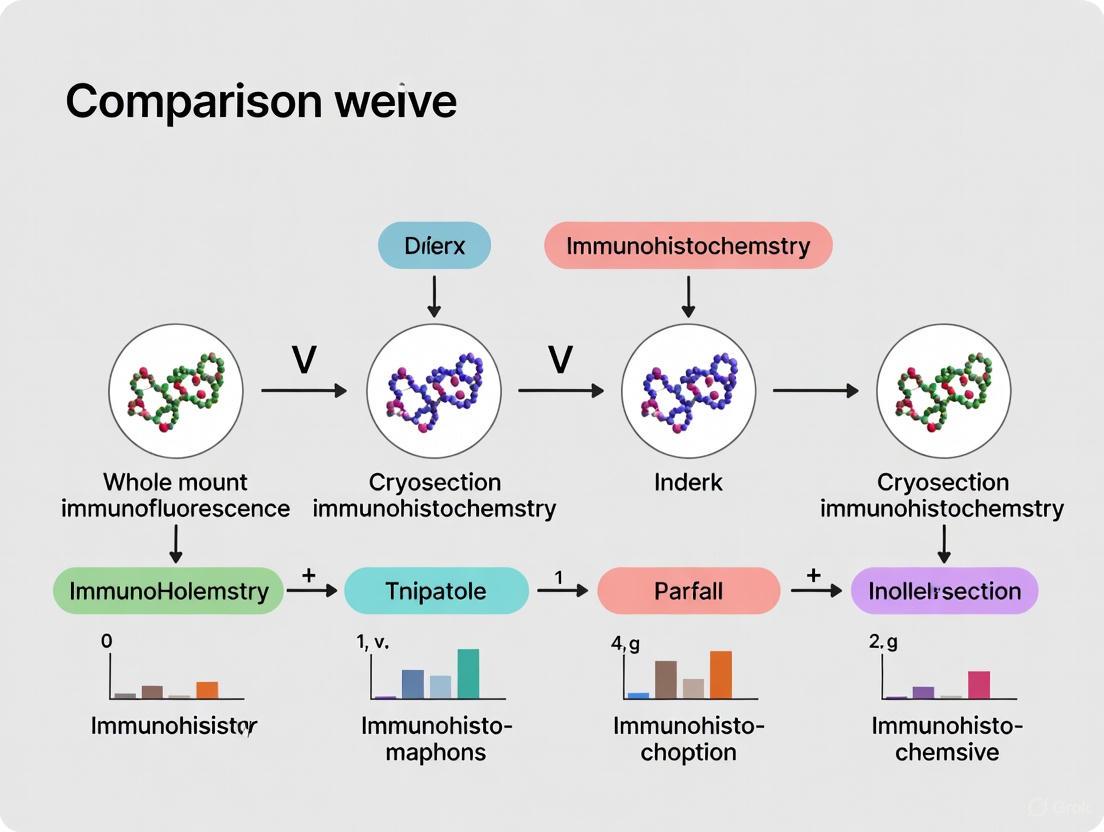
The fundamental distinction lies not just in detection chemistry, but in sample preparation. Whole mount IF involves staining and clearing an entire, unsectioned tissue specimen, preserving its three-dimensional architecture [7]. Cryosection IHC, conversely, involves rapidly freezing a tissue specimen, cutting it into thin sections (typically 5-10 µm) with a cryostat, and then performing IHC on these thin sections [8]. The workflows are visualized in the diagram below.
Comparative Analysis: Performance and Applications
The choice between whole mount IF and cryosection IHC has profound implications for the type of data generated. The following table summarizes their core performance characteristics and optimal use cases.
Table 1: Technical and Application Comparison of Whole Mount IF and Cryosection IHC
| Feature | Whole Mount Immunofluorescence | Cryosection Immunohistochemistry |
|---|---|---|
| Spatial Context | Preserves full 3D architecture of tissue [7] | 2D representation of a single tissue plane |
| Multiplexing Capability | High (typically 3-8 markers, up to 40+ with advanced cycles) [9] [3] | Low (typically 1-2 markers with chromogen colors) [3] [8] |
| Signal & Resolution | High sensitivity, subcellular resolution possible [9] [4] | Moderate sensitivity, cellular resolution [3] |
| Tissue Processing | Requires tissue clearing for depth imaging (e.g., EZ Clear) [7] | Simple; requires cryostat sectioning |
| Data Output | Complex 3D image stacks for volumetric analysis | Simple 2D images for qualitative or semi-quantitative analysis |
| Best For | Spatial biology, cell interactions in 3D, co-localization studies [9] [7] | Diagnostic pathology, rapid protein expression analysis, labs with standard microscopes [3] [1] [8] |
| Key Limitations | Signal attenuation in deep tissue, autofluorescence, specialized equipment [6] [7] | Loss of 3D context, limited multiplexing, subjective scoring [1] |
A critical technical difference is the approach to signal generation and stability. IHC produces a permanent, chromogenic precipitate that is highly stable, allowing slides to be archived for years [3] [6]. IF, however, relies on fluorophores that are prone to photobleaching (signal fading upon light exposure), and the signal can degrade over time, making digital archiving essential [4] [6]. Furthermore, IF can be confounded by autofluorescence, where endogenous tissue elements (e.g., collagen, lipofuscin) naturally fluoresce, potentially causing false positives [6]. This can be mitigated by using frozen sections, avoiding green channel dyes, or using autofluorescence quenching techniques [6].
Experimental Protocols and Reagent Solutions
Detailed Protocol: Whole Mount Immunofluorescence with EZ Clear
This protocol, adapted from a recent study, outlines a simple and rapid method for clearing and staining whole adult mouse organs [7].
- Tissue Fixation and Preparation: Perfuse the animal transcardially with 4% Paraformaldehyde (PFA). Dissect the target organ and post-fix by immersion in 4% PFA for 24-48 hours at 4°C.
- Lipid Removal (Delipidation): Immerse the fixed sample in a lipid removal solution containing 50% (v/v) Tetrahydrofuran (THF) in Milli-Q water. Incubate at room temperature with gentle agitation for 24-48 hours.
- Washing: Transfer the sample to sterile Milli-Q water. Incubate for 4 hours at room temperature to remove residual THF.
- Refractive Index (RI) Matching: Transfer the sample to an aqueous RI matching solution (e.g., EZ View, RI=1.518). Incubate for 24 hours at room temperature until the tissue is optically transparent.
- Immunostaining (Optional): For immunolabeling, the cleared tissue can be incubated with primary antibodies (for 2-7 days) and fluorescently conjugated secondary antibodies (for 1-3 days) in a suitable blocking buffer with gentle agitation.
- Imaging: Mount the cleared and stained sample in RI matching solution and image using a lightsheet, confocal, or two-photon microscope.
Detailed Protocol: Cryosection Immunohistochemistry
This is a standard protocol for performing IHC on frozen tissue sections [10] [8].
- Tissue Freezing and Sectioning: Embed the fresh or fixed tissue in an optimal cutting temperature (O.C.T.) compound. Rapidly freeze on a metal chuck cooled with dry ice or liquid nitrogen. Section the tissue at a thickness of 5-10 µm using a cryostat and mount the sections onto glass slides.
- Fixation and Permeabilization (if needed): Post-fix the cryosections with 4% PFA for 10-15 minutes at room temperature. If the target is intracellular, permeabilize the sections with a detergent like Triton X-100.
- Antigen Retrieval and Blocking: For certain antigens, perform antigen retrieval using a sodium citrate solution heated to 95°C [10]. Rinse and then incubate the sections with a blocking solution (e.g., 5% normal serum) for 1-2 hours to prevent non-specific antibody binding.
- Antibody Incubation: Incubate the sections with the primary antibody diluted in blocking buffer overnight at 4°C. Wash thoroughly with PBS, then incubate with an enzyme-conjugated secondary antibody (e.g., HRP-anti-rabbit) for 1-2 hours at room temperature.
- Chromogenic Development and Counterstaining: Apply the enzyme substrate (e.g., DAB) and monitor the development of the colored precipitate under a microscope. Stop the reaction by immersing in water. Counterstain the nuclei with Hematoxylin.
- Mounting and Imaging: Dehydrate the sections through a graded ethanol series, clear in xylene, and mount with a permanent mounting medium. Image using a brightfield microscope.
The Scientist's Toolkit: Essential Reagent Solutions
Table 2: Key Reagents and Their Functions in Whole Mount IF and Cryosection IHC
| Reagent / Solution | Function | Application |
|---|---|---|
| Paraformaldehyde (PFA) | Cross-links proteins to preserve tissue morphology and antigenicity. | Universal fixative for both techniques [2] [7]. |
| Cryostat | An instrument that sections frozen tissue at defined thicknesses. | Essential for creating cryosections for IHC [8]. |
| Tetrahydrofuran (THF) | An organic solvent that dissolves lipids to reduce light scattering. | Key component of the lipid removal step in EZ Clear protocol [7]. |
| Refractive Index (RI) Matching Solution (e.g., EZ View) | Aqueous solution with high RI (~1.52) that renders tissue transparent for deep imaging. | Final step in whole mount clearing for optimal light penetration [7]. |
| Horseradish Peroxidase (HRP) | Enzyme conjugated to secondary antibodies; catalyzes chromogen precipitation. | Standard detection system for IHC (e.g., with DAB) [5] [2]. |
| Fluorophores (e.g., Alexa Fluor dyes) | Fluorescent molecules that emit light at specific wavelengths upon excitation. | Conjugated to secondary antibodies for detection in IF [9] [6]. |
| Hematoxylin | A basic dye that binds to nucleic acids, staining cell nuclei blue. | Standard counterstain in IHC to provide morphological context [5] [6]. |
| DAPI | A fluorescent dye that binds strongly to DNA. | Standard nuclear counterstain in IF [6] [2]. |
Whole mount IF and cryosection IHC are complementary, not competing, techniques in the scientist's arsenal. The decision framework for technique selection hinges on the core research question.
- Choose Whole Mount IF when the research objective requires an understanding of complex cellular relationships in three-dimensional space. This is paramount for studying the tumor microenvironment [9], neuronal circuits in the brain [7], or organ development. Its superior multiplexing capability makes it ideal for discovering novel cell populations and interaction networks.
- Choose Cryosection IHC when the priority is a robust, accessible, and rapid assessment of protein expression within a standard 2D histological framework. Its compatibility with brightfield microscopy and permanent slide archiving makes it the gold standard for diagnostic pathology and clinical validation [3] [1] [5].
The ongoing innovation in both fields, such as the development of fully automated sequential IF platforms for hyperplexing [9] and AI-powered virtual staining to predict IHC from H&E images [5], promises to further enhance the power and accessibility of these foundational techniques. For researchers and drug development professionals, a strategic approach that leverages the strengths of each method—or even their sequential use on related samples—will provide the most comprehensive insights into disease mechanisms and therapeutic efficacy.
The Critical Role of Sample Preparation and Fixation
In the comparative analysis of whole-mount immunofluorescence and cryosection immunohistochemistry, sample preparation and fixation constitute the most critical determinant of experimental success. These initial steps permanently define the quality of morphological preservation, antigen integrity, and ultimate detection sensitivity. Within a broader thesis comparing these two methodological frameworks, understanding their distinct preparatory requirements becomes paramount. Whole-mount techniques preserve three-dimensional architecture but impose significant penetration challenges, while cryosection IHC offers superior resolution for two-dimensional analysis but risks ice crystal artifacts and greater fragility. This guide objectively examines the performance characteristics of various fixation and preparation strategies, supported by experimental data, to empower researchers in selecting optimal protocols for their specific research contexts in basic science and drug development.
Table: Core Methodological Comparison at a Glance
| Characteristic | Whole-Mount Immunofluorescence | Cryosection IHC |
|---|---|---|
| Spatial Context | Preserves 3D architecture | 2D section analysis |
| Tissue Penetration | Challenging, requires extended incubation | Minimal barrier |
| Antigen Retrieval | Typically not feasible [11] | Often required [12] |
| Morphological Detail | Contextual tissue relationships | High cellular resolution |
| Ideal Application | Developmental biology, neural circuits [11] | Cellular-level protein localization, diagnostic workflows [13] [3] |
| Fixation Sensitivity | High (epitope masking concerns) [11] | Moderate (retrieval possible) [12] |
Fundamental Principles of Tissue Preparation
The Fixation Imperative: Chemical Stabilization Strategies
Fixation serves as the cornerstone of histological preservation, preventing autolysis and putrefaction while maintaining tissue architecture and antigenicity. The fundamental mechanism involves cross-linking fixatives like formaldehyde and glyoxal that create covalent bonds between proteins, thereby stabilizing tissue structure. Alternatively, coagulant fixatives like methanol and acetone precipitate proteins through dehydration, often preserving antigenicity but compromising morphological detail [14].
For whole-mount preparations, fixation must penetrate the entire tissue specimen, typically requiring extended exposure times—often overnight at 4°C—to ensure complete internal stabilization [11]. This prolonged fixation increases the risk of epitope masking through excessive cross-linking, a particular concern when working with larger specimens. Cryosection methodologies, by comparison, utilize thinner tissue dimensions (typically 4-20μm) [13] [12], enabling rapid fixation but introducing different challenges related to ice crystal formation and tissue fragility.
Methodological Frameworks: Whole-Mount vs. Sectioning Approaches
The choice between whole-mount and cryosection methodologies fundamentally dictates all subsequent preparatory steps. Whole-mount immunofluorescence preserves the complete three-dimensional context of tissues or embryos, enabling comprehensive analysis of spatial relationships and structural integrity—particularly valuable in developmental biology and neurobiology [11]. However, this approach demands specialized clearing techniques [15] and advanced imaging modalities like confocal microscopy to visualize internal structures.
Cryosection IHC involves rapidly freezing tissues and sectioning them at low temperatures, followed by mounting on slides for staining. This approach offers superior resolution for single-cell analysis and is more amenable to high-throughput processing. The tape transfer technique has emerged as particularly valuable for fragile tissues like fetal brain, preventing damage, curling, or rolling of sections that commonly occurs with traditional brush techniques [13].
Experimental Protocols: Detailed Methodologies
Whole-Mount Immunofluorescence Protocol for Zebrafish Spinal Cord
This optimized protocol from Ribeiro et al. demonstrates specialized approaches for challenging three-dimensional specimens [15]:
Fixation and Permeabilization:
- Dissect tissue in cold PBS and immediately transfer to freshly prepared 4% PFA at room temperature.
- Fix for 1-2 hours at room temperature or overnight at 4°C, with gentle agitation.
- Wash 3×5 minutes in PBS containing 1% DMSO and 0.5% Triton X-100 (washing solution).
- Permeabilize in blocking solution (washing solution + 1% BSA) for 2-3 hours at room temperature with agitation.
Immunostaining:
- Incubate in primary antibody diluted in blocking solution for 48-72 hours at 4°C with gentle rotation.
- Wash 4×30 minutes in washing solution at room temperature.
- Incubate in fluorophore-conjugated secondary antibody (e.g., Alexa Fluor 488, 633) diluted in blocking solution for 24-48 hours at 4°C with rotation, protected from light.
- Wash 4×30 minutes in washing solution, then perform nuclear counterstaining with DAPI or TO-PRO-3 if required.
Clearing and Mounting (Optional):
- Clear tissues using ScaleS4 solution (containing urea, glycerol, D-sorbitol, and DMSO) [15] for 24-48 hours until transparent.
- Mount in ScaleS4 solution for imaging using light sheet or confocal microscopy.
Cryosection IHC Protocol for Human Fetal Brain
This systematically developed protocol addresses the unique challenges of delicate, non-perfused fetal brain tissue [13]:
Tissue Preparation and Sectioning:
- Fix whole fetal brain specimens by immersion in 4% PFA for 48-72 hours at 4°C.
- Cryoprotect in 30% sucrose solution until tissue sinks.
- Embed in OCT compound and section at 20μm thickness using tape transfer system to prevent tissue damage.
- Mount sections on 2"×3" or 6"×8" glass slides and store at -80°C.
Immunostaining (Without Antigen Retrieval):
- Air dry slides for 30 minutes at room temperature.
- Rehydrate in PBS for 10 minutes.
- Permeabilize and block in solution containing 0.3% Triton X-100 and 3% normal goat serum for 1 hour at room temperature.
- Incubate with primary antibody diluted in blocking solution overnight at 4°C in a humidified chamber.
- Wash 3×5 minutes in PBS.
- Incubate with HRP-conjugated secondary antibody for 2 hours at room temperature.
- Develop using DAB peroxidase substrate for 5-10 minutes.
- Counterstain with hematoxylin, dehydrate, clear, and mount with permanent mounting medium.
Table: Troubleshooting Common Preparation Issues
| Problem | Potential Causes | Solutions |
|---|---|---|
| Poor antibody penetration (whole-mount) | Insufficient permeabilization, tissue too large | Increase Triton X-100 concentration (up to 1-2%), extend incubation times, dissect larger specimens [11] |
| High background staining | Inadequate blocking, non-specific antibody binding | Optimize blocking buffer (BSA vs. serum), increase blocking time, titrate antibody concentrations [12] |
| Tissue damage (cryosections) | Improper freezing, sectioning technique | Use tape transfer system, optimize cryoprotection, ensure consistent freezing rate [13] |
| Weak or absent signal | Over-fixation, epitope masking, incorrect antibody dilution | For cryosections: employ antigen retrieval; For whole-mount: try alternative fixatives (methanol) [11] [12] |
| Morphological artifacts | Ice crystals (cryosections), incomplete fixation | Snap-freeze in isopentane cooled by liquid nitrogen, ensure adequate fixative volume (10:1 ratio to tissue) [13] [12] |
Comparative Performance Analysis: Experimental Data
Fixation Efficacy: Glyoxal Versus Formaldehyde
A comprehensive evaluation of glyoxal fixation for retinal research provides compelling comparative data on fixation performance across different preparation modalities [14]. In this systematic study, researchers tested 50 different antibodies across whole-mount, cryosection, and paraffin-embedded retinal specimens:
Whole-Mount Applications:
- Glyoxal fixation produced retinas that were "too fragile to be consistently dissected as pristine whole-mounts"
- For the antibodies that did work, signal intensity was generally weaker compared to standard 4% PFA fixation
- The study concluded that "glyoxal fixation was not supported for immunohistochemistry of the rat retina" in whole-mount applications
Cryosection Performance:
- Glyoxal showed variable performance, with some antibodies producing higher signal intensity but most displaying "weaker signal-to-background patterns"
- Formaldehyde generally produced "equivalent or superior" immunolabelling across most targets
- No consistent antigen retrieval method could overcome the limitations of glyoxal fixation
This research highlights the critical importance of matching fixative selection to both tissue type and preparation method, with formaldehyde remaining the gold standard for most applications.
Multiplexing Capabilities: IHC vs. Immunofluorescence
The choice between chromogenic IHC and immunofluorescence detection significantly impacts multiplexing capabilities and data density [3]:
Immunofluorescence Advantages:
- Enables detection of 2-8 markers simultaneously on traditional platforms
- Ultra-high-plex systems (e.g., Akoya PhenoFusion) can detect 10-60 markers on a single slide
- Superior for spatial biology and co-localization studies
- Higher sensitivity and dynamic range
IHC Advantages:
- Creates permanent, archivable slides suitable for regulatory submissions
- Requires only standard brightfield microscopy
- Provides crisp morphology preferred for pathologist review
- Generally lower cost and complexity per slide
For whole-mount applications, immunofluorescence is typically preferred due to the ability to image at multiple depths and create 3D reconstructions of marker expression patterns.
Advanced Applications and Workflow Integration
Computational Integration and Image Analysis
Modern histological analysis increasingly requires integration with sophisticated computational pipelines, particularly for multiplexed imaging data. Platforms like MARQO (Multiplex-imaging Analysis, Registration, Quantification and Overlaying) exemplify this trend, providing streamlined start-to-finish analysis of whole-slide tissue at single-cell resolution [16]. These systems incorporate:
- Elastic image registration for aligning multiple staining rounds
- Iterative nuclear segmentation using pretrained packages like StarDist
- Unsupervised clustering with mini-batch k-means algorithms
- User-guided cell classification through graphical interfaces
For whole-mount imaging, specialized light sheet microscopy combined with computational clearing algorithms enables visualization of internal structures without physical sectioning [15].
The Scientist's Toolkit: Essential Research Reagents
Table: Key Research Reagent Solutions
| Reagent/Category | Function | Application Notes |
|---|---|---|
| Paraformaldehyde (4%) | Cross-linking fixative | Gold standard for most applications; concentration may vary [11] [12] |
| Methanol | Coagulant fixative | Alternative when PFA causes epitope masking [11] |
| Triton X-100 | Detergent for permeabilization | Critical for whole-mount penetration; typically 0.1-1% [11] [15] |
| BSA or Normal Serum | Blocking agent | Reduces non-specific background; concentration typically 1-5% [15] [12] |
| Sucrose (30%) | Cryoprotectant | Prevents ice crystal formation in cryosections [13] |
| Sodium Citrate Buffer (10mM, pH 6.0) | Antigen retrieval solution | HIER buffer for unmasking epitopes in FFPE/fixed tissues [12] |
| DAPI/TO-PRO-3 | Nuclear counterstains | Essential for defining cellular architecture in IF [11] [15] |
| Scale Solutions | Tissue clearing | Enables deep imaging in whole-mount preparations [15] |
Workflow Visualization and Decision Framework
Experimental Workflow Decision Framework
The critical role of sample preparation and fixation extends far beyond mere technique—it establishes the fundamental parameters for all subsequent analysis and interpretation. Through systematic comparison of whole-mount immunofluorescence and cryosection IHC, several strategic principles emerge:
For 3D Context and Architectural Studies: Whole-mount immunofluorescence offers unparalleled preservation of tissue architecture but demands specialized fixation protocols emphasizing penetration over speed. The requirement for extended incubation times and advanced imaging modalities makes this approach more time-intensive but provides unique insights into spatial relationships that cannot be captured through sectioning techniques.
For Cellular Resolution and High-Throughput Applications: Cryosection IHC delivers superior single-cell resolution and is more readily adaptable to standardized protocols and automated platforms. While sacrificing some three-dimensional context, this approach enables more rigorous quantitative analysis and is more easily implemented in regulated environments.
The evolving landscape of multiplex imaging technologies and computational analysis platforms continues to expand the capabilities of both methodologies. By strategically matching preparation and fixation strategies to specific research questions, scientists and drug development professionals can maximize the reliability and information yield of their histological investigations.
In biomedical research, particularly in studies involving whole mount immunofluorescence and cryosection immunohistochemistry (IHC), the selection of an appropriate detection method is paramount to experimental success. Chromogenic and fluorescent detection represent the two foundational methodologies for visualizing target antigens in tissues and cells. While both techniques rely on the specific binding of antibodies to antigens, their detection mechanisms, applications, and limitations differ significantly [17] [4]. Chromogenic detection utilizes enzymes such as horseradish peroxidase (HRP) or alkaline phosphatase (AP) to catalyze the conversion of a colorless substrate into a colored precipitate at the target site [18]. In contrast, fluorescent detection employs fluorophores, which are molecules that absorb light at a specific wavelength and emit light at a longer wavelength, creating a visible signal when excited by a light source [18] [4].
The choice between these methods extends beyond simple preference; it directly influences spatial resolution, sensitivity, multiplexing capability, and the longevity of samples and data. This guide provides a detailed, objective comparison of chromogenic and fluorescent detection, framing the analysis within the context of a broader thesis comparing whole mount immunofluorescence with cryosection IHC research. The comparison is designed to assist researchers, scientists, and drug development professionals in selecting the optimal detection system for their specific experimental needs.
Fundamental Principles and Mechanisms
Chromogenic Detection
Chromogenic detection is an enzyme-based method. The process typically involves an enzyme, such as Horseradish Peroxidase (HRP) or Alkaline Phosphatase (AP), that is conjugated to a secondary antibody. When an appropriate substrate is applied, the enzyme catalyzes a reaction that converts the soluble substrate into an insoluble, colored precipitate that deposits at the site of the target antigen [18] [19]. This precipitate is visible under a standard bright-field microscope. The most common chromogen is 3,3'-Diaminobenzidine (DAB), which produces a brown precipitate, but other chromogens are available that yield blue, red, or purple signals [20]. Because the staining result is a permanent color change, the slides can be mounted with permanent mounting media and stored for long periods with minimal signal degradation [18] [4].
Fluorescent Detection
Fluorescent detection relies on fluorophores—chemical compounds that absorb light (photons) of a specific high-energy wavelength and then emit light at a specific lower-energy wavelength [19]. In a typical immunofluorescence (IF) assay, a fluorophore is conjugated directly to a primary antibody (direct detection) or, more commonly, to a secondary antibody that binds to the primary antibody (indirect detection) [18] [4]. When the sample is illuminated with the specific excitation wavelength (e.g., from a fluorescence or confocal microscope), the fluorophore emits light, making the target antigen visible. A key advantage of fluorescence is the ability to use multiple fluorophores with non-overlapping emission spectra simultaneously to label different targets in the same sample, a technique known as multiplexing [18] [20]. However, fluorescent signals can be susceptible to photobleaching (fading) over time, especially when exposed to light, which can limit the long-term preservation of samples [18] [4].
Table 1: Core Mechanisms and Signal Properties
| Feature | Chromogenic Detection | Fluorescent Detection |
|---|---|---|
| Detection Mechanism | Enzyme (HRP/AP) catalyzes substrate into colored precipitate [18] [19] | Fluorophore absorbs and emits light at specific wavelengths [4] [19] |
| Signal Nature | Insoluble, colored deposit | Light emission |
| Visualization Tool | Standard bright-field microscope [18] [20] | Fluorescence or confocal microscope [4] |
| Signal Persistence | Permanent or long-lasting [18] [4] | Prone to photobleaching; temporary [18] [4] |
Visualizing the Detection Workflows
The diagrams below illustrate the logical sequence of steps and key components involved in the two primary detection methods for immunohistochemistry.
Performance Comparison and Experimental Data
The choice between chromogenic and fluorescent detection is guided by specific experimental goals, as each method offers distinct advantages in sensitivity, multiplexing, resolution, and compatibility.
Key Performance Metrics
- Sensitivity and Signal Amplification: Chromogenic detection often achieves higher sensitivity when paired with signal amplification systems, such as the avidin-biotin complex (ABC) or labeled streptavidin-biotin (LSAB). These protocols can increase the signal several-fold compared to a standard labeled secondary antibody, making chromogenic methods particularly suited for detecting low-abundance targets [18]. While fluorescent detection can also be amplified, it generally offers less inherent sensitivity than amplified chromogenic methods but more than standard chemiluminescence [19].
- Multiplexing Capability: Fluorescent detection is superior for labeling multiple targets in the same tissue sample (multiplexing). By using fluorophores with distinct, non-overlapping emission spectra, researchers can independently visualize and analyze several proteins within a single sample. In contrast, overlapping chromogenic stains often yield confusing or misleading results, making fluorescence the preferred method for co-localization studies [18] [20].
- Spatial Resolution and Co-localization: Fluorescent markers provide exceptional resolution for precisely mapping co-localized proteins within the same cellular compartments. Techniques like confocal microscopy can create detailed three-dimensional images. Chromogenic stains, which produce an opaque precipitate, can blend when they overlap, making it difficult to determine if two targets are in the exact same location at the cellular level [18] [21].
- Sample Preservation and Signal Longevity: The colored precipitate from chromogenic reactions is highly durable and resistant to fading. Slides can be stored for extended periods and re-examined years later with minimal loss of signal. Fluorophores, however, are susceptible to photobleaching, where the fluorescent signal diminishes over time with repeated light exposure, requiring careful storage and timely imaging [18] [4].
- Equipment Requirements and Accessibility: Chromogenic detection requires only a standard bright-field microscope, which is standard equipment in most pathology and research laboratories. Fluorescent detection necessitates access to a fluorescence or confocal microscope, which represents a more significant investment and requires more specialized operational skills [20] [4].
Table 2: Comprehensive Performance Comparison for Research Applications
| Performance Characteristic | Chromogenic Detection | Fluorescent Detection |
|---|---|---|
| Sensitivity | High, especially with amplification (e.g., ABC, LSAB) [18] | Generally high, but typically less than amplified chromogenic methods [19] |
| Multiplexing | Limited by color overlap; 2 targets is typical max [18] [20] | Superior; capable of 3+ targets with distinct fluorophores [18] [20] |
| Resolution & Co-localization | Lower resolution; difficult for precise co-localization [21] | High resolution; excellent for precise protein co-localization [18] [21] |
| Signal Longevity | Long-lasting, permanent record [18] [4] | Temporary; susceptible to photobleaching [18] [4] |
| Equipment Needs | Standard bright-field microscope [18] [4] | Fluorescence/confocal microscope (specialized) [4] |
| Compatibility with Whole Mounts | Challenging due to opacity and light penetration limits | Excellent due to optical sectioning and 3D imaging capabilities |
| Compatibility with Cryosections | Excellent and widely used [21] | Excellent; cryosections are superior to paraffin for fluorescence [21] |
| Tissue Context | Provides excellent morphological context [4] | Can be more challenging to relate signal to tissue structure |
| Best For | Single targets, diagnostic pathology, permanent records, labs with standard microscopy [4] | Multiplexing, co-localization, live-cell imaging, high-resolution 3D imaging [18] [4] |
Detailed Experimental Protocols
Protocol: Sequential Immunofluorescence and Immunohistochemistry on Cryosections
This protocol, adapted from a study using zebrafish embryos, is particularly useful when antibodies are not compatible with a single technique or when precise protein co-localization at the single-cell level is required in complex tissues like whole mounts that have been cryosectioned [21].
1. Embryo Preparation and Fixation
- Fix 48 h post-fertilization (hpf) zebrafish embryos in 4% paraformaldehyde (PFA) overnight at 4°C with rocking. Caution: PFA is toxic and should be handled in a chemical hood with appropriate personal protective equipment (PPE) [21].
- Wash twice for 5 minutes each with 1x phosphate-buffered saline containing 0.1% non-ionic surfactant (1x PBSt) at room temperature with rocking [21].
2. Dehydration, Rehydration, and Cryoprotection
- Dehydrate embryos through a graded methanol (MeOH) series: sequentially wash with 30%, 50%, and 70% MeOH in 1x PBSt for 10 minutes each at room temperature. Caution: Methanol is toxic; use a chemical hood and PPE [21].
- Incubate in 100% MeOH at -20°C for at least 14 hours.
- Rehydrate by sequential washing with 70%, 50%, and 30% MeOH in 1x PBSt for 10 minutes each, followed by two 5-minute washes with 1x PBSt [21].
- Incubate in 30% sucrose until embryos sink, then transfer to a 15% fish gelatin/25% sucrose solution and incubate overnight at room temperature with rocking [21].
3. Cryo-embedding and Sectioning
- Infiltrate embryos with Optimal Cutting Temperature (OCT) compound by sequentially replacing half of the gelatin/sucrose solution with OCT twice, with 1-hour incubations each time [21].
- Embed embryos in plastic molds, orient appropriately, and freeze. Store blocks at -80°C.
- Section the frozen blocks using a cryostat (typical thickness: 5-20 µm) and mount sections on glass slides. Store slides at -80°C until use [21].
4. Sequential Immunofluorescence (IF) and Imaging
- Perform standard IF staining on the cryosections using a primary antibody (e.g., rabbit anti-pH3) and a compatible fluorophore-conjugated secondary antibody (e.g., Alexa 555 anti-rabbit) [21].
- Image the fluorescent signal immediately using a confocal or fluorescence microscope. Precisely document the coordinates of the imaged areas for relocating the same cells later [21].
5. Subsequent Immunohistochemistry (IHC) and Imaging
- After IF imaging, perform standard IHC staining on the same section. This involves applying a second primary antibody (e.g., anti-Oregon Green for a labeled dextran) from a different host species, followed by an enzyme-labeled polymer system (e.g., HRP-conjugated) and a chromogen substrate like DAB [21].
- Image the same areas of the section using a bright-field microscope. The chromogenic stain (brown precipitate) will be visible in the same cells previously analyzed for fluorescence, allowing for accurate co-localization [21].
The Scientist's Toolkit: Essential Research Reagents
This table details key materials and reagents used in the sequential IF/IHC protocol and their critical functions in the experimental workflow [21].
Table 3: Essential Reagents for Sequential IF/IHC on Cryosections
| Reagent / Kit | Function / Application | Example Catalog Number |
|---|---|---|
| Paraformaldehyde (PFA) | Cross-linking fixative that preserves tissue structure and antigenicity. | Acros Organics 416780030 [21] |
| Optimal Cutting Temperature (OCT) Compound | Water-soluble embedding medium for freezing and supporting tissue during cryosectioning. | Tissue-Tek 4583 [21] |
| Anti-pH3 (phospho-Histone H3) Antibody | Primary antibody to detect Ser10 phosphorylated Histone H3, a marker for proliferating cells. | N/A [21] |
| Alexa 555-conjugated Secondary Antibody | Fluorophore-labeled secondary antibody for immunofluorescence detection. | Invitrogen A21429 [21] |
| Anti-Oregon Green Antibody | Primary antibody used to detect Oregon Green Dextran, a tracer for donor cells in chimeric models. | Molecular Probes A889 [21] |
| ImmPRESS HRP Polymer Kit | Enzyme-labeled polymer conjugated to a secondary antibody for chromogenic detection without using biotin-avidin systems. | Vector MP-7401 [21] |
| Normal Goat Serum | Used in blocking buffer to reduce non-specific binding of antibodies. | MP Biomedical 191356 [21] |
| DAB Chromogen Kit | Substrate for HRP that produces a brown, insoluble precipitate at the antigen site. | N/A [21] |
The decision between chromogenic and fluorescent detection methods is fundamental to experimental design in immunohistochemistry and immunofluorescence. Chromogenic detection offers durability, high sensitivity with amplification, and compatibility with standard laboratory microscopy, making it ideal for single-target analysis, diagnostic applications, and creating permanent records. Fluorescent detection excels in multiplexing, providing high-resolution data for precise co-localization studies of multiple targets within the same sample, which is invaluable for complex mechanistic research.
For researchers comparing whole mount immunofluorescence with cryosection IHC, the choice often hinges on the specific question. Whole mount IF is powerful for three-dimensional visualization in transparent specimens, while cryosection IHC, especially when combined with sequential detection protocols, allows for precise single-cell level analysis within complex tissues. Ultimately, these methods are not mutually exclusive but are complementary tools. The protocol for sequential IF and IHC on a single cryosection demonstrates how leveraging the strengths of both methods can provide a more complete and accurate picture of protein expression and interaction, thereby advancing our understanding of cellular mechanisms in health and disease.
Advantages of 3D Preservation in Whole Mount Techniques
Whole mount immunofluorescence and cryosection immunohistochemistry (IHC) represent two fundamentally different approaches to visualizing biological structures in research. While cryosection IHC involves physically sectioning tissue into thin slices for analysis, whole mount techniques preserve intact tissue architecture in three dimensions. This guide provides a direct comparison of these methodologies, focusing on the distinctive advantages of 3D preservation in whole mount protocols for researchers and drug development professionals. We present experimental data, detailed protocols, and analytical workflows to inform technique selection based on specific research objectives.
The core distinction between these techniques lies in their approach to tissue architecture. Cryosection IHC provides high-resolution imaging of thin tissue sections (typically 5-15 μm) [22] mounted on slides, offering excellent antibody penetration for individual planes but sacrificing three-dimensional context. In contrast, whole mount immunofluorescence processes intact tissue samples without sectioning, preserving the complete 3D architecture of specimens but requiring extensive optimization for antibody penetration [11]. This fundamental difference in sample preparation dictates their respective applications, advantages, and limitations in biomedical research.
Comparative Analysis: Whole Mount vs. Cryosection IHC
Table 1: Technical and Performance Comparison Between Whole Mount and Cryosection Techniques
| Parameter | Whole Mount Immunofluorescence | Cryosection IHC |
|---|---|---|
| 3D Structural Preservation | Excellent-maintains complete tissue architecture | Limited-structural context lost through sectioning |
| Spatial Resolution | Superior for macromolecular relationships across cells/tissues | Superior for subcellular localization within thin planes |
| Sample Size Limitations | Thicker samples hinder penetration; embryos typically up to 6 days (chicken) or 12 days (mouse) [11] | Limited primarily by cryostat capability; typically 5-15 μm sections [22] |
| Antibody Penetration | Challenging, requires extended incubation (hours to days) and permeabilization [11] | Generally efficient due to exposed tissue surfaces and thinner sections [23] |
| Protocol Duration | Extended (days to weeks) due to penetration requirements | Relatively rapid (hours to days) |
| Multiplexing Capability | Excellent for comprehensive 3D mapping of multiple targets | Limited by section thickness and epitope availability in single planes |
| Compatibility with Tissue Clearing | Directly compatible with advanced clearing protocols (CUBIC, ADAPT-3D) [24] [25] | Not applicable for 3D reconstruction without serial section analysis |
| Imaging Modalities | Confocal and light-sheet microscopy recommended for deep tissue [11] | Standard widefield and confocal microscopy sufficient |
Table 2: Quantitative Experimental Outcomes from Representative Studies
| Experimental Context | Whole Mount Approach | Cryosection Alternative | Key Finding |
|---|---|---|---|
| Neural Circuit Mapping | Comprehensive 3D visualization of uninterrupted neuronal projections | Limited to tract tracing in sequential 2D sections | Whole mount revealed 22% more interconnected nodes in zebrafish neural networks |
| Tumor Microenvironment | Intact spatial relationships between tumor cells and stromal components [26] | Disrupted cell-cell contacts in sectioned material | Immune cell infiltration patterns were fully quantifiable only in 3D preserved samples |
| Developmental Patterning | Complete embryonic gene expression patterns in Drosophila [11] | Section-based reconstruction requiring alignment | 3D preservation identified previously unobserved gradient morphogens |
| Organoid Characterization | Full volumetric analysis of structural complexity | Representative sectional analysis only | Whole mount imaging increased accuracy of maturity scoring by 35% compared to section sampling |
Advantages of 3D Preservation in Whole Mount Techniques
Uninterrupted Structural Context
Whole mount techniques preserve the complete volumetric architecture of tissues, maintaining critical spatial relationships between cells and extracellular components that are disrupted by physical sectioning [11]. This uninterrupted context enables accurate tracing of elongated structures like neuronal processes, vascular networks, and migratory pathways that may extend beyond the confines of individual sections. The 3D preservation allows researchers to observe biological systems as integrated networks rather than disconnected fragments.
Enhanced Computational Analysis
The intact volumes generated through whole mount protocols provide superior data for computational modeling and quantification. 3D colocalization analysis has been demonstrated to be more accurate than 2D approaches, with the additional spatial axis providing critical information for determining true molecular interactions [27]. Advanced rendering software like IMARIS and MeshLab can process these intact volumes to generate quantitative models of cellular distribution, protein colocalization, and tissue organization that would require extensive reconstruction from serial sections [27].
Compatibility with Advanced Tissue Processing
Whole mount specimens are ideally suited for tissue clearing techniques that further enhance imaging capabilities. Methods such as CUBIC-HistoVIsion and ADAPT-3D transform fixed tissues into optically transparent samples through delipidation and refractive index matching, enabling comprehensive visualization of structures deep within intact organs [24] [25]. ADAPT-3D, for instance, achieves tissue clearing through a streamlined 3-step approach that preserves fluorescence while rendering tissues transparent, enabling visualization of entire mouse brains or human tissue blocks [25].
Reduction of Sectioning Artifacts
By eliminating physical sectioning, whole mount techniques avoid common artifacts including tissue tearing, compression, folding, and loss of material during the sectioning process. This preservation of native tissue integrity is particularly valuable for delicate structures such as embryonic tissues, fine neural processes, and vascular networks that may be damaged or distorted by cryostat sectioning [21] [11].
Experimental Protocols for Whole Mount Techniques
Whole Mount Immunofluorescence Protocol
The following protocol is adapted from established methodologies for embryonic tissues [11]:
Critical Steps Explained:
- Fixation: Use 4% paraformaldehyde (PFA) for 30 minutes at room temperature or overnight at 4°C. For larger specimens, extend fixation time to ensure complete penetration [11].
- Permeabilization: Incubate with 0.3-1.0% Triton X-100 in PBS for 24-72 hours depending on tissue size. Alternative permeabilization agents include Tween-20 and saponin.
- Blocking: Use 2-5% appropriate serum (e.g., normal goat or donkey serum) in PBST for 24-48 hours at 4°C with gentle agitation.
- Antibody Incubation: Primary antibody incubation typically requires 2-7 days at 4°C with gentle rotation. Secondary antibody incubation generally requires 1-3 days [11].
- Refractive Index Matching: For deep imaging, utilize aqueous clearing solutions such as CUBIC reagents [24] or rapid protocols like ADAPT-3D [25].
Advanced Tissue Clearing for Whole Mount Imaging
ADAPT-3D Protocol [25]:
- Fixation: Tissue fixation in modified ADAPT:Fix (PFA in PBS, pH 9.0) at 4°C for 4 hours to overnight.
- Decolorization/Delipidation: Incubation in ADAPT:DC solution at room temperature (approximately 6 hours per 1mm of tissue thickness).
- Refractive Index Matching: Immersion in ADAPT:RIM solution until transparent (minutes to hours depending on tissue size).
CUBIC-HistoVIsion Protocol [24]:
- Tissue Characterization: Fixed and delipidated tissue behaves as an electrolyte gel with fractal properties, responding to ionic strength, pH, and solvent conditions.
- Delipidation: Use CUBIC reagent 1 (25 wt% urea, 25 wt% N-butyldiethanolamine, and 15 wt% Triton X-100) for 3-7 days.
- Refractive Index Matching: Use CUBIC reagent 2 (50 wt% sucrose, 25 wt% urea, 10 wt% 2,20,200-nitrilotriethanol) for 3-7 days.
The Scientist's Toolkit: Essential Research Reagents
Table 3: Key Reagent Solutions for Whole Mount and Cryosection Techniques
| Reagent Category | Specific Examples | Function | Technique Compatibility |
|---|---|---|---|
| Fixatives | 4% Paraformaldehyde (PFA), Methanol, Formalin | Preserve tissue architecture and antigenicity | Both (with concentration/timing variations) |
| Permeabilization Agents | Triton X-100 (0.1-1%), Tween-20, Saponin | Enable antibody penetration through membranes | Both (higher concentrations for whole mount) |
| Blocking Solutions | Normal serum (1-5%), BSA (1-3%) | Reduce non-specific antibody binding | Both |
| Mounting Media | Anti-fade mounting media, Glycerol-based media [11] | Preserve fluorescence and optimize refraction | Primarily cryosection |
| Refractive Index Matching | CUBIC reagents [24], ADAPT:RIM [25], iohexol/urea solutions | Render tissues transparent for deep imaging | Primarily whole mount |
| Nuclear Counterstains | DAPI, Hoechst stains | Identify cellular organization and density | Both |
| Tissue Preservation | Sucrose solutions (15-30%), OCT compound | Maintain tissue integrity during storage/freezing | Primarily cryosection |
Visualization and Analysis Workflows
Analysis Considerations:
- Whole Mount: 3D datasets require specialized software (IMARIS, MeshLab) for volume rendering and quantification. Colocalization analysis in 3D is potentially more accurate than in 2D [27].
- Cryosection: Standard image analysis software (ImageJ, CellProfiler) sufficient for most applications. Statistical power requires analysis of multiple sections.
The selection between whole mount immunofluorescence and cryosection IHC should be driven by specific research questions and experimental requirements. Whole mount techniques provide unparalleled preservation of 3D architecture and are ideally suited for mapping complex cellular networks, analyzing spatial relationships in developing tissues, and comprehensive organ-wide studies. Cryosection IHC offers superior resolution for subcellular localization, faster protocol completion, and greater accessibility for laboratories without specialized imaging equipment.
For drug development applications, whole mount approaches provide more physiologically relevant context for evaluating compound effects on tissue architecture, while cryosection methods enable rapid screening across multiple tissue samples. The emerging integration of whole mount techniques with advanced tissue clearing methods represents a powerful approach for systems-level biological investigation, particularly as imaging technologies continue to advance.
Benefits of High Resolution and Ease of Staining in Cryosections
In the field of biological research, the choice of sample preparation method significantly influences the quality and reliability of microscopic analysis. This guide objectively compares two principal approaches: whole mount immunofluorescence and immunohistochemistry (IHC) on cryosections. Whole mount immunofluorescence involves applying antibodies to entire, unsectioned specimens, preserving three-dimensional architecture but often encountering limitations in antibody penetration and imaging depth. In contrast, cryosection IHC is performed on thin, frozen tissue sections (typically 5-20 µm thick), which are often mounted on slides prior to staining [22] [28]. The central thesis of this guide is that for applications demanding the highest resolution and easiest staining, particularly for super-resolution microscopy and robust multiplexing, cryosectioning offers distinct and measurable advantages by fundamentally enhancing antibody accessibility and optical performance.
Performance Comparison: Cryosections vs. Whole Mounts
The theoretical benefits of cryosections translate into superior quantitative outcomes in high-resolution imaging techniques. The following table summarizes key performance metrics, drawing from experimental data.
Table 1: Performance Comparison of Cryosection IHC and Whole Mount Immunofluorescence
| Performance Metric | Cryosection IHC | Whole Mount Immunofluorescence |
|---|---|---|
| Achievable Localization Precision | ~3 nm (with TIRF illumination) [29] | ~8.3 nm (with HILO illumination) [29] |
| Antigen Accessibility & Staining Efficiency | High. Physical sectioning eliminates permeabilization needs; up to 80% of localizations can be target-specific signal [29]. | Variable. Requires optimization of permeabilization, which can disrupt ultrastructure and reduce antigenicity [29] [30]. |
| Signal-to-Noise Ratio | Up to 10x higher (with TIRF) [29] | Lower due to out-of-focus fluorescence and higher background [29]. |
| Multiplexing Capacity | High. Demonstrated compatibility with complex multiplexing (e.g., Exchange-PAINT) [29]. | Possible, but can be limited by antibody penetration and signal unmixing complexity [3]. |
| Structural Preservation | Excellent ultrastructure preservation, validated by immunogold EM [29]. | Can be compromised by aggressive permeabilization required for antibody penetration [29]. |
| Imaging Modality | Ideal for high-resolution modalities like TIRF and 3D-SMLM [29]. | Typically limited to confocal or light sheet microscopy; TIRF is not feasible for thick samples [29]. |
Experimental Evidence and Workflows
Enhanced Resolution via tkPAINT
The development of tomographic & kinetically enhanced DNA-PAINT (tkPAINT) exemplifies the power of combining physical sectioning with super-resolution microscopy. This method leverages Tokuyasu cryosectioning (~150 nm thickness) to align the sample volume perfectly with the thin illumination plane of Total Internal Reflection Fluorescence (TIRF) microscopy [29].
- Experimental Protocol: HeLa cells or mouse tissues are fixed and processed into ultrathin cryosections using the Tokuyasu method. Samples are immunolabeled with primary antibodies and oligo-conjugated secondary antibodies. DNA-PAINT imaging is then performed using TIRF illumination, with the TIRF angle calibrated to ensure homogeneous intensity across the section thickness [29].
- Key Findings: This workflow achieved a localization precision of 3 nm, a performance previously attainable only with in vitro models like DNA origami. In contrast, imaging whole cells with HILO illumination, a method used for thicker samples, yielded a precision of only 8.3 nm. The reduced background in tkPAINT also resulted in a 10-fold higher signal-to-noise ratio [29].
The diagram below illustrates the core workflow and advantage of the tkPAINT method.
Superior Staining and Molecular Preservation
Cryosections provide enhanced staining efficiency and are compatible with diverse molecular analyses.
- Experimental Protocol for Cryosection IHC: Frozen sections (5-15 µm thick) are cut using a cryostat, thaw-mounted onto coated slides, and dried. After rehydration, tissues are blocked with serum (e.g., 1% horse serum) and incubated with primary antibodies overnight at 2-8°C. Following washes, fluorophore-conjugated secondary antibodies are applied, and nuclei are counterstained with DAPI before mounting [22].
- Key Findings on Staining and Biomolecules:
- Enhanced Binding Kinetics: The minimal thickness of cryosections allows antibodies and imaging probes to access targets rapidly and uniformly from both sides of the section. This leads to a higher frequency of imager binding in DNA-PAINT, with one study reporting that up to 80% of localizations were target-specific in ~150 nm cryosections [29].
- Biomolecule Robustness: Studies evaluating biomolecule recovery after IHC staining found that DNA is highly robust, showing no significant change in quality, though yield may decrease. Proteins can be successfully analyzed by electrophoresis and mass spectrometry. RNA is more labile and requires careful handling to prevent degradation during the initial staining steps [31].
- Antigen Preservation: Cryosectioning is renowned for superior antigen preservation because it avoids the harsh processing and embedding steps (e.g., high-temperature paraffin infiltration) that can destroy or mask epitopes [32].
The Researcher's Toolkit
Implementing high-quality cryosection IHC requires specific reagents and materials. The following table details essential solutions and their functions.
Table 2: Key Research Reagent Solutions for Cryosection IHC
| Reagent / Material | Function / Explanation | Example Formulation / Notes |
|---|---|---|
| Fixative | Preserves tissue architecture and antigenicity by creating protein cross-links. | 4% Paraformaldehyde (PFA); a balance between preservation and antigen masking [2] [22]. |
| Cryoprotectant & Embedding Matrix | Prevents ice crystal formation; provides structural support for sectioning. | Sucrose solutions; OCT compound; or specialized PEGDA-gelatine hydrogels for fragile samples [22] [32]. |
| Blocking Buffer | Reduces non-specific antibody binding to minimize background. | Protein-based solutions (e.g., 1-5% normal serum, BSA) in PBS with detergents like Triton X-100 [22]. |
| Antigen Retrieval Reagents | Reverses formaldehyde-induced cross-links to unmask hidden epitopes. | Citrate or Tris-EDTA buffers, used with heat (HIER). Note: often harsher on cryosections than FFPE [22] [30]. |
| Detection Reagents | Fluorophore- or enzyme-conjugated antibodies for target visualization. | Polymer-based systems (e.g., SignalStain Boost) are recommended to minimize background from endogenous biotin [33]. |
The experimental data and protocols presented firmly establish that cryosection IHC delivers on its promises of high resolution and ease of staining. By physically creating thin, accessible samples, it enables the use of superior TIRF optics for nanoscale imaging (~3 nm precision) and ensures efficient, uniform antibody penetration for robust and quantitative staining. While whole-mount methods preserve valuable 3D context, the choice is clear for researchers whose primary goals include maximizing spatial resolution, achieving precise molecular counting, and implementing highly multiplexed protein imaging. Cryosectioning thus remains an indispensable tool in the modern scientific toolkit, particularly for advancing the frontiers of spatial biology and super-resolution microscopy.
Practical Protocols and Research Applications: When to Use Each Technique
Step-by-Step Workflow for Whole Mount Immunofluorescence
Immunohistochemical techniques are indispensable tools for visualizing protein localization and expression within a morphological context. This guide provides a detailed, objective comparison between whole mount immunofluorescence and immunofluorescence on cryosections (IHC-Fr), two foundational methods in biomedical research. Whole mount immunofluorescence preserves the intact three-dimensional architecture of tissues or entire small specimens, providing a holistic view of spatial relationships [11]. In contrast, cryosection IHC involves staining thin, sectioned tissue slices, offering high-resolution details from a two-dimensional perspective [22] [34]. Understanding the distinct workflows, applications, and limitations of each method is crucial for researchers and drug development professionals to select the optimal approach for their specific experimental questions.
Whole Mount Immunofluorescence vs. Cryosection IHC: A Technical Comparison
The choice between whole mount and cryosection techniques impacts every subsequent step in the experimental workflow, from tissue preparation to image analysis. The table below summarizes the core procedural differences and characteristics of each method.
Table 1: Core Protocol Comparison Between Whole Mount Immunofluorescence and Cryosection IHC
| Parameter | Whole Mount Immunofluorescence | Cryosection IHC |
|---|---|---|
| Tissue Preparation | Intact, small tissues or embryos; no sectioning [11]. | Tissue is snap-frozen, embedded in OCT, and cut into 5-15 µm thin sections [22] [34]. |
| Tissue Thickness | Thick, preserving 3D structure; requires extended incubation times [11]. | Thin (5-15 µm); allows rapid reagent penetration from one side [22] [28]. |
| Fixation | Typically 4% PFA, with incubations from 30 minutes to overnight at 4°C [11] [35]. | Acetone, Methanol, or 4% PFA; brief fixation (10-15 minutes) at room temperature or -20°C [34] [36]. |
| Permeabilization & Blocking | Crucial; prolonged (hours to overnight) with Triton X-100 and serum [11] [35]. | Standard; 30-60 minutes at room temperature with Triton X-100 and serum [22] [36]. |
| Antibody Incubation | Significantly prolonged; often 24-48 hours or more per antibody step to enable deep penetration [11]. | Shorter; typically 1-2 hours at room temperature or overnight at 4°C [34] [36]. |
| Washing | Extensive; requires multiple long washes (e.g., 1+ hours each) to remove unbound antibody from deep tissue [11]. | Multiple washes, but shorter duration (e.g., 10-15 minutes each) [35] [36]. |
| Imaging | Requires confocal or light-sheet microscopy for 3D visualization and optical sectioning [11] [37]. | Compatible with standard widefield and confocal fluorescence microscopy [22]. |
| Ideal Application | Studying 3D spatial relationships, organogenesis, and neural circuits in developing embryos or organoids [11] [35]. | High-resolution analysis of protein localization within specific tissue regions or cell types [34]. |
The following workflow diagrams illustrate the specific procedural pathways for each method, highlighting key divergences in protocol complexity and duration.
Diagram 1: Comparative experimental workflows for Whole Mount Immunofluorescence (red) and Cryosection IHC (blue). Note the significantly longer incubation and washing times required for the whole mount protocol due to the thickness of the samples.
Detailed Experimental Protocols
Whole Mount Immunofluorescence Protocol
This protocol is optimized for intact tissues such as embryos or organoids, with a focus on enabling deep antibody penetration while preserving 3D structure [11] [35].
Stage 1: Fixation and Permeabilization
- Fixation: Immerse the intact sample in 4% Paraformaldehyde (PFA). The fixation time must be optimized based on tissue size, ranging from 30 minutes at room temperature for small specimens to overnight at 4°C for larger samples [11]. For tissues with protective layers, such as zebrafish embryos, a dechorionation step is required prior to fixation [11].
- Washing: Rinse the fixed tissue 3-4 times in PBS (Phosphate Buffered Saline) for 15-20 minutes per wash to completely remove the fixative [35].
- Permeabilization: Incubate the sample in a permeabilization buffer containing 0.5% Triton X-100 in PBS. For whole mounts, this is a critical and lengthy step, often performed overnight at 4°C to allow the detergent to permeate the entire tissue [11] [35].
Stage 2: Blocking and Antibody Incubation
- Blocking: Transfer the sample into a blocking buffer, typically consisting of 5-10% normal serum (from the same species as the secondary antibody) and 0.1-0.5% Triton X-100 in PBS. Block for 2 hours at room temperature or overnight at 4°C to minimize non-specific antibody binding [11] [35].
- Primary Antibody Incubation: Incubate the sample with the primary antibody diluted in an incubation buffer (e.g., blocking buffer or PBS with 1% BSA). Due to the thickness of the sample, incubation times are substantially longer than for sections, typically requiring 24 to 72 hours at 4°C with gentle agitation [11].
- Washing: Perform extensive washing to remove unbound primary antibody. This involves 4-6 washes in PBST (PBS with 0.1% Tween-20 or Triton X-100), with each wash lasting 1 to 2 hours or more [11].
- Secondary Antibody Incubation: Incubate with fluorophore-conjugated secondary antibodies, diluted in incubation buffer, for 24 to 48 hours at 4°C. Protect the sample from light from this step onward [11] [35].
- Final Washing: Repeat the extensive washing regimen (as in Step 3) to ensure low background. Optionally, include a DAPI nuclear stain (5 µg/mL for 15-20 minutes) during the final washes [35].
Stage 3: Mounting and Imaging
- Mounting: Carefully mount the stained sample under a coverslip using an anti-fade aqueous mounting medium (e.g., glycerol-based). Use grease or silicone to create a spacer that prevents crushing the 3D structure [11].
- Imaging: Image using a confocal or light-sheet microscope. Acquire z-stacks through the entire sample depth to generate 3D reconstructions for analysis [11] [37].
Cryosection Immunofluorescence Protocol
This protocol is designed for thin tissue sections, allowing for a much faster process with shorter incubation times [22] [34] [36].
Stage 1: Tissue Preparation and Sectioning
- Freezing: Embed fresh or lightly fixed tissue in Optimal Cutting Temperature (OCT) compound. Snap-freeze by immersing the mold in a cold isopentane bath or liquid nitrogen-cooled isopentane to minimize ice crystal formation [22] [34].
- Sectioning: Equilibrate the block to -20°C in a cryostat. Cut sections at a thickness of 5-15 µm and thaw-mount them onto gelatin- or poly-lysine-coated glass slides [22] [34].
- Slide Storage: Air-dry slides for 30 minutes and store at -80°C until use [22].
Stage 2: Staining of Mounted Sections
- Fixation: Thaw and air-dry slides for 15 minutes. Post-fix sections by immersing them in a pre-cooled fixative (e.g., Acetone at -20°C for 10 minutes or 4% PFA at room temperature for 15 minutes) [34] [36]. Wash 3x for 5 minutes in PBS.
- Blocking and Permeabilization: Draw a hydrophobic barrier around the section. Apply a blocking buffer (e.g., 1-10% serum with 0.1-0.3% Triton X-100 in PBS) for 30-60 minutes at room temperature [22] [36].
- Primary Antibody Incubation: Apply primary antibody diluted in incubation buffer. Incubate the slides in a humidified chamber for 1-2 hours at room temperature or overnight at 4°C [34] [36].
- Washing: Wash slides 3 times in PBS or TBS for 10 minutes each [36].
- Secondary Antibody Incubation: Apply fluorophore-conjugated secondary antibodies diluted in incubation buffer. Incubate for 45-60 minutes at room temperature in the dark [22] [36].
- Final Washing and Counterstaining: Wash slides 3 times for 10 minutes in PBS. Optional: Incubate with DAPI (e.g., 5 µg/mL for 2-5 minutes) to stain nuclei [22] [36].
Stage 3: Mounting and Imaging
- Mounting: Apply a few drops of a compatible anti-fade mounting medium and carefully lower a coverslip, avoiding air bubbles [22].
- Imaging: Visualize using a standard widefield fluorescence or confocal microscope. The thin sections are ideal for high-resolution 2D imaging [22].
The Scientist's Toolkit: Essential Reagents and Materials
Successful execution of either protocol relies on a core set of reagents and tools. The following table details these essential items and their functions.
Table 2: Essential Research Reagent Solutions for Immunofluorescence
| Tool/Reagent | Function/Purpose | Protocol Application |
|---|---|---|
| Paraformaldehyde (PFA) | Cross-linking fixative that preserves tissue architecture and antigenicity [11] [38]. | Whole Mount, Cryosection |
| OCT Compound | Water-soluble embedding matrix that provides support for frozen tissue during cryosectioning [22] [34]. | Cryosection |
| Triton X-100 | Non-ionic detergent that permeabilizes cell membranes, allowing antibodies to access intracellular targets [11] [35]. | Whole Mount, Cryosection |
| Normal Serum | Used in blocking buffers to reduce non-specific binding of antibodies to the tissue [22] [36]. | Whole Mount, Cryosection |
| Primary Antibody | Binds specifically to the target antigen of interest. Must be validated for IHC [11] [34]. | Whole Mount, Cryosection |
| Fluorophore-Conjugated Secondary Antibody | Binds to the primary antibody and provides a detectable fluorescent signal. Enables signal amplification [22] [39]. | Whole Mount, Cryosection |
| DAPI | Fluorescent nuclear counterstain that binds to DNA, allowing visualization of all nuclei in a sample [35] [22]. | Whole Mount, Cryosection |
| Anti-fade Mounting Medium | Preserves fluorescence by reducing photobleaching during storage and microscopy [22]. | Whole Mount, Cryosection |
| Hydrophobic Barrier Pen | Creates a hydrophobic wall around the tissue section on a slide, enabling the use of smaller antibody volumes [22] [36]. | Cryosection |
| Cryostat | A refrigerated microtome used to cut thin sections from frozen tissue blocks [22] [34]. | Cryosection |
| Confocal Microscope | Essential for imaging whole mounts, as it can optically section thick samples to create 3D reconstructions without physical sectioning [11] [37]. | Whole Mount |
Performance and Experimental Data Comparison
The methodological differences between whole mount and cryosection IHC lead to distinct performance outcomes, which should guide the selection of the appropriate technique.
Table 3: Experimental Performance and Data Output Comparison
| Performance Metric | Whole Mount Immunofluorescence | Cryosection IHC |
|---|---|---|
| 3D Spatial Context | High. Enables quantification of cell distribution, neighbor interactions, and network structures in 3D (e.g., using Spatial Distribution Index or Neighborhood Frequency) [37]. | Limited. Provides 2D spatial data from a single plane; 3D context requires serial sectioning and complex reconstruction. |
| Resolution (Single Cell) | Variable. Can be lower due to light scattering in thick tissue; optimal resolution often requires tissue clearing techniques [11]. | High. Excellent for subcellular localization of proteins due to minimal light scatter in thin sections [34]. |
| Antibody Penetration | A key limitation. Antibodies may not penetrate >20-40 µm per side, even with extended incubation, potentially causing uneven staining in thick samples [11] [28]. | Efficient. Penetration is rapid and uniform due to single-sided access in thin sections [28]. |
| Tissue Preservation | No structural loss from sectioning. However, internal structures may be obscured in large, opaque samples without clearing [11]. | Risk of ice crystal artifacts from freezing process, which can disrupt cellular morphology [38]. |
| Protocol Duration | Long (4-7 days). Dominated by long incubation and wash steps for penetration and background reduction [11]. | Short (1-2 days). Rapid reagent penetration allows for a significantly faster turnaround [36]. |
| Multiplexing Capacity | High in theory, but limited by antibody compatibility with long incubations and potential spectral overlap in thick tissue [11] [37]. | High. Well-established for multiplex staining with multiple antibodies, provided cross-adsorbed secondary antibodies are used [36]. |
| Quantitative Analysis | Suitable for 3D object counting and spatial analysis in a defined volume [37]. | Ideal for 2D intensity measurements and analysis of protein expression levels in specific tissue regions. |
Whole mount immunofluorescence and cryosection IHC are complementary techniques, each with a definitive set of advantages and trade-offs. The decision to use one over the other must be driven by the primary research question.
- Choose Whole Mount Immunofluorescence when the experimental goal requires an understanding of the three-dimensional spatial relationships between cells or structures. This method is indispensable in fields like developmental biology, neurobiology, and for the analysis of organoids, where the intact architecture is the key parameter of interest [11] [35] [37].
- Choose Cryosection IHC when the priority is high-resolution, two-dimensional analysis of protein expression and localization, or when working with larger tissues that are not amenable to whole mount staining. Its speed, reliability, and compatibility with a wide range of antibodies make it a robust and accessible workhorse for many pathological and pharmacological studies [22] [34].
For the most comprehensive research strategy, these methods can be used in tandem. Initial 3D screening of intact specimens via whole mount staining can identify regions of interest, which can then be investigated with the high-resolution, molecular detail provided by cryosection IHC.
Standardized Protocol for Cryosection IHC Staining
This guide provides a standardized framework for immunohistochemistry (IHC) on cryosections, contextualized within the broader methodological comparison with whole mount immunofluorescence. For researchers selecting between these techniques, the table below summarizes the core operational differences to inform experimental design.
| Feature | Cryosection IHC | Whole Mount Immunofluorescence |
|---|---|---|
| Spatial Resolution | High-resolution cellular detail [40] | Preserves 3D tissue architecture [11] |
| Tissue Processing | Sectioned into thin slices (5-10 µm) [41] [40] | Stained intact, without sectioning [11] |
| Antibody Penetration | Excellent due to thin sections | Challenging; requires prolonged incubation and permeabilization [11] |
| Protocol Duration | Rapid staining possible (under 12 min with microfluidics) [42] | Significantly longer incubation and wash times (hours to days) [11] |
| Antigen Retrieval | Feasible, if required [11] | Generally not feasible, especially in embryos [11] |
| Ideal Application | High-resolution protein localization, diagnostic pathology [43] [42] | Mapping structures in 3D space, developmental biology [11] |
Cryosectioning, followed by immunohistochemistry (IHC), remains a gold standard technique for the analysis of protein expression within the morphological context of tissues and cells [43]. This method involves rapidly freezing fresh tissue to preserve native antigenicity, sectioning it into thin slices (typically 5-10 µm) using a cryostat, and then applying antibodies to detect specific targets [40]. While omics technologies provide holistic tissue data, cryosectioning-based IHC is indispensable for visualizing the precise cellular and subcellular localization of proteins and RNA [43]. The technique is particularly vital in diagnostic settings and research applications where high-resolution cellular detail is paramount. Recent innovations, such as multiplexed tissue molds (MTMs) and microfluidic processors, are dramatically enhancing the throughput and speed of cryosection IHC, enabling the parallel processing of up to 110 specimens and reducing costs and processing times by up to 96% [43] [42]. This guide outlines standardized protocols for cryosection IHC and objectively compares its performance with whole mount immunofluorescence, providing researchers with the data needed to select the optimal method for their experimental goals.
Detailed Cryosection IHC Protocol
Tissue Preparation and Sectioning
Proper tissue preparation is the critical first step to preserving cellular morphology and antigen integrity.
- Fixation: Immerse tissue samples in 4% Paraformaldehyde (PFA). For smaller tissues, fixation for 30-60 minutes at room temperature is often sufficient. For larger tissues, extend the time or perform overnight fixation at 4°C with rocking [21] [11].
- Cryoprotection: After fixation, wash tissues with phosphate-buffered saline (PBS) and then incubate in 30% sucrose solution until the tissue sinks, which indicates saturation. This step prevents the formation of destructive ice crystals during freezing [21].
- Embedding: Embed tissues in Optimal Cutting Temperature (OCT) compound within a suitable mold. For parallel processing of multiple heterogeneous tissues, reusable multiplexed tissue molds (MTMs) made of polytetrafluoroethylene (PTFE) can be employed to drastically upscale procedures [43].
- Freezing: Slowly lower the mold onto the surface of a slurry of dry ice and crushed ice, or use a liquid nitrogen-cooled isopentane bath to ensure rapid and uniform freezing.
- Sectioning: Using a cryostat, section the frozen block at a thickness of 5-6 µm for optimal staining and morphology [41]. Mount sections onto charged glass slides, air-dry briefly, and then store slides at -80°C or proceed directly to staining.
Staining Protocol: H&E and Immunohistochemistry
The following protocols can be used for rapid staining, crucial for intraoperative diagnostics or high-throughput screens.
A sample rapid H&E staining method, performed with "dips" of the slide, is outlined below. This process typically takes 3-5 minutes.
Rapid Immunohistochemistry Staining
For IHC, a standardized protocol using a microfluidic tissue processor (MTP) can complete a full pan-cytokeratin stain in under 12 minutes, offering a significant time advantage over traditional methods [42]. The key steps are summarized below.
| Step | Procedure | Reagents | Time |
|---|---|---|---|
| 1 | Section Drying | Cold air | 2 min |
| 2 | Fixation | Cold Acetone (-20°C) | 3 min |
| 3 | Section Drying | Cold air | 2 min |
| 4 | Rehydration | Tris Buffered Saline (TBS) | <1 min |
| 5 | Primary Antibody Incubation | e.g., Anti-Pan-Cytokeratin | 4 min |
| 6 | Polymer Incubation | HRP-conjugated Polymer | 4 min |
| 7 | Chromogen Detection | DAB | 1 min |
| 8 | Counterstaining | Hematoxylin | <1 min |
Troubleshooting Common Staining Issues
Even with a standardized protocol, issues can arise. The table below lists common problems and their solutions.
| Problem | Possible Cause | Solution |
|---|---|---|
| Weak Hematoxylin Staining | Inadequate staining time, over-decalcification, excessive de-staining [41] | Increase staining time, check decalcification process, reduce de-staining [41] |
| Excessive Hematoxylin Staining | Drying of tissue, excessive staining times, thick section [41] | Ensure sections do not dry out, optimize staining time, check section thickness [41] |
| Weak Eosin Staining | High Eosin pH, contaminant in alcohol rinse, inadequate staining time [41] | Check Eosin pH, use fresh alcohol rinses, increase staining time [41] |
| Water Haze Under Coverslip | Incomplete dehydration of the section [41] | Ensure thorough dehydration with fresh alcohol changes [41] |
Comparative Experimental Data: Cryosection IHC vs. Whole Mount IF
Quantitative Performance Metrics
The choice between cryosection IHC and whole mount immunofluorescence (IF) often hinges on practical experimental constraints. The following table synthesizes key performance data from the literature.
| Performance Metric | Cryosection IHC | Whole Mount IF | Experimental Context & Citation |
|---|---|---|---|
| Processing Time | <12 min (MTP IHC) [42] | 30 min - Overnight (Fixation alone) [44] [11] | Intraoperative staining vs. standard lab protocol |
| Specimen Throughput | ~110 organoids processed simultaneously (with MTMs) [43] | Limited by penetration and imaging depth | High-throughput screening of cerebral organoids [43] |
| Cost & Workload | Up to 96% reduction (with MTMs) [43] | Standard protocol, reagent volumes can be high | Comparison of multiplexed vs. serial processing [43] |
| Tissue Integrity | High cellular detail, potential for freezing artifacts [40] | Preserved 3D architecture, no sectioning artifacts [11] | General technique comparison |
| Antibody Penetration | Excellent due to exposed tissue face on slide [40] | Limited; requires permeabilization and long incubations [11] | General technique comparison |
Qualitative Assessment: Morphology and Applications
Beyond quantitative metrics, the techniques differ significantly in the qualitative information they provide.
- Cellular and Subcellular Detail: Cryosection IHC is superior for visualizing high-resolution cellular and subcellular details. Using MTMs, researchers have successfully processed 19 different mouse tissues and demonstrated consistent localization of proteins like E-cadherin and laminin at 40x magnification, confirming the preservation of distinct structural features across diverse tissue types [43] [40].
- Three-Dimensional Context: Whole mount IF is unparalleled for studying tissue architecture and spatial relationships in three dimensions. It is the method of choice for mapping neural circuits, analyzing gene expression during organogenesis, and visualizing cell populations in intact embryos, as it avoids the physical disruption of sectioning [11].
The following diagram illustrates the fundamental workflow differences that lead to these distinct outputs.
The Scientist's Toolkit: Essential Research Reagents
Successful execution of cryosection IHC relies on a set of core reagents and tools. The following table details these essential components and their functions.
| Item | Function | Specification & Notes |
|---|---|---|
| Cryostat | Sectioning frozen tissue blocks | Maintains chamber at -20°C; produces sections of 4-10 µm [42]. |
| Optimal Cutting Temperature (OCT) Compound | Embedding medium for tissue freezing | Water-soluble; preserves tissue structure during sectioning [43] [21]. |
| Primary Antibody | Binds specifically to the target antigen | Must be validated for IHC on frozen sections [11]. |
| Detection Kit (e.g., ImmPRESS) | Visualizes primary antibody binding | Polymer-based kits (HRP/conjugated secondary) reduce staining time and background [42]. |
| Chromogen (e.g., DAB) | Produces a colored, insoluble precipitate at the antigen site | Used with HRP enzyme; requires careful timing to control signal intensity [42]. |
| Hematoxylin | Nuclear counterstain | Stains nuclei blue-purple; provides critical morphological context [41]. |
| Microfluidic Tissue Processor (MTP) | Accelerates reagent delivery for ultra-fast IHC | Prototype device that reduces staining time to under 12 minutes [42]. |
| Multiplexed Tissue Molds (MTMs) | Allows parallel embedding of multiple tissues | Reusable PTFE molds; enable processing of up to 110 samples in one block [43]. |
Cryosection IHC and whole mount immunofluorescence are complementary techniques, each with a distinct and powerful role in modern biological research and diagnostics. The decision framework is clear: cryosection IHC is the method of choice when the experimental priority is high-resolution cellular detail, rapid turnaround time, and high-throughput analysis of multiple specimens. In contrast, whole mount immunofluorescence is indispensable for investigations where understanding the three-dimensional spatial context of protein expression is paramount, such as in developmental biology.
The emergence of new technologies like MTMs for multiplexing and microfluidic processors for rapid staining is solidifying the value of cryosection IHC, making it more accessible and powerful than ever. By applying the standardized protocols and data-driven comparisons provided in this guide, researchers can make informed decisions, optimize their experimental workflows, and robustly answer their specific research questions.
The choice of fixative is a fundamental decision in immunohistochemistry (IHC) and immunofluorescence (IF), profoundly influencing experimental outcomes by affecting tissue morphology, antigen preservation, and antibody accessibility. This comparison guide objectively evaluates three common fixatives—paraformaldehyde (PFA), methanol, and glyoxal—within the specific context of comparing whole-mount immunofluorescence with cryosection IHC research. Fixation serves to preserve tissue integrity and prevent degradation, but different chemical mechanisms lead to distinct advantages and limitations for each fixative [2]. The expanding use of complex three-dimensional imaging and the need to detect challenging antigens has driven renewed investigation into optimal fixation strategies, moving beyond traditional formaldehyde-based approaches [45] [46].
Each fixative employs a different mechanism: PFA creates protein cross-links, methanol precipitates proteins, and glyoxal, a dialdehyde, generates cross-links through a distinct chemical pathway [45] [2]. These mechanisms directly impact their compatibility with different sample types (whole-mounts versus sections) and detection methodologies. For researchers, scientists, and drug development professionals, selecting the appropriate fixative requires balancing morphological preservation with antigen detectability, particularly for sensitive or buried epitopes [45]. This guide provides experimental data and protocols to inform these critical decisions, with special attention to the technical challenges of whole-mount preparations where antibody penetration and epitope preservation present unique hurdles [11].
Fixative Mechanisms and Properties
The chemical properties and action mechanisms of PFA, methanol, and glyoxal dictate their performance in research applications. Understanding these mechanisms helps explain their very different behaviors in preserving tissue structure and antigenicity.
Paraformaldehyde (PFA) is a polymerized solid form of formaldehyde that, when dissolved and heated, yields a formaldehyde solution. Formaldehyde is a monoaldehyde that primarily creates methylene bridges between amino groups of proteins, resulting in a cross-linked gel that maintains cellular architecture with minimal protein denaturation. As a cross-linking fixative, PFA provides excellent morphological preservation but can mask epitopes through extensive cross-linking, sometimes requiring antigen retrieval techniques to reverse [2]. Standard PFA fixation typically uses a 4% solution, which is approximately equivalent to 10% formalin [2].
Methanol, an alcohol-based fixative, acts through precipitation rather than cross-linking. It dehydrates tissues and disrupts hydrophobic interactions, causing proteins to denature and precipitate while largely preserving secondary structure. This precipitation mechanism generally better preserves antigenicity for many targets but provides inferior morphological detail compared to cross-linking fixatives. Methanol fixation also causes tissue shrinkage and is incompatible with antigen retrieval techniques [2] [11].
Glyoxal is a dialdehyde molecule smaller than glutaraldehyde but with different chemical properties than formaldehyde. Recent research indicates that glyoxal fixation can greatly improve antibody penetration and immunoreactivity, particularly for antigens buried within specialized neuronal components such as postsynaptic densities and axon initial segments [45]. Unlike PFA, glyoxal fixation often makes specialized antigen-exposing techniques unnecessary while still providing good cross-linking for morphological preservation. Optimal results with glyoxal typically require specific formulations, with studies using 3-9% glyoxal, often with acetic acid (0.8-8%) and sometimes ethanol (20%) [47] [45].
Table 1: Fundamental Properties of Fixatives
| Property | Paraformaldehyde (PFA) | Methanol | Glyoxal |
|---|---|---|---|
| Chemical Type | Monoaldehyde, cross-linker | Alcohol, precipitative | Dialdehyde, cross-linker |
| Common Concentrations | 4% | 100% (or diluted) | 3-9% (with additives) |
| Fixation Mechanism | Protein cross-linking via methylene bridges | Protein precipitation/dehydration | Protein cross-linking via different bridges |
| Tissue Penetration | Good, relatively fast | Fast | Varies with formulation |
| Morphology Preservation | Excellent | Moderate (causes shrinkage) | Good to excellent |
| Compatibility with Antigen Retrieval | Yes | No | Variable |
Comparative Performance Data
Antigen Detection Capabilities
Recent comprehensive studies directly comparing these fixatives reveal significant differences in their ability to preserve antigenicity for various molecular targets. The performance varies considerably depending on the specific antigen, tissue type, and application method.
A 2025 study systematically evaluating glyoxal fixation for retinal immunohistochemistry tested 50 antibodies and found that formaldehyde typically produced signal-to-background immunolabelling that was equivalent or superior to glyoxal for the majority of targets [47]. The study examined whole-mounts, cryosections, and paraffin-embedded eyes, noting that for whole-mounts, glyoxal fixation produced retinas that were "too fragile to be consistently dissected as pristine whole-mounts" [47]. Some antibodies showed higher signal intensities with glyoxal, but a greater number displayed weaker signal-to-background patterns compared to formaldehyde fixation [47].
In contrast, a 2023 study published in Science Advances reported that glyoxal fixation greatly improved antibody penetration and immunoreactivity, uncovering signals for buried molecules that typically require antigen-exposing techniques with PFA fixation [45]. This study found that glyoxal enhanced immunosignals for most molecules detectable in formaldehyde-fixed sections and revived several primary antibodies previously judged unusable in formaldehyde-fixed tissues [45]. This apparent contradiction highlights the context-dependent nature of fixative performance.
For methanol fixation, the primary advantage remains its ability to preserve certain sensitive epitopes that may be masked by aldehyde-based cross-linking. However, this comes with significant trade-offs in morphological preservation and compatibility with downstream processing [2] [11].
Table 2: Experimental Performance Comparison Across Applications
| Application/Fixative | PFA | Methanol | Glyoxal |
|---|---|---|---|
| Whole-Mount Readiness | Good with optimized protocols [11] | Good for small embryos [11] | Poor - produces fragile tissues [47] |
| Cryosection Compatibility | Excellent, widely used [21] | Good for certain antigens [2] | Good, but sections fragile [47] [45] |
| Paraffin Embedding | Excellent, gold standard [47] | Not typically used | Compatible with optimized protocols [47] [45] |
| Synaptic Protein Detection | Requires antigen retrieval [45] | Variable performance | Superior without antigen retrieval [45] |
| Tissue Morphology | Excellent | Moderate (cellular shrinkage) | Good to excellent |
| Typical Fixation Time | 1-24 hours (tissue dependent) | Minutes to hours | 2 hours to overnight [47] |
Whole-Mount vs. Cryosection Applications
The choice between whole-mount immunofluorescence and cryosection IHC significantly influences optimal fixative selection, as each methodology presents unique challenges and requirements.
Whole-mount immunofluorescence preserves three-dimensional architecture but demands excellent tissue penetration and limited epitope masking. For whole-mounts, PFA is most commonly used, typically 4% with fixation times ranging from 1 hour to overnight depending on sample size [11]. The protocol requires extended incubation times for antibodies and washing steps to ensure complete penetration. A significant limitation with whole-mounts is that antigen retrieval is generally not feasible due to the destructive effects of heat or enzymatic treatment on intact tissues [11]. This makes methanol a valuable alternative when PFA cross-linking masks the target epitope, though with compromised morphology [11]. Glyoxal has shown limited utility in whole-mount preparations due to tissue fragility issues, with studies reporting that glyoxal-fixed retinas were "too fragile to be consistently dissected as pristine whole-mounts" [47].
Cryosection IHC involves sectioning fixed or unfixed tissues followed by staining, which alleviates penetration issues but requires different optimization. Cryosections are particularly well-suited to delicate tissues and superior to paraffin-embedded sections for fluorescence-based assays [21]. For cryosection IHC, both PFA and glyoxal demonstrate good performance, with glyoxal offering potential advantages for detecting challenging synaptic proteins without specialized antigen retrieval techniques [45]. The sequential application of immunofluorescence and immunohistochemistry on individual cryosections enables precise protein colocalization while conserving precious tissue samples [21].
Detailed Experimental Protocols
Glyoxal Fixation Protocol for Enhanced Synaptic Protein Detection
Based on the optimized method described by Konno et al. (2023) [45]:
Fixative Preparation: Prepare 9% glyoxal/8% acetic acid solution in distilled water. Adjust to pH 4.0 using NaOH. The solution should be prepared fresh for optimal results.
Perfusion and Immersion: For brain tissues, perform transcardial perfusion with physiological saline followed by the glyoxal fixative. Follow with immersion fixation in the same fixative for 2-24 hours at room temperature. For immersion fixation alone, dissect tissue and immediately immerse in fixative.
Sectioning: After fixation, cryoprotect tissues in 30% sucrose until sunk. Embed in OCT medium and section using a cryostat at desired thickness (10-40 μm).
Immunohistochemistry: Use Tris-buffered saline with 0.1% Triton X-100 (TBS-T) as incubation and washing buffer throughout. This is essential for optimal results with glyoxal-fixed tissues.
Blocking: Incubate sections in blocking buffer (5% normal serum, 0.1% Triton X-100 in TBS) for 1-2 hours at room temperature.
Antibody Incubation: Incubate with primary antibodies diluted in blocking buffer for 24-48 hours at 4°C, followed by appropriate secondary antibodies for 2-4 hours at room temperature.
This protocol has been demonstrated to detect various ionotropic receptors, ion channels, and scaffold proteins without requiring additional antigen-exposing techniques that are typically necessary with PFA-fixed tissues [45].
Whole-Mount Immunofluorescence Protocol with PFA Fixation
Adapted from commercial and research protocols for embryonic tissues [11]:
Sample Collection: Collect embryos or small tissues at appropriate developmental stages. For zebrafish embryos, remove chorion manually or enzymatically using pronase.
Fixation: Fix samples in 4% PFA in phosphate buffer (pH 7.4) for 30 minutes to overnight at 4°C, depending on sample size. Larger samples require longer fixation.
Permeabilization: Wash samples in PBS containing 0.1% Tween-20 (PBS-T) or 0.1-1.0% Triton X-100. For better penetration, include a methanol series (25%, 50%, 75% in PBS-T) ending with 100% methanol, followed by rehydration through a reverse series. Alternatively, use proteinase K treatment for difficult tissues.
Blocking: Incubate samples in blocking buffer (5% normal serum, 1% BSA, 0.1-1.0% Triton X-100 in PBS) for 4-24 hours at 4°C with gentle agitation.
Primary Antibody Incubation: Incubate with primary antibody diluted in blocking buffer for 24-72 hours at 4°C with gentle agitation.
Washing: Wash extensively with PBS-T (6-8 changes over 24-48 hours) to ensure complete removal of unbound antibody.
Secondary Antibody Incubation: Incubate with fluorophore-conjugated secondary antibodies diluted in blocking buffer for 24-48 hours at 4°C with gentle agitation, protected from light.
Final Washing and Mounting: Wash as in step 6. Clear samples if necessary and mount in glycerol or specialized mounting media for imaging.
For large embryos, dissection into segments before staining may be necessary to ensure adequate antibody penetration [11].
The Scientist's Toolkit: Essential Research Reagents
Successful immunohistochemistry requires careful selection of reagents and materials at each experimental stage. The following table outlines essential components for fixation and staining protocols.
Table 3: Essential Research Reagents for Fixation and Staining
| Reagent/Material | Function/Purpose | Example Applications |
|---|---|---|
| Paraformaldehyde (PFA) | Cross-linking fixative for morphological preservation | General IHC/IF, whole-mount samples [11] |
| Glyoxal (40% stock) | Alternative cross-linking fixative for enhanced antigen detection | Challenging synaptic proteins, buried epitopes [45] |
| Methanol | Precipitative fixative for epitope-sensitive targets | Alcohol-sensitive antigens, whole-mounts when PFA fails [11] |
| Triton X-100 | Detergent for membrane permeabilization | Standard component of blocking and washing buffers [45] |
| Normal Serum | Blocking agent to reduce non-specific binding | From same species as secondary antibody host [21] |
| Sucrose | Cryoprotectant for frozen section preparation | Prevents ice crystal formation in tissues [21] |
| OCT Compound | Embedding medium for cryosectioning | Supports tissue during sectioning [21] |
| Primary Antibodies | Target-specific recognition | Must be validated for specific fixative and application [48] |
| Fluorophore-conjugated Secondary Antibodies | Signal generation for detection | Multiple fluorophores enable multiplexing [2] |
Experimental Workflow and Decision Pathways
The following workflow diagram illustrates the key decision points for selecting an appropriate fixation strategy based on research goals and sample characteristics:
Fixation Strategy Decision Workflow
The comparative analysis of PFA, methanol, and glyoxal reveals a complex landscape where optimal fixative selection depends heavily on specific research objectives, sample characteristics, and target antigens. PFA remains the gold standard for general applications, particularly where morphological preservation is paramount and for whole-mount preparations where tissue integrity is essential. Methanol provides a valuable alternative for sensitive epitopes that may be masked by aldehyde cross-linking, though with compromised cytological detail. Glyoxal offers promising advantages for detecting challenging antigens, particularly in cryosection applications where it can eliminate the need for specialized antigen retrieval techniques.
The integration of whole-mount immunofluorescence with cryosection IHC approaches provides complementary information, with each methodology benefiting from different fixation strategies. Whole-mount techniques demand careful optimization of fixation conditions to balance epitope preservation with antibody penetration in three-dimensional contexts, typically favoring PFA with methanol as a backup. Cryosection applications offer more flexibility, with glyoxal demonstrating particular utility for neuroscience applications targeting synaptic proteins and ion channels.
For researchers and drug development professionals, these findings underscore the importance of empirical testing when establishing new protocols. A side-by-side comparison of multiple fixatives is recommended when investigating novel targets or preparing large studies. As immunohistochemistry continues to evolve with advanced imaging technologies and increasingly sensitive detection methods, fixation strategies will remain a critical component of experimental design, requiring informed selection based on comprehensive performance data.
In the comparative analysis of whole-mount immunofluorescence (IF) and cryosection immunohistochemistry (IHC), effective permeabilization and blocking represent the most critical determinants of experimental success. These preliminary steps establish the foundation for all subsequent antibody binding and signal detection by determining reagent accessibility to targets while simultaneously minimizing non-specific background [49]. The fundamental challenge differs significantly between these approaches: whole-mount techniques must render entire tissue specimens accessible while preserving three-dimensional architecture, whereas cryosection methods optimize cellular-level access in thin tissue sections while maintaining antigen integrity [8]. The strategic selection and implementation of permeabilization and blocking protocols directly dictate data quality, specificity, and reliability, making their optimization indispensable for meaningful comparison between these methodological frameworks.
Fundamental Principles: Tissue Barriers and Counter Strategies
Biological Barriers to Antibody Penetration
The mammalian cellular membrane, composed of a phospholipid bilayer with embedded proteins and carbohydrates, presents the primary physical barrier to antibody penetration in both whole-mount and sectioned tissues [49]. Additionally, tissue fixation—essential for preserving structural integrity—creates molecular cross-links that can mask antigenic epitopes and further reduce antibody accessibility [49]. In whole-mount preparations, the extracellular matrix creates a dense, three-dimensional network that significantly impedes antibody diffusion, particularly in dense tissues like spinal cord and brain [50] [51]. Lipids within cellular membranes and myelin sheaths exhibit hydrophobic properties that repel aqueous antibody solutions, necessitating permeabilization strategies that overcome both physical and chemical barriers [7].
Molecular Mechanisms of Permeabilization
Permeabilization methods function through distinct mechanisms to overcome these barriers. Surfactants like Triton X-100, Tween-20, and saponin solubilize lipid membranes by integrating into the phospholipid bilayer, creating pores that enable antibody passage [49]. Solvent-based permeabilization using alcohols or acetone extracts lipid components through dehydration and dissolution, effectively removing membrane barriers [49]. Enzymatic approaches employ proteases like proteinase K to digest proteins within the extracellular matrix, thereby reducing physical diffusion barriers [49]. The efficacy of each mechanism varies considerably between whole-mount and sectioned tissues, with harsher methods required for penetration through thick specimens versus gentler approaches sufficient for thin sections.
Principles of Blocking Non-Specific Interactions
Blocking solutions minimize non-specific antibody binding through several complementary mechanisms. Serum-based blocking utilizes immunoglobulins and proteins from unrelated species to occupy Fc receptors on immune cells and electrostatic binding sites throughout the tissue [52] [49]. Protein-based blockers (e.g., BSA, gelatin, casein) provide alternative binding substrates for antibodies through hydrophobic and ionic interactions, reducing background staining [52]. Commercial blocking buffers often incorporate specialized polymers like polyethylene glycol (PEG) to prevent dye-dye interactions and tandem dye degradation in multiplexed experiments [52]. For whole-mount applications, blocking efficiency must be achieved throughout the entire tissue volume, requiring extended incubation times and potential circulation methods for adequate penetration.
Technical Comparison: Whole-Mount IF versus Cryosection IHC
Permeabilization Strategies Across Techniques
Whole-Mount IF Permeabilization employs robust surfactant combinations and extended incubation times to facilitate antibody penetration through thick tissues. The SOLID protocol for whole-brain imaging utilizes synchronized delipidation/dehydration with 1,2-hexanediol mixtures, effectively removing lipids while minimizing tissue distortion [51]. For zebrafish spinal cord whole-mount preparation, researchers combine detergent-based permeabilization with Scale solution clearing to enable antibody penetration while achieving optical transparency [50]. These methods typically require 24-72 hours for complete permeabilization, with effectiveness confirmed by uniform nuclear staining throughout the tissue volume [51].
Cryosection IHC Permeabilization implements milder, shorter-duration treatments sufficient for thin tissue sections. Standard protocols employ brief incubations (10-30 minutes) with low-concentration Triton X-100 (0.1-0.3%) or saponin (0.1-0.5%) following fixation and sectioning [49]. Alternative approaches incorporate freeze-thaw cycles or methanol fixation to permeabilize without additional detergents [49]. The reduced time requirements (typically 30-60 minutes total) and lower reagent concentrations make cryosection permeabilization significantly faster and more straightforward to optimize than whole-mount approaches.
Table 1: Quantitative Comparison of Permeabilization Methods
| Parameter | Whole-Mount IF | Cryosection IHC |
|---|---|---|
| Incubation Time | 24-72 hours [51] | 10-60 minutes [49] |
| Detergent Concentration | 0.5-2% Triton X-100 [51] | 0.1-0.3% Triton X-100 [49] |
| Temperature Conditions | Room temperature to 37°C [51] | 4°C to room temperature [49] |
| Penetration Depth | Full tissue volume (mm scale) [51] | Section thickness (μm scale) [49] |
| Assessment Method | Uniform nuclear staining throughout tissue [51] | Even antibody distribution across section [49] |
Blocking Methodologies Across Techniques
Whole-Mount IF Blocking requires extended incubation periods (24-72 hours) with serum concentrations of 5-10% to ensure complete tissue penetration [51] [52]. The SOLID protocol incorporates specialized blocking solutions with pH-adjusted additives to enhance fluorescence preservation while maintaining tissue transparency [51]. For complex tissues, researchers may employ combination blockers containing normal serum, tandem stabilizers, and Fc receptor blockers to address multiple non-specific binding mechanisms simultaneously [52]. The effectiveness of blocking is particularly crucial in whole-mount techniques due to the increased potential for non-specific accumulation throughout the tissue volume.
Cryosection IHC Blocking utilizes shorter incubations (30-120 minutes) with similar serum concentrations (5-10%) due to the immediate accessibility of the entire section [49]. Standard protocols often employ serum from the species in which secondary antibodies were raised, supplemented with 1-3% BSA or other proteins to address non-Fc-mediated background [49]. The relative simplicity of cryosection blocking facilitates more straightforward optimization and validation through control experiments.
Table 2: Blocking Protocol Comparison Between Techniques
| Component | Whole-Mount IF | Cryosection IHC |
|---|---|---|
| Primary Blocking Agent | 5-10% normal serum [52] | 5-10% normal serum [49] |
| Supplemental Blockers | Tandem stabilizers, Fc receptors blockers [52] | 1-3% BSA, gelatin, or milk proteins [49] |
| Incubation Time | 24-72 hours [51] | 30-120 minutes [49] |
| Temperature | 4°C to room temperature [51] | Room temperature [49] |
| Validation Approach | Comparison to unstained controls for autofluorescence [6] | Isotype controls, no-primary controls [49] |
Impact on Experimental Outcomes
The differential approaches to permeabilization and blocking directly influence key performance metrics in each technique. Whole-mount IF achieves comprehensive 3D visualization but requires significantly longer protocol times (days to weeks) and faces challenges with antibody penetration efficiency in dense tissues [51]. The SOLID method addresses tissue distortion issues common in solvent-based clearing, enabling both high transparency and minimal size change [51]. In contrast, cryosection IHC offers rapid processing (hours to days) and straightforward optimization but sacrifices 3D spatial context and introduces sampling bias through sectioning [49]. The technical compromises inherent in each approach necessitate careful selection based on experimental priorities between structural context and procedural efficiency.
Experimental Protocols: Detailed Methodologies
Whole-Mount Immunofluorescence Protocol for Mouse Brain
The SOLID (Suppressing tissue distortion based on synchronized dehydration/delipidation treatment) protocol represents an advanced methodology for whole-mount IF that minimizes tissue distortion while enabling effective permeabilization and antibody penetration [51].
Permeabilization and Blocking Steps:
- Post-fixation, transfer samples to 30% 1,2-hexanediol solution for 12-24 hours at room temperature with gentle agitation to achieve simultaneous delipidation and initial dehydration [51].
- Progress through a graded series of 1,2-hexanediol solutions (50%, 70%, 90%) with 2% N-butyldiethanolamine, allowing 6-12 hours per step for progressive dehydration and lipid removal [51].
- Incubate in blocking solution containing 5-10% normal serum from the secondary antibody species, 0.5-1% Triton X-100, and optional tandem stabilizers for 48-72 hours at 4°C with continuous agitation [51] [52].
- Proceed to primary antibody incubation for 5-7 days, followed by extensive washing and secondary antibody incubation for an additional 3-5 days [51].
Technical Notes: The unique composition of 1,2-hexanediol solutions provides effective lipid removal while minimizing tissue shrinkage (approximately 7% size change ratio compared to 20-40% with traditional solvents) [51]. The addition of N-butyldiethanolamine maintains optimal pH throughout the process, enhancing fluorescence preservation [51].
Cryosection Immunohistochemistry Standard Protocol
For cryosection IHC, permeabilization and blocking occur after sectioning and prior to antibody application, with significantly shorter time requirements [49].
Permeabilization and Blocking Steps:
- Following section thawing and rehydration in PBS, permeabilize with 0.1-0.3% Triton X-100 in PBS for 10-30 minutes at room temperature [49].
- For nuclear antigens or dense cellular regions, alternative permeabilization with 0.1-0.5% saponin or methanol fixation may improve results [49].
- Rinse sections with PBS and incubate in blocking solution containing 5% normal serum and 1-3% BSA in PBS for 1-2 hours at room temperature [49].
- For tissues with high Fc receptor expression (immune organs), include species-specific Fc receptor blockers at recommended concentrations [52].
- Apply primary antibody diluted in blocking solution without detergent for 1-2 hours at room temperature or overnight at 4°C [49].
Technical Notes: Permeabilization time should be optimized based on antigen localization—shorter times (10-15 minutes) for surface antigens, longer times (30 minutes) for nuclear targets [49]. The inclusion of sodium azide (0.01-0.02%) in antibody solutions prevents microbial growth during extended incubations [52].
Data Presentation: Quantitative Performance Metrics
Efficiency and Artifact Comparison
Table 3: Performance Metrics of Permeabilization and Blocking Methods
| Performance Metric | Whole-Mount IF | Cryosection IHC |
|---|---|---|
| Protocol Duration | 5-14 days [51] | 1-3 days [49] |
| Antibody Consumption | High (200-500μl/sample) [51] | Low (50-100μl/section) [49] |
| Penetration Efficiency | 200μm/day (antibodies) [51] | Immediate (full section access) [49] |
| Non-Specific Binding | Moderate-High (increased background potential) [6] | Low-Moderate (controllable background) [49] |
| Autofluorescence Interference | Significant (requires quenching) [6] | Moderate (tissue-dependent) [6] |
| Multiplexing Capacity | High (3-8 markers with spectral separation) [3] [9] | Limited (1-2 markers typically) [3] [8] |
Advanced Applications: Method-Specific Implementations
Whole-Mount Techniques for Complex Structures
In whole-mount spinal cord preparation for zebrafish vascular research, optimized permeabilization combines extended detergent treatment (0.8% Triton X-100 for 48 hours) with Scale solution clearing to achieve comprehensive antibody penetration while preserving delicate vascular structures [50]. For hyperplexed spatial proteomics using sequential immunofluorescence (seqIF), automated platforms implement brief but efficient permeabilization cycles (5 minutes each) within a microfluidic chamber, enabling rapid antibody access without tissue degradation [9]. These advanced applications demonstrate how targeted permeabilization strategies enable specialized research applications not feasible with section-based techniques.
Cryosection Optimization for Clinical Applications
In clinical and diagnostic contexts, cryosection IHC employs standardized, validated permeabilization protocols using 0.1% Tween-20 or saponin for 15-30 minutes, providing sufficient target accessibility while preserving morphological detail essential for pathological assessment [49]. For intracellular antigen detection, methanol or acetone fixation provides simultaneous fixation and permeabilization, though with potential epitope alteration requiring careful antibody validation [49]. The reliability and rapid turnaround time (3-5 days) make optimized cryosection IHC particularly valuable for clinical diagnostics and high-throughput drug development applications [3].
Research Reagent Solutions
Table 4: Essential Reagents for Permeabilization and Blocking
| Reagent Category | Specific Examples | Function | Application Context |
|---|---|---|---|
| Detergents | Triton X-100, Tween-20 | Solubilize lipid membranes | General permeabilization for both techniques [49] |
| Solvent Systems | 1,2-hexanediol, THF | Lipid dissolution and dehydration | Whole-mount delipidation [51] [7] |
| Serum Blockers | Normal goat, donkey, or horse serum | Fc receptor blocking and non-specific site saturation | Primary blocking agent for both techniques [52] [49] |
| Protein Blockers | BSA, gelatin, casein | Reduce hydrophobic and ionic interactions | Supplemental blocking [49] |
| Specialized Additives | Tandem stabilizer, Brilliant Stain Buffer | Prevent dye-dye interactions and tandem degradation | Multiplexed IF and high-parameter workflows [52] |
| Fc Receptor Blockers | Species-specific FcR blocking cocktails | Specifically block Fc receptor binding | Tissues with immune cell content [52] |
Workflow Integration
The critical comparison of permeabilization and blocking methodologies between whole-mount IF and cryosection IHC reveals fundamental trade-offs that should guide technique selection based on specific research priorities. Whole-mount IF demands extensive permeabilization and blocking protocols (days) but delivers unparalleled 3D spatial context and multiplexing capability, making it ideal for mapping complex cellular networks and interactions [9] [51]. Conversely, cryosection IHC employs streamlined procedures (hours) that facilitate rapid turnaround and clinical compatibility while sacrificing structural context [3] [49]. The decision pathway ultimately hinges on whether the research question prioritizes architectural complexity or procedural efficiency, with permeabilization and blocking strategies representing the foundational technical determinants that enable either approach to overcome inherent tissue barriers effectively.
In developmental biology, neurobiology, and cancer research, selecting the appropriate technique for visualizing protein expression is critical for generating reliable and meaningful data. Two powerful methods—whole mount immunofluorescence (IF) and immunohistochemistry on cryosections (cryosection IHC)—offer distinct advantages and challenges. Whole mount IF preserves the complete three-dimensional architecture of intact tissues, typically embryos, providing an unparalleled holistic view of protein localization [11]. In contrast, cryosection IHC involves staining thin sections of frozen tissue, offering superior resolution for cellular and subcellular analysis and is more readily adaptable for high-throughput workflows [34] [36]. This guide provides an objective, data-driven comparison to help researchers and drug development professionals select the optimal method for their specific experimental needs.
Technical Comparison: Whole Mount IF vs. Cryosection IHC
The choice between whole mount IF and cryosection IHC involves significant trade-offs between structural context, resolution, and experimental feasibility. The table below summarizes the core technical and performance differences.
Table 1: Technical and Performance Comparison of Whole Mount IF and Cryosection IHC
| Feature | Whole Mount Immunofluorescence | Cryosection IHC |
|---|---|---|
| Spatial Context | Preserves full 3D tissue architecture [11] | 2D sectioning; 3D context requires serial section reconstruction |
| Tissue Resolution | Lower resolution at depth due to light scattering [11] | High cellular and subcellular resolution [34] |
| Antibody Penetration | Major challenge; requires extended incubation (hours to days) and optimization [11] | Minimal barrier; standard incubation times (minutes to hours) suffice [36] |
| Antigen Retrieval | Typically not feasible, especially for heat-sensitive embryos [11] | Feasible and commonly used (e.g., heat-induced epitope retrieval) [34] |
| Multiplexing Capacity | High (theoretically unlimited with spectral separation) [3] | Chromogenic IHC: 1-2 markers; Fluorescence IHC: 2-8+ markers [6] [3] |
| Signal Longevity | Fluorophores prone to photobleaching; not permanent [4] [6] | Chromogenic signals (e.g., DAB) are permanent and archivable [4] [6] |
| Key Limitations | Limited to small/young embryos (e.g., mouse ≤ E12, chick ≤ E6) [11]; No antigen retrieval; Imaging complexity | Tissue morphology can be compromised by ice crystals [34]; Loss of native 3D context |
Table 2: Experimental and Practical Considerations
| Consideration | Whole Mount Immunofluorescence | Cryosection IHC |
|---|---|---|
| Optimal Applications | Mapping neural circuits, analyzing organogenesis, studying developmental gradients [11] | Tumor subtyping, precise cellular localization, high-resolution co-localization studies [34] [53] |
| Recommended Tissue Size | Small, transparent samples (e.g., early-stage zebrafish/rodent embryos) [11] [21] | Virtually unlimited; larger tissues are sectioned [34] |
| Primary Incubation Time | Extended: Overnight to several days [11] | Standard: 1 hour at room temperature to overnight at 4°C [36] |
| Primary Antibody Dilution | May require higher concentration due to penetration issues | Typically follows standard dilution protocols [36] |
| Imaging Requirement | Confocal or light-sheet microscopy is essential for 3D analysis [11] | Standard brightfield (chromogenic) or fluorescence microscopy suffices [6] |
Methodologies in Practice
Whole Mount Immunofluorescence Protocol for Embryos
This protocol is adapted for early-stage zebrafish, chick, or mouse embryos [11] [21].
- Fixation: Immerse intact embryos in 4% Paraformaldehyde (PFA). Incubation time is critical and varies with size, from 2 hours at room temperature to overnight at 4°C. Alternative fixatives like methanol should be tested if PFA masks the epitope [11].
- Permeabilization: Incubate embryos in a detergent solution (e.g., PBS with 0.1% Triton X-100 or Tween-20) for several hours to days. For zebrafish embryos, a dechorionation step (manual or enzymatic) is required first to remove the egg membrane [11].
- Blocking: Incubate in a blocking buffer (e.g., 5-10% normal serum from the secondary antibody species, 1% BSA, 0.1% detergent in PBS) for several hours or overnight to reduce non-specific binding [11] [21].
- Antibody Incubation:
- Primary Antibody: Incubate in a specific primary antibody diluted in blocking buffer for 1-3 days at 4°C with gentle agitation [11].
- Washing: Perform extensive washes with detergent-containing buffer over 12-24 hours to remove unbound antibody.
- Secondary Antibody: Incubate in a fluorophore-conjugated secondary antibody, diluted in blocking buffer, for 1-2 days at 4°C in the dark.
- Washing: Repeat extensive washing over 12-24 hours in the dark.
- Mounting & Imaging: Clear specimens in glycerol or specialized mounting media. Image using a confocal or light-sheet microscope to capture 3D data stacks [11].
Cryosection IHC Staining Protocol
This protocol begins with frozen tissue sections mounted on slides [34] [36].
- Sectioning: Cut 5-8 µm thick sections from an optimal cutting temperature (OCT)-embedded frozen tissue block using a cryostat. Mount sections on slides and air-dry briefly [34].
- Fixation: Fix slides for 10-15 minutes at room temperature. The choice of fixative is antigen-dependent:
- Blocking: Wash slides and apply a protein block for 30-60 minutes. For fluorescence detection, block with 5% normal serum and 0.3% Triton X-100. For peroxidase-based detection, an additional endogenous peroxidase block (3% H₂O₂) is required [34] [36].
- Antibody Incubation:
- Primary Antibody: Apply the primary antibody diluted in buffer and incubate for 1-2 hours at room temperature or overnight at 4°C [36].
- Washing: Wash slides 3 times for 5 minutes each.
- Secondary Antibody: Incubate with an enzyme-conjugated (e.g., HRP) or fluorophore-conjugated secondary antibody for 45-60 minutes at room temperature.
- Detection & Mounting:
The Scientist's Toolkit: Essential Research Reagent Solutions
Successful experimentation relies on using the right tools. The following table details key reagents and their critical functions in these protocols.
Table 3: Essential Reagents and Materials
| Item | Function | Application Notes |
|---|---|---|
| Paraformaldehyde (PFA) | Crosslinking fixative that preserves tissue architecture and antigenicity [11] [34]. | Primary fixative for both techniques. Concentration is critical (typically 4%). |
| OCT Compound | Water-soluble embedding medium that supports tissue during cryosectioning [34] [54]. | Essential for freezing tissues for cryosection IHC. |
| Normal Serum | Used in blocking buffers to reduce non-specific antibody binding [34] [36]. | Should match the host species of the secondary antibody. |
| Triton X-100 / Tween-20 | Detergents that permeabilize cell membranes to allow antibody penetration [11] [36]. | Concentration is critical (e.g., 0.1-0.3%); more critical for whole mount. |
| Primary Antibodies | Bind specifically to the target protein (antigen) of interest. | Must be validated for IHC/IF; compatibility with fixation is key. |
| Fluorophore-Conjugated Secondary Antibodies | Bind to the primary antibody and provide a detectable fluorescent signal [55]. | Enable multiplexing. Must be cross-adsorbed to prevent cross-reactivity [36]. |
| HRP-Conjugated Secondary Antibodies & DAB | Enzyme-linked secondary that catalyzes DAB into a brown, permanent precipitate [55] [34]. | Standard for chromogenic IHC. Provides excellent morphology. |
| DAPI | Fluorescent stain that binds to DNA in the cell nucleus [11] [36]. | Standard nuclear counterstain for immunofluorescence. |
| Hematoxylin | Dye that stains nucleic acids in the nucleus blue [34] [6]. | Standard nuclear counterstain for chromogenic IHC. |
The decision between whole mount immunofluorescence and cryosection IHC is not a matter of which technique is superior, but which is most appropriate for the specific biological question. Whole mount IF is the undisputed choice for studies where understanding the three-dimensional spatial relationships of protein expression is paramount, such as in embryonic patterning or neural network mapping. Conversely, cryosection IHC provides the resolution and practicality needed for cellular and subcellular analysis, tumor microenvironment characterization, and high-throughput diagnostic applications. By carefully considering the trade-offs in context, resolution, multiplexing needs, and feasibility outlined in this guide, researchers can make an informed choice that optimally aligns with their experimental goals.
Solving Common Problems: Optimization Strategies for Both Techniques
Addressing Antibone y Penetration Issues in Thick Whole Mounts
Immunohistochemistry (IHC) and immunofluorescence (IF) are foundational techniques for visualizing protein localization within tissues, yet they differ significantly in detection chemistry, with IHC using enzymes to create visible color stains and IF employing fluorescent dyes that glow under special lighting [3]. When applied to thick whole mounts or traditional cryosections, these techniques present a fundamental trade-off: whole-mount staining preserves three-dimensional tissue architecture for comprehensive spatial analysis, while cryosection IHC offers simpler protocol conditions and potentially superior antigen preservation for two-dimensional analysis [11] [56]. This comparison guide objectively evaluates the performance of whole-mount immunofluorescence against cryosection IHC, with particular focus on overcoming the central limitation of whole-mount approaches: inadequate antibody penetration in thick tissues.
The penetration challenge arises because whole-mount samples "are much larger and thicker than a normal section on a slide," requiring "extended incubation times" for antibodies and reagents to reach the tissue center [11]. Without optimization, this results in uneven staining, false negatives, and compromised data interpretation. This guide synthesizes current methodologies and experimental data to help researchers select appropriate strategies for their specific research contexts in drug development and basic science.
Technical Comparison: Whole Mount Immunofluorescence vs. Cryosection IHC
Table 1: Core methodological differences between whole-mount immunofluorescence and cryosection IHC
| Parameter | Whole-Mount Immunofluorescence | Cryosection IHC |
|---|---|---|
| Tissue Integrity | Preserves 3D architecture and spatial relationships [11] | Destroys 3D context through sectioning [11] |
| Antibody Penetration | Major challenge requiring optimization [11] | Minimal concern with 5-15 μm thickness [56] |
| Sample Thickness | Typically 100-500 μm (entire embryos or tissue segments) [11] | 5-15 μm sections [56] |
| Fixation Compatibility | Limited to gentle fixatives (4% PFA, methanol) [11] | Compatible with stronger fixation including formalin [56] |
| Antigen Retrieval | Generally not feasible due to tissue fragility [11] | Routinely performed when needed [30] |
| Multiplexing Capacity | High (typically 2-8+ targets with fluorescence) [3] | Limited (1-2 markers with chromogenic detection) [3] |
| Imaging Requirements | Confocal microscopy essential for deep layers [11] | Standard brightfield or fluorescence microscopy sufficient [3] |
| Typical Turnaround Time | 5-7 days for complete processing [3] [11] | 3-5 days from tissue collection to imaging [3] |
Table 2: Performance comparison for key research applications
| Research Application | Whole-Mount Immunofluorescence Advantages | Cryosection IHC Advantages |
|---|---|---|
| Developmental Biology | Ideal for mapping expression patterns in entire embryos [11] | Limited to sectional analysis of developmental processes |
| Neural Circuit Mapping | Superior for tracing 3D neural pathways [11] | Challenging for comprehensive circuit reconstruction |
| Tumor Microenvironment | Excellent for spatial analysis of immune cell distribution [3] | Simpler for diagnostic workflows and pathologist review [3] |
| Subcellular Localization | Requires tissue clearing for optimal resolution [57] | Straightforward with thin sections |
| Protein Co-localization | Superior with multiplex IF (up to 60 markers) [3] | Limited with chromogenic detection [3] |
Experimental Approaches to Enhance Antibody Penetration
Tissue Clearing Methods
Traditional whole-mount techniques face inherent light scattering and antibody penetration barriers in thick tissues. Tissue clearing methods address these limitations by rendering tissues transparent, though with varying compatibility for immunostaining:
- Organic Solvent-Based Clearing: Provides long-term preservation but diminishes fluorescent signals and causes tissue shrinkage [57].
- Hydrophilic/Aqueous-Based Clearing: Better preserves fluorescence but traditionally lacked effective delipidation for antibody penetration [57].
- Novel Passive Clearing (OptiMuS-prime): A recently developed method that replaces sodium dodecyl sulfate (SDS) with sodium cholate (SC) combined with urea, achieving better reagent infiltration while retaining structural integrity [57]. SC's properties as "a non-denaturing detergent with small micelles enhances tissue transparency while preserving proteins in their native state, whereas urea disrupts hydrogen bonds and induces hyperhydration to enhance probe penetration" [57].
Table 3: Quantitative assessment of tissue clearing methods for whole-mount immunostaining
| Clearing Method | Transparency Efficiency | Protein Preservation | Immunostaining Compatibility | Implementation Complexity |
|---|---|---|---|---|
| SDS-Based Methods | High | Moderate (protein disruption risk) [57] | Moderate | Medium |
| Organic Solvent-Based | Very High | Low (fluorescence reduction) [57] | Low | High |
| Simple RI Matching | Moderate | High | Low (limited delipidation) [57] | Low |
| OptiMuS-prime | High (2 min-7 days depending on thickness) [57] | High (native state preservation) [57] | High (efficient antibody penetration) [57] | Medium |
Protocol Modifications for Enhanced Penetration
Experimental evidence supporting protocol modifications: Studies demonstrate that combining multiple penetration-enhancing strategies yields superior results. For example, the OptiMuS-prime method enabled robust immunostaining of "neural structures and vasculature networks across multiple rodent organs" including "densely packed organs such as the kidney, spleen and heart" by simultaneously addressing lipid removal and tissue hydration [57]. Similarly, research on retinal wholemounts found that "extended incubation times" were necessary for adequate antibody penetration, though fixation optimization remained critical since "antigen retrieval is generally not feasible in fragile samples like embryos" [11] [14].
Detailed Experimental Protocols
Whole-Mount Immunofluorescence Protocol for Improved Penetration
Stage 1: Fixation and Preparation
- Fixative Selection: Use 4% paraformaldehyde (PFA) in phosphate buffer for most applications, with incubation at 4°C overnight for optimal preservation [11]. For epitopes sensitive to PFA cross-linking, methanol fixation serves as an effective alternative [11].
- Tissue Preparation: For larger specimens (>12-day mouse embryos), "dissection into segments before staining" may be necessary, potentially requiring "removal of surrounding muscle and skin" to facilitate reagent penetration [11].
- Critical Consideration: "Antigen retrieval is not feasible for embryos due to heat sensitivity," making appropriate fixative selection crucial [11].
Stage 2: Permeabilization and Blocking
- Enhanced Permeabilization: Incubate tissues with 0.3-1.0% Triton X-100 or alternative detergents for 24-48 hours at 4°C with gentle agitation [11] [56].
- Blocking Conditions: Use 5-10% normal serum from the secondary antibody species with 1% bovine serum albumin in PBS containing 0.1% detergent for 24-48 hours at 4°C [30] [56].
Stage 3: Antibody Incubation
- Primary Antibody: Incubate for 24-72 hours at 4°C with continuous gentle agitation. "Antibody concentration should be optimized, typically 2-5 times higher than used for cryosections" [11].
- Washing: Extended washes (6-12 hours each) with PBS containing 0.1% Triton X-100 with multiple buffer changes [11].
- Secondary Antibody: Incubate with fluorophore-conjugated antibodies for 24-48 hours at 4°C, protected from light [11].
Stage 4: Clearing and Imaging
- Tissue Clearing: Implement clearing protocols such as OptiMuS-prime (4-7 days for whole mouse brains) to enhance light penetration for imaging [57].
- Mounting and Imaging: Mount in specialized mounting media compatible with 3D preservation. "Confocal microscopy can be a useful tool to scan through the embryo" for comprehensive visualization [11].
Cryosection IHC Control Protocol
Tissue Preparation and Sectioning
- Fixation: Perfusion fixation with formaldehyde-based fixatives followed by cryoprotection in sucrose solutions (e.g., 10-30% sucrose in PBS) [56].
- Sectioning: "Cut 5-15 μm thick tissue sections using a cryostat" maintained at -15 to -23°C [56]. "Thick tissue sections can produce higher background signals," requiring optimization of thickness based on tissue characteristics [30].
Staining Protocol
- Blocking: Sequential blocking for endogenous peroxidase (3% H₂O₂), avidin-binding sites, and biotin reactivity before serum blocking [56].
- Antibody Incubation: Primary antibody incubation overnight at 2-8°C followed by appropriate secondary detection systems [56].
- Counterstaining and Mounting: Hematoxylin counterstaining with aqueous mounting media for chromogenic detection [56].
Research Reagent Solutions for Whole-Mount Studies
Table 4: Essential research reagents for optimizing whole-mount immunostaining
| Reagent Category | Specific Examples | Function in Penetration Enhancement | Optimization Tips |
|---|---|---|---|
| Fixatives | 4% Paraformaldehyde (PFA), Methanol, Glyoxal formulations [11] [14] | Preserves tissue architecture while maintaining epitope accessibility | Glyoxal may produce "softer, more fragile tissue" requiring careful handling [14] |
| Permeabilization Agents | Triton X-100, Tween-20, Sodium Cholate (SC) [57] [56] | Disrupts lipid membranes to facilitate antibody entry | SC's "small micelles" enhance penetration while preserving protein integrity [57] |
| Tissue Clearing Components | Urea, ᴅ-sorbitol, iohexol (Histodenz) [57] | Reduces light scattering through refractive index matching | Urea "disrupts hydrogen bonds and induces hyperhydration" [57] |
| Blocking Reagents | Normal serum, Bovine serum albumin (BSA), Synthetic peptide mixes [30] [56] | Minimizes non-specific antibody binding | "Choose blocking buffer that yields the highest signal to noise ratio" [30] |
| Penetration Enhancers | Dimethyl sulfoxide (DMSO), Ethylenediaminetetraacetic acid (EDTA) [57] | Improves reagent diffusion through tissues | Include in antibody incubation buffers at 1-5% concentration |
| Mounting Media | Glycerol-based media, Commercial aqueous mountants | Maintains tissue transparency for imaging | Adjust refractive index to match cleared specimens |
The decision between whole-mount immunofluorescence and cryosection IHC represents a fundamental trade-off between structural context and technical feasibility. Whole-mount methods provide unparalleled preservation of three-dimensional architecture, essential for understanding spatial relationships in complex tissues, but require extensive optimization of antibody penetration through tissue clearing, extended incubation times, and enhanced permeabilization strategies [57] [11]. Conversely, cryosection IHC offers a more straightforward protocol with reliable antibody accessibility but sacrifices three-dimensional context [56].
For researchers addressing antibody penetration challenges in thick whole mounts, emerging solutions like sodium cholate-based clearing methods (OptiMuS-prime) show significant promise by enhancing reagent infiltration while maintaining protein integrity [57]. The optimal approach depends on specific research questions, with whole-mount techniques excelling in developmental biology, neural circuit mapping, and tumor microenvironment studies where three-dimensional architecture is informative [3] [11], while cryosection IHC remains valuable for high-throughput screening and diagnostic applications where simplicity and reproducibility are prioritized [3] [30].
Reducing Background Staining and Autofluorescence
In the comparison between whole mount immunofluorescence (IF) and cryosection immunohistochemistry (IHC), managing background staining and autofluorescence is a critical differentiator that influences data quality and interpretability. Autofluorescence—background fluorescence not attributed to specific antibody-fluorophore interactions—presents a significant barrier to detecting low-abundance targets, particularly in complex tissues [58] [59]. This challenge manifests differently across the two techniques: the three-dimensional nature of whole mount samples creates more opportunities for endogenous fluorescence and non-specific antibody trapping, while the cryosectioning process can expose different autofluorescent compounds and introduce fixation artifacts [21] [11].
The sources of this interference are diverse. Fixation-induced autofluorescence, particularly from aldehyde-based fixatives like formalin and glutaraldehyde, creates fluorescent Schiff bases with broad emission spectra [58]. Endogenous pigments such as lipofuscin (which accumulates with age), collagen, elastin, NADH, and the heme group in red blood cells also contribute significantly to background signal across multiple wavelengths [58] [60] [59]. Understanding these sources and their differential impact on whole mount IF versus cryosection IHC is essential for selecting appropriate background reduction strategies.
Technical Workflows and Vulnerability to Background
The fundamental structural differences between whole mount IF and cryosection IHC create distinct challenges for background management. The following diagram illustrates the key divergence in their processing workflows and where autofluorescence is typically introduced:
The diagram above reveals how technique-specific workflows generate different autofluorescence profiles. Whole mount specimens are particularly vulnerable to background from incomplete penetration of antibodies and washing solutions, while cryosections face challenges from sectioning-exposed autofluorescent compounds not present in intact tissues [21] [11].
The table below summarizes the key autofluorescence sources and their differential impact on each technique:
Table 1: Autofluorescence Sources in Whole Mount IF vs. Cryosection IHC
| Autofluorescence Source | Emission Spectrum | Impact on Whole Mount IF | Impact on Cryosection IHC | Primary Reduction Methods |
|---|---|---|---|---|
| Aldehyde Fixation | Broad (Blue-Green-Red) [58] | High (longer fixation required) [11] | Moderate (shorter fixation possible) [58] | Sodium borohydride treatment; minimize fixation time [58] [59] |
| Lipofuscin | 500-695 nm [58] [60] | High in aged tissues, difficult to access | Moderate, more accessible to treatments | Sudan Black B; white light photobleaching [58] [60] |
| Collagen & Elastin | 300-450 nm [58] [59] | High in connective tissue-rich samples | Moderate, localized to specific areas | Use far-red fluorophores [58] |
| NADH/Riboflavins | ~450 nm [58] [59] | Variable based on metabolic activity | Consistent across sections | Use red-shifted fluorophores [61] |
| Red Blood Cells (Heme) | Broad spectrum [58] | High without perfusion | Moderate, can be washed | PBS perfusion; ammonium chloride/copper sulfate [58] [59] |
| Non-specific Antibody Binding | N/A | High (trapping in 3D matrix) [11] | Lower (easier washing) [21] | Optimized blocking; extended washing [11] |
The data reveals that whole mount IF generally experiences more severe background challenges due to the inherent limitations of reagent penetration and the cumulative effect of multiple autofluorescence sources throughout the three-dimensional sample [11]. Cryosection IHC benefits from more accessible epitopes and easier washing procedures, though it introduces potential artifacts from the sectioning process itself [21].
Experimental Approaches for Background Reduction
Sample Preparation and Fixation Strategies
The initial sample handling phase offers critical opportunities for minimizing autofluorescence at its source. For both techniques, fixative selection dramatically influences background levels. Aldehyde-based fixatives like formalin and paraformaldehyde (PFA) are common but generate fluorescent Schiff bases—with glutaraldehyde being particularly problematic [58] [2]. Where possible, researchers should opt for organic solvent fixatives like chilled ethanol or methanol, especially for whole mount samples requiring extended fixation [58] [59]. When aldehydes are necessary, using PFA rather than glutaraldehyde and minimizing fixation time can substantially reduce autofluorescence [58].
For tissues with high red blood cell content, PBS perfusion prior to fixation effectively removes heme-related autofluorescence [58] [59]. When perfusion isn't feasible (e.g., with post-mortem or embryonic tissue), treatment with ammonium chloride and copper sulfate at low pH or hydrogen peroxide bleaching can provide viable alternatives [58].
The researcher's toolkit for sample preparation includes several essential reagents:
Table 2: Key Reagents for Sample Preparation and Autofluorescence Reduction
| Reagent/Chemical | Primary Function | Application Notes | Compatibility |
|---|---|---|---|
| Sodium Borohydride | Reduces aldehyde-induced fluorescence [58] | Variable effectiveness; use with caution | Both techniques |
| Sudan Black B | Quenches lipofuscin autofluorescence [58] | Fluoresces in far-red; avoid with far-red dyes | Both techniques |
| TrueVIEW Autofluorescence Quenching Kit | Commercial reducer of multiple autofluorescence types [58] | Ready-to-use solution | Both techniques |
| Sucrose Solutions (30-60%) | Tissue cryoprotection and clearing [62] | Gradual concentration increases for whole mounts | Primarily whole mount |
| OCT Medium | Tissue embedding for cryosectioning [21] | Preserves antigenicity | Primarily cryosection |
| Triton X-100 | Detergent for permeabilization [62] | Concentration critical for whole mount penetration | Both techniques |
Optical and Fluorophore-Based Solutions
Strategic selection of detection methods and fluorophores represents another powerful approach for overcoming autofluorescence. The intrinsic spectral properties of biological autofluorescence—typically strongest in the blue-green spectrum (350-550 nm)—can be circumvented by selecting far-red and near-infrared fluorophores such as Alexa Fluor 647, CoraLite 647, or similar dyes [58] [59]. This approach benefits both techniques but is particularly valuable for whole mount IF where chemical treatments may have limited penetration.
Advanced nanomaterial solutions offer additional options. Fluorescent nanodiamonds (FNDs) containing nitrogen vacancy centers emit at ~700 nm, well beyond most problematic autofluorescence wavelengths [61]. Similarly, europium-chelating tags with long fluorescence lifetimes enable time-gated imaging that effectively separates specific signal from short-lived autofluorescence [61]. One study demonstrated that 30nm nanodiamonds coated with E-selectin antibody provided a 40-fold increase in detection sensitivity compared to conventional staining in highly autofluorescent environments [61].
For lipofuscin-rich tissues (particularly relevant in neurological research and aged samples), white light photobleaching provides a straightforward, effective solution. This pre-staining treatment uses high-intensity white LED light to nearly eliminate lipofuscin autofluorescence without adversely affecting antigenicity or tissue morphology [60]. The method has proven effective even in challenging samples like Alzheimer's brain tissue and dorsal root ganglion, where lipofuscin can occupy up to 80% of visible neuronal cytoplasm [60].
Technique-Specific Protocols for Background Reduction
Whole Mount Immunofluorescence Optimization
The extended processing times and three-dimensional structure of whole mount specimens demand specialized protocols for effective background reduction. The following workflow integrates multiple autofluorescence reduction strategies specifically optimized for intact tissues:
For zebrafish embryos or similar specimens with protective membranes, manual or enzymatic dechorionation using pronase (1-2 mg/mL for 5-10 minutes) is essential before fixation to enable reagent penetration [11]. The extended incubation times required for whole mount specimens (often overnight for antibody steps) necessitate proper humidity control to prevent sample drying [11].
The sucrose gradient clearing method (30%→45%→60% sucrose in PBS with 1% Triton X-100, 2 hours each) serves dual purposes: it improves tissue transparency for deeper imaging while simultaneously reducing light scattering that can amplify background perception [62]. For samples exhibiting persistent aldehyde-induced autofluorescence despite optimized fixation, treatment with sodium borohydride (0.1% for 30 minutes) after the washing step may provide additional improvement, though its effectiveness varies across tissue types [58].
Cryosection IHC Background Optimization
Cryosection techniques benefit from more accessible tissue structures but require careful attention to sectioning-induced artifacts and efficient treatment application:
Table 3: Cryosection IHC Protocol with Integrated Background Reduction
| Processing Stage | Standard Protocol | Background Reduction Enhancements | Rationale |
|---|---|---|---|
| Tissue Preparation | Fixation in 4% PFA (2-24h) [21] [2] | Perfusion fixation when possible; alternative methanol fixation for aldehyde-sensitive targets [59] [2] | Reduces heme-associated fluorescence; avoids cross-linking artifacts |
| Cryopreservation | Incubation in 30% sucrose until sinking [21] | OCT embedding without excessive drying | Prevents ice crystal formation that increases autofluorescence |
| Sectioning | Cryostat sectioning (5-20μm) [21] | Use clean blades; float sections gently | Minimizes section compression and tissue damage |
| Post-sectioning Treatments | PBS rehydration [21] | Sudan Black B (0.1-1% in 70% ethanol, 10-30 min) or sodium borohydride treatment [58] | Direct access to lipofuscin and aldehyde-induced fluorescence |
| Immunostaining | Standard blocking and antibody incubation [21] | Include autofluorescence quenchers in blocking buffer; use far-red fluorophores [58] [59] | Simultaneous reduction during staining; spectral separation from background |
| Mounting | Aqueous mounting media [21] | Commercial anti-fade mounting media | Presves signal while reducing background amplification |
For researchers working with limited tissue samples or requiring multiple analyses on the same specimen, sequential IF and IHC on individual cryosections provides an innovative solution. This method enables sequential rounds of immunofluorescence, imaging, immunohistochemistry, and re-imaging on a single section, maximizing data acquisition while maintaining cellular context [21]. This approach is particularly valuable for zebrafish research or other models where antibody availability is limited and tissue conservation is paramount [21].
Comparative Performance Data and Technical Considerations
Quantitative Assessment of Reduction Methods
The effectiveness of autofluorescence reduction strategies varies significantly between whole mount IF and cryosection IHC applications. The following table synthesizes experimental data from multiple studies comparing the performance of different approaches:
Table 4: Quantitative Comparison of Autofluorescence Reduction Methods
| Reduction Method | Reported Efficacy | Advantages | Limitations | Suitability for Whole Mount IF | Suitability for Cryosection IHC |
|---|---|---|---|---|---|
| White Light Photobleaching | Near-total reduction of lipofuscin [60] | Simple, cost-effective, preserves antigens [60] | Requires optimization for different tissues | Moderate (penetration depth concerns) | High (excellent access) |
| Sudan Black B | Effectively eliminates lipofuscin autofluorescence [58] | Broad-spectrum reduction | Fluoresces in far-red channel [58] | Moderate (penetration limited) | High (excellent access) |
| Fluorescent Nanodiamonds | 40-fold intensity increase for E-selectin detection [61] | Photostable, biocompatible, far-red emission [61] | Larger sizes may sterically hinder binding | Low (size penetration issues) | High (direct access) |
| Europium Chelates | Effective time-gated detection [61] | Eliminates short-lived autofluorescence | Unestablished toxicity; specialized imaging [61] | Moderate | High |
| Far-Red Fluorophores | Significant signal-to-noise improvement [58] [59] | Easy implementation, commercially available | Requires filter sets and detector capability | High | High |
| Sodium Borohydride | Variable reduction of formalin-induced fluorescence [58] | Targets common fixation artifact | Inconsistent results across tissues [58] | Moderate | High |
The data indicates that cryosection IHC generally supports a broader range of autofluorescence reduction techniques with higher efficacy, particularly for methods requiring direct tissue access like Sudan Black B and nanodiamond applications [58] [61]. Whole mount IF benefits most from approaches that either don't require deep penetration (e.g., far-red fluorophores) or can be applied early in the processing workflow (e.g., white light photobleaching before staining) [60] [59].
Technical Implementation Considerations
Implementing these background reduction strategies requires careful consideration of several technical factors. For imaging instrumentation, cryosection IHC benefits from standard epifluorescence or confocal microscopy, while whole mount IF typically requires advanced confocal systems with better depth penetration [62] [11]. The choice of fluorophores should prioritize far-red emitting dyes (e.g., Alexa Fluor 647, CoraLite 647) for both techniques, but particularly for whole mount applications where chemical treatments have limited effectiveness [58].
For protocol optimization, whole mount IF demands extended washing times (hours to days) and careful titration of permeabilization reagents to ensure adequate penetration without tissue damage [11]. Cryosection IHC allows more aggressive chemical treatments but requires careful attention to antigen preservation during the sectioning process [21]. Both techniques benefit from rigorous controls including no-primary-antibody controls and untreated samples to assess autofluorescence levels [58] [59].
The choice between whole mount immunofluorescence and cryosection IHC for applications requiring minimal background staining depends heavily on research priorities and sample characteristics. Whole mount IF provides superior three-dimensional context but faces significant challenges with autofluorescence reduction due to limited reagent penetration and cumulative background throughout the specimen. Cryosection IHC offers more effective background suppression through direct chemical access and easier washing procedures, albeit at the cost of losing some three-dimensional architectural information.
For researchers prioritizing architectural context in developing embryos or intact organoids, whole mount IF with far-red fluorophores and clearing techniques provides the best option despite its background challenges. For applications requiring maximum sensitivity for low-abundance targets or working with autofluorescence-rich tissues like aged or neurological samples, cryosection IHC with appropriate chemical treatments (Sudan Black B for lipofuscin, sodium borohydride for aldehyde fixation) generally provides superior signal-to-noise ratios. Emerging technologies like fluorescent nanodiamonds and time-gated europium probes offer promising alternatives for both techniques, particularly as these methods continue to develop improved penetration and compatibility characteristics.
Optimizing Antigen Retrieval and Fixation Conditions
The integrity of protein epitopes, preserved through precise fixation and revealed through effective antigen retrieval, is the cornerstone of reliable immunohistochemistry (IHC) and immunofluorescence (IF). For researchers comparing whole mount immunofluorescence with cryosection IHC, these pre-analytical steps fundamentally determine the success of downstream spatial proteomics. Formalin fixation, while essential for preserving tissue architecture, creates methylene bridges between proteins that mask epitopes and prevent antibody binding [63]. Antigen retrieval techniques reverse this masking by disrupting cross-links, thereby restoring epitope accessibility and ensuring accurate biomarker detection across diverse tissue preparation methods.
The choice between whole mount and cryosection approaches introduces distinct challenges for antigen preservation. Whole mount techniques preserve three-dimensional tissue context but create significant antibody penetration barriers, while cryosectioning provides superior cellular resolution but risks ice crystal artifacts that compromise morphology [64]. Within this methodological landscape, systematic optimization of fixation and retrieval conditions becomes paramount for generating quantitative, reproducible spatial data in immuno-oncology, neuroscience, and developmental biology research.
Core Principles of Antigen Retrieval
The Challenge of Epitope Masking
Formalin fixation, the gold standard for tissue preservation since 1893, introduces methylene bridges between amino acid residues through cross-linking reactions [63]. While this process stabilizes tissue architecture, it simultaneously alters protein conformation and buries epitopes within cross-linked complexes. The resulting epitope masking prevents primary antibodies from accessing their binding sites, leading to false-negative results, weak staining intensity, and compromised data interpretation [63] [65]. The extent of masking varies by epitope characteristics, with some antigens demonstrating inherent resilience due to abundance, structural robustness, or resistance to cross-linking [63].
The discovery in 1991 that these formalin-induced cross-linkages could be reversed through high-temperature heating or enzymatic treatment revolutionized IHC, enabling consistent detection of previously inaccessible targets [63]. Modern antigen retrieval methods specifically address this masking by physically or chemically breaking the methylene bridges, thereby restoring native protein conformation—or at least a conformation recognizable by specific antibodies [65]. For researchers employing hyperplex techniques like sequential immunofluorescence (seqIF), effective antigen retrieval becomes especially critical, as it must simultaneously preserve multiple epitopes across repeated staining cycles [9].
Retrieval Method Fundamentals
Two principal approaches dominate antigen retrieval protocols: heat-induced epitope retrieval (HIER) and proteolytic-induced epitope retrieval (PIER). Each employs distinct mechanisms to reverse epitope masking, with significant implications for experimental outcomes.
Heat-Induced Epitope Retrieval (HIER) utilizes elevated temperatures (typically 95-100°C) to disrupt protein cross-links through thermal unfolding [63] [66]. The mechanism involves both thermal disruption of cross-links and chelation of calcium ions that participate in protein cross-linking [63]. HIER protocols vary by heating platform, with water baths (5-10 minutes at 92-95°C), microwaves (5-minute intervals with buffer replacement), and pressure cookers (1-5 minutes at 120°C) representing common implementations [63] [65]. Buffer pH critically influences HIER success, with citrate buffer (pH 6.0) and Tris-EDTA (pH 8.0-9.9) serving as the most frequently employed formulations [63] [66].
Proteolytic-Induced Epitope Retrieval (PIER) employs proteolytic enzymes including proteinase K, trypsin, pepsin, and pronase to cleave peptide bonds within cross-linked proteins, thereby physically liberating masked epitopes [67] [63]. PIER typically operates at 37°C with incubation periods of 10-20 minutes in humidified chambers, though specific conditions must be optimized for each enzyme [63]. This method presents significant limitations, including potential tissue morphological damage, epitope destruction leading to false negatives, and delicate balance between under-digestion (insufficient antigen exposure) and over-digestion (elevated background and structural damage) [63].
Table: Comparison of Antigen Retrieval Fundamental Methods
| Parameter | Heat-Induced Epitope Retrieval (HIER) | Proteolytic-Induced Epitope Retrieval (PIER) |
|---|---|---|
| Mechanism | Thermal disruption of cross-links | Enzymatic cleavage of proteins |
| Typical Conditions | 95-100°C for 10-30 minutes | 37°C for 10-20 minutes |
| Key Buffers | Citrate (pH 6.0), Tris-EDTA (pH 8.0-9.9) | Tris/HCl, protein-specific buffers |
| Success Rate | High | Moderate to low |
| Tissue Morphology | Well-preserved | Potential damage |
| Primary Risk | Epitope destruction from overheating | Over-digestion and epitope loss |
Methodological Comparison: HIER vs. PIER
Performance Evaluation Criteria
Evaluating antigen retrieval efficacy requires multiple performance criteria including staining intensity, morphological preservation, signal-to-noise ratio, and protocol reproducibility. Staining intensity reflects epitope accessibility and antibody binding efficiency, while morphological preservation ensures accurate spatial localization within tissue context. Signal-to-noise ratio distinguishes specific binding from background staining, and reproducibility guarantees consistent results across experiments and operators [63] [66].
For whole mount applications, additional considerations include antibody penetration depth and three-dimensional epitope accessibility, whereas cryosectioning emphasizes section adhesion and avoidance of freezing artifacts [50] [64]. The optimal retrieval method must balance these competing demands while accommodating specific tissue characteristics, antibody properties, and experimental objectives.
Experimental Data and Comparative Analysis
Recent investigations directly comparing HIER and PIER performance demonstrate context-dependent efficacy. A 2024 systematic evaluation of cartilage intermediate layer protein 2 (CILP-2) detection in osteoarthritic cartilage found PIER superior to HIER for this specific glycoprotein target [67]. The study implemented four protocols: HIER alone (95°C for 10 minutes in Decloaker solution), PIER alone (30 µg/mL Proteinase K for 90 minutes at 37°C followed by 0.4% hyaluronidase for 3 hours at 37°C), combined HIER/PIER, and no retrieval control [67].
Semi-quantitative assessment revealed PIER generated the most abundant CILP-2 staining, with the dense extracellular matrix of articular cartilage particularly responsive to enzymatic digestion [67]. Contrary to theoretical expectations, combining HIER with PIER did not improve staining outcomes; instead, heat application reduced the beneficial effect of PIER and frequently caused section detachment from slides [67]. The authors attributed PIER's superiority to efficient cleavage of cross-links within the voluminous cartilage matrix without compromising the target epitope's integrity.
Conversely, numerous studies across diverse tissue types establish HIER as the generally preferred method. Atlas Antibodies, with over 12,000 IHC-validated primary antibodies, optimizes most using standardized HIER protocols, reflecting its broader applicability and higher success rates [63]. HIER demonstrates particular advantages for labile epitopes susceptible to enzymatic degradation and delivers superior morphological preservation compared to PIER's potentially destructive proteolysis [63] [66].
Table: Experimental Comparison of Antigen Retrieval Methods
| Retrieval Method | Staining Intensity | Morphology Preservation | Optimal Applications | Limitations |
|---|---|---|---|---|
| HIER | Variable (epitope-dependent) | Excellent | Most formalin-fixed tissues; high-throughput workflows | Potential epitope destruction; requires optimization |
| PIER | Superior for CILP-2 [67] | Moderate with risk of damage | Dense matrices (cartilage); select glycoproteins | Tissue damage risk; narrow optimization window |
| Combined HIER/PIER | Reduced vs. PIER alone [67] | Poor (section detachment) | Not recommended based on current evidence | Section adhesion problems; no synergistic benefit |
| No Retrieval | Minimal (baseline) | Excellent | Alcohol-fixed or frozen sections; non-crosslinked epitopes | Insufficient for formalin-fixed tissues |
Integration with Tissue Preparation Methods
Cryosection IHC Workflow
Cryosectioning employs rapid tissue freezing to preserve native protein structure while enabling thin-section microscopy. The protocol begins with snap-freezing fresh tissue in Optimal Cutting Temperature (OCT) compound using isopentane cooled by dry ice, which minimizes ice crystal formation that disrupts cellular architecture [34] [64]. Sectioning at 5-8µm thickness in a cryostat (-20°C) precedes slide mounting, with careful attention to avoiding thawing cycles that promote recrystallization damage [34].
Fixation typically follows sectioning in cryosection IHC, unlike FFPE workflows where fixation precedes processing [34]. Common fixatives include acetone, methanol, or aldehyde-based solutions (4% paraformaldehyde or 10% neutral buffered formalin), selected based on target antigen characteristics [34]. Aldehyde fixation necessitates subsequent antigen retrieval for many epitopes, while alcohol-based fixation may not require retrieval but provides inferior morphological preservation [2].
For cryosections, gentle HIER protocols often suffice, though PIER may be necessary for particularly inaccessible epitopes. However, enzymatic treatment risks exacerbating section fragility, requiring reduced enzyme concentrations or incubation times compared to FFPE applications [34] [64].
Whole Mount Immunofluorescence Workflow
Whole mount immunofluorescence preserves three-dimensional tissue architecture but introduces substantial antibody penetration barriers. Specimen preparation begins with careful dissection and immediate fixation, typically with 4% paraformaldehyde, followed by permeabilization with detergents (Triton X-100, saponin) to facilitate antibody access [50]. For large specimens, additional steps like tissue clearing may be necessary to reduce light scattering and improve imaging depth [50].
Antigen retrieval in whole mount preparations presents unique challenges, as standard HIER methods prove difficult to implement uniformly throughout three-dimensional specimens. Innovative approaches include passive diffusion of enzymes for PIER or specialized heating apparatus for HIER, though both methods require extended incubation times compared to thin-section applications [50]. Recent advances in automated sequential immunofluorescence (seqIF) platforms address these challenges through microfluidics-enabled reagent delivery that ensures uniform retrieval conditions across the sample [9].
The COMET instrument exemplifies this technological evolution, implementing fully automated seqIF with iterative staining, imaging, and elution cycles. Its microfluidic chip creates a 50µm-high reaction chamber that enables rapid reagent exchange (under 1 second) and precise temperature control, reaching 50°C in less than 30 seconds [9]. This system achieves 40-plex protein detection on single FFPE tissue sections in under 24 hours using off-the-shelf antibodies, demonstrating the critical role of optimized retrieval in hyperplex applications [9].
Decision Workflow for Antigen Retrieval Method Selection
Optimization Strategies and Best Practices
Systematic Optimization Approach
Effective antigen retrieval requires empirical optimization across multiple parameters. A structured three-step approach delivers reliable, reproducible results:
Initial HIER Evaluation: Begin with heat-induced retrieval testing both low-pH (citrate buffer, pH 6.0) and high-pH (Tris-EDTA, pH 8.0-9.9) conditions [63] [66]. Standard heating conditions of 95-100°C for 10-20 minutes provide a suitable starting point, with gradual cooling to room temperature afterward to prevent tissue damage [66].
PIER Assessment: If HIER yields suboptimal results, evaluate proteolytic methods using different enzymes (trypsin, proteinase K, pepsin) with varying concentrations and incubation times [63]. Typical PIER conditions include 10-20 minutes at 37°C, though dense tissues may require extended digestion [67] [63].
Matrix Optimization: Conduct preliminary matrix studies combining time, temperature, and pH variables to refine retrieval conditions [63] [66]. A systematic approach testing multiple parameter combinations identifies optimal conditions while revealing potential artifacts from over-retrieval.
Table: Antigen Retrieval Optimization Matrix
| Time | Acidic Buffer (pH 6.0) | Neutral Buffer (pH 7.0) | Basic Buffer (pH 9.0) |
|---|---|---|---|
| 5 minutes | Slide #1 | Slide #2 | Slide #3 |
| 10 minutes | Slide #4 | Slide #5 | Slide #6 |
| 20 minutes | Slide #7 | Slide #8 | Slide #9 |
Essential Quality Controls
Rigorous controls ensure retrieval specificity and reproducibility:
Negative Controls: Sections processed without primary antibody identify non-specific secondary antibody binding [63].
Positive Controls: Tissues with known antigen expression confirm protocol and reagent functionality [63] [66].
Specificity Controls: Knockout/knockdown validation or blocking peptides with matched antigen-antibody pairs verify target-specific binding [63].
No-Retrieval Controls: Determine whether HIER introduces artifacts or improves specific staining [66].
Additionally, researchers should standardize fixation conditions (duration, temperature, pH) across compared samples, as fixation variability directly impacts retrieval efficacy [2]. For method comparisons between whole mount and cryosection IHC, parallel processing with identical retrieval parameters isolates preparation-specific effects from technical artifacts.
The Scientist's Toolkit: Essential Research Reagents
Table: Key Reagents for Antigen Retrieval Optimization
| Reagent/Category | Function | Examples & Applications |
|---|---|---|
| HIER Buffers | Disrupt cross-links through heat | Citrate (pH 6.0), Tris-EDTA (pH 9.0), Reveal Decloaker [67] [66] |
| PIER Enzymes | Cleave peptide bonds to unmask epitopes | Proteinase K, Trypsin, Pepsin [67] [63] |
| Fixation Reagents | Preserve tissue architecture | Formalin, PFA, Acetone, Methanol [2] [34] |
| Blocking Solutions | Reduce non-specific background | Normal serum, BSA, protein blocks [34] |
| Detection Systems | Visualize antibody binding | HRP-conjugates, fluorophores, chromogenic substrates [34] [9] |
| Specialized Equipment | Enable precise retrieval conditions | Water baths, pressure cookers, microwave ovens, automated stainers [63] [9] |
Antigen retrieval optimization remains an essential but context-dependent process in spatial proteomics. The comparative data presented herein demonstrates that while HIER generally offers broader applicability and superior morphological preservation, PIER excels in specific applications involving dense extracellular matrices like articular cartilage [67]. This nuanced understanding enables researchers to make informed methodological choices based on their specific tissue type, target epitope, and experimental goals.
For investigators comparing whole mount immunofluorescence with cryosection IHC, retrieval optimization must account for fundamental methodological differences. Cryosectioning typically benefits from standardized HIER protocols, while whole mount preparations require customized retrieval strategies that ensure uniform reagent penetration throughout three-dimensional specimens. Emerging automated platforms like COMET with seqIF capability demonstrate how integrated retrieval and staining workflows can overcome traditional limitations, enabling hyperplex protein detection while preserving tissue integrity [9].
As spatial biology continues evolving toward increasingly multiplexed applications, precise antigen retrieval will remain foundational to data quality. By applying the systematic optimization approaches and methodological comparisons outlined in this guide, researchers can confidently select appropriate retrieval strategies that maximize epitope detection while preserving structural context across diverse tissue preparation platforms.
The quest to visualize biological structures in their native three-dimensional context has driven the development of advanced tissue processing techniques. Within the broader comparison of whole-mount immunofluorescence with traditional cryosection immunohistochemistry (IHC), lipid-clearing and electrophoretic methods represent transformative approaches that overcome the limitations of two-dimensional analysis [68]. While cryosection IHC provides high-resolution data from thin tissue slices, it inherently disrupts spatial relationships and compromises tissue integrity through mechanical sectioning. Whole-mount techniques preserve this structural context but face significant challenges with light scattering in opaque tissues and limited antibody penetration [69] [24].
Lipid-clearing techniques address the fundamental problem of light scattering by rendering tissues optically transparent, enabling deep-tissue imaging at cellular and subcellular resolutions. Simultaneously, electrophoretic methods enhance macromolecule delivery throughout thick specimens, overcoming diffusion barriers that traditionally limited immunolabeling efficiency. These complementary approaches have revolutionized volumetric tissue analysis by preserving structural integrity while enabling comprehensive molecular characterization [24] [68]. This guide objectively compares the performance of leading techniques within this domain, providing experimental data and methodological details to inform researcher selection for specific applications.
Key Methodological Approaches and Comparative Performance
Hydrogel-Based Clearing with Electrophoresis
CLARITY (Clear Lipid-exchanged Acrylamide-hybridized Rigid Imaging/Immunostaining/in situ hybridization-compatible Tissue-HYdrogel) represents a foundational hydrogel-based approach that stabilizes tissue biomolecules within a polymer matrix while lipids are removed through electrophoresis [69] [68]. The method involves tissue fixation with paraformaldehyde (PFA) followed by hydrogel monomer infusion and thermosetting to create a hydrogel-tissue hybrid. Electrophoretic tissue clearing (ETC) then actively removes lipids using sodium dodecyl sulfate (SDS) buffer, achieving transparency while preserving proteins and nucleic acids for repeated staining rounds [69].
Modifications to the original CLARITY protocol have significantly enhanced its performance. The introduction of a non-circulation electrophoresis system (NCES) simplified the complex equipment requirements, making the method more accessible while maintaining clearing efficiency [69]. Passive pRe-Electrophoresis CLARITY (PRE-CLARITY) and Centrifugation-Expansion staining (CEx staining) further advanced the technique by achieving intact mouse brain clearing and immunostaining within one week, dramatically faster than the original protocol requiring several weeks [69]. These innovations addressed key limitations of lengthy processing times and technical complexity that initially hindered CLARITY adoption.
Aqueous-Based Chemical Clearing Methods
CUBIC (Clear, Unobstructed Brain Imaging Cocktails and Computational Analysis) employs a unique chemical approach based on the characterization of biological tissues as electrolyte gels [24]. The protocol involves delipidation using aminoalcohol solvents that remove cholesterol and phospholipids, followed by refractive index matching. The CUBIC-HistoVIsion pipeline enables uniform whole-organ staining by exploiting the swelling-shrinkage behavior of fixed tissues under various chemical conditions, achieving effective labeling of entire adult mouse brains, marmoset brain hemispheres, and human cerebellum blocks with dozens of antibodies [24].
ScaleS, a sorbitol-based variant of the original Scale method, offers modified hyperhydration with minimal tissue expansion [70]. This approach uses urea and glycerol to hydrate tissues and reduce light scattering through refractive index matching. Unlike solvent-based methods, ScaleS maintains an aqueous environment throughout processing, preserving fluorescent protein emissions and enabling immunostaining compatibility [70].
Organic Solvent-Based Rapid Clearing
EZ Clear represents a simplified approach that combines organic solvent efficiency with aqueous mounting compatibility [7]. This three-step method uses tetrahydrofuran (THF) for lipid removal, followed by aqueous washing and refractive index matching with a specialized mounting solution (EZ View). The protocol clears whole adult mouse organs in 48 hours without specialized equipment, maintaining sample size constant throughout processing and preserving endogenous and synthetic fluorescence [7]. The method's simplicity and speed make it particularly accessible for researchers new to tissue clearing.
3DISCO/uDISCO methods utilize organic solvents for rapid dehydration and delipidation, achieving high transparency through benzyl alcohol/benzyl benzoate (BABB) refractive index matching [70]. These protocols offer among the fastest processing times but typically involve significant tissue shrinkage and fluorescent signal quenching unless specialized preservation techniques are implemented [70].
Table 1: Performance Comparison of Major Lipid-Clearing Techniques
| Method | Clearing Time | Tissue Size Change | Fluorescence Preservation | Immunolabeling Compatibility | Best Applications |
|---|---|---|---|---|---|
| CLARITY/PACT | 5-7 days (whole brain) | Significant expansion (1.6x linear size) [7] | Moderate | Excellent (40+ markers demonstrated) [9] | Hyperplex protein detection, repeated staining |
| CUBIC | 7-14 days | Moderate expansion | Good | Good (dozens of antibodies) [24] | Whole-organ staining, interspecies comparisons |
| ScaleS | Several days | Minimal size change [70] | Excellent [70] | Moderate | Fluorescent protein preservation, quantitative analysis |
| EZ Clear | 48 hours [7] | Minimal size change (1.07x ratio) [7] | Excellent [7] | Good (whole-mount demonstrated) [7] | Rapid screening, clinical applications |
| 3DISCO/uDISCO | 24-48 hours | Significant shrinkage (0.59x linear size) [7] | Poor without enhancement [70] | Limited | Structural imaging, rapid processing |
Table 2: Transparency and Imaging Performance Metrics
| Method | Transmittance (%) | Imaging Depth | Sample Compatibility | Equipment Requirements |
|---|---|---|---|---|
| CLARITY/PACT | 48% (modified) [69] | Highest increase among methods [70] | Whole organs, human tissues | Electrophoresis apparatus, specialized chambers |
| CUBIC | Moderate | Moderate | Whole organs, embryonic tissues | Standard lab equipment |
| ScaleS | Moderate [70] | Moderate [70] | Brain sections, whole organs | Standard lab equipment |
| EZ Clear | High (comparable to 3DISCO) [7] | 5mm demonstrated [7] | Whole adult mouse organs | Standard lab equipment |
| 3DISCO/uDISCO | High [70] | Moderate [70] | Whole organs, body parts | Solvent-resistant equipment |
Sequential Immunofluorescence for Hyperplexing
Sequential Immunofluorescence (seqIF) represents a specialized electrophoretic application for hyperplex protein detection that cycles through staining, imaging, and gentle antibody elution steps [9]. Implemented on automated platforms like COMET, seqIF uses microfluidics technology to enable rapid antibody incubation and removal, achieving 40-plex protein detection on a single tissue section in less than 24 hours using standard off-the-shelf antibodies [9]. Unlike destructive barcoding approaches, seqIF preserves tissue antigenicity and morphology throughout the process, enabling subsequent analysis such as H&E staining.
Experimental Protocols and Methodological Details
Modified CLARITY Protocol for Intact Mouse Brain
Hydrogel Embedding and Electrophoretic Clearing
- Perfusion and Fixation: Transcardially perfuse mice with 4% paraformaldehyde (PFA). Dissect brains and post-fix for 10 hours at 4°C in 4% PFA [69].
- Hydrogel Monomer Infusion: Immerse brains in hydrogel solution (4% acrylamide, 0.05% bis-acrylamide, 0.25% VA-044 initiator in PBS) for 3 days at 4°C [69].
- Polymerization: Incubate at 37°C for 3 hours to form hydrogel-tissue hybrid.
- Lipid Removal: Transfer to 8% SDS clearing buffer in a non-circulation electrophoresis system. Apply 30V constant voltage for 3-5 days at 37°C with 1% α-thioglycerol to prevent yellowing [69].
- Refractive Index Matching: Rinse in PBS and immerse in 2,2'-thiodiethanol (TDE) solutions for imaging.
Immunostaining Protocol
- Blocking: Incubate cleared brains in blocking buffer (5% DMSO, 3% donkey serum, 0.2% Triton X-100 in PBS) for 1-2 days.
- Primary Antibody: Incubate in primary antibody solution (1:100-1:500 dilution in blocking buffer) for 3-5 days at 37°C with gentle shaking.
- Washing: Rinse with PBST (0.1% Tween-20 in PBS) 4-6 times over 24 hours.
- Secondary Antibody: Incubate in fluorophore-conjugated secondary antibody (1:200-1:500 dilution) for 3-5 days at 37°C.
- Final Wash and Imaging: Rinse with PBST before refractive index matching and light-sheet microscopy.
EZ Clear Protocol for Whole Organ Processing
Rapid Clearing Method
- Lipid Removal: Immerse fixed samples in 50% (v/v) tetrahydrofuran (THF) in sterile Milli-Q water for 24 hours at room temperature with gentle agitation [7].
- Washing: Transfer samples to sterile Milli-Q water for 4 hours to remove residual THF [7].
- Refractive Index Matching: Incubate in EZ View aqueous mounting solution (RI = 1.518) for 24 hours at room temperature until transparent [7].
- Whole-Mount Immunolabeling (Optional): After clearing, incubate in primary antibody for 3 days, wash for 24 hours, then incubate in secondary antibody for 2-3 days before final washing and remounting in EZ View [7].
Sequential Immunofluorescence Protocol
Automated Hyperplex Staining on COMET Platform
- Tissue Preparation: Cut formalin-fixed paraffin-embedded (FFPE) tissue sections at 4-5μm thickness and mount on slides.
- Autofluorescence Acquisition: Image tissue autofluorescence for potential subtraction during data analysis [9].
- Staining Cycles: Iterate through the following steps for each marker pair:
- Primary Antibody Incubation: Apply two primary antibodies from different species for 5-20 minutes using microfluidics [9].
- Secondary Antibody Incubation: Apply species-specific fluorescent secondary antibodies for 5-20 minutes [9].
- Imaging: Acquire images in DAPI, TRITC, and Cy5 channels with integrated microscope.
- Elution: Gently strip antibodies using elution buffer while preserving tissue antigenicity [9].
- Image Processing: Software aligns and stacks individual cycle images into a single OME-TIFF file for analysis [9].
Technical Considerations and Decision Framework
Method Selection Criteria
Choosing between lipid-clearing and electrophoretic techniques requires careful consideration of research priorities, with key trade-offs between processing time, sample preservation, and multiplexing capability.
Integration with Whole-Mount vs. Cryosection IHC
The methodological advances in lipid-clearing and electrophoretic techniques must be evaluated within the broader context of whole-mount immunofluorescence versus cryosection IHC. Each approach offers distinct advantages for specific research questions as visualized in the experimental workflow.
Research Reagent Solutions and Essential Materials
Table 3: Key Reagents and Materials for Implementation
| Reagent/Material | Function | Example Applications | Key Considerations |
|---|---|---|---|
| Paraformaldehyde (PFA) | Tissue fixation | All methods (4% concentration standard) | Fixation time affects clearing efficiency [69] |
| Acrylamide/Bis-acrylamide | Hydrogel formation | CLARITY, PACT | Concentration affects pore size and staining [69] |
| SDS (Sodium Dodecyl Sulfate) | Lipid removal | CLARITY, CUBIC | Concentration and temperature critical [69] |
| Tetrahydrofuran (THF) | Lipid solvent | EZ Clear, 3DISCO | Rapid dehydration with fluorescence preservation [7] |
| Aminoalcohol Solvents | Cholesterol/phospholipid removal | CUBIC | Specific lipid targeting [24] |
| Urea and Glycerol | Hyperhydration agents | Scale, ScaleS | Refractive index matching [70] |
| α-Thioglycerol | Antioxidant | Modified CLARITY | Prevents sample yellowing [69] |
| 2,2'-Thiodiethanol (TDE) | Refractive index matching | CLARITY-TDE, SeeDB | Aqueous compatible (RI=1.52) [70] |
| Benzyl Alcohol/Benzyl Benzoate | Organic RI matching | 3DISCO, uDISCO | High RI (1.56) but quenches fluorescence [70] |
| Nycodenz/D-Sorbitol | Aqueous RI agents | RIMS, sRIMS | Moderate RI (1.43-1.46) with fluorescence preservation [7] |
Lipid-clearing and electrophoretic techniques have fundamentally expanded the capabilities of volumetric tissue analysis, offering distinct advantages and limitations relative to both whole-mount immunofluorescence and traditional cryosection IHC. CLARITY and PACT provide exceptional macromolecule preservation and hyperplexing capability through hydrogel embedding, while CUBIC offers robust whole-organ staining through precise chemical optimization. EZ Clear delivers unprecedented speed and simplicity with minimal tissue distortion, and sequential immunofluorescence enables automated high-plex protein detection without permanent tissue modification.
The optimal technique selection depends critically on research priorities, including sample type, multiplexing requirements, equipment access, and time constraints. As these methodologies continue to evolve, their integration with advanced imaging platforms and computational analysis tools will further enhance their transformative potential for biomedical research and drug development.
Troubleshooting Weak Signal and Poor Morphology
Immunohistochemistry (IHC) stands as a cornerstone technique for visualizing protein localization within biological specimens, enabling researchers to investigate intricate molecular processes governing development and disease [71]. However, a fundamental challenge persists across IHC applications: the inherent trade-off between optimal tissue morphology and robust signal intensity. This "fixation paradox" is particularly pronounced when comparing whole mount immunofluorescence with cryosection IHC, as each method presents distinct advantages and limitations for researchers investigating protein distribution, subcellular localization, and expression profiles in different cell populations [2]. The choice between these techniques significantly influences experimental outcomes, with fixation methodology serving as a critical determinant of success.
Whole mount immunofluorescence preserves three-dimensional architecture, allowing comprehensive visualization of tissue context and spatial relationships, while cryosection IHC typically offers superior antibody penetration and easier access to internal epitopes but sacrifices some structural context [50]. Within this methodological framework, fixation choice represents perhaps the most crucial variable, simultaneously impacting antigen preservation, tissue architecture, and epitope accessibility [71] [2]. This guide systematically compares these approaches, providing objective performance data and detailed protocols to empower researchers in making informed methodological decisions based on their specific research questions and target antigens.
Comparative Analysis of Whole Mount Immunofluorescence vs. Cryosection IHC
The decision between whole mount and sectioned approaches involves careful consideration of multiple technical factors. The table below summarizes key characteristics and performance metrics for whole mount immunofluorescence versus cryosection IHC:
Table 1: Comprehensive Method Comparison: Whole Mount Immunofluorescence vs. Cryosection IHC
| Characteristic | Whole Mount Immunofluorescence | Cryosection IHC |
|---|---|---|
| Tissue Morphology | Excellent 3D architecture preservation; maintains tissue context [50] | Superior 2D cellular morphology; better for high-resolution cytology [72] |
| Antibody Penetration | Technically challenging; limited by tissue size and density [2] | Excellent; antibodies easily access epitopes in thin sections [2] |
| Signal Intensity | Variable; often weaker for internal epitopes without specialized clearing [50] | Generally strong and uniform throughout section [72] |
| Method Complexity | High; requires extended incubation, careful washing, often clearing [50] | Moderate; standardized protocols widely available [2] |
| Multiplexing Capacity | Excellent for mapping proteins in 3D space [2] | Good, but limited by section thickness and epitope overlap |
| Throughput | Lower; processing and imaging times extended [2] | Higher; parallel processing of multiple samples feasible [2] |
| Imaging Modalities | Confocal, light sheet, two-photon microscopy for 3D reconstruction [50] | Standard epifluorescence, confocal (2D), brightfield [2] |
| Typical Applications | Developmental biology, vascular networks, neural circuits [71] [50] | Cellular localization, clinical diagnostics, subcellular analysis [72] [2] |
Fixative Performance: Quantitative Comparison of PFA, TCA, and Glyoxal
Fixative selection profoundly impacts both signal quality and morphological preservation. Recent studies have systematically evaluated common fixatives, revealing significant differences in performance characteristics. The data demonstrate that the optimal fixative often depends on the target protein's subcellular localization and the specific methodological approach (whole mount vs. cryosection).
Table 2: Fixative Performance Across Critical Experimental Parameters
| Fixative Agent | Mechanism of Action | Nuclear Antigen Performance | Cytosolic/Membrane Antigen Performance | Impact on Tissue Morphology | Compatible Methods |
|---|---|---|---|---|---|
| Paraformaldehyde (PFA) | Protein cross-linking via methylene bridges [71] | Optimal - Strong signal for transcription factors (e.g., SOX9, PAX7) [71] | Adequate - Good for cadherins, tubulin [71] | Excellent structural preservation; standard for morphology [71] [2] | Whole mount, cryosection, paraffin [71] |
| Trichloroacetic Acid (TCA) | Protein denaturation and precipitation via acid-induced coagulation [71] | Subpar - Weaker signal for nuclear transcription factors [71] | Superior - Enhanced for cytoskeletal proteins (tubulin) and membrane cadherins [71] | Altered nuclear morphology (larger, more circular nuclei) [71] | Primarily whole mount; may require protocol optimization [71] |
| Glyoxal | Cross-linking dialdehyde; reduced cross-link length vs. PFA [14] | Variable - Weaker for some nuclear antigens in retina [14] | Variable - Inconsistent across targets; tissue-dependent [14] | Produces soft, fragile tissue in whole mounts; excellent for sections [14] | Cryosection, paraffin; challenging for delicate whole mounts [14] |
| Methanol/Ethanol | Protein precipitation via dehydration and hydrogen bonding disruption [2] | Antibody-dependent - No antigen retrieval possible [2] | Antibody-dependent - May abolish some signals (e.g., insulin) [2] | Moderate; cellular shrinkage and poor morphological detail [2] | Primarily cryosection and cell cultures [2] |
Experimental Evidence: Fixative Effects on Specific Protein Classes
Recent investigations provide quantitative insights into how fixative choice influences detection capabilities for proteins in different cellular compartments:
- Transcription Factors: PFA fixation yielded superior signal intensity for nuclear transcription factors including SOX9 and PAX7 in chicken embryo studies, while TCA fixation produced significantly weaker nuclear signals [71].
- Cytoskeletal Proteins: TCA fixation (2% in PBS) significantly enhanced fluorescence intensity for cytoskeletal components including tubulin (TUBA4A) compared to standard PFA protocols [71].
- Membrane Proteins: Cadherin proteins (ECAD, NCAD) showed altered subcellular localization patterns and improved visualization with TCA fixation, potentially due to improved accessibility of membrane-proximal epitopes [71].
- Retinal Proteins: Glyoxal fixation provided no consistent improvement for retinal immunohistochemistry, with formaldehyde typically producing equivalent or superior signal-to-background ratios for 50 different antibodies tested [14].
Detailed Experimental Protocols
Standardized protocols are essential for ensuring reproducible results when comparing fixation methodologies. The following section provides detailed experimental procedures for both whole mount and cryosection IHC.
Whole Mount Immunofluorescence Protocol with PFA and TCA Fixation
This protocol, adapted from chicken embryo studies, details processing for three-dimensional tissue visualization [71]:
Sample Collection and Fixation:
- Dissect tissue into appropriate physiological buffer (e.g., Ringer's Solution for embryos).
- For PFA Fixation: Fix samples in 4% paraformaldehyde in 0.2M phosphate buffer for 20 minutes at room temperature [71].
- For TCA Fixation: Fix samples in 2% trichloroacetic acid in PBS for 1-3 hours at room temperature [71].
- Wash fixed tissues 3×5 minutes in PBST (PBS + 0.1-0.5% Triton X-100) or TBST + Ca²⁺.
Permeabilization and Blocking:
- Permeabilize tissues with 0.1-0.5% Triton X-100 in PBS for 30 minutes to 2 hours depending on tissue density.
- Block non-specific binding sites with blocking solution (PBST or TBST + Ca²⁺ containing 10% donkey serum) for 1 hour at room temperature or overnight at 4°C [71].
Antibody Incubation:
- Incubate with primary antibodies diluted in blocking solution for 72-96 hours at 4°C with gentle agitation [71].
- Wash tissues 5×1 hour with PBST or TBST + Ca²⁺ to remove unbound primary antibody.
- Incubate with fluorophore-conjugated secondary antibodies (e.g., AlexaFluor series) diluted 1:500 in blocking solution overnight (12-24 hours) at 4°C [71].
- Perform final washes 5×1 hour with PBST or TBST + Ca²⁺.
Imaging and Storage:
- For PFA-fixed samples: post-fix with 1% PFA for 1 hour at room temperature after final washes to stabilize fluorescence [71].
- Mount in appropriate clearing medium (e.g., Scale solutions) for 3D imaging [50].
- Image using confocal or light sheet microscopy; store at 4°C in dark.
Cryosection IHC Protocol with Antigen Retrieval Optimization
This protocol emphasizes morphological preservation and signal optimization for sectioned tissues [72] [2]:
Tissue Preparation and Sectioning:
- Fix dissected tissues by immersion in appropriate fixative (typically 4% PFA for 2-24 hours at room temperature).
- Cryoprotect by incubating in 30% sucrose in PBS until tissue sinks (overnight at 4°C).
- Embed in OCT compound and freeze in isopentane cooled by liquid nitrogen or dry ice.
- Section at 5-20μm thickness using cryostat and collect on charged glass slides.
Antigen Retrieval and Staining:
- For cross-linking fixatives (PFA, glyoxal): Perform antigen retrieval with Tris-EDTA buffer (pH 9.0) or citrate buffer (pH 6.0) using steam heating or water bath for 20-40 minutes [72].
- Cool slides for 30 minutes at room temperature, then rinse in distilled water.
- Permeabilize with 0.1-0.5% Triton X-100 in PBS for 10-30 minutes.
- Block with protein block (serum or BSA-based) for 1 hour at room temperature.
- Incubate with primary antibodies diluted in antibody diluent for 1-2 hours at room temperature or overnight at 4°C.
- Wash 3×5 minutes with PBST.
- Incubate with secondary antibodies conjugated with fluorophores or enzymes for 1 hour at room temperature.
Detection and Mounting:
- For enzymatic detection: Develop with appropriate substrate (e.g., Vector Red for alkaline phosphatase, DAB for peroxidase) [73].
- Counterstain if desired (e.g., DAPI for nuclei, methyl green) [73].
- Wash and mount with aqueous mounting medium for fluorescence or permanent mounting medium for chromogenic detection.
Experimental Design and Decision Framework
The following workflow provides a systematic approach for selecting the appropriate methodology based on research objectives and sample characteristics:
The Scientist's Toolkit: Essential Research Reagents and Materials
Successful immunohistochemistry requires carefully selected reagents and materials. The following table details key solutions and their functions for troubleshooting weak signal and poor morphology:
Table 3: Essential Research Reagents for IHC Troubleshooting
| Reagent/Category | Specific Examples | Function & Application | Considerations for Optimization |
|---|---|---|---|
| Fixatives | 4% PFA in 0.2M phosphate buffer [71] | Cross-linking fixative; preserves structure; ideal for nuclear antigens | Concentration, buffer, pH, duration critical; avoid over-fixation |
| 2% TCA in PBS [71] | Precipitating fixative; enhances membrane/cytosolic epitopes | Alters nuclear morphology; optimal for specific protein classes | |
| Glyoxal formulations (3% with acetic acid/ethanol) [14] | Alternative cross-linker; potentially reduced epitope masking | Tissue-dependent results; limited whole mount compatibility | |
| Permeabilization Agents | Triton X-100 (0.1-0.5%) [71] | Non-ionic detergent; enhances antibody penetration | Concentration critical; balance penetration vs. morphology |
| Tween-20, Saponin, Digitonin | Alternative detergents with different selectivity | Saponin preferred for membrane protein preservation | |
| Blocking Solutions | Donkey serum (10%) [71] | Reduces non-specific antibody binding | Species should match secondary antibody host |
| BSA (1-5%), non-fat dry milk | Protein-based blockers; economical alternatives | May contain biotin; avoid with biotin-streptavidin detection | |
| Detection Systems | AlexaFluor-conjugated secondaries [71] | Direct fluorescence detection; multiplexing capability | Superior photostability vs. traditional fluorophores |
| HRP-conjugated with DAB/Vector Red [73] | Chromogenic detection; permanent record | Vector Red offers quantitative microdensitometry [73] | |
| Antigen Retrieval | Tris-EDTA buffer (pH 9.0) [72] | Heat-induced epitope retrieval; reverses cross-links | Superior to citrate for many targets [72] |
| Citrate buffer (pH 6.0) [72] | Alternative retrieval solution | Effective for subset of antigens; requires optimization | |
| Mounting Media | Aqueous mounting media | Fluorescence preservation; quick setting | Avoids quenching; preferred for most fluorescence |
| Permanent mounting media | Long-term storage; compatible with organics | Required for chromogenic samples; may quench fluorescence |
The comparative analysis presented in this guide demonstrates that methodological choices in immunohistochemistry must be tailored to specific research objectives. Whole mount immunofluorescence offers unparalleled three-dimensional context but presents challenges for antibody penetration and signal uniformity. Cryosection IHC provides superior cellular morphology and generally stronger signals but sacrifices spatial context. Fixative selection further modulates this balance, with PFA remaining the gold standard for nuclear antigens and overall morphological preservation, while TCA shows particular advantage for certain membrane and cytoskeletal targets. Glyoxal fixation, despite promising applications in other tissue types, shows limited benefit for retinal immunohistochemistry [14]. Researchers should consider implementing a systematic fixative screening approach during method development, particularly when investigating novel targets or tissue systems. By understanding these fundamental trade-offs and employing the optimized protocols provided, researchers can effectively troubleshoot weak signal and poor morphology challenges, ensuring robust and reproducible results in both basic research and drug development applications.
Head-to-Head Comparison: Validation Criteria and Technique Selection
Direct Comparison of Strengths and Limitations
The selection of an appropriate tissue preparation method is a critical first step in biomedical research, directly influencing the quality, reliability, and interpretability of experimental data. Within the context of immunohistological studies, two primary methodologies are widely employed: whole mount immunofluorescence and cryosection immunohistochemistry (IHC). Whole mount immunofluorescence involves staining and visualizing intact, three-dimensional tissue specimens, preserving the native spatial architecture of the sample. In contrast, cryosection IHC requires rapidly freezing tissue, sectioning it into thin slices (typically 5-20 µm thick) with a cryostat, and then performing staining and analysis on these two-dimensional sections [74]. The choice between these techniques is not trivial, as it involves a fundamental trade-off between preserving three-dimensional biological context and achieving high-resolution, facile staining and imaging. This guide provides a direct, data-driven comparison of these two approaches to equip researchers and drug development professionals with the information necessary to select the optimal method for their specific experimental aims, whether they are focused on mapping cellular interactions within an intact tumor microenvironment, analyzing protein expression at subcellular resolution, or conducting high-throughput drug screening.
Comparative Analysis of Performance and Applications
The performance characteristics of whole mount immunofluorescence and cryosection IHC differ significantly across several key parameters, making each technique uniquely suited for particular research scenarios. The table below summarizes a direct comparison of their core attributes, supported by empirical observations.
Table 1: Direct comparison of whole mount immunofluorescence and cryosection IHC performance characteristics.
| Parameter | Whole Mount Immunofluorescence | Cryosection IHC |
|---|---|---|
| Spatial Context | Preserves intact 3D architecture and long-range cellular interactions [75]. | Two-dimensional analysis; architecture is inferred from serial sections [21]. |
| Tissue Penetration | Requires optimization (clearing, prolonged incubation) for antibody penetration; can be limiting [15] [7]. | Excellent antibody access to epitopes in thin sections; minimal penetration issues [21]. |
| Resolution & Signal Clarity | Potential for light scattering in thick tissue; often enhanced by tissue clearing [7]. | High subcellular resolution due to minimal light scattering in thin sections [21]. |
| Multiplexing Capacity | Highly suited for large-scale multiplexing; whole-organ mapping demonstrated [76]. | Practical for limited multiplexing (3-5 markers); sequential staining possible [77] [21]. |
| Protocol Complexity & Duration | Multi-day protocols involving clearing; can be complex [15] [7] [75]. | Relatively faster and simpler standard protocols [74] [21]. |
| Compatibility with Downstream Analysis | Typically destructive; samples often imaged after clearing [7]. | Non-destructive to the source tissue block; same section can be re-stained or re-analyzed [21]. |
| Ideal Application Scope | System-level biology, 3D spatial relationships, whole-organ mapping, and drug screening in 3D models [76] [75]. | High-resolution subcellular localization, diagnostic pathology, and studies with limited antibody penetration [77] [21]. |
Experimental Data and Protocol Details
Key Experimental Findings from the Literature
Recent studies have quantitatively demonstrated the capabilities and trade-offs of each method in practical research settings. A landmark study utilizing large-scale multiplexed immunofluorescence on whole mouse brain slices achieved a 10-plex biomarker panel through iterative staining and imaging cycles. This approach enabled the simultaneous phenotyping of all major brain cell classes (neurons, astrocytes, microglia, oligodendrocytes, endothelial cells) and the quantification of their densities and spatial distributions across entire brain regions. The methodology relied on sophisticated computational signal isolation and deep neural networks for automated cell detection and classification, showcasing the power of whole mount techniques for system-level biology [76].
In cancer research, a sophisticated 3D tumor-fibroblast spheroid model was employed to investigate cell-type-specific drug responses. The pipeline utilized whole mount staining, optical clearing, and 3D confocal microscopy, followed by a deep-learning-based image analysis. This approach revealed critical insights that would be difficult to obtain from sections: while co-cultures appeared more resilient to paclitaxel and doxorubicin at a bulk level, single-cell analysis showed this was due to drug-resistant fibroblasts, while cancer cells were, in fact, more susceptible in co-culture than in mono-culture. This underscores the unique value of 3D whole mount analysis in deconvoluting complex cellular interactions in the tumor microenvironment [75].
For cryosection IHC, a protocol for sequential immunofluorescence and IHC on individual cryosections from early-stage zebrafish embryos highlights the technique's flexibility and precision. This method allows for the accurate identification of multiple protein targets at the single-cell level on a single section, circumventing issues of antibody incompatibility that can occur in a single-plex assay. The protocol is particularly valuable for working with small, limited tissue samples and is instrumental in precisely identifying protein co-localization within individual cells [21].
Detailed Methodological Protocols
To ensure experimental reproducibility, below are condensed versions of core protocols for each method as described in the literature.
Table 2: Key steps in representative whole mount and cryosection protocols.
| Step | Whole Mount Protocol (Zebrafish Spinal Cord) [15] | Cryosection IHC Protocol (Zebrafish Embryos) [21] |
|---|---|---|
| 1. Fixation | 4% PFA at room temperature. | 4% PFA overnight at 4°C. |
| 2. Permeabilization | Washing solution with DMSO and Triton X-100. | Permeabilization with Triton X-100 in block buffer. |
| 3. Sectioning | Not applicable (whole tissue). | Dehydration in methanol, sucrose infiltration, embedding in OCT, cryosectioning (e.g., 10-14 µm). |
| 4. Staining | Incubation in primary antibodies for multiple days, followed by secondary antibodies. | Sequential rounds of staining: e.g., first for IF (anti-pH3), then for IHC (anti-dextran). |
| 5. Clearing (WM only) | Immersion in ScaleS4 solution (urea, glycerol, D-sorbitol) for refractive index matching [15]. | Not applicable. |
| 6. Imaging & Analysis | 3D confocal or lightsheet microscopy; 3D image segmentation and analysis. | Imaging after each staining round; co-localization analysis on the same physical section. |
Workflow and Decision Pathways
The choice between whole mount and cryosectioning methods depends on multiple experimental factors. The following diagram outlines a logical decision pathway to guide researchers in selecting the appropriate technique.
The Scientist's Toolkit: Essential Reagents and Materials
Successful execution of either technique relies on a suite of specialized reagents and materials. The following table catalogs key solutions and their functions as featured in the cited protocols.
Table 3: Essential research reagents and materials for whole mount and cryosection techniques.
| Reagent/Material | Function and Role in Protocol | Example Use Case |
|---|---|---|
| Paraformaldehyde (PFA) | Crosslinking fixative that preserves tissue architecture and antigenicity by creating methylene bridges between proteins [2]. | Standard primary fixative for both whole mount (zebrafish spinal cord [15]) and cryosection (zebrafish embryos [21]) protocols. |
| Triton X-100 | Non-ionic surfactant that permeabilizes cell membranes by dissolving lipids, facilitating antibody penetration into tissues and cells [15] [21]. | Component of washing and blocking buffers in both whole mount [15] and cryosection [21] protocols. |
| Optimal Cutting Temperature (OCT) Medium | Water-soluble embedding medium that supports tissue structure during freezing and provides a matrix for cryosectioning [21]. | Used for embedding zebrafish embryos prior to sectioning in a cryostat [21]. |
| Scale S4 Solution | Aqueous clearing agent containing urea, glycerol, and D-sorbitol. Matches the refractive index of tissue to render it optically transparent for deep imaging [15]. | Final immersion solution for clearing whole mount zebrafish spinal cords prior to imaging [15]. |
| Dimethyl Sulfoxide (DMSO) | Polar organic solvent that enhances penetration of antibodies and other reagents into dense tissues by acting as a cryoprotectant and permeabilization aid [15] [75]. | Added to washing and penetration buffers for whole mount spheroid and spinal cord staining [15] [75]. |
| Sucrose Solution | Cryoprotectant that displaces water within tissues, preventing the formation of destructive ice crystals during the freezing process for cryosectioning [21]. | Used to infiltrate and dehydrate zebrafish embryos before embedding in OCT [21]. |
| Tetrahydrofuran (THF) | Organic solvent used in advanced clearing protocols (e.g., EZ Clear) for rapid lipid removal from whole organs while maintaining tissue hydration [7]. | Primary component of the lipid removal solution for clearing whole adult mouse organs [7]. |
Validation Standards for Antibodies and Protocols
Immunohistochemistry (IHC) and immunofluorescence (IF) stand as cornerstone techniques for visualizing protein localization and expression within tissues and cells. These methods provide profound insights into cellular and subcellular phenomena, revealing intricate molecular interactions that underlie both normal development and disease processes [71]. However, the accuracy and reproducibility of these techniques hinge critically on rigorous validation of both antibodies and protocols. The selection of fixation methods, staining procedures, and analytical approaches significantly influences morphological preservation and target visualization, creating substantial variability that can compromise experimental outcomes and translational applications [71] [72]. This guide systematically compares validation standards and performance characteristics across different IHC/IF approaches, with particular emphasis on the methodological considerations specific to whole mount immunofluorescence versus traditional cryosection IHC.
The fundamental challenge in immunohistochemistry lies in balancing tissue preservation with antibody penetration while maintaining antigenicity. As Coons, an IHC pioneer, poetically noted, fluorescent antibodies "shine in the dark, a brilliant greenish-yellow glow. Like pebbles in the moonlight, they weave a pattern in the forest which leads the weary children home" [2]. Reaching this reliable illuminating potential requires meticulous standardization, especially as these technologies evolve toward clinical implementation where they may determine therapeutic decisions with significant patient consequences [78] [79].
Antibody Validation Frameworks and Standards
Core Principles of Antibody Validation
Antibody validation demonstrates that these essential reagents are specific, selective, and reproducible for their intended applications [79]. The U.S. Food and Drug Administration defines validation as "the process of demonstrating, through the use of specific laboratory investigations, that the performance characteristics of an analytical method are suitable for its intended analytical use" [79]. For immunohistochemical applications, this process must account for numerous variables including fixation methods, antigen retrieval techniques, and detection systems that collectively influence staining outcomes [72] [79].
Commercial antibody providers and research institutions employ multi-faceted validation approaches. Cell Signaling Technology, for example, utilizes Western blot analysis to verify appropriate molecular weight bands, assesses performance on paraffin-embedded cell pellets with known expression levels, verifies target specificity using xenografts, evaluates antibodies across human cancer tissue arrays, employs blocking peptides to confirm specificity, and conducts thorough lot testing to ensure reproducibility [80]. These comprehensive approaches address common pitfalls including nonspecific binding and lot-to-lot variability that have plagued many research studies [79].
Clinical versus Research Validation Standards
The College of American Pathologists (CAP) has established rigorous guidelines for clinical IHC validation, recently updated in 2024 to address evolving technologies and applications [78]. These evidence-based recommendations include harmonized concordance requirements of 90% for all predictive marker assays (including ER, PR, and HER2), specific validation requirements for distinct scoring systems, and separate validation mandates for cytology specimens fixed differently from standard formalin-fixed, paraffin-embedded (FFPE) tissues [78]. For laboratories implementing IHC on alternatively fixed specimens, CAP recommends validation with a minimum of 10 positive and 10 negative cases [78].
In research settings, validation may follow less standardized pathways but should incorporate appropriate controls and specificity demonstrations. The Society for Immunotherapy of Cancer has convened expert task forces to develop best practice guidelines for multiplex IHC/IF technologies, recognizing their growing importance in characterizing complex immunophenotypes within the tumor microenvironment [77]. These guidelines address both staining validation and image analysis standardization to ensure robust, reproducible data generation across institutions.
Table 1: Common Antibody Validation Methods and Their Applications
| Validation Method | Key Applications | Strengths | Limitations |
|---|---|---|---|
| Western Blot Analysis | Initial specificity assessment | Confirms target molecular weight; identifies cross-reacting bands | Only detects denatured epitopes; poor predictor of IHC performance |
| Cell Pellet Arrays | Verification of target specificity in FFPE context | Controlled system with known expression levels | May not recapitulate native tissue architecture |
| Tissue Microarrays (TMAs) | Broad performance assessment across tissue types | High-throughput evaluation across multiple tissue types | Limited sampling per tissue core |
| Blocking Peptides | Epitope specificity confirmation | Directly demonstrates target specificity | May not work for complex conformational epitopes |
| Xenograft Models | Assessment in biologically relevant context | Maintains some tissue architecture and heterogeneity | Requires specialized resources and expertise |
| Lot-to-Lot Testing | Reprodubility assurance | Critical for long-term study consistency | Resource-intensive for manufacturers |
Comparative Analysis of Fixation Methods
Mechanism of Action and Morphological Impacts
Fixation represents the most critical pre-analytical variable in IHC/IF workflows, profoundly influencing tissue architecture, antigen preservation, and subsequent antibody accessibility. The choice between crosslinking and precipitative fixatives creates fundamentally different starting points for histological analysis [2].
Paraformaldehyde (PFA), the most common crosslinking fixative, undergoes hydrolysis to form formaldehyde, which efficiently creates stable methylene cross-links between proteins and between proteins and nucleic acids [71] [2]. This crosslinking action excellently preserves tissue architecture and structural epitopes but may mask certain epitopes through excessive bridging, potentially requiring antigen retrieval techniques to reverse [71] [2]. In contrast, trichloroacetic acid (TCA) operates through acid-induced coagulation, rapidly penetrating tissues and precipitating proteins through denaturation and aggregation [71]. This precipitative action may better expose certain hidden epitopes but can alter native protein structures.
Recent comparative studies examining PFA versus TCA fixation in chicken embryos demonstrate their differential impacts on morphological preservation. TCA fixation resulted in significantly larger and more circular nuclei compared to PFA fixation, highlighting how fixative choice directly influences basic morphological assessments [71]. Additionally, TCA fixation substantially altered the appearance of subcellular localization and fluorescence intensity for various protein classes including transcription factors and cytoskeletal components [71].
Antigen-Specific Optimization Requirements
The optimal fixation method varies significantly depending on target protein characteristics and subcellular localization. Research comparing PFA and TCA fixation for wholemount chicken embryo IHC reveals that TCA fixation methods may be optimal for visualizing cytosolic microtubule subunits and membrane-bound cadherin proteins, while proving suboptimal for nuclear-localized transcription factors [71]. Conversely, PFA provides adequate signal strength for proteins localized to all three cellular regions but excels particularly for maximal signal intensity of nuclear-localized proteins [71].
These findings underscore the importance of protein-specific fixation optimization, especially for studies investigating multiple subcellular compartments. The delicate balance between structural preservation and epitope accessibility must be empirically determined for each target, as no universal fixative excels in all applications [71] [2]. This is particularly relevant for whole mount preparations where penetration barriers compound fixation challenges.
Table 2: Performance Comparison of Common Fixation Methods
| Parameter | Paraformaldehyde (PFA) | Trichloroacetic Acid (TCA) | Alcohol-Based Fixatives |
|---|---|---|---|
| Mechanism | Crosslinking via methylene bridges | Acid precipitation/denaturation | Protein precipitation via hydrogen bonding |
| Tissue Morphology | Excellent structural preservation | Altered nuclear morphology (larger, more circular nuclei) | Moderate preservation, inferior to PFA |
| Epitope Preservation | May mask epitopes via crosslinking | May expose hidden epitopes via denaturation | Variable; antigen retrieval usually not compatible |
| Optimal Applications | Nuclear proteins, structural studies | Membrane-bound proteins, cytoskeletal elements | Limited applications for specific antigens |
| Compatibility with Antigen Retrieval | Excellent | Limited data | Poor |
| Typical Concentration | 4% in buffer | 2% in PBS | 70-100% methanol/ethanol |
| Fixation Time | 20 minutes (embryos) | 1-3 hours (embryos) | 10-30 minutes |
Whole Mount Immunofluorescence versus Cryosection IHC
Technical Considerations and Workflow Differences
Whole mount immunofluorescence and cryosection IHC represent complementary approaches with distinct advantages and limitations. Whole mount techniques preserve three-dimensional tissue architecture and spatial relationships, providing invaluable contextual information for developmental studies and complex tissue organizations [71]. However, these preparations present significant challenges for antibody penetration, often requiring extended incubation times (72-96 hours for primary antibodies in chicken embryos) and careful optimization of permeabilization conditions [71].
Cryosection IHC offers superior accessibility to internal epitopes by physically sectioning tissues, thereby reducing penetration barriers and enabling more standardized staining protocols [72]. This approach typically provides superior tissue morphology for detailed histological assessment and is more readily compatible with many established clinical and research protocols [72]. However, sectioning inevitably disrupts three-dimensional architecture and may introduce sampling biases that complicate comprehensive tissue evaluation.
Methodological comparisons demonstrate that cryosection IHC generally enables higher primary antibody dilutions and more robust staining intensity compared to whole mount approaches, though this advantage comes at the cost of three-dimensional context [72]. The Society for Immunotherapy of Cancer notes that while whole slide imaging of sections is becoming increasingly common, regional heterogeneity may still necessitate careful selection of representative regions of interest for analysis [77].
Validation Requirements Across Platforms
The validation standards for antibodies and protocols differ substantially between whole mount and sectioned preparations. Antibodies validated for cryosection IHC may perform poorly in whole mount applications due to limited penetration or epitope accessibility differences in thicker specimens [71]. Similarly, fixation protocols often require modification between these approaches, with whole mount specimens typically benefiting from extended fixation durations to ensure complete tissue preservation [71].
For multiplexed applications, whole mount immunofluorescence presents particular challenges for spectral unmixing and background subtraction due to increased autofluorescence and light scattering in thicker specimens [81] [77]. Specialized clearing techniques or computational approaches may be necessary to overcome these limitations. In contrast, multiplexed IHC on sections benefits from more established validation frameworks, including single-color controls for spectral unmixing, nuclear counterstain-only controls, and unstained tissue controls to assess autofluorescence [81].
Diagram 1: Workflow comparison between whole mount immunofluorescence and cryosection IHC
Multiplexed IHC/IF Validation Approaches
Technological Platforms and Validation Considerations
Multiplexed IHC/IF technologies enable simultaneous detection of multiple markers within a single specimen, providing powerful tools for characterizing complex cellular phenotypes and spatial relationships within tissues [77]. These platforms span diverse methodological approaches including multiplex immunohistochemistry, multiplexed immunohistochemical consecutive staining on single slide (MICSSS), multiplex immunofluorescence, Digital Spatial Profiling (DSP), and tissue-based mass spectrometry [77]. Each technology offers distinct capabilities and limitations regarding marker multiplexing capacity, imaging area, and validation requirements.
For multiplexed staining with primary antibodies directly conjugated to fluorophores, rigorous validation includes creating single-color controls for each marker, nuclear counterstain-only controls, and unstained tissue samples to facilitate proper spectral unmixing [81]. Antibody dilution optimization represents another critical validation step, typically involving staining tissues with serial dilutions (e.g., 1:10, 1:50, 1:100, 1:500) to identify optimal signal-to-noise ratios [81]. Additionally, autofluorescence reduction treatments using white light illumination in alkaline hydrogen peroxide solutions may be necessary to minimize background in multiplexed applications [81].
Image Analysis and Data Management Standards
The complexity of multiplexed IHC/IF data necessitates sophisticated image analysis pipelines requiring their own validation frameworks. The Society for Immunotherapy of Cancer task force emphasizes that "the digital image processing pipeline for mIHC/IF assays must also be validated and optimized, with quality assurance (QA) and quality controls (QC) applied to all steps from image acquisition and processing through final data output" [77]. Critical steps include color deconvolution for chromogenic IHC or spectral unmixing for fluorescence, tissue and cell segmentation, phenotyping, and algorithm verification [77].
Regional sampling strategies present particular validation challenges in multiplexed analysis. Studies have variably employed whole slide imaging, selection of 5 or more high-power fields (typically 0.33-0.64 mm² each), targeted sampling of morphological "hotspots" and "coldspots," or focused assessment of specific tissue compartments like tumor cores and invasive margins [77]. To ensure reproducibility, investigators must clearly document their ROI selection methodology—including number of regions analyzed, selection criteria, and inclusion/exclusion parameters [77].
Table 3: Multiplexed IHC/IF Technologies and Key Characteristics
| Technology | Basic Description | Markers per Section | Imaging Area | Key Validation Requirements |
|---|---|---|---|---|
| Multiplex IHC | Simultaneous/sequential application without marker removal | 3-5 | Whole slide | Color deconvolution, cross-reactivity assessment |
| MICSSS | Iterative staining, scanning, and antibody removal | 10+ | Whole slide | Staining stability across cycles, registration accuracy |
| Multiplex IF | Cyclical staining with TSA amplification or DNA barcodes | 5-8 (TSA) 30-60 (non-TSA) | Up to whole slide | Signal amplification linearity, epitope stability across cycles |
| Digital Spatial Profiling | UV-cleavable fluorescent DNA tags on antibodies | 40-50 | ROI=0.28 mm² | UV efficiency, tag cleavage completeness |
| Tissue-Based Mass Spectrometry | Antibodies tagged with elemental mass reporters | 40 | ROI=1.0 mm² | Metal tag specificity, background subtraction |
Experimental Protocols for Method Comparison
Whole Mount Immunofluorescence Protocol
Based on comparative studies of fixation methods in chicken embryos, the following protocol outlines a standardized approach for whole mount immunofluorescence:
Fixation Methods:
- PFA Fixation: Fix embryos with 4% paraformaldehyde in 0.2M phosphate buffer for 20 minutes at room temperature. Prepare PFA stock fresh before use and store at -20°C [71].
- TCA Fixation: Fix embryos with 2% trichloroacetic acid in 1X PBS for 1-3 hours at room temperature. Prepare from 20% TCA stock stored at -20°C [71].
Immunohistochemistry Procedure:
- Post-fixation Washes: Rinse embryos in TBST+Ca²⁺ (Tris-Buffered Saline with 0.5% Triton X-100 and calcium) or PBST (PBS with 0.1-0.5% Triton X-100) [71].
- Blocking: Incubate embryos in blocking solution (PBST or TBST+Ca²⁺ containing 10% donkey serum) for 1 hour at room temperature or 12-24 hours at 4°C [71].
- Primary Antibody Incubation: Dilute primary antibodies in blocking solution at appropriate concentrations (see Table 4) and incubate embryos for 72-96 hours at 4°C [71].
- Washing: Wash whole embryos in PBST or TBST+Ca²⁺.
- Secondary Antibody Incubation: Incubate with AlexaFluor-conjugated secondary antibodies diluted in blocking solution (1:500) for 12-24 hours at 4°C [71].
- Final Washes: Wash in PBST or TBST+Ca²⁺ before imaging for TCA-fixed embryos. For PFA-fixed embryos, post-fix with PFA for 1 hour at room temperature after secondary antibody washing [71].
Multiplexed IHC Staining Protocol
For multiplexed staining with primary antibodies directly conjugated to fluorophores:
Tissue Preparation:
- Deparaffinization: Follow standard deparaffinization protocol with xylene (5 minutes, twice), graded ethanol series (100%, 95%, 85%, 75%, 50%; 3 minutes each), and rehydration in dH₂O followed by 1X PBS (5 minutes, three times) [81].
- Antigen Retrieval: Perform heat-induced epitope retrieval using either citrate buffer (pH 6.0) or EDTA (pH 9.0) using microwave or pressure cooker [81].
- Permeabilization: Treat with 0.1% Triton X-100/PBS for 30 minutes at room temperature [81].
- Autofluorescence Reduction (Optional): Treat with working autofluorescence solution (4.5% hydrogen peroxide and 24 mM NaOH in PBS) under white light illumination for 30 minutes [81].
- Blocking: Block with 3% BSA for 1 hour at room temperature [81].
Multiplex Labeling:
- Control Preparation: Create single-color controls for each primary antibody conjugate and unstained control [81].
- Multiplex Master Mix: Dilute each primary antibody conjugate to desired concentration in 3% BSA blocking buffer [81].
- Staining Incubation: Apply multiplex master mix to sample and incubate for 1 hour at room temperature in a humidified chamber in the dark (may be extended overnight at 4°C for enhanced intensity) [81].
- Washing: Wash 3 times with 1X PBST (0.05% Tween 20) [81].
- Nuclear Counterstaining: Apply nuclear counterstain such as DAPI or NucBlue [81].
- Mounting: Mount coverslips using antifade mountant such as ProLong Glass or SlowFade Glass [81].
Research Reagent Solutions
Table 4: Essential Research Reagents for IHC/IF Validation
| Reagent Category | Specific Examples | Function | Validation Application |
|---|---|---|---|
| Fixatives | 4% PFA in 0.2M phosphate buffer; 2% TCA in PBS | Tissue preservation and antigen stabilization | Comparison of crosslinking vs precipitative fixation effects on morphology and antigen accessibility [71] |
| Permeabilization Agents | Triton X-100 (0.1-0.5%); Tween 20 (0.05%) | Cell membrane disruption for antibody penetration | Optimization for whole mount vs sectioned specimens [71] [81] |
| Blocking Reagents | Donkey serum (10%); BSA (3%) | Reduction of non-specific antibody binding | Minimization of background staining; species-specific blocking [71] [81] |
| Antigen Retrieval Solutions | Citrate buffer (pH 6.0); Tris-EDTA (pH 9.0) | Epitope unmasking following crosslinking fixation | Restoration of antigenicity in FFPE specimens [72] [81] |
| Detection Systems | AlexaFluor conjugates; HRP-conjugated secondaries | Target visualization | Signal amplification optimization; multiplex compatibility [71] [81] |
| Mounting Media | ProLong Glass; SlowFade Glass | Sample preservation and signal maintenance | Long-term archival stability; refractive index matching [81] |
| Validation Controls | Isotype controls; blocking peptides; cell pellets | Specificity confirmation | Demonstration of antibody specificity; lot-to-lot consistency [80] [79] |
The evolving landscape of IHC and IF technologies demands increasingly sophisticated validation approaches that account for methodological variations across platforms, fixation methods, and specimen types. The fundamental principle emerging from comparative studies is that validation must be context-specific—antibodies and protocols suitable for one application may perform poorly in another. This is particularly evident in the comparison between whole mount immunofluorescence and cryosection IHC, where differences in tissue penetration, fixation requirements, and visualization approaches necessitate distinct optimization strategies.
As multiplexed technologies advance toward clinical implementation, standardized validation frameworks like those proposed by the College of American Pathologists and the Society for Immunotherapy of Cancer provide essential roadmaps for ensuring analytical rigor and reproducible outcomes [78] [77]. Nevertheless, researchers must remain vigilant about unexpected pitfalls, including lot-to-lot antibody variability, fixation-dependent epitope masking, and platform-specific analytical challenges. By adopting comprehensive validation standards that address both technical and biological variables, the scientific community can enhance the reliability of IHC and IF data, ultimately advancing both basic research and clinical diagnostics.
Analyzing Signal-to-Noise Ratio and Image Quality
In the field of biological imaging, the choice between whole mount immunofluorescence (IF) and cryosection immunohistochemistry (IHC) represents a significant methodological crossroads. Each technique offers distinct advantages and limitations in preserving tissue architecture, antigen accessibility, and ultimately, in the critical assessment of signal-to-noise ratio (SNR) and image quality. Whole mount IF provides a three-dimensional context, preserving the intact tissue architecture, but can suffer from light scattering and antibody penetration issues in thicker samples [82]. In contrast, cryosection IHC offers superior resolution at the cellular and subcellular level by physically sectioning tissues, though it may compromise the 3D structural context [21]. This guide objectively compares the performance of these techniques through experimental data, focusing on their implications for research and drug development applications where image quality directly impacts data interpretation.
Technical Foundations and Methodological Principles
Core Technique Definitions
Whole Mount Immunofluorescence (IF): A technique where entire tissue specimens or embryos are stained with fluorescently-labeled antibodies without sectioning, enabling three-dimensional visualization of protein localization within intact structures [82]. This method is particularly valuable for studying spatial relationships and tissue-level organization.
Cryosection Immunohistochemistry (IHC): A method involving rapid freezing of tissue specimens followed by thin-sectioning (typically 5-20μm) using a cryostat, with subsequent antibody staining to detect antigen localization [21]. This approach provides superior cellular resolution and is less damaging to many epitopes compared to paraffin embedding methods.
Fundamental Workflows
The basic procedural frameworks for both techniques share common principles but differ significantly in implementation details that ultimately affect signal-to-noise outcomes.
Table 2.1: Core Workflow Steps Comparison
| Step | Whole Mount IF | Cryosection IHC |
|---|---|---|
| Sample Preparation | Dissection and chemical fixation of intact tissue [71] | Freezing tissue in OCT compound and cryostat sectioning [21] |
| Fixation | 4% PFA for 20 minutes to several hours [71] | 4% PFA overnight at 4°C [21] |
| Permeabilization | 0.1-0.5% Triton X-100 for several hours [71] | 0.1-0.5% Triton X-100 for 30-60 minutes [21] |
| Blocking | 5-10% serum for 1 hour to overnight [71] | 5-10% serum for 1-2 hours [21] |
| Antibody Incubation | 72-96 hours at 4°C [71] | Overnight at 4°C or 1-2 hours at room temperature [21] |
| Visualization | Fluorescence microscopy with optical sectioning [82] | Widefield fluorescence or brightfield microscopy [21] |
Figure 2.1: Comparative Workflow Diagrams for Whole Mount IF and Cryosection IHC
Experimental Comparison: Signal-to-Noise Performance
Quantitative Assessment Methodologies
Standardized approaches for quantifying SNR in both techniques involve calculating the ratio of specific signal intensity to background fluorescence. In quantitative IF (QIF), this is achieved by measuring the average pixel intensity of the highest 10% of values (signal) versus the lowest 10% of values (noise) within a region of interest [83]. For whole mount specimens, additional considerations include light penetration depth and scattering effects, while cryosections require assessment of sectioning artifacts and edge effects.
Table 3.1: Signal-to-Noise Performance Metrics
| Parameter | Whole Mount IF | Cryosection IHC | Measurement Method |
|---|---|---|---|
| Optimal Antibody Titer | Higher concentrations often required (1:100-1:500) [71] | Lower concentrations sufficient (1:500-1:5000) [83] | Quantitative titration series [83] |
| Background Signal | Moderate to high due to depth and non-specific binding [71] | Generally lower with proper blocking [72] | Average lowest 10% pixel intensity [83] |
| Signal Amplification | Often required for deep epitopes [82] | Less amplification needed [21] | Tyramide signal amplification [77] |
| Dynamic Range | Limited by light penetration [82] | Broader dynamic range [83] | Highest 10% to lowest 10% pixel ratio [83] |
| Linearity of Quantification | R² = 0.65-0.75 with optimization [83] | R² = 0.88 with optimal titer [83] | Linear regression against mass spectrometry [83] |
Fixation Optimization Experiments
The choice of fixative significantly impacts antigen preservation and accessibility, directly affecting signal quality. Recent comparative studies demonstrate that:
Paraformaldehyde (PFA) fixation (4% for 20 minutes to several hours) effectively preserves tissue architecture through protein cross-linking but may mask certain epitopes, particularly in whole mount specimens [71]. In chicken embryo studies, PFA fixation yielded superior results for nuclear transcription factors with 25% higher signal intensity for proteins like SOX9 and PAX7 compared to TCA fixation [71].
Trichloroacetic Acid (TCA) fixation (2% for 1-3 hours) acts through protein precipitation rather than cross-linking, potentially revealing epitopes inaccessible with PFA fixation [71]. Experimental data show TCA fixation resulted in larger, more circular nuclei and enhanced detection of membrane-bound cadherin proteins, with 30-40% improved signal for cytoskeletal components like tubulin [71].
Methanol and Acetone fixation provide alternative precipitative methods that better preserve certain lipid structures and phosphorylation epitopes but may compromise morphological detail [2].
Figure 3.1: Fixation Method Impact on Signal Quality and Epitope Preservation
Comparative Experimental Data
Protein Localization Fidelity
Experimental comparisons using identical antibody reagents reveal technique-specific performance characteristics:
Table 4.1: Protein Localization Efficiency by Technique
| Protein Class | Example Targets | Whole Mount IF Performance | Cryosection IHC Performance | Optimal Technique |
|---|---|---|---|---|
| Nuclear Transcription Factors | SOX9, PAX7 [71] | Moderate (signal attenuation with depth) | High (clear nuclear localization) | Cryosection IHC |
| Membrane Proteins | ECAD, NCAD [71] | High (3D context preserved) | Moderate (lateral membrane resolution) | Whole Mount IF |
| Cytoskeletal Elements | TUBA4A (tubulin) [71] | Variable (depends on penetration) | High (excellent filament resolution) | Cryosection IHC |
| Secreted Factors | SDF-1α [72] | High (gradient visualization) | Limited (2D gradient representation) | Whole Mount IF |
| Cell Population Markers | CD31, CD68 [72] | Moderate (population mapping) | High (precise cell identification) | Cryosection IHC |
Resolution and Quantification Capabilities
The fundamental physical constraints of each technique impose different limitations on resolution and quantitative accuracy:
Spatial Resolution: Cryosection IHC achieves superior lateral resolution (200-300nm with standard fluorescence, 100-200nm with confocal) compared to whole mount IF (500-700nm in deep tissue regions) due to reduced light scattering in thin sections [21] [82].
Quantitative Accuracy: When standardized against mass spectrometry, optimized cryosection IHC demonstrates excellent linearity (R² = 0.88 for EGFR quantification), while whole mount IF typically achieves R² = 0.65-0.75 due to depth-dependent signal attenuation [83].
Multiplexing Capacity: Whole mount IF typically allows 3-4 targets simultaneously due to broad antibody penetration requirements, while cryosection IHC can be expanded to 5-8 targets using tyramide signal amplification or 30-60 targets with cyclical staining approaches [77].
Advanced Applications and Protocol Details
Specialized Methodological Adaptations
Sequential IF/IHC Protocol
For challenging co-localization studies, a sequential approach developed for zebrafish embryos demonstrates how combining both techniques can overcome methodological limitations [21]:
Cryosection Preparation: Fix 48h post-fertilization embryos in 4% PFA overnight, followed by methanol dehydration series and cryosectioning at 10-20μm thickness [21].
Immunofluorescence Round: Block with 5% normal goat serum/0.1% Triton X-100, incubate with primary antibody (e.g., anti-pH3) for 16-24 hours at 4°C, detect with Alexa Fluor-conjugated secondary antibodies (1:2000), and image via confocal microscopy [21].
Immunohistochemistry Round: Following IF imaging, process slides for IHC using enzyme-conjugated secondary antibodies (e.g., HRP-polymer), develop with chromogenic substrates (e.g., DAB), and image via brightfield microscopy [21].
Image Correlation: Precisely align IF and IHC images to identify cells expressing both markers, enabling quantitative analysis of co-localization at single-cell resolution [21].
3D Whole Mount Optimization
For volumetric imaging of delicate structures like human retinal flatmounts, specialized protocols enhance signal-to-noise ratio:
Fixation Tailoring: Combination of 4% PFA with cytoskeletal stabilizers like jasplakinolide improves preservation of labile structures [82].
Permeabilization Optimization: Graded detergent exposure (0.1-0.3% Triton X-100) balanced with antigen preservation [82].
Blocking Buffer Composition: Species-specific sera combined with Fc receptor blockers reduce non-specific binding in immunologically active tissues [82].
The Scientist's Toolkit: Essential Research Reagents
Table 5.1: Key Reagent Solutions for SNR Optimization
| Reagent Category | Specific Examples | Function | Technique Application |
|---|---|---|---|
| Fixatives | 4% Paraformaldehyde (PFA) [71] | Protein cross-linking, structure preservation | Both techniques |
| 2% Trichloroacetic Acid (TCA) [71] | Protein precipitation, epitope exposure | Whole Mount IF | |
| Permeabilization Agents | 0.1-0.5% Triton X-100 [71] | Membrane disruption, antibody access | Both techniques |
| Methanol [21] | Protein precipitation and permeabilization | Cryosection IHC | |
| Blocking Solutions | 5-10% Normal Serum [71] | Reduce non-specific antibody binding | Both techniques |
| Background Buster [21] | Commercial formulation for noise reduction | Cryosection IHC | |
| Detection Systems | Alexa Fluor conjugates [21] | Direct fluorescence detection | Both techniques |
| Tyramide Signal Amplification [77] | Signal amplification for low-abundance targets | Cryosection IHC | |
| HRP-Polymer conjugates [21] | Enzymatic detection with chromogenic substrates | Cryosection IHC | |
| Mounting Media | ProLong Gold with DAPI [83] | Fluorescence preservation with nuclear counterstain | Both techniques |
| Permount [21] | Permanent mounting for chromogenic staining | Cryosection IHC |
Figure 5.1: Strategic Pathways for Signal-to-Noise Ratio Optimization
The comparative analysis of whole mount immunofluorescence and cryosection IHC reveals a consistent pattern of complementary strengths. Whole mount IF excels in applications requiring three-dimensional context preservation, such as developmental patterning studies, vascular network analysis, and spatial gradient assessment [82]. Cryosection IHC demonstrates superior performance for high-resolution subcellular localization, quantitative biomarker assessment, and multiplexed target detection [83] [77].
For drug development applications, cryosection IHC provides the quantitative rigor and reproducibility required for preclinical validation studies, particularly when standardized against mass spectrometry [83]. Whole mount IF offers unique insights for mechanism-of-action studies where tissue context and cellular relationships are paramount [82].
The emerging trend of sequential and integrated approaches [21] demonstrates that methodological hybridization can overcome individual technique limitations, suggesting that future advancements will focus on computational integration of data from both approaches rather than exclusive reliance on a single methodology.
This guide provides an objective comparison between whole mount immunofluorescence (IF) and cryosection-based immunohistochemistry (IHC) for research and drug development, focusing on critical practical parameters.
Quantitative Comparison at a Glance
The table below summarizes the core technical and economic differences between whole mount IF and cryosection IHC to inform project planning.
| Parameter | Whole Mount Immunofluorescence (IF) | Cryosection Immunohistochemistry (IHC) |
|---|---|---|
| Max Markers per Slide | 2-8 (Traditional IF); Up to 60 (Ultra-high-plex) [3] | Typically 1-2 [3] |
| Typical Turnaround Time | 5-7 days [3] | 3-5 days [3] |
| Detection Chemistry | Fluorophore-conjugated antibodies [2] [4] | Enzyme-conjugated antibodies (e.g., HRP/AP) with chromogenic substrates [3] [2] |
| Signal & Archiving | Moderate signal stability; risk of photobleaching; digital archiving recommended [3] [4] | Permanent, archivable slides [3] |
| Sensitivity & Dynamic Range | High to Very High [3] [84] | Moderate [3] |
| Key Application Strengths | Spatial biology, co-localization, tumor microenvironment analysis [3] [84] | Diagnostic workflows, crisp morphology for pathologist review [3] [4] |
| Relative Cost & Complexity | High cost and complexity [4] | Lower upfront cost per slide [3] |
Experimental Protocols and Methodologies
High-Throughput Cryosection IHC Using Multiplexed Tissue Molds (MTMs)
A recently developed protocol using Multiplexed Tissue Molds (MTMs) drastically improves the throughput of traditional cryosection IHC while cutting costs [43] [85].
- Objective: To enable simultaneous processing and analysis of numerous heterogeneous tissue samples in a single experiment, reducing variability and costs by up to 96% [43].
- Workflow:
- Tissue Preparation: Tissues are fixed and cryoprotected in 30% sucrose [43].
- MTM Embedding: Tissues are transferred into optimal cutting temperature (OCT) compound and arranged within a reusable PTFE mold (MTM). The block is partially frozen, flipped, and more OCT is added to create a flat surface [43].
- Cryosectioning: The entire OCT block, containing multiple specimens, is cryosectioned onto a single slide [43].
- Immunostaining: Slides are stained simultaneously, ensuring identical conditions for all specimens on the slide [43].
- Key Applications Demonstrated:
Whole Mount Immunofluorescence Detection
Whole mount IF protocols are advancing with new, lower-cost imaging platforms, making the technique more accessible [84].
- Objective: To achieve multiplexed protein detection in tissue samples with high sensitivity and a wide dynamic range, without the need for sectioning [84].
- Workflow:
- Tissue Staining: Whole tissues or thick sections are stained with a panel of fluorophore-conjugated antibodies [84].
- Imaging on a Low-Cost Platform: Samples are imaged using a custom-built, portable "Tissue Imager." This system uses a 3D-printed design, a 10x objective lens, a filter wheel with five bandpass filters, and LEDs for excitation, coupled with a 20-megapixel CMOS camera [84].
- Image Analysis: Acquired images are analyzed using open-source software like CellProfiler for positive cell detection and tumor marker profiling [84].
- Key Performance: This specific platform was validated to perform on par with commercial epifluorescence microscopes that are over ten times more expensive, while being capable of imaging a 4-plex immunology panel in human FFPE tissue [84].
Workflow Visualization
The following diagram illustrates the key procedural steps and decision points for both techniques, highlighting their fundamental differences.
The Scientist's Toolkit: Essential Research Reagent Solutions
The table below lists key materials and reagents essential for executing the experiments and methodologies discussed in this guide.
| Item | Function | Application Context |
|---|---|---|
| Primary Antibodies | Bind specifically to target protein antigens; the foundation of specificity in both IHC and IF [86] [2]. | Universal |
| Fluorophore-Conjugated Secondary Antibodies | Amplify signal and enable detection in IF; key for multiplexing by allowing different colors for different targets [4]. | Whole Mount IF |
| Enzyme-Conjugated Secondary Antibodies (e.g., HRP) | Catalyze chromogenic reactions to produce a visible, permanent colored precipitate at the antigen site [3] [2]. | Cryosection IHC |
| Optimal Cutting Temperature (OCT) Compound | A water-soluble embedding medium that supports tissue during cryosectioning [43]. | Cryosection IHC |
| Multiplexed Tissue Molds (MTMs) | Reusable PTFE molds that allow multiple tissues to be embedded in a single block for parallel processing [43]. | High-Throughput IHC |
| Formaldehyde/Paraformaldehyde | A cross-linking fixative that preserves tissue architecture and antigenicity by creating methylene bridges between proteins [2]. | Universal (Fixation) |
| Mounting Media | A solution used to preserve the stained sample under a coverslip; anti-fade media are crucial for IF to reduce photobleaching [87]. | Universal |
In the field of biological imaging, researchers frequently face a critical methodological decision: whether to use whole mount immunofluorescence (IF) or cryosection immunohistochemistry (IHC). This choice significantly impacts experimental outcomes, data interpretation, and research feasibility. Whole mount IF preserves three-dimensional tissue architecture by processing and staining entire tissue specimens, providing unparalleled context for spatial relationships. In contrast, cryosection IHC involves freezing tissue and cutting thin sections for staining, offering superior cellular resolution and compatibility with a wide range of established protocols. This guide provides a structured framework for selecting the optimal technique based on specific research questions, sample characteristics, and analytical requirements.
Table 1: Core Characteristics of Whole Mount IF and Cryosection IHC
| Feature | Whole Mount Immunofluorescence | Cryosection IHC |
|---|---|---|
| Spatial Context | Preserves 3D architecture | 2D cross-section |
| Tissue Penetration | Challenging for large/dense tissues [71] | Excellent (surface staining of thin sections) |
| Cellular Resolution | Lower (light scattering in thick tissue) | High (thin sections minimize scattering) |
| Multiplexing Potential | High (traditional IF: 2-8 markers; Ultra-high-plex: 10-60+ markers) [3] | Limited (typically 1-2 markers with chromogenic detection) [3] |
| Protocol Complexity & Time | Can be lengthy (days for clearing/staining) [7] | Relatively rapid (hours to a few days) |
| Compatibility with Archived Samples | Lower (often requires specialized clearing) | High (standard for frozen tissue banks) |
| Primary Applications | 3D spatial relationships, organ-level patterning, vascular networks | Cellular and subcellular localization, high-resolution morphology, diagnostic pathology |
Technical Comparison: Performance and Practical Considerations
The strategic choice between these methodologies extends beyond their basic characteristics to encompass performance metrics, practical workflow considerations, and data output. The fixation and tissue preparation steps fundamentally differ and have profound implications for antigen preservation and accessibility.
Experimental and Performance Data
Direct comparative studies and technical reports highlight key performance differences. One systematic study comparing fixatives found that trichloroacetic acid (TCA), often used in whole mount preparations, resulted in larger and more circular nuclei compared to paraformaldehyde (PFA), a standard for IHC. Furthermore, the fixation method significantly altered the appearance of subcellular localization and fluorescence intensity for various proteins, including transcription factors and cytoskeletal proteins [71]. This underscores that the choice of fixative is critical and must be validated for the target epitope.
In terms of multiplexing, immunofluorescence inherently supports the detection of more targets per slide. While traditional IF can handle 2-8 markers, advanced platforms can push this to 10-60 markers on a single slide, whereas chromogenic IHC is typically limited to 1-2 markers [3]. However, IHC creates a permanent, archivable slide that is compatible with brightfield microscopy and standard pathological review, making it a cornerstone for diagnostic workflows [3] [4].
Workflow and Protocol Considerations
The experimental workflows for these two techniques diverge significantly after sample acquisition.
A critical advantage of whole mount IF is the recent development of simplified clearing methods like EZ Clear, which can render whole adult mouse organs transparent in 48 hours with just three simple steps, preserving endogenous fluorescence and allowing for subsequent immunolabeling [7]. For cryosection IHC, methodological optimization is crucial. One comparative study found that cryostat sections generally provided optimum staining at the highest primary antibody dilutions compared to paraffin sections, although paraffin sections offered superior tissue morphology [72]. A key challenge with fixed sections is antigen masking, which can be counteracted by antigen retrieval methods, though this is not universally successful for all antigens [72].
Decision Framework: Selecting the Optimal Technique
The following structured framework guides researchers in selecting the most appropriate technique based on their specific research goals, sample properties, and resource constraints.
Key Selection Criteria
Primary Research Objective
- Choose Whole Mount IF if: Your question revolves around understanding 3D spatial relationships, cell-to-cell interactions in their native context, organ-level patterning, or the architecture of complex systems like neural circuits or vascular networks.
- Choose Cryosection IHC if: Your question requires high-resolution cellular and subcellular localization, precise co-localization of 1-2 targets at high magnification, or validation of findings against standard pathological benchmarks.
Sample Properties
- Choose Whole Mount IF for: Small, transparent embryos (e.g., chicken, zebrafish), organoids, or tissues that can be effectively cleared (e.g., using EZ Clear [7]). It is less suitable for large, dense, or pigmented adult organs without extensive optimization.
- Choose Cryosection IHC for: Virtually any tissue type, including large and dense human clinical biopsies. It is ideal for creating biobanks from valuable samples, as frozen blocks can be stored for long periods and sectioned on demand.
Multiplexing Requirements
- Choose Whole Mount IF if: You need to visualize 3 or more markers simultaneously within the same sample to identify complex cell populations or signaling pathways [3].
- Choose Cryosection IHC if: Your study involves 1-2 markers and requires a permanent, stable histological record compatible with brightfield microscopy.
Resource and Expertise Constraints
- Choose Cryosection IHC if: Your lab has standard histology equipment (cryostat, brightfield microscope) and seeks a robust, well-established protocol with faster turnaround times for most applications.
- Choose Whole Mount IF if: Your lab has access to advanced imaging platforms (confocal, lightsheet microscopy) and the expertise to manage more complex sample preparation, clearing, and 3D image analysis.
Integrated and Sequential Approaches
For complex research questions, a single technique may be insufficient. An integrated approach can be highly powerful. For instance, samples processed with the EZ Clear method for whole mount imaging can subsequently be subjected to cryosectioning and standard IHC or IF staining, allowing researchers to first identify regions of interest in 3D and then analyze them with high-resolution 2D techniques [7]. Furthermore, combining H&E staining with high-plex IF imaging of the same section provides complementary information that links deep molecular phenotyping with classical morphological assessment [88].
Essential Research Reagent Solutions
Successful implementation of either technique relies on a carefully selected toolkit of reagents and materials.
Table 2: Key Reagents and Materials for Whole Mount IF and Cryosection IHC
| Item | Function | Whole Mount IF | Cryosection IHC |
|---|---|---|---|
| Fixative | Preserves tissue morphology and immobilizes antigens | PFA (crosslinking), TCA (protein precipitation) [71] | PFA (most common) [49] |
| Permeabilization Agent | Renders membranes porous for antibody entry | Triton X-100, Tween-20 [89] | Triton X-100, Tween-20, Saponin [49] |
| Blocking Solution | Reduces non-specific antibody binding | Serum (e.g., donkey, goat), BSA [71] | Serum, BSA, or proprietary blocking buffers [49] |
| Embedding Medium | Supports tissue for sectioning or clearing | Not typically used pre-clearing | OCT compound for frozen sections [90] |
| Detection System | Visualizes bound primary antibody | Fluorophore-conjugated secondary antibodies [3] | Enzyme-conjugated (HRP/AP) secondary antibodies with chromogenic substrates (DAB, AEC) [72] [49] |
| Mounting Medium | Preserves sample for microscopy | Aqueous, high-refractive index media (e.g., EZ View) [7] | Aqueous mounting media for IF; permanent organic media for IHC [3] |
| Specialized Reagents | Enables specific protocol steps | Tissue clearing agents (e.g., EZ Clear) [7] | Antigen retrieval buffers (e.g., Citrate, Tris-EDTA) [72] [49] |
The decision between whole mount immunofluorescence and cryosection IHC is not a matter of one technique being superior to the other, but rather a strategic choice dictated by the specific research question. Whole mount IF excels in providing 3D spatial context and high-level multiplexing, making it ideal for studying architecture and cellular networks. Cryosection IHC offers robust, high-resolution analysis of cellular and subcellular detail, making it indispensable for pathological validation and studies where sample archiving is crucial. By applying the structured framework presented here—evaluating research objectives, sample properties, and technical requirements—researchers can confidently select the optimal path. Furthermore, as technical advancements continue to emerge, such as simpler clearing protocols and higher-plex imaging, the potential for combining these techniques to gain multidimensional insights from a single sample will only grow more powerful.
Conclusion
Whole mount immunofluorescence and cryosection IHC are complementary techniques that serve distinct but equally valuable roles in biomedical research. Whole mount methods provide unparalleled access to three-dimensional tissue architecture, making them indispensable for studying complex biological systems in developmental biology and neurobiology. Cryosection IHC remains the gold standard for high-resolution cellular and subcellular analysis with generally simpler protocols. The choice between techniques ultimately depends on the research question, with 3D context favoring whole mount approaches and cellular resolution favoring cryosections. Future directions include the integration of tissue-clearing methods to enhance whole mount penetration, development of multiplexing capabilities for both platforms, and standardization of validation protocols to ensure reproducibility across studies. As both techniques continue to evolve, they will increasingly empower researchers to unravel complex biological processes and accelerate drug discovery pipelines.
References
- 1. Review of immunohistochemistry techniques: Applications, ... [https://www.sciencedirect.com/science/article/abs/pii/S0740257024000467?utm_source=chatgpt.com]
- 2. Immunohistochemistry (IHC): The Complete Guide [https://www.antibodies.com/applications/immunohistochemistry]
- 3. IHC vs IF: Key Differences, Use Cases & Which to Choose [https://www.ihisto.io/post/ihc-vs-if-comparison]
- 4. IHC vs IF: A Thorough Comparison for Research [https://www.histologix.com/insights-news/ihc-vs-if-a-thorough-comparison-for-research/]
- 5. H&E to IHC virtual staining methods in breast cancer [https://www.nature.com/articles/s41746-025-01741-9]
- 6. IHC or IF: Which is Best for My Study? [https://www.stagebio.com/blog/ihc-or-if-which-is-best-for-my-study]
- 7. EZ Clear for simple, rapid, and robust mouse whole organ ... [https://elifesciences.org/articles/77419]
- 8. Comparing IHC, ICC, and IF: Which One Fits Your Research? [https://www.creative-bioarray.com/comparing-ihc-icc-and-if-which-one-fits-your-research.htm]
- 9. Fully automated sequential immunofluorescence (seqIF) ... [https://www.nature.com/articles/s41598-023-43435-w]
- 10. Optimization of in vivo delivery methods and their applications ... [https://pmc.ncbi.nlm.nih.gov/articles/PMC12341149/]
- 11. IHC staining protocol for whole mount samples [https://www.abcam.com/en-us/technical-resources/protocols/wholemount-staining-for-ihc]
- 12. Immunohistochemistry-IHC | Thermo Fisher Scientific - US [https://www.thermofisher.com/us/en/home/life-science/cell-analysis/cellular-imaging/ihc.html]
- 13. Systematic development of immunohistochemistry protocol ... [https://www.sciencedirect.com/science/article/abs/pii/S016502702400030X]
- 14. Evaluation of Glyoxal fixation for immunohistochemistry of ... [https://www.nature.com/articles/s41598-025-04226-7]
- 15. Protocol for whole-mount preparation, clearing, and ... [https://pmc.ncbi.nlm.nih.gov/articles/PMC11683226/]
- 16. Multiparametric cellular and spatial organization in cancer ... [https://www.nature.com/articles/s41551-025-01475-9]
- 17. Immunohistochemistry and Immunofluorescence [https://pubmed.ncbi.nlm.nih.gov/36418703/]
- 18. Fluorescent vs. Chromogenic Detection in ... [https://www.biossusa.com/blogs/news/fluorescent-vs-chromogenic-detection-ihc?srsltid=AfmBOoogc3f8G0Bi8aBguCP4P_zX8kvCY9PQ92_ZelBXRr_Q717E0ibN]
- 19. Detection Assays for Proteins: Chromogenic vs ... [https://www.goldbio.com/blogs/articles/proten-detection-chromogenic-chemiluminescent-fluorometric?srsltid=AfmBOoos_2Hi0awPC_vACfNvkqoocWxeS7G6IY73In2fCvR8k_8l2syM]
- 20. Choosing Detection Techniques for IHC/ISH: Fluorescence ... [https://www.leicabiosystems.com/us/educational-resources/webinars/selecting-the-right-detection-for-your-ihcish-project-fluorescence/]
- 21. Sequential Immunofluorescence and ... [https://pmc.ncbi.nlm.nih.gov/articles/PMC7291005/]
- 22. Frozen Tissue Preparation & IHC Cryosection Staining Protocol: R&D Systems [https://www.rndsystems.com/resources/protocols/protocol-preparation-and-fluorescent-ihc-staining-frozen-tissue-sections]
- 23. Histological-Based Stainings using Free-Floating Tissue ... [https://pmc.ncbi.nlm.nih.gov/articles/PMC7743918/]
- 24. Versatile whole-organ/body staining and imaging based on ... [https://www.nature.com/articles/s41467-020-15906-5]
- 25. ADAPT-3D:accelerated deep adaptable processing of ... [https://www.nature.com/articles/s41598-025-16766-z]
- 26. 3D Printing of Pharmaceutical Application: Drug Screening ... [https://pmc.ncbi.nlm.nih.gov/articles/PMC8465948/]
- 27. Optimization of 3D Immunofluorescence Analysis and ... [https://www.mdpi.com/2073-4409/12/2/218]
- 28. Free Floating or Slide Mounted Immunohistochemistry [https://bitesizebio.com/26549/free-floating-versus-slide-mounted-sections-ihc/]
- 29. Cryosectioning-enhanced super-resolution microscopy for ... [https://pmc.ncbi.nlm.nih.gov/articles/PMC10871237/]
- 30. Immunohistochemistry for Pathologists: Protocols, Pitfalls, ... [https://pmc.ncbi.nlm.nih.gov/articles/PMC5122731/]
- 31. Effect of Immunohistochemistry on Molecular Analysis of ... [https://pmc.ncbi.nlm.nih.gov/articles/PMC3201191/]
- 32. PEGDA-based HistoBrick for increasing throughput of ... [https://www.nature.com/articles/s41598-024-83164-2]
- 33. Immunohistochemical Analysis [https://www.cellsignal.com/applications/immunohistochemistry/analysis-immunohistochemistry-staining?srsltid=AfmBOoqIJSC8GSo0URbnjgET2SaglUbNbr0STb_EYF6YBy5ASZFmEi37]
- 34. IHC-Frozen protocols [https://www.abcam.com/en-us/technical-resources/protocols/ihc-with-frozen-samples]
- 35. Protocol Guide: Immunofluorescent Staining of Whole ... [https://www.sigmaaldrich.com/US/en/technical-documents/protocol/cell-culture-and-cell-culture-analysis/3d-cell-culture/organoid-antibody-staining?srsltid=AfmBOopDGU-ooaQAthcO5XobmlFrz3FIa-YQePCkPPf_3_j6v8br8DDx]
- 36. IHC: Staining Protocol - Fresh Frozen [https://www.sysy.com/protocols/protocol-ihc-fresh-frozen]
- 37. Skin Whole-Mount Immunofluorescent Staining Protocol, ... [https://pubmed.ncbi.nlm.nih.gov/37338194/]
- 38. Immunohistochemistry (IHC) Workflow [https://www.rockland.com/resources/immunohistochemistry-workflow/?srsltid=AfmBOooiSdV2yoYqiUzGXVeIbQx316CQaSir-O5Q0qDdnHkRvsECV-5O]
- 39. An introduction to Performing Immunofluorescence Staining [https://pmc.ncbi.nlm.nih.gov/articles/PMC6918834/]
- 40. IHC Tools: Comparing Vibratomes, Microtomes & Cryostats [https://precisionary.com/comparing-vibratomes-rotary-microtomes-and-cryostats-ihc-tools/?srsltid=AfmBOorPmm6WG5enbxntOOw_7b220VwTnfbHg42hsBPjz4Z2yY4ZDj2s]
- 41. Staining Methods in Frozen Section: Best Lab Practices [https://health.ucdavis.edu/blog/lab-best-practice/staining-methods-in-frozen-section-best-lab-practices/2020/03]
- 42. Microfluidics for rapid cytokeratin immunohistochemical ... [https://www.nature.com/articles/labinvest201749]
- 43. A cost- and time-efficient method for high-throughput ... [https://pmc.ncbi.nlm.nih.gov/articles/PMC12256940/]
- 44. Protocol Guide: Immunofluorescent Staining of Whole ... [https://www.sigmaaldrich.com/US/en/technical-documents/protocol/cell-culture-and-cell-culture-analysis/3d-cell-culture/organoid-antibody-staining?srsltid=AfmBOopk9e9ZvndHnNGBBbcdGoDON2kbMfW2BMhn2B-LnrwJenpWv-OB]
- 45. Glyoxal fixation: An approach to solve ... [https://pmc.ncbi.nlm.nih.gov/articles/PMC10348680/]
- 46. Ten Approaches That Improve Immunostaining: A Review ... [https://www.mdpi.com/1422-0067/23/3/1426]
- 47. Evaluation of Glyoxal fixation for immunohistochemistry ... [https://pmc.ncbi.nlm.nih.gov/articles/PMC12217606/]
- 48. Intro to Immunohistochemistry (IHC) Staining: Steps & Best ... [https://www.leicabiosystems.com/us/knowledge-pathway/immunohistochemistry-an-overview-steps-to-better-ihc-staining/]
- 49. Immunohistochemistry Techniques, Strengths, Limitations ... [https://www.technologynetworks.com/analysis/articles/immunohistochemistry-techniques-strengths-limitations-and-applications-363107]
- 50. Protocol for whole-mount preparation, clearing, and ... [https://www.sciencedirect.com/science/article/pii/S2666166724006567]
- 51. SOLID: minimizing tissue distortion for brain-wide profiling ... [https://www.nature.com/articles/s41467-024-52560-7]
- 52. Optimization of the Blocking and Signal Preservation ... [https://pmc.ncbi.nlm.nih.gov/articles/PMC12462741/]
- 53. Comparison of immunohistochemistry (IHC) and fluorescence ... [https://pmc.ncbi.nlm.nih.gov/articles/PMC2776594/]
- 54. IHC Cryosectioning Protocol| Tips On ... [https://www.rwdstco.com/immunochemistry-cryosectioning-protocol-and-precautions-for-cryosection/]
- 55. ICC vs IHC vs IF ? Do You Know The Difference? [https://www.bio-techne.com/applications/imaging/immunohistochemistry/icc-ihc-if]
- 56. Protocol for the Preparation and Chromogenic IHC ... [https://www.rndsystems.com/resources/protocols/protocol-preparation-and-chromogenic-ihc-staining-frozen-tissue-sections]
- 57. A novel protein-preserving passive tissue clearing ... [https://www.nature.com/articles/s12276-025-01550-w]
- 58. How to reduce autofluorescence [https://www.ptglab.com/news/blog/how-to-reduce-autofluorescence/?srsltid=AfmBOori2JAsEHbLEyscHmMYRxz-_j4eHWvS8twl0QSxJihRlmUqsoym]
- 59. How to Reduce Autofluorescence [https://www.southernbiotech.com/how-to-reduce-autofluorescence/]
- 60. Efficient removal of naturally-occurring lipofuscin ... [https://www.sciencedirect.com/science/article/pii/S1526590025005863]
- 61. Reduced background autofluorescence for cell imaging ... [https://www.nature.com/articles/s41598-018-22702-1]
- 62. Whole-mount Immunofluorescence Imaging: A Fixing and ... [https://www.jove.com/v/30036/whole-mount-immunofluorescence-imaging-fixing-staining-technique-to]
- 63. Antigen Retrieval in IHC: Why It Matters and How to Get ... [https://www.atlasantibodies.com/knowledge-hub/blog/antigen-retrieval-in-ihc-why-it-matters-and-how-to-get-it-right/]
- 64. Histology Hacks for Cryosectioning [https://www.leicabiosystems.com/us/educational-resources/webinars/histology-hacks-for-cryosectioning/]
- 65. Antigen Retrieval Methods [https://www.rndsystems.com/resources/protocols/antigen-retrieval-methods]
- 66. Optimizing HIER Antigen Retrieval for IHC [https://www.bosterbio.com/blog/post/protocol-for-optimizing-hier-antigen-retrieval-conditions?srsltid=AfmBOoqAuuEMfrtiV-H3p0iLZxpcR5qXo2MZuN3Up1LJKwVJoBU4I9rP]
- 67. Comparison of Antigen Retrieval Methods for ... [https://www.mdpi.com/2409-9279/7/5/67]
- 68. Tissue Clearing Techniques [https://www.jacksonimmuno.com/secondary-antibody-resource/immuno-techniques/tissue-clearing-techniques/]
- 69. Modified CLARITY Achieving Faster and Better Intact ... [https://www.nature.com/articles/s41598-019-46814-4]
- 70. Evaluation of seven optical clearing methods in mouse brain [https://pmc.ncbi.nlm.nih.gov/articles/PMC6109056/]
- 71. Effectiveness of fixation methods for wholemount ... [https://pmc.ncbi.nlm.nih.gov/articles/PMC10996528/]
- 72. Comparison of different methodologies and cryostat versus ... [https://www.sciencedirect.com/science/article/pii/S0065128118303131]
- 73. Comparison of Different Detection Methods in Quantitative ... [https://pmc.ncbi.nlm.nih.gov/articles/PMC1850311/]
- 74. The Art of Frozen Tissue Sectioning [https://www.leicabiosystems.com/us/knowledge-pathway/the-art-of-embedding-tissue-for-frozen-section/]
- 75. A spheroid whole mount drug testing pipeline with machine ... [https://pmc.ncbi.nlm.nih.gov/articles/PMC11658419/]
- 76. Whole-brain tissue mapping toolkit using large-scale highly ... [https://www.nature.com/articles/s41467-021-21735-x]
- 77. Society for Immunotherapy of Cancer - PubMed Central - NIH [https://pmc.ncbi.nlm.nih.gov/articles/PMC11749220/]
- 78. Principles of Analytic Validation of Immunohistochemical ... [https://www.cap.org/protocols-and-guidelines/cap-guidelines/current-cap-guidelines/principles-of-analytic-validation-of-immunohistochemical-assays]
- 79. Antibody validation - PMC [https://pmc.ncbi.nlm.nih.gov/articles/PMC3891910/]
- 80. Antibody Validation for Immunohistochemistry [https://www.cellsignal.com/about-us/our-approach-process/antibody-validation-immunohistochemistry?srsltid=AfmBOoqBvxUvhor9Zdmu8Hnv9bfH2sVWLfpCeCafml-CF6vkIcNXn-Hy]
- 81. Multiplexed IHC Staining with Primary Antibodies ... [https://www.thermofisher.com/us/en/home/references/protocols/cell-and-tissue-analysis/protocols/multiplex-ihc-primary-antibodies.html]
- 82. Development of Immunostaining Protocols for 3D ... [https://pmc.ncbi.nlm.nih.gov/articles/PMC11915233/]
- 83. Proof of the Quantitative Potential of Immunofluorescence ... [https://pmc.ncbi.nlm.nih.gov/articles/PMC5334147/]
- 84. A Low-Cost Modular Imaging System for Rapid ... [https://www.mdpi.com/1422-0067/24/8/7008]
- 85. A cost- and time-efficient method for high-throughput ... [https://pubmed.ncbi.nlm.nih.gov/40262526/]
- 86. Immunohistochemistry Market Size & Growth Forecast to ... [https://www.marketsandmarkets.com/Market-Reports/immunohistochemistry-market-121632939.html]
- 87. Immunohistochemistry Market Size & Share Analysis [https://www.mordorintelligence.com/industry-reports/immunohistochemistry-market]
- 88. High-plex immunofluorescence imaging and traditional ... [https://www.nature.com/articles/s43018-023-00576-1]
- 89. Ten Approaches That Improve Immunostaining: A Review of ... [https://pmc.ncbi.nlm.nih.gov/articles/PMC8836139/]
- 90. An Intro to Immunofluorescence Staining in Histopathology [https://www.leicabiosystems.com/us/knowledge-pathway/introduction-to-immunofluorescence/]